
SWED 500 A1 - Radio SILVERCREST - Free user manual and instructions
Find the device manual for free SWED 500 A1 SILVERCREST in PDF.
| Product type | Universal clock radio with digital clock |
| Brand | SilverCrest |
| Model | SWED 500 A1 |
| Frequency bands | FM (87.5-108 MHz), MW (522-1620 kHz), SW (9 sub-bands from 4.75 to 21.85 MHz), LW (153-279 kHz) |
| Power supply | 6 V/0.3 A power adapter (included) or 4 AA 1.5 V batteries (not included) |
| Power consumption | Radio mode ~0.6 W, standby <0.2 W |
| Audio output power | 500 mW |
| Presettable stations | 400 (100 per frequency band) |
| Dimensions (W x D x H) | 17.7 x 3.9 x 11 cm |
| Weight | ~300 g (without batteries) |
| Battery life | ~40 hours |
| Main functions | Clock, dual alarm (radio/buzzer), snooze, nap timer, stopwatch, auto/manual tuning, presets, earphones |
| Care and cleaning | Dry cloth, do not open the casing, remove batteries if not used for long |
| Supplied accessories | Power adapter, SWED 500 A1 earphones, storage pouch, instruction manual |
| Warranty | 3 years (excluding batteries and earphones) |
| After-sales service | Phone: 01-71230283 (FR), email: service.FR@targa-online.com |
Frequently Asked Questions - SWED 500 A1 SILVERCREST
User questions about SWED 500 A1 SILVERCREST
0 question about this device. Answer the ones you know or ask your own.
Ask a new question about this device
Download the instructions for your Radio in PDF format for free! Find your manual SWED 500 A1 - SILVERCREST and take your electronic device back in hand. On this page are published all the documents necessary for the use of your device. SWED 500 A1 by SILVERCREST.
USER MANUAL SWED 500 A1 SILVERCREST
- UTC: Universal Time Coordinated
| Gamage de fréquences | Portées d'émission Normale/Précise |
| VHF (FM) 100 kHz/50 kHz | |
| MW (AM) EU 9 kHz/1 kHz | |
| MW (AM) US 10 kHz/1 kHz | |
| KW (SW) 5 kHz/1 kHz | |
| LW 9 kHz/1 kHz |
* UTC: Universal Time Coordinated
Introduction 122
Intended use 122
Package contents 123
Specifications 124
Safety instructions 125
Copyright 131
Overview of controls and button functions 132
Screendisplay. 134
Stand. 135
Before start-up 135
Using mains and battery power 135
Inserting the batteries. 135
Connecting the mains adapter. 137
Initial start-up 137
Light-up screen 137
Switching the device on and off 137
Functions of the 'MODE' button 138
Set the time zone 139
Setting the date / time. 141
Display world time 142
SDA Special Date Alarm. 143
NAP timer 143
Stopwatch 144
Set the AM reception range 145
Set the volume 145
Set up reception sensitivity 146
Activate bass boost 146
Choose a station 146
Automatic station scanning with auto-store function 146
Manually scanning for stations: 147
Manual tuning control 148
Fine tuning a station 148
Manually saving stations. 149
Go to a saved station 149
Playback in stereo 150
SLEEP timer 150
Set the alarm time 150
Activate the alarm 151
Activate/deactivate the button lock 153
Connecting the earphones 153
Storing the device when not in use 154
Troubleshooting 154
Environmental and waste disposal information. 155
Marks of conformity 156
Guarantee and service 156
Introduction
Thank you for choosing a SilverCrest product.
The SilverCrest SWED 500 A1 multi-band radio gives you the opportunity to receive stations from VHF MW and LW frequencies, as well as nine different shortwave bands. The device also features a digital clock, which can be set up for use as an alarm clock.
Intended use
This device is an electric entertainment appliance, designed to receive and play radio stations. The device can also be used as a clock and an alarm clock. It may only be used for private purposes and is not for industrial or commercial use. The device should also not be used in tropical climates. The manufacturer shall not be liable for any damages or faults arising as a result of unauthorised modification of the device. Only use the accessories specified by the manufacturer. Please observe the national regulations and/or laws of the country in which the device is used.
Please be aware that national laws in different countries vary regarding which frequency ranges you may legally receive. Information received outside of the allowed frequency ranges may not be utilised and its content or any facts received may not be passed on to third parties.
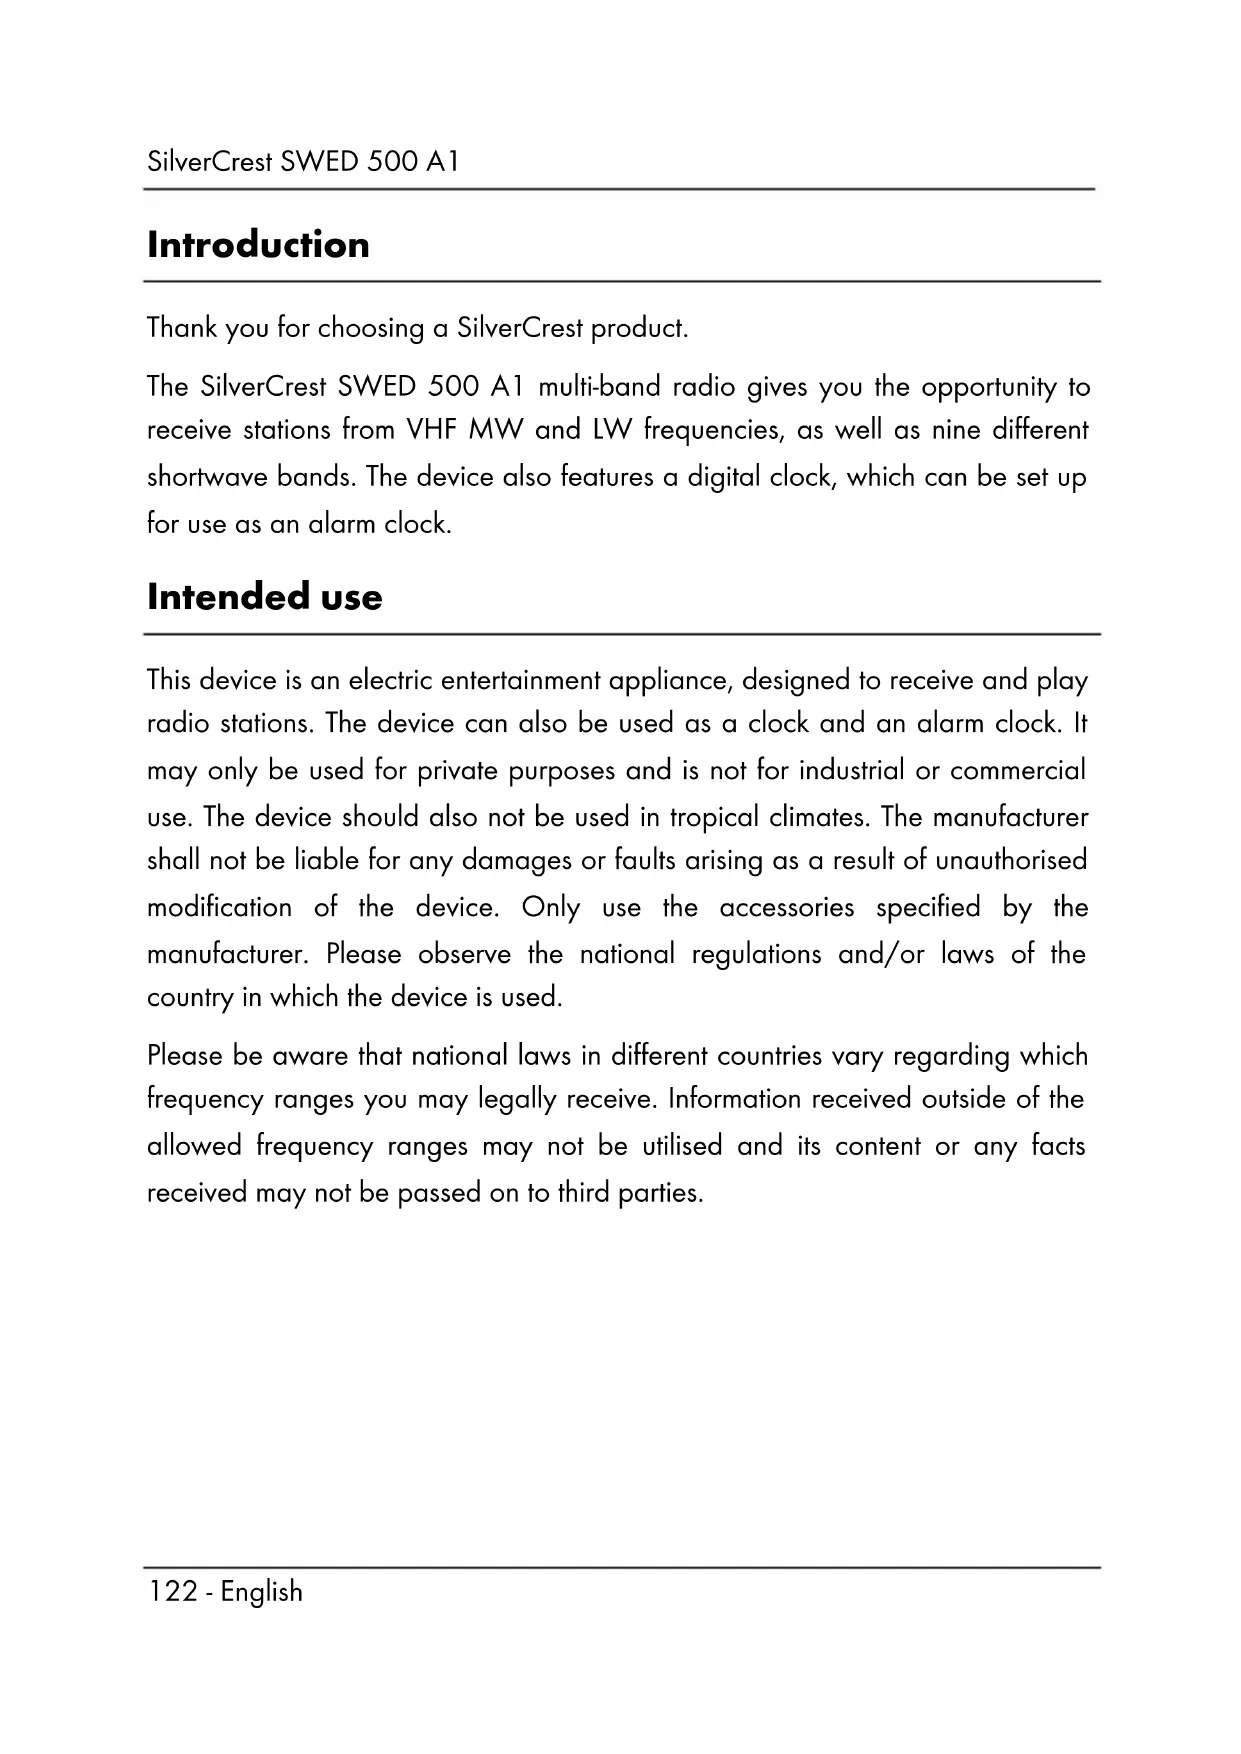
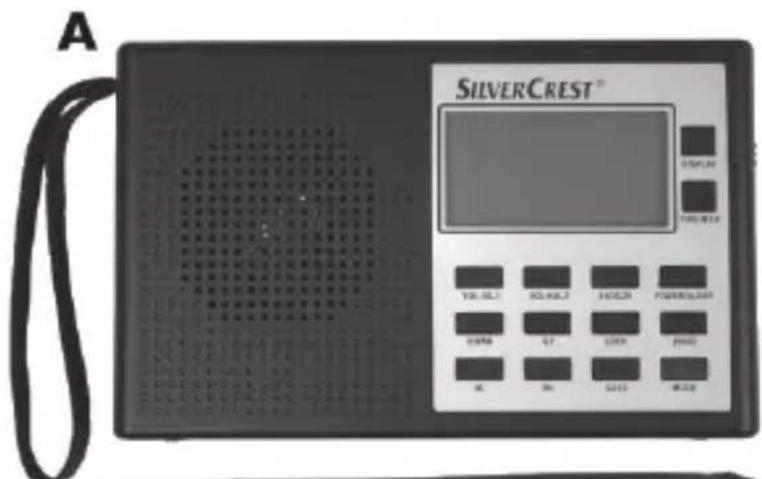
Package contents
Unpack the device and all accessories. Remove all packaging materials and check all parts for completeness and for signs of damage. If any parts are missing or damaged, please contact the manufacturer.


A Multi-band radio SWED 500 A1
B Mains adapter
C Case
D SWED 500 A1 earphones
E These instructions (symbol icon)
Specifications

These details only describe the technical capabilities of this device. Laws about the frequency ranges that you may legally receive can vary in different countries. Please note that receiving stations outside the scope of these laws is illegal and could result in penalties.
| Power supply | • Mains adapter provided: Manufacturer: TAIYTECH Model: TYTM0600030EU 6V = 0.3A • Optional batteries 4x AA 1.5V (Mignon, LR6) |
| Polarity of the mains adapter | ∅∅∅ |
| Maximum current consumption 0.3A | |
| Power consumption During use as a radio: approximately 0.6 W In standby: < 0.2 W | |
| Audio power output 500 mW | |
| Frequency bands | FM 87.5 - 108 MHz MW 522 - 1620 KHz SW1 4.75 - 5.94 MHz SW2 5.95 - 7.09 MHz SW3 7.10 - 9.49 MHz SW4 9.50 - 11.64 MHz SW5 11.65 - 13.59 MHz SW6 13.60 - 15.09 MHz SW7 15.10 - 17.49 MHz SW8 17.50 - 21.44 MHz SW9 21.45 - 21.85 MHz LW 153 - 279 KHz |
| Please note, due to production tolerances, the upper and lower ends of the reception range can vary slightly from the values given here. | |
| Number of memory locations 400 (100 per frequency band) | |
| Dimensions Approximately 11 cm x 17.7 cm x 3.9 cm (H x W x D) | |
| Weight Approximately 300 g (without batteries) | |
| Earphones SWED 500 A1 | |
| Impedance 32 ohm | |
| Broadband voltage identification Approximately 90 mV +/-10% | |
| Maximum sound pressure with the earphones supplied Approximately 90 dB(A) | |
| Maximum output voltage at earphone connector socket Approximately 40 mV | |
| Battery life Approximately 40 hours | |
| Operating temperature 5°C to 35°C | |
| Storage conditions -10°C to 50°C | Tip: The device should not be stored in hot locations e.g. a car during summer). |
| Operating humidity Maximum 85% relative humidity | |
The specifications and design are subject to change without notice.
Safety instructions
Before using the device for the first time, please read the following instructions carefully and observe all warnings, even if you are familiar with using electronic devices. Keep this manual in a safe place for future reference. If you give the device away or sell it, please ensure that you also pass on this manual. It is part of the product.

DANGER! This icon, together with the word 'Danger', indicates an impending dangerous situation which, if not prevented, can lead to serious injuries or even death.

WARNING! This icon, together with the word 'Warning', indicates important information for the safe operation of the device and user safety.

This icon indicates impending danger due to an electric shock.

This icon indicates further information on the topic.
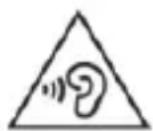
Dangers due to volumelevels being too high

Take care when using earphones. Listening at a high volume for prolonged periods can damage the user's hearing.
DANGER!

-
Only use the earphones supplied with the device (D) of the following type: SWED 500 A1. Using other earphones can lead to harmful sound pressure levels.
-
Do not use the SWED 500 A1 earphones supplied (D) with other playback devices.
Do not use the earphones (D) at a high volume. This would risk damaging your hearing and may disturb those around you. Please note that ambient noises may sound different when using earphones. Although the device is set up so that you can still be aware of ambient noises, set the volume at least low enough so that you can continue to be aware of sounds in your surroundings. In dangerous situations e.g., road use, working with machines or other
situations requiring your full attention, the noise may negatively affect your concentration or decrease your awareness of what is happening around you. In scenarios such as these, do not use the device.
Operating environment
The device is not designed for operation in rooms with high temperature, humidity (for example, the bathroom) or excessive dust. Operating temperature and operating humidity: 5^ to 35^ ; 85% maximum relative humidity.

DANGER! Please make sure that:
- there is always adequate ventilation (do not place the device on a shelf, a carpet, a bed or anywhere where the ventilation slots will be covered; leave a distance of at least 10cm free on each side)
- the device is not exposed to direct sources of heat (for example, heaters)
- the device is not exposed to direct sunlight or strong artificial light
- contact with splashing and dripping water and aggressive liquids is avoided, and that the device is not operated in the vicinity of water. In particular, the device should never be immersed, nor should any objects filled with liquids, for example vases or drinks, be placed on or near the device.
- the device is not placed close to magnetic fields (for example, loudspeakers)
- there are no naked flames (for example, burning candles) placed on or near the device
- no foreign bodies penetrate into the device
- the device is not exposed to excessive temperature fluctuations, as otherwise condensation can occur and lead to electrical short circuits. If, however, the device is exposed to large temperature fluctuations, wait for approximately two hours until the device has reached ambient temperature before starting it up.
-
the device is not exposed to excessive shocks and vibrations
-
the device and the mains adapter are not used during lightning storms. During lightning storms, remove the mains adapter from the plug socket.
- the mains adapter is always easily accessible whenever it is being used. Always lay the cable in such a way that nobody can trip on it.

DANGER! Batteries
Always connect the batteries with the correct polarity. To do this, follow the marking in the battery housing. Do not attempt to recharge the batteries and never dispose of batteries in a fire. Do not mix battery types (old and new, alkaline and zinc-carbon etc.). Remove the batteries when not using the device for a prolonged period of time. Improper use can cause explosions and leakages. Batteries must not be opened or deformed because the leaked chemicals can cause injuries. In the case of contact with eyes, rinse eyes immediately with plenty of water and seek medical attention.
Children should never play with batteries because batteries can be lethal if swallowed. Always store batteries out of the reach of children. If a battery is swallowed, medical help should be sought immediately.

DANGER! Children and people with disabilities
Keep electrical equipment out of reach of children. The use of electrical devices by people with reduced physical, sensory or mental capabilities should also be appropriate to their capacity. Ensure that children and people with reduced capabilities never use electrical devices unsupervised, unless they have been properly familiarised with the equipment or are being supervised by a person in charge of their safety. Children should generally be supervise
they do not play with this device. Small parts can be lethal if swallowed. If a small part is swallowed, medical help should be sought immediately.
Keep the packaging film away from children.

There is a risk of suffocation!

DANGER! Mains adapter

Only plug the mains adapter into a suitable plug socket that is always easily accessible. Never touch the mains adapter with wet hands. There is a risk of electric shock. In the following cases, remove the mains adapter from the mains:
- If there is a dangerous situation.
- If unusual sounds or smoke are coming from the mains adapter.
- Before a storm or thunderstorm where there is a danger of lightning.
- The mains adapter has been damaged.
- The mains adapter has been exposed to rain, liquid or extreme humidity.
If you wish to clean it. - The mains adapter uses electricity even when in standby. To completely remove it from the mains, the mains adapter must be unplugged from the socket.
Please observe this advice to avoid the risk of death and of fire! The mains adapter should also never be covered as this is a fire hazard. Never try to open the housing of the mains adapter. There is a risk of death by electric shock.

DANGER! Cables
Always take hold of all cables by the plug and do not pull on the cable itself. Do not place any items of furniture or other heavy objects on cables. Make sure that the cables are not bent, particularly at the plug and at the connector sockets. To avoid damaging the cable, do not lay it over hot or sharp locations or corners. Never make a knot in a cable and do not connect it with other cables. All cables should be laid in such a way that no one steps on them or is obstructed by them.

DANGER! Screen
Do not apply pressure to the screen and keep it away from sharp objects. A broken screen can cause injuries. Wear gloves when collecting broken pieces and, where relevant, contact the manufacturer. Where the screen is scratched or otherwise damaged, make completely sure that no liquid is leaking from it.
If any liquid leaks, please observe the following advice:
- If the liquid comes into contact with skin, wipe it off with a clean cloth and then rinse with plenty of water. It may be necessary to seek medical attention.
- If the liquid comes into contact with the eyes, rinse with running water for at least 15 minutes. Seek immediate medical attention.
If the liquid is swallowed, first rinse the mouth with water and then drink plenty of water. Seek medical attention immediately!

DANGER! Maintenance / cleaning
Repair work is required if the device has been damaged, for example, if the mains adapter or the device housing are damaged, liquids or objects have got inside the device or if the device has been exposed to rain or moisture. Repair work is also required if the device does not work properly or has been dropped. If you notice any smoke, unusual noises or smells, switch off the device immediately, remove the mains adapter from the socket and remove any batteries from the device. In these cases, you must not continue to use the device until it has been checked by a specialist. All repair work should only be carried out by qualified specialists. Never open the housing of the mains adapter or the device.
Remove the device from the mains. Clean the multi-band radio using a clean, dry cloth only and never use abrasive liquids. Do not try to open the housing of the device, as this will void your guarantee.
In the case of battery leakage, the device must be cleaned by a specialist.
Copyright
All contents of these operating instructions are subject to copyright law, and are provided to the user solely as a source of information.
Any form of copying or reproduction of data and information is prohibited without the express written permission of the author. This also concerns commercial use of the contents and data.
The text and illustrations correspond to the technical standards at the time of printing.
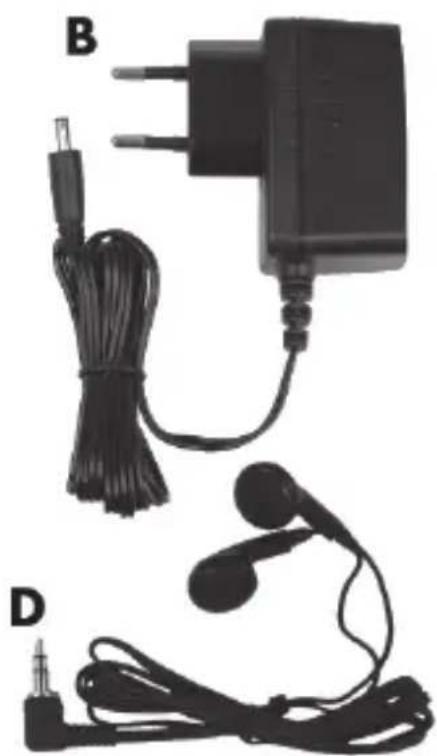
Overview of controls and button functions
This user manual also contains a cover that can be unfolded. Unfold this cover page so that you can always see the controls.
1 Telescopic aerial (on the back)
2 VOL-/AL1 button (reduce volume, Alarm 1)
3 VOL + / AL2 button (increase volume, Alarm 2)
4 SNOOZE button (postpone the alarm for 5 to 120 minutes)
5 Screen
6 POWER/SLEEP button (switch on/off; set sleep timer)
7 Display button (displays time settings)
8 TIME/MEM button (set time, save station)
9 BAND button (choose frequency band)
10 MODE button
11 LOCK button (lock the buttons)
12 BASS button (boosts the bass notes)
13 UP button (station scan up, set minutes +)
14 M+ button (go to next memory location)
15 DOWN button (station scan down, set minutes -)
16 M- button (go to previous memory location)
17 Loudspeaker
18 Carry strap
19 Battery housing (on the back)
20 Stand (on the back)
21 (connector socket for optional mains adapter)
22 (connector socket for earphones)
23 DX/LOCAL button (set up reception sensitivity)
Screendisplay
24 PRESET (station memory)
25 SDA (special date alarm)
26 VOLUME (volume)
27 LOCK (lock the buttons)
28 SLEEP (snoopze function)
29 NAP Timer
30 Alarm 1/2 active (buzzer)
31 Alarm 1/2 active (radio)
32 Low battery
33 Volume level warning icon
34 Frequency unit
35 Other displays: memory location, seconds, volume, alarm, frequency, BASS, city abbreviations etc.
36 Time / frequency display
37 STEREO (only when using earphones)
38 Frequency band
39 PM time display
40 Weekday display
41 SCAN (searching)
Stand
On the back of the device there is a stand (20), which can be used to stand the multi-band radio in a tilted position. To do this, pull out the stand (20).
Before start-up
You can choose whether to run the device using the supplied mains adapter (B) or with four AA batteries (Mignon, LR6). Batteries are not included in the delivery.
Using mains and battery power
When the multi-band radio (A) is disconnected from the mains, various settings (time and alarm time) are lost. To avoid this, insert batteries before disconnecting from the mains. This will mean that these settings are maintained.
Inserting the batteries
Open the battery housing (19) on the back of the device by lifting the battery housing lid down towards you and removing it. Insert the batteries with the
correct polarity (see the + and - markings), as shown in the following diagram. The polarity is marked on the batteries and on the battery housing. When inserting the batteries, ensure that the fabric strip is underneath the batteries. This makes it easier to remove the batteries when you need to change them. Now place the two plastic tabs from the battery housing lid into their notches below the battery housing (19) and lift the battery housing lid up and towards the radio until it clicks in.
If your screen (5) signals that the battery level is low (32), the batteries have almost run out of charge. Swap them for new batteries of the same type.

WARNING! Remove the batteries when not using the device for a prolonged period of time.
Connecting the mains adapter
Insert the connector from the mains adapter (B) into the connector socket (21) of the multi-band radio (A). Plug the mains adapter (B) into an easily accessible mains plug socket.
When the device is plugged into the mains adapter (B), it is powered exclusively by the adapter and not by any batteries that may be inserted. When using the mains adapter (B) to power the radio for prolonged periods of time, you should remove the batteries to prevent them from draining.
Initial start-up
Light-up screen
Every time a button is pressed, the screen lights up for approximately 5 seconds and then the light switches off.
Switching the device on and off
To switch on the device, briefly press the 'POWER/SLEEP' button (6) once. When switched on, the screen (5) displays the frequency and the frequency band that the radio is tuned to:
| FM | VHF |
| MW | Medium wave |
| SW | Shortwave |
| LW | Longwave |
To switch off the device, briefly press the 'POWER/SLEEP' button (6) again. When switched off, the screen (5) displays the current time and the weekday.
Functions of the 'MODE' button
When switched off, you can use the 'MODE' button (10) to access the set up mode for various functions:
| Press once SDA special | date alarm |
| Press twice NAP timer (timer for short periods) | |
| Press three times Stopwatch | |
| Press four times Set the | AM reception range (EU/US) |
| Press five times Set the | time zone |

When setting up the multi-band radio, the best way to begin is by setting the time zone. To do this, read the following section entitled 'Set the time zone'.
When the radio is on, the 'MODE' button has the following functions
| Press once Display 'AL1' setting |
| Press twice Display 'AL2' setting |
| Press three times Display and change the tuning resolution |
Set the time zone
The following tables provide an overview of the city abbreviations for the various time zones. You can also use the table to see the time differences and any summer time arrangements.
| Abbreviation | Difference to CET | Summer time | City / Country |
| HNL | -10:00 h no | Honolulu / USA | |
| ANC | -9:00 h yes | Anchorage / USA | |
| YVR | -8:00 h yes | Vancouver / Canada | |
| LAX | -8:00 h yes | Los Angeles / USA | |
| DEN | -7:00 h yes | Denver / USA | |
| CHI | -6:00 h yes | Chicago / USA | |
| MEX | -6:00 h yes | Mexico City / Mexico | |
| NYC | -5:00 h yes | NewYork / USA | |
| YYZ | -5:00 h yes | Toronto / Canada | |
| YUL | -5:00 h yes | Montreal / Canada | |
| CCS | -4:30 h no | Caracas / Venezuela | |
| RIO | -3:00 h yes | Rio de Janeiro / Brazil | |
| BUE | -3:00 h no | Buenos Aires / Argentina | |
| UTC* | 0:00 h no | Universal Time | Coordinated |
| LON | 0:00 h yes | London / Great Britain | |
| BER | +1:00 h yes | Berlin / Germany | |
| PAR | +1:00 h yes | Paris / France | |
| ROM | +1:00 h yes | Rome / Italy | |
| CAI | +2:00 h yes | Cairo / Egypt | |
| IST | +2:00 h yes | Istanbul / Turkey | |
| MOW | +3:00 h yes | Moscow / Russia | |
| KWI | +3:00 h no | Kuwait City / Kuwait | |
| DXB | +4:00 h no | Dubai / Saudi Arabia | |
| KHI | +5:00 h no Karachi/Pakistan | ||
| DAC | +6:00 h yes Dhaka / Bangladesh | ||
| BKK | +700 h no Bangkok / Thailand | ||
| SIN | +8:00 h no Singapore | ||
| HKG | +8:00 h no Hong Kong | ||
| PEK | +8:00 h no Beijing / China | ||
| SHA | +800 h no Shanghai / China | ||
| TYO | +9:00 h no Tokyo / Japan | ||
| SYD | +10:00 h yes Sydney / Australia | ||
| NOU | +11:00 no Noumea / New Caledonia | ||
| AKL | +12:00 yes Auckland / Zealand | ||
* UTC: Universal Time Coordinated
UTC represents the reference time for the various global time zones. The times of the time zones are derived from this reference time. The differences are presented in the second column.
To set the time zone, do the following:
- When the radio is switched off, press the 'MODE' button (10) five times. The current time will be on the screen and the associated city abbreviation will be displayed in the bottom right-hand corner. The default setting is 'UTC'.
- By pressing the 'UP' (13) or 'DOWN' (15) buttons, you can now set the city abbreviation that is appropriate to your time zone, e.g., BER for Berlin. You can find the appropriate city abbreviation in the table above.
After this, set the correct time, as described below.
Setting the date / time
First, set the correct time zone.
The time can only be altered when the radio is switched off. If it is on, press the 'POWER/SLEEP' button (6) to switch it off.
If no buttons are pressed for five seconds during set-up, the settings will be accepted and the set-up mode will be ended.
- Press the 'TIME/MEM' button (8) once. By pressing the 'UP' (13) or 'DOWN' (15) buttons, you can now set the year. You can also hold down the buttons to move more quickly through the numbers. Confirm your settings by pressing the 'TIME/MEM' button (8).
- At this stage you can set the day.month by pressing the 'UP' (13) or 'DOWN' (15) buttons. You can also hold down the buttons to move more quickly through the numbers. Confirm your settings by pressing the 'TIME/MEM' button (8).
In the screen (5) you will also see the weekday (40) that coordinates with the date that you set.
| Display | Weekday |
| MON | Monday |
| TUE | Tuesday |
| WED | Wednesday |
| THU | Thursday |
| FRI | Friday |
| SAT | Saturday |
| SUN | Sunday |
-
Now you can begin using the 'UP' (13) or 'DOWN' (15) buttons to choose the hours:minutes settings. You can hold down the buttons to move more quickly through the numbers. Confirm your settings by pressing the 'TIME/MEM' button (8).
-
You can use the 'UP' (13) or 'DOWN' (15) buttons to set the time format. The default setting is the 24-hour format. You can choose between the 12-hour or 24-hour format. Confirm your settings by pressing the 'TIME/MEM' button (8).
- Set-up is now complete.
- If you have chosen the 12-hour time format, the screen (5) will display the 'PM' icon (39) during the hours after midday.

The time must be adapted if you travel to another time zone.
With the 'DISPLAY' button (7), you can access the following information at any time:
When the device is off:
| Press once | year |
| Press twice | day:month |
| Press three times | time zone (hours:minutes and city abbreviation) |
When the device is on:
| Press once | hours:minutes |
| Press twice | year |
| Press three times | day:month |
| Press four times | time zone (hours:minutes and city abbreviation) |
Display world time
Press the 'DISPLAY' button (7) three times if the device is off or four times if it is being used as a radio. The time for the currently selected time zone will be on the screen (5). The associated city abbreviation will be displayed in the bottom right-hand corner.
- You can use the 'UP' (13) and 'DOWN' (15) buttons to view the corresponding times in other time zones.
Tip: World time will only be displayed briefly for information. The settings will not be saved.
SDA Special Date Alarm
This functions gives you the option of setting up to ten annual special date alarms. This can be done as follows:
- When the radio is switched off, press the 'MODE' button (10) once. The number 01 (for SDA 01) will be displayed on the screen (5) and the date associated with it will flash in the day.month format. If the alarm is not activated, the 'SDA' icon will also flash. An activated SDA will be indicated by the 'SDA' icon being displayed. In this scenario, the SDA icon will also be displayed when the device is being used as a clock.
- Use the 'UP' (13) and 'DOWN' (15) buttons to set the date. Hold down the buttons to start automatically scrolling through the numbers.
- Press the 'BASS' button for about a second in order to activate or deactivate the SDA that has been set up. Each SDA can be activated and deactivated separately. The setting will be saved automatically.
- Press the 'TIME/MEM' (8) button to set further SDAs.
The activated SDAs will now go off every year. If the current date corresponds with the SDA alarm, a buzzer tone will go off every hour between 08:00 and 23:00 for about ten minutes. If in use, the radio function of the multi-band radio will stop. To end this alarm, press any button.
NAP timer
You have the option of setting a timer for a short period (alarm sound only) for a one-off occurrence. There are five pre-set NAP timers and you can choose between them using the 'TIME/MEM' button (8). The durations of the five preset timers are all different: 10, 15, 20, 25 and 30 minutes.
- When the radio is switched off, press the 'MODE' button (10) twice. The NAP timer icon (29) will be displayed on the screen (5), also number of the timer and the pre-set activation time in minutes.
- Press the 'TIME/MEM' button (8) repeatedly in order to activate the pre-set NAP timer.
- You can use the 'UP' (13) and 'DOWN' (15) buttons to adapt these times to your requirements, from 1 minute to 39 minutes.
- To start the timer, press the 'TIME/MEM' button (8) for about one second.
- The screen will now display the time counting down. When the timer ends, an alarm will sound until it is switched off.
The NAP timer alarm can be switched off by pressing any button.
Stopwatch
The stopwatch function can be used as follows:
- When the device is switched off, press the 'MODE' button (10) three times. The screen will display 0:00 (minutes:seconds) and the bottom right hand of the screen will also show the hundredths of a second.
- Briefly press the 'TIME/MEM' button (8) to start the stopwatch.
- Briefly press the 'TIME/MEM' button (8) again to stop the stopwatch.
- To reset the timer to 0:00, press the 'TIME/MEM' button (8) for about one second.

While the stopwatch is running, the stopwatch time will be displayed on the screen (5). When the stopwatch is stopped, the screen display switches back to the normal time. The time measured by the stopwatch can be recalled by clicking three times on the 'MODE' button (10).
Set the AM reception range
Due to the various radio transmission systems in different countries, it is best to adapt the channel spacing and/or the reception area:
| Region | Frequency band | range |
| Europe 522 kHz - | 1620 kHz 9 kHz | |
| America 520 kHz | - 1710 kHz 10 kHz |
This can be done as follows:
- When the device is switched off, press the 'MODE' button (10) four times. On the screen, either EU or US will be displayed as the currently selected region.
- You can use the 'UP' (13) and 'DOWN' (15) buttons to change the region.
Set the volume
By pressing the 'VOL-/AL1' (2) and 'VOL+/AL2' (3) buttons, you can change the volume in accordance with your preferences. The settings range from a minimum volume level of '00' to a maximum volume level of '16'. When being used as a loudspeaker, the device starts at the volume that it was at when last switched off.
In order to avoid hearing damage due to excessive volume, the volume settings for use with earphones are regulated as follows:
- When the volume reaches level '07', the volume warning icon (33) begins to flash. You can now only increase the volume further if you confirm the volume warning by briefly pressing the 'LOCK' button (11). The increased volume level will remain until the device is next switched off.
- If the volume level during use as a loud speaker was set as higher than level '07' and earphones were then inserted during use as a radio, the volume will jump back to level '07'. By pressing the 'VOL+/AL2' button (3) ag volume warning icon will begin to flash (33). You can now only increase the
volume further if you confirm the volume warning by briefly pressing the 'LOCK' button (11).
- If the volume level during use as a loud speaker or with earphones was set as higher than level '07' and the device was then swi switched on again while earplugs are inserted, the volume will jump back to level '07'. By pressing the 'VOL+/AL2' button (3) again, the volume warning icon will begin to flash (33). You can now only increase the volume further if you confirm the volume warning by briefly pressing the 'LOCK' button (11).
Set up reception sensitivity
This function only applies for FM and SW. If you wish to use the device in normal mode, slide the 'DX/LOCAL' selection switch (23) to the 'DX' position.
If you only wish to receive stations with a high field stre, 'DX/LOCAL' selection switch (23) to the 'LOCAL' position. This is recommended if, for example, you wish to receive a weak local station that stronger national stations are blocking out.
Activate bass boost
You have the option of boosting the playback of bass notes.
- During use as a radio, press the 'BASS' button (12). 'BASS' (35) will be displayed on the screen.
- Press the 'BASS' button (12) again to switch off the bass boost. 'BASS' (35) will disappear from the screen.
Choose a station
In order to achieve the best possible signal, pull out the telescopic aerial (1) to its maximum length. The telescopic aerial (1) can be rotated. In this way, the reception can be optimised.
Automatic station scanning with auto-store function
The most convenient way of searching for and saving stations is the automatic station scanning function with automatic channel saving (auto-store function).
-
Switch the device on.
-
Next, choose the desired frequency band by pressing the 'BAND' button (9).
- Press the 'TIME/MEM' button (8) for about one second to start automatically scanning for stations. Automatic station scanning always begins with the lowest frequency. 'PRESET' (24) is displayed on the screen.
- The multi-band radio (A) will now scan the entire frequency range for stations with a strong signal. As soon as a station with a strong signal is found, the memory location (35) that it is stored in will be displayed on the screen.
- The first 100 stations found will be stored and saved straight to memory locations 001 to 100.
When all 100 memory locations are full, the scanning will continue until completion but no further stations will be saved.

Please note this will overwrite memory locations that are already in use.
Manually scanning for stations:
- Switch the device on.
- Next, choose the desired frequency band by pressing the 'BAND' button (9). The shortwave band 'SW; is divided into nine sub-bands, 'SW1' to 'SW9' (see section entitled 'Specifications'). To select individual sub-bands, now press the 'BAND' button (9) and select the 'SW' band. Now press the 'BAND' button (9) for about one second, until the 'SW' icon flashes on the screen. You can now use the 'UP' (13) or 'DOWN' (15) buttons to select the 'SW' sub-bands. When the 'SW' icon (5) is no longer flashing on the screen (5), you can begin searching for stations.
- To begin the search in the direction of your choice, press the 'UP' (13) or 'DOWN' (15) button for about one second. The search will stop at the next station that is found and the frequency will be displayed on the screen (5).
Manual tuning control
Instead of using the station search, you also have the option of configuring stations manually. This makes it possible to find weaker stations as well. To do this, proceed as follows:
To increase or decrease the frequency by one step, briefly press either the 'UP' (13) or 'DOWN' (15) button respectively. The spacing of the steps varies depending on the frequency band selected. For FM it is 0.1 MHz, 9 kHz for 'AM-EU', 10 kHz for 'AM-US', 5 kHz for 'SW' and 9 kHz for 'LW'.
Fine tuning a station
You have the option of refining the tuning resolution of the tuning controls according to the following table, in the event that a station cannot be exactly located.
To configure this, do the following:
- When the radio is switched on, press 'MODE' three times.
- The current frequency is displayed on the screen (5) and the current tuning resolution is shown in the bottom right-hand corner.
- You can now use the 'UP' (13) or 'DOWN' (15) buttons to select set tuning to normal or fine. The setting will be saved automatically.
| Frequency range: | Fine / normal tuning resolution |
| UKW (FM) 100 kHz / 50 kHz | |
| MW (AM) EU 9 kHz / 1 kHz | |
| MW (AM) US 10 kHz / 1 kHz | |
| SW 5 kHz / 1 kHz | |
| LW 9 kHz / 1 kHz |
Manually saving stations
It is possible to save 100 stations or frequencies per frequency band. To do this, proceed as follows:
Find a station that you would like to save.
- Briefly press the 'TIME/MEM' button (8).
- The previously chosen memory location (35) is displayed on the screen (5) and 'PRESENT' (24) is flashing.
- Use the 'M-' (16) or 'M+' (14) buttons to choose the memory location in which you wish to store your station. You can also hold down the buttons to move more quickly through the numbers.
- Press the 'TIME/MEM' button (8) to finish saving.

Please note this will overwrite memory locations that are already in use.
Go to a saved station
- To go to a station that you have previously saved, use the 'M-' (16) or 'M+' (14) buttons to choose the memory location in which your chosen station is stored. You can also hold down the buttons to move more quickly through the numbers.

Please note:
The memory locations are not in use in the default setting. When a memory location not in use is selected, the previously selected station continues to play.
If a memory location is in use, the stored frequency is maintained until it is overwritten by saving once again.

If the multi-band radio is not supplied with electricity, the time settings are lost but any saved stations will be retained.
Playback in stereo
Playback can only be in stereo quality when earphones are attached. When this is the case, the 'STEREO' icon (37) appears on the screen (5).
SLEEP timer
With the SLEEP timer, you can set a time between 10 and 90 minutes, after which your multi-band radio (A) will automatically switch off. This can be set in intervals of ten minutes. Proceed as follows:
- Switch off the device using the 'POWER/SLEEP' button (6).
- Press the 'POWER/SLEEP' button (6) for about one second, until the number 90 (for 90 minutes) appears on the screen (5).
- Now press the 'POWER/SLEEP' button (6) until the desired number of minutes has been reached (e.g., 40). Each time the 'POWER/SLEEP' button (6) is pressed, the duration until the radio switches off is reduced by ten minutes.
- The multi-band radio (A) will now switch on and will switch off automatically after the number of minutes (e.g., 40) that was selected.
- The 'SLEEP' icon (28) is visible on the screen (5) when the SLEEP timer is activated.
- While the SLEEP timer is activated you can still change the frequency band, begin scanning for stations, access saved stations and set the volume.
- You can cancel the activated SLEEP timer by switching off the device.
Set the alarm time
You have the option of setting two alarm times (AL1 and AL2). Ensure that the clock has been set to the correct time. The alarm time can only be altered when the radio is switched off. If it is on, press the 'POWER/SLEEP' button (6) to switch it off.
Below is a description of how to set up AL1. AL2 can be set in the same way. If no buttons are pressed for five seconds during set-up, the settings will be accepted and the set-up mode will be ended.
- Press the 'VOL-/AL1' button (2) for about one second. The time in hours will flash on the screen (5).
- Now use the 'UP' (13) or 'DOWN' (15) buttons to set the desired time for the alarm. You can also hold down the buttons to move more quickly through the numbers. To accept the settings, briefly press on the 'VOL-/AL1' button (2).
- Now you can choose which weekdays the alarm time should apply to. You can use the "UP" (13) or "DOWN" buttons to continue choosing the following alternatives.
| All weekdays |
| Individual weekdays |
| Weekdays from Monday to Friday |
| Weekends Saturday and Sunday |
To accept the settings, briefly press on the 'VOL-/AL1' button (2).
- You can now use the 'UP' (13) or 'DOWN' (15) buttons to set the alarm volume. Please note that the alarm volume setting only applies if it is the radio that is being used as an alarm. The volume of the buzzer alarm is unaffected by this setting.
The alarm time has now been set.
Activate the alarm
Below is a description of how to set up AL1. The same procedure applies to AL2.
When you have set the alarm time, you can activate the alarm function as follows:
- When the radio is switched off, briefly press the 'VOL-/AL1' button (2) once to activate the radio alarm. The associated icon (31) appears on the screen.

Please note that earphones must not be connected when using the radio alarm.
- Briefly press the 'VOL-/AL1' button (2) for a second time to activate the buzzer alarm. The associated icon (30) appears on the screen.
- At the time the alarm was set for, the device will switch on automatically, at the same frequency that it was last tuned to and in the same frequency band. However, if you chose the buzzer alarm setting, you will be woken up by this instead.
- To switch off the alarm sound, press the 'VOL-/AL1' button (2) or press the 'SNOOZE' button (4) to delay the alarm for about five more minutes. The alarm icon (30, 31) will be flashing. Once the five minute snooze period if over, the alarm sound will switch on again. If you press the 'BAND' button (9) during the five minute snooze period, the snooze function will be deactivated but the alarm function will remain activated.

The default setting for snooze duration is five minutes. You can increase the snooze time up to 120 minutes, according to your preference. To do this, hold down the 'SNOOZE' button for about one second when the radio is switched off. The current snooze duration setting will be displayed on the screen (5). You can use the 'UP' (13) or 'DOWN' buttons to change the snooze duration. You can also hold down the buttons to move more quickly through the numbers. Briefly press the 'SNOOZE' button (4) to accept the setting.
- To deactivate the alarm, keep pressing the 'VOL-/AL1' button (2) until the alarm icon (30, 31) is no longer displayed on the screen.

You can still use the device as normal when the alarm function is activated. Please note:
Radio alarm:
The automatic alarm will turn the radio on at the same frequency that it was last tuned to and in the same frequency band.
- Buzzer alarm:
The automatic alarm will always be at a pre-set volume. This volume cannot be changed.
Activate/deactivate the button lock
Press the 'LOCK' button (11) for about a second in order to activate the button lock on the multi-band radio. The 'LOCK' icon (27) will now flash on the screen.
When the button lock is activated, you can still use the following functions:
Stop the alarm
Activate the 'SNOOZE' function on the alarm
End the 'SNOOZE' function by pressing the 'BAND' button
Activate the light-up screen
Any further actions require the button lock to be deactivated again by pressing and holding the 'LOCK' button (11) again for about one second. The 'LOCK' icon (27) will no longer be flashing on the screen (5).
Connecting the earphones

DANGER! Do not use any other earphones than the SWED 500 A1 pair supplied. Using other earphones can lead to harmful sound pressure levels.
Take care when using earphones. Listening at full volume for prolonged periods can damage the user's hearing.
You can connect the SWED 500 A1 earphones supplied (D) to the earphone socket (22). When the earphones are inserted, the loudspeaker (17) is automatically switched off and the volume is automatically reduced.
Storing the device when not in use

If you will not be using the device for a prolonged period of time, remove any batteries that you may have inserted.
Keep the device in a cool, dry place. To protect it from dust, we recommend storing it in the case (C) supplied.
Troubleshooting
The device will not switch on
- Check that the mains adapter is connected.
- If you have inserted batteries, these may be empty; replace with new batteries.
- Check that the batteries are inserted with the correct polarity. Observe the marking on the battery housing and on the batteries. See also the section entitled 'Inserting the batteries'.
- Check whether the button lock is activated. If so, press the 'LOCK' button (11) for about a second in order to deactivate the button lock.
No radio reception, poor radio reception
- Pull out the telescopic aerial (1) as far as it will go and ensure it is correctly oriented.
- Configure the station correctly. It may be necessary to start a new search.
- Check that the 'DX/LOCAL' selection switch (23) is in the correct position. See also the section entitled 'Set up reception sensitivity'.
No sound despite the device being switched on
- Check the volume settings.
- If a set of earphones are connected, the in-built loudspeaker is switched off.
I cannot use the controls on the device
- Check whether the button lock is activated.
Environmental and waste disposal information

If this icon with a crossed out disposal bin is displayed on a product, this product is governed by the European Directive 2012/19/EU. All electrical and electronic equipment must not be put in the household waste, but must be disposed of via designated public disposal centres. Before disposing of this
device, remove the batteries. By properly disposing of the old/defective device, you can avoid environmental damage and hazards to health. Further information regarding disposal of the old/defective device can be obtained from your local authority or the shop where you purchased the product.
Disposing of packaging
Make sure the packaging is disposed of in an environmentally friendly manner. Cardboard packaging can be put out for waste-paper collection or taken to public collection points for recycling. The plastic packaging used for your device is collected by your local waste management company and disposed of in an environmentally sound manner.
Disposing of batteries
Consider the environment. Used batteries should not be disposed alongside household waste. They should be brought to a collection point for old batteries. Please note that you should only take discharged batteries to the old battery
collection point. As a precaution, use sticky tape to tape up the contacts of batteries that are not completely discharged.
Marks of conformity
CE This device conforms to the fundamental requirements and other relevant regulations of the EMC Directive 2004/108/EC, the Low Voltage Directive 2006/95/EC, the ErP Directive 2009/125/EC and the RoHS Directive 2011/65/EU.
The corresponding declaration of conformity can be found at the end of this manual.
Guarantee and service
Warranty of TARGA GmbH
This device is sold with three years warranty from the date of purchase. Please keep the original receipt in a safe place as proof of purchase. Before using your product for the first time, please read the enclosed documentation. Should any problems arise which cannot be solved in this way, please call our hotline. Please have the article number and, if available, the serial number to hand for all enquiries. If it is not possible to solve the problem on the phone, our hotline support staff will initiate further servicing procedures depending on the fault. Within the warranty period the product will be repaired or replaced free of
charge as we deem appropriate. No new warranty period commences if the product is repaired or replaced. Consumables such as batteries, rechargeable batteries and lamps are not covered by the warranty.
Your statutory rights towards the seller are not affected or restricted by this warranty.
Service

Phone: 0207-3650744
E-Mail: service.GB@targa-online.com

Phone: 01-2421583
E-Mail: service.IE@targa-online.com

Phone: 800-62175
E-Mail: service.MT@targa-online.com

Phone: 800 - 92 496
E-Mail: service.CY@targa-online.com
IAN:107035

Manufacturer
TARGA GmbH
Coesterweg 45
59494 SOEST
GERMANY
CE
EU-Declaration of Conformity
Address: Targa GmbH Coesterweg 45 59494 Soest, Germany
Product: Digital Multi-Band Radio
Model: SilverCrest SWED 500 A1
Identification number: 107035
The product complies with the requirements of the following European directives:
2004/108/EC Electromagnetic Compatibility 2006/95/EC Low Voltage
2009/125/EC Energy Relating Products
2011/65/EU Restriction of the use of certain hazardous substances in electrical and electronic equipment
Compliance was proved by the application of the following standards:
EMC: EN 55013:2001 + A1:2003 + A2:2006
EN 55020:2007 + A11:2011
EN 61000-3-2:2006 + A1:2009 + A2:2009
EN 61000-3-3:2008
Safety: EN 60065:2002 + A1:2006 + A11:2008 +A2:2010 + A12:2011
RoHS: EN 50581:2012
ErP EN 50564:2011 with Regulation 1275/2008 EN 50563:2011 with Regulation 278/2009
Year of CE marking: 2015
Soest, 9^th of March 2015

Matthias Klauke, Managing Director

- * UTC: Universal Time Coordinated
- Troubleshooting 154
- Environmental and waste disposal information. 155
- Marks of conformity 156
- Guarantee and service 156
- Introduction
- Intended use
- Package contents
- Specifications
- Safety instructions
- Dangers due to volumelevels being too high
- DANGER!
- Operating environment
- DANGER! Please make sure that:
- DANGER! Batteries
- DANGER! Children and people with disabilities
- Keep the packaging film away from children.
- There is a risk of suffocation!
- DANGER! Mains adapter
- DANGER! Cables
- DANGER! Screen
- DANGER! Maintenance / cleaning
- Copyright
- Overview of controls and button functions
- Screendisplay
- Stand
- Before start-up
- Using mains and battery power
- Inserting the batteries
- Connecting the mains adapter
- Initial start-up
- Light-up screen
- Switching the device on and off
- Functions of the 'MODE' button
- Set the time zone
- Setting the date / time
- Display world time
- SDA Special Date Alarm
- NAP timer
- Stopwatch
- Set the AM reception range
- Set the volume
- Set up reception sensitivity
- Activate bass boost
- Choose a station
- Automatic station scanning with auto-store function
- Manually scanning for stations:
- Manual tuning control
- Fine tuning a station
- Manually saving stations
- Go to a saved station
- Playback in stereo
- SLEEP timer
- Set the alarm time
- Activate the alarm
- Activate/deactivate the button lock
- Connecting the earphones
- Storing the device when not in use
- Troubleshooting
- The device will not switch on
- No radio reception, poor radio reception
- No sound despite the device being switched on
- I cannot use the controls on the device
- Environmental and waste disposal information
- Disposing of packaging
- Disposing of batteries
- Marks of conformity
- Guarantee and service
- Warranty of TARGA GmbH
- Service
- Manufacturer
- CE
- EU-Declaration of Conformity
Brand : SILVERCREST
Model : SWED 500 A1
Category : Radio