
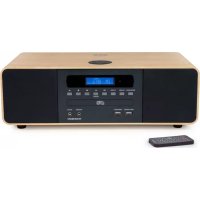
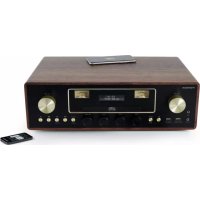
MIC500IWF - Hi-Fi System THOMSON - Free user manual and instructions
Find the device manual for free MIC500IWF THOMSON in PDF.
| Brand | Thomson |
| Model | MIC500IWF |
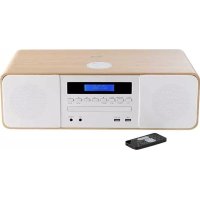
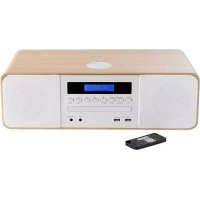
| Product type | Hi-Fi system |
| Power supply | DC 15 V / 3 A (AC adapter) |
| Maximum power consumption | 45 W |
| Total audio output power | 40 W |
| Frequency response | 50 Hz - 20 kHz |
| Signal-to-noise ratio | 86 dB |
| Total harmonic distortion (THD) | 0.5% (1 kHz, 1 W) |
| Speaker impedance | 4 ohms |
| AUX input sensitivity | 750 mV |
| FM frequencies | 88.8 - 108.00 MHz |
| DAB+ frequencies | Band III (174 - 240 MHz) |
| Bluetooth band | 2402 - 2480 MHz |
| Wireless charging | 9 V / 1.4 A (Qi compatible) |
| USB charging | 5 V / 1 A |
| Connectivity | Wi-Fi, LAN, Bluetooth, USB, AUX, Headphone |
| Main functions | Internet radio, DAB+, FM, CD player, Bluetooth streaming, AirMusic Control, Alarm, Timer |
| Supported audio formats | Audio CD, MP3 |
| Included accessories | Remote control, AC adapter |
| Maintenance | Disconnect before cleaning, use a soft dry cloth, avoid harsh products |
| Safety | Do not open the casing, avoid moisture, do not block ventilation openings |
Frequently Asked Questions - MIC500IWF THOMSON
User questions about MIC500IWF THOMSON
0 question about this device. Answer the ones you know or ask your own.
Ask a new question about this device
Download the instructions for your Hi-Fi System in PDF format for free! Find your manual MIC500IWF - THOMSON and take your electronic device back in hand. On this page are published all the documents necessary for the use of your device. MIC500IWF by THOMSON.
USER MANUAL MIC500IWF THOMSON
Moo-Form with Induction and Fuzzy Rules
Moo-Ind. 1982, 3rd ed.

OPERATINGFUNCTIONS
PHLPP, HCMC AND YODI JAINNANA (COMPLIANT) BOPPIE OF JAINNANA; THE CANDIDATE OF JAINNANA BY THE CHAOTYING ADULTURE.
N° Qte Nom
11MIC500IWF
21 Telecommande
31 Cable RCA
41 Cable USB de recharge
51 Manuel d'utilisation
3. EMPLACEMENT DES COMMANDES

- Marche/arret
- Menu
CD-USB-AUX-DAB-FMRADIO INTERNET
EN : https://www/bigben-interactive.co.uk/support/
IT: https://www/bigbeninteractive.it/supporto-technico/
PLEASE READ THIS USER MANUAL CAREFULLY BEFORE OPERATING THIS UNIT AND RETAIN THIS BOOKLET FOR FUTURE REFERENCE.
Contents
- INTRODUCTION 1
7.AIR MUSIC CONTROL 14
- ITEMS SUPPLIED 3
8.CHARGING 16
- LOCATION OF CONTROLS 4
9 FEATURESAND TECHNICAL SPECIFICATIONS 17
-
REMOTE CONTROL 5
-
ABOUT THE DISC
-
INSTALLATION 6
-
SERVICE AND SUPPORT 18
-
OPERATION
1. INTRODUCTION
Getting Started
- Remove the appliance from the box.
- Remove any packaging from the product.
- Place the packaging inside the box and either or dispose of safely.
Safety and Notice
Read and understand all instructions before you use this product. If damage is caused by failure to follow the instructions, the warranty does not apply.
Safety
Warning
- Never remove the casing of this apparatus.
- Never lubricate any part of this apparatus.
- Never place this apparatus on other electrical equipment.
- Keep this apparatus away from direct sunlight, naked Fames or heat.
- Never look into the laser beam inside this apparatus.
- Ensure that you always have easy access to the power cord, plug or adaptor to disconnect this apparatus from the power.
- Minimum distances 10cm around the apparatus for sufficient ventilations.
- The ventilation should not be impeded by covering the ventilation openings with items, such as newspapers, tablecloths, curtains, etc.
- No naked flame sources such as lighted candles should be placed on the apparatus.
-
Attention should be drawn to environmental aspects of battery disposal.
The use of apparatus in moderate climates. -
Read these instructions.
- Keep these instructions.
- Heed all warnings.
- Follow all instructions.
- Do not use this apparatus near water.
- Clean only with dry cloth.
- Do not block any ventilation openings. Install in accordance with the manufacturer's instructions.
- Do not install near any heat sources such as radiators, heat registers, stoves, or other apparatus (including amplifiers) that produce heat.
- Protect the power cord from being walked on or pinched, particularly at plugs, convenience receptacles, and the Point where they exit from the apparatus.
- Only use attachments/accessories specified by the manufacturer.
- Unplug this apparatus during lightning storms or when unused for long periods of time.
- Refer all servicing to qualified service personnel. Servicing is required when the apparatus has been damaged in anyway, such as power-supply cord or plug is damaged, liquid has been spilled or objects have fallen into the apparatus, apparatus has been exposed to rain or moisture, does not operate normally, or has been dropped.
- Apparatus shall not be exposed to dripping or splashing.
- Do not place any sources of danger on the apparatus (e.g. liquid filled objects, lighted candles).

- Where the MAINS plug or an appliance coupler is used as the disconnect device, the disconnect device shall remain readily operable.
- Make sure there is enough free space around the product for ventilation.
- Batteries (battery pack or batteries installed) shall not be exposed to excessive heat such as sunshine, fire or the like.
- The rating label is placed on the back side of apparatus.
Care for your product
- Always unplug the appliance when not in use and before cleaning.
- Do not play music at excessive volume levels as damage to hearing and or the equipment may occur.
- Do not use this unit in wet or damp conditions.
- Always disconnect the unit from the mains power supply before cleaning.
- Clean the appliance with a soft, damp, lint free cloth. Do not use abrasives or harsh cleaners.
Care of the environment

Your product is designed and manufactured with high quality materials and components, which can be recycled and reused.

Your product contains batteries covered by the European Directive 2006/66/EC, which cannot be disposed with normal household waste. Please inform yourself about the local rules on separate collection of batteries because correct disposal helps to prevent negative consequences for the environmental and human health.

When this crossed-out wheeled bin symbol is attached to a product it means that the product is covered by the European Directive 2002/96/EC. Please inform yourself about the local separate collection system for electrical and electronic products. Please act according to your local rules and do not dispose of your old products with your normal household waste. Correct disposal of your old product helps to prevent potential negative consequences for the environment and human health.
CLASS1LASER PRODUCT APPARELÁ LASER DE CLASSE 1 PRODUCTO LASER DE CLASE 1
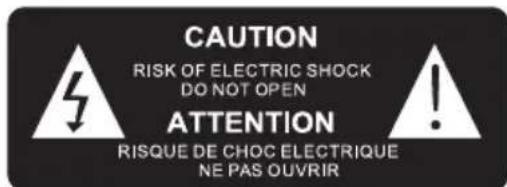
The lightning symbol inside an equilateral triangle warns the user of the presence inside the product of uninsulated hazardous electric voltages powerful enough to represent an electrocution risk.
2. ITEMS SUPPLIED
12345

THOMSON
Moo-Form with Induction and Fuzzy Rules
Moo-Ind. 1982, 3rd ed.

OPERATINGFUNCTIONS
PHLPP, HCMC AND YODI JAINNANA (COMPLIANT) BOPPIE OF JAINNANA; THE CANDIDATE OF JAINNANA BY THE CHAOTYING ADULTURE.
No. Qty Name
11MIC500IWF
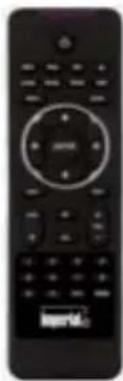
2.1 Remote control
31 RCA cable
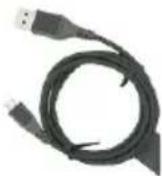
4.1 USB charging cable
51 Operating manual
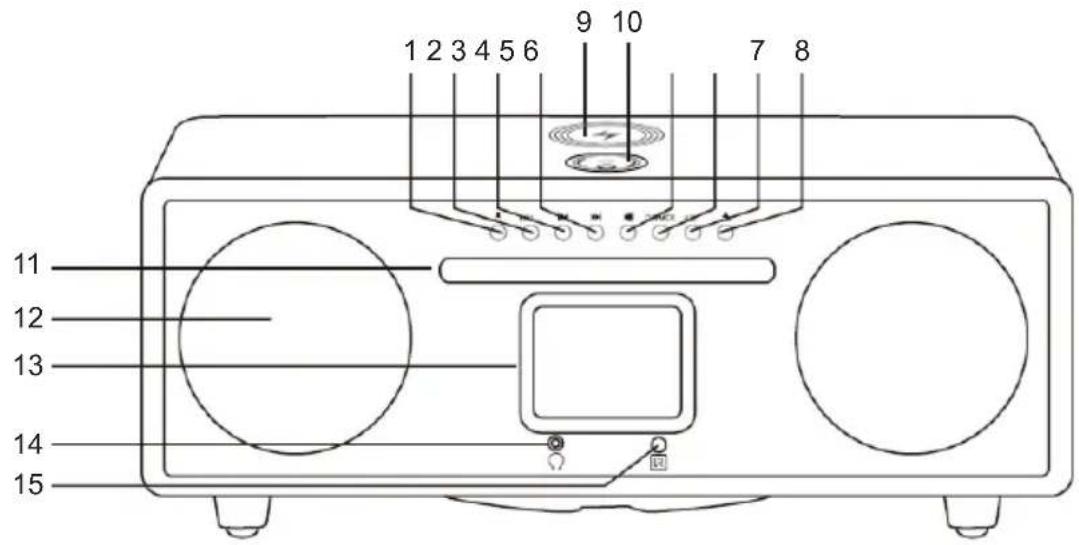
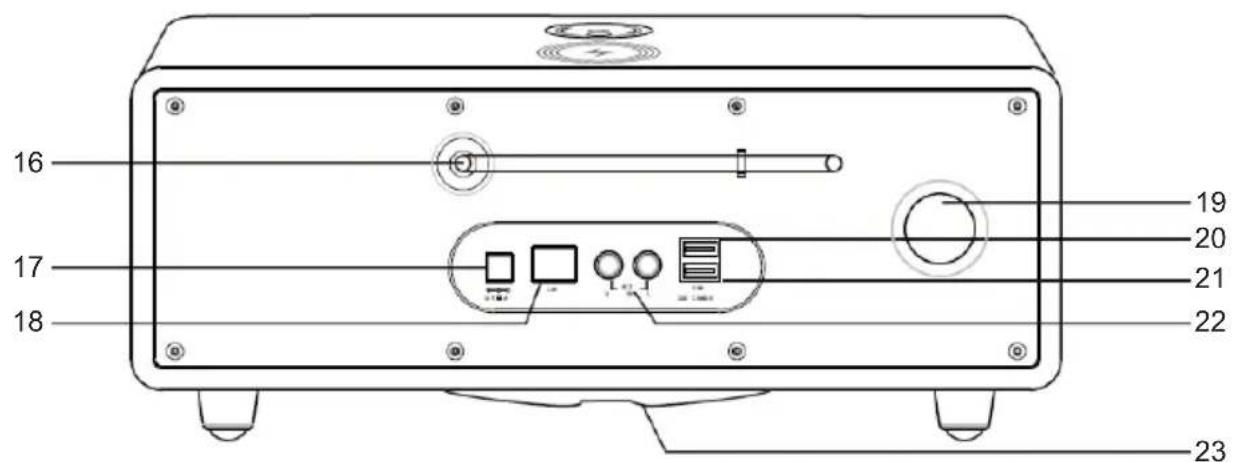
3. LOCATION OF CONTROLS


- Power on/off
- Menu
Displays the device menu
- Skip to the previous track
- Skip to the next track
- Start or pause play
- Dimmer
- Key
- Ejects the CD from the drive.
- Wireless induction charging
- Volume adjust knob / Enter
- CD slot
- R/L speaker
-
LCD display
-
Headphone jack
- Remote receiver
- FM/DAB antenna
- DC input
- LAN connection
Here you connect the device to an existing network with a network cable to enable the internet radio feature. (Alternatively, the device can also be connected via Wi-Fi).
- Air hole
- USB port
- USB charging port
- AUX in
- Subwoofer speaker
4. REMOTE CONTROL
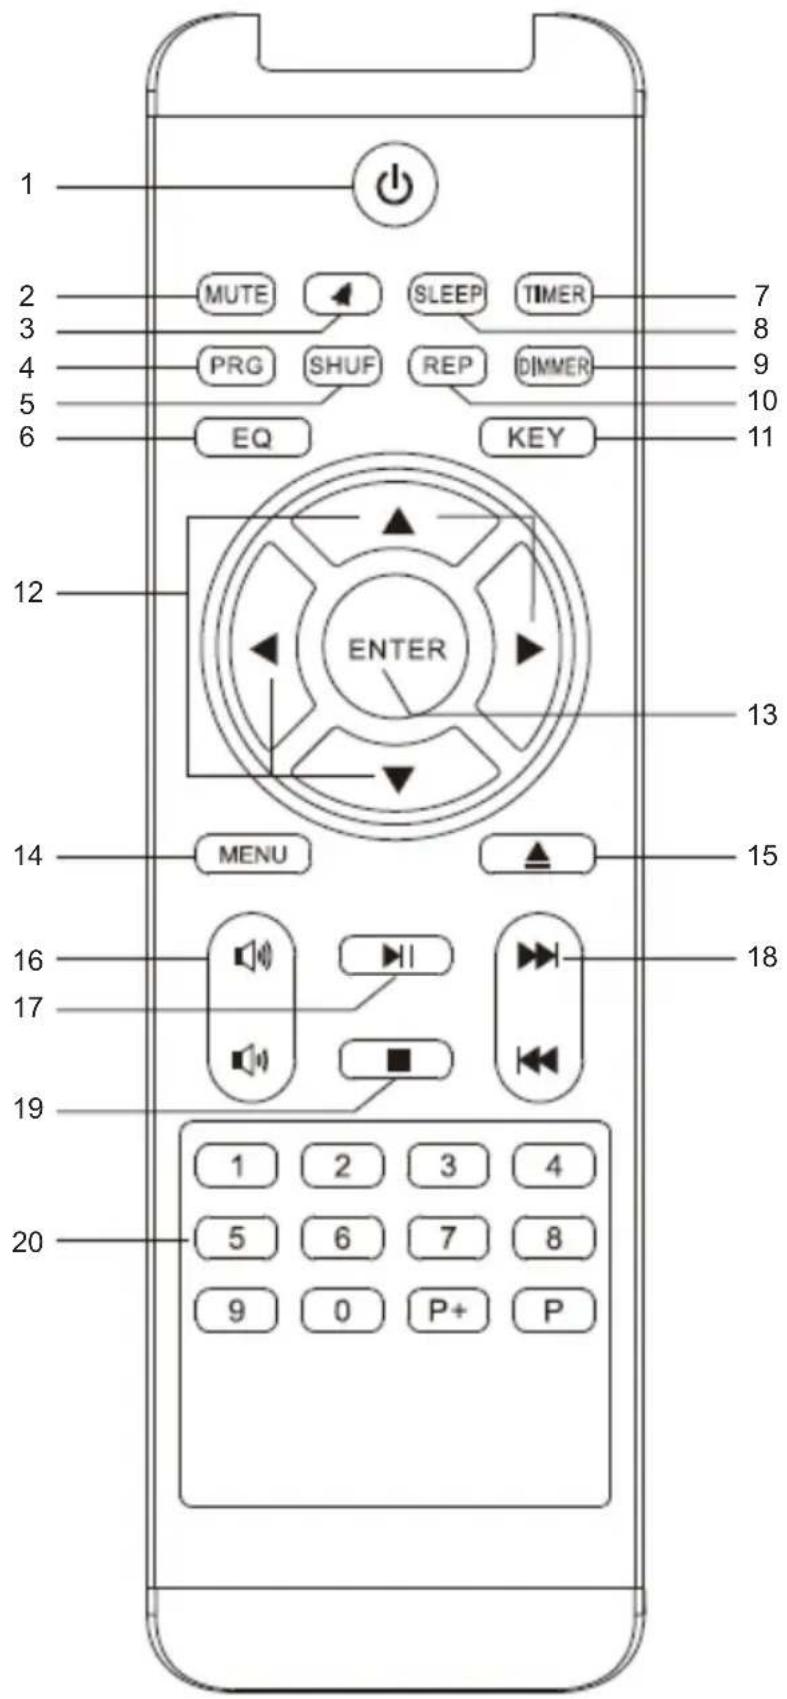
- Power on / off button
Use this button to turn on the device or to enter standby mode.
- Mute the sound
To cancel, press the button again.
- Alarm
Press to set Alarm
- Programme
5.Shuffle
- Sound effect:
Normal, flat, jazz, rock, soundtrack, classical, pop, news
-
Timer
-
Sleep
-
Dimmer
Select the backlight level
- Repeat
Press once to select to repeat all tracks Press again to select to repeat one track
- Key [SOURCE]
CD-USB-AUX-DAB-FM-INTERNET RADIO
- Atow keys
Press to select the setting and then press [ENTER]
- Ent
- Menu
- Eject
- Volume +/-
- Play/Pause
- Prev/Next
- Stop
- Number keys
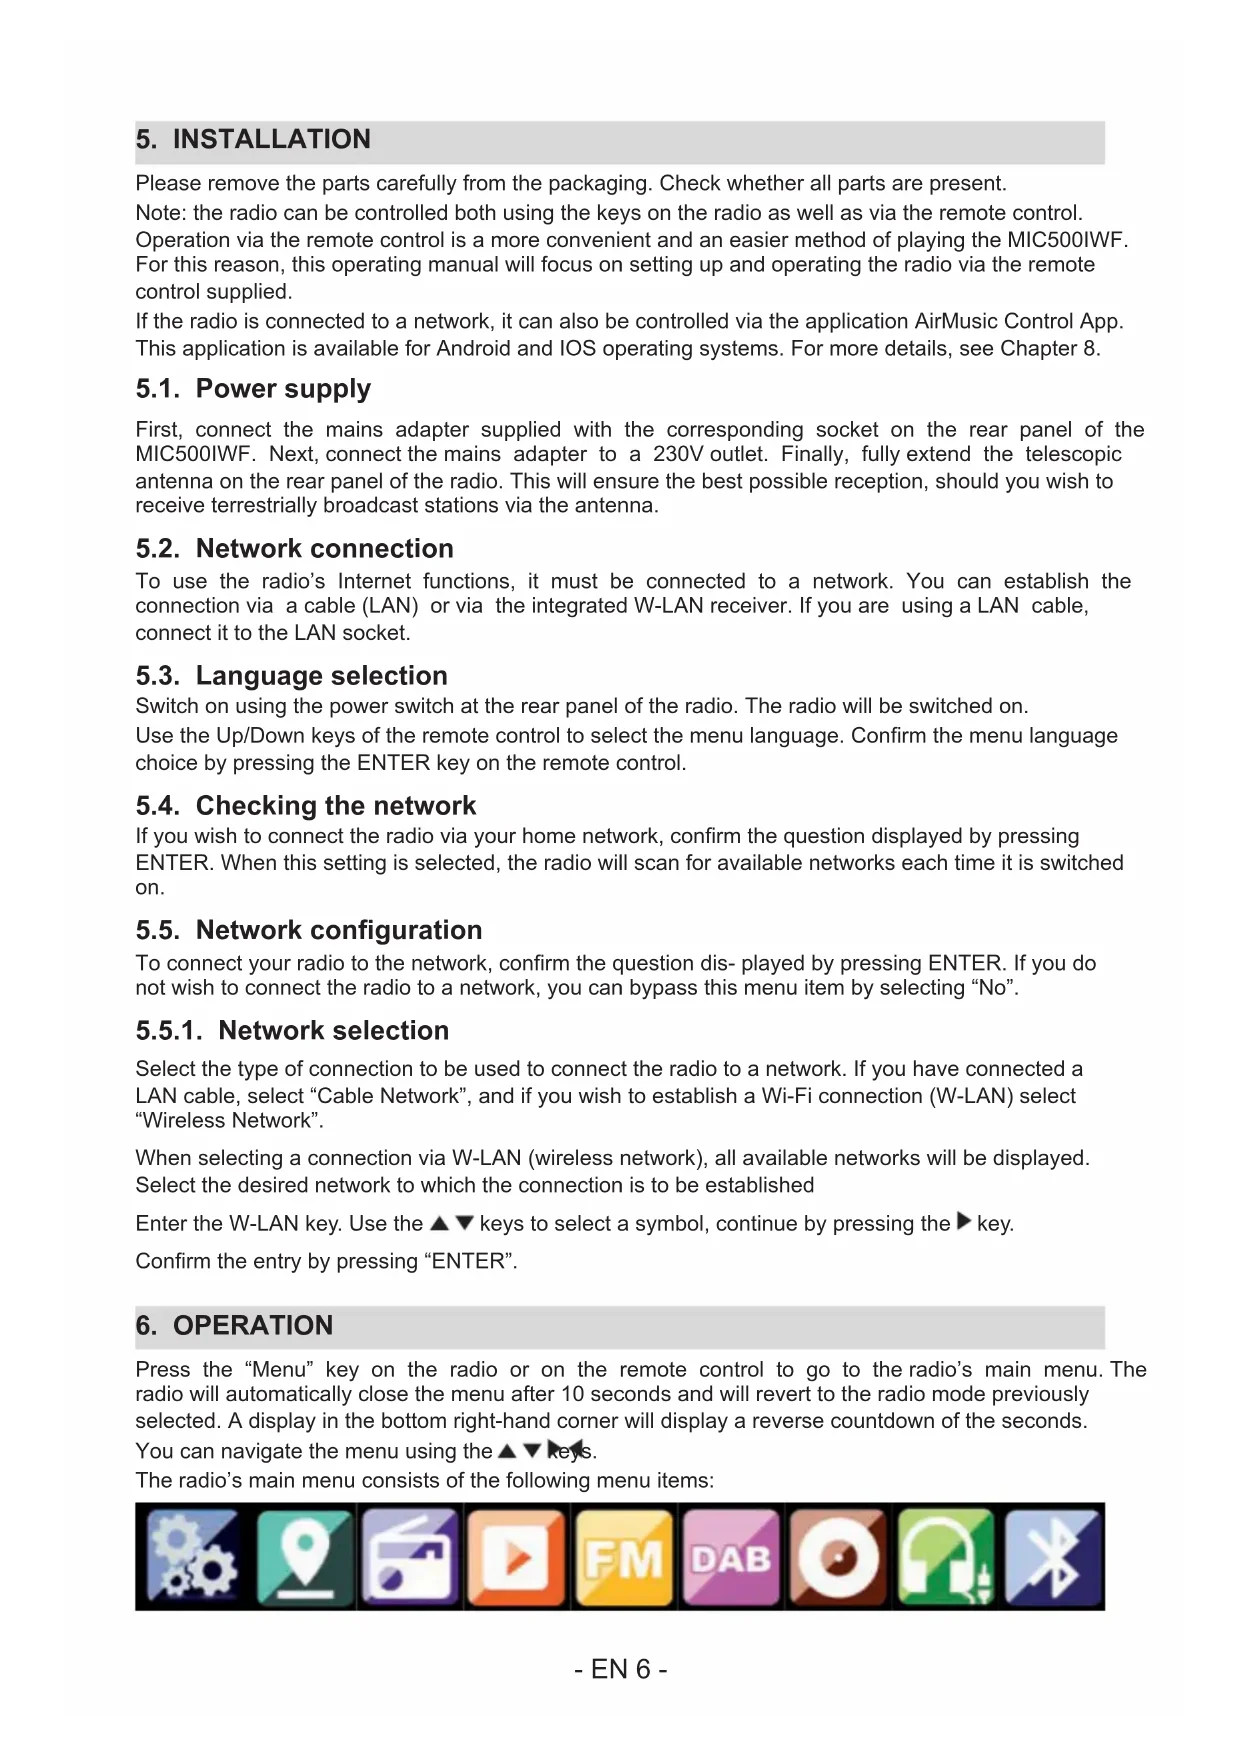
5. INSTALLATION
Please remove the parts carefully from the packaging. Check whether all parts are present.
Note: the radio can be controlled both using the keys on the radio as well as via the remote control.
Operation via the remote control is a more convenient and an easier method of playing the MIC500IWF. For this reason, this operating manual will focus on setting up and operating the radio via the remote control supplied.
If the radio is connected to a network, it can also be controlled via the application AirMusic Control App.
This application is available for Android and IOS operating systems. For more details, see Chapter 8.
5.1. Power supply
First, connect the mains adapter supplied with the corresponding socket on the rear panel of the MIC500IWF. Next, connect the mains adapter to a 230V outlet. Finally, fully extend the telescopic antenna on the rear panel of the radio. This will ensure the best possible reception, should you wish to receive terrestrially broadcast stations via the antenna.
5.2. Network connection
To use the radio's Internet functions, it must be connected to a network. You can establish the connection via a cable (LAN) or via the integrated W-LAN receiver. If you are using a LAN cable, connect it to the LAN socket.
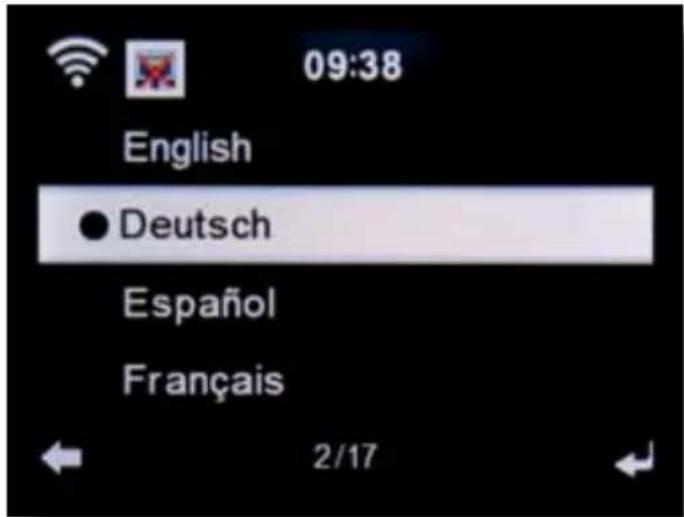
5.3. Language selection
Switch on using the power switch at the rear panel of the radio. The radio will be switched on.
Use the Up/Down keys of the remote control to select the menu language. Confirm the menu language choice by pressing the ENTER key on the remote control.
5.4. Checking the network
If you wish to connect the radio via your home network, confirm the question displayed by pressing ENTER. When this setting is selected, the radio will scan for available networks each time it is switched on.
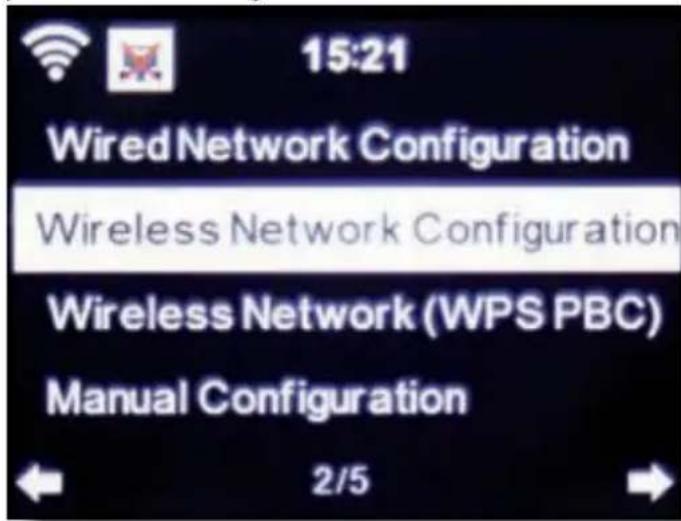
5.5. Network configuration
To connect your radio to the network, confirm the question displayed by pressing ENTER. If you do not wish to connect the radio to a network, you can bypass this menu item by selecting "No".
5.5.1. Network selection
Select the type of connection to be used to connect the radio to a network. If you have connected a LAN cable, select "Cable Network", and if you wish to establish a Wi-Fi connection (W-LAN) select "Wireless Network".
When selecting a connection via W-LAN (wireless network), all available networks will be displayed. Select the desired network to which the connection is to be established
Enter the W-LAN key. Use the keys to select a symbol, continue by pressing the key.
Confirm the entry by pressing "ENTER".
6. OPERATION
Press the "Menu" key on the radio or on the remote control to go to the radio's main menu. The radio will automatically close the menu after 10 seconds and will revert to the radio mode previously selected. A display in the bottom right-hand corner will display a reverse countdown of the seconds.
You can navigate the menu using the keys.
The radio's main menu consists of the following menu items:

You can select the individual menu items using the keys. Confirm your selection by pressing the "ENTER" key
6.1. Configuration

Press the "Menu" key on the radio or on the remote control and use the keys to select "Settings". You can select individual settings for the radio under this menu item.
6.1.1.Mode
Select the radio's operating mode.
When you select the "Radio Alarm" mode, the radio will display a digital clock. Go to the menu item "ALARM" to configure the radio as a radio alarm.
6.1.2. My MediaU Management
Here you can activate or deactivate the MediaU Management function.
The MediaU Management function allows you to save an individual station list, and to play these stations.
To set up and activate your station list, you will need to log in on the following Internet page: http://www.mediayou.net/
Once you have successfully logged in, you can register your radio.
To do this, please enter the MAC address of the radio as a serial number. The MAC address of the radio can be found under the item "Information Centre".

Whenever you have updated the web page used to manage and update your personal selection of radio stations, please navigate your radio to My MediaU Management to synchronise the changes.
6.1.3. Network
Here you can configure your network settings.
Use the keys to select the desired menu item and confirm by pressing "ENTER".
The network will be configured as described under Item 6.4.
6.1.4. Time & date
Here you may set the time and date.
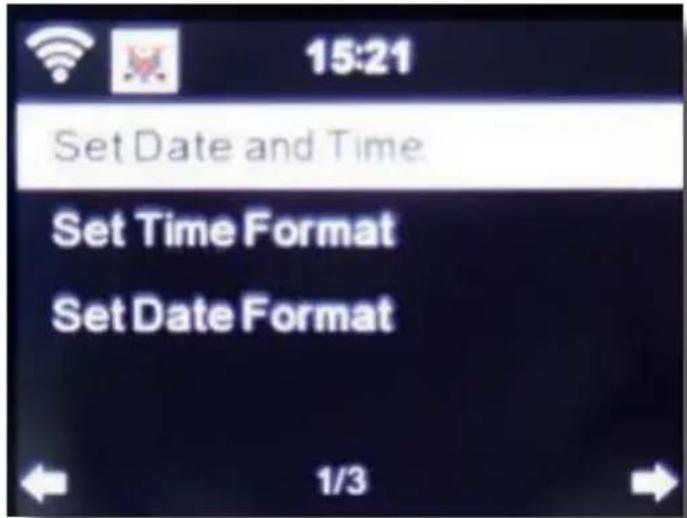
The factory setting for this radio is "automatic time". When the radio is connected to the Internet via a network, the time and date will automatically be synchronised. In this case it is not necessary to set the time.
6.1.5. Alarm
The radio can be used as a radio alarm.
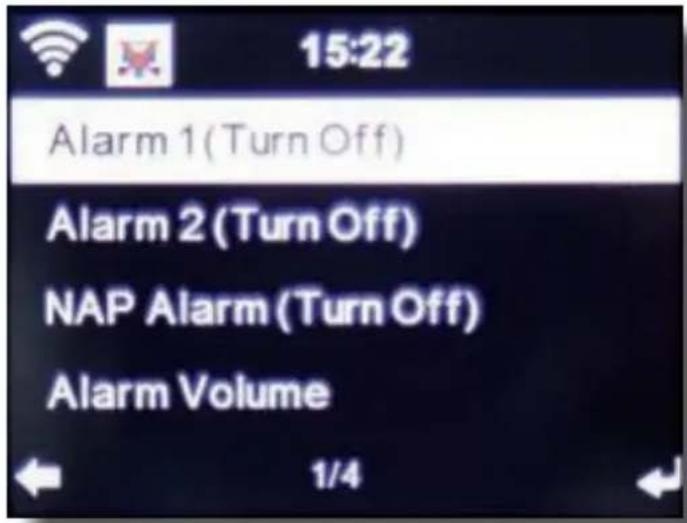
This menu item allows you to set two wake-up times, if desired. Also, you can choose whether the alarm will go off at the set time with an alarm sound, a melody, an Internet radio station, a DAB+ radio station or an FM station.
When you have entered the alarm time, activate the radio alarm function in the menu.
To stop the alarm, press the "Enter key" on the remote control, or key 7 on the radio.
To do this, go to "Settings" and select the "Mode" menu item, and switch the operating mode to "radio alarm".
6.1.6. Timer
The timer function provides another way to set an alarm. Set the timer duration; the alarm will sound once the duration has elapsed.
To do this, use the keys to enter the time in minutes and seconds. Pressing the key repeatedly will increase or decrease the time in one-second intervals. Hold the or key down for longer to scan forward or backward through time.
Confirm your entry by pressing "Enter".
6.1.7. Language
Here you can set the radio's menu language.
6.1.8. Dimmer
The dimmer function allows you to adjust the brightness of the display. The radio is set to the highest level of brightness at the factory. Use this menu item to manual adjust the brightness.
6.1.9. Display
Here you can change the display to either "multi-colour" or "black and white", as required.
6.1.10. Power management
Here you can determine whether respective. after what interval the radio should switch automatically from "operating" to "standby" mode. You can either select 5, 15, or 30 minutes.
If the radio does not switch off automatically, go to the line "Switch Off", and confirm the command with "Enter".
6.1.11. Weather
If the radio is connected to the Internet, you can also show weather information on the radio display. This menu item allows you to select the place for which weather information is to be shown. You can also specify the temperature units.
Weather information is displayed in "standby" mode. The radio will automatically alternate the display between weather data and the current time.
6.1.12. FM Settings
Here you can switch between stereo and mono sound FM radio reception.
This setting may be useful if you are tuned to an FM station with a weak and distorted signal. In this case, change the setting to "Mono" to improve the quality.
6.1.13. Setting for local stations
To facilitate the search for stations in your area while in "Internet radio" mode, you can search specifically for radio stations in your region using the menu.
To do this, you must inform the radio of your location.
Here you can manually enter your location or activate an automatic location search.
6.1.14. Play/ reproduction settings
Here you can select the applicable "play/reproduction" settings when playing audio files via an external USB data medium.
6.1.15. DLNA setting
The radio can communicate with DLNA-enabled equipment. For example, it is possible to reproduce audio files on a DLNA- enabled cell phone via the radio. Here you can change the name of the equipment used to indicate the radio on a DLNA unit.
6.1.16. Equalizer
Here you can select certain pre-selected sound settings. Alternatively, you may also press the "EQ"
key on the remote control while the unit is in operation.
6.1.17. Software update
It may be necessary to update the operating software to improve the radio's functionality.
The USB interface allows you to update your radio's operating system, provided you have the requisite software, which is available for download on www/bigben.fr/support
The software provided on the Internet page must be downloaded. The downloaded files may then be saved on a suitable storage medium and connected with the radio via the USB connection.
6.1.18. Factory default settings
You can use this menu item to reset the radio to its factory default condition. The radio will then start up based on its initial setup.
6.2. Local station

Press the "Menu" key on the radio or on the remote control and use the keys to select "Local Station".
Under this menu item, the most popular Internet radio stations, as well as DAB+ radio stations, are sorted by geographic region, and can thus be found more easily.
In this menu item, you can use the keys to select the desired program list. Confirm your selection by pressing "Enter".
If you wish to call up radio stations broadcast via DAB+, select "DAB". All other radio selection options refer to receiving Internet radio.
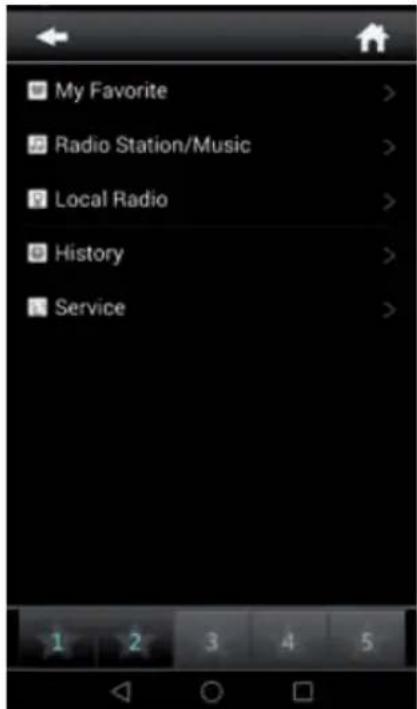
6.3. Internet Radio

Press the "Menu" key on the radio or on the remote control and use the keys to select "Internet Radio".
In the "Internet Radio" menu, you can select and manage all Internet radio stations. As many as 10,000 radio stations may be available, provided your radio is connected to a network that is in turn connected to the Internet.
My favourites
You can use this menu to select one of the 5 favourite stations you have saved via the keys used to save stations on the radio.
Alternatively, the radio stations can also be called up via the keys used to save stations on the radio, or by directly entering the number on the remote control.
Radio stations / music
Here you can select between different radio station lists. Use the keys and confirm by pressing "Enter".
Local stations
Under this menu item, you will find the most popular Internet radio stations and DAB+ stations sorted by geographic region, which can thus be called up more easily. See also Chapter 7.2.
Sleep radio
You can set the sleep radio to Birds/Piano/Rain/Spa/Space/Wave.
History
This menu item will show you a list of the Internet radio stations you have selected most recently.
Note: a precondition for the contents of the "last selected" menu sub-item is that you must have previously used the "Internet radio" mode. When you switch to this mode for the first time, the list will not yet reflect any entries.
Service
This menu item allows you to search specifically for a radio station on the Internet. To do this, you must enter the name of the station.
Go to the Service menu and select "Scan for station", then confirm by pressing "Enter".
Use the keys on the remote control to enter the name of the radio station in the search field. Use the key to move by one character. Confirm the entry by pressing "Enter".
The radio will now scan for all stations that correspond to this entry. Select a station by using the keys and confirm by pressing "Enter". Alternatively, you may also add new radio stations if you know their Internet address.
To do this, enter the Internet address of the radio provider.
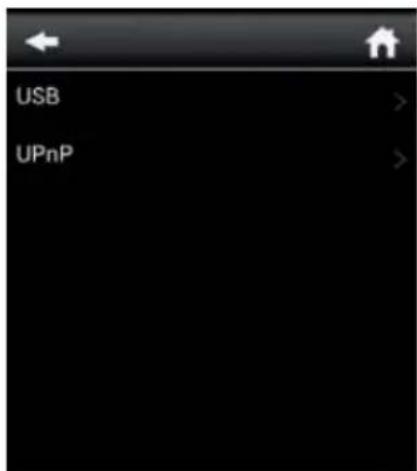
6.4. Media Centre

Press the "Menu" key on the remote control or on the radio and use the keys to select "Media Centre". If the MIC500IWF is connected to a wireless network, the radio may also be used as a media player to reproduce music data from PCs or smartphones connected to the same home network via UPnP or DLNA, provided that the appropriate media contents have been released for distribution in this network. To select the "media player" option, proceed as follows: Use the keys to select the area from which you wish to play music.
You have the choice of selecting either "USB" (USB data source connected to the radio's USB socket) or "UPnP" (music data via the UPnP protocol, if available in the same network as the radio).
You can also connect a CD USB drive to the USB port to play back Audio CDs as well as audio files from a compact disc.
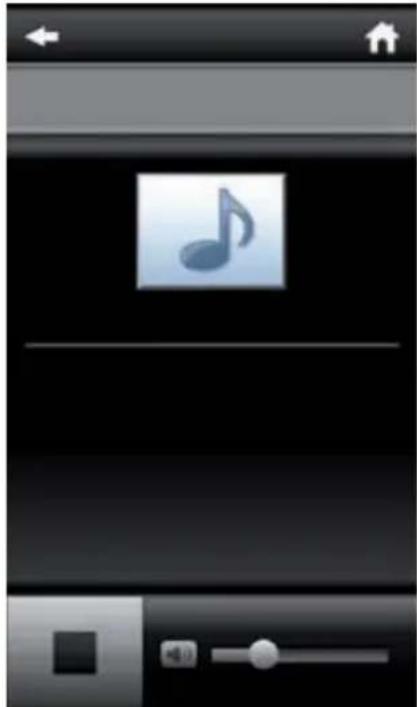
Select a title you wish to play and confirm by pressing "Enter".
Use the go to the next title. Use the key go back one title.
Use the key to pause during play, press again to continue playing.
6.5.FM

Press the "Menu" key on the remote control or on the radio and use the keys to select "FM".
In this menu, you will find all relevant settings to receive radio stations broadcast on the FM band.
FM station scan
When the MIC500IWF is switched to "FM" mode for the first time, a station scan must be performed.
To do this, both automatic and manual scan functions are available.
Automatic FM scan
When you switch to "FM", press the "Enter" key, followed by "Yes".
The radio will start the automatic station scan and will save all stations found. The radio can store up to 20 FM radio stations
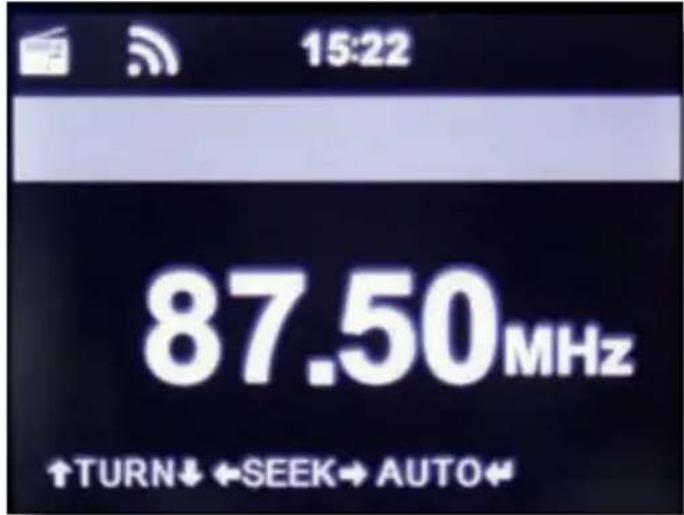
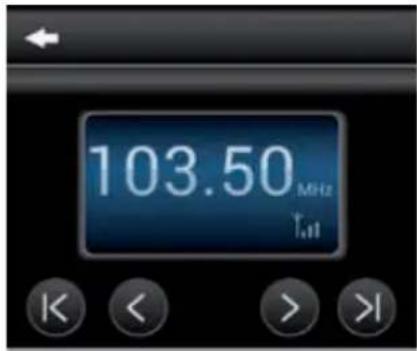
6.5.1. FM radio operation
To call up the radio stations saved, press the or key. Alternatively, you may also call up the first 5 stations saved via station keys 1-5 on the radio.
If you wish to change the allocation of the keys used to save the stations, press the station selection key 6 to perform a scan to the next station that can be received. If necessary, repeat this step until you have found the desired station. Then press the desired station selection key 1- 10 for approx. 2 seconds. The station will now be saved on this key.
6.6. DAB

Press the "Menu" key on the radio or on the remote control and use the keys to select DAB.
DAB station scan
In addition to FM stations, the radio can also receive DAB+ radio, digital radio broadcast via terrestrial antenna.
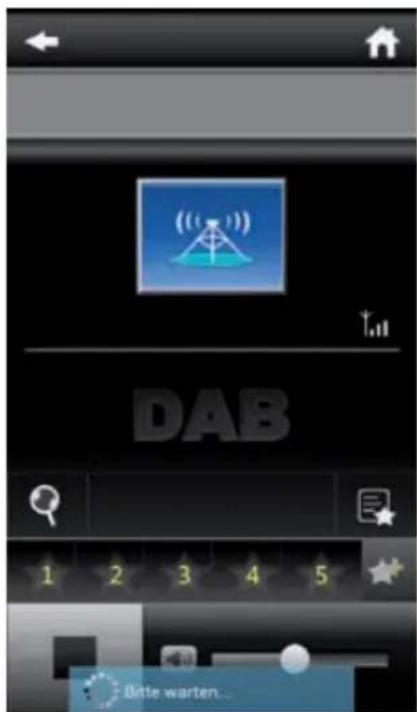
When the radio is initially switched to "DAB" mode, it will start an automatic station scan to scan for all stations that can be received at that location.
The station scan will begin and the display will show a scan progress bar. As soon as the scan has been completed, the radio will begin playing the station most recently selected.
6.6.1. Station selection
While in "DAB" mode, use the keys to navigate through the DAB+ stations that can be received. To change stations, press the "Enter" key.
The radio is equipped with a favourites memory for 10 radio stations. To save a station, switch to the station you wish to save as described above. Now press the numeric key 1-10 on the remote control or on the radio and hold it pressed down for approx. 2 seconds or press station saving keys 1-5 on which you wish to save the station.
The display will show a message that the station has been saved under the favourites slot selected.
6.6.2. DAB radio operation
If you have saved stations in the "Favourites" memory, you can call these up by pressing the desired numeric key.
Or, while in DAB mode press the "Preset" key to call up the "Favourites" list.
Use the keys to navigate through the "Favourites" list, then press the "Enter" key (volume control) to confirm your selection.
6.7. Information Centre

The unit has a CD drive, which can play audio and MP3 data CDs. To use this function, select "CD" in the menu.
Insert a CD in the drive. The device retracts the CD automatically.
You will get an overview of audio tracks on the CD. Select a track you want to play via the volume dial and confirm by pressing the dial or the "ENTER" button on the remote.
The button advances play to the next track. The butt goes back to the previous track.
The button pauses playback or resumes play.
Press the "EJECT" button on the remote or the device to eject the CD.
6.8.AUX

If you connect an external device (e.g. MP3 player) to the MIC500IWF via cable using the "AUX In" socket, this can be used as an option to play back audio files. To do this, proceed as follows:
Use a suitable cable (3.5 mm cinch, sold separately; may vary from one device to the next) to connect an external device to the MIC500IWF (AUX In, p. 10) and switch on this device.
While in operation, press the "Mode" key on the remote control. It may be necessary to do so repeatedly until the display shows "AUX" below the time, or press the "Menu" key, and use the key to select the menu item "AUX".
You can now play music from the external device. Playback control (Title backward/forward, Stop, Play) is provided via the external device connected; the sound volume can be adjusted using the volume knob, the MIC500lWF's volume control (see page 10) or via the external device.
6.9. Bluetooth

The MIC500IWF may be connected to an external device (e.g. smart phone/tablet) via Bluetooth. Media (locally stored MP3 files, streaming music, web radio) on the external device can then be played through the radio via the Bluetooth connection.
"Bluetooth" mode is recommended for when there is no network connection available and the radio and the device to be connected are in close proximity to each other.
Select "Bluetooth" in the menu.
A Bluetooth connection must be established to send audio files to the radio via Bluetooth.
6.9.1. Establish Bluetooth connection
When you select "Bluetooth" mode on the radio, it enters the pairing mode and searches for available
Bluetooth devices.
Next, activate the "Bluetooth" function on the external device to be connected (for details, refer to the user manual of the device to be connected). Search for "MIC500IWF" in the list of available devices, select it and make the connection. Double arrows will appear in the upper left corner of the radio's display. A 'beep' will then sound the announcement "Connected".
6.9.2. Play media via Bluetooth
Once you have established a Bluetooth connection as described in section 7.9.1, you can play music files stored on the external device through the MIC500IWF.
To do this, proceed as follows:
Start playing the music on the external device by switching on the corresponding playback function (MP3 player, etc.) or by selecting a track on the respective play list and starting playback.
7. AIR MUSIC CONTROL
The radio can be controlled via smartphone or tablet and an appropriate application. The application "AIR Music Control" can be downloaded for Android and Apple iOS. The application also allows you to reproduce local music files on your smartphone via the radio.
Note:
This description applies to the app (valid as of 09.2015). Its functions as well as its appearance may change within the scope of software updates!
To use the function, download the app from the Google Play Store for Android operating systems, or via iTunes for iOS operating systems, and install the app on your smartphone.
Ensure that the radio and your mobile tablet are logged into the same network.
Start the application.
When starting the app, it will automatically recognise the MIC500IWF, provided it is logged into the same network.
The app's main menu is structured along the same lines as the radio's menu.
Main menu
Start the desired function by tapping on the appropriate symbol.
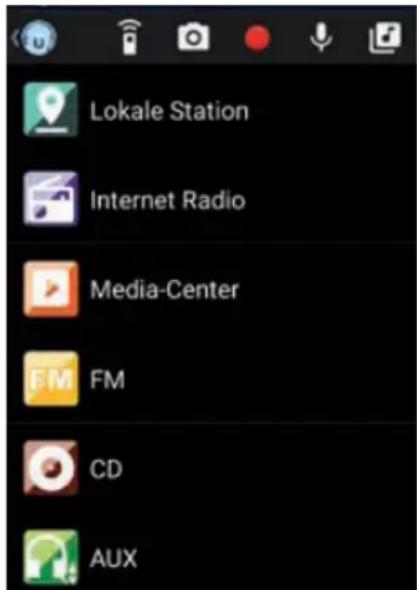
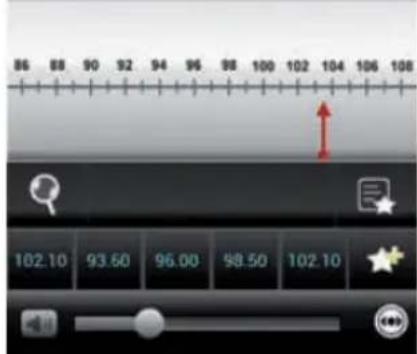
Internet radio
In this mode, all the familiar functions in Internet radio operation can be selected. In the lower section, you can select the station saving spaces 1-5.
Media Centre
Use this area to connect with media servers in your network. In addition, you can access music files stored on a USB storage device connected to the system.
FM Radio
In this mode, you can operate the FM radio.
DAB
In this mode, you can operate the DAB+ radio.
8. CHARGING
USB charging
There is a USB charger on the side of the unit to charge small devices such as smartphones that can be charged via USB cable.
Output power: 5V/1A
Wireless induction charging for mobile
There is a charging surface on the top of the unit for charging your smartphone. Please place the smartphone on the charging spot:
Your smartphone will begin charging. If not, please ensure that the phone is placed on the centre of the charging spot.
- Your phone must be compatible with wireless chargers or Qi technology.
9. FEATURES AND TECHNICAL SPECIFICATIONS
Power supply: DC 15 V/3 A (AC adapter)
Max consumption: 45 W
Wireless charge: 9V = 1.4A
USB charge: 5 V =1A
USB music: 5 V =0.3 A
Input sensitivity: Aux in 750mV
Speakers impedance: 4 ohms
S/N (A): 86 dB
THD (1 kHz, 1 W): 0.5%
Frequency response: 50 Hz-20 KHz
DAB frequency: Band III 174 MHz-240 MHz
Bluetooth frequency band: 2402 MHz-2480 MHz
FM frequency: 88.8 MHz-108.00 MHz
Total music output: 40w
10. ABOUT THE DISC
| Handling Do not touch the underside of disks. Hold disks by the edges to avoid leaving fingerprints on the surface. Any dust, fingerprints or scratches may cause a malfunction. Never affix a label or sticky tape to the disk. | |
| Storage Put disks back in their case after use. Never expose disks to direct sunlight or heat sources. Never leave disks inside a car parked in full sunlight. | |
| Cleaning Use a clean, soft, lint-free cloth to clean the disk, working from the centre outwards in a straight line. Do not use solvents such as petrol, thinners, commercially available cleaners or antistatic sprays for vinyl disks. |
11. SERVICE AND SUPPORT
Remarks:
Don't discard the electrical and electronic appliances in the regular waste disposal.
a) Take them to a collection point.
b) Some components in these appliances may be hazardous to health and the environment.

- In order to save energy when the unit has no sound output for a while, the unit will be switched to stand-by automatically. It can be switched ON by using the POWER selector again.
- If there is an incoming call while MIC500IWF is connected to your cell phone for music playback, it will pause at once when you answer the call and resume after the call ended. (Sometimes it will pause after end the call, it depend on your cell phone.)
- The Bluetooth® word, mark and logo are registered trademarks owned by Bluetooth SIG, Inc. and any use of such marks by Bigben Interactive is under license. Other trademarks and trade names are those of their respective owners.
- Hereby, Bigben Interactive SA, declares that the MIC500IWF device complies with the essential requirements of the directive 1995/5/EC of the European Parliament and of the Council of 9 March 1999 on radio equipment and telecommunications terminal equipment and the mutual recognition of their conformity.
- THOMSON is a trademark of TECHNICOLOR SA or its affiliates used under license to Bigben Interactive.
- You can find the information on the plate located at the back of the unit.
The undersigned, Bigben Interactive declares that the radio equipment of the MIC500lWF type complies with the 2014/53/EU directive.
To download the full statement, please visit our website:
EN:https://www/bigben-interactive.co.uk/support/
IT: https://www/bigbeninteractive.it/supporto-technico/
OTHER LANGUAGES : https://www/bigbeninteractive.com/support/ and the section <
Manufactured by BIGBEN INTERACTIVE SA
396, Rue de la Voyette
CRT2-FRETIN
CS 90414
59814 LESQUIN Cedex - France
www/bigben.eu
Made in China


Fabricant:BigbenInteractive FRANCE
396, Rue de la Voyette, C.R.T. 2 Fretin, CS 90414 - 59814 LESQUIN Cedex, France
Moo-Form with Induction and Fuzzy Rules
Moo-Ind. 1982, 3rd ed.
OPERATINGFUNCTION
PHLPP, HCMC AND YODI JAINNANA (COMPLIANT) BOPPIE OF JAINNANA; THE CANDIDATE OF JAINNANA BY THE CHAOTYING ADULTURE.
N.° Cstad. Nombre
11MIC500IWF
2.1 Control remote
31 Cable RCA
4.1 Cable de energia USB
51 Manual de instrucciones
6.1.3. "Network" (Red)
"History" (Historical)
EN: https://www/bigben-interactive.co.uk/support/
DE: https://www/bigben-interactive.de/support/
ES: https://www/bigbeninteractive.es/asistencia-technica/
IT: https://www/bigbeninteractive.it/supporto-technico/
OTROS IDIOMAS: https://www/bigbeninteractive.com/support/ y elApartado <
Moo-Form with Induction and Fuzzy Rules
Moo-Ind. 1982, 3rd ed.

OPERATINGFUNCTIONS
PHLPP, HCMC AND YODI JAINNANA (COMPLIANT) BOPPIE OF JAINNANA; THE CANDIDATE OF JAINNANA BY THE CHAOTYING ADULTURE.
N. Q.tà Nome
EN: https://www/bigben-interactive.co.uk/support/
DE: https://www/bigben-interactive.de/support/
ES: https://www/bigbeninteractive.es/asistencia-technica/
IT: https://www/bigbeninteractive.it/supporto-technico/
Moo-Form with Induction and Fuzzy Rules
Moo-Ind. 1982, 3rd ed.

OPERATINGFUNCTIONS
PHLPP, HCMC AND YODI JAINNANA (COMPLIANT) BOPPIE OF JAINNANA; THE CANDIDATE OF JAINNANA BY THE CHAOTYING ADULTURE.
N^ Q.de Nome
11MIC500IWF
21 Telecomando
31 Cabo RCA
41 Cabo de carregamento USB
51 Manual de funciona
3. LOCALIZAZão DOS CONTROSOS


- Ligar/desligar
- Menu
EN: https://www/bigben-interactive.co.uk/support/
DE: https://www/bigben-interactive.de/support/
ES: https://www/bigbeninteractive.es/asistencia-technica/
IT: https://www/bigbeninteractive.it/supporto-technico/
OUTRAS LINGUAS: http://www/bigben-interactive.co.uk/support e a��a de Conformidade". Fabricado pela BIGBEN INTERACTIVE SA
396, Rue de la Voyette
CRT2-FRETIN
CS 90414
59814 LESQUIN Cedex - Franca
www/bigben.eu
Fabricado na China


Fabricant:BigbenInteractive FRANCE
396, Rue de la Voyette, C.R.T. 2 Fretin, CS 90414 - 59814 LESQUIN Cedex, France
Moo-fermion with Induction and Fitterment Rules
606.1372981

OPERATINGFUNCTIONS
PHLPP, HCMC AND YODIN KANNAHAM (COMPLIANT) BOPPIE OF JAPANESE LITERATURE: THE ADOPTIC AND THE RESEARCH. By T. S. RAY.
Nr. MENGGE Name
Local stations (Lokale Radiosender)
EN: https://www/bigben-interactive.co.uk/support/
IT https://www/bigbeninteractive.it/supporto-technico/
Moody's Investors Indicators and Interest Rates Sd:10/13/2017 Yearly
OPERATING ACTIVITIES
PHYLLOM. MCMYU YI ANDYAN HAMADI, CYNTHYSTIC BILIBINOMY, JOURNAL OF CLINICAL PHYSICS, 1987, 20(3): 156-164. DOI: http://dx.doi.org/10.1186/journal.pone.0000-0000-0000-156
Nr. Aantal Naam
11MIC500IWF
21 Afstandsbediening
31 RCA-kabel
41 USB-laadkabel
51 Gebruikershandleiding
3. BESCHRIJVING VAN DE ONDERDELEN

- Aan/uit
- Menu
CD-USB-AUX-DAB-FM-INTERNET RADIO
12. ▲Rjtoetsen
EN: https://www/bigben-interactive.co.uk/support/
DE: https://www/bigben-interactive.de/support/
ES: https://www/bigbeninteractive.es/asistencia-technica/
IT: https://www/bigbeninteractive.it/supporto-technico/
- N° Qte Nom
- EMPLACEMENT DES COMMANDES
- Contents
- INTRODUCTION
- Getting Started
- Safety and Notice
- Safety
- Warning
- Care for your product
- Care of the environment
- ITEMS SUPPLIED
- No. Qty Name
- LOCATION OF CONTROLS
- REMOTE CONTROL
- INSTALLATION
- Power supply
- Network connection
- Language selection
- Checking the network
- Network configuration
- Network selection
- OPERATION
- Configuration
- 6.1.1.Mode
- My MediaU Management
- Network
- Time & date
- Alarm
- Timer
- Language
- Dimmer
- Display
- Power management
- Weather
- FM Settings
- Setting for local stations
- Play/ reproduction settings
- DLNA setting
- Equalizer
- Software update
- Factory default settings
- Local station
- Internet Radio
- My favourites
- Radio stations / music
- Local stations
- Sleep radio
- History
- Service
- Media Centre
- 6.5.FM
- FM station scan
- Automatic FM scan
- FM radio operation
- DAB
- DAB station scan
- Station selection
- DAB radio operation
- Information Centre
- 6.8.AUX
- Bluetooth
- Establish Bluetooth connection
- Play media via Bluetooth
- AIR MUSIC CONTROL
- Start the application.
- Main menu
- Internet radio
- Media Centre
- FM Radio
- DAB
- CHARGING
- USB charging
- FEATURES AND TECHNICAL SPECIFICATIONS
- ABOUT THE DISC
- SERVICE AND SUPPORT
- Remarks:
- N.° Cstad. Nombre
- "Network" (Red)
- "History" (Historical)
- Q.tà Nome
- N° Q.de Nome
- LOCALIZAZão DOS CONTROSOS
- Nr. MENGGE Name
- Local stations (Lokale Radiosender)
- Nr. Aantal Naam
- BESCHRIJVING VAN DE ONDERDELEN
- ▲Rjtoetsen
Brand : THOMSON
Model : MIC500IWF
Category : Hi-Fi System