
MOG1 - Oven TELEFUNKEN - Free user manual and instructions
Find the device manual for free MOG1 TELEFUNKEN in PDF.
| Brand | Telefunken |
| Model | MOG1 |
| Product type | Oven |
| Capacity | 30 L |
| Power | 1600 W |
| Power supply voltage | 220-240 V ~50/60 Hz |
| Temperature range | 100 °C to 230 °C |
| Cooking modes | Top heat, Bottom heat, Top + Bottom heat, Convection, Rotisserie |
| Timer | 0 to 60 minutes, automatic shut-off |
| Interior light | Yes, activated by timer |
| Included accessories | Grid, Drip tray, Grid/drip tray handle, Rotisserie spit, Rotisserie handle |
| Glass door | Yes, glass |
| Hot surfaces | Metal parts and glass |
| Cleaning | Wait 1 hour after switching off, unplug, use soft sponge and neutral detergent |
| Glass maintenance | Special glass cleaner, soft cloth |
| Child safety | Not for children under 8, supervision required |
| Grounding | Mandatory |
| Extension cord | Must have ground plug |
| Warranty | Void if non-compliant accessories used |
| Recycling | WEEE 2012/19/EU, do not dispose with household waste |
| Standards | LVD 2014/35/EU, EMC 2014/30/EU, ERP 2009/125/EC, RoHS 2011/65/EU, REACH 1907/2006/EC |
| Dimensions | Not specified in the manual |
| Weight | Not specified |
Frequently Asked Questions - MOG1 TELEFUNKEN
User questions about MOG1 TELEFUNKEN
0 question about this device. Answer the ones you know or ask your own.
Ask a new question about this device
Download the instructions for your Oven in PDF format for free! Find your manual MOG1 - TELEFUNKEN and take your electronic device back in hand. On this page are published all the documents necessary for the use of your device. MOG1 by TELEFUNKEN.
USER MANUAL MOG1 TELEFUNKEN
natural_image
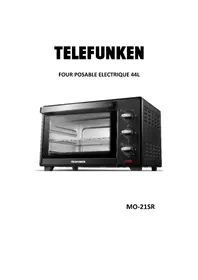
Black TELEFUNKEN 30-woman toaster oven with illuminated wood grilles and control knobs (no visible text or symbols on main body)MOG-1
Table des maères
natural_image
Circular diagram with four corner markers and a central dot, no text or symbols presentnatural_image
Black TELEFUNKEN 30-woman toaster oven with illuminated oven and control knobs (no visible text or symbols on main body)MOG-1
Table of contents
Safety advices and warnings 3
√ Warning 3
√ Danger of electrocuon 5
√ Danger of burns 6
√ Standards 8
Descripon 9
Set-up and Use 10
√ Before rst use 10
√ Using your oven 10
Cleaning and maintenance 13
Technical informaon 13
Environment and recycling....13....
SAFETY ADVICES AND WARNINGS

WARNING
- READ CAREFULLY THE INSTRUCTIONS BEFORE INSTALLING AND USING THIS APPLIANCE. IN THE CASE YOU RESELL THIS APPLIANCE, PLEASE MAKE SURE TO PROVIDE THIS INSTRUCTION MANUAL TO YOUR BUYER.
- THIS APPLIANCE IS INTENDED FOR DOMESTIC HOUSEHOLD USE ONLY AND SHOULD NOT BE USED FOR ANY OTHER PURPOSE OR IN ANY OTHER APPLICATION, SUCH AS FOR NON-DOMESTIC USE OR IN A COMMERCIAL ENVIRONMENT. ANY COMMERCIAL USE, INAPPROPRIATE USE OR FAILURE TO COMPLY WITH THE INSTRUCTIONS, THE MANUFACTURER ACCEPTS NO RESPONSIBILITY AND THE GUARANTEE WILL NOT APPLY.
- AFTER UNPACKING THE APPLIANCE, MAKE SURE IT IS NOT DAMAGED. IN CASE OF DOUBT, DO NOT USE THE APPLIANCE AND CONTACT YOUR SUPPLIER OR A QUALIFIED TECHNICIAN.
- THE USE OF ACCESSORY AND ATTACHMENTS NOT RECOMMENDED BY THE MANUFACTURER MAY CAUSE INJURIES.
- THE APPLIANCE MUST NOT BE USED IF IT HAS BEEN DROPPED, IF IT HAS ANY VISIBLE DAMAGE, IF IT LEAKS OR IF IT FUNCTIONS ABNORMALLY IN ANY WAY.
- ALWAYS UNPLUG THE APPLIANCE IF NOT USING IT FOR A PERIOD OF TIME.
- REMOVE ALL PACKAGING AND DO NOT LEAVE THE PACKAGING MATERIAL SUCH AS PLASTIC BAGS, POLYSTYRENE AND ELASTIC BANDS IN EASY REACH OF CHILDREN AS THEY MAY CAUSE SERIOUS INJURIES.
- AFTER UNPACKING YOUR APPLIANCE, MAKE SURE YOU HAVE PUT IT ON A FLAT, STABLE AND HEAT-RESISTANT WORK PLAN OR KITCHEN COUNTER WHICH CAN ALSO STAND A MINIMUM TEMPERATURE OF 90°C. CHECK YOU HAD LEAVE ENOUGH SPACE BETWEEN YOUR APPLIANCE AND SURROUNDING WALL TO LET THE AIR CIRCULATE AROUND THE OVEN. THERE SHOULD BE AT LEAST 50CM ON THE TOP AND 20CM ON SIDES APART FROM THE OVEN.
- CHILDREN FROM 0 TILL 8 YEARS SHALL NOT USE THIS APPLIANCE. THE APPLIANCE IS NOT INTENDED FOR USE BY PERSONS (INCLUDING CHILDREN ABOVE 8 YEARS OLD) WITH REDUCED PHYSICAL, SENSORY OR MENTAL CAPABILITIES, OR LACK OF EXPERIENCE AND KNOWLEDGE, UNLESS THEY HAVE BEEN GIVEN SUPERVISION OR INSTRUCTION CONCERNING USE OF THE APPLIANCE BY A PERSON RESPONSIBLE FOR THEIR SAFETY. KEEP AWAY THIS APPLIANCE AND ITS ELECTRIC PLUG AWAY FROM CHILDREN UNDER 8 YEARS OLD. CLEANING AND MAINTENANCE SHALL NOT BE MADE BY CHILDREN.
-
CHILDREN SHALL NOT PLAY WITH THE APPLIANCE.
-
FOR THE DETAILS ON HOW TO CLEAN SURFACES IN CONTACT WITH FOOD, PLEASE SEE SECTION “CLEANING AND MAINTENANCE IN PAGE ....
- REGARDING THE INFORMATION FOR OPERATING TIMES AND SETTING, THANKS TO REFER TO THE BELOW PARAGRAPH OF THE MANUAL.
- THIS APPLIANCE IS INTENDED TO BE USED IN HOUSEHOLD AND SIMILAR APPLICATIONS SUCH AS:
○ STAFF KITCHEN AREAS IN SHOPS, OFFICES AND OTHER WORKING ENVIRONMENTS;
○ FARM HOUSES;
○ BY CLIENTS IN HOTELS, MOTELS AND OTHER RESIDENTIAL TYPE OF ENVIRONMENTS;
○ BED AND BREAKFAST TYPE ENVIRONMENTS.

DANGER OF ELECTROCUTION!
- THIS APPLIANCE MUST BE EARTHED. IF YOU NEED TO USE AN EXTENSION LEAD, IT IS IMPORTANT THAT YOU USE A MODEL FITTED WITH AN EARTH PLUG.
- THIS APPLIANCE SHALL NOT BE USED WITH AN EXTERNAL TIMER OR A SEPARATE REMOTE CONTROL SYSTEM.
-
CHECK THAT THE VOLTAGE MARKED ON THE RATING PLATE MATCHES TO YOUR LOCAL SUPPLY. IF NOT THE CASE, DO NOT USE THE APPLIANCE AND SEEK FOR EXPERT ADVICE.
-
CHECK THAT YOUR ELECTRICAL INSTALLATION IS SUFFICIENT FOR SUPPLYING AN APPLIANCE OF THIS WATTAGE.
- TAKE ALL NECESSARY MEASURE WITH CORDS AND EXTENSIONS TO AVOID ANY INJURIES WHILE IN USE.
- NEVER IMMERSE IN WATER OR ANY OTHER LIQUID THIS APPLIANCE, ITS ELECTRIC PLUG AND CORD.
- ALWAYS UNPLUG THE APPLIANCE AND LET IT COOL DOWN COMPLETELY BEFORE ANY CLEANING OPERATION.
- FOR YOUR OWN SAFETY, WE RECOMMEND YOU NEVER LEAVE THE APPLIANCE IN A PLACE THAT IS EXPOSED TO HUMIDITY OR INCLEMENT WEATHER CONDITION.
- NEVER USE APPLIANCE AS AN ADDITIONAL HEATING SOURCE.
• DO NOT PUT THIS APPLIANCE ON TOP OF OTHERS. - NEVER LEAVE APPLIANCE PLUGGED IN WHEN NOT IN USE.
- IF THE SUPPLY CORD IS DAMAGED, IT MUST BE REPLACED BY THE MANUFACTURER, ITS SERVICE AGENT OR SIMILARLY QUALIFIED PERSONS IN ORDER TO AVOID A HAZARD.
- THE SUPPLY CORD SHOULD BE REGULARLY EXAMINED FOR SIGNS OF DAMAGE AND THE APPLIANCE IS NOT TO BE USED IF THE CORD IS DAMAGED.
- NEVER PLUG THE APPLIANCE AND TOUCH THE THERMOSTAT WITH WET HANDS.
-
NEVER USE THE APPLIANCE WITH BARE OR WET FEET.
-
NEVER UNPLUG THE APPLIANCE BY PULLING THE POWER CABLE. ALWAYS UNPLUG THE APPLIANCE FROM THE MAINS SOCKET.
- NEVER MOVE THE APPLIANCE WHEN IN USE.
- DO NOT USE THE APPLIANCE CLOSE TO ANY FABRICS.

DANGER OF BURNS!
- THE APPLIANCE MUST BE USED AND PLACED ON A FLAT, STABLE, HEAT AND WATER RESISTANT SURFACE.
- WHEN IN USE, THE SURFACES OF YOUR APPLIANCE CAN REACH VERY HIGH TEMPERATURES, WHICH MAY CAUSE BURNS. DO NOT TOUCH THE HOT SURFACES OF THE APPLIANCE (ACCESSIBLE METAL PARTS AND GLASS DOOR).
- WHEN IN USE, ALWAYS THINK OF USING THE DOOR HANDLE AND A PAIR OF GLOVES TO OPEN THE DOOR.
- DO NOT REHEAT ANY FOOD PACKAGED IN GLASS BOTTLE OR TINS, THEY ARE NOT SUITABLE TO BE USED IN AN OVEN AND COULD BROKE INSIDE THE OVEN.
- HANDLE WITH CARE THE DOOR OF YOUR OVEN: ANY STRONG SHOCK OR EXCESSIVE THERMAL CONSTRAINTS MAY CAUSE THE GLASS TO BREAK.
- IN THE CASE OF SOME PARTS OF THE OVEN OR FOODS DURING THE COOKING CATCH FIRE, DO NOT ATTEMPT TO EXTINGUISH IT WITH WATER. USE A DAMP CLOTH OR A BLANKET TO CHOKE THE FLAMES OR USE AN
EXTINGUISHER BY SPRAYING THE FOAMS TOWARDS THE OVEN AND ON THE SAME DIRECTION THAN THE WIND.
- DO NOT STORE ANY FLAMMABLE PRODUCTS CLOSE TO OR UNDER THE UNIT WHERE YOU PLACED THE OVEN. DO NOT PLACE AND USE THE OVEN CLOSE TO ANY FURNITURE WITH FABRICS, CURTAINS OR DRAPES.
- NE PLACEZ JAMAIS DE PAPIER, CARTON OU PLASTIQUE DANS L'APPAREIL AINSI QUE SUR SON DESSUS.
- DO NOT PUT PAPER, CARDBOARD OR PLASTIC IN THE APPLIANCE AND DO NOT PLACE ANYTHING ON TOP (USTENSILS, RACKS, OBJECTS, ETC.).
- DO NOT PUT ANYTHING INTO THE VENTILATION SLITS, OR OBSTRUCT THEM.
- NEVER LEAVE THE OVEN UNATTENDED WHEN IN USE AND UNTIL IT HAS COOLED DOWN (AROUND 1 HOUR).
- BEFORE ANY CLEANING OPERATION, WAIT UNTIL THE APPLIANCE IS COMPLETELY COLD AND HAS BEEN UNPLUGGED FOR AT LEAST 1 HOUR.
- DO NOT LIFT OR MOVE THE APPLIANCE WHEN IN USE TO AVOID BURNS.
STANDARDS
THIS APPLIANCE IS CONFORMED TO DIRECTIVES LVD 2014/35/EU, EMC 2014/30/EU, ERP 2009/125/CE, DEEE 2012/19/EU, ROHS 2011/65/EU ET REACH 1907/2006/CE.
DESCRIPTION
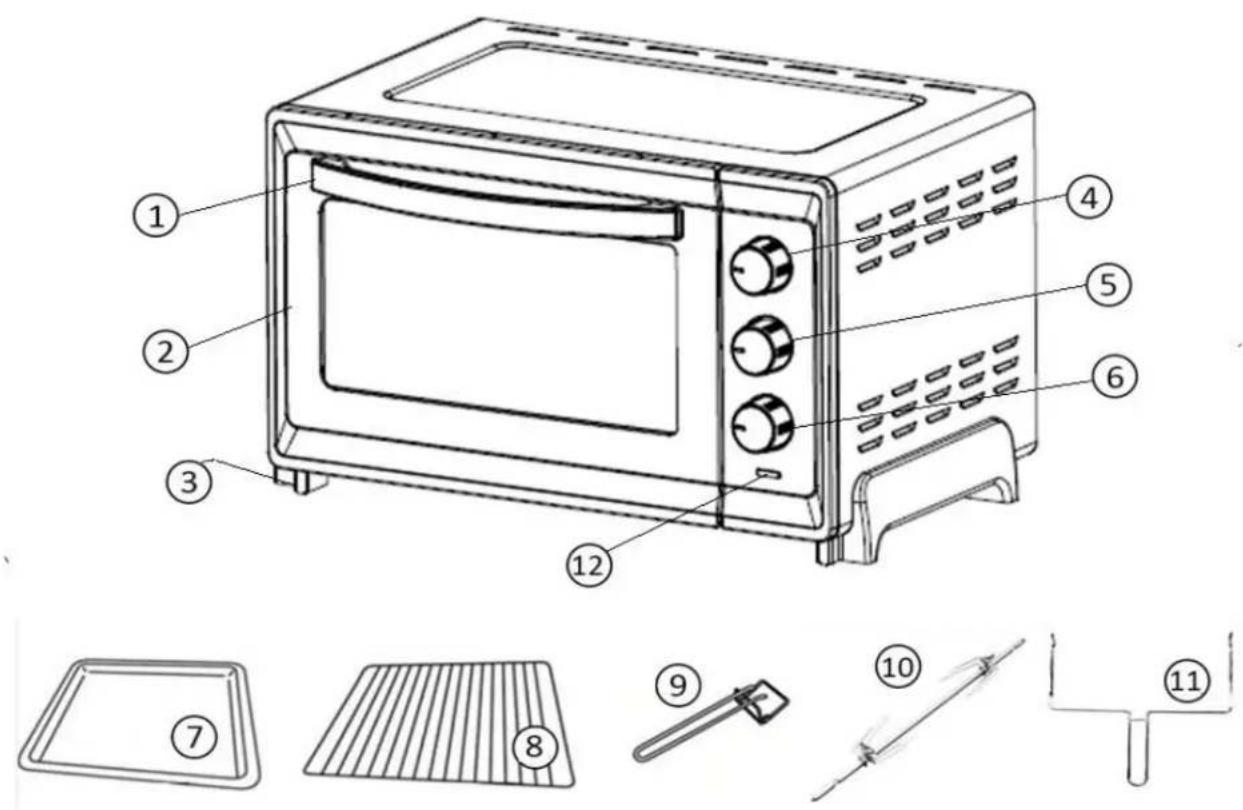
- Door handle
- Glass door
- Feet
- Thermostat buon
- Cooking method buon
-
Timer buon
-
Gril/roasng pan
- Wire grill rack
- Tray handle
- Rosserie spit
- Rosserie spit handle
- Light Indicator
SET-UP AND USE
Before rst use
- Place your appliance on a at and stable surface.
- Remove any scker, protective foil or storage cover on and inside the oven
- Plug your appliance into a earth socket.
- Before the rts use, always heat up the empty oven to burn the protective fat and to eliminate smells when you buy new appliances. Follow the below steps:

a. Put the grill pan and the wire rack into the oven
b. Turn the thermostat buon and select 200°C
c. Turn the cooking secon buon and choose
d. Set the mer at 10min
e. The light indicator illuminate to indicate the oven is funconning
f. Air the room during this operaon
g. You will hear a buzz sound when it's nished, turn o all the buons
h. Let the oven cool down before starng to clean the oven with a damp cloth. To clean the accessories (wire rack and grill pan) you can use a sponge humidied with a dishwashing liquid.
NOTE: It is normal that strange odor comes out from the unit for the rst use. This will cease aer a short while.
Using your oven
√ Always check you have plugged your oven into an earth socket. Put your preparaon into the oven, then follow the below steps:
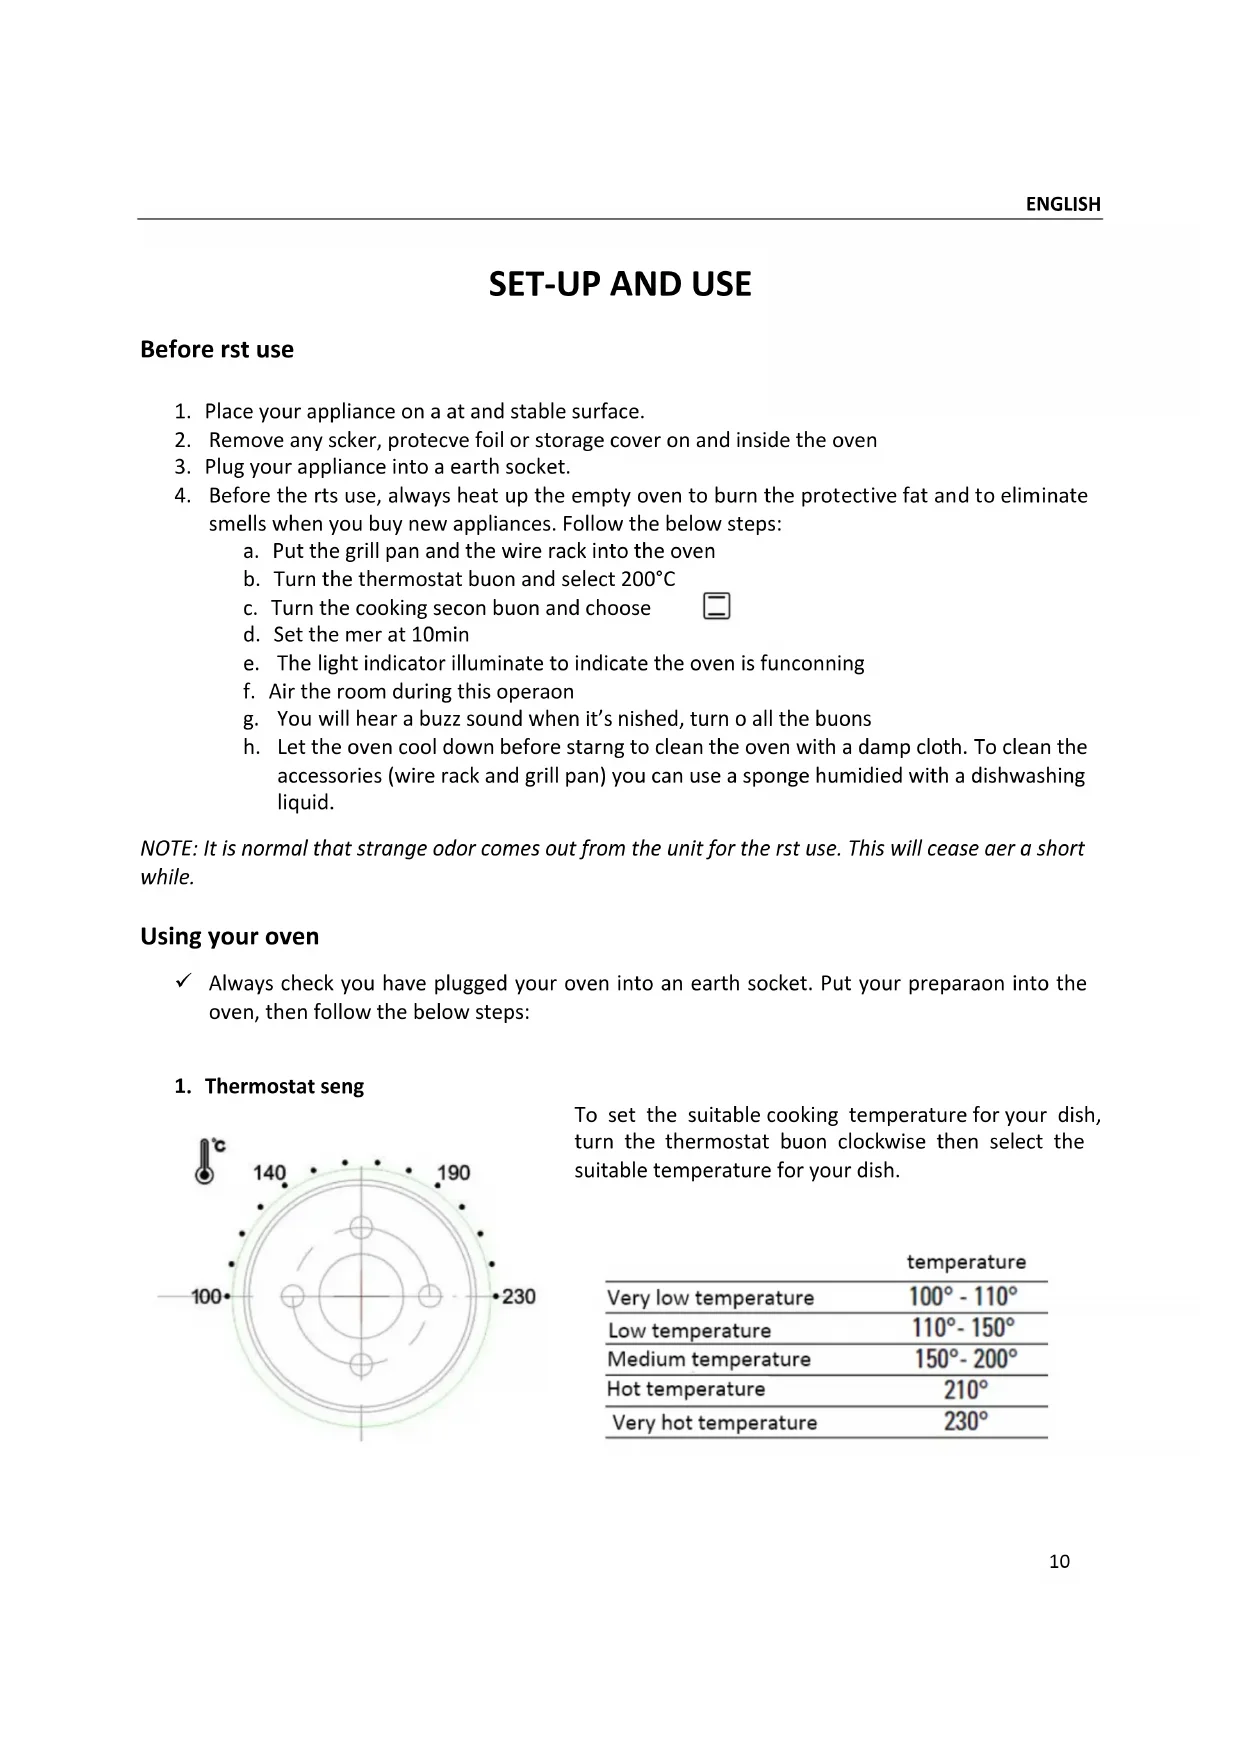
1. Thermostat seng
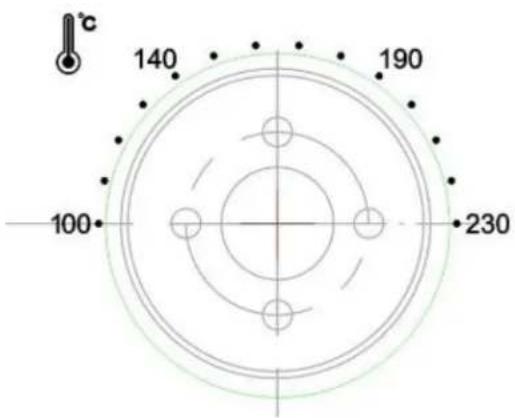
To set the suitable cooking temperature for your dish, turn the thermostat buon clockwise then select the suitable temperature for your dish.
| temperature | |
| Very low temperature | 100° - 110° |
| Low temperature | 110° - 150° |
| Medium temperature | 150° - 200° |
| Hot temperature | 210° |
| Very hot temperature | 230° |
2. Cooking method seng
To set the suitable cooking method for your dish, turn the cooking selecon buon clockwise then select the suitable cooking method for your dish.
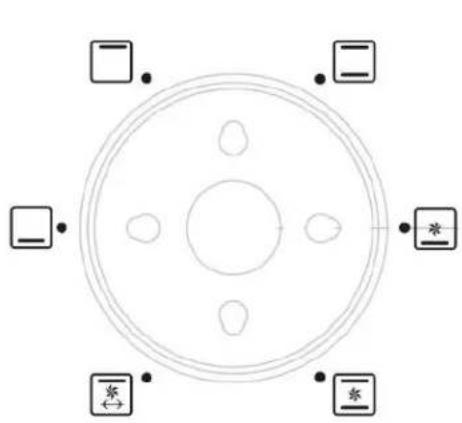
natural_image
Circular diagram with four corner markers and a central dot, no text or symbols presentUpper heang posion, perfect for toasng or grilling some bread
☐ Lower heang posion, that posion means the heang of the lower heang elements
☐ Upper and lower heang posion, that posion means the heang of the both heang elements
Lower heang posion with convecon fan funcon
Upper and lower heang posion with convecon fan funcon
Upper heang posion with convecon fan and rosserie funcons
3. Timer seng
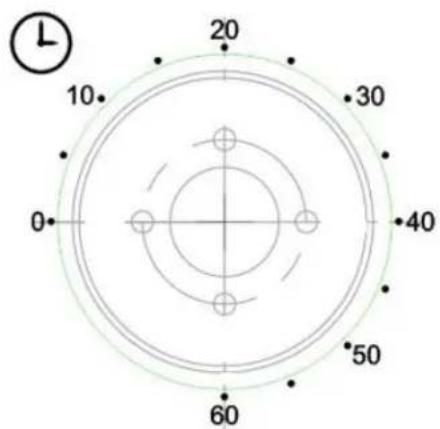
The mer buon allows you to set up the correct me for your dish. To set the suitable me for your dish, turn the mer buon clockwise then select the suitable me for your dish.
As soon as you have selected your me, the light indicator will illuminate to indicate the oven is funconing.
The oven will turn o automacally at the end of the selected me and a bell will ring.
You can turn o manually your oven during cooking by turning the mer buon an-clockwise to the OFF posion.
Note : Your oven is equipped with internal lighng which will be switch on when you start seng the mer.
| Mode | Cooking type |
 | Convecon fan with lower heang posion, that posion means the heang of the lower heang elements. |
 | Convecon fan upper and lower heang posion, that posion means the heang of the both heang elements, perfect for cooking pastries. |
 | Convecon fan + rosserie with upper heang posion. |
Tips for beer use of your oven:
√ Do not overload your oven.
√ Put your dish in the center of the oven.
√ Do not open too frequently your oven during the cooking to prevent heat loss.
√ Try to keep an eye from me to me when baking your dish.
How to set up your rosserie spit:
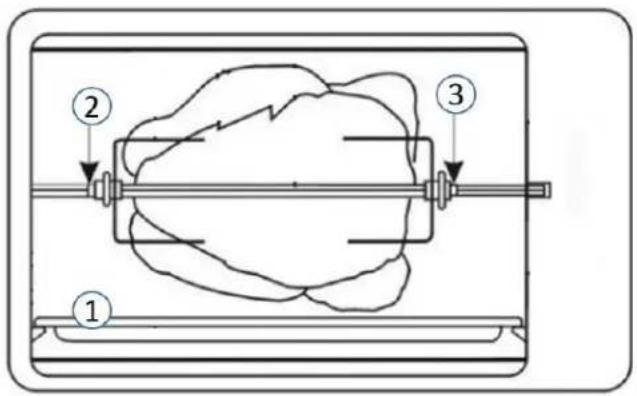
- Never preheat your oven when using the rosserie funcon to avoid geng burned! Always use the rosserie spit handle when pull out the cooked meal from the oven!
- Place the tray on the lowest posion of the oven (1).
- Unscrew the forks and thread the ed-up chicken onto the rosserie spit. Check that the chicken is in the center and does not pass beyond points 2 and 3. Then slide in the two forks and check also they do not pass beyond points 2 and 3 before screwing them rmly on the spit.
- Rest the spit on the two notches located on the center le and right side of the oven, make sure it is well posioned into its notches before starng your cooking.
CLEANING AND MAINTENANCE
√ At the end of your cooking, check you have turn o all the buons.
√ Unplug the oven.
√ Always let the appliance to cool down for at least one hour before starng any cleaning operaon.
√ Take out the wire rack and the grill pan, wash them with a sponge humidied with a neutral pH dishwashing liquid, rinse them under clear water and dry them with clean cloth.
√ When cleaning, use a so cloth (or sponge) and neutral cleaner on the interior and exterior surfaces of the oven.
√ Do not use a hard brush or any others cleaners to avoid scratching or damaging the interior surface of the oven, tray, wire rack and the rosserie fork.
√ To clean the door glass, use a damp cloth with a glass product cleaner then dry the glass door with a clean cloth.
√ Never put the oven under the water.
√ To optimize your oven heang system, clean regularly your oven to take o the dirt s, grease and food stains.
Note: the boom of your oven is equipped with a glass panel which allow easy cleaning. You only need to use a sponge to clean it.

WARNING: Always let your oven unplugged and cool down for at least one hour before any thing operaon! Do not use any toxic, solvent, industrial or harsh cleaning products.
TECHNICAL INFORMATION
| Model | MOG-1 |
| Capacity | 30L |
| Rated voltage | 220V-240V ~50Hz/60Hz |
| Rated power input | 1600W |
ENVIRONMENT AND RECYCLING
For EU product versions and/or in case that it is requested in your country:
- The materials of which the packaging of this appliance consists are included in a collecon, classicaon and recycling system. Should you wish to dispose of them, use the appropriate public recycling bins for each type of material.
The product does not contain concentraons of substances that could be considered harmful to the environment
- The following informaon concerns the energy labeling and the ecological design:
This symbol means that in case you wish to dispose of the product once its working life has ended, take it to an authorized waste agent for the selective collecon of waste electrical and electronic equipment (WEEE)
This appliance complies with Directive 2012/19/EC on Low Voltage and Directive 2004/108/EC on Electromagnec Compatibility.


Imported by Vestel France, 17 rue de la Couture – 94563 Rungis CEDEX

This manual instruction is also available on the following website:
http://pieces-detachees.sogedis.fr/


- Table des maères
- Table of contents
- Safety advices and warnings 3
- Descripon 9
- Set-up and Use 10
- Cleaning and maintenance 13
- Technical informaon 13
- Environment and recycling....13....
- SAFETY ADVICES AND WARNINGS
- WARNING
- DANGER OF ELECTROCUTION!
- DANGER OF BURNS!
- STANDARDS
- DESCRIPTION
- SET-UP AND USE
- Before rst use
- Using your oven
- Thermostat seng
- Cooking method seng
- Timer seng
- CLEANING AND MAINTENANCE
- TECHNICAL INFORMATION
- ENVIRONMENT AND RECYCLING
Brand : TELEFUNKEN
Model : MOG1
Category : Oven