Hummingbird - Tripod CELESTRON - Free user manual and instructions
Find the device manual for free Hummingbird CELESTRON in PDF.

| Product Type | Tripod |
| Brand | Celestron |
| Model | Hummingbird |
| Leg Material | Aluminum |
| Leg Sections | 4 |
| Adjustable Leg Angles | Yes (3 positions: narrow, intermediate, flat) |
| Orientation Head | Quick horizontal and vertical orientation |
| Quick-release Plate | Yes |
| Mounting Thread | 1/4"-20 |
| Adjustable Center Column | Yes |
| Spirit Level | Yes |
| Horizontal/Vertical Orientation Handle | Yes |
| Pan Tension Knob | Yes |
| Plate Lock Knob | Yes |
| Center Column Lock Knob | Yes |
| Leg Angle Adjustment Lock | Yes |
| Rubber Feet | Yes |
| Approximate Maximum Height | 170 cm |
| Approximate Minimum Height | 50 cm |
| Approximate Weight | 2.5 kg |
| Recommended Maximum Load | 5 kg |
| Warranty | 2 years |
| Recommended Use | Nature observation, astronomy, photography |
| Maintenance | Clean with a mild detergent and a soft cloth; avoid shocks and excessive heat |
| Safety | Do not exceed the maximum load; do not release the instrument until the plate is secured |
| Repairability | Contact Celestron technical support or the retailer |
Frequently Asked Questions - Hummingbird CELESTRON
User questions about Hummingbird CELESTRON
0 question about this device. Answer the ones you know or ask your own.
Ask a new question about this device
Download the instructions for your Tripod in PDF format for free! Find your manual Hummingbird - CELESTRON and take your electronic device back in hand. On this page are published all the documents necessary for the use of your device. Hummingbird by CELESTRON.
USER MANUAL Hummingbird CELESTRON
natural_image
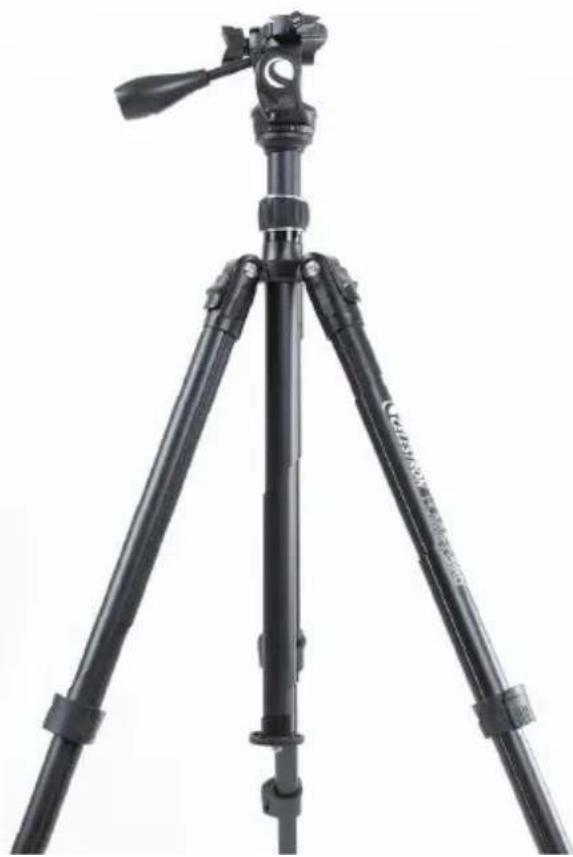
Black tripod with tripod-mounted propeller and stand (no visible text or symbols)HUMMINGBIRD™
FAST ACTION PAN/TILT HEAD TRIPOD
MANUAL #82051
ENGLISH
ENGLISH ....1
FRANÇAIS......11
DEUTSCH....21
ITALIANO 31
ESPAÑOL 41
INTRODUCTION
Thank you for purchasing your Celestron Hummingbird Fast Action Pan/Tilt Head Tripod. This tripod will provide you with years of enjoyment and faithful service. Before using your tripod for the first time, read these instructions carefully to ensure proper use and care.
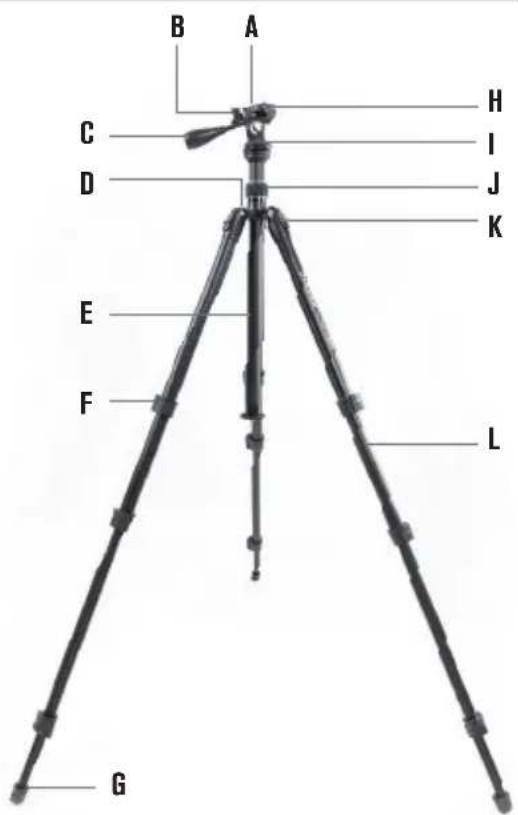
FEATURES
(A) Quick-release plate
(B) Mounting platform knob
(C) Pan/tilt handle
(D) Bubble level
(E) Center column
(F) Leg lock levers
(G) Rubber feet
(H) Quick-release plate lock knob
(I) Panning tension knob
(J) Center column lock knob
(K) Leg angle adjustment latch
(L) Aluminum legs
natural_image
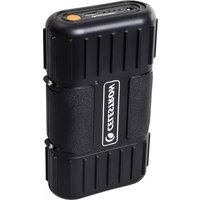
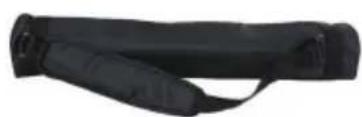
Black athletic strap device with handle and strap (no text or symbols visible)Carry case
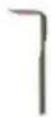
Hex key
text_image
B A C H I D J K E F L GENGLISH I 1
USING YOUR TRIPOD
The Hummingbird tripod will provide you with a stable platform for your spotting scope, binocular or camera in the field. With four leg sections, three leg angles and an adjustable center column, the tripod can be set in multiple configurations to get the exact height or stance needed for your terrain and conditions. The Hummingbird is the perfect tripod for any outdoor excursion from bird watching to stargazing and everything in between.
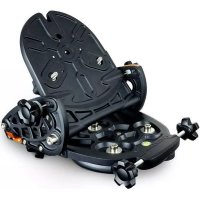
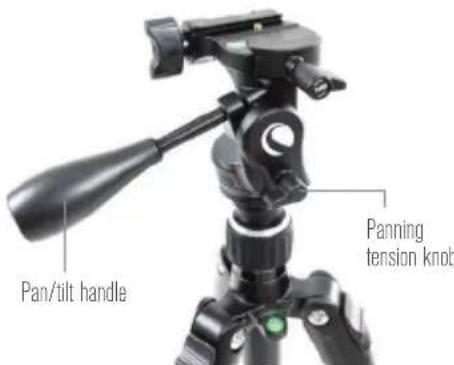
ADJUSTING THE FAST ACTION PAN/TILT HEAD
The fast action pan/tilt head of the Hummingbird tripod has two control knobs. To pan with the tripod, loosen the panning tension knob until the head moves smoothly around the horizontal plane. To move the direction and/or angle of the head, twist the pan/tilt handle and adjust the mounting platform to the desired position, then twist it again in the opposite direction to secure your position in place. Once the tripod is in position, tighten the tension knobs to secure.
text_image
Pan/tilt handle Panning tension knobENGLISH 12
ADJUSTING THE MOUNTING PLATFORM
The Hummingbird tripod is equipped with a tilting mounting platform for even more adjustability. Simply turn the mounting platform knob to loosen it, raise the platform by lifting the edge opposite this knob, and raise it to the desired angle. Finally, turn the mounting platform knob the opposite direction to secure the mounting platform position in place.

text_image
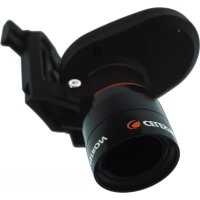
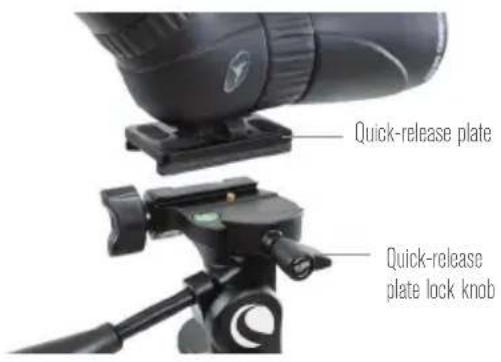
Mounting platform knobQUICK-RELEASE PLATE
The quick-release plate allows you to quickly attach your optics to the tripod. To remove the quick-release plate from the fast action pan/tilt head, turn the quick-release plate lock knob until it releases the locking mechanism. The plate can then be lifted free of the tripod's head by lifting the side of the plate nearest to the knob slightly upward.
Attach the quick-release plate to any device or optic with a 1/4"-20 mount thread. Place the quick-release plate back onto the mounting platform so that one long side is aligned with the side of the mounting platform rail opposite the quick-release plate lock knob.
Then, lay the plate into the channel until it is squarely aligned. Finally, turn the quick-release plate lock knob until the plate with the attached optic is secure in position.
CAUTION: DO NOT LET GO OF THE MOUNTED OPTIC UNTIL YOU ARE CONFIDENT THAT THE MOUNTING PLATE IS FIRMLY SECURED TO THE TRIPOD HEAD.
text_image
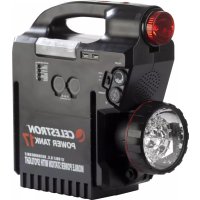
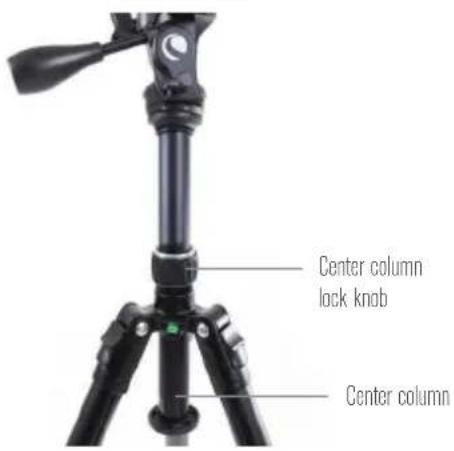
Quick-release plate Quick-release plate lock knobADJUSTING THE CENTER COLUMN
The center column of the Hummingbird tripod can be extended to raise the tripod head when additional height is needed. To extend the center column, twist the center column lock knob and move the center column to the desired height. Once the head is in place, tighten the center column lock knob to secure.
text_image
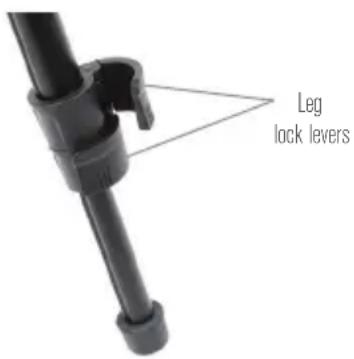
Center column lock knob Center columnADJUSTING THE LEG LENGTH
The length of each leg section of the Hummingbird tripod can be adjusted. To adjust the length of a leg section, release the leg lock lever and extend the leg section to the desired height. Press the leg lock lever back into position to secure it. Repeat the process for all leg sections. The legs will extend to a maximum of four sections.
text_image
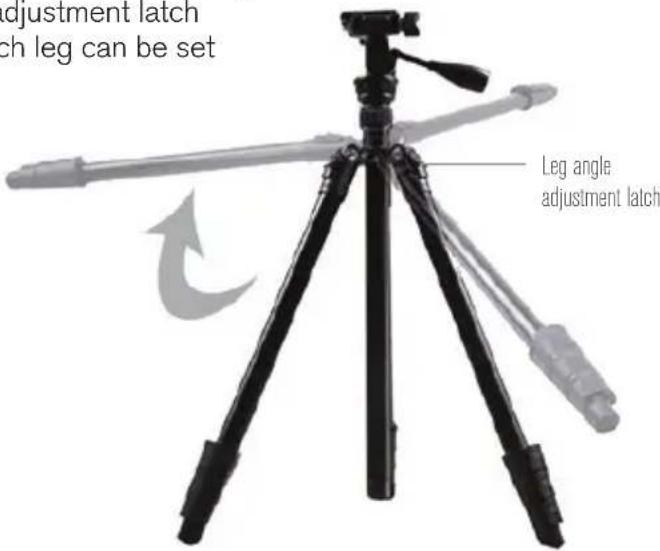
Leg lock leversADJUSTING THE LEG ANGLE
The legs of the Hummingbird tripod can be set at two different fixed angles as well as a fully expanded position for laying flat on a surface. To change the angle, slightly push the leg in towards the center column and pull out the leg angle adjustment latch. Pivot the leg outward until it reaches the end of its travel to obtain the widest angle setting.
To use the middle setting, start at the widest angle setting and slowly push the leg inward while pressing on the leg angle adjustment latch. When the middle angle setting is reached the latch will depress and lock into place, preventing it from pivoting outward.
To return to the standard leg angle, continue to push the leg inward while pressing on the leg angle adjustment latch until it locks into place. The angle of each leg can be set independently of the other two legs.
NOTE: The leg angle adjustment latch only prevents the legs from pivoting outward. The tripod legs can always be pushed inward regardless of the position of the adjustment latch.
text_image
adjustment latch ch leg can be set Leg angle adjustment latchBUBBLE LEVEL
To ensure that the tripod legs and pan head are level, reference the bubble level on the Hummingbird tripod.
CARE AND STORAGE
Your Celestron tripod will provide you years of dependable service if it is cared for and stored properly.
- Protect the tripod from impact and do not force any of the moving parts beyond their limits.
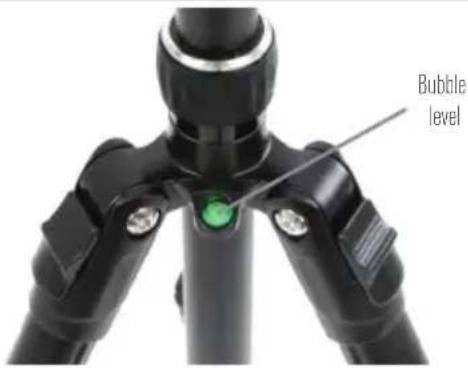
text_image
Bubble level-
Do not exceed the maximum specified load.
-
Store your tripod in a cool, dry place whenever possible.
-
Do not leave the product in the sun for long periods of time. Avoid hot environments, like the inside of a car. Do not place the tripod near anything that generates heat as this may cause damage.
-
Clean your tripod with a mild detergent and a soft cloth. Wipe away any dust, dirt or water on the tripod or inside moving parts as soon as possible to prevent damage.
SERVICE AND REPAIR
If warranty problems arise or repairs are necessary, U.S. and Canadian residents should contact Celestron Technical Support. If you live outside of these countries, contact the
dealer that sold you your tripod or the Celestron distributor in your country. You'll find a full list of our distributors at www.celestron.com.
WARRANTY
Celestron warrants your tripod to be free from defects in materials and workmanship for two years. Celestron will repair or replace the tripod which, upon inspection by Celestron, is found to be defective in materials or workmanship and within the definitions of the limits described below.
This warranty does not cover products that have been subject to abuse, misuse, physically damaged, altered, or had unauthorized repairs or modifications. This warranty does not cover defects due to normal wear and tear and other conditions.
This warranty is valid to USA and Canadian customers who have purchased their tripod from an authorized Celestron dealer in the USA or Canada. For products purchased outside of the USA or Canada please contact your local Celestron Distributor or authorized Dealer for applicable warranty information. Additional warranty information and eligibility details can be found on the Celestron website.
This product is designed and intended for use by those 14 years of age and older. Product design and specifications are subject to change without prior notification.
For complete specifications and product information: www.celestron.com

CELESTRON
©2019 Celestron • All rights reserved • 08-19
celestron.com/pages/technical-support
2835 Columbia Street • Torrance, CA 90503 USA

CELESTRON
natural_image
Black tripod with tripod-mounted camera and propeller (no visible text or symbols)HUMMINGBIRD™
TRÉPIED PANORAMIQUE/INCLINABLE RAPIDE
MODE D'EMPLOI #82051
FRANÇAIS
INTRODUCTION
natural_image
Black athletic strap with a strap strap (no text or symbols visible)Mallette de transport
text_image
B A C H I D J K E F L GUTILISATION DE VOTRE TRÉPIED
natural_image
Black tripod with tripod-mounted camera and propeller, no visible text or symbolsHUMMINGBIRD™
natural_image
Black cylindrical object with a strap, possibly a device or tool (no visible text or symbols)Tragetasche
text_image
B A C H I D J K E F L GGEBRAUCH DES STATIVS
natural_image
Close-up of a black mechanical component with a triangular bracket and cylindrical shaft (no text or symbols visible)natural_image
Black cylindrical object with a strap, possibly a device or tool (no visible text or symbols)Sacca di trasporto
text_image
B A C H I D J K E F L GITALIANO I 31
UTILIZZO DEL TREPPIEDE
natural_image
Close-up of a black mechanical lever with a triangular guide pin (no text or symbols visible)natural_image
Black tripod with tripod-mounted camera and propeller, no visible text or symbols
HUMMINGBIRD™
natural_image
Close-up of a black mechanical component with a strap (no visible text or symbols)Funda de transporte
text_image
B A C H I D J K E F L GESPAÑOL I 41