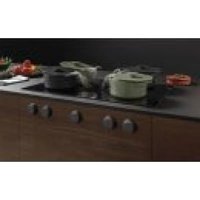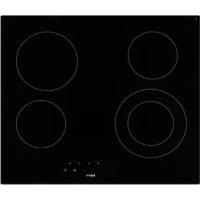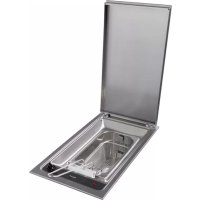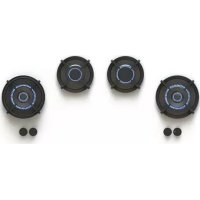
56014 - Cooker NOVY - Free user manual and instructions
Find the device manual for free 56014 NOVY in PDF.


| Technical Features | Type of stove: Gas stove |
|---|---|
| Dimensions | Width: 60 cm, Depth: 60 cm, Height: 85 cm |
| Number of burners | 4 gas burners |
| Type of oven | Gas oven |
| Oven capacity | 60 liters |
| Usage | Ideal for cooking various dishes, precise temperature control |
| Maintenance | Easy cleaning thanks to smooth surfaces, regular burner checks |
| Safety | Safety system to prevent gas leaks, piezo ignition |
| General Information | 2-year warranty, compliant with European safety standards |
Frequently Asked Questions - 56014 NOVY
User questions about 56014 NOVY
0 question about this device. Answer the ones you know or ask your own.
Ask a new question about this device
Download the instructions for your Cooker in PDF format for free! Find your manual 56014 - NOVY and take your electronic device back in hand. On this page are published all the documents necessary for the use of your device. 56014 by NOVY.
USER MANUAL 56014 NOVY
EN Operation Instructions p. 26
56 0xx Top
INHOUD
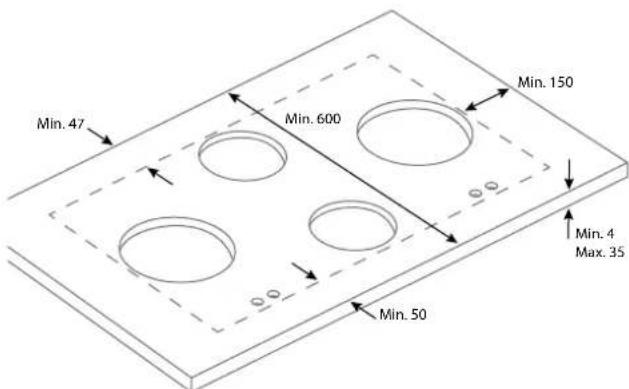
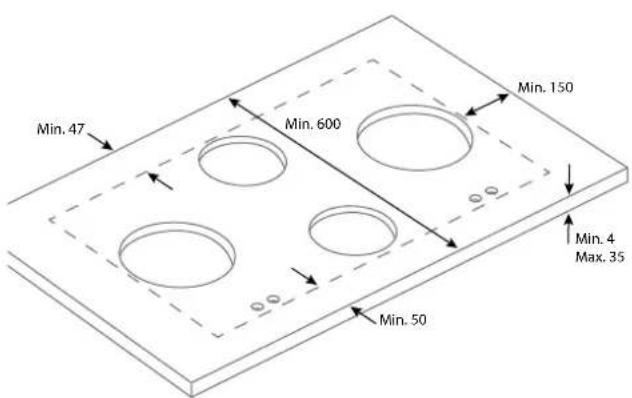
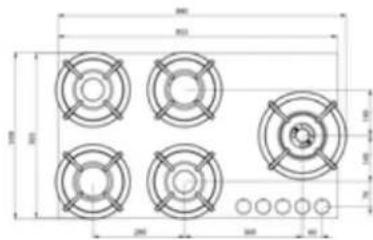
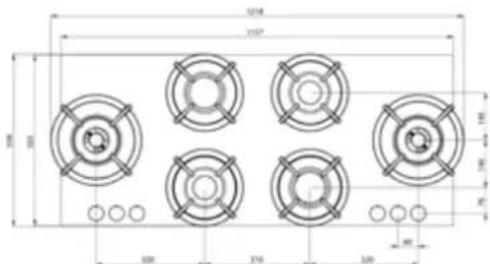
Top (TS) maten in mm
Top (TS) Abmessungen in mm
General information 33
1 Installation dimensions 33
2 Connection: gas and electrical 34
2.1 Gas connection instructions 34
2.2 Electrical connection instructions 230 V - 50 Hz - 0.6 VA 34
2.3 Battery spark ignition*1,5V DC 34
Models overview 34
Gastype - nozzle combination overview 34
Unit category 34
3 General instructions 35
3.1 Safety Rules 35
4 Control 35
4.1 Burners 35
4.2 Burners ignite and set 35 Igniting 35 Turning off
5 Optimal use 36
5.1 High burner 36
6 Maintenance 36
7 Failures 37
8 Models overview Top (TS) 38
GAS
56 0xx TOP
Dear customer,
Congratulations on the purchase of your gas hob. Thanks to the various burner capacities you can properly prepare each dish and the integrated spark ignition in the controls ensures that the burners can be handled with one hand. This manual describes how to take full advantage of all the features of this gas hob.
We recommend you read the user manual and mounting instructions carefully before you use the gas hob.
Do not throw this manual away, so that any following user also benefits from it.
Happy Cooking!
This manual makes use of a number of symbols. The meanings of these symbols are given below.
| SymbolMeaning | ||
| Indication Explanation of an indication on the device. | ||
| Information/Warning | This symbol indicates an important tip or a dangerous situation | |
Follow these instructions to avoid injury and material damage.
GENERAL INFORMATION
The gas hob is manufactured using sustainable materials. The packaging is recyclable and consists of the following types of materials:
paperboard
-paper
These materials are in accordance with the provisions of Government to be disposed of in a responsible manner. The packaging of this product is equipped with a sticker with the image of a crossed-out dustbin (see fig. 9).
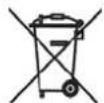
fig.9
The directive on waste electrical and electronic equipment (WEEE) of the European Union. The WEEE directive of the European Union requires that products that are sold in the countries of the EU (or in some cases the packaging thereof) must be labelled with a crossed-out dustbin. As determined by the WEEE directive, this means label with the crossed-out dustbin that customers and end users in the countries of the EU electrical and electronic equipment or accessories not with the garbage may dispose. Customers and end users within the EU should contact their local supplier or maintenance centre for information about the waste collection system in their municipality.
1 INSTALLATION DIMENSIONS
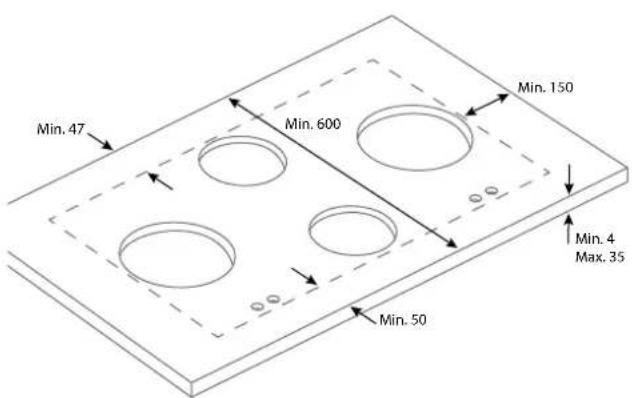
Top (TS) measure in mm
- The gas hob module cannot be installed over a partition of cabinets. It has to be accessible in case it needs servicing.
- When the gas hob is combined with a drawer cabinet, always be aware of the measurements of the unit and the support bar. The height of the unit and the support bar is 119mm (TS) measured from the top of the worktop (fig.2).
- To prevent bending of the worktop the appliance need to be supported by two support bars (fig. 2 and 3).
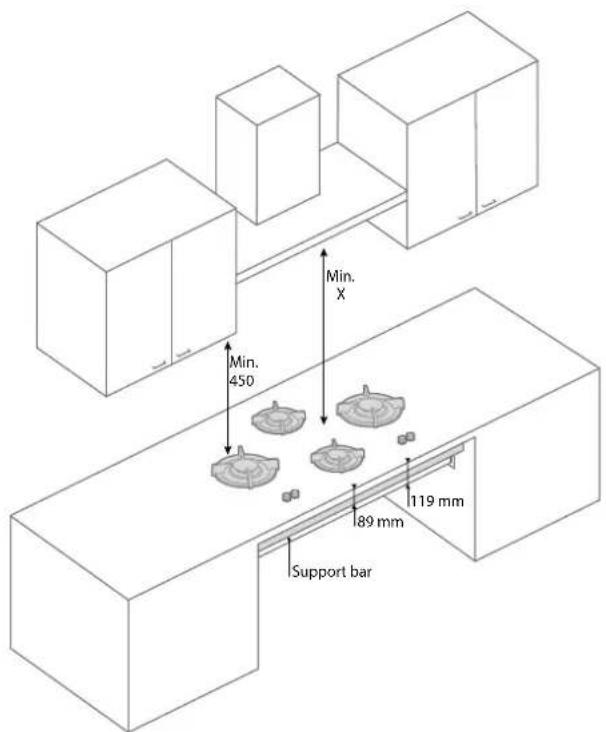
fig. 2
Between the gas hob and the one above it installed cooker hood, a minimum safety clearance (X) as specified by the manufacturer must be maintained.
If this information is not available, keep than a distance of at least 650mm . Even if there are highly flammable materials above the gas hob, this distance must be observed.
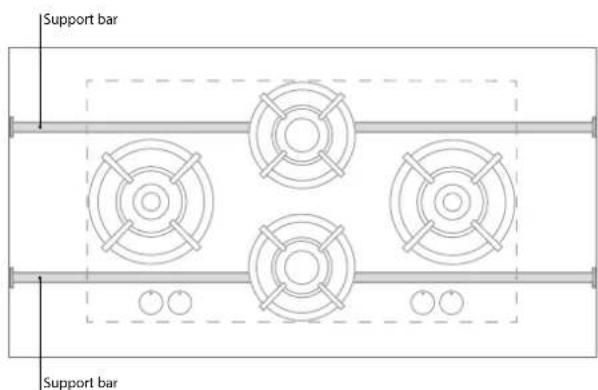
fig. 3
2 CONNECTION: GAS AND ELECTRICAL
2.1 Gas connection instructions
- Check that installation or local distribution regulations (type of gas and gas pressure) match the setting value of this device.
- The setting values of this device are indicated on the type plate.
- This device is not equipped with a combustion gas drain installation. Installation and connection must comply with the regulations in force locally and nationwide. You must check the regulations in regards to ventilation requirements.
- The gas connection must comply with the general regulations. We recommend to connect the hob with a fixed gas pipeline or to use an approved gas hose.
- Always use a full metal hose behind the oven.
- An approved gas hose should not be kinked and should not come into contact with moving parts of the kitchen furniture.
- The main gas supply must be in an easily accessible place.
- Before using the cooking unit check all the connections for leaks with soapy water.
2.2 Electrical connection instructions*
230V-50Hz-0.6VA
- The electrical installation must conform to the national and local regulations.
- Power socket and plug must always be reachable.
- Connect the unit with the supplied plug to an earthed socket.
- Damage to the connection cable may only be replaced by the manufacturer, or an approved Installer. This to prevent dangerous situations.
2.3 Battery spark ignition* 1,5V DC
- The spark ignition operates through a battery AA.
- The battery is positioned in the casing at the underside.
- Replace the battery if the spark ignition does not operate
- Depending on the model
Models overview
| Type Total kW Bel. gr/h | ||
| Akan 1,8 Kw Hs 130 | ||
| Altar 3 kW Hs 220 | ||
| Air 5 kW Hs 360 | ||
| Azuma 5 kW Hs 360 | ||
| Bandai 4,8 kW Hs 350 | ||
| Baluran 8 kW Hs 580 | ||
| Bennett 6,8 kW Hs 490 | ||
| Baula 8 kW Hs 580 | ||
| Bely 6,8 kW Hs 490 | ||
| Bromo | 10 kW | 720 |
| Capital 9,8 kW Hs 710 | ||
| Cima | 9,8 kW Hs 710 | |
| Colo | 12 kW Hs | 850 |
| Cusin 13 kW Hs | 940 | |
| Dempo | 14,8 kW Hs | 1070 |
| Danau | 14,8 kW Hs | 1070 |
| Drum | 14,8 kW Hs | 1070 |
| Ebeko | 14,6 kW Hs | 1060 |
| Elbrus | 14,6 kW Hs | 1060 |
| Enep | 14,6 kW Hs | 1060 |
| Foessa 19,6 kW Hs | 1420 | |
Gastype - nozzle combination overview
| Gas | Supply pressure | Burner - 0.3 - 1.8 kW nozzle | Burner - 0.3 - 3 kW nozzle | Burner - 0.2 - 5 kW outer ring nozzle | Burner - 0.2 - 5 kW inner ring nozzle |
| G25 | 25 | 1.02 | 1.32 | 2x 1.18 | 1x 0,71 |
| G25.3 | 25 | 1.02 | 1.32 | 2x 1.18 | 1x 0,71 |
| G25 | 20 | 1.07 | 1.45 | 2x 1.28 | 1x 0,74 |
| G20 | 20 | 1.01 | 1.29 | 2x 1.15 | 1x 0,70 |
| G30 | 30 | 0.66 | 0.87 | 2x 0.72 | 1x 0.46 |
| G30 | 50 | 0.58 | 0,79 | 2x 0.68 | 1x 0.40 |
| G31 | 30 | 0.70 | 0.94 | 2x 0.80 | 1x 0.48 |
| G31 | 37 | 0.66 | 0.87 | 2x 0.72 | 1x 0.46 |
| G31 | 50 | 0.62 | 0.80 | 2x 0.70 | 1x 0.42 |
Unit category
| Gas | 12H/ELL - G20/25 | 12L/12EK - G25/G25.3 | 13+ - G30/31 | 13B/P - G30/31 | 13P - G31 |
| Supply pressure mbar | 25 | 25 | 30/37 | 50 | 50 |
| Toe Class of appliances: 3 | |||||
3 GENERAL INSTRUCTIONS

SafetyWarnings

Read the instructions in this user manual carefully. Only then you can use your gas hob the right way.

Save both the Assembly instructions and the user manual. If the gas hob transfers to another user, they need this documentation.

Check the gas hob immediately after removing the packaging. If there is any shipping damage you should contact your dealer immediately by e-mail or in writing.
3.1 Safety Rules
- The gas hob is intended for domestic use only.
- Only use the gas hob for the preparation of dishes. This appliance is not suitable for heating your home.
- Please ensure that all burner parts are placed correctly.
- Ensure adequate ventilation during use.
- Distance from the pan to a non-heat resistant wall or control knob must be at least 2 cm or 0.8 inches.
Always place pans on the pan support, never directly on the burner top. - Check the product regularly for damage. Do not use the product when damaged, repair it immediately.
- The user is responsible for the proper use and good state of the system. When used incorrectly, the manufacturer is not liable for any damages.

Overheating and fire hazards
- Use the burner only with a pan or a wok on the pan support. Warning: an empty pan may overheat.
Overheated oil or butter can easily ignite. Never put out with water. You can smother the flames by closing the pan with a lid. - Do not flambé under a cooker hood, this can cause a fire.
- Never put flammable objects on the hob.
- Never place a grill or griddle over two burners.
- Do not use pans with a larger base diameter than the pan support. We recommend for the 2 and 3KW burners a pan with a maximum base diameter of 230mm and for the 5KW burner a maximum base of 270mm .

Hot parts
- Parts of the burner and the worktop surrounding the burner
may become hot during use and will remain hot for a long period after use. Please take care not to touch these parts until they have fully cooled.
- Please be aware that if you use a pan with a larger base diameter than the pan support (see point 14) there is a possibility that the control knobs may become hot.
- Please be aware that the flame should always remain beneath the base of the pan (unless you are stir frying with a wok). Flames rising against the side of the pan will not be effective and will produce unwanted overheating.
- It is very important that children remain at a distance.
4 CONTROL
4.1 Burners
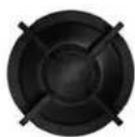
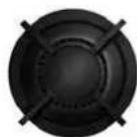
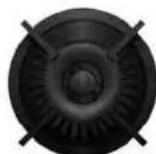
0,3-3kW0,2-5kW0,3-2kW
4.2 Burners ignite and set
Before you ignite the burner verify that all components are mounted in the right way to prevent unwanted interference. Before igniting the burner you need to place a pan on the hob. Each burner can be set easily between high and low.
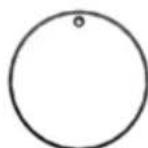
fig.4
Bumer off
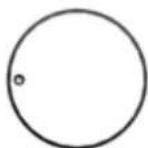
fig.5
High flame size
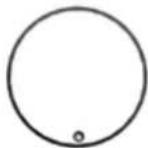
fig.6
Low flame size
Igniting
To ignite the burner you need to activate the spark ignition. You do this by pressing the control knob all the way and hold. Turn the control knob to the left (fig. 5). Keep the button pressed for another 5 to 8 seconds. This way the temperature sensor warms and gas can be distributed. You can regulate the size of the flame by turning the control knob slowly between the high and low position (fig. 5 and 6).

Caution: If the flame does not ignite after 2 to 4 seconds, you need to return the knob to the low position (Figure 6). A small flame often kindles faster than a large flame.
Turning off
To turn off the burner, turn the control knob back to the state displayed on fig. 4.
5 OPTIMAL USE
- Avoid flames rising around the pan to minimise the loss of energy. Be careful as the handles of the pans can become hot.
- To cook large quantities you best use the stir-fry cooker. For preparation of sauces and simmering dishes best use the side burner. To cook through it should be on the highest level.
- Cooking with the lid on the pan conserves energy.
- Use cookware with a flat, clean and dry bottom. Flat pans are more stable and a clean bottom makes for a better heat transfer..
5.1 High burner
With the cooker you can prepare dishes at a very high temperature. It is important, however, to pay attention to a number of things:
- Make sure you have the ingredients cut in advance.
- Use an oil of good quality for frying, for example: olive oil, sunflower oil or peanut oil. Do not use butter or margarine as these will be overheated and blackened by high temperatures.
- To ensure all the ingredients are ready at the same time, you must put the ingredients with the longest preparation time in the pan first.
6 MAINTENANCE
The gas hob is manufactured with high-grade materials, which can be very easily cleaned.
Please take the following into consideration:
- Never clean in the dishwasher as the detergent can affect the materials. Avoid cleaning with too much moisture as the can enter the burner outlet and cause damage.
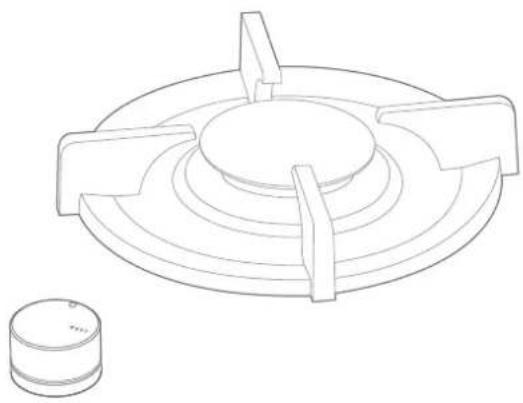
- Use a cloth to clean the electric spark ignition (fig. 7). In case of heavy use it can be cleaned with the point of a fine brush. Do this carefully as an accidental change in the distance between the burner and spark ignition may result in the burner being damaged or failing to ignite.
- Place the pan support directly onto the burners without scratching your countertop.
- Assemble the burner parts via the centring cans in each part (see fig. 8).
- Clean the cooker immediately after use. This prevents overcooked food settling on the burner and becoming difficult to remove.
- Start with cleaning the buttons, burners and pan support. Then clean the countertop to prevent it from being stained again.
- Use a mild detergent and a soft cloth to clean the removable burner parts. Stubborn stains on pan carriers and burner tops are best removed with a liquid cleanser.
- Never use scouring powders, pads, sharp objects or aggressive cleaning agents.
- For maintenance and cleaning of the countertop refer to the manual of the particular product.

CAUTION: The gas hob must not be steam cleaned or high-pressure cleaned. If cleaned this way the electrical safety is not ensured.

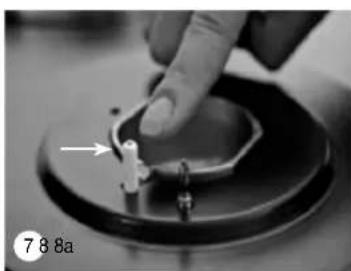
CAUTION: Never unscrew the screws of the heat shield(s) (see fig. 8a).
Note: the gas hob may only be connected by an approved installer. To ensure the safety and warranty repairs may only be performed by approved professionals. You should only use original parts.
| Failure Cause Solution Chapter / Page | |||
| A burner ignites and turns off again. | The control knob is not pressed long enough to activate the auto-flame detection. | Press the control knob down long enough to turn between full and low heat. | Chapter 4 / page 18 |
| The control knob is not adjusted at the correct height. | Adjust the control knob properly. Installation manual** 13 - 15 | ||
| The control-button touches the sealing scale. | Hob is not mounted the right way under the countertop. | Adjust the control knob properly. Installation manual** 13 - 15 | |
| Sealing scale is not in the center vs. control knob. | Detach sealing scale and and re-stick again. | Installation manual** 13 - 15 | |
| Spark ignition remains igniting. | Hob is not mounted the right way under the countertop. | Adjust the control knob properly. Installation manual** 13 - 15 | |
| Sealing scale is not in the center vs. control knob. | Detach sealing scale and and re-stick again. | Installation manual** 13 - 15 | |
| The burner doesn't ignite. | The control knob is not adjusted at the correct height. | Adjust the control knob properly. Installation manual** 13 - 15 | |
| The power plug is not in the power socket. | Put the power plug into the power socket. | ||
| Fuse malfunction / fuse in meter cupboard is disabled. | Install a new fuse or switch on the fuse again. | ||
| Spark ignition is dirty or wet. Clean or dry theBurner parts are not properly mounted. Ensure the burner parts are correctly aligned with the centring cans. | The spark ignition. Chapter 6 / page 19 | Chapter 6 / page 19 | |
| Burner parts are dirty or wet. Clean or dry theburner parts. Make sure the outflow holes are open. | The burner parts. Make sure the outflow holes are open. | Chapter 6 / page 19 | |
| The main gas supply is not open. Open the main gas supply. | |||
| The control knob is not pressed long enough | Press the control knob down long enough to turn between full and low heat. | Chapter 4 / page 18 | |
| Battery empty* Replace battery Chapter 2 / page 16 | |||
| A burner does not burn evenly. | Burner parts are not placed properly. | Ensure the burner parts are correctly aligned with the centring cans. | Chapter 6 / page 19 |
| Burner parts are dirty or wet. Clean or dry theburner parts. Make sure the outflow holes are open. | Theburner parts. Make sure the outflow holes are open. | Chapter 6 / page 19 | |
| Gas smell. | Gas connection leaks. | Check the connection. Turn main gas supply off immediately when you're not able to fix it right away. | |
| There is a burner turned on, but not inflamed. | Close the control knob and wait a few minutes before reigning. | Chapter 4 / page 18 | |
- Depending on the model
** TS = Top
If the failure still remains please contact your dealer
or the Novy customer servic.
8 MODELS OVERVIEW TOP (TS)
| Akan Altar Azuma Air | |||
| Baluran Bennett Baula Bey | |||
| Bromo Cima Capital | |||
| Cusin Colo | |||
| Danau Drum |
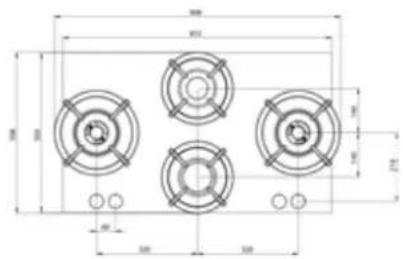
Dempo Elbrus
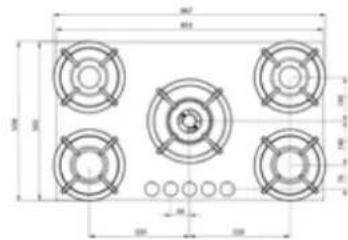
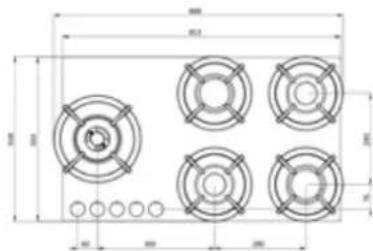
Enep Ebeko
Foessa
NOVY nv reserves the right to change the construction and prices of its products at all times and without notice.