
SEM 40 - Fitness Equipment SANITAS - Free user manual and instructions
Find the device manual for free SEM 40 SANITAS in PDF.
| Brand | Sanitas |
| Model | SEM 40 |
| Product type | Digital EMS/TENS device for electrostimulation and massage |
| Dimensions (L × W × H) | 130 × 68 × 29 mm (with belt clip) |
| Weight | 105 g (without batteries), 140 g (with clip and batteries) |
| Power supply | 3 AAA alkaline batteries 1.5 V |
| Stimulation channels | 2 independent channels with separate intensity adjustment |
| Electrodes | 4 self-adhesive electrodes (45 × 45 mm) |
| Programs | Over 50 programs: TENS (10 programs + 10 customizable), EMS (10 + 10), Massage (10) |
| Current parameters | Frequency 1-120 Hz, pulse width 40-250 μs, adjustable intensity from 0 to 15, max output voltage 90 Vpp, max current 180 mApp |
| Treatment duration | Adjustable from 5 to 90 minutes |
| Main functions | TENS (pain relief), EMS (muscle stimulation), Massage (massage effect), individual programs, Doctor's Function |
| Display | Liquid crystal display with selection, navigation and adjustment buttons |
| Safety | Automatic shut-off after 3 minutes of inactivity, sound signal, protection against electrostatic discharge, warning against use near the heart, neck, etc. |
| Care and cleaning | Clean the device with a slightly damp soft cloth; electrodes: clean with a damp lint-free cloth and air dry |
| Spare parts and accessories | Replacement self-adhesive electrodes, cables, batteries |
| Operating conditions | 10°C to 40°C, relative humidity 30-85% |
| Storage conditions | -10°C to 50°C, relative humidity 10-95% |
| Standards | Compliant with European standards EN60601-1, EN60601-1-2, EN60601-2-10, medical directive 93/42/EC |
| Warranty | 2 years (subject to proper use), repairs by authorized service center |
Frequently Asked Questions - SEM 40 SANITAS
User questions about SEM 40 SANITAS
0 question about this device. Answer the ones you know or ask your own.
Ask a new question about this device
Download the instructions for your Fitness Equipment in PDF format for free! Find your manual SEM 40 - SANITAS and take your electronic device back in hand. On this page are published all the documents necessary for the use of your device. SEM 40 by SANITAS.
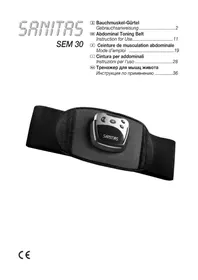
USER MANUAL SEM 40 SANITAS
GB Instruction for Use
Digital EMS/TENS unit (16-28)
Moded'emploi
1A-2A/1B-2B 1A-1B/2A-2B
1A-1B/2A-2B 1A-1B/2A-2B
A22AYB2BB
1A-1B/2A-2B
1A-2A/1B-2B
1A-1B/2A-2B
1A-2A/1B-2B
1A-1B/2A-2B
1A-2B/2A-1B
1A-1B/2A-2B
1A-2B/2A-1B
1A-1B/2A-2B
1A-2A/1B-2B
1A-1B/2A-2B
1A-1B/2A-2B
1A-1B/2A-2B
1A-2A/1B-2B
1A-1B/2A-2B
1A-2A/1B-2B
1A-1B/2A-2B
1A-2A/1B-2B
1A-1B/2A-2B
1A-2A/1B-2B
1A-1B/2A-2B
1A-2B/2A-1B
1A-1B/2A-2B
1A-2A/1B-2B
1A-1B/2A-2B
1A-2B/2A-1B
1A-2A/1B-2B
1A-1B/2A-2B
1A-2B/2A-1B
1A-2A/1B-2B
1A-1B/2A-2B
1A-2A/1B-2B
1A-1B/2A-2B
1A-2A/1B-2B
1A-1B/2A-2B
1A-2A/1B-2B
1A-1B/2A-2B
1A-2A/1B-2B
1A-1B/2A-2B
1A-2B/2A-1B
1A-2A/1B-2B
1A-1B/2A-2B
1A-2B/2A-1B
1A-2A/1B-2B
1A-1B/2A-2B
2A-1B/1A-2B
1A-1B/2A-2B
1A-2B/2A-1B

1A-2A/1B-2B
1A-1B/2A-2B
2A-1B/1A-2B
DEUTSCH
Inhaltsverzeichnis
7.5 Doctor's Function
- Getting to know your machine 16
1.1 What is Digital EMS/TENS and what can it do? 16
1.2 Scope of supply 17
- Important information 17
3.Current parameters. 19
3.1 Pulse shape 19
3.2 Pulse frequency 19
3.3 Pulse width 20
3.4 Pulse intensity 20
3.5 Cycle-controlled pulse parameter variation 20
- Unit description 20
4.1 Description of components 20
4.2 Key functions 20
5.Start-up 21
- Programme overview 21
6.1 Basic information 21
6.2 TENS programmes 22
6.3 EMS programmes 23
6.4 MASSAGE programmes 24
6.5 Information on placing the electrodes 24
7.Application 25
7.1 Advice on application 25
7.2 Procedure for TENS, EMS and MASSAGE programmes 01-10.....25
7.3 Procedure for TENS/EMS programmes 11-20 (ind. prog.) 25
7.4 Changes to settings 26
7.5 Doctor's Function 26
- Cleaning and storage 26
- Disposal 26
10.Problems and solutions. 27 - Technical details 27
Please read these instructions for use carefully and keep them for later use, be sure to make them accessible to other users and observe the information they contain.
1. Getting to know your machine
1.1 What is Digital EMS/TENS and what can it do?
Digital EMS/TENS belongs to the group of electrical stimulation systems. It has three basic functions, which can be used in combination:
- Electrical stimulation of nerve tracts (TENS).
- Electrical stimulation of muscle tissue (EMS).
- A massage effect generated by electrical signals.
For this, the device has two independent stimulation channels and four self-adhesive electrodes. It has various versatile functions in order to increase general wellbeing, alleviate pain, maintain physical fitness, relaxation, revitalise muscles and combat fatigue. You can either select these functions from preset programmes or determine them yourself according to your requirements.
The operating principle of electrical stimulation equipment is based on simulating the body's own pulses which are transmitted transcutaneously to nerve or muscle fibres by means of electrodes. The electrodes can thereby be attached to many parts of the body, whereby the electrical stimuli are safe and practically painless. You merely feel a gentle prickling or vibrating in some applications. The electrical pulses transmitted to the tissue affect the trans mission of stimulation in nerve conductions as well as neural nodes and muscle groups in the field of application.
The effect of electrical stimulation is generally only recognisable after regularly repeated application. Electrical stimulation does not replace regular exercising of the muscle, but is able to reasonably supplement the effect thereof.
TENS, transcutaneous electrical nerve stimulation, means electrical stimulation of nerves through the skin. TENS is recognised as a clinically proven, effective, non-medication method of treating pain from certain causes. It is free from side-effects when used properly, and can also thereby be used as a simple means of self-treatment. The pain-alleviating or suppressing effect
is also achieved by preventing pain from being passed on into nerve fibres (above all through high-frequency pulses) and increasing the secretion of the body's own endorphines which reduce awareness of pain through their effect on the central nervous system. The method is scientifically underpinned and medically approved.
Any symptoms indicating TENS application must be clarified with the doctor in charge of your treatment. The latter will also give you information on the respective benefits of TENS self-treatment.
TENS is clinically tested and approved with the following applications:
- Back pain, particularly also lumbar and cervical spine problems
Joint pain (e.g. knee joint, hip joint, shoulder)
Neuralgia - Headaches
Women's period pains - Pain after injuries to musculoskeletal system
- Pain with circulatory problems
- Chronic pain through various causes
Electrical muscle stimulation (EMS) is a widespread and generally recognised method and has been used for years in sports and rehabilitation medicine. In the sports and fitness field, one of the uses of EMS is as a supplement to conventional muscle training, in order to increase the efficiency of muscle groups and adapt physical proportions to the desired aesthetic results. EMS application goes in two directions. On the one hand, a targeted strengthening of musculature can be produced (activating application) and on the other hand a relaxing, resting effect can also be achieved (relaxing application).
Active application includes the following:
- Muscle training to improve endurance performance and/or
- Muscle training to support the strengthening of certain muscles or muscle groups in order to achieve desired changes to body proportions.
Relaxing application includes the following:
- Muscle relaxation in order to loosen up muscular tension
- Improving muscular fatigue symptoms
- Accelerating muscle regeneration after high muscular performance (e.g. after a marathon).
Through integrated massage technology, Digital EMS/TENS also offers the possibility of reducing muscular tension and combating fatigue symptoms using a programme based on real massage in terms of sensation and effect.
Using the positioning suggestions and programme charts in this manual, you can determine the machine setting fast and easily for the respective application (depending on the region of the body affected) in order to ensure the desired effect.
Through the two separately adjustable channels, the Digital EMS/TENS has the advantage of adapting the intensity of the pulses independently of each other to two parts of the body to be treated, for example in order to cover both sides of the body or ensure even stimulation of larger areas of tissue. The individual intensity setting of each channel also allows you to treat two different parts of the body at the same time, whereby it is possible to save time compared with individual sequential treatment.
1.2 Scope of supply
- 1x Digital EMS/TENS machine (incl. belt clip)
- 1x connecting cable
- 4x adhesive electrodes (45 x 45 mm)
- 3x AAA batteries
- these instructions for use
Subsequent purchase articles
8x adhesive electrodes (45× 45mm) Art.no.661.22
4x adhesive electrodes (50× 100mm) Art.no.661.21

2. Important Information
Use of the machine does not replace medical consultation and treatment. In the event of any type of pain or illness, you must therefore always first ask your doctor.
WARNING!
In order to prevent any damage to health, we would urgently advise against using the Digital EMS/TENS in the following cases:
- With any implanted electrical devices (such as pacemakers)
If there are any metal implants - When using an insulin pump
In case of high fever (e.g. >39^

- In case of known or acute cardiac arrhythmias and other disorders in stimulus formation and conduction of the heart
- If suffering from attacks (e.g. epilepsy)
If pregnant
In case of cancer
After operations where increased muscle contractions might impair the healing process - Never use near the heart. Stimulation electrodes should never be placed anywhere on the front of the thorax (marked by ribs and breastbone), but above all not on the two large pectoral muscles. Here it can increase the risk of ventricular fibrillation and lead to cardiac arrest
- On the bony part of the cranium, near the mouth, throat or larynx
Near the throat / carotid artery
Near the genitals - On acutely or chronically diseased (injured or inflamed) skin (e.g. in the event of painful and painless inflammation, reddening, skin rashes (e.g. allergies), burns, bruises, swellings, open wounds and wounds in the process of healing, on operation scars in the process of healing)
- In environments with high humidity such as in the bathroom or when having a bath or shower
- Do not use after consuming alcohol
- When a high frequency surgical device is connected at the same time
Before using the machine, you should consult with the doctor in charge of your treatment in the event of the following:
- Acute diseases, especially if hypertension is suspected or actually exists, or blood-clotting disorders, tendency to thromboembolic diseases or in case of malignant new masses
All skin diseases - Chronic pain disorders which have not been clarified, regardless of the region of the body
Diabetes -
All sensitivity disorders with reduced pain awareness (such as metabolic disturbances)
Medical treatments carried out simultaneously -
Complaints arising as a result of the stimulation treatment
- Constant skin irritation as a result of prolonged stimulation at the same electrode point
IMPORTANT!
Use the Digital EMS/TENS solely:
- On humans.
- For the purpose for which it was developed and in the manner specified in these instructions for use. Any improper use can be hazardous.
- For external application.
- With the original accessory parts which are supplied and can be reordered, otherwise the warranty becomes null and void.
PRECAUTIONARY MEASURES:
- Always remove the electrodes from the skin with a moderate pull in order to avoid injury in the event of highly sensitive skin.
- Keep the machine away from heat sources and never use it near ( 1m) short-wave or microwave equipment (e.g. mobile phones), as this may lead to unpleasant current spikes.
- Do not expose the machine to direct sunlight or high temperatures.
- Protect the machine from dust, dirt and humidity. Never submerge the device in water or other liquids.
- The machine is suitable for private use.
- For reasons of hygiene, the electrodes should only be used on one person.
- If the machine is not functioning properly, or if you start feeling unwell or there is any pain, stop the application immediately.
- To remove or move the electrodes, first switch off the machine or the appropriate channel in order to avoid unwanted irritation.
- Never modify any electrodes (e.g. by cutting). This leads to a higher current density and can be dangerous (max. recommended output value for electrodes: 9mA/cm^2 , an effective current density over 2mA/cm^2 requires greater attention).
- Do not use when asleep, when driving a vehicle or at the same time as operating machinery.
-
Never use with any activities where an unforeseen reaction (e.g. increased muscle contraction despite low intensity) may be dangerous.
-
Make sure that no metallic objects such as belt buckles or necklaces can come in contact with the electrodes during stimulation. If you wear any jewellery or piercings (e.g. belly piercing) near the application site, you must remove these before using the machine as burning may otherwise occur at some points.
- Keep the device away from children to prevent any hazards.
- Do not confuse the electrode cables and contacts with your headphones or other devices, and do not connect the electrodes to other devices.
- Do not use this machine at the same time as other equipment which sends electrical pulses to your body.
- Do not use it near any highly flammable substances, gases or explosives.
- Never use accumulators, always use the same types of battery.
- In the initial minutes, carry out the application sitting or lying down in order to avoid any unnecessary risk of injury in the rare event of a vagal reaction (feeling of weakness). If you start feeling weak, switch the machine off immediately and put your legs up (approx. 5-10 minutes).
- It is not advisable to apply any enriching creams or ointments to the skin beforehand, as this greatly increases electrode wear or else unpleasant current spikes may occur here.
Damage:
- If the machine is damaged, do not use it if you are in any doubt but rather contact your dealer or the customer service address indicated.
- Check the device at regular intervals for signs of wear or damage. If you find any such signs or if the device was used improperly, you must bring it to the manufacturer or dealer before it is used again.
- Switch off the device immediately if it is defective or if is not working properly.
- Do not, under any circumstances, attempt to open or repair the machine yourself! Only have repairs carried out by the customer service department or an authorized dealer. If these instructions are not heeded, the warranty becomes null and void.
- The manufacturer assumes no liability for damage caused through improper or wrong use.
Information on ESD (Electrostatic Discharge)
Please note that jacks marked with the ESD warning label must not be touched.
ESD protective measures:
- Do not touch plugs/jacks marked with the ESD warning label with fingers!
- Do not touch plugs/jacks marked with the ESD warning label with handheld tools!
Further explanations on the ESD warning label, as well as possible training courses and their contents, are available on request from the customer service department.
3. Current parameters
Electrical stimulation machines operate with the following current settings, which will alter the stimulation effect depending on the setting.
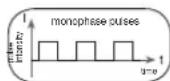
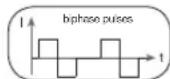
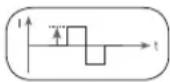
3.1 Pulse shape
This describes the time function of the excitation current whereby monophase pulse trains are differentiated from biphas. With monophase pulse trains, the current flows in one direction. With biphas pulses, the excitation current alternates its direction.
In the Digital EMS/TENS unit, there are only biphase pulse trains, as they reduce the strain on the muscle, leading to less muscle fatigue as well as safer application.
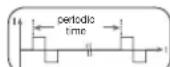
3.2 Pulse frequency
Frequency indicates the number of individual pulses per second, and is indicated in Hz (Hertz). It can be calculated by working out the inverse value of the periodic time. The respective frequency determines which types of muscle fibre preferably react. Slow-response fibres tend to react to frequencies up to 15Hz while fast-response fibres only respond over approx. 35Hz .
With pulses of approx. 45 - 70Hz there is permanent tension in the muscle combined with premature muscle fatigue. Higher pulse frequencies can therefore preferably be used for elasticity and maximum strength training.
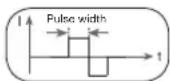
3.3 Pulse width
Pulse width is used to indicate the duration of an individual pulse in microseconds. Pulse width also determines the pene tration depth of the current whereby in general, the following applies: a greater muscle mass requires a greater pulse width.
3.4 Pulse intensity
Setting the degree of intensity is individually dependent on the subjective feeling of each individual user and is determined by a number of parameters such as application
site, skin circulation, skin thickness as well as quality of electrode contact. The actual setting should be effective but should never produce any unpleasant sensations such as pain at the site of application. While a slight tingling sensation indicates sufficient stimulation energy, any setting which leads to pain must be avoided.
With prolonged application, readjustment may be necessary due to time adjustment processes at the site of application.
3.5 Cycle-controlled pulse parameter variation
In many cases it is necessary to cover the entirety of tissue structures at the site of application by using several pulse parameters. With the Digital EMS/ TENS unit, this is done by the existing programmes automatically making a cyclical pulse parameter change. This also prevents individual muscle groups at the site of application from getting tired.
With the Digital EMS/TENS unit there are useful presettings for current para meters. During the application, however, you do have the possibility of changing pulse intensity at any time and, with individual programmes, you can also alter pulse frequency beforehand in order to implement the application which is the most comfortable or promises the most success for you.
ctrode contact.
4. Unit description
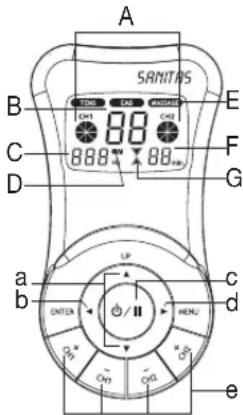
4.1 Description of components
Display (main menu):
A Pulse intensity
B Programme/cycle numbers
C Frequency (Hz)
D Low battery
E TENS/EMS/MASSAGE submenus
F Timer function (residual time indicator)
G Operating status display
Keys:
a UP and DOWN selection keys
b ENTER key
c ON/OFF key
d MENU key
e CH1+, CH1-, CH2+, CH2- keys
Accessories:
- 1x connection cable (with 2 separately controllable channels, recognisable by their difference in colour)
- 4x adhesive electrodes (45 x 45 mm)
- 1x belt clip
4.2 Key functions
Every time a key is pressed, this is acknowledged by a signal tone in order to ensure that any unintentional pressing of a key is detected. This signal tone cannot be switched off.
ON/OFF
(1) Hit briefly to switch on the machine. If the key is held down for 10 seconds when switching on, the unit automatically switches off again.
(2) Press once to interrupt stimulation treatment = pause mode.
(3) Hold ON/OFF key down (approx. 3 seconds) to switch off the machine.
and
(1) Select between (A) treatment programme, (B) frequency and (C) treatment time.
(2) The DOWN key is used to reduce pulse intensity for both channels during stimulation.
MENU
(1) Navigation between the submenus TENS, EMS and MASSAGE.
(2) Return to (A) programme selection window or (B) main menu.
ENTER
(1) Menu selection.
(2) To confirm a selection made with UP/ DOWN, apart from channel intensity.
CH1+, CH1-, CH2+, CH2-
Setting pulse intensity.
5. Start-up
- Remove the belt clip from the machine, if attached.
- Press on the battery cover at the back of the machine and push it to the side.
- Insert three AAA 1.5 V alkaline batteries. Make absolutely sure that you insert the batteries with the correct polarity as marked.
- Replace the battery cover carefully (Fig. 1).
- Attach the connecting cable to the electrodes (Fig. 2).
① Note: The electrodes have a clip fastener to ensure easy connection. - Insert the connecting cable connector into the socket at the back of the machine (Fig. 3).
- Do not pull, twist or make any sharp kinks in the cables (Fig. 4).

Fig.1
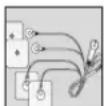
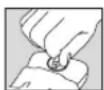
Fig. 2
Fig. 3
Fig. 4
6. Programme overview
6.1 Basic information
The Digital EMS/TENS unit has a total 50 programmes:
20 TENS programmes
20 EMS programmes
10 MASSAGE programmes
With all programmes, you can set the length of application and (for each of the two channels) pulse intensity separately.
Besides this, with TENS and EMS programmes 11-20, you can also change the pulse frequency of the individual cycles in order to adapt the stimulation effect to the structure of the site of application.
Cycles are the different sequences making up the programmes. They automatically run one after the other and increase the efficacy of stimulation on different types of muscle fibre and combat premature muscle fatigue.
You will find the standard stimulation parameter settings and information on placing the electrodes in the following programme charts for TENS, EMS and MASSAGE.
6.2 TENS programmes
| Prog.No. | Reasonable areas of applicationIndications | Possible electrode position | Cycle 1 Cycle 2 Cycle 3 Cycle 4 | |||||||||||||||
| Cycle 5 Cycle 6 Cycle 7 Cycle 8 | ||||||||||||||||||
| Width(μs) | Fre-quen-cy (Hz) | On Time (sec.) | Off Time (sec.) | Width(μs) | Fre-quen-cy (Hz) | On Time (sec.) | Off Time (sec.) | Width(μs) | Fre-quen-cy (Hz) | On Time (sec.) | Off Time (sec.) | Width(μs) | Fre-quen-cy (Hz) | On Time (sec.) | Off Time (sec.) | |||
| 1+11 | Neck pain, tension headache | 01, 02, 13 250 | 4 30 0 | 250 4 | 30 0 2 | 50 5 30 | 0 250 | 5 30 0 | ||||||||||
| 250 6 | 20 0 25 | 0 6 20 | 0 250 | 8 30 0 | 250 8 30 | 0 | ||||||||||||
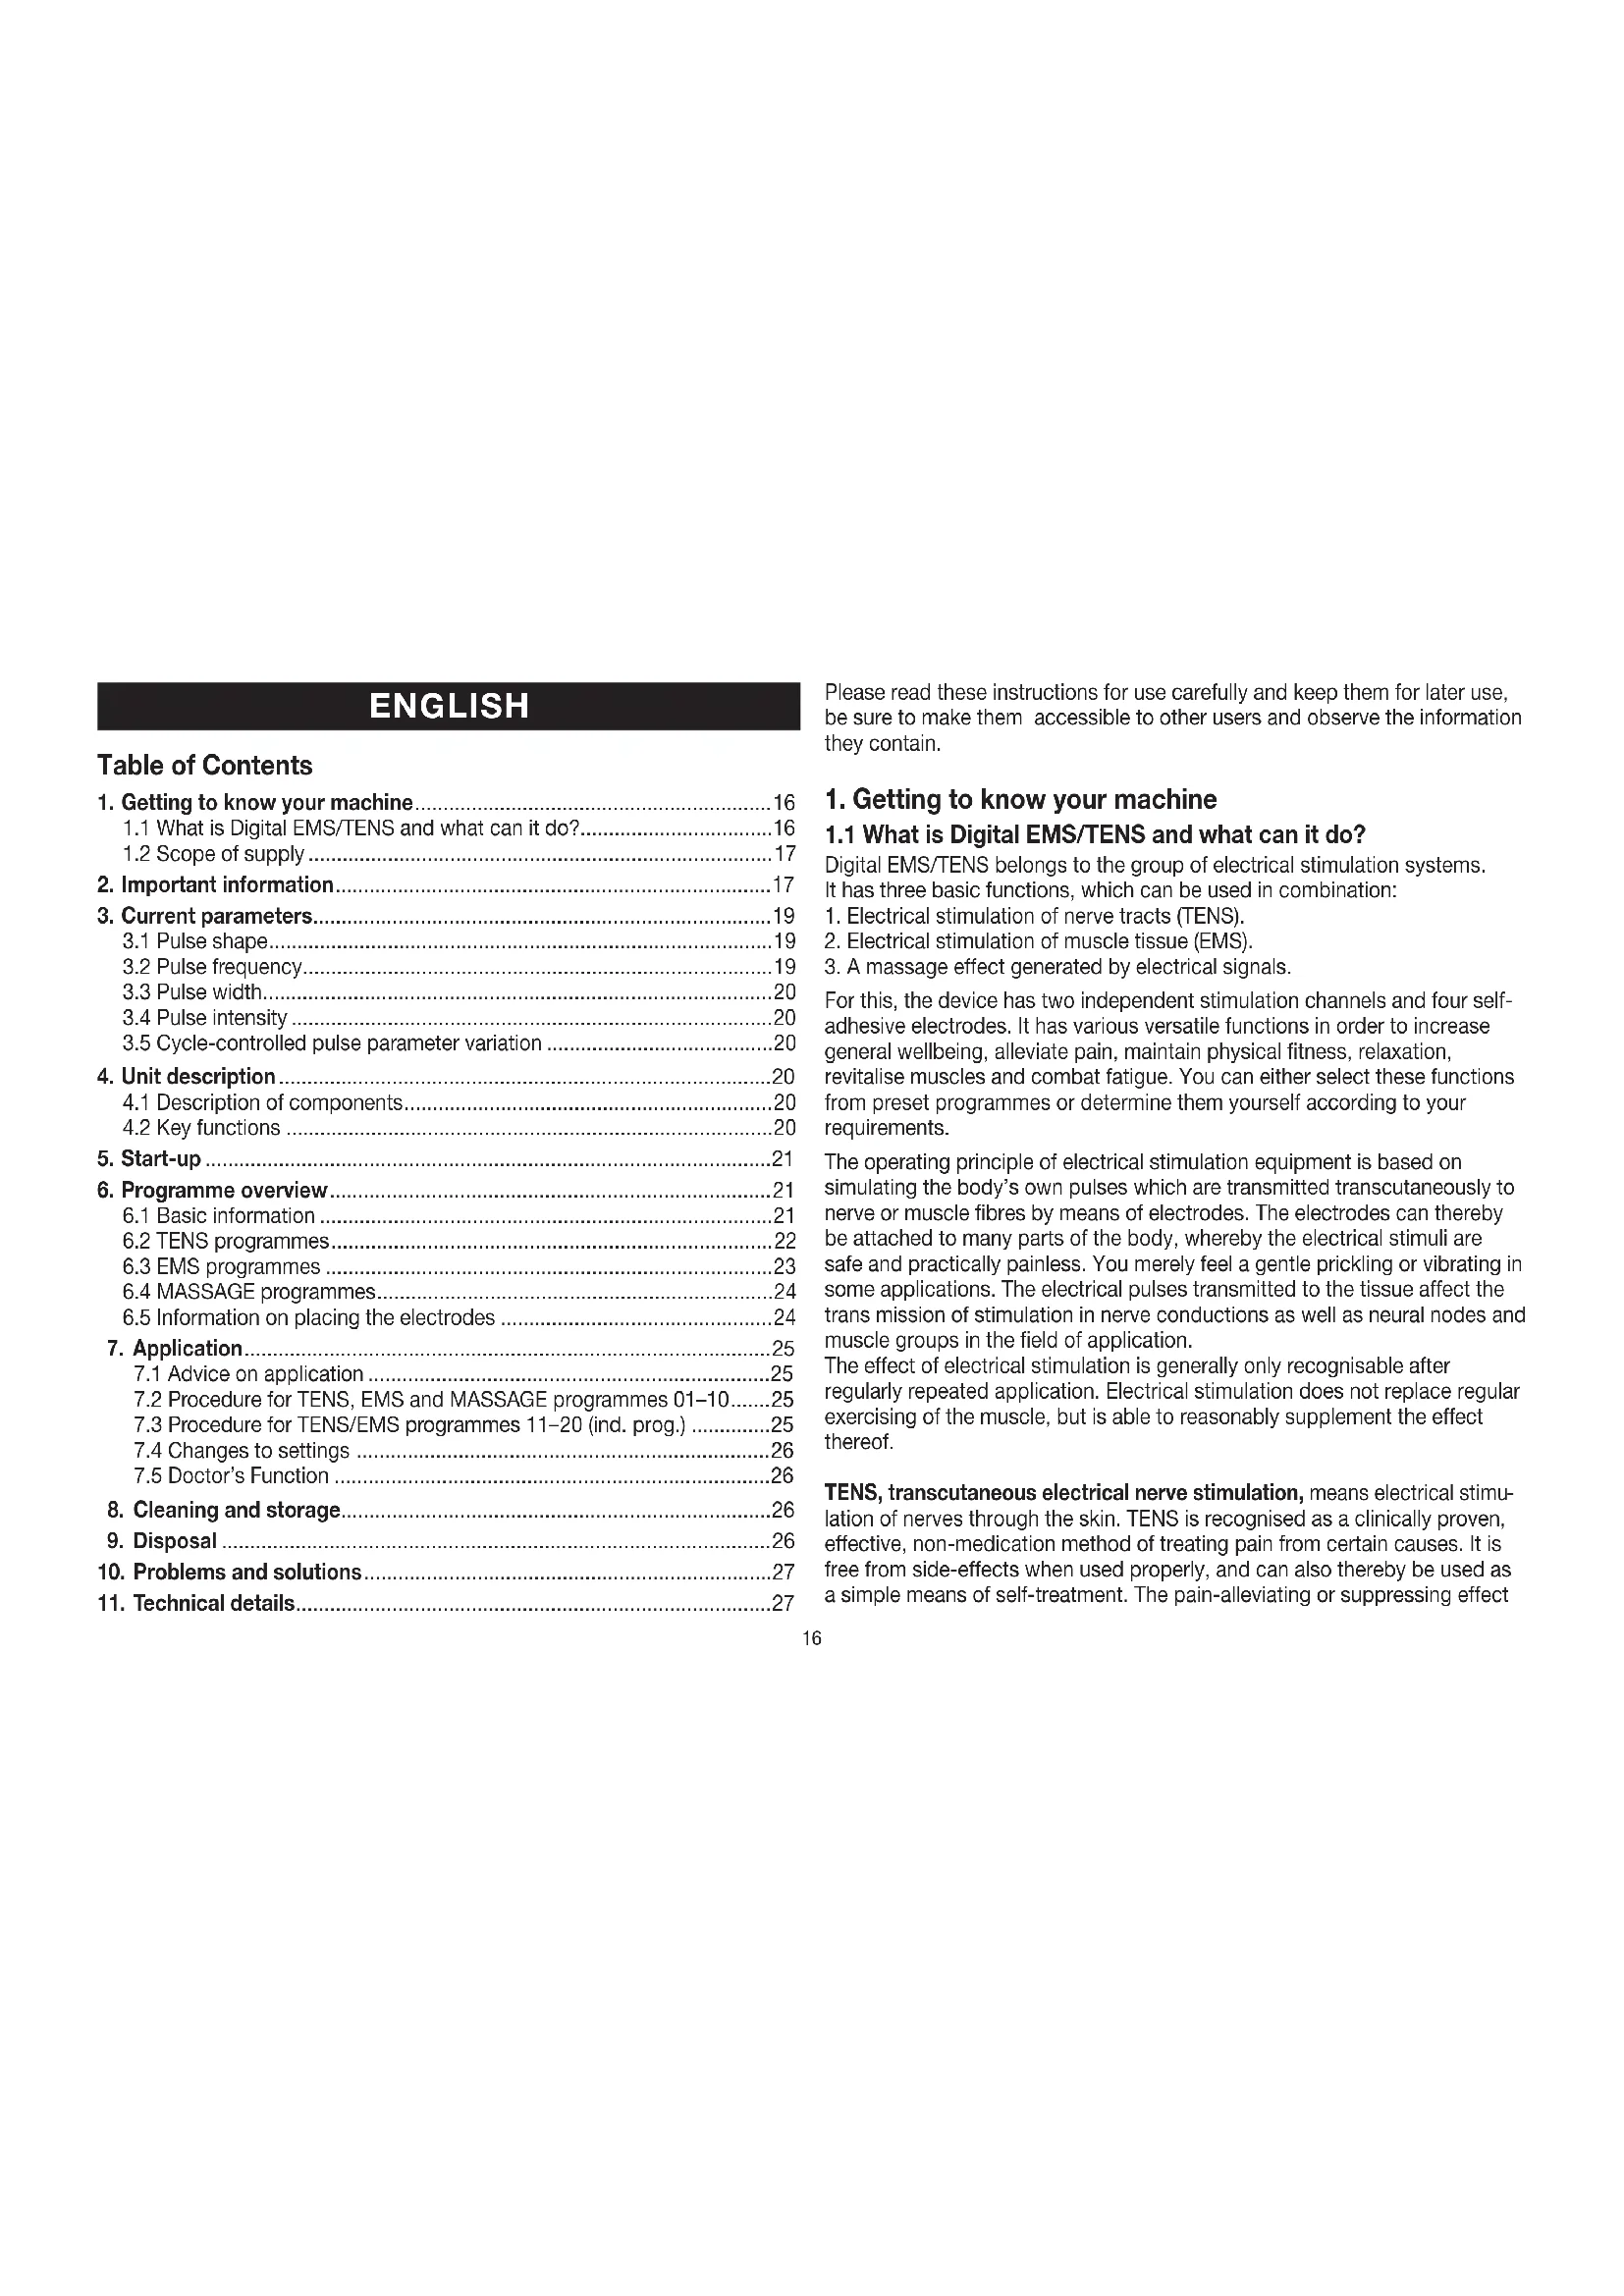
| 2+12 | Back pain 03, 04, 05, | 06, 15, 23 | 250 6 | 30 0 25 | 0 6 30 | 0 250 | 8 20 0 | 250 8 20 | 0 | |||||||||
| 250 10 | 20 0 2 | 50 10 | 20 0 | |||||||||||||||
| 3+13 | Shoulder pain 07, 14 250 | 2 10 0 250 4 | 8 0 250 | 6 6 0 | ||||||||||||||
| 4+14 | Pain as a result of rheumatoidarthritis | See note 250 | 60 20 | 0 250 | 70 20 0 | 250 80 | 30 0 2 | 50 80 3 | 0 | |||||||||
| 5+15 | Lumbar pain 22 250 80 | 20 0 250 80 20 | 0 250 | 75 4 0 | 250 10 | 20 0 | ||||||||||||
| 250 70 | 4 0 25 | 0 65 4 | 0 | |||||||||||||||
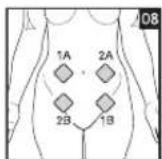
| 6+16 | Menstrual pain 08 250 4 | 30 0 250 45 | 30 0 250 | 55 3 | 0 250 | 60 30 | 0 | |||||||||||
| 7+17 | Pain programme I | See note | 250 | 4 | 30 | 0 | 250 | 4 | 20 | 0 | 250 | 6 | 30 | 0 | 250 | 6 | 20 | 0 |
| 250 8 | 30 0 25 | 0 8 20 | 0 250 | 10 30 0 | 250 10 | 20 0 | ||||||||||||
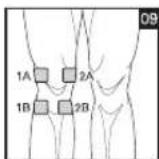
| 8+18 | Knee pain Ankle joint pain, capsularinjuries | 09, 10 250 40 | 5 0 250 | 6 10 | 0 250 | 50 5 0 | ||||||||||||
| 9+19(Burst) | Pain programme II | See note | 250 | 75 | 0,25 | 0,25 | 250 | 2 | 0,5 | 0 | ||||||||
| 10+20(Burst) | Pain programme III | See note | 250 | 100 | 0,25 | 0,25 | ||||||||||||
On-Time (sec.) = Cycle switch-on time in seconds (contraction) - Off-Time (sec.) = Cycle switch-off time in seconds (relaxation)
Note: Electrode position is supposed to surround the painful area. With painful muscle groups, the electrodes are grouped round the muscle affected. In case of joint pain, the joint on the front/rear side of the joint and, if electrode distances permit, on the right and left sides of the joint, should be surrounded with electrodes.
Minimal electrode distance should not be less than 5cm and not exceed 15cm . See figure no. 9 an 10 for knee and ankle joint.
Burst programmes are suitable for all sites which should be treated with an alternating signal pattern (to ensure minimum habituation).
6.3 EMS programmes
| Prog.No. | Reasonable areas of applicationIndications | Possible electrode position | Cycle 1 Cycle 2 Cycle 3 Cycle 4 | |||||||||||||||
| Cycle 5 Cycle 6 Cycle 7 Cycle 8 | ||||||||||||||||||
| Width(μs) | Fre-quen-cy (Hz) | On Time (sec.) | Off Time (sec.) | Width(μs) | Fre-quen-cy (Hz) | On Time (sec.) | Off Time (sec.) | Width(μs) | Fre-quen-cy (Hz) | On Time (sec.) | Off Time (sec.) | Width(μs) | Fre-quen-cy (Hz) | On Time (sec.) | Off Time (sec.) | |||
| 1+11 | Shoulder muscles 07, 14 250 | 30 5 1 250 10 | 15 1 250 50 50 5 1 | |||||||||||||||
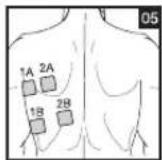
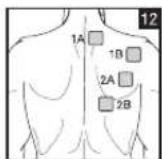
| 2+12 | Middle and lower trapezius muscle, lattisimus dorsi muscle, neck muscles | 01, 02, 03, 04, 05, 12, 15 | 250 4 | 30 1 250 4 20 | 1 250 | 5 30 1 | 250 5 | 20 1 | ||||||||||
| 250 6 | 30 1 250 6 20 | 1 | ||||||||||||||||
| 3+13 | Back musculature near spinal column, Prog. I | 03, 06, 22, 23 | 250 2 | 10 1 250 4 10 | 1 250 | 6 10 1 | ||||||||||||
| 4+14 | Front and back upper arm musculature (including biceps), front and back lower arm musculature | 16, 17, 18, 19 | 250 4 | 30 1 250 4 30 | 1 250 | 4 30 1 | 250 5 | 30 1 | ||||||||||
| 250 5 | 30 1 | |||||||||||||||||
| 5+15 | Straight and transverse abdominalmusculature | 11, 20, 21 250 | 6 15 | 1 250 8 | 15 1 250 | 15 1 | ||||||||||||
| 6+16 | Back musculature near spinal column, Prog. II | 03, 06, 22, 23 | 250 2 | 20 1 250 2 20 | 1 250 | 1 30 1 | 250 1 | 30 1 | ||||||||||
| 7+17 | Back musculature near spinal column, Prog. III | 03, 06, 22, 23 | 250 4 | 30 1 250 4 20 | 1 250 | 6 30 1 | 250 6 | 20 1 | ||||||||||
| 250 8 | 30 1 250 8 20 | 1 | ||||||||||||||||
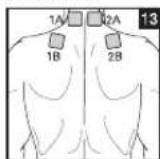
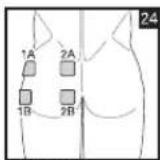
| 8+18 | Posterior musculature 24 250 | 20 5 1 250 6 5 | 1 250 | 30 5 1 | ||||||||||||||
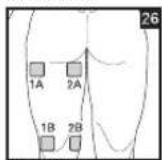
| 9+19 | Front and back upper thigh musculature | 25, 26 250 20 | 5 1 250 | 0 6 8 1 | 250 | 25 5 1 | ||||||||||||
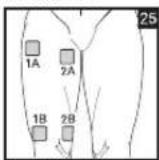
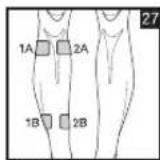
| 10+20 | Front and back lower thigh musculature | 27, 28 250 25 | 5 1 250 | 0 6 8 1 | 250 | 35 5 1 | ||||||||||||
On-Time (sec.) = Cycle switch-on time in seconds (contraction) - Off-Time (sec.) = Cycle switch-off time in seconds (relaxation)
6.4 MASSAGE programmes
| Prog. no. Massage form |
| 1 Tap and grasp massage |
| 2 Knead and grasp massage |
| 3 Tap massage |
| 4 Side of hand/pressing massage |
| 5 Side of hand/pressing massage |
| 6 Vibratory massage |
| 7 Tap massage (switch between electrodes) |
| 8 Massage jet (switch between electrodes) |
| 9 Pressure massage jet (switch between electrodes) |
| 10 Combination programme (switch between electrodes) |
Electrodes must be placed so that they surround the muscle segments in question. For optimal effect, electrode distance must not be greater than approx. 15cm
The electrodes should not be applied to the anterior wall of the thorax, i.e. never massage the left or right large pectoral muscle.
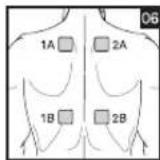
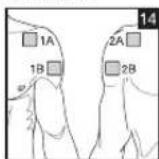
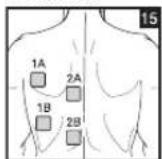
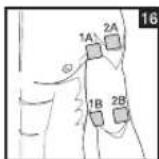
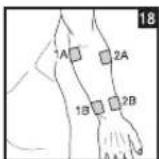
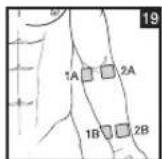
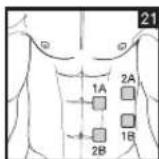
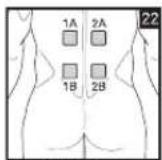
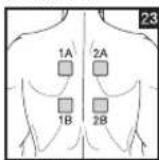
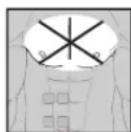
6.5 Information on placing the electrodes
For the desired success of any stimulation application, it is important that electrodes are placed sensibly.
We advise you to coordinate with your doctor regarding the best electrode positions for your intended field of application.
The electrode positions suggested inside the cover (Figs. 1-28) serve as a guide. The following applies when choosing electrode positions:
Electrode distance
The greater the electrode distance which is selected, the greater will be the volume of tissue that is stimulated. This applies to the area and the depth of the tissue volume. At the same time, however, the strength of tissue stimulation decreases as the electrode distance becomes greater, which means that, if a greater electrode distance is chosen, a greater volume is stimulated, but stimulation is weaker. To increase stimulation, pulse intensity must then be increased.
The following guideline holds when selecting electrode distances:
- most reasonable distance: approx. 5 -15 cm,
below 5cm it is mainly surface structures which are strongly stimulated,
- over 15cm , large-area and deep structures are stimulated very weakly.
Electrode relationship to muscle fibre orientation
Choice of current flow direction must be adapted to the muscle fibre orientation according to the desired muscle layer. If surface muscles are to be reached, the electrodes must be placed parallel to the fibre orientation (p. 2, fig. 16; 1A-1B/2A-2B). If deep tissue layers are to be reached, the electrodes must be placed crosswise to the fibre orientation (p. 2, fig. 16; 1A-2A/1B-2B). The latter arrangement can, for example, be achieved via the cross electrode arrangement, e.g. p. 2, fig. 16; 1A-2B/2A-1B.
Note the colour-codes of the cables and the channels. The white cable belongs to channel CH1 and the grey cable to channel CH2.
1 In the treatment of pain (TENS) using the Digital EMS/TENS machine with its 2 separately controllable channels and in each case 2 adhesive electrodes, it is advisable to either position the electrodes of one channel so that the pain spot lies between the electrodes or else you position one electrode directly on the pain spot and the other at least 2 - 3cm away.
The electrodes of the second channel can be used to treat other pain spots simultaneously or else, however, together with the electrodes of the first channel, to surround the pain area (opposite). A cross arrangement is again advisable here.
① Massage function tip: always use all 4 electrodes to ensure optimal treatment.
① In order to extend the durability of the electrodes, use them on clean skin which is as free as possible from hair and grease. If necessary, clean the skin with water before application and remove the hair.
① If an electrode becomes detached during the application, the pulse intensity of both channels goes to the lowest setting. Press the ON/OFF key to enter pause mode, reposition the electrode and continue application by pressing the ON/OFF key again and setting the required pulse intensity.
7. Application
7.1 Advice on application
- If the machine is not used within 3 minutes, it switches off automatically (automatic switch-off function). When it is switched on again, the LCD main menu screen appears, with the last used submenu flashing.
- If an admissible key is pressed, there is one short beep. If an inadmissible key is pressed, there are two short beeps.
7.2 Procedure for TENS, EMS and MASSAGE programmes 01-10 (quick start)
- From the programme charts, select a programme that is suitable for your purpose.
- Place the electrodes in the area selected and connect these to the machine. The corresponding positioning suggestions may help you here.
- Press the ON/OFF key in order to switch on the machine.
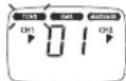
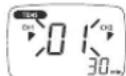
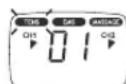
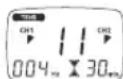
- Press MENU and navigate through the sub-menus (TENS/EMS/MASSAGE) and confirm your selection with ENTER (Fig. 1, example of TENS display).
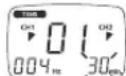
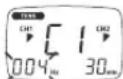
- Using the UP/DOWN keys, select the programme you want and confirm with ENTER (Fig. 2, example of display for No. 1 TENS programme).
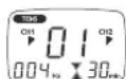
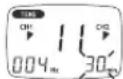
- Using the UP/DOWN keys, select the total treatment time and confirm with ENTER (Fig. 3, example of 30-minute treatment duration). The machine is in wait status (Fig. 4).
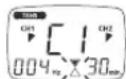
- Press ON/OFF to start the stimulation treatment. The operation status display starts to change (Fig. 5).
- Select the pulse intensity which is the most comfortable for you by pressing the key CH 1+/CH 2+. The pulse intensity display adapts accordingly.

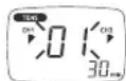
Fig. 2
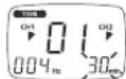
Fig. 3
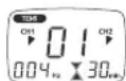
Fig.4
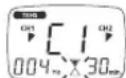
Fig.5
7.3 Procedure for TENS/EMS programmes 11 to 20 (individual programmes)
Programmes 11 to 20 are preset programmes which you can also individualise. Here you can set pulse frequency.
- From the programme charts, select a programme that is suitable for your purpose.
- Place the electrodes in the area selected and connect these to the machine. The corresponding positioning suggestions may help you here.
- Press the ON/OFF key in order to switch on the machine.
- Press MENU and navigate through the sub-menus (TENS/EMS/MASSAGE) and confirm your selection with ENTER (Fig. 1, example of TENS display).
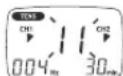
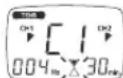
- Using the UP/DOWN keys, select the programme you want and confirm with ENTER (Fig. 2, example of display for No. 11 TENS programme).
- Using the UP/DOWN keys, select the frequency you want for Cycle 1 (Hz) and confirm with ENTER (Fig. 3). Repeat this process for all subsequent cycles.
- To terminate frequency setting, set the frequency (Hz) after the cycle last required "--0" and press ENTER. All frequency settings of subsequent cycles are then automatically set at "0" and thus not taken into account.
Tip: Hold down the ENTER key for 2 seconds in order to skip frequency settings and access 'treatment time setting'. In the event that you need all 8 cycles, you can also press ENTER for 2 seconds to terminate selection of frequency settings.
- Using the UP/DOWN keys, select the desired treatment time and confirm with ENTER (Fig. 4, example of 30-minute treatment duration).
The machine is in wait status (Fig. 5). - Press ON/OFF to start the stimulation treatment. The operation status display starts to flash (Fig. 6).

Fig. 1
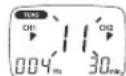
Fig.2
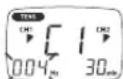
Fig. 3
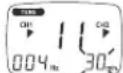
Fig. 4
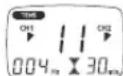
Fig.5
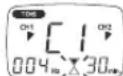
Fig. 6
- Select the pulse intensity which is the most comfortable for you by pressing the key CH 1+/CH 2+.
The pulse intensity display adapts accordingly.
① Note: Your individualised programme settings are stored and automatically retrieved when you select it next.
7.4 Changes to the settings
Changing intensity (during application)
- CH1+/- and CH2+/-: Changing the intensity for each channel.
- DOWN key : the intensity of both channels is reduced.
Interrupting stimulation
Press the ON/OFF button.
If you press it again, the application is resumed.
Switching off a complete channel
Press the CH- key until the channel reaches the lowest intensity, then hold the key depressed until the channel no longer appears in the display.
Hold down the corresponding key CH + to reactivate the channel.
Changing application (completely or single parameters)
- ON/OFF: to interrupt stimulation.
- MENU: back to program selection window or main menu.
- Set required parameters. Confirm with ENTER. Press ON/OFF to continue application.
7.5 Doctor's Function
Doctor's Function is a specific setting to allow you to call up your specific personal programme even more easily.
Your individual programme setting is immediately retrieved in wait status when you switch on and is activated by simply pressing the ON/OFF key. Settings for this individual programme may, for example, be on the advice of your doctor.
With the Doctor's Function, only pulse intensity can be changed during stimulation treatment. All other parameters and programmes of the Digital EMS/TENS are blocked in this case and cannot be modified or called up.
Setting the Doctor's Function
- Select your programme and appropriate settings as described under 7.2 or 7.3.
- Before you activate the programme by pressing the ON/OFF key, hold ON/OFF and CH 2+ keys down simultaneously for approximately 5 seconds. Storage in Doctor's Function is confirmed by a long signal tone.
Cancelling Doctor's Function
To clear the device again and access other programmes, hold down the two keys ON/OFF and CH 2+ once again for approximately 5 seconds (not possible during stimulation). Cancelling of the Doctor's Function is confirmed by a long signal tone.
8. Cleaning and storage
Adhesive electrodes
- In order to ensure that the electrodes adhere for as long as possible, they should be cleaned carefully with a damp, lint-free cloth.
After use, stick the electrodes onto the backing film.
Cleaning the unit
- Remove the batteries from the device every time you clean.
- Clean the unit after use with a soft, slightly moistened cloth. In case of more extreme soiling you can also moisten the cloth with mild soapy water.
- Ensure that no water penetrates into the machine. If this should ever happen, only use the machine again once it is completely dry.
- Do not use any chemical cleaners or abrasive agents for cleaning.
Storage
- Remove the batteries from the unit if you are not going to use it for a longer period. Leaking batteries can damage the unit.
- Do not make any sharp kinks in the connecting leads or electrodes.
- Detach the connecting cable from the electrodes.
After use, stick the electrodes onto the backing film. - Store the machine in a cool, well-ventilated place.
- Never place any heavy objects on the machine.
9. Disposal
Used, fully discharged batteries must be disposed of in a specially labeled collection container, at toxic waste collection points or through an electrical retailer. You are under legal obligation to dispose of batteries correctly.
Note: You will find these markings on batteries containing harmful substances: Pb = battery containing lead, Cd = battery containing cadmium, Hg = battery containing mercury.

Please dispose of the device in accordance with the directive 2002/96/ EC - WEEE (Waste Electrical and Electronic Equipment). If you have any queries, please refer to the local authorities responsible for waste disposal.

10. Problems and solutions
The machine does not switch on when the ON/OFF button is pressed. What should I do?
(1) Make sure that the batteries have been inserted correctly and have contact.
(2) Change the batteries if necessary.
(3) Contact customer service.
The electrodes are detaching themselves from the body. What should I do?
(1) Clean the adhesive surface of the electrodes with a damp, lint-free cloth. Then let them dry in the air and attach them again. Should the electrodes still not adhere firmly, they must be replaced.
(2) Before each application, clean the skin, avoiding using any skin cream or oils before treatment. Shaving can increase adhesion of the electrodes.
The machine is giving out abnormal signal tones during treatment. What should I do?
(1) Look at the display. Is any channel flashing? Interrupt the programme by pressing the ON/OFF button. Make sure that the connecting leads are properly connected to the electrodes. Make sure that there is a firm contact between the electrodes and the treatment area.
(2) Make sure that the plug of the connecting lead is firmly connected to the machine.
(3) If the signal tones do not stop and the channel is flashing, change the connecting cable.
(4) The display shows a flashing battery signal. Renew the batteries.
There is no noticeable stimulation. What should I do?
(1) If a warning signal sounds, go through the steps described above.
(2) Press the ON/OFF key to start the programme again.
(3) Check that the electrodes are positioned properly and make sure that the adhesive electrodes are not overlapping.
(4) Increase pulse intensity in stages.
(5) The batteries are almost empty. Replace these.
You are aware that the electrodes feel uncomfortable. What should I do?
(1) The electrodes are badly positioned. Check positioning and if necessary reposition the electrodes.
(2) The electrodes are worn. Due to the fact that current distribution can no longer be guaranteed evenly over the entire surface, these may lead to skin irritation. You must therefore replace these.
The skin in the treatment area becomes red. What should I do?
Stop treatment immediately and wait until the skin has returned to normal. If any redness beneath the electrode soon disappears, this is not dangerous and is due to the increased circulation which has been stimulated locally. If, however, the skin irritation remains and there is possibly itching or inflammation, please consult your doctor before further use. It may possibly be caused by an allergy to the adhesive surface.
The belt clip is not secure. What should I do?
If the clip is fastened to the belt and only then connected to the machine, there is not optimal hold. You should therefore take the machine in your hand. Position the belt clip on the back of the machine. You will notice the correct position of the clip when you hear it click into position. Now secure the machine with belt clip on the belt again.
11. Technical details
Name and model SEM 40
Initial curve shape biphas square-wave pulse
Pulseduration40-250us
Pulse frequency 1-120 Hz
Output voltage max. 90 Vpp (at 500 Ohm)
Output current max. 180 mApp (at 500 Ohm)
Power supply 3x AAA batteries
Treatment time adjustable from 5 to 90 minutes
Intensity adjustable from 0 to 15
Operating conditions 10^ - 40^ (50^ - 104^) with a relative humidity of 30 - 85%
Storageconditions-10°C-50°C(14°F-122°F)with arelativelhumidity of 10-95%
Dimensions 130 × 68 × 29 ~mm (incl. belt clip)
Weight 105 g (without batteries), 140 g (incl. belt clip and batteries)
Explanation of symbols Application part type BF
Caution! Read the instructions for Use.

Note: If the machine is not used according to these specifications, perfect functioning is not guaranteed.
We reserve the right to make any technical alterations that are necessary in order to improve and develop the product further.
This unit is in line with European Standards EN60601-1, EN60601-1-2 and EN60601-2-10 and is subject to particular precautions with regard to electromagnetic compatibility (EMC). Please note that portable and mobile HF communication systems may interfere with this unit. For more details, please contact customer service at the address indicated.
The machine meets the requirements of the European Medical Products Directive 93/42/EC and the German Medical Products Act. In accordance with the Operators' Ordinance on Medical Products, regular measurement precision controls must be carried out if the machine is used for commercial or economic purposes. Even in the case of private use, we recommend checking measurement precision at two-yearly intervals at the manufacturers.
FRANÇAIS
Sommaire
8x electrodes auto-adhesives (45 x 45 mm), ref. n° 661.22
4x electrodes auto-adhesives (50 x 100 mm), ref. n° 661.21
2. Remarques importantes
20 programmes TENS
20 programmes EMS
10 programmes MASSAGE
7.5 Doctor's Function
7.5 Doctor's Function
KakmbpyuOmy npMmHeHMO OTHOCATc:
- TpeHnpoBkaMbIuDJIIOBbIeHnBbHOCIMBOCTN/
TpEHPOBKaMbIuIyNoIePckKynKpKeIeHnO npPeIeHbIXMbIuIyIpynnMbIuIyTO6bI DOCTHy XeNaemBix N3MeHEn B npOnOpUx TeJa.
KpaccablaIIOUeMyIpIMHeHnOTHOCYTCA:
- penakcaIyMbIuДIy yCTpaHEnIy pactxKeHn I 3aUeMneHn MbIu
-
yIyUHeHne npRyBJIeHnX MbIeHNoY cTaNIOCTN
-
yckopenepeheepaMbluocne6bIbwoMbIeHnHarpy3n (HaNPmep, noce mapafohckoro 6era).
Kpome toro, uippoB np6op EMS/TENS 6laorapb BCTpoehHouTexhoJIMMaccxJaet BO3MOXHOCTb C NOMOJIbIO pnp6NIKHeHNO IO BOCPIAHTMOI NeiCTBNO KpeaHbHOMy Maccxky npOrpaMMbYMeHbTaPactXeHn I 3aUeMNEHmMbUc 60pOTBCrC RJIeHNMI YCTALOCTN.
Ha ochoBaHm peKoMeHdaI m noNo3IuHnHpoBaHmIO n TabmI nporpaMM, npBBeEHbIX B daHHoN IHCTpykUIM, Bbl MoKeTe 6bICTPO n IpOcTO ONpeDenTb HacTpoKy npB6opA Dn rcooBTcTBkyIOero npMHeHnR (B 3aBNCIMOCr OT qactn Teia) n dI rcooBTcTBkyIOe IeMCTBn.
Blaqapnpa3dnebno perynpemybim kanaanam, uippoboi np6op EMS/ TENS oecneuBaet BO3MOXHOCTb perynpOBKN INTEHCNBHOCTN IMTYLCOB He3aBcIMo DpyOT dpyra Ha DBe Yactn TeNa, HApIMep, YTObI OXBATb TENo C 06ex CTOPOHIN PAHOMEPHO CTMMyIPOBaTb 6Obnue yHaCTKn TKaHei.
Kpome toro, HndnBnDyabHna perynnpOBKa nHTeCNBHOCTKaJdoro KaHaHa daet Bam Bo3MOxHOCTb ONDOBpeMeHHoro npIMHeHHra IpNbopa B DByx pa3mHybx Yactx Ta, 6bnorapA yemy DoCTMaTcRA 3KOHOMBApeMeHHIO C nocneobateBbHM npIMHeHHEM.
1.2 06bEM nocTabKn
-1цфрови пьбор EMS/TENS(Вкноча зашиелку дя ремн)
-1coeINHITbHbI Ka6eB
-4camokkneouxxraeKtpo45x45MM)
- 36aTaapeKn Tmna AAA
- DAnHn HNCTpyKuIy No npIMeHeHHO
DOnoJIHnTeIbHO nokynaemble yactn
8camokkoleuoxcraJektpoob (45x45 MM),apT.No 661.22
4camoklenouxcxra 3eKtpoda (50 x 100 MM), apT. Ne 661.21
2.BaKhble yka3aHn
PpimmeHne np6opae He 3aMeHReBpaue6bHex KOHCyIbTaucn I neeHna.
No3tomy npn IIO6bIX Tnnax 6OneI nn 6Oone3He Bcerda npedBaPntelho
npokocnyIbTpyTeCb C BpaOH!
BHIMAHHEI
Bo n36eXaHHe BpeDa 3dOpOBbIO HAcToTEnbHO He peKOMeHyEtCn PnIMeHrB cnPpOBOI np6op EMS/TENS B CneDyUOnx CnyAax:
- pπn HmπaHntpoBaHHbIX 3JIeKtpoPnp6opax (HaNPIMep, CTMMyIyTOp PMTma cepua)
- PnHAnuM MeTaNueCKNX MMnNaHTaTOB
- IInIIOEIN, INCNOB3yIOUHX INHCYJINHOBBIE HACOCBI
- PnBbICOKoTEmNepaType (HapPmep, CbIe 39°C)
- PnIN N3BECTbIX INN OCTbIX HApUWeHIX pNTMa cepDua IN DpyrNX HApUWeHIX B036yXKeHIN INPOBedeHIN MMNyIbCOB B CepDue
- PnPnpnaqkax (Hapnpimep, 3nnJenncm)
BOBpemBepeMeHHOCTN - Pn paKobbix 3a6oJIeBaHmJx
Pocne Oepaui, npKOTOpbix ycHHeCOKpaueHHe Mblu MoKeT MeJAtb PPOeCCy Bb3DopOBHeHn
3anpeaaetcnpimmeHne np60paB6n3n cepua.
CTMmnypkyoune 3nEeTpoDbl 3anpeaetcYctHaBnBaTb B KAKNX-1I60 TOKxk AnepEny ChtN rpyHoi KNETKN (OprpanuHHeHn pe6paMn I rpyHnO), B OOCbeHNocTn Ha oBOnX 6OJIbIXrpyNbIXMbIXaX.3Decb OH MOKeT NOBIIaTb ONaCHOCTb MEPaHnA XeJyDoQKOB cepDa n BB3BaTb OCTaHOBYC cepDa
- Ha KOTX Yepena, B Obnactn pTa, TNOTKN NINN TOpTaH
B O6nactuwen /coHHbIX apTeepn
B0bnaCTnNOIOBbIXOPraHOB - pnpoctpbix nI npohnuececknx 3a6oBaeBaHnIX Koxn (NOpeXeHnHn IN BOCnAeHn), (HaNPmep, np6oBne3HeHHbx IN IN 6e36oBne3HeHHbx BOCnAeHnIX, NOKpaCHeHnIX, KoxhOoi Cblnn (HaNPmep, aIJIepm), OxKorax, yDapax, OTeKAX, Ha OTKpbTbIX IN 3axNBAUux paHax, NaIpamax nocne onepaun, HaxOJauxxCB B IpOcece 3axNBJEHn)
- PnB BbICOKO BJIaXHOCTH BO3dyxa, HApPIMep, B BaHHbIX KOMHatax IIN PnI PnIPMe BAHHbI INJ dyJa.
He nonb3oBaTbCnocne ynoTpe6nHnAnkOron - PnO OHOBpeMeHHOM PnCOeHHeHm K BbICOKoAcTOTHOMxNpyprHeCKOMy annapaty

Ipeep npimmeHem np60pa npokocybltpuyTecb leaumBpavomnp
octpbix 3aboeBaHnX, BOCOBEHNOCTn PnIN NOO3peHNm HANHm apTePnaBHOI INePTOHN, HApUeEHNIX CBeptbIBaHnKPOBN, CKIOHNOCTN K TpOM6oM0lIM, aTAKKe npi 3JOKaueCTBeHHbIX HOBOO6pa3OBAHnX
TIO6bIXKOxKbIX3a0BaeHnX
HeBbIcHcHHbIX XPOHmuecknX 60NE3HeHHbIX COCTOHRnX, He3aBcIMo OT YaCTn Tena
- DnaabeTe
- HApUeHnXyBCTBnTEJIbHOCTn C NOHNKeHHO 60JeBOY CyBCTBnTEJIbHOCTbO (Haipmep, npHapUeHnX OMeHa BEIectB)
- ODHOBpeMeHHIOPOBOIDMbIX MeDmUHckNX JIeEHnX
B03HnKaIOUxN pN CTmMyJLcM JkaIIO6ax
HENCHe3aOuXpaaDpaKeHnXKoXnBCBraN C DInTeJIbHOCTMMyIaUNC paCNOJOKeHnEM 3NeKTPOOB B ODHOM U TOM Ke MeMeCTe
BHIMMAHIVE!
IcnoIb3yIte zIpOBoBOn np6Op EMS/TENS nckHouHTenbHO:
-ⅡIJIHOJei.
Buejx, nKOTopbix OH 6bn pa3pa6oTaH, nToIbKO cnoC06OM, OINCAHHbIM B daHHOH INCTpykUIN IIO pImMeHEHIO. IIIO6OE HENpABINbHOE INONb3OBAHHe MOXET 6bITb ONaCHbIM.
- HapuyxHOrI npMHeHn.
C BXOJUIMM B Obem NOCTABK M I DNOJINHTeBHO KYNJIENHbIMN OPUNHnAIBHBIMN PINHAJIeXHOCTaMM, B NPOTNBHOM CInyae TepaKOT CBOHO CNIy PNITRAHIN NO PnpoOCTaBHeHne rapaTmN.
MEPbI INPEOCTOPOXHOCTN:
BceIa CHMMAte 3JIeKTPoDbIC KOKn, He CNIuKOM CUNbHO TnHr 3a Hnx, YTO6bl B peKnx CUYaA XOHeHyCBCTBnTbHO KOKn IpeD0TBPaTmTb ee NOBpeJxHn.
He np6knaKe Tnp6op K nctOHHKam TeIa Hne nIOJIb3yTe erO B6n3n (~1 M) KOPOKO- INMKNPOBONHOBX np6obop (HapnIMep,MOBILbHbIX TEeEOHOB),T.K. 3TO MOKET PNPBOIDb K HEPNIAITbIM cKaHcAM TOKA.
He noDBepraIte npBOp DeICTBIO npAMybIX COJIHbIX LyueN INN BICOKNX TEMpepaTyp.
3aunuainepnupopotnbinnrpaanBnarn.HnBkoemcnyaehe norpykaite np60p BBOUYINDpytne KNDKOCTN.
-ПиборпохдлгпрсогьногИСповьаня.
-
Ito rHHeHueeCKnmpuHnAM 3neKtpoamM MoKeT Nl630BaTbCra TOnbKO OndH HeIOBek.
Ecnn npnbop He fynkmoHpye TdoJXhBIM o6pa3OM, no8BnIOTcR HeD0MaHn nn 60n, He3aMeNtTeNbHO npePBte NcNoB3ObaHne.
-ДяСНТИУМСЕЦЕнЯЗЛЕКТPOДОПпeДВAPITeHbO OTKIQUHTb ПиборИN COOTBETCTBYUOIM KAHAN,чTOБIпeDOTBpATmTb HHexeJATEbHyO CTMMyJIaIIO.
He BINOUMMeHnIe 3NeKTPoBb (HaNPmep, Obpe3aIux). 3To BeET K NOBbUeHHO H IIOTHOCTN TOKA INMOXET 6bITb ONaCHbIM (MAKC. peKOMEHyEMoe BbIXOHoe 3NaueHne IIN 3NeKTPoBD: 9 mA/cm², 3ΦΦeKTHBnAra TIOTHOCb TOKCA CbIiue 2 mA/cm² Tpe6yEm NOBbUeHHO BHIMATEJIbHOCTN).
He npimehrBoBpemcHb,BOXdHnABTOMObIaNIIINPiOnOHOBpeMeHHOM ynpabneHNMaunHAMmIO6OpDobAHm.
He npimehnpi npi IIObix pa6oTax, pni KOTopbIX Hnpecka3yemaar peakuHa nnpimep, ycuneneHHoe cokpaueHmeMbIu, HeCMOTpHa Hm3Kyo INTEHCINBHOCTb) MoKet 6bIT OnaCHOI.
CneIe 3a TEm, YTO6bI BO BPEMr CTmMyJnM MetaJIINHeCKMe OBeKtbl, HApIMep, npAeknn pemHne mInu cenoKn, He MOrJIN BoITN B KOHTAK C 3NeKtpoamn. Ecn y BacB 30NE npIMeHEnH NMEOTcY kPaawHnN ININ PnPCnHr (HApIMep, Bynke), To neped nCnOls3OBaHnE npi6opa nX Heo6xOmo CHrTb, T. K. B IpOTNBOM Cnyae MOKHO NOyUHTb TOHeHhle OXGN.
Bo 36eKaHHe Bo3MOxHbIX onaCHOcte XpaHnTe npu6Op B HeoCTynHom dIra deTe MeCTe.
He npenytbaiye Kaebin 3neKTpoDB KoHTaKbIc HayuHkAmu nn DpyTMM np6opamn He coeHNyTe 3neKTPODb C pyTMM np6opamn.
He nCIOIb3yIte 3OT np6Op OJHOBpeMeHHO C npYIMn pnp6opamK, KOToPbIe nepedaIOT Tety 3NEKTpuueckme MMnyIbcbI.
He nCnOJIb3yIte npI6Op B6JIm3N JERKBOBcJIaMeHraUxxCBeIeCTB,ra3OBIMB3pbIBaTbIX BeIeCTB.
He nCnoJIb3yIte aKKMyJnTOpb; BcERda nCnoJIb3yIte 6aTapeKu OdnHakOBOrTo Tuna.
IcnoJb3yIte np6opB nepBbIe MNHyTbI B noJIOxHn JExa nn CnIg, YTO6bl B peKnx cnyaX Ba3OBaIbHOI peakUIN (YyBCTBO CnaBOCTN) He NOBeprATbcn 3NIuHHe ONaCHOCTN NOnyehn TpaBM. PnIOABJIeHNyBCTa CnaBOCTn He3aMeDINTeHbO OTKIOHITe np6op INoDHmHTe HOrn (Pn6bnNTeHbHO Ha 5-10 MNHyT). -
PnpBapnteHbna Opa6oTKa Koxn KInpHbIMKpeMaMn He pekomeHyTeTc, T. K. 3TO BeET K NOBbUeHHOMy N3HOcy 3NeKtpOIOB INMOKET TaKKe npNBOuNTb K HEPnPnTHbIM CkAChkAM TOKa.
Повжdenя
Bcnyae comhen npn nobpejdenx npnbopa He nCnIb3yTeero I o6paTntecb Toprobyo opraHMaZIO, npdaBwU npnbop, NIO NO yKa3aHHOMy aDpccy cnykbl texhneckoro oecneehn.
- PnpnoDnueck npOBepaIte np60hp OTCyTCTBne np3HakOB nobpejdeHn mnn 3nOca. nPn o6hApyeHm noo6bIx np3HaKOB nB Cnyae HnpabNbo Horocnol3OBAHn np60pa neped noBtOpHbIM nCIOJIb3OBAHm ero Heo6xoJMO OTnpabInb N3rTOBUTeHn nn B TropobyO opraHn3aHIO.
He3aMeIITbHO BbKJIIOHTe pINbOp, cIn OH HeNcPiBaH INI IMeHTc HENoIaIKn B paOte.
HnB KOEM Cnyae He NbItaTcB CamOCToTeNb HO OTKpbTy B/INN OTpeMOHTnpOBaT np6op. DObepraTe BbINOJIrTa peMOHT TOnIbKO CnyjXBe TEXHueCKOrO 0ececneHn nn ABTopu3nPOBaHHbIM TOPROBbIM opraHn3aunm. HecobNoHeH eBET K notepe rapaHTm.
V3rTOBNTeIbHe HecET OTBeCTBENHOCTN 3a yuepe6,BblBaHHbI HeKBaJIINΦUHpOBaHHbIM JIN HEnPabUHbIM IcNoJIb3OBAHnEM.
HΦopmaun6o3CP(3eKtpocTaTuYeckompa3pe)
YyTtTe, YTO 3aPeeaaTcR npKacatbC K THe3dAm, KOToPbIe 06o3HaueHbI npdeynpejdaokuie TaBnUkO ,3CP".
Mepbno 3aunteOT,3CP
He npikacatbca naIbauM K ITeKepaM/He3aM, KOtOpBle 06o3HaueHbnpedynpejckdaioe TaBmUkoi ,3CP
He npikacatbca HaxoJHMMICBpykax INCTpymTaMKNITEKepaM/THe3dAM, KOtOpBe 0603aueHbI npdynpexdaoue TaMukoi ,3CP"!
Дальншпс noясен,在 kacaioшиce npdynpexkaioшт tabnky,“3CP”,a taKke nepehenb BO3MOxHbIX obyaIOxN KycPCOB IN IX COePxAHne MOXHO nOlyHTb NO 3anpoCy B cIyX6Be texHnueckoro ObeCnehenia.
3. Napametpbi Toka
3NeKTPoCTMMyJrTObpIpaOaTIO CcNdeUHMMHACToPOMKaMn TOKa,KOTOpBIE, B 3aBNCIMOCNT O pEpyNIPOBKM,OTKa3bIBaIOT pa3INuHHeJeCTBnE Ha 3ΦΦKT CTMMyJIaUM:
3.1ΦopmaHmnybcOB
OHaOncBbAeT FyHKUIO BpEmEH TOKa BO36yKeHn.
PnI 3OM pa3NluaHOT MOHO-N DByxFpa3HbIE MMpyCbHbE TOKn.
PnI MOHOa3HbIX MMpybcax TOK TcET B ODHOM HApPaJIeHn,
PnI DByxFpa3HbIX-TOK BO36yKeHn MeHReT CBoE HaPaJIeHne.
B UΦpOboBIX Pnp6opax EMS/TENS pImMeHrOToTOLko
DByXFa3HbIX MMpyCbHbE ToK T.K.OHI pa3rpyKaHOT MblUcbl,
BeYt K MEhBseMy YOTmLeHn MOblU N ObceHnBaIOT 60nee
HAdExHoE n Be3OJNaCHOe pIMMeHHe.
3.2 Yactota UMMyNtcbOB
Ykta 1yK3bAeT YcNIO eHNHbIX IMNpybCOB B CekyHny, OHa N3MpePcTcB Tc (repax).Ee MoKHO paccnTaTB, B3RB
OBpatHOe OT dInntelbHOCTn nepnoa. COOTBETCTByoUaJr cactota
OpndenRt, KAKNE TINbMbIeueHb BONOKH pearnpuyot. MeDneHPOearpuyoume MbIeHbBOLOKHApearnpuyetCKopee Hn3KMe qactOTo bIMNpybCoBdo 15Tu a 6bICTpO pearnpuyuue BOLOKHa HauHaiotpearnpoBaTb ToIbKO C cactOTo bOone 35Tu.PpimmNylbcax C cactTOI 45-70Tu npomcxOHTdInNTelbHOe HaprrKeHMe MBIIu B COEtAHmC b6ltpo MblueHoY cTALocTbIO. PO3OMy Bblcokar
Yactota IMNylcoB PnemMyueCTBO pImMeHReTC DnTpeHPOBKn CKOPOCTHO mMAKcIMaJIbHOcNIbl.
pacctoHnXOTNCTMMyIpyETcOBJbWmObE,HO CMeHbWeMHTEHCNBHOCTbIO.
TnnoBtueHnCTMMyIaHmHeo6xOIMOnyBEJIINHTb HTHCNCBHOCTbMMYJbCOB.
PpN BbIbOpacctoHnMEXdy 3NeKToDAMn CJeDeYeYHTbBaTcJeDyUOee:
- Han60eepaiohoanbHOe pacctOHHe: np6m.5-15cm,
MeHee 5 cm: npEmyuectBeHHO CnHbHO CTMyIpyTOr NOBepxHOCTHbE CTpyKtpybI,
cBbIe 15 cm: ouHb cna6o CTMmynpyoTcKpynHbI e rny60Ke cTpykTpybI.
PacnoIoxHeHne 3JIeKToPOB OTHoNtJIbHO HnPaBJeHIOMbIeUHbIX BOJOKOH
Bb6op HapablenHr TeehnTo kCJeIeTcOrlaocBaTc HapablenHmMbIeHbIX B0LOKOH COOTBETCTBeHHo Tpe6yEMomy CIOHO MIIUc. EcnI DOJIKNb6bITb DOCTMHTbI NOBepxHOCTbIE MIIUc,TO CJeIeT paONJOKNt3NEKTPOdbI npaIeJIbHO HapablenHO B0LOKOH (S.2, PNC.16; 1A-1B/2A-2B);ecnI DOJIKNb6bITb DOCTMHTbI rly6okme cOnTKaHe,TO 3eKTPOdbI Heo6XoIMMo paONJOKNb nonepek HapablenHO B0LOKOH (S.2, PNC.16; 1A-2A/1B-2B).PocneHHe MoXHO,HanpImep, dOCTMH KPeCTOO6pa3HbIM (= nopeuHbIM) paONJOKHeHem 3eKTPoDB, Hapimep, S.2, PNC.16; 1A-2B/2A-1B.
PacnpedeJnte zbeta Kaebene COOTBeTCTByUOzMM KaHajam. Bemb Kaebb OTHCNTcK KaHany CH1, a cepbl - K KaHany CH2.
①ПибоевТеран(TENS)cnomoьuцfpoborO npbopaEMS/TENS ceroDBymarpa3dellohopeyunipyeMbIMKaHaanamnIdbymcAMOKleoummncERJekTpoDAmHaKaJDOMHMeetCMblCINYCTAHOBITbJekTPODbIOnHOKaHApTaKIM o6pazom,HTo6bI60JIeBaaTOkaPacnoIraIacbMeXdyJekTpoDAmn,JI6oBpaCnoIraaTeOINHJekTPOdHHeNocpeCTBeHHoHa60beoToUKe,aBtopo- HapacctOahmHe Mehee2-3cmOTnpBOrO.
3JekTpoBbBTOPORo KaHana MoXHO NcONb3ObaT bIra OndOBpeMeHHOI TepaNN DpyrN6 60JeBbIX TOeK IIN60 CoBMecTHO C 3JekTPOdAMN NepBBO rKaHana PnIMHeHT bIra 6bOKuPobAHNA 60eBbIO 3ObHI (C npOTIBOnEkaue cTOpOHb). 3Dec sbCHOB aMeet Cmblc KpctOo6pa3Hoe paCnIoNoxKeHne.
① CoBET NO MACCAXHON ΦyHKUHN:ДПА ONTMMALbHOrO DeIcTBnB BcerDa INCNoIb3yInTe BCE 4 3NeKtpoJa.
①Дуушенифкалдзл ektpoOB uCnoJb3yTe nx Ha HCTO, no BO3MOxHOCTN, 06e3xHepHHoi nO6pntOToKoKe.Прн Heo6xOIMocTn,прED uCNoJb3OBAHEm npOMtB Koxy BODOn n ydaJIITb BOLOcI.
① Ecln BO Bpempa0bI OINH 3JIeKTPoDOB TOOEINHReTc,TO INTEHCMBHOCTb MMyIbcoB o6Ox KAHAIOB yCTaHABINBaETcHa HA MmEhBuYIO BeMNHy. HAKMITE KhoNk BYI/BlKI, YTO6bI nonaTb B pexIM nay3bl, 3aHOBO paCNOJOKNTe
3IeKToPbI INpOoJnxHtE NcNoJIb3ObaHHe NOBTOpHbIM HaKaTHeM KHOJIbIKN UyCTaHOBtpe Tpe6yEmyIO HTEHCINBHOCTb IMNlybCOB.
7.Пурменинe
7.1 Ka3aHnno npmHeHHIO
Ecnip60heNCIOB3yETc3MmHtby,OHABTOMaTHeCKNOTKIOHaTc (abTOMaTKOIKOTKIOHeHn)PiN NOBTOPHOM BKNIOHeHn HaKK-DCnIe NoBnTcR TJIaBHOe MeHKO,NCIOb3OBaBueeCnOCNEHIM NODMeHO MInAeT.
-Пинхаим ДпсгмоКHONKIN 3ByHT KOPOTKIM 3ByKOBOI CmHaJI,пинхаим HeDOnyCTMnO -ДБa KOpOTKIN CmHaJI.
7.2 Topaok deicbni niporpaMM 01-10 TENS, EMS u MASSAGE (6bictpbnyck)
- Bb6epnte n3 tabnIbI nporpaMM noxodayuIyIraBawix ceen nporpamMy.
PacnoIoxnTe 3JIeKToDbI B Tpe6yEmoI oBlaCTN I CoeINHIne IN c npin6opom.B 3TOM Bam MoY nOmoY peKOMHeHaUNI no pacnoIoxKeHHIO.
-ДяВКЛЮЧЕНИnpибopaнжмITEKHONKYBKN/БblKJI. - HaxkTnEM KhONKm MEHIO BbINONHHe HaBnraCmEO MExy IOmEH0 (TENS/EMS/MASSAGE) mOITBePmTe BaW bIbOp hXaTnEM KhoNkENTER(Pnc.1, npIMep: nHnkaunHa dncnnee TENS).
- Bb6epnte KhoNkAMn UP/DOWN tpebyemyu nporpaMMy n noTBePnTe Bb6op KhoNkoE ENTER (Pnc.2, npimep: Hndkaua Ha dncnnee, nporpamma TENS N01).
3aTeM bIbepNTe KHOKNKAMN UP/DOWN 06uYIO dIMTNbHocTb BO3dEChTBn I NOITBepNTe BbIbOp KHOKNoI ENTER (Pnc. 3, npIMep: dINTEbHocTb BO3dEChTBn 30 MMHy). PnIbOp haxOHTcB CcoCTOHN OXUNaHn (Pnc.4).
-ДяTORO,YTO6bIHaHTCTMMyJauHIO,HAXMITEKHONKYBKJI/ BblKJI.HaunHaETcRcMeHrTbcraHIMdkaLmaPabOcheroCoCToHHNRA (Pnc.5). - Bb6epnte Hanbolee npnTHyD nIiBac INTeHCNBHOCTb NmnyIbCOB HaxktaMEM KhoNki CH 1+/CH 2+. INdikakma INTEHCNBHOCTn IMnyIbCOB COOTBETCTBYIOIM 06pa3OM I3MeHReTcR.
Pnc.1
Pnc.2
PNC.3
Pnc.4
PNC.5
7.3TopaOK DeiCTBn I nporpaMM TENS/EMS 11-20 (HINBUNyAJIbHbIe nporpaMbl)
Iporpammb11-20-3to npedapntelho Hactpoehhble porpammbl, KOTOpbe Bm Moxete INHINBnUaJIMnIOPOBaTb. Bb Moxete HAcTPONTb HaCTOTy MMNtboCB.
Bb6epnte n3 tabnmbi nporpamm noxdxodnyo dna Baaux ceen nporpaMMy.
PacnoIoxnTe 3JIeKToDbl B Tpe6yEmoO mbactm coedHInTe nx C npu6opom. B 3TOM Bam moryt nomoy pekomehdaun no pacnoIoxKeHHIO.
-ДяВКЛЮЧЕпriбopaнжмITEKнОПКВКЛ/БblKЛ.
- HaxktaHem KhoKm MEHO BbINONHHe HaBnraCmIO Mekdy nOIMeHIO (TENS/EMS/MASSAGE) u noTBePnTe BaW bIbOp hXaKaHem KhoKm ENTER (Pnc. 1, npImep: uHnkaunHa dncnnee TENS).
- BbI6epNTe KhoNkamn UP/DOWN Tpe6yEmyIO npOrpAmMy nOHTBepDnte BbI6Op KhoNkoI ENTER (Pnc. 2, npIMeP: INHdkauaHa dncTnee, npOrpAmMa TENS N 11).
- BbIbePHTe KhoNkAMn UP/DOWN Tpe6yEmyO yactOty (Tc) nIra kna 1 nIOITBePHTe BbIbop KhoNkoI ENTER (Pnc.3).PiobToPHTe 3Ty npocedpyp Ira BCex nocJeDyUoXuKNoB.
-Дя OkOHaHnHa HAcTpoKn 华CTObI yCTaHOBHTe YAcTOTy (T) NocJeHrero Tpe6yEmoTO uKJaHa,--0"u HaxMMTe KHNky ENTER, Bce HAcTpoKn 华CTObI NocJeDyoUxuXuKNBo ABOMaTHHeCKN YctAHABINBaIOCTHa,0"u,TAKMM O6pa3OM,HeYHTbBAIOCTc. ① Cobet: yJepKuBaIte KONky ENTER HaxKaToI 2 cekyHdbI, YTObI npOnyCtNTb HAcTpoKu YAcTObI u NpeMItN K HAcTPOKe BpemeHn Bo3dEChTBn.B Cnuyae,ecm Bam Tpe6yIOCTc Bce 8 U KkJIOB, TAKKE 3aOKOHHTe BblOp HAcTpoKu YAcTObI 2-CekyHDbIM HAXKaTMEM KHONKI ENTER.
- 3aTeM BbIbepTe KHOIIKAMN UP/DOWN Tpe6yEmyIO DnITeINbHOCTb BO3DeIcTBn I NOITBePdTe BbI6Op KHOIKO ENTER (Pnc.4, PnIMEP: DnITeINbHOCTb BO3DeIcTBn 30 MNHT).
- Pn60h HaxoHCTB CcoTcHm OxuaHa (Pnc.5).
- TTO, YTO6bHaHAtb CTMyJLHIO, HAXMITE KHOIky BKJI/BblKJI. HaHnHaETc MIRATb HINkauaia paOohercoctOHHra (Pnc. 6).
Pnc.1
Pnc.2
Puc.3
PVC.4
Pnc.5
Pnc.6
BbI6epHTe HAM60ee npAryHIOIgBaN HNTeHCNBHOCTMbNpyNbCOB HaxaTMeKHOJKN CH 1+/CH 2+. INDnKaun NHTeHCNBHOCTN MMnyNbCOB COOTBeCTByIOUcIMO6pa3OM N3MeHReTcR.
①ПИМЕЧАНИЕ:ИИДИВИДУАЛМИЗЮВАнБИЕ Bamн Habpoikn nporpamm coхpaHЯOTcR B nAMrTи n ABTOMATUHECKN Bb3bBAIOTcR npn CLENYOLOEM Bb6ope.
7.4 N3mehnnaHactpoek
N3MeHeHHe HHTeHCnBHOCTn (BO BpEmr MCNoIb3OBAHmR)
CH1+/- n CH2+/:- N3MeHeHHe NHTeHCnBHOCTK KaJdORo KaHana.
- KHONKA DOWN▼: INTEHCMBHOCTb 608x KAHANOB yMeHBsaetcA.
IpepbBaHHe CTmUyIaun
HaxaTb KhoNky BKN/ BblKJ.
PnIOBTOPHOM HAXATM CTIMyJIaH NauHaAETC CHOBA.
OTKIOUeHHe BCero KaHaJa
Haxkmatb KhoNky CH- do Tex nop, noka KaHaI He DoCTMHT He HAMMeHbWei INTEHCMBOCTn, 3aTeM ydepKBaT KhoNky HaxKaToI Do Tex nop, noka OH 60nbHe 6byET NOKa3bIBaTcRa Hdncnnee.
Ecnn Bby ydepkmbaete Haxkatoon COOTBETCTBYOuyo KhoNky CH+,TO KaHAn CHOba AKTNBMpyETCA.
I3meHHe IcNoIb3OBAHnI (noHocTbIO nIOn OTeJIbHbIX npaMeTpOB)
BKN/BblkI:PipepbBaHne CTMMyJauu.
- MEHIO: Bo3bpat B OKHO Bb6opa nporpaMMblnI rnaBHOe MeHIO.
Hacptpoika Tpe6yembix napametpoB Poontbepeinte haxaTneM ENTER. BKJI/BblKJI JnnpoJoxKeHH npimHeHH.
7.5 Doctor's Function
Doctor's Function - 3TO cneuaHbHa HAcTPOKa, C NMOUb KOTOpB bI eue npoJe u CEHeHapBaHEn He MoXeTe Bb3BaTb abCOJIIOTHo NEpcoHAnbHyIO npOrpAmMy. BaWa INDbVduaHbHa HAcTPOKa IporpAMM Bb3bBaEtc rpa3y Je pRn BKJIOeHN B coCTOHNr OxuDnHn AAKTNBupyETc IpocTbIM HaxaTMn KHOKN BKL/BblKl. HAcTPOKa 3Toi INDbVduaHbON IporpAMMb MoXe BbIOINrTaC, HApPmep, no cobety BaWero Brapa.
PnakTINBnPOBaHHO Doctor's Function BO BpMa CTmMyIaM MoXHO N3MeHHTb TJIbKO INTEHCINBHOCTb IMIpyJbCOB. Bce Dpyrne npapameTpbl n IporpaMMbl uNΦpOBOrnpnbopa EMS/TENS B 3tOM Clyuae 3a6loKupoBaHbl He MoryT 6bl N3MeHeHbl N Bbl3BaHbl.
Hactpoika Doctor's Function
BbIbePteBauy nporpammy n COOTBETCTBYUOme HAcTPOkM, KaONcaHO Bn.7.2 n 7.3.
- Pπexjde, cemakTbnpaBt nporpammy haxaTMe KhoKn BKJ/BBkJ, oHOBpeMeHO ydepXbaIte haxaTbIMN KhoKN BKL/BblKI n CH 2+ b TeHeMe 5 ceyHd.
CoxpaHHe B Doctor's Function noTBePckdaeTcA nIITeNbHbIM 3ByKOBbIM CnHaNoM.
Ydalenme Doctor's Function
IraToro, yto6bI cHOBa pa36nKIOPOBaTB npBOp nOJyHTB B03MOXHOCTb
ObaaueHn K npyHM nporpaMMam, yepxNBAITE 06e KNKn BKJI/BblkNJ CH
2+ HaxaTbIM B TeHeHne 5ceHyd (He BO3MOXHO Bo BPema CTMMyLm).YdaeneHne
Doctor's Function noDTBePxAaETcRAnteBbHbIM 3ByKObBIM CINHaIOM.
8. yxod xpaheHne
Camokkienounece 3Jektpodbl
Дяобсесеняк мохнhoболee dnteIbHOrO cquenHn3JIeKtpoOB,ix CneDyET OMHaTb BnaXKHo, He BOLOKNHcTOn TpRKnO.
- Pocne IcnoJb3oBaHm npKneBawTe 3JeKtpOdb CHOBA K PHeHKe.
YncTka np6opa
-Перед каддю чстков Вьтackивайteбаташики n3 пибopa.
OuHuaTe np6op MrgKo, CJIeKa CMOeHHoT TpIaKo. PnCunbHom 3aPra3HeHN Bbl MoKeTe CMOHTB TpIaKy IeKIMMbIbHbIM pactBOPOM.
CneIte 3a TEM, YTO6bI BOJa He NOnaB BHYTpB npN60pa. EcIn 3To CnyuHIOCb, INONL3yTe npN6Op NOBtPO HO TOLKo NocTe TOR, KAK OH NnHOCTbBO BVICOX.
-ДячТКн He npmehHЯ Te XMHueckne nI aBpa3MHBbIe cpeCTBa.
XpaHHeHne
- BbTaunTe 6aTapeKIn, ecn Bbl dntteHoe Bpemr He noIb3yeTeCb np6opom. BbTEkuM n3 6BaTapeek 3JeKtpoNIT MoKET NOBpeDnB np6Op.
He neperm6aIte coeMHntelbHie npoBa n 3JeKtpoB. - OToCoeHInHte CoeHInHteIbIbIe IpoBOda OT 3JIeKtpoIOB.
- Iocne nCnoJb3oBaHnprnkneuBaiTe 3JeKToDbl ChOBA K TneHKe.
XpaHHTe pnp60B npoxnaHOM, npOBETPbBaEMOM MeCTe.
HE CTaBbTe Ha npnbop TjXeJIbe npedMeTbI.
9. YTNIN3aUN
IcnoIb3oBaHHbIe, noHocTbIO pa3pKaeHHbIe 6aTaapeKnN aKKyMyJrTObpI dONKbI yTNIN3IPOBaTBcra NOMeueHHem B cneuaNaBHO 0603HaehHHbIe KOHTHepebl, NYKtbl c6opa CneuaNaBHBx OTXoOBu Nm Upeep3 TOPROBcE 3NeKtpOTobapAMn.
Bb63aHbI NO 3akoHy yTnIm3npoBaTb 6atapeKu.
HfopmaJHr:3TN o6OshaHeHcSTabTcRa Ha 6atapeKax, coepkaux
Bpehblte MaTePmJIb: Pb = B 6atapeKe coepkntc cBnHeC, Cd = B
6atapeKe coepkntc KaDMn, Hg = B 6atapeKe coepkntc pTytb.
YtMn3aIy np6bopa doJxHc oCyUeCTBnTBC B COOTBETCTBN C Tpe6OBAHmIM
Dipekmbbl 2002/96/EC «CtapbIe 3JIeKTPoPnPbOpbI n 3JIeKTPoO6OpyOBOAHe".
(WEEE, Waste Electrical and Electronic Equipment).ДЯ NOJUeHMa Heo6xOdMbIX
CBedeHm ObaaaiTeCb B COOTBETCTByOuI prAn MeCTHOro CamoynpabEnHr.
HnkaKoYyBCTBNTeBHOn CTmMyJzIMn He npOcXoDIT. Yo deJaTb?
(1)Ecn3BvHnT npdynpexkaOuN CnHaN, BbINONHTb ONCaHbIe BbIe OpeaMn.
(2)ДЯ NOBTOPHORO 3aNYcKa IporpAmMbI HaxaTb KhoNky BKN/BblKJI.
图
(3)Поверпгурпснолжение anektpodOBи cneDHTe 3a TEM,чTOБы anektpodBy He nepekepbblanncb.
(4) ⅢaIARMOBbICHTb INTHeHCINBHOCTb IMNpyIbCOB.
(5) BaTapeiKn noTm pa3pJKeHbI. 3aMeHIne INX.
HenprrhBhe ouyueHH BOKpy 3neKtpoob. YTo deJatb?
(1)3eKtpoDbI nIOxopacnOKeHb.IpOBepbTe pacnONKeHme u,piNe Heo6XoDMocTn, 3aHOBo paCNOJKeTe 3eKTPoDbI.
(2) 3NeKTKpOdbI N3HOHeHbI. OHH 60JIbIe He MOrTy oBcEneHTb CTmMyJLrAIO H3-3a HEBO3MOXHOCTN paBHomePHorO NOBepxHOCTHO pAcnpedeENHnToKa. POn3TOMy 3aMeHInTe INX.
B o6nactn npimeneHnKpacheet Koxa. YTo deJatb?
He3aMeIINTeBHO npepBaTb MCIOJIb3OBAHnE n NOOJaTb, NOKA He HOpMaIIIN3yETc COCTOHHe KOHN. BbICTro NcE3aIOUeN OOKpacHeHne KOKNoD 3NEKTPoAMn HE onACHO MoKET 6bITb OBJcHEnO NOKAJHoN INTEHCmPkaue KPOBOOpaueHn. Ho eCNIOKpacHeHne KOHN He NCe3aEt N BO3HnKaet BOCNAHeHne INI 3yD, nepeD daJIbHEIMM pIPMEHeHemN IpOKOHcyJIbTmPoBaTbC bPaHOM. Bo3MOxHO, pIPuHnHa 3AKIOUaETcB aJIpeRmK K KneIKoN NobEPXHOCTN.
3aueKka pRpeMH He depkntc. YTo deJatb?
EcnBbHae 3aueKk KpeNTc HApemHe, a TolbKO 3aTeM yCTaHabNbaTcnp6bp, To OTImalbHOe KpeIeHHe He oecneuHaBcTc. Bo3bMtpe np6bp Bpyk.YctaHOBtte 3aueKky Ha 3aNDIO CTOpOHy np6bopa. 3aueKka DOnKha 3aΦNKCuPoBaTbcra C xapaKTePbHIM ZeJIhKom. Teepb NOBTOPO 3akpenTe np6bp Bmecte c 3aueKoH apeHHe.
11. TexHHueckNe daHHbe
HaMeHOBaHne MoOpJIb SEM 40
ΦopMa BixoHoi KpmbOi DByxΦa3HbIe IprMoYrOJIbHbIe IMnYJbCbI
JInTeBHOCTb Nmnybca 40-250 MkC
Yactota mmybcoB 1-120T
BbixoHoe HnpanpKaHeHne MaKc. 90 Bpp (npu 500 Om)
BixoHoi ToK MaKc. 180 mApp (npu 500 O#
3JNeKTPoNTaHHe 36aTapeuKu Tnna AAA
IINITeIbHocTb BO3dEmCTBnpeyIpyemaor 5 Do 90 MInHT
InTeHCINBHOCTbpeynpyemarO10do15
YcNoBm3KcNpyatau
10^ - 40^ (50^ - 104^) npu OTHOCHTeHbHO
BnaxHQCTM Bo3Dyxa 30-85%
YcnoBxpanen-10°C-50°C(14°F-122°F) npn OTHOCINTeJbHOI
BnaxHQCTN BO3Dyxa 10-95%
Pa3Mepb1 130x68x29MM(BKJIIOUa3aUeIkyIpypeMH)
Bec 105 r (6e3 6aTapeek), 140 r (Bkniouy 3aueky dny peMH
n6atapeienK)
PONCHEHNE CUMBBOOB AKTMBHbI y3e TnA BF

BHHMaHHe!PpoecThbHcTpyKuHIO NO 3KcNJIyataaMIM.

PpimmeaHHe: PnncnoJb3oBaHnn nnp60paBhe npedeIOB cneuMkaun He rapaHTpyetcero 6e3ynpueHna paOta!
MbOCTaBnEM 3a cob0I npaBO h BHeCHeMe TEXHuecknx m3MeHEn, CnyKaauxycOBepseHCTBOBaHmIO np6opa.
Данньnpn6bopcoTBeTcByeEBPoneckMCTaHdpamEN60601-1 IN EN60601-1-2,aTaKkeEN60601-2-10nRbIeTc npEIMToOMoc6bxMe npedoctopoXHOCTN BOTHOWEHN3JIeKTPOMaTHIOCBMECTUMOCTN.Ppnt 3tOM yHTbBAITE,TOpeHEOCBHe NMOBILbHe CpeCTBa BY-CB3rMoYrBMATb Ha daHHB np6bOp.ToHyIO INHΦopMaUH Bbl MoKTe nOlyHTB CepBCHbIX CEHTpax.
Pnp60 cooBETCTByet Tpe60BaHnM EBponeNCKOrO HOpMaTHBOHO AKTa nO Meiunckm 93/42/EC, 3aKOHy O meiuHcknx 3dEeHX. CornaCHO "IpaBn 3kCnpyatauMeiunHcknx 3dEJeH" Heo6xOJIMO peryIraHPO npOBOnTb MeTPOGNHeCKN KOHTPOB, cInn annapaat PnimeHaERcTg nPOMblNeHHbx INX03AChTBehhIX CEJIe. Jaxe pnin LNHOM NcONl3OBaHN Mbl peKomeHdyem KaKDbie 2 roda nepeDaabatb annapat B cepBnCHyO cnjx6by dmeTPOGNHeCKORO KOHTPOIA.
12. Tapaanttna
MbI npedocTabnem rapaHTIO HA depeKTb MaTePnaOB I m3rOToBJIeHnHa CpOK
12 MecraeB CO Hn npoJaxm Upe3 pO3HHyIO CTb.
TapaTmHe paCnPoCTpaHReTc:
Ha cnuyan yuepe6a, BbI3BaHHoro HnepaBnIbHbIM nCNoJIb3OBAHNEM
Ha 6bIcTpOM3HaWBAHOUHmecAuaCTM(HacAdK,3JIeKTPOdbi,6aTaapeKn)
Ha defeKbI, O KOtOpBIX NOKyNaTeJIb 3HaJI B MOMENT NOKyNKN
HaCnyaCObCTBeHHoBINbHnOKyNaTeIa.
TobapceTINmIOPOBaH:6bITOBIeMaCCaKepeB-OC
"MexpernohaBna CeptnikauonHnKaOMnHaN" NPOCC
DE.AB52.B35744 cpoK dIeCTBmC 18.03.2011 no 17.03.2014rT
Cpok 3Kcnpyataum M3dEmn: MmN 3 roda
Hnma n3rotobntelb: BoeprM6x, CodHHrep wtpaccce 218
89077-YNM,FepMaHnIyIaIeIhC XaHC DInHcnaEJT
88524 YtTeHbaiJIep, TepMaHnIa
Tei(foac),3495-6585490
Data npodaxn

AB52
Ipoanbc npoaba
UItamn mara3Ha
Ipondnbc nokpataeia


- DEUTSCH
- Inhaltsverzeichnis
- Doctor's Function
- Getting to know your machine
- What is Digital EMS/TENS and what can it do?
- Scope of supply
- Subsequent purchase articles
- Important Information
- WARNING!
- Before using the machine, you should consult with the doctor in charge of your treatment in the event of the following:
- IMPORTANT!
- Use the Digital EMS/TENS solely:
- PRECAUTIONARY MEASURES:
- Damage:
- Information on ESD (Electrostatic Discharge)
- Current parameters
- Pulse shape
- Pulse frequency
- Pulse width
- Pulse intensity
- Cycle-controlled pulse parameter variation
- Unit description
- Description of components
- Display (main menu):
- Keys:
- Accessories:
- Key functions
- ON/OFF
- and
- MENU
- ENTER
- CH1+, CH1-, CH2+, CH2-
- Start-up
- Programme overview
- Basic information
- MASSAGE programmes
- Information on placing the electrodes
- Electrode distance
- Application
- Advice on application
- Procedure for TENS, EMS and MASSAGE programmes 01-10 (quick start)
- Procedure for TENS/EMS programmes 11 to 20 (individual programmes)
- Changes to the settings
- Changing intensity (during application)
- Interrupting stimulation
- Switching off a complete channel
- Changing application (completely or single parameters)
- Setting the Doctor's Function
- Cancelling Doctor's Function
- Cleaning and storage
- Adhesive electrodes
- Cleaning the unit
- Storage
- Disposal
- Problems and solutions
- The machine does not switch on when the ON/OFF button is pressed. What should I do?
- The electrodes are detaching themselves from the body. What should I do?
- The machine is giving out abnormal signal tones during treatment. What should I do?
- There is no noticeable stimulation. What should I do?
- You are aware that the electrodes feel uncomfortable. What should I do?
- The skin in the treatment area becomes red. What should I do?
- The belt clip is not secure. What should I do?
- Technical details
- FRANÇAIS
- Sommaire
- Remarques importantes
- 06bEM nocTabKn
- DOnoJIHnTeIbHO nokynaemble yactn
- 2.BaKhble yka3aHn
- BHIMAHHEI
- Bo n36eXaHHe BpeDa 3dOpOBbIO HAcToTEnbHO He peKOMeHyEtCn PnIMeHrB cnPpOBOI np6op EMS/TENS B CneDyUOnx CnyAax:
- Ipeep npimmeHem np60pa npokocybltpuyTecb leaumBpavomnp
- BHIMMAHIVE!
- IcnoIb3yIte zIpOBoBOn np6Op EMS/TENS nckHouHTenbHO:
- MEPbI INPEOCTOPOXHOCTN:
- Повжdenя
- HΦopmaun6o3CP(3eKtpocTaTuYeckompa3pe)
- Napametpbi Toka
- 3.1ΦopmaHmnybcOB
- Yactota UMMyNtcbOB
- 7.Пурменинe
- Ka3aHnno npmHeHHIO
- Topaok deicbni niporpaMM 01-10 TENS, EMS u MASSAGE (6bictpbnyck)
- 7.3TopaOK DeiCTBn I nporpaMM TENS/EMS 11-20 (HINBUNyAJIbHbIe nporpaMbl)
- N3mehnnaHactpoek
- N3MeHeHHe HHTeHCnBHOCTn (BO BpEmr MCNoIb3OBAHmR)
- IpepbBaHHe CTmUyIaun
- OTKIOUeHHe BCero KaHaJa
- I3meHHe IcNoIb3OBAHnI (noHocTbIO nIOn OTeJIbHbIX npaMeTpOB)
- Hactpoika Doctor's Function
- Ydalenme Doctor's Function
- yxod xpaheHne
- Camokkienounece 3Jektpodbl
- YncTka np6opa
- XpaHHeHne
- YTNIN3aUN
- HnkaKoYyBCTBNTeBHOn CTmMyJzIMn He npOcXoDIT. Yo deJaTb?
- HenprrhBhe ouyueHH BOKpy 3neKtpoob. YTo deJatb?
- B o6nactn npimeneHnKpacheet Koxa. YTo deJatb?
- 3aueKka pRpeMH He depkntc. YTo deJatb?
- TexHHueckNe daHHbe
- Tapaanttna
Brand : SANITAS
Model : SEM 40
Category : Fitness Equipment