
MT 6340 - Razor GRUNDIG - Free user manual and instructions
Find the device manual for free MT 6340 GRUNDIG in PDF.
| Product Type | Shaver / Beard Trimmer |
| Brand | Grundig |
| Model | MT 6340 |
| Power Supply | Rechargeable Hybrid NiMH battery / Mains via 5V 1A adapter |
| Adapter Input Voltage | 100-240 V~, 50/60 Hz |
| Adapter Output Power | 5.0 W |
| Battery Life | Approximately 30 minutes |
| Initial Charge Time | 24 hours |
| Standard Charge Time | Approximately 12 hours |
| Number of Cutting Positions | 30 (0.5 mm - 15 mm, in 0.5 mm steps) |
| Main Functions | Beard trimming, adjustable cutting, cordless or mains operation |
| Included Accessories | Guide comb, USB cable, cleaning brush, lubrication oil, mains adapter |
| Charge Indicator | Yes (red while charging, blue when charged) |
| Care and Cleaning | Clean with brush after use; oil the blade every 2-3 months; do not immerse in water |
| Charging Ambient Temperature | 5 °C to 40 °C |
| Use in Bathroom | Not recommended; unplug after use if used near water |
| Safety Instructions | Do not use in bathtub/shower; do not immerse; keep out of reach of children; do not open the device |
| Warranty | Information not provided in the manual |
Frequently Asked Questions - MT 6340 GRUNDIG
User questions about MT 6340 GRUNDIG
0 question about this device. Answer the ones you know or ask your own.
Ask a new question about this device
Download the instructions for your Razor in PDF format for free! Find your manual MT 6340 - GRUNDIG and take your electronic device back in hand. On this page are published all the documents necessary for the use of your device. MT 6340 by GRUNDIG.
USER MANUAL MT 6340 GRUNDIG
natural_image
Simple black-and-white line drawing of a bearded man's face (no text or symbols)MT 6340
natural_image
Prohibition sign showing a showerhead falling from a surface, no text presentnatural_image
Stylized grayscale illustration of a tree with leaves and roots, enclosed in a circular frame (no text or symbols)natural_image
Close-up of a mechanical component with internal springs and a hole (no visible text or symbols)Lagerung
Please read this instruction manual thoroughly prior to using this appliance! Follow all safety instructions in order to avoid damage!
Keep the instruction manual for future use. Should a third party be given the appliance, please ensure the instruction manual is included.
■ This appliance is intended for domestic use only.
■ To avoid damage and risks due to improper use, please read the instructions for use and store in a safe place.
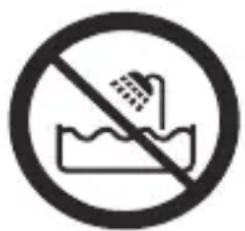
■ Never use the appliance in the bath, shower or over a washbasin full of water or with wet hands.
natural_image
Prohibition sign showing a showerhead falling from a surface, crossed out by a diagonal line (no text or symbols)- Do not immerse the appliance in water and never allow it to come into contact with water, even when cleaned.
■ Do not let the appliance fall.
■ Disconnect mains adapter after use.
This appliance can be used by children aged from 8 years and above and persons with reduced physical, sensory or mental capabilities or lack of experience and knowledge if they have been given supervision or instruction concerning use of the appliance in a safe way and understand the hazards involved. Children shall not play with the appliance. Cleaning and user maintenance shall not be made by children without supervision.
If you use the appliance in the bathroom, always ensure that the mains adapter is disconnected after use, as the proximity of water is a potential risk, even if the appliance is switched off.
■ Never start up the appliance if it shows signs of visible damage.
- Keep the appliance out of reach of children!
■ Never open up the appliance. All rights to claim under the guarantee are invalidated for damage caused by improper interventions.
SAFETY
- Do not apply excessive pressure as this damages the attachment and may cause skin injury.
AT A GLANCE
Dear customer,
Congratulations on the purchase of your GRUNDIG MT 6340 Beard Trimmer.
Read the following user notes carefully to ensure you can enjoy your quality product from GRUNDIG for many years to come.
A responsible approach!

natural_image
Stylized grayscale illustration of a tree with leaves and roots, enclosed in a circular frame (no text or symbols)GRUNDIG focusses on contractually agreed social working conditions with fair wages for both internal employees
and suppliers. We also attach great importance to the efficient use of raw materials with continuous waste reduction of several tonnes of plastic every year. Furthermore, all our accessories are available for at least 5 years.
For a future worth living.
For a good reason. Grundig.
Controls and parts
See the figure on page 3.
A Cutting length adjustable rolling knob
B Attachment comb with 30 cutting positions (0.5-15mm, each position +0.5mm)
On/Off switch
D Charging indicator
E Socket for connecting the mains adapter
Accessories
USB cable (For charging only)
Cleaning brush
Lubricating oil
Power adapter
Charging via adapter
If run with the installed rechargeable nickel metal hydride batteries, use the supplied mains adapter as a charger. Check whether the mains voltage given on the rating plate of the mains adapter matches the local mains voltage. The appliance is not disconnected from the power supply until the mains adapter is disconnected.
1 Insert the mains adapter cable in socket E, plug in the mains adapter plug.
- Charge indicator D lights up red.
- Charge indicator color changes to blue when fully charged.
Note
■ Fully charge the batteries (24 hours) before using for the first time or if the batteries have not been used for a long time.
■ After the batteries are first charged, the charging time is approx. 12 hours when the appliance is switched off. If you switch on the appliance while it is charging, charging will stop.
■ The ambient temperature should be between 5^ C and 40^ C.
- When charged, the appliance can be used for approx 30 minutes. We recommend you do not recharge the batteries after each use, especially if you have not used the appliance for the full 30 minute running time. Do not recharge the batteries until they have been used to their full capacity. This extends their life. Avoid daily charging.
USB charging via computer
Note:
- Charging time in USB mode is higher and needs approximately double the time of the mains adaptor
1 Ensure the beard trimmer is switched OFF.
2 Connect the USB cable to the USB port on the computer.
3 Connect the USB cable to the beard trimmer.
4 Make sure the beard trimmer is OFF, it only charges when it is switched off.
5 During charging, the RED charging indicator D lights up.
6 Only recharge when performance of the trimmer is noticeably drops.
7 When the battery is fully charged, the charge indicator LED color changes to blue and the equipment can be used approx. 30 minutes.
Caution
■ The USB cable is provided only for charging battery via computer, it is not for mains operation. Do not operate the trimmer while the trimmer is connected to a computer via the USB port.
Mains operation
1 Ensure the appliance is switched off.
2 Connect the adapter insert the mains adapter cable in Socket E to the beard trimmer.
3 Connect the adapter to the mains supply.
4 The RED charging indicator light will light up.
5 To start mains operation, switch ON the trimmer. When finish, switch OFF.
Note
■ The charging indicator D light will turn off when the trimmer is switched on.
■ The appliance is only to be used with mains adaptor provided with the appliance.
Fixing attachment comb
1 Ensure the beard trimmer is OFF.
2 Ensure the adjustable rolling knob at the shortest cutting length position (0.5mm).
3 Push in the attachment comb B.
4 Set the required hair length by adjusting the side rolling knob A.
5 The attachment comb B will be locked automatically when the trimmer is switched on.
Removing attachment comb
1 Ensure the beard trimmer is OFF.
2 Ensure the adjustable rolling knob at the shortest cutting length position (0.5mm).
3 Pull out the attachment comb B.
Useful tips
■ Use the appliance with a relaxed and comfortable grip.
■ Always cut against the natural direction of hair growth.
- Pause cutting at short intervals. You can always make corrections later, but you can't replace cut hair.
■ When using for the first time, cut small amounts of hair only. This enables you to get used to the adjustable cutting lengths.
■ Comb the hair repeatedly. While combing, look for hair that is too long.
■ For a good beard cut, the beard should be dry.
INFORMATION
Cleaning and care
1 Switch off the appliance and, if using in mains mode, remove the mains adapter plug from the socket or disconnect from USB port.
2 If attached, remove comb attachment B and carefully clean the blade using the brush supplied.
3 Clean the housing and comb attachment with a soft cloth moistened with water.
Important
■ Never hold the appliance, cable or mains adapter in water or any other liquid.
4 Before using again, ensure all parts have been carefully dried with a soft cloth.
5 Do not use cleaning agents.
6 Re-attach the comb attachment.
Note
■ Remove hair remains after each use.
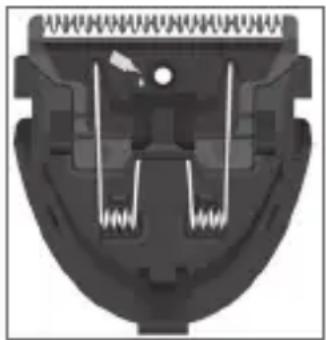
If you want to retain the original condition of the blade for a long time, it is worthwhile adding 1-2 drops of oil every 2-3 months using the oil supplied.
natural_image
Close-up of a mechanical component with internal wires and mounting holes (no visible text or symbols)Storage
If you are not going to be using the appliance for a lengthy time, please store it carefully.
1 Ensure the appliance is switched off and is completely dry.
2 Pack the parts in the original packaging and store them in a cool, dry place.
3 Ensure the appliance is kept out of reach of children.
Compliance with the WEEE Directive and Disposing of the Waste Product:
This product complies with EU WEEE Directive (2012/19/EU). This product bears a classification symbol for waste electrical and electronic equipment (WEEE).
This symbol indicates that this product shall not be disposed with other household wastes at the end of its service life. Used device must be returned to offi-cal collection point for recycling of electrical and electronic devices. To find these collection systems please contact to your local authorities or retailer where the product was purchased. Each household performs important role in recovering and recycling of old appliance. Appropriate disposal of used appliance helps prevent potential negative consequences for the environment and human health.
Compliance with RoHS Directive
The product you have purchased complies with EU RoHS Directive (2011/65/EU). It does not contain harmful and prohibited materials specified in the Directive.
Package information

Packaging materials of the product are manufactured from recyclable materials in accordance with our
National Environment Regulations. Do not dispose of the packaging materials together with the domestic or other wastes. Take them to the packaging material collection points designated by the local authorities.
Technical data
Parameter of External Power Supply
Manufacturer: Lygo (Dongguan)
Electronic Product Ltd.
Model Identifier: LGSPSD050100EP
Input Voltage: 100-240V\~
Input Frequency: 50/60Hz
Input Current: 0.5A
Output Voltage: 5.0V
Output Current: 1.0A
Output Power: 5.0W
Average active efficiency: 77.32%
No-load power consumption: 0.049W
Electrical insulation class: II

natural_image
Stylized grayscale illustration of a tree with leaves and roots, enclosed in a circular frame (no text or symbols)natural_image
Close-up of a mechanical component with springs and a central hub (no visible text or symbols)Saklama
natural_image
Prohibition sign showing a showerhead falling from a surface with a diagonal line (no text or symbols)natural_image
Stylized grayscale illustration of a tree with leaves and roots, enclosed in a circular frame (no text or symbols)natural_image
Close-up of a mechanical component with internal wires and mounting holes (no visible text or symbols)Almacenaje
natural_image
Symbol of a trash bin crossed out by a diagonal line, with no text or numbers present.Cher client, chère cliente,
natural_image
Stylized grayscale illustration of a tree with leaves and roots, enclosed in a circular frame (no text or symbols)natural_image
Close-up of a mechanical component with internal springs and a central hub (no visible text or symbols)Rangement
■ Pazite da uređaj ne padne.
■ Nakon uporabe isključite strujni adapter.
natural_image
Stylized grayscale illustration of a tree with leaves and roots, enclosed in a circular frame (no text or symbols)natural_image
Close-up of a mechanical component with internal springs and a central hole (no visible text or symbols)Čuvanje
Ovaj simbol označava da se ovaj proizvod ne smije odlagati zajedno s ostalim kućanskim otpadom na kraju njegovog radnog vijeka. Rabljeni uredaj mora se vratiti na službeno sabirno mjesto za recikliranje električnih i elektroničkih uređaja. Da biste pronašli te sustave za prikupljanje, obratite se lokalnim vlastima ili prodavaču gdje je proizvod kupljen. Svako kućanstvo igra važnu ulogu u uporabi i recikliranju starih uređaja. Odgovarajuće odlaganje iskorištenog aparata pomaže u sprečavanju mogućih negativnih posljedica za okoliš i ljudsko zdravlje.
Usklađenost s Direktivom o zabra- ni uporabe određenih opasnih tvari u električ- noj i elektroničkoj opre- mi (RoHS):
BEZPIECZEŃSTWO
natural_image
Stylized grayscale illustration of a tree with leaves growing from soil, enclosed in a circular frame (no text or symbols)natural_image
Cross-sectional view of a mechanical component with internal springs and a central hub (no visible text or symbols)natural_image
Symbol of a waste bin crossing over a battery, no text or labels presentProducent: Lygo (Dongguan) Electronic Product Ltd.


- Lagerung
- SAFETY
- AT A GLANCE
- A responsible approach!
- Controls and parts
- Accessories
- Charging via adapter
- Note
- USB charging via computer
- Note:
- Caution
- Mains operation
- Fixing attachment comb
- Removing attachment comb
- Useful tips
- INFORMATION
- Cleaning and care
- Important
- Storage
- Compliance with the WEEE Directive and Disposing of the Waste Product:
- Compliance with RoHS Directive
- Package information
- Technical data
- Saklama
- Almacenaje
- Rangement
- Čuvanje
- Usklađenost s Direktivom o zabra- ni uporabe određenih opasnih tvari u električ- noj i elektroničkoj opre- mi (RoHS):
- BEZPIECZEŃSTWO
Brand : GRUNDIG
Model : MT 6340
Category : Razor