
Selection LS 7140 - Shaver GRUNDIG - Free user manual and instructions
Find the device manual for free Selection LS 7140 GRUNDIG in PDF.
| Product Type | Women's Shaver (Lady Shaver) |
| Brand | Grundig |
| Model | Selection LS 7140 |
| Power Supply | Rechargeable Ni-MH battery, mains adapter 100-240 V~ |
| Adapter Input Voltage | 100-240 V~, 50/60 Hz |
| Adapter Output Voltage | 3.6 V, 1.0 A |
| Adapter Output Power | 3.6 W |
| Battery Type | Nickel-metal hydride (Ni-MH) |
| Charging Time | First charge: 12 h; subsequent charges: 8 h |
| Runtime | Approximately 45 minutes |
| Cutting System | Shaving foil with two side trimmers |
| Usage | Dry or in the shower (battery only) |
| Cleaning | Removable shaving head, rinseable under tap, cleaning brush included |
| Included Accessories | Protective cap, cutting comb (5 mm), hanging hook, cleaning brush, power adapter |
| Charge Indicator | Blue light while charging, turns off when fully charged |
| Accessories Availability | At least 5 years |
| Safety | Do not use if foil is damaged; adapter must stay dry; do not immerse the appliance |
Frequently Asked Questions - Selection LS 7140 GRUNDIG
User questions about Selection LS 7140 GRUNDIG
0 question about this device. Answer the ones you know or ask your own.
Ask a new question about this device
Download the instructions for your Shaver in PDF format for free! Find your manual Selection LS 7140 - GRUNDIG and take your electronic device back in hand. On this page are published all the documents necessary for the use of your device. Selection LS 7140 by GRUNDIG.
USER MANUAL Selection LS 7140 GRUNDIG
Hersteller: E-TEK Electronics
Manufactory Co., LTD
Modellidentifikator: ZDM036100EU
Please note the following instructions when using the appliance:
This appliance is designed for domestic use only.
- This appliance is designed solely for shaving human body hair. Any other use is expressly prohibited.
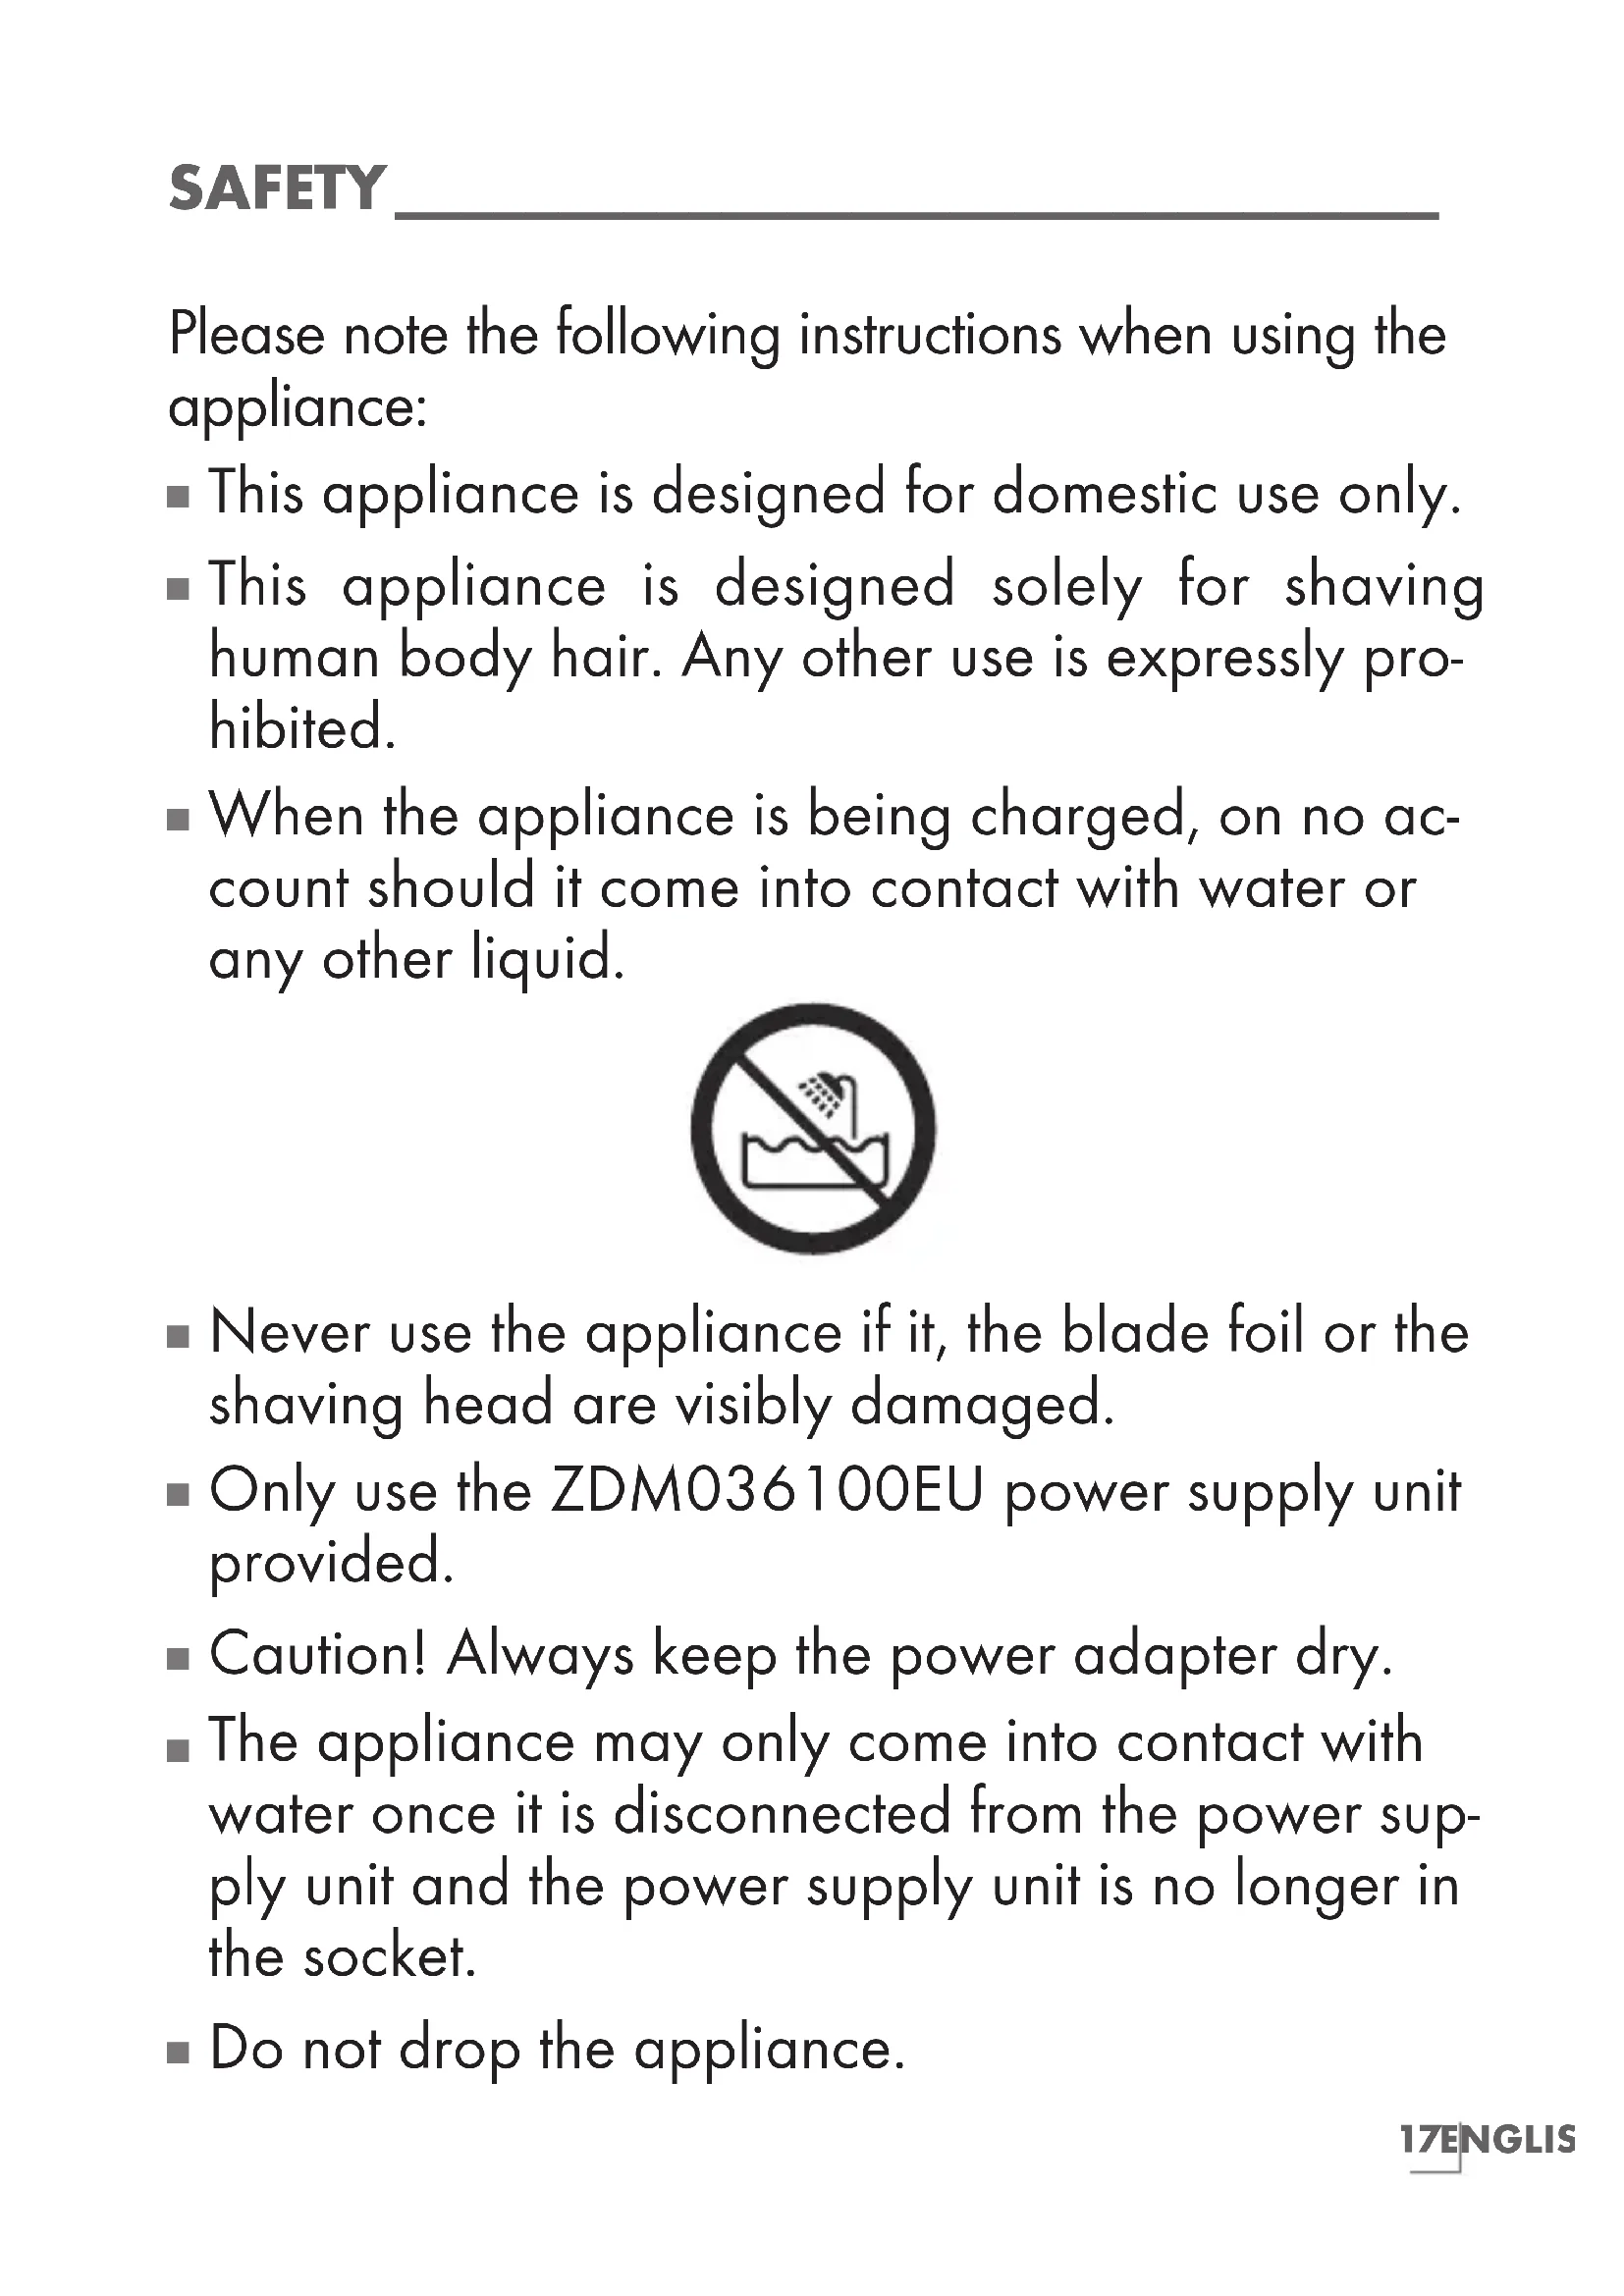
- When the appliance is being charged, on no account should it come into contact with water or any other liquid.

- Never use the appliance if it, the blade foil or the shaving head are visibly damaged.
- Only use the ZDM036100EU power supply unit provided.
- Caution! Always keep the power adapter dry.
- The appliance may only come into contact with water once it is disconnected from the power supply unit and the power supply unit is no longer in the socket.
-
Do not drop the appliance.
-
This appliance can be used by children aged from 8 years and above and persons with re duced physical, sensory or mental capabilities or lack of experience and knowledge if they have been given supervision or instruction concerning use of the appliance in a safe way and understand the hazards involved. Chil dren shall not play with the appliance. Clean ing and user maintenance shall not be made by children without supervision.
- Do not open the appliance under any circumstances. No warranty claims are accepted for damage caused by improper handling.
Dear customer,
Congratulations on the purchase of your new GRUNDIG Lady Shaver LS 7140.
Please read the following user notes carefully to ensure you can enjoy your quality GRUNDIG product for many years to come.
A responsible approach!

GRUNDIG focuses on contractually agreed social working conditions with fair wages for both internal employ
ees and suppliers, as well as on the efficient use of raw materials with continual waste reduction of several tonnes of plastic each year - and availability of at least 5 years for all accessories.
For a future worth living.
For a good reason. Grundig.
Controls
See the illustrations on page 3.
A Cutting system (shaving foil with two side trimmers)
B Shaving head
C Release buttons
D Switch for turning on and off
E Charging indicator light
F Power cord socket
G Protective cap
Accessories
H Hanging holder
Trimming comb (5 mm)
Power supply unit
K Cleaning brush
Note
The appliance can be used on wet skin in the shower and cleaned under the tap (only in battery mode, see section cleaning the shaving head).
Rechargeable battery operation
When operating the appliance with the built-in nickel metal hydride battery, only use the power supply unit J supplied for charging.
Check if the type plate on the power supply unit J corresponds to your local mains supply.
1 Press the switch D, then push the switch D downwards to turn off the appliance.
2 Plug the power supply unit J into the wall socket first and then the power cord into the power cord socket F.
- During the charging process, the charging indicator light E lights up blue.
- Once the appliance is fully charged, the charging indicator light disappears.
Notes
Charge up the batteries completely (for at least 12 hours) before you first use them or if you have not used them for a long time.
The ambient temperature should be between 5^ and 40^ .
Once you have used the appliance, charging time is approx. 8 hours.
In its fully charged state, the appliance can run for approx. 45 minutes. It is not advisable to charge the batteries after each use. Only charge the batteries when they are completely discharged. This increases their service life.
3 Pull the power cord out of the power cord socket F and the power supply unit J out of the wall socket.
Mains operation
Only operate the appliance with the power supply unit J provided.
Check that the voltage indicated on the type plate of the power supply unit J corresponds to your local power supply.
The only way to disconnect the appliance from the power supply is to unplug the power supply unit J
1 Plug the power supply unit into the wall socket.
2 Insert the power cord into the power cord socket F on the appliance.
Caution
- Never use the appliance in mains operation when you are beside a water connection.
Shaving
Note
If the hair you shave is longer than 10 mm, pre-trim the hair with the comb attachment to a length of 5 mm for an optimal shaving performance.
1 Remove the plastic protective cap G.
Caution
The shaving foil and side trimmers for long hair must not be damaged. Replace any damaged parts before shaving.
2 Press the switch D, then push the switch D upwards to turn on the appliance.
3 Stretch the skin with your free hand to make the hairs stand upright.
4 Shave with slow, gentle movements against the direction of hair growth. Hold the appliance at a 70^ angle to your skin.
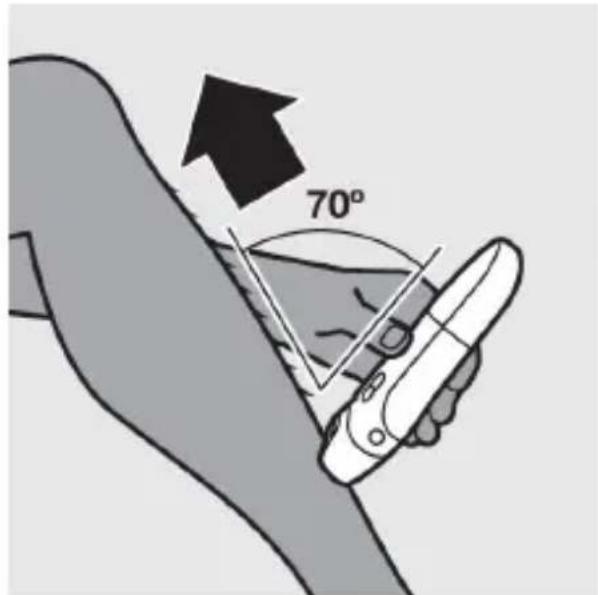
- Make sure that the shaving foil and side trimmer are fully in contact with your skin.
Caution
Do not press too hard as you may damage the shaving foil.
5 After use, switch off the appliance by pressing the switch D then pushing the switch downwards, clean the shaving head (see section "Cleaning the shaving head"), and put the protective cap G back on.
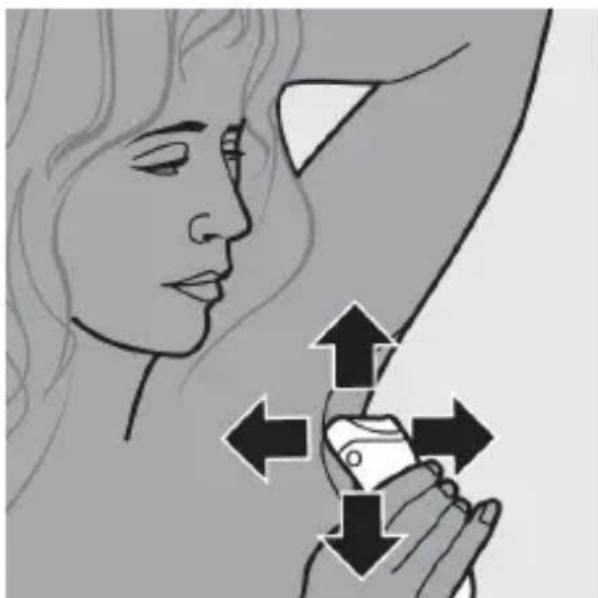
Armpits
1 When you shave the underarm area, place one arm behind your head to stretch the skin.
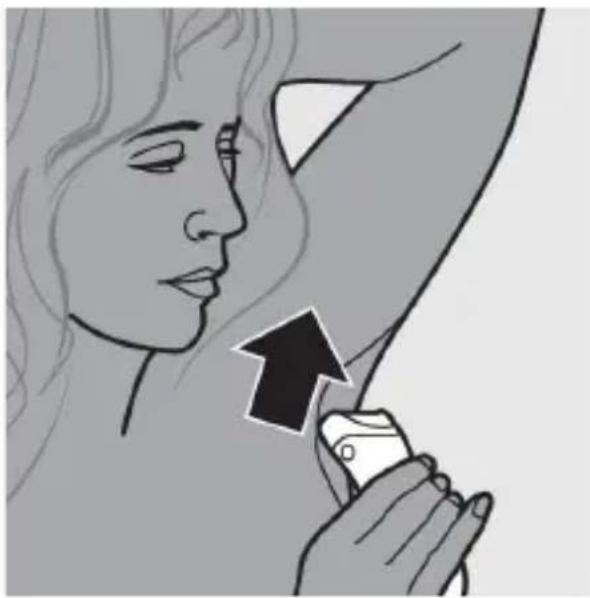
2 Move the Lady Shaver gently over the skin.
- To achieve the best result, move the appliance up and down and from left to right.
Trimming
1 Attach the trimming comb onto the appliance.
2 Press the switch D, then push the switch D upwards to turn on the appliance.
3 Move the appliance against the direction of hair growth.
- Make sure that the surface of the comb is in full contact with the skin at all times.
Hints and Tips
In the case of thick or copious hair growth, which cannot be removed by just one shave, do one quick shave and then a more thorough second one.
Do not apply alcohol based-lotions to the skin directly before or after shaving. If you want, you can apply some baby powder after shaving.
- Do not press the shaving head too hard onto the skin, as this has a negative effect on shaving performance and may cause some skin irritation.
- Basically, there is no difference in using the appliance on wet skin and using it on dry skin. You can simply choose which method you like best. But if you prefer to use the Lady Shaver dry, make sure that your skin is clean and completely dry.
General information
The device must be cleaned regularly so that you can continue to enjoy its top performance and optimum results. Clean the housing with a soft, damp cloth and mild detergent. Do not use household cleaning agents.
Caution
- Never hold the appliance in water or any other liquid.
Detaching/attaching the shaving head
1 To detach the shaving headB, press the release buttons C on both sides of the appliance and pull the shaving head B.
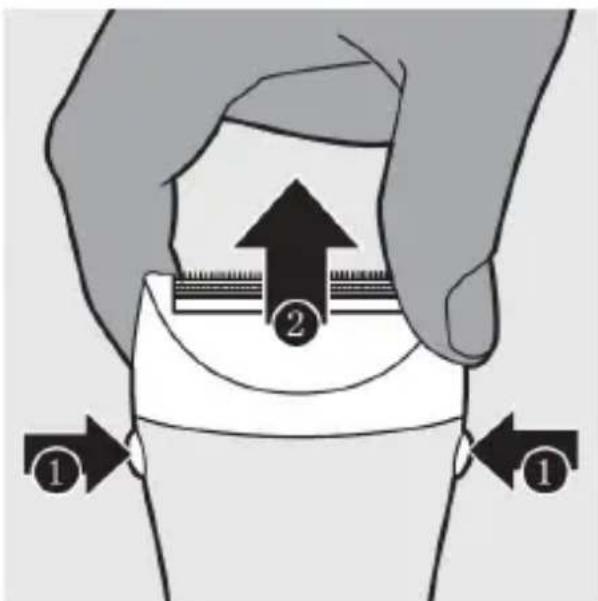
2 To attach the shaving head B push it onto the appliance.
Note
- Do not exert pressure on the shaving foil A to avoid damage.
Attaching/detaching attachments
1 To attach protective cap G or trimming comb carefully put it onto the appliance. Make sure the recess of the comb is aligned with the front of the appliance.
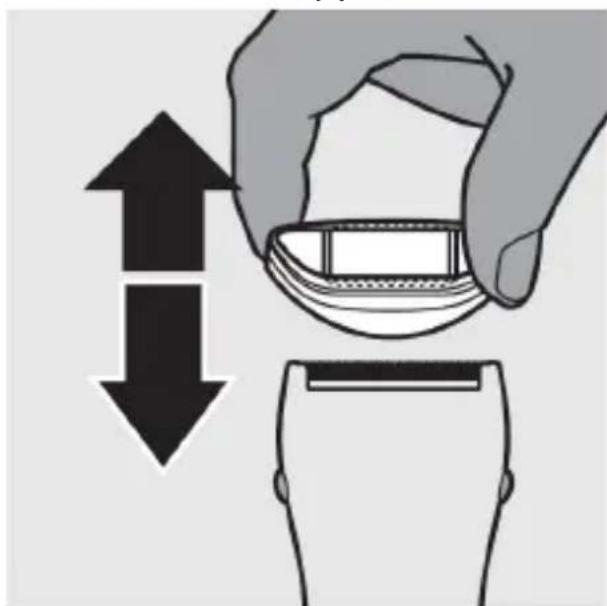
Cleaning the shaving head
1 Turn the appliance off and unplug the cable. Pull the power supply unit J out of the mains socket.
2 Pull up the shaving head out of the attachment (see "Attaching/detaching the shaving head" section).
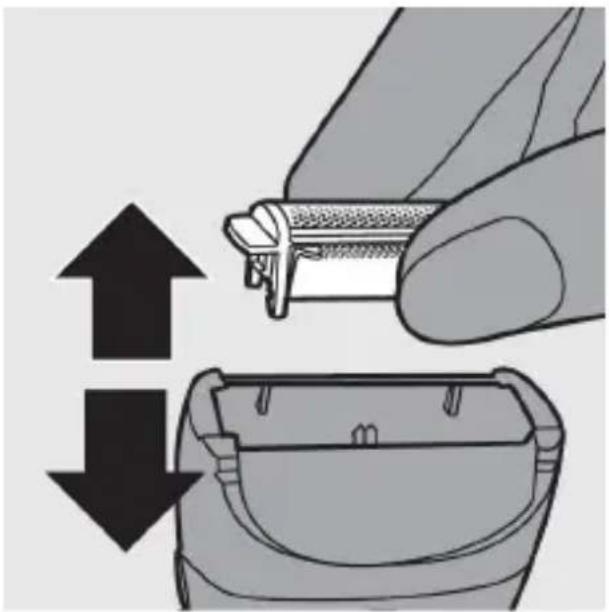
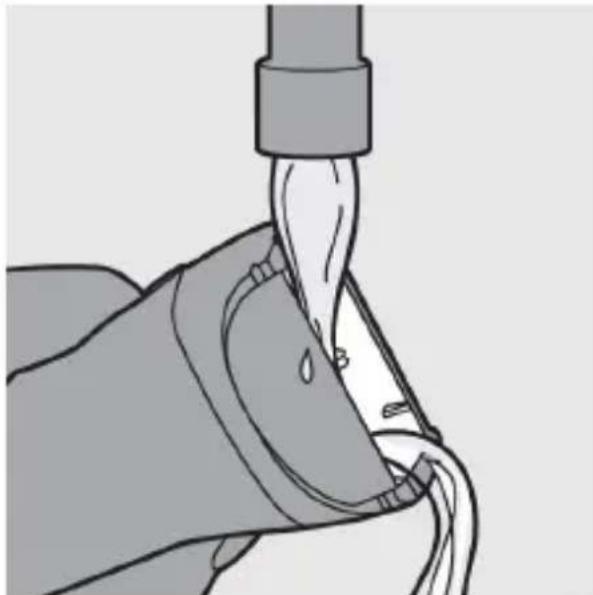
3 To clean the shaving head B or the cutting system A rinse them under running water or use the cleaning brush K.
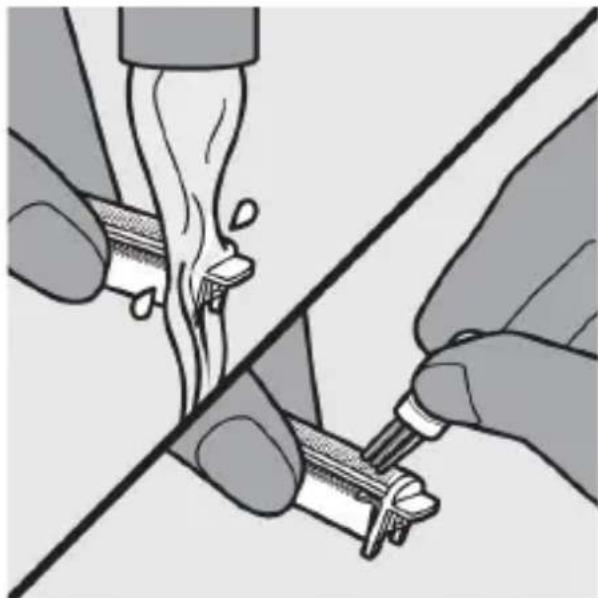
4 Clean the bottom of the shaving head B with the cleaning brush K supplied.Note
- Do not clean the appliance with water over shower temperature.
5 Rinse the hair off the appliance.
6 Make sure the appliance is completely dry before you reattach the cutting system A.
7 Insert the cutting systemA in the shaving head B again.
Storage
If you do not want to use the appliance for a long period of time, please store it carefully.
Use the hanging holder to hang the appliance securely and stable.
Make sure that it is switched off and completely dry.
Store the appliance and the power supply unit in a cool, dry place.
Make sure the appliance is kept out of reach of children.
Compliance with the WEEE Directive and Disposing of the Waste Product:
This product complies with EU WEEE Directive (2012/19/EU). This product bears a classification symbol for waste electrical and electronic equipment (WEEE).
This symbol indicates that this product shall not be disposed with other household wastes at the end of its service life.
Used device must be returned to official collection point for recycling of electrical and electronic devices. To find these collection systems please contact to your local authorities or retailer where the product was purchased. Each household performs important role in recovering and recycling of old appliance. Appropriate disposal of used appliance helps prevent potential negative consequences for the environment and human health.
Compliance with RoHS Directive
The product you have purchased complies with EU RoHS Directive (2011/65/EU). It does not contain harmful and prohibited materials specified in the Directive.
Package information

Packaging materials of the product are manufactured from recyclable materials in accordance with
our National Environment Regulations. Do not dispose of the packaging materials together with the domestic or other wastes. Take them to the packaging material collection points designated by the local authorities.
Technical data

Parameter of External Power Supply
Manufacturer: E-TEK Electronics
Manufactory Co., LTD
Model Identifier: ZDM036100EU
Input Voltage: 100-240V~
Input Frequency: 50/60Hz
Input Current: 0.2A
Output Voltage: 3.6V
Output Current: 1.0A
Output Power: 3.6W
Average active efficiency: 74.04%
Efficiency at low load(10%): 66.63%
No-load power consumption: 0.061W
Batteries: Nickel metal hydride Ni-MH
Technical and design modifications reserved.
Fabricante: E-TEK Electronics
Manufactory Co., LTD
Identificado del modelo: ZDM036100EU
Cher client, chere clientele,
Fabricant: E-TEK Electronics
Manufactory Co., LTD
Produsent: E-TEK Electronics
Manufactory Co., LTD
Modellidentifikator: ZDM036100EU
Inngangsspenning: 100-240V~
Inngangsfrekvens: 50 / 60Hz
Manufactory Co., LTD
Geen-belasting stroomver
bruik: 0.061W
Batterijen:
Nikkel-metaalhydride Ni-MH

Ni-MH
Producent: E-TEK Electronics
Manufactory Co., LTD
Veja as ilustracoes na网页 3.
Fabricante: E-TEK Electronics
Manufactory Co., LTD
Identificado do Modelo: ZDM036100EU
Manufactory Co., LTD
Model Kimligi: ZDM036100EU
Kataokεuaatης: E-TEK Electronics
Manufactory Co., LTD
Avaywpiotikovtlambda: ZDM036100EU
Tao 100-240 V~
Σuxvônta εισδου: 50/60 Hz


- A responsible approach!
- Controls
- Accessories
- Note
- Rechargeable battery operation
- Notes
- Mains operation
- Caution
- Shaving
- Armpits
- Trimming
- Hints and Tips
- General information
- Detaching/attaching the shaving head
- Attaching/detaching attachments
- Cleaning the shaving head
- Storage
- Compliance with the WEEE Directive and Disposing of the Waste Product:
- Compliance with RoHS Directive
- Package information
- Technical data
- Parameter of External Power Supply
- Batteries: Nickel metal hydride Ni-MH
Brand : GRUNDIG
Model : Selection LS 7140
Category : Shaver