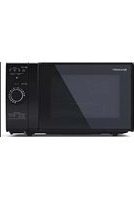
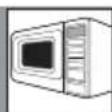
R870KM - Microwaves SHARP - Free user manual and instructions
Find the device manual for free R870KM SHARP in PDF.

User questions about R870KM SHARP
0 question about this device. Answer the ones you know or ask your own.
Ask a new question about this device
Download the instructions for your Microwaves in PDF format for free! Find your manual R870KM - SHARP and take your electronic device back in hand. On this page are published all the documents necessary for the use of your device. R870KM by SHARP.
USER MANUAL R870KM SHARP
This operation manual contains important information which you should read carefully before using your microwave oven.
Important: There may be a serious risk to health if this operation manual is not followed or if the oven is modified so that it operates with the door open.
DE
13/14
Achtung:
INICIO/+30sec. (+30Sec.
SKOTSEL OCH RENGORING 27

SPECifikATIONER
| Modellnamn: R-870 | |
| Nätspänning | : 230 V, 50 Hz enfas |
| Distributionsnätssäkring/kretsskydd | : 16 A |
| Nödvändig effekt: Mikrovågsugn | : 1450 W |
| Uteffekt: Mikrovågsugn | : 900 W |
| Toppgrill (infraröd) | : 1100 W |
| Konvektion | : 2500W |
| Av-läge (Energisparläge) | :indre öän 1,0 W |
| Mikrovågsfrekvens | : 2450 MHz* |
| Yttermätt (B) x (H) x (D)** mm | : 513,0 x 307,0 x 503,0 |
| Innermätt (B) x (H) x (D)*** mm | : 328,0 x 226,0 x 346,0 |
| Ugnsvolym | : 25 liter*** |
| Roterande tallrik (glas) | : ø 315 mm |
| Vikt | : cirka 18,5kg |
| Ugnslampa | : 25 W/240 V |
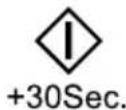
You can directly start cooking on P100 microwave power level for 30 seconds by pressing the START+30sek
- Tryck pA START/+30sek
- Press the START/+30sek
Att notera for TIDUPPTINING:
For at undgå risiko for brand.
MANUEL TILBEREDNING/MANUEL OPTØNING
knappen ( ) for at bekrafte temperature.
4. Tryk pã START/+30 sek. knappen
Displayet viser: dEF1
- Angiv den onskede vegt ved at trykke på erler, indtil displayet viser:
1200
Samtidig vil indicatoren "g" lyse pa displayet.
- Tryk pa START/+30 sek
knappen ( ) for at pabegynde optøningen.30Sec.
2. OPTØNING EFTER TID
TILBEREDNING MED VARMLUFT 21
ANDRE PRAKTISKE FUNKSJONER 22
TINING PÅ TID ELLER I HENHOLD TIL VEKT 23
MINNEFUNSKJON 23
AUTOMENY 24
AUTOMENY-TABELL 24-25
PASSENDE Kokekar 26
STELLOGRENGJØRING 27
| Modellnavn: R-870 | |
| Spenning | : 230 V, 50 Hz enfaset |
| Sikring / kretsbryter | : 16 A |
| Vekselstrøm påkrevet: Mikrobølge | : 1450 W |
| Effekt: Mikrobølge | : 900 W |
| Øverste grill (infrarød) | : 1100 W |
| Varmluft | : 2500 W |
| Av-modus (Energisparemodus) | :mindre enn 1,0 W |
| Mikrobølgefrekvens | : 2450 MHz* |
| Utvendige dimensjoner (B) x (H) x (D)** mm | : 513,0 x 307,0 x 503,0 |
| Dimensjoner i ovsrommet (B) x (H) x (D)*** mm | : 328,0 x 226,0 x 346,0 |
| Ovnsrom | : 25 liter*** |
| Roterende tallerken (glass) | : Ø 315 mm |
| Vekt | : ca. 18,5 kg |
| Ovnslampe | : 25 W/240 V |
MANUELL TILBEREDNING / MANUELL TINING
to ganger for P80 ell trykk
or for a velge mikro
- Fyll inn onsket tilbered
for a startetidsuret.
(Displayet vil telle ned
innstilt bileredningstd.)
NB:
Nar ovnen starter vil ovnslampen lyse og dreiefoten rotere mot hyre erer venstre. Hvis daren apnes under tilberedning/ti ning for a rre ellrte maten vil tilberedningstiden pa displayet stoppe automatisk. Tilberednings/tinetiden vil begynne
TILBEREDNING MED VARMLUFT
1. TINING I HENHOLD TIL VEKT
Noter for TINING I HENHOLD TIL VEKT:
Frduyfryserinnmat,paseatmatenerfriskogavgodkvalitet.
- Plasser mat med vekt mindre enn 200g pa kanten -iks i midten -av dreiefoten.
Vekten skal rundes opp til naermeste 100g for eksempel 650g blr 700g .
- Om不同程度 skjermes minre omrader av kjott erer fjarkre med sma flate biter av aluminiumfolie. Dette vil hindre at omradene blir varme under opptining. Pase at folien icke har kontakt med veggene i ovnen.
2. TINING PÅ TID
Noter for TINING PÅ TID:
- Etter tilberedningen vil et lydsignal hores fem ganger og LED-skjermen vil vise klokkeslettet dersom klokken er stilt. Dersom klokken ikke er stilt, vil displayet vise «0:00» narr tilberedningen er fertig.
Den forhandsinnstilte mikrobolggeeffekten er P30 og kan/DDKE endres.
MINNEFUNSKJON
START/+30sek-knappen
( ) for a bekrefte tilberedningsmodus.
* Klargjøring for sukkerbrod (A8):
KYPSENNYS/VALIKKOTOIMINTO 18
MIKROALLOILLA KYPSENNYS 19
GRILLIKYPSENNYS-/YHDISTELMATOIMINTO 20
KIERTOILMAKYPENNYS 21
MUUT HELPOT TOIMINNOT 22
SULATUKSEN AIKA- JA PAINOTOIMINTO 23
MUISTITOIMINTO 23
KYPSENNYS/VALIKKOTOIMINTO
Valitsetehotaso
MIKROAALLOILLA KYPSENNYS
MANUAALINEN KYPSENNYS/ MANUAALINEN SULATUS
1. KYPSENNYS VAIN GRILLILLA
2.YHDISTELMAKYPSENNYS
m = 311
Attention:
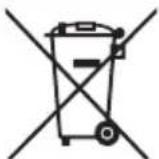
Your product is
marked with this symbol. It means that used electrical and electronic products should not be mixed with general household waste. There is a separate collection system for these products.
A. Information on Disposal for Users (private households)
1. In the European Union
Attention: If you want to dispose of this equipment, please do not use the ordinary dust bin!
Used electrical and electronic equipment must be treated separately and in accordance with legislation that requires proper treatment, recovery and recycling of used electrical and electronic equipment.
Following the implementation by member states, private households within the EU states may return their used electrical and electronic equipment to designated collection facilities free of charge*.
In some countries* your local retailer may also take back your old product free of charge if you purchase a similar new one.
*) Please contact your local authority for further details.
If your used electrical or electronic equipment has batteries or accumulators, please dispose of these separately beforehand according to local requirements. By disposing of this product correctly you will help ensure that the waste undergoes the necessary treatment, recovery and recycling and thus prevent potential negative effects on the environment and human health which could otherwise arise due to inappropriate waste handling.
2. In other Countries outside the EU
If you wish to discard this product, please contact your local authorities and ask for the correct method of disposal.
For Switzerland: Used electrical or electronic equipment can be returned free of charge to the dealer, even if you don't purchase a new product. Further collection facilities are listed on the homepage of www.swico.ch or www.sens.ch.
B. Information on Disposal for Business Users
1. In the European Union
If the product is used for business purposes and you want to discard it:
Please contact your SHARP dealer who will inform you about the take-back of the product. You might be charged for the costs arising from take-back and recycling. Small products (and small amounts) might be taken back by your local collection facilities.
For Spain: Please contact the established collection system or your local authority for take-back of your used products.
2. In other Countries outside the EU
If you wish to discard of this product, please contact your local authorities and ask for the correct method of disposal.
Operation manual
INFORMATION ON PROPER DISPOSAL 1
CONTENTS 2
SPECIFICATIONS 2
OVEN AND ACCESSORIES 3
CONTROL PANEL 4
IMPORTANT SAFETY INSTRUCTIONS 5-15
INSTALLATION 16-17
BEFORE OPERATION 18
SETTING THE CLOCK. 18
CONVECTION COOKING 21
OTHER CONVENIENT FUNCTIONS 22
TIME DEFROST AND WEIGHT DEFROST OPERATION 23
MEMORY FUNCTION 23
CARE AND CLEANING 27
| Model name: R-870 | |
| AC Line Voltage : 230 V, 50 Hz single phaseDistribution line fuse/circuit breaker : 16 ACPower required: Microwave : 1450 WOutput power: Microwave : 900 WTop Grill (Infrared) : 1100 WConvectionOff Mode (Energy Save Mode)Microwave FrequencyOutside Dimensions (W) x (H) x (D)** mmCavity Dimensions (W) x (H) x (D)*** mmOven CapacityTurntable (glass)WeightOven lamp | : 2500W: less than 1,0 W: 2450 MHz*: 513,0 x 307,0 x 503,0: 328,0 x 226,0 x 346,0: 25 litres***:ø 315 mm: approx. 18,5 kg: 25 W/240 V |
- This Product fulfils the requirement of the European standard EN55011.
In conformity with this standard, this product is classified as group 2 class B equipment.
Group 2 means that the equipment intentionally generates radio-frequency energy in the form of electromagnetic radiation for the heat treatment of food.
Class B equipment means that the equipment is suitable to be used in domestic establishments.
The depth does not include the door opening handle.
* Internal capacity is calculated by measuring maximum width, depth and height. Actual capacity for holding food is less.
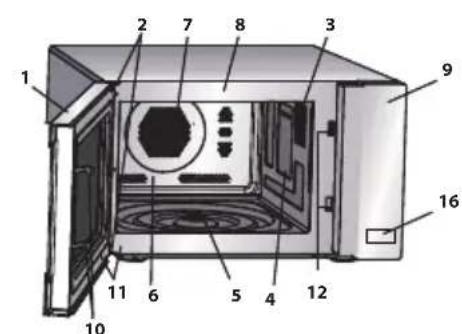


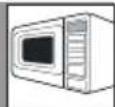
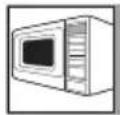
OVEN
- Door
- Door hinges
- Oven lamp
- Waveguide cover (DO NOT REMOVE)
- Coupling
- Oven cavity
- Convection fan (covered)
- Grill heating element (under the ceiling)
- Control panel
- Door latches
- Door seals and sealing surfaces
- Door safety latches
- Ventilation openings
- Outer cabinet
- Power supply cord
- Door Released Button
ACCESSORIES:
Check to make sure the following accessories are provided:
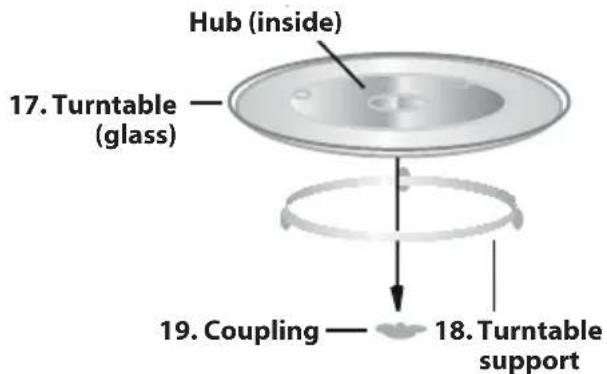
(17) Turntable (18) Turntable support (19) Coupling (20) Rack
- Place the turntable support in the centre of the oven floor so that it can freely rotate around the coupling. Then place the turntable on to the turntable support so that it locates firmly into the coupling.
- To avoid turntable damage, ensure dishes and containers are lifted clear of the turntable rim when removing them from the oven.
- For use of the rack, refer to the grilling sections on page GB-10.
- The non stick coating crisp plate can be used in all cooking modes to obtain crisp and best performance results. It is ideal for food like oven chips, Pizza etc. or it can act as a splash guard, if you are grilling food directly on the rack to keep the oven clean.
Never touch the grill when it is hot.
NOTE: When you order accessories, please mention two items: part name and model name to your dealer or SHARP authorised service agent.
NOTES:
- The waveguide cover is fragile. Care should be taken when cleaning inside the oven to ensure that it is not damaged.
- After cooking fatty foods without a cover, always clean the cavity and especially the grill heating element thoroughly, these must be dry and free from grease. Built-up grease may overheat and begin to smoke or catch fire.
- Always operate the oven with the turntable and turntable support fitted correctly. This promotes thorough, even cooking. A badly fitted turntable may rattle, may not rotate properly and could cause damage to the oven.
- All food and containers of food are always placed on the turntable for cooking.
- The turntable rotates clockwise or anti-clockwise. The rotary direction may change each time you start the oven. This does not affect cooking performance.
WARNING:
The door, outer cabinet, oven cavity, accessories and dishes will become very hot during operation. To prevent burns, always use thick oven gloves.
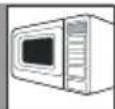
- DIGITAL DISPLAY
- GRILL/COMBI key
- MICROWAVE POWER key
- CONVECTION key
- WEIGHT DEFROST key
- CLOCK/KITCHEN TIMER key
- TIME DEFROST key
- AUTO MENU key
-
Start/+30 SEC key
-
Increase/decrease power lever or adjust combi mode,temperature, Auto Menu.
- Adjust cooking time or weight
- STOP/CLEAR key
- MEMORY key
IMPORTANT SAFETY INSTRUCTIONS: READ CAREFULLY AND KEEP FOR FUTURE REFERENCE
To avoid the danger of fire.
The microwave oven should not be left unattended during operation. Power levels that are too high, or cooking times that are too long, may overheat foods resulting in a fire.
This oven is designed to be used on a countertop only. It is not designed to be built into a kitchen unit.
Do not place the oven in a cabinet.
The electrical outlet must be readily accessible so that the unit can be unplugged easily in an emergency.
The AC power supply must be 230V , 50Hz , with a minimum 10 A distribution line fuse, or a minimum 10 A distribution circuit breaker.
A separate circuit serving only this appliance should be provided.
Do not place the oven in areas where heat is generated.
For example, close to a conventional oven.
Do not install the oven in an area of high humidity or where moisture may collect.
Do not store or use the oven outdoors.
If smoke is observed, switch off or unplug the oven and keep the door closed in order to stifle any fl ames.
Use only microwave-safe containers and utensils. See Page GB-25. Utensils should be checked to ensure that they are suitable for use in microwave ovens.
When heating food in plastic or paper containers, keep an eye on the oven due to the possibility of ignition.
Clean the waveguide cover, the oven cavity, the turntable and turntable support after use. These must be dry and free from grease. Built-up grease may overheat and begin to smoke or catch fire.
Do not place flammable materials near the oven or ventilation openings.
Do not block the ventilation openings.
Remove all metallic seals, wire twists, etc., from food and food packages. Arcing on metallic surfaces may cause a fire.
Do not use the microwave oven to heat oil for deep frying. The temperature cannot be controlled and the oil may catch fire.
To make popcorn, use only special microwave popcorn makers.
Do not store food or any other items inside the oven.
Check the settings after you start the oven to ensure the oven is operating as desired.
To avoid overheating and fire, special care must be taken when cooking or reheating foods with a high sugar or fat content, for example, Sausage rolls, Pies or Christmas pudding.
See the corresponding hints in the operation manual.
To avoid the possibility of injury
WARNING:
Do not operate the oven if it is damaged or malfunctioning. Check the following before use:
a) The door; make sure the door closes properly and ensure it is not misaligned or warped.
b) The hinges and safety door latches; check to make sure they are not broken or loose.
c) The door seals and sealing surfaces; ensure that they have not been damaged.
d) Inside the oven cavity or on the door; make sure there are no dents.
e) The power supply cord and plug; ensure that they are not damaged.
If the door or door seals are damaged, the oven must not be operated until it has been repaired by a competent person.
Never adjust, repair or modify the oven yourself. It is hazardous for anyone other than a competent person to carry out any service or repair operation which involves the removal of a cover which gives protection against exposure to microwave energy.
Do not operate the oven with the door open or alter the door safety latches in any way. Do not operate the oven if there is an object between the door seals and sealing surfaces.
Do not allow grease or dirt to build up on the door seals and adjacent parts. Clean the oven at regular intervals and remove any food deposits. Follow the instructions for "Care and Cleaning" on page GB-26. Failure to maintain the oven in a clean condition could lead to a deterioration of the surface that could adversely affect the life of the appliance and possibly result in a hazardous situation.
Individuals with PACEMAKERS should check with their doctor or the manufacturer of the pacemaker for precautions regarding microwave ovens.
To avoid the possibility of electric shock
Under no circumstances should you remove the outer cabinet.
Never spill or insert any objects into the door lock openings or ventilation openings. In the event of a spill, turn off and unplug the oven immediately, and call an authorised SHARP service agent.
Do not immerse the power supply cord or plug in water or any other liquid.
Do not let the power supply cord hang over the edge of a table or work surface.
Keep the power supply cord away from heated surfaces, including the rear of the oven.
- Keep the appliance and its cord out of reach of children less than 8 years.
Do not attempt to replace the oven lamp yourself or allow anyone who is not an electrician authorised by SHARP to do so. If the oven lamp fails, please consult your dealer or an authorised SHARP service agent.
If the power supply cord of this appliance is damaged, it must be replaced with a special cord.
The exchange must be made by an authorised SHARP service agent.
To avoid the possibility of explosion and sudden boiling:
WARNING: Liquids and other foods must not be heated in sealed containers since they are liable to explode.
Microwave heating of beverages can result in delayed eruptive boiling, therefore care must be taken when handling the container.
Never use sealed containers. Remove seals and lids before use. Sealed containers can explode due to a build up of pressure even after the oven has been turned off.
Take care when microwaving liquids. Use a wide mouthed container to allow bubbles to escape.
Never heat liquids in narrow necked containers such as baby bottles, as this may result in the contents erupting from the container when heated and cause burns.
To prevent sudden eruption of boiling liquid and possible scalding:
- Do not use excessive amount of time.
- Stir liquid prior to heating/reheating.
- It is advisable to insert a glass rod or similar utensil (not metal) into the liquid whilst reheating.
- Let liquid stand for at least 20 seconds in the oven at the end of cooking time to prevent delayed eruptive boiling.
Do not cook eggs in their shells, and whole hard boiled eggs should not be heated in microwave ovens since they may explode even after microwave cooking has ended. To cook or reheat eggs which have not been scrambled or mixed, pierce the yolks and the whites, or the eggs may explode. Shell and slice hard boiled eggs before reheating them in the microwave oven.
Pierce the skin of such foods as potatoes, sausages and fruit before cooking, or they may explode.
To avoid the possibility of burns
WARNING: The contents of feeding bottles and baby food jars must be stirred or shaken and the temperature checked before consumption, in order to avoid burns.
Use pot holders or oven gloves when removing food from the oven to prevent burns.
Always open containers, popcorn makers, oven cooking bags, etc., away from the face and hands to avoid steam burns and eruption of boiling.
To avoid burns, always test food temperature and stir before serving and pay special attention to the temperature of food and drink given to babies, children or the elderly. Accessible parts may become hot during use. Young children should be kept away.
Temperature of the container is not a true indication of the temperature of the food or drink; always check the food temperature.
Always stand back from the oven door when opening it to avoid burns from escaping steam and heat.
Slice stuffed baked foods after heating to release steam and avoid burns.
Keep children away from the door to prevent them burning themselves.
To avoid misuse by children
WARNING: Only allow children aged from 8 years and above to use the oven without supervision when adequate instructions have been given so that the child is able to use the oven in a safe way and understands the hazards of improper use. When the appliance is operated in the GRILL, MIX GRILL and AUTO MENU operation, children should only use the oven under adult supervision due to the temperature generated. This appliance is not intended for use by persons (including children) with reduced physical, sensory or mental capabilities, or lack of experience and knowledge, unless they have been given supervision or instruction concerning use of the appliance by a person responsible for their safety. Children should be supervised to ensure that they do not play with the appliance.
Do not lean or swing on the oven door. Do not play with the oven or use it as a toy.
Children should be taught all important safety instructions: use of pot holders, careful removal of food coverings; paying special attention to packaging (e.g. self-heating materials) designed to make food crisp, as they may be extra hot.
Other warnings
Never modify the oven in any way.
Do not move the oven while it is in operation.
This appliance is intended to be used in household and similar applications such as:
- staff kitchen areas in shops, offices and other working environments;
- farm houses;
- by clients in hotels, motels and other residential environments;
- bed and breakfast type environments.
This oven is for home food preparation only and may only be used for cooking food. It is not suitable for commercial or laboratory use.
To promote trouble-free use of your oven and avoid damage.
Never operate the oven when it is empty. When using a browning dish or self-heating material, always place a heat-resistant insulator such as a porcelain plate under it to prevent damage to the turntable and turntable support due to heat stress. The preheating time specified in the dishes instructions must not be exceeded.

ORTANT SAFETY INSTRUCTIONS
Do not use metal utensils, which reflect microwaves and may cause electrical arcing. Do not put cans in the oven.
Use only the turntable and the turntable support designed for this oven. Do not operate the oven without the turntable.
To prevent the turntable from breaking:
(a) Before cleaning the turntable with water, leave the turntable to cool.
(b) Do not put hot foods or hot utensils on a cold turntable.
(c) Do not put cold foods or cold utensils on a hot turntable.
Do not place anything on the outer cabinet during operation.
NOTE:
Do not use plastic containers for microwaving if the oven is still hot from using the GRILL and MIX GRILL operation because they may melt.
Plastic containers must not be used during above modes unless the container manufacturer says they are suitable.
If you are unsure how to connect your oven, please consult an authorised, qualified electrician.
Neither the manufacturer nor the dealer can accept any liability for damage to the oven or personal injury resulting from failure to observe the correct electrical connection procedure.
Water vapour or drops may occasionally form on the oven walls or around the door seals and sealing surfaces. This is a normal occurrence and is not an indication of microwave leakage or a malfunction.
- Remove all packing materials from the inside of the oven cavity and remove any protective film found on the microwave oven cabinet surface.
- Check the oven carefully for any signs of damage.
- Place the oven on a secure, level surface, strong enough to take the oven weight, plus the heaviest item likely to be cooked in the oven. Do not place the oven in a cabinet.
- Select a level surface that provide enough open space for the intake and/or outlet vents.
The rear surface of appliance shall be placed against a wall.
- The minimum installation height is 85~cm .
- A minimum space of 20~cm is required between the oven and any adjacent walls.
- Leave a minimum space of 30~cm above the oven.
- Do not remove the feet from the bottom of the oven.
- Blocking the intake and/or outlet openings can damage the oven.
- Place the oven as far away from radios and TV as possible. Operation of microwave oven may cause interference to your radio or TV reception.
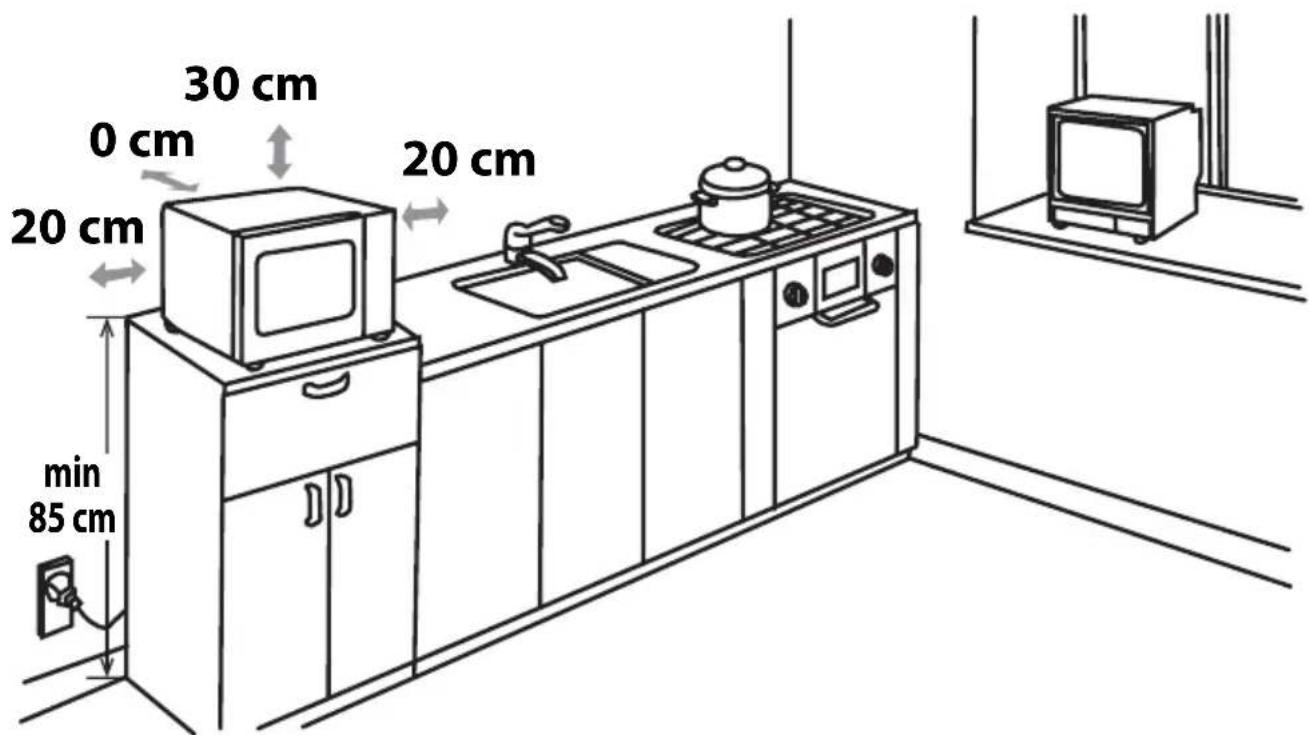
- Securely connect the plug of the oven to a standard earthed (grounded) household electrical outlet.
WARNING: Do not place the oven where heat, moisture or high humidity are generated, (for example, near or above a conventional oven) or near combustible materials (for example, curtains).
Do not block or obstruct air vent openings.
Do not place objects on top of the oven.
Plug in the oven. The oven display will display: "0:00", an audible signal will sound once.
This model has a clock function and the oven uses less than 1.0W in stand by mode. To set the clock, see below.
SETTING
THE
CLOCK
This is a 24 hour clock. To set the clock
- Press once. The hour figure will flash.
- Press or to adjust the hour figure until the correct hour is displayed and then press to confirm the hour figure. The minute figure will now flash.
- Press or to adjust the minute figure until the correct minute is displayed and then press to confirm the setting.
Notes:
- If the STOP key is pressed while setting the clock, the oven will go back to the previous setting.
- If the electrical power supply to your microwave oven is interrupted, the display will show "0:00" after the power is reinstated. The time of day will also be erased.
After cooking, END will show in the display window. Once the microwave door has been opened or the STOP key has been pressed, the time of day will show in the display window, providing the clock has been set.
OOK/MENU OPERATION
Select the Power Level
Press continuously or the arrows or until the required power level is displayed.
There are 5 power levels to choose from - 100% 80% 50% 30% 10% . Refer to the following page for a guide on how to select the right power level.
Enter the Cook Time
Press the arrows or until the required time is displayed.
The cook time can be can be programmed for up to 95 minutes (95:00) and can be entered in the following increments
| Cooking Time | Increasing Unit |
| 0-1 minute | 5 seconds |
| 1-5 minutes | 10 seconds |
| 5-10 minutes | 30 seconds |
| 10-30 minutes | 1 minute |
| 30-95 minutes | 5 minutes |
Start Cooking
Press to start cooking.
The clock will start counting down to 0 and a beep will sound 5 times once cooking is finished.
Notes:
- To stop the microwave before the end of the cook time, press the STOP key.
- If the door is opened during cooking/defrosting to stir or turn the food, the cook time on the display stops automatically. The time will start to count down again once the door is closed and the key is pressed.
Refer to the next page for a guide on cook times and power levels for different foods
Use the STOP key to:
- Erase a mistake during programming.
- Stop the oven temporarily during cooking.
- Cancel a programme during cooking, press the STOP key twice.
- To set and to cancel the child lock.
STOP
Automatically lamp off function:
When the microwave oven is powered on, if opening the door the oven lamp will be turned off automatically after 1 minute.
ECO Mode:
In standby mode, press the "STOP" button once, the LED display will be off and microwave oven enter to ECO mode. Any operation can light the LED display again, and the microwave oven will return to standby mode.
MICROWAVE
Microwave power level guide
| DISPLAY | POWER LEVEL EXAMPLE | |
| P100% | Cook or reh | eat rice, pasta, vegetables, beverages |
| P80% | Cook or reh | eat delicate food such as eggs or seafood |
| P50% | ||
| P30% | Defrosting, | soften butter |
| P100% | Keep food | warm |
MANUAL COOKING/MANUAL DEFROSTING
- Enter the cooking time and use microwave power levels P100 to P10 to cook or defrost (see example below).
- Stir or turn the food, where possible, 2 - 3 times during cooking.
After cooking, cover the food and leave to stand, where recommended. - After defrosting, cover the food in foil and leave to stand until thoroughly defrosted.
Example:
To cook 2 minutes and 30 seconds on 80% microwave power.
-
Input the power level by pressing the MICROWAVE POWER LEVEL (on) twice times for P80 or press or to select the microwave power to P80.
-
Press the START/+30sec 3. Enter desired cooking button () to time by press the > or < button. confirm the selected power level.
-
Press the START/+30sec button to start +30Sec. the timer. (The display will count down through the set cooking time.)
NOTE:
- When the oven starts, the oven lamp will light and the turntable will rotate clockwise or anticlockwise. If the door is opened during cooking/defrosting to stir or turn over food, the cooking time on the display stops automatically. The cooking/defrosting time starts to count down again when the door is closed and the START/+30sec/ button (+) is pressed. +30Sec.
- When cooking/defrosting is complete, the time of day will reappear on the display, if the clock has been set.
- If you wish to know the power level during cooking, press the MICROWAVE POWER LEVEL button. The current power level will be displayed for 2-3 seconds.
IMPORTANT:
- Close the door after cooking / defrosting. Please note that the light will remain on for 10 minutes when the door is open, this is for safety reason to remind you to close the door.
1. GRILL ONLY COOKING
The grill at the top of the oven cavity has one power setting only. The grill is assisted by the turntable which rotates simultaneously to ensure even browning. Use the rack for grilling small items of food such as bacon, gammon and teacakes. Food can be placed either directly onto the rack, or into a flan dish/heat-resistant plate on the rack.
Example:
To grill for 20 minutes, using GRILL/COMBI button.
-
Press GRILL/COMBI button once. G and the grill indicator will light up on the display.
-
Press the START/+30sec button (1_+30Sec) to confirm the cooking mode.
-
Enter desired cooking time by press the button.
-
Press the START/+30sec button ( 1 ) once more to +30Sec. start the grilling. (The display will count down through the set grilling time.)
Note:
After half of grilling time the audible signal sounds twice and will remind you to turn the food over to ensure even browning. Please be aware that the oven will not stop automatically during grilling. For a better grill effect the food should turn over after halfway through cooking time. After turnover the food halfway through, close the door and then press the START/ +30sec button ( ) to continue grilling.
2.COMBI COOKING
The COMBI COOKING feature enables a combination microwave power with grill or/and convection as well as the combination of grill and convection. COMBI means to cook by microwave power, grill power and/or convection power alternately. The combination cooking reduces cooking time and provides a crisp, brown finish giving you the convenience of fast cooking with a traditional appetising appearance.
There are 4 choices for the combination as shown in the chart below:
| Press GRILL/COMBI button | Display Microwave Grill Convection | |||
| twice C-1 • | ||||
| 3 times C-2 | • | • | ||
| 4 times C-3 | • | • | ||
| 5 times C-4 • | • | • | ||
- = available
Example for Microwave and Convection:
To cook for 30 minutes using the combination of microwave and convection (C-1).
-
Press GRILL/ COMBI button once. G will light up on the display.
-
Select C-1 by pressing the button once more or press or until the display will show C-1. At the same time microwave and convection indicator will light up.
-
Press the START/+30sec button ( ) to confirm +30Sec. the cooking mode.
-
Enter desired cooking time by press the or < button.
-
Press the START/+30sec button ( 1 +30Sec. to start the cooking. (The display will count down through the set cooking time.)
NOTES for GRILL and COMBI COOKING:
It is not necessary to preheat the grill.
- When browning food place it either on the low or high rack or in a deep container on the turntable.
- You may detect smoke or a burning smell when using the grill for the first time. This is normal and not a sign that the oven is out of order. To avoid this problem, when first using the oven, heat the oven without food for 20 minutes on grill.
IMPORTANT: During operation, to allow smoke or smells to disperse open a window or switch the kitchen ventilation on.

WARNING:
The door, outer cabinet, oven cavity and accessories will become very hot during operation. To prevent burns, always use thick oven gloves.
Your oven can be used as a conventional oven using the convection facility and 10 pre-set oven temperatures. Preheating is recommended for better results. The temperature can be chosen from 150^ to 230^ in 10^ increments.
| Press CONVECTION button 1 2 3 4 5 6 7 8 9 | ||||||||
| Oven Temp (°C) 150 160 170 180 190 200 210 220 230 |
Example 1: To cook with preheating
Suppose you want to preheat to 200^ and cook for 25 minutes at 200^ .
-
Press the CONVECTION button once. 150 and the temperature indicator will flash on the display and the convection indicator will light up.
-
Enter the desired preheat temperature by pressing the CONVECTION button (5 times) x5 or press or until the display will show 200.
-
Press the START/+30sec button (1) to confirm the temperature.
4. Press the START/+30sec
button (1) once more to +30Sec. start preheating.When the preheated temperature has been reached the audible signal will sound twice to remind you to put the food into the oven. The current temperature will flash in the display.
-
Open the door, place the food inside the oven and close the door. Press or to input the cooking time (25 minutes).
-
Press the START/+30sec button ( ) to start cooking. +30Sec. The display will count down trough the set cooking time. The convection indicator will flash.
Example 2: To cook without preheating
Suppose you want to cook at 230^ for 20 minutes.
-
Open the door, place the food inside the oven and close the door. Press the CONVECTION button once. 150 and the temperature indicator will flash on the display and the convection indicator will light up.
-
Enter the desired temperature by pressing the CONVECTION button (8 times) x8 or press or until the display will show 230.
-
Press the START/+30sec button (口 +30Sec) to confirm the temperature.
-
Press or to input the cooking time (20 minutes).
-
Press the START/+30sec button (+30Sec to start cooking.
Notes:
- The cooking time cannot be input until the preheating temperature arrives. If the temperature arrives, door must be opened to input the cooking time.
- The convection heater will stop automatically; if there will be no input for the cooking time within 5 minutes. The audible signal will sound five times to remind and the LED will display the time of day, if the clock has been set. If the clock has not been set, the display will only show "0:00".
- When the oven is preheating, the turntable should be in the oven. During preheating and convection cooking, you will hear the cooling fan cycling on and off. This is completely normal and will not affect the cooking.
- Food manufacturers instructions are only a guideline, so cooking times may need to be adjusted
- After cooking is complete the cooling fan will continue working for a short time to lower the temperature of the electrical and mechanical parts.
- You may detect smoke or a burning smell when using convection for the first time. This is normal and is not a sign that the oven is out of order. To avoid this problem, when first using the oven, heat the oven without food for 20 minutes on grill and then at convection 230^
IMPORTANT: During operation, to allow smoke or smells to disperse open a window or switch the kitchen ventilation on. Make sure there is no food in the oven.
WARNING:
The door, outer cabinet, oven cavity and accessories will become very hot during operation. To prevent burns, always use thick oven gloves.
1. SEQUENCE COOKING
This function quickly defrosts food while enabling you to choose a suitable defrost period, depending on the food type. Follow the example below for details on how to operate this function. This function allows you to cook using up to 2 different stages which can include manual cooking time and mode and/or time defrost as well as weight defrost function.
Once programmed there is no need to interfere with the cooking operation as the oven will automatically move onto the next stage. The audible signal will sound once after the first stage. If one stage is defrosting, it should be in the first stage.
Note: Auto menu cannot be set as one of the multiple sequences.
Example : If you want to defrost the food for 5 minutes, then to cook with P80 microwave power for 7 minutes. The steps are as follows:
-
- Press the TIME DEFROST button once, in the LED display will appear dEF2.
-
- Enter the defrosting time bypass or button until the display show "5:00" minutes.
-3. Press the MICROWAVE POWER LEVEL button once.
- Enter the defrosting time bypass or button until the display show "5:00" minutes.
-
- Input the power level by pressing the MICROWAVE POWER LEVEL button once more for P80 or press or to select the microwave power to P80.
-5. Press the START/+30sec button (+30sec.) to confirm the setting.
- Input the power level by pressing the MICROWAVE POWER LEVEL button once more for P80 or press or to select the microwave power to P80.
-
- Enter the cooking time by press the or until the display show "7:00" minutes.
-7. Press the START/+30sec button () to start cooking.
- Enter the cooking time by press the or until the display show "7:00" minutes.
2. +30sec FUNCTION (Direct start)
The START/+30sec button ( 公 ) allows you to operate the two following functions:
a. Direct start
You can directly start cooking on P100 microwave power level for 30 seconds by pressing the START/+30sec button. ()30Sec. The cooking process will start immediately, whereas each time pressing the button will increase the cooking time by 30 seconds.
b. Extend the cooking time
You can extend the cooking time during manual, grill, convection, combi cooking and time defrost for multiples of 30 seconds if the START/+30sec button (+) is pressed while the oven is in operation. During weight defrost and auto menu function and sequence cooking, the cooking time cannot be increased by pressing START/+30sec button ().
NOTE: The cooking time may be extended to a maximum of 95 minutes.
3. DELAY START
DELAY START cooking allows you to program the oven to start cooking at a point later in the day. Before setting, make sure the clock is set to the correct time of day.
Example:
Follow the example below for starting the microwave automatically at a later point of time. The maximum time-delay is 23 hours and 59 minutes.)
- 1) Press the MICROWAVE button once and press or to select the microwave power level to P80.
- 2) Press the START/+30sec button ( ) to confirm the setting.
- 3) Enter the cooking time bypress or until the display show "7:00" minutes. After the above steps, please do not press START/+30sec button
- 4) Press the CLOCK/KITCHEN TIMER button (20 / 10) once. The display will show the current time and the hours figure will flash.
- 5) Press or to set the hour of the desired start time for cooking. The input time should be within 0-23 (24-hour clock) or 1-12 (12-hour clock)
- 6) Press CLOCK/KITCHEN TIMER button ( / ) and the minutes figure will flash.
-7)Press or to set the minutes of the desired start time for cooking. The input time should be within 0-59 minutes. - 8) Press the START/+30sec button ( & ) to confirm the setting for the delay start.
4. CHILD LOCK:
Use to prevent unsupervised operation of the oven by little children.
a. To set the CHILD LOCK:
Press and hold the STOP key for 3 seconds until a long beep sound. On the display will light the lock indicator:
b. To cancel the CHILD LOCK:
Press and hold the STOP key for 3 seconds until a long beep sound. The lock indicator will disappear.
DEFROSTAMD DEFROST OPERATION
1. WEIGHT DEFROST
The microwave oven is pre-programmed with a time and power level so that the following food is defrosted easily: Pork, beef and chicken. The weight range for this food is from 100g - 2000g in 100g steps.
Follow the example below for details on how to operate these functions.
Example: To defrost a Meat joint weighing 1.2kg using WEIGHT DEFROST.
Place the meat in a flan dish or in a microwave oven defrost rack on the turntable.
- Select the menu required by pressing the WEIGHT DEFROST button.
The display will show:
- Enter the desired weight by press or until the display show:
1200
At the same time "g"indicator will light on the display.
- Press the START/+30sec button () to start defrosting.
The microwave and defrost indicators will light and "g" indicator will disappear. (The display will count down through defrosting time).
Frozen foods are defrosted from -18^
Notes for WEIGHT DEFROST:
Before freezing foods, ensure food is fresh and of good quality.
- Place food with a weight less than 200g at the edge of the turntable and do not place it to the centre of the turntable.
- Food weight should be rounded up to the nearest 100g, for example, 650g to 700g.
- If necessary, shield small areas of meat or poultry with flat pieces of aluminium foil. This will prevent the areas from becoming warm during defrosting. Ensure the foil does not touch the oven walls.
2. TIME DEFROST
This function quickly defrosts food while enabling you to choose a suitable defrost period, depending on the food type. Follow the example below for details on how to operate this function. The time range is 0:05 - 95:00.
Example: To defrost the food for 10 minutes.
- Select the menu required by pressing the TIME DEFROST button.
The display will show:
dEF2
- Enter the desired cooking time by press or until the display show:
10:00
- Press the START/+30sec button () to start defrosting.
The microwave and defrost indicators will light.
Frozen foods are defrosted from -18^
Notes for TIME DEFROST:
- After cooking the audible signal will sounds five times and the LED will display then time of day, if the clock has been set. If the clock has not been set, the display will only show "0:00" when cooking is complete.
- The preset microwave power level is P30 and can not be changed.
MEMORY FUNCTION
The memory function allows you to store 3 frequently used microwave power levels and cook times to make cooking/reheating more convenient.
To set this function:
Press MEMORY . The display will show "1". If setting the second or third memory, press this key 2 or 3 times.
The display will show "2" or "3".
Select the microwave power level by pressing continuously or press 口 or until the
required power level is displayed.
To set the cook time, press or until the required time is displayed
To confirm the setting, press
To use this function:
Press MEMORY until the required memory setting is displayed and then press +30Sec
AUTO MENU OPERATION
The AUTO MENU programmes automatically work out the correct cooking mode and cooking of the foods. Follow the example below for details on how to operate this function.
Example: To cook 350g carrots by using the AUTO MENU function for fresh vegetables (A-04).
1. PressAUTO MENUS
button once. A-01 will light up on the display. Select A-04 by pressing the button 3 times or press or until the display will show A4.
2. Press the
START/+30secbutton ( ) to confirm +30Sec. the cooking mode.
- Enter the desired weight by press or until the display shows 350g.
4. Press the START/+30sec button
( ) to start the cooking.
+30Sec.
(The display will count down through the set cooking time.)
At the same time "g" indicator will light on the display.
NOTES:
- The weight or quantity of the food can be input by press or until the desired weight/quantity is displayed. Enter the weight of the food only. Do not include the weight of the container.
- For food weighing more or less than the weights/quantities given in the AUTO MENU chart on page GB-14 cook by manual operation.

O MENU CHART
| Auto Menu Display | Cooking | method | WEIGHT/ PORTION / UTENSILS | Procedure |
| Reheat Dinner Plate (pre-cooked food e.g. meat, vegetable and garnishes) | A-01 100% Micro 150g | 250g, 350g, 450g, 600g (initial temp. 5°C) Plate and vented microwave cling fi lm or suitable lid | Put the pre-cooked food on a plate. Use vented microwave cling fi lm or a suitable lid to cover the plate. Place the plate in the centre of the turntable. Stir after cooking. | |
| Jacket Potato A-02 100% Micro | 1, 2, 3 potatoes | (pieces) 1 potato = approx. 230g (initial temp. 20°C) | Please use potatoes with a similar size of approx. 230g. Pierce each potato in several places and place towards the edge of the turntable. Turn over and rearrange halfway through cooking. Stand for 3 - 5 minutes before serving. | |
| Meat (boneless meat e.g. beef, lamb, pork or poultry) | A-03 100% Micro 150g | 300g, 450g, 600g (initial temp 5°C) Flan dish and vented microwave cling fi lm or suitable lid | Cut the meat into small stripes and place it in a fl an dish. Use vented microwave cling fi lm or a suitable lid to cover the fl an dish. Place the fl an dish in the centre of the turntable. | |
| Fresh vegetables e.g. Cauliflower, carrots, broccoli, fennel, leek, pepper, courgettes etc. | A-04 100% Micro 150g | 350g, 500g (initial temp 20°C) Bowl and lid | Cut, chop or slice fresh vegetables into even sized pieces. Place fresh vegetables in a suitable container. Place on the turntable. Add the required amount of water (1 tbsp per 100 g). Cover with a lid. Sir after cooking and let the food stand for approx. 2 minutes. | |
| Fish (Only fish sh ilet is recommended for this programme) | A-05 80% Micro | 150g, 250g, 350g, 450g, 650g (initial temp. temp 20°C) Flan dish and vented microwave cling fi lm or suitable lid | Place in a single layer in a fl an dish.Use vented microwave cling fi lm or a suitable lid to cover. | |
| Pasta (dried pasta e.g. Fussili, Farfalle, Rigatoni) | A-06 80% Micro Pasta | Water 50 g 450 ml 100 g 800 ml 150 g 1200 ml (initial temp. for the water: 20°C) Big and wide bowl | Place pasta in an appropriate sized bowl and add the water. Do not cover. Place the bowl in the centre of the turntable. After cooking, stir well and stand for 2 minutes before draining. | |
| Soup | A-07 | 200g, 400g, 600g (initial temp. 5°C) Cups (200 g per cup) | Place the cups on the turntable and stir after cooking. | |
| Popcorn | A-08 | 100% Micro | 0.05kg,0.1kg | Place the popcorn bag directly on the turntable.(Please see the note below:'Important Information About Microwave Popcorn Feature') |
| Sponge Cake* Ingredients: 4 eggs 110 g sugar 100 g fl our 10 g corn starch 60 g water 60 g vegetable oil | A-09 Preheat at 180°C | 475g (initial temp. 20°C) Spring form (about 26 cm diameter) Low rack | The oven will preheat to 180°C. When the temperature is reached, open the door and place the cake on the low rack inside. Press the Start /+30sec button (+) to start the baking. | |
| Frozen Pizza (Oven Ready Pizza → prebaked) | A-10 C-4 | 200g, 300g, 400g (initial temp. -18°C) Low Rack | Remove packaging and place directly on the low rack. No standing time is required. | |
| Roast Chicken A-11 | C-4 500g, 750g, 1000g | 1200g (initial temp. 20°C) Low Rack | If desired, season with salt, pepper and paprika.Pierce the skin of the chicken a few times. Place the chicken, breast side up, onto the low rack. | |
| Cookies* | A-12 Preheat at 180°C | 475g (initial temp. 20°C) Spring form (about 26 cm diameter) Low rack | The oven will preheat to 180°C. When the temperature is reached, open the door and place the cookies on the low rack inside. Press the Start / +30sec button (+) to start the baking. +30Sec. | |
* Preparation of the sponge cake (A8):
- Separate the eggs.
- Cream the egg yolk, oil and water with a handheld blender (low speed) until light and fluffy.
- Add the flour and mix well.
- In a separate dish, beat the egg white, sugar and cornstarch with a handheld blender (high speed) until stiff. Carefully fold into the cake mixture.
- Spoon in the mixture into the greased spring form and smooth the surface.
- After preheating place the spring form on the rack.
Notes:
- The final temperature will vary according to the initial food temperature. Check food is piping hot after cooking. If necessary, you can extend the cooking manually.
- The results when using auto cook depend on variances such as the shape and size of the food and your personal preference as regards cooking results. If you are not satisfied with the programmed result, please adjust the cooking time to match your requirement.
To cook/defrost food in a microwave oven, the microwave energy must be able to pass through the container to penetrate the food. Therefore it is important to choose suitable cookware.
Round/oval dishes are preferable to square/oblong ones, as the food in the corners tends to overcook. A variety of cookware can be used as listed below.
| Cookware Microwave | Safe | Grill Convection Mix | Cook Comments | ||
| Aluminium foil Foil Containers | ✓ / x | ✓ | ✓ | ✓ / x | Small pieces of aluminium foil can be used to shield food from overheating. Keep foil at least 2cm from the oven walls, as arcing may occur. Foil containers are not recommended unless specified by the manufacturer, e.g. Microfoil®, follow instructions carefully. |
| Browning dishes | ✓ | x | x | x | Always follow the manufacturers instructions. Do not exceed heating times given. Be very careful as these dishes become very hot. |
| China and ceramics | ✓ / x | x | ✓ | ✓ Mix Conv. only | Porcelain, pottery, glazed earthenware and bone china are usually suitable, except for those with metallic decoration. |
| Glassware e.g. Pyrex® | ✓ | ✓ | ✓ | ✓ | Care should be taken if using fi ne glassware as it can break or crack if heated suddenly. |
| Metal | x | ✓ | ✓ | x | It is not recommended to use metal cookware as it will arc, which can lead to fire. |
| Plastic/Polystyrene e.g fast food containers | ✓ | x | ✓ | ✓ / x | Care must be taken as some containers warp, melt or discolour at high temperatures. |
| Cling fi lm | ✓ | x | x | x | It should not touch the food and must be pierced to let the steam escape. |
| Freezer/Roasting bags | ✓ | x | ✓ / x | x | Must be pierced to let steam escape. Ensure bags are suitable for microwave use. Do not use plastic or metal ties, as they may melt or catch fire due to the metal 'arcing'. |
| Paper - Plates, cups and kitchen paper | ✓ | x | x | x | Only use for warming or to absorb moisture. Care must be taken as overheating may cause fire. |
| Straw and wooden Containers | ✓ | x | x | x | Always attend the oven when using these materials as overheating may cause fire. |
| Recycled paper and newspaper | x | x | x | x | May contain extracts of metal which will cause 'arcing' and may lead to fire. |
| Rack | ✓ | ✓ | ✓ | ✓ | The metal racks supplied have been specially designed for all cooking modes and will not damage the oven. |
WARNING:
When heating food in plastic or paper containers, monitor the oven due to the possibility of ignition.
CAUTION: DO NOT USE COMMERCIAL OVEN CLEANERS, STEAM CLEANERS, ABRASIVE, HARSH CLEANERS, ANY THAT CONTAIN SODIUM HYDROXIDE OR SCOURING PADS ON ANY PART OF YOUR MICROWAVE OVEN.
Before cleaning, make sure the oven cavity, door, oven cabinet and accessories are completely cool. CLEAN THE OVEN AT REGULAR INTERVALS AND REMOVE ANY FOOD DEPOSITS - Keep the oven clean, or the oven could lead to a deterioration of the surface. This could adversely affect the life of the appliance and possibly result in a hazardous situation.
Oven exterior
The outside of your oven can be cleaned easily with mild soap and water. Make sure the soap is wiped off with a moist cloth, and dry the exterior with a soft towel.
Oven controls
Open the door before cleaning to de-activate the oven controls. Care should be taken when cleaning the oven control. Using a cloth dampened with water only, gently wipe the panel until it becomes clean. Avoid using excessive amounts of water. Do not use any sort of chemical or abrasive cleaner.
Oven Interior
- For cleaning, wipe any splatters or spills with a soft damp cloth or sponge after each use while the oven is still warm. For heavier spills, use a mild soap and wipe several times with a damp cloth until all residues are removed. Built-up splashes may overheat and begin to smoke or catch fire, and cause arcing. Do not remove the waveguide cover.
- Make sure that mild soap or water does not penetrate the small vents in the walls which may cause damage to the oven.
-
Do not use spray type cleaners on the oven interior.
-
Heat up your oven regularly by using the convection and grill. Remaining food or fat splashed can cause smoke or bad smell.
- Food will release steam during cooking and cause condensation inside the oven and door. It is important to wipe the oven dry. A build up of condensation will eventually lead to rust forming on the oven interior.
SPECIAL NOTE for WAVEGUIDE COVER: Keep the waveguide cover clean at all times. The waveguide cover is constructed from a fragile material and should be cleaned with care (follow the cleaning instructions above).
Excessive soaking may cause disintegration of the waveguide cover. The waveguide cover is a consumable part and without regular cleaning, will need to be replaced.
Accessories
The accessories like turntable, turntable support, rack and crisp plate should be washed in a mild washing up liquid solution and dried. They are dishwasher safe.
SPECIAL NOTE for TURNTABLE SUPPORT:
After cooking, always clean the turntable support, especially around the rollers. These must be free from food splashes and grease. Built-up splashes or grease may overheat and cause arcing, begin to smoke or catch fire.
Door
To remove all trace of dirt, regularly clean both sides of the door, the door seals and adjacent parts with a soft, damp cloth. Do not use harsh abrasive cleaners or sharp metal scrapers to clean the oven door glass since they can scratch the surface, which may result in shattering of the glass.
NOTE: A steam cleaner should not be used.
Cleaning tip - For easier cleaning of your oven:
Place half a lemon in a bowl, add 300ml (1/2 pint) water and heat on 100% for 10 -12 minutes.
Wipe the oven clean using a soft, dry cloth.
IMPORTANT:
- If you cook food for more than the standard time (see chart below) using the same cooking mode, the oven's safety mechanisms automatically activate. The microwave power level will be reduced or the grill heating element will turn on and off.
| Cooking Mode Standard time | |
| Microwave 100 P 30 minutes | |
| Grill/ Convection/ Combi cooking mode Inte rment operation, temperature and time controlled | |
KUNDEN-SERVICE · ONDERHOUDSADRESSEN · ADRESSES DES SAV · CENTRI DI ASSISTENZA · DIRECCIONES DE SERVICIO
www.sharphomeappliances.com
SHARP

Gedruckt in China
Impreso en China
Impresso na China
Imprimé en Chine
Stampato in Cina
Gedrukt in China
Tryckt i Kina
Trykti Kina
Trykt i Kina
Painettu Kiinassa
Printed in China