
RS 3 - Exercise bike Christopeit - Free user manual and instructions
Find the device manual for free RS 3 Christopeit in PDF.
User questions about RS 3 Christopeit
0 question about this device. Answer the ones you know or ask your own.
Ask a new question about this device
Download the instructions for your Exercise bike in PDF format for free! Find your manual RS 3 - Christopeit and take your electronic device back in hand. On this page are published all the documents necessary for the use of your device. RS 3 by Christopeit.
USER MANUAL RS 3 Christopeit
Assembly and operating instructions
Order No.: 1826
GB
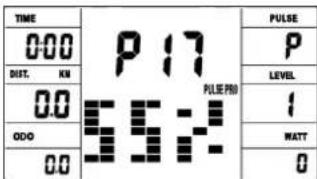
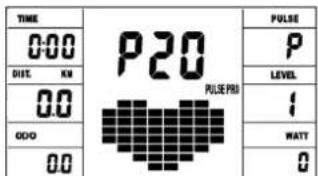
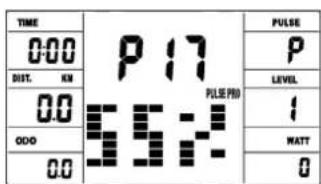
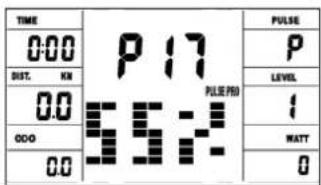
Programm 17 HRC (55%)

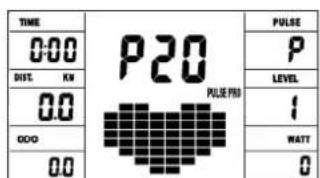
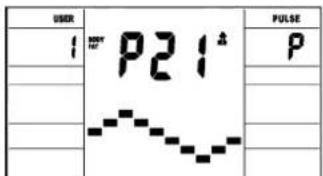
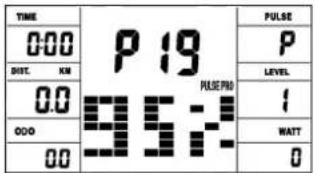
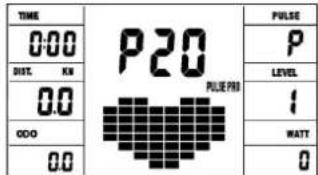
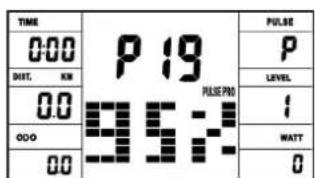
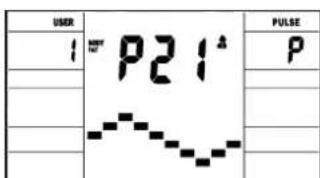
Programm 19 HRC (95%) Programm 20 HRC Programm 21 Body Fat
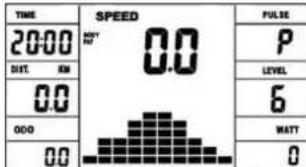
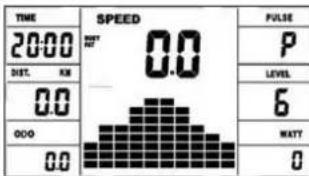
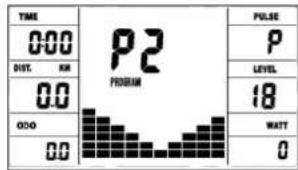
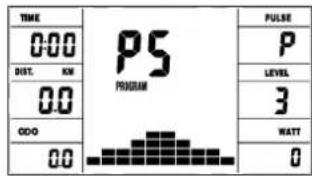
Programm 5 Berg
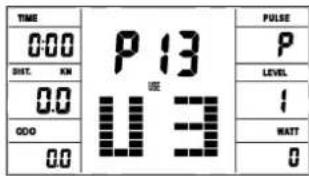
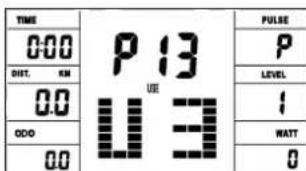
User Setting Programm 13 (U3)
| TIME | P13 U3 | PULSE |
| 000 | P | |
| SET. ON | LEVEL | |
| 00 | I | |
| 000 | WATT | |
| 00 | O |
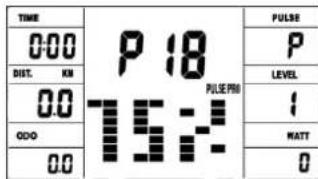
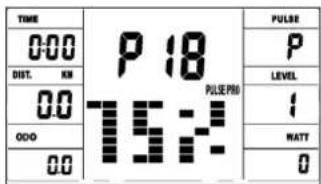
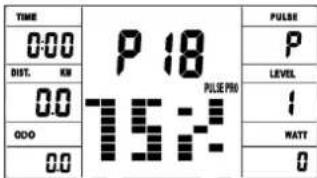
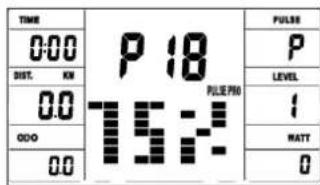
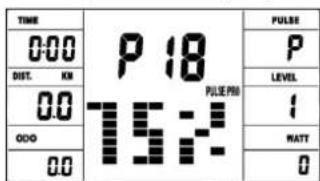
Programm 18 HRC (75%)
| TIME | P 18 PULSE P00 |
| 000 | |
| DNT. KM | |
| 00 | 1 |
| 000 | WATT |
| 00 | 0 |
Programm Manual:
Programme 1 - 10: Fitness
- Summary of Parts Page 3 - 4
- Important Recommendations and Safety Information Page 17
- Parts List-List of spare parts-tec. Data Page 18 - 20
- Assembly Instructions With Exploded Diagrams Page 21 - 23 Mount, use and dismount
- Computer instructions-trouble shooting Page 25-28 Cleaning, Check and Storage
- Training Instructions, Warm-up
- Watt table Page 24
8.Declaration of conformity Page 83
Dear customer,
We congratulate you on your purchase of this home training sports unit and hope that we will have a great deal of pleasure with it. Please take heed of the enclosed notes and instructions and follow them closely concerning assembly and use.
Please do not hesitate to contact us at any time if you should have any questions.
Important Recommendations and Safety Instructions
Our products are all tested and therefore represent the highest current safety standards. However, this fact does not make it unnecessary to observe the following principles strictly.
- Assembly the machine exactly as described in the installation instructions and use only the enclosed, specific parts of the machine. Before assembling, verify the completeness of the delivery against the delivery notice and the completeness of the carton against the assembly steps in the installation and operating instructions.
- Before the first use and at regular intervals (approximately every 50 Operating hours) check the tightness of all screws, nuts and other connections and the access shafts and joints with some lubricant so that the safe operating condition of the equipment is ensured.
- Set up the machine in a dry, level place and protect it from moisture and water. Uneven parts of the floor must be compensated by suitable measures and by the provided adjustable parts of the machine if such are installed. Ensure that no contact occurs with moisture or water.
- Place a suitable base (e.g. rubber mat, wooden board etc.) beneath the machine if the area of the machine must be specially protected against indentations, dirt etc.
- Before beginning training, remove all objects within a radius of 2 metres from the machine.
- Do not use aggressive cleaning agents to clean the machine and employ only the supplied tools or suitable tools of your own to assemble the machine and for any necessary repairs. Remove drops of sweat from the machine immediately after finishing training.
- WARNING! Systems of the heart frequency supervision can be inexact. Excessive training can lead to serious health damage or to the death. Consult a doctor before beginning a planned training programme. He can define the maximum exertion (pulse, Watts, duration of training etc.) to which you may expose yourself and can give you precise information on the correct posture during training, the targets of your training and your diet. Never train after eating large meals.
- Only train on the machine when it is in correct working order. Use original spare parts only for any necessary repairs. WARNING! Replace the worm parts immediately and keep this equipment out of use until repaired.
- When setting the adjustable parts, observe the correct position and the marked, maximum setting positions and ensure that the newly adjusted position is correctly secured.
- Unless otherwise described in the instructions, the machine must only be used for training by one person at a time. The exercise time should not overtake 90 min./daily.
-
Wear training clothes and shoes which are suitable for fitness training with the machine. Your clothes must be such that they cannot catch during training due to their shape (e.g. length). Your training shoes should be appropriate for the trainer, must support your feet firmly and must have non-slip soles.
-
WARNING! If you notice a feeling of dizziness, sickness, chest pain or other abnormal symptoms, stop training and consult a doctor.
- Never forget that sports machines are not toys. This appliance can be used by children aged from 8 years and above and persons with reduced physical, sensory or mental capabilities or lack of experience and knowledge if they have been given supervision or instruction concerning use of the appliance in a safe way and understand the hazards involved. Children shall not play with the appliance. Cleaning and user maintenance shall not make by children without supervision. Take suitable measures to ensure that children never use the machine without supervision.
- The appliance use only to be used with the power supply unit provided with the appliance.
- Ensure that the person conducting training and other people never move or hold any parts of their body into the vicinity of moving parts.

- At the end of its life span this product is not allowed to dispose over the normal household waste, but it must be given to an assembly point for the recycling of electric and electronic components. You may find the symbol on the product, on the instructions or on the packing. The materials are reusable in accordance with their marking. With the re-use, the material utilization or the protection of our environment. Please ask the local administration for the responsible disposal place.
- To protect the environment, do not dispose of the packaging materials, used batteries or parts of the machine as household waste. Put these in the appropriate collection bins or bring them to a suitable collection point.
- For speed dependent operation mode, the braking resistance level can be adjustable manually and the variations of power will depend on the pedaling speed. For speed independent operation mode, the user can set the wanted power consumption level in Watt, constant power level will be kept by various braking resistance levels, that will be determined automatically by system. That is independent on the pedaling speed.
- The machine is equipped with 24-step resistance adjustment. This makes it possible to reduce or increase the braking resistance and thereby the training exertion. Pressing the button "-" for the resistance setting towards stage 1 reduces the braking resistance and thereby the training exertion. Pressing the button "+" for the resistance setting towards stage 24 increases the braking resistance and thereby the training exertion.
- The maximum permissible load (=body weight) is specified as 150kg . The classification of HA means this exercise bike is designed foe home use only and with good accuracy class, the variations of power consuming are within ± 5W up to 50W and ± 10% over 50W .
- The assembly and operating instructions is part of the product. If selling or passing to another person the documentation must be provided with the product.
Parts List - Spare Parts List RS 3 Order No. 1826
Technical data: Issue: 19.08.2024
Ergometer of Class HA with high accuracy
- Magnetic brake system with approx. 10 KG flywheel
- Motor- and Computer-controlled resistance, with 24 manually adjustable load steps
10 installed programs
4 heart rate programs - 5 individual programs
- 1 speed independent program, power control in steps of 5 Watt (10 -300 Watt)
1 Body Fat program - Hand Pulse measurement
Saddle horizontally approx. 20cm adjustable - Wheels for easier transportation
- Power plug (Adapter)
Computer, showing at same time: Speed, time, distance, approx. calories, pedal revolutions per minute, Watt and heart rate, ODO, Holder for Smartphone/Tablet - incl. receiver for wireless pulse belt
- Input of limits for time, distance, approx. calories and pulse
- Announcement of higher limits and Fitness test announcement
Max. body weight 150 KG
Items weight: 37kg
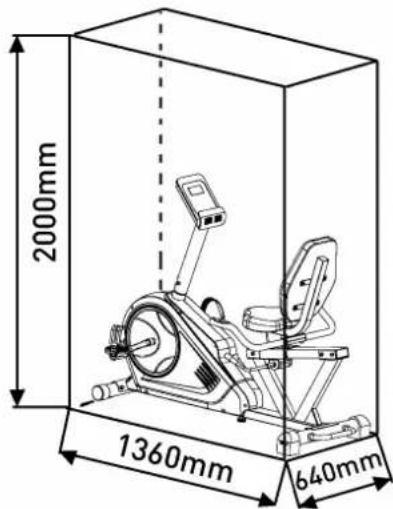
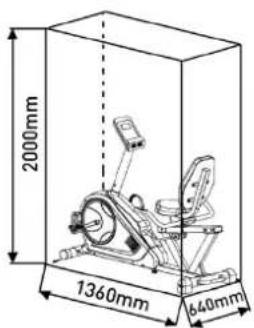
Space requirement approx. L 136 x W 64 x H 107 cm
Exercise space approx.: min. 2,5m^2
Please contact us if any components are defective or missing, or if you need any spare parts or replacements in future:
This product is created only for private Home sports activity and not allowed to us in a commercial or professional area. Home Sport use class H/A

| Illus No. | Designation Dimensions | mm | Quantity Attached | to illustration No. | ET number |
| 1 Main frame 1 33-1826-01-SW | |||||
| 2 Seat frame 1 4 33-1826-02-SW | |||||
| 3 Hand grip | 1 2 33 | 1826-03-SW | |||
| 4 Seat rail | 1 1 33 | 1826-04-SW | |||
| 5 Computer holder | 1 1 33 | 1826-05-SW | |||
| 6 Front stabilizer | 1 1 33 | 1826-06-SW | |||
| 7 Rear stabilizer | 1 1 33 | 1826-07-SW | |||
| 8 Adjusting grip | 1 19 | 33-18 | 26-08-SW | ||
| 9 Carriage bolt | M8x75 | 4 | 1,6+7 | 39-10019-CR | |
| 10 Carriage bolt | M8x45 | 2 | 2+3 | 39-9955-CR | |
| 11 Acorn nut | M8 | 6 | 10 | 39-9900-CR | |
| 12 Arc washer | 8//20 | 10 | 9,14+50 | 39-9966-CR | |
| 13 Spring washer | for M8 | 17 | 9,14,50+67 | 39-9864-VC | |
| 14 Allen screw | M8x16 | 21 | 4,5,7,8+61 | 39-9886-CR | |
| 15 Washer | 8//16 | 20 | 10+14 | 39-10520 | |
| 16 C-Clip washer | C12 | 3 | 19 | 36-9111-39-BT | |
| 17 C-Clip spring washer | C10 | 1 | 19 | 36-1826-16-BT | |
| 18 Eccentric gear | 1 8 36-1826-06-BT | ||||
| 19 Eccentric shaft | 1 | 2+18 | 36-1826-07-BT | ||
| 20 Small alloy bushing | 1 | 19 | 36-1826-08-BT | ||
| 21 Big alloy bushing | 1 | 19 | 36-1826-09-BT | ||
| 22 Hex bolt | M6x10 | 4 | 8+18 | 39-9850-SW | |
| 23 Nut | M10 1 28 | 39-10032 | |||
| 24 Screw | M4x10 | 4 | 44 | 39-9909 | |
| 25L Front end cap left | 1 6 36-9220-06-BT | ||||
| 25R Front end cap right | 1 | 6 | 36-1209-05-BT | ||
| 26 Rear end cap | 2 7 36-1213-05-BT | ||||
| 27L Pedal left | 9/16" | 1 | 40L | 36-1107-14-BT | |
| 27R Pedal right | 9/16" | 1 | 40R | 36-1107-15-BT | |
| 28 High adjustable screw | 1 1 36-1213-13-BT | ||||
| 29 Adapter | 9V=DC/1A | 1 | 89 | 36-1420-17-BT | |
| 30 Connection cable | 1 | 43 | 36-1826-10-BT | ||
| 31 Foam grip | 2 3 36-1826-11-BT | ||||
| 32 Square end cap | 38x38 | 2 | 2 | 36-9211-23-BT | |
| 33 Square end cap | 80x40 | 2 | 4 | 36-1826-13-BT | |
| Illus No. | Designation Dimensions | mm | Quantity Attached to illustration No. | ET number |
| 34 Bushing 2 2 36-1826-12-BT | ||||
| 35 Bracket 1 18 36-1826-14-BT | ||||
| 36 Seat 1 2 36-1213-03-BT | ||||
| 37 Backrest 1 2 36-1826-05-BT | ||||
| 38 Cable safe 2 1+3 36-9821-13-BT | ||||
| 39 Round end cap 2 3 36-9211-21-BT | ||||
| 40L Crank left 9/16" 1 62 33-1107-12-SI | ||||
| 40R Crank right | 9/16" | 1 | 62 | 33-1107-13-SI |
| 41 Pulse wire 1 | 2 3+42 | 36-1826-15-BT | ||
| 42 Pulse connection cable 2 | 1 | 41+45 | 36-1826-17-BT | |
| 43 Motor cable | 1 30 | 36-9212-04-BT | ||
| 44 Computer | 1 5 36 | -1825-23-BT | ||
| 45 Pulse connection cable 3 | 2 | 43+44 | 36-1213-11-BT | |
| 46 Cross tapping screw 3x10 | 2 25 | 39-9909-SW | ||
| 47 Square end cap 60x30 | 1 1 39-10136 | |||
| 48 Cross tapping screw | 4.2x18 | 19 | 26,55+64 | 36-9111-38-BT |
| 49 Moving handle | 1 7 33 | -1826-09-SI | ||
| 50 Allen screw | 2 | 7+49 | 39-10413-CR | |
| 51 Knob | 1 8 36 | -1826-18-BT | ||
| 52 Washer 4/8 | 4 24 | 39-10510 | ||
| 53 Crank cap | 2 40 | 36-9840-15-BT | ||
| 54 Axle nut M10x1.25 | 2 62 | 39-9820-SI | ||
| 55L Chain cover left | 1 | 1+55R | 36-1826-21-BT | |
| 55R Chain cover right | 1 | 1+55L | 36-1826-22-BT | |
| 56 Turn plate | 2 55 | 36-1826-04-BT | ||
| 57 Screw 4x10 | 8 55+56 | 36-9836-22-BT | ||
| 58 C-Clip washer C17 | 2 62 | 36-9211-33-BT | ||
| 59 Bearing 6003Z | 2 1 39-9947 | |||
| 60 Wave washer 17/25 | 1 62 | 36-9918-22-BT | ||
| 61 Belt wheel | 1 62 | 36-1213-15-BT | ||
| 62 Axle 59 33-1826-10-SI | ||||
| 63 Nylon nut M8 | 5 14+67 | 39-981 | ||
| 64 Motor | 1 1+43 | 36-1721-09-BT | ||
| 65 Belt | 1 61+85 | 36-1213-16-BT | ||
| 66 Idler wheel | 1 67 | 36-9211-28-BT | ||
| 67 Idler wheel bracket | 1 1 33-1212-03-SI | |||
| 68 Washer 10/20 | 1 67 | 39-9989-CR | ||
| 69 Bolt M6x15 | 2 72 | 39-9823-SW | ||
| 70 Spring washer for M6 | 2 69 | 39-9865-SW | ||
| 71 Washer 6/12 | 2 69 | 39-10013-VC | ||
| 72 Magnetic bracket axle | 1 73 | 36-9211-26-BT | ||
| 73 Magnetic bracket | 1 72 | 33-9211-12-SI | ||
| 74 Magnet | 1 | 61 36 | 9613222-BT | |
| 75 Screw M5x50 | 1 73 | 39-10450-VC | ||
| 76 Nut M5 | 2 75 | 39-10012 | ||
| 77 Spring | 1 73 | 36-9214-23-BT | ||
| 78 Tension cable | 1 64+73 | 36-1721-10-BT | ||
| 79 Axle nut M10x1.0 | 1 86 | 39-9820-SW | ||
| 80 Eye bolt M6x40 | 2 86 | 39-10000 | ||
| 81 U-shaped washer | 2 80 | 36-9713-55-BT | ||
| 82 Nut M6 | 2 80 | 39-9861-VZ | ||
| 83 Axle nut small M10x1.0 | 2 86 | 39-9820 | ||
| 84 Bushing 1 86 36-9211-15-BT | ||||
| 85 Flywheel 1 86 33-1826-11-SI | ||||
| 86 Flywheel Axle | 1 85 | 33-9211-13-SI |
| Illus No. | Designation Dimensions | mm | Quantity Attached | to illustration No. | ET number |
| 87 Small belt wheel 1 85+86 36-9211-38-BT | |||||
| 88 Nut M10x1.0 1 86 39-9820 | |||||
| 89 DC connection cable 1 55 36-1721-07-BT | |||||
| 90 End cap 2 55 36-1826-20-BT | |||||
| 91 Sensor 1 1 36-1721-13-BT | |||||
| 92 Tool set 1 | 36-9211-34-BT | ||||
| 93 Assembly and exercise Instruction | 1 | 36-182 | 6-23-BT | ||
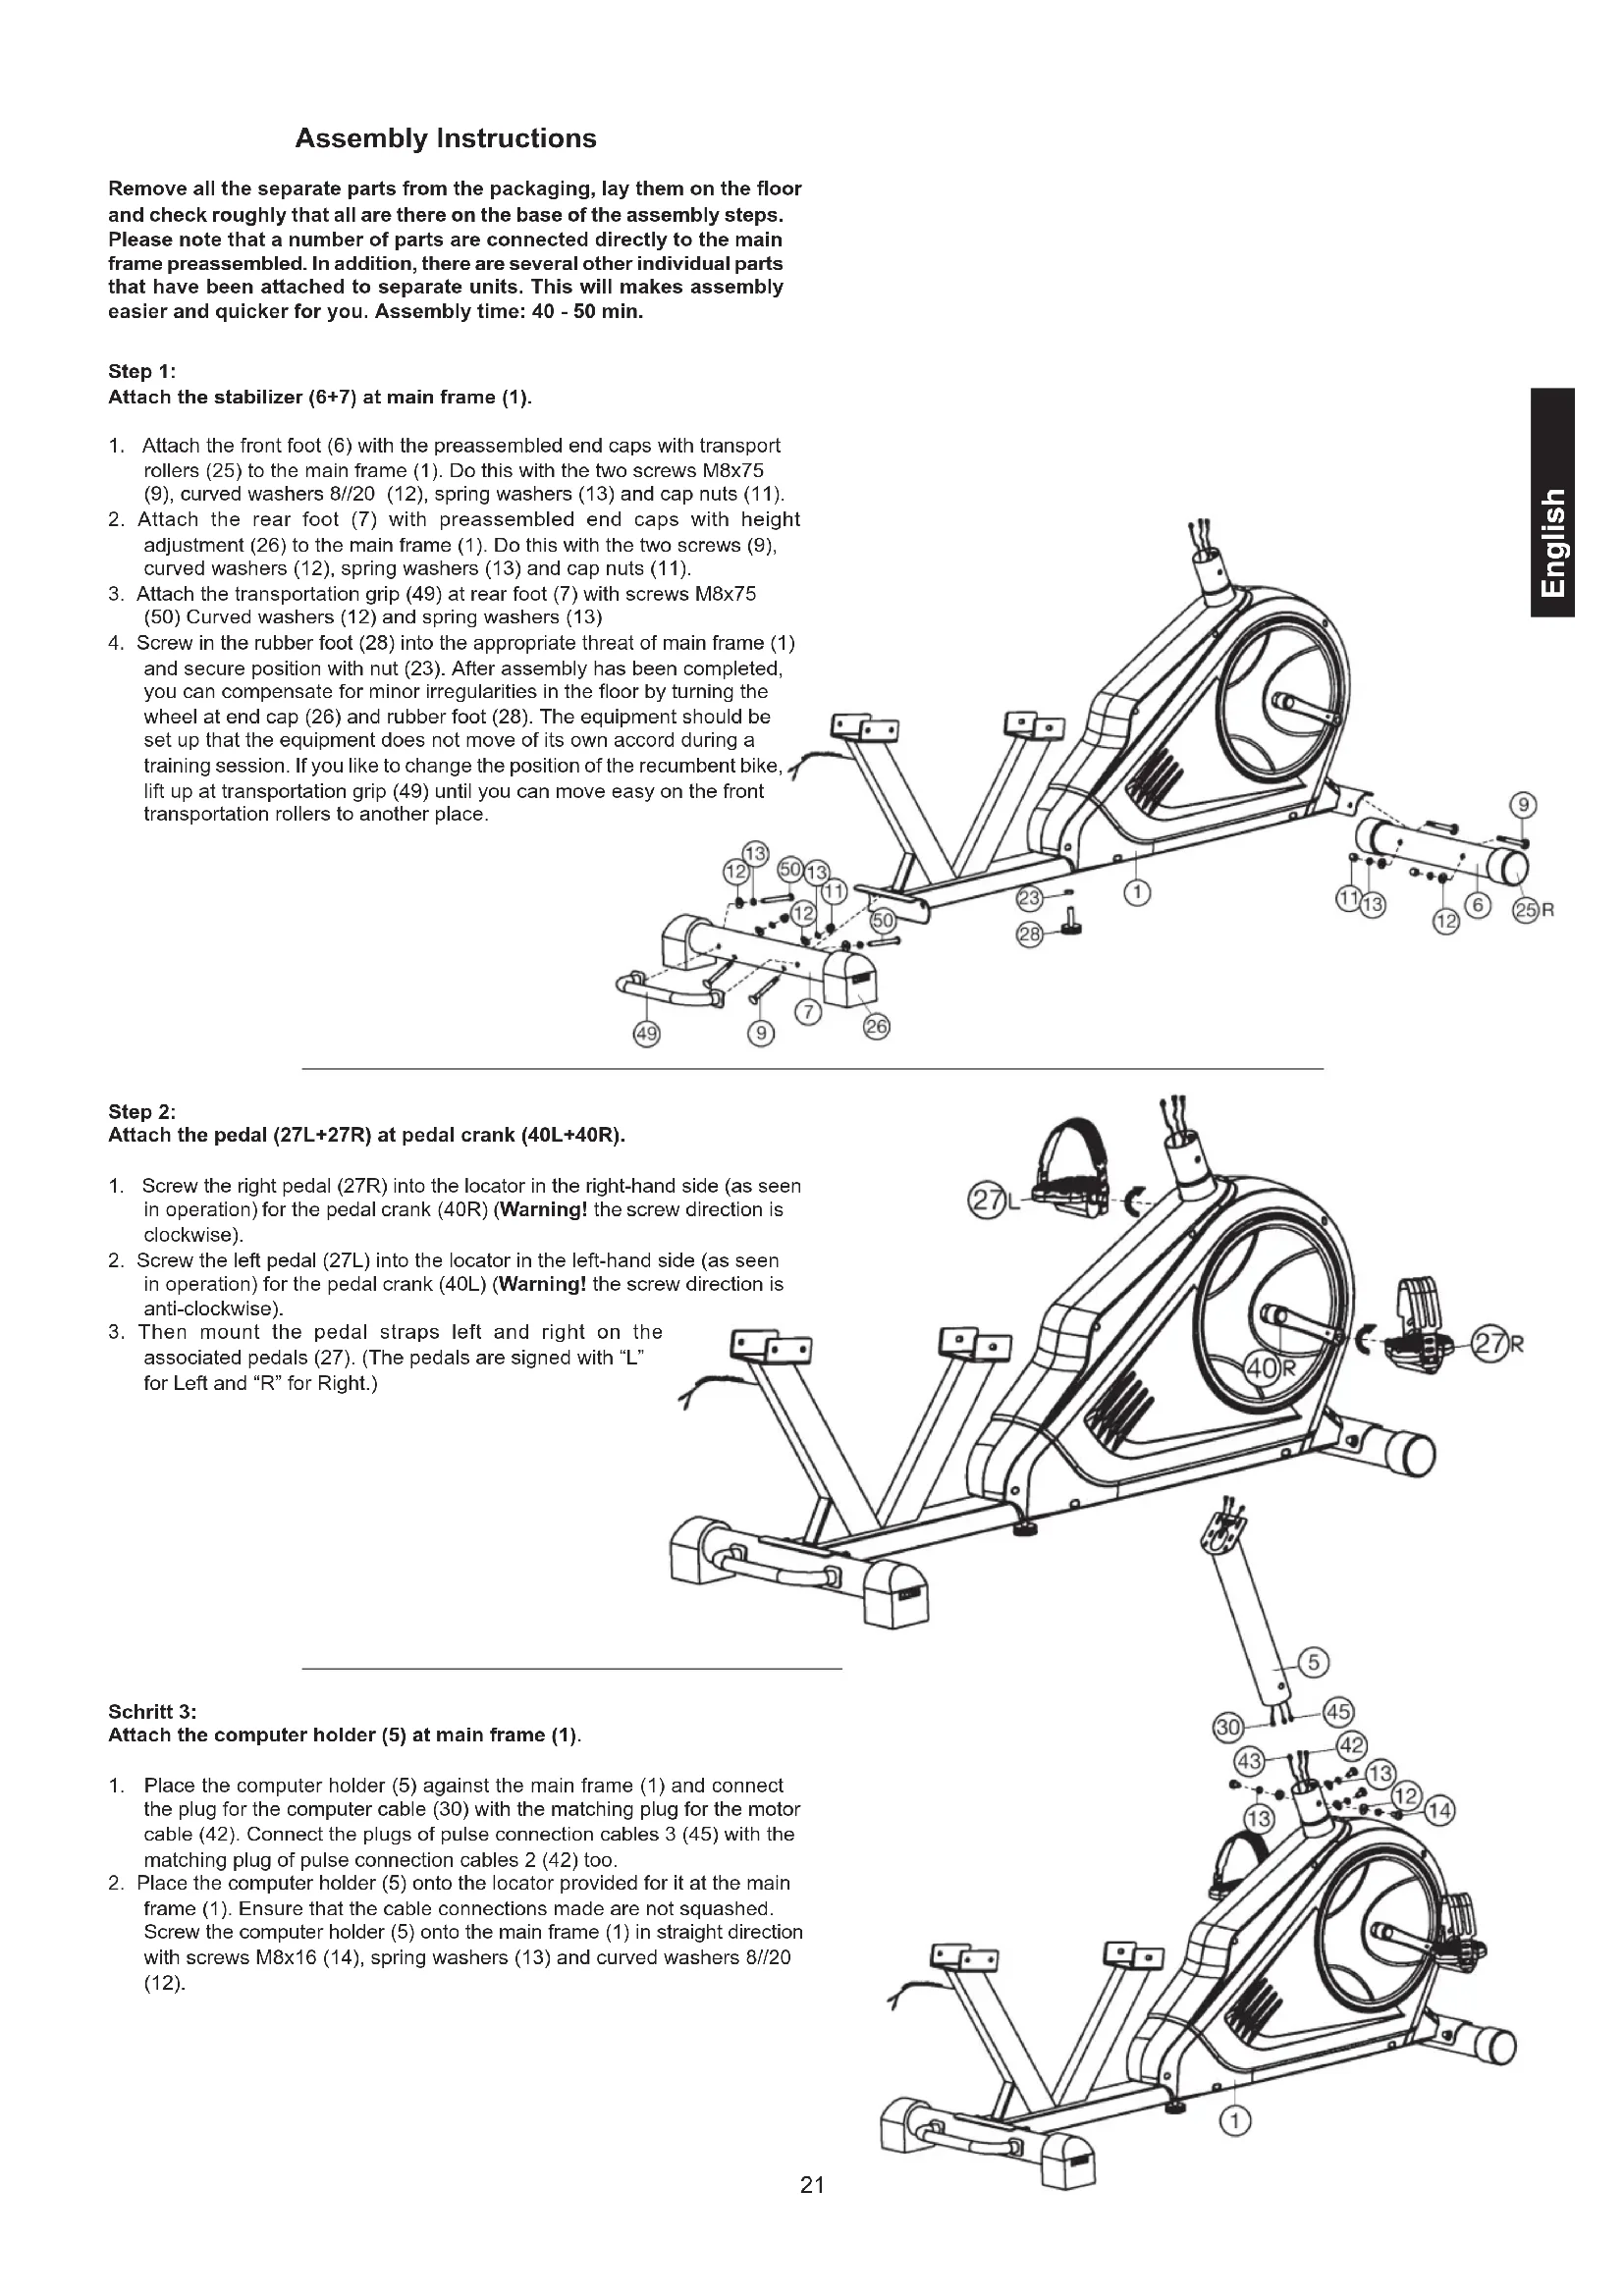
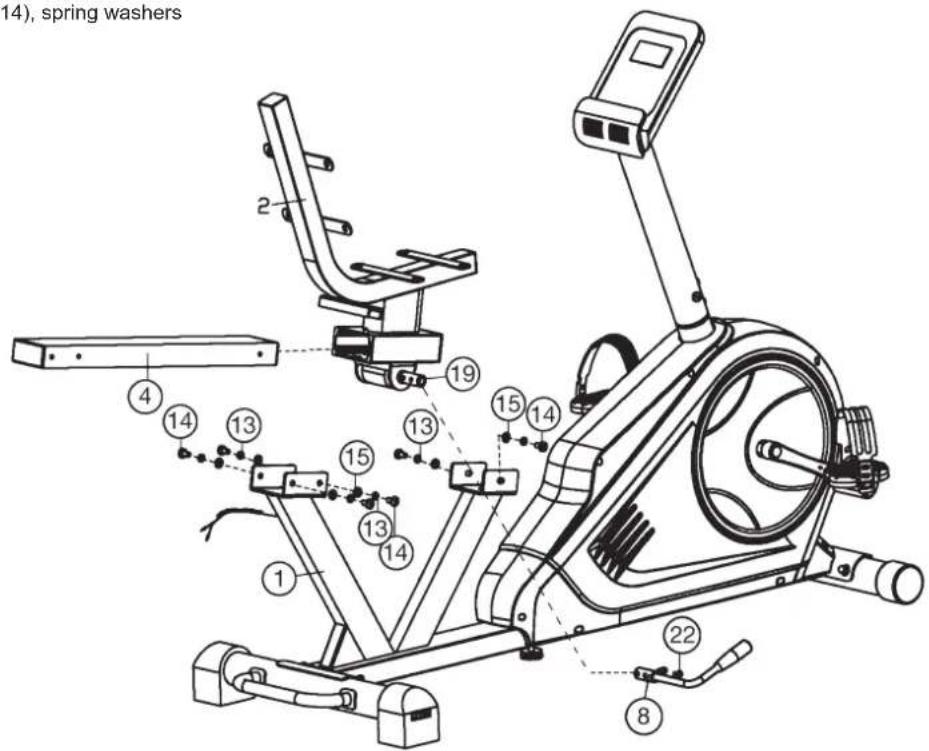
Assembly Instructions
Remove all the separate parts from the packaging, lay them on the floor and check roughly that all are there on the base of the assembly steps. Please note that a number of parts are connected directly to the main frame preassembled. In addition, there are several other individual parts that have been attached to separate units. This will makes assembly easier and quicker for you. Assembly time: 40 - 50 min.
Step 1:
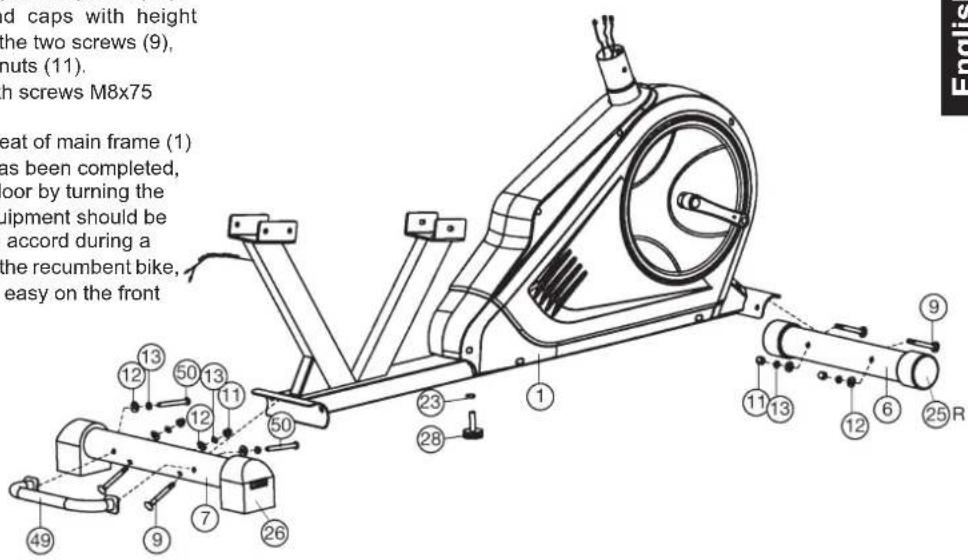
Attach the stabilizer (6 + 7) at main frame (1).
- Attach the front foot (6) with the preassembled end caps with transport rollers (25) to the main frame (1). Do this with the two screws M8x75 (9), curved washers 8//20 (12), spring washers (13) and cap nuts (11).
- Attach the rear foot (7) with preassembled end caps with height adjustment (26) to the main frame (1). Do this with the two screws (9), curved washers (12), spring washers (13) and cap nuts (11).
- Attach the transportation grip (49) at rear foot (7) with screws M8x75 (50) Curved washers (12) and spring washers (13)
- Screw in the rubber foot (28) into the appropriate threat of main frame (1) and secure position with nut (23). After assembly has been completed, you can compensate for minor irregularities in the floor by turning the wheel at end cap (26) and rubber foot (28). The equipment should be set up that the equipment does not move of its own accord during a training session. If you like to change the position of the recumbent bike, lift up at transportation grip (49) until you can move easy on the front transportation rollers to another place.
Step 2:
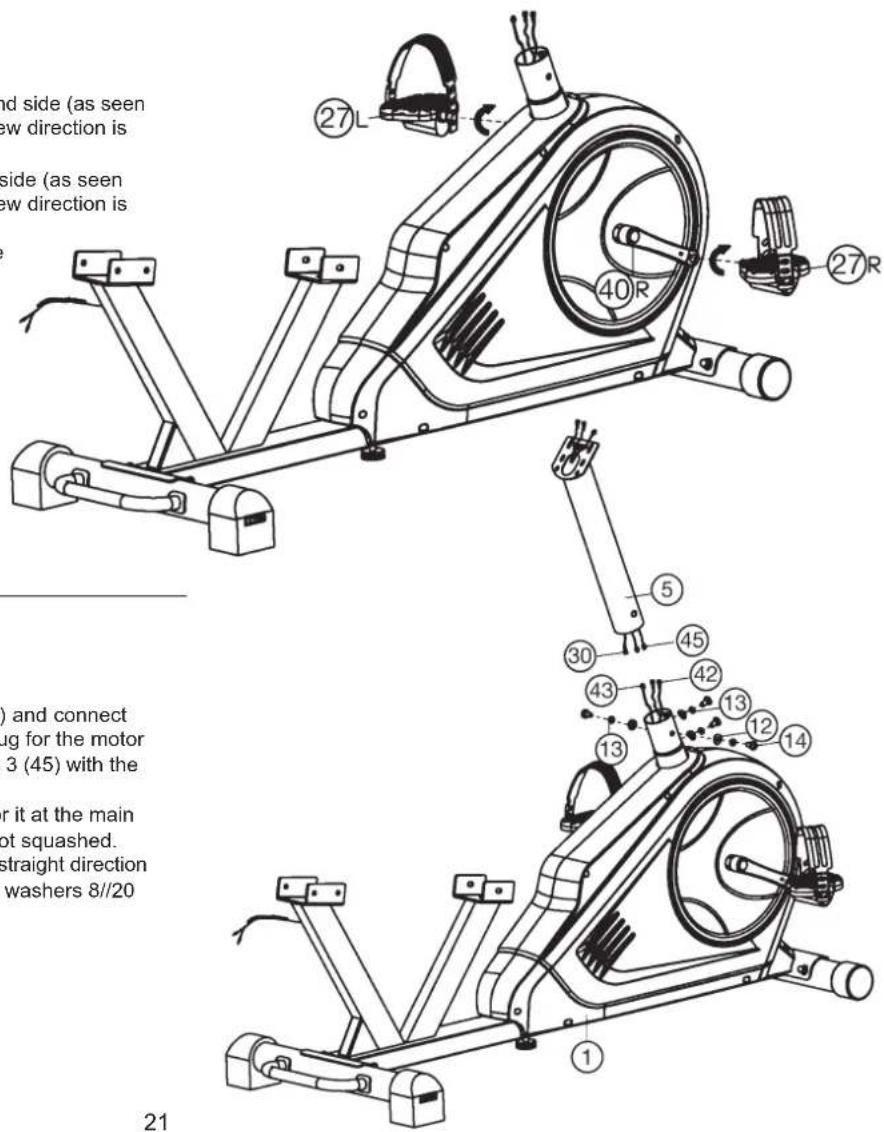
Attach the pedal (27L + 27R) at pedal crank (40L + 40R)
- Screw the right pedal (27R) into the locator in the right-hand side (as seen in operation) for the pedal crank (40R) (Warning! the screw direction is clockwise).
- Screw the left pedal (27L) into the locator in the left-hand side (as seen in operation) for the pedal crank (40L) (Warning! the screw direction is anti-clockwise).
- Then mount the pedal straps left and right on the associated pedals (27). (The pedals are signed with "L" for Left and "R" for Right.)
Schritt 3:
Attach the computer holder (5) at main frame (1).
- Place the computer holder (5) against the main frame (1) and connect the plug for the computer cable (30) with the matching plug for the motor cable (42). Connect the plugs of pulse connection cables 3 (45) with the matching plug of pulse connection cables 2 (42) too.
- Place the computer holder (5) onto the locator provided for it at the main frame (1). Ensure that the cable connections made are not squashed. Screw the computer holder (5) onto the main frame (1) in straight direction with screws M8x16 (14), spring washers (13) and curved washers 8//20 (12).
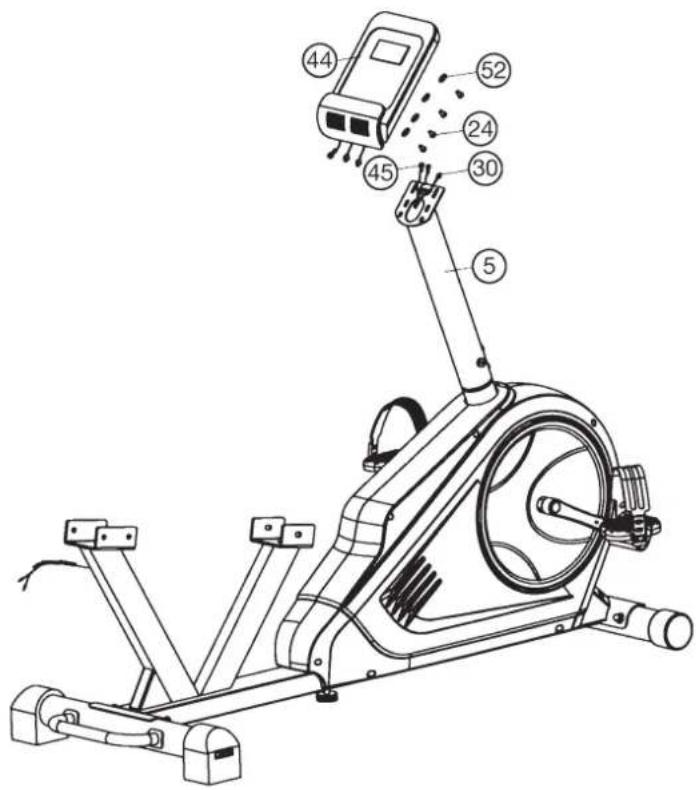
Step 4: Installation of the computer (44) at computer holder (5).
- Put the plug of pulse connection cable 3 (45) and connection cable (30) into the cable sockets from monitor (44).
- Attach the monitor (44) to computer holder (5) and tighten with screws M4x10(24) and washers 4/8 (52). (Attention: Ensure that the cable loom are not crunched or pinched during installation.)
Step 5: Attach the seat holder (2) and seat frame (4).
- Put the seat handle (8) onto the axle (19) so that the holes are aligned and screw it tightly by using screws M6x10 (22).
(To adjust the seat position, unlock the seat by pull the seat handle (8) upwards. After reach new seat position push seat handle (8) downwards to secure.) - Push the seat frame (4) through the holder of seat holder (2) and take care of the right direction.
- Place the seat frame (4) with seat holder (2) onto the holder of main frame (1) and screw it tightly with screws M8x16 (14), spring washers (13) and washers 8//16 (15).
Step 6: Installation of the pulse grip (3) at the seat frame (2).
- Place the pulse grip (3) from bottom side to the holder at seat frame (2) and adjust the holes in the tubes so that they are aligned. Push the bolts M8x45 (10) from bottom side through the holes and tighten the pulse grip (3) at seat frame (9) with washers 8//16 (15) and cap nuts (11) firmly.
- Connect the plugs of pulse connection cables 2 (42) and pulse cables (41).

Step 7: Attach the seat (36) and back cushion (37) at seat support (2).
- Place the seat (36) with back side onto the seat support (2) sothat the holes are align.
- Put on each screw M8x16 (14) one washer 8//16 (15) and tighten the seat (36) at seat support (2) firmly.
- Place the back side of back cushion (37) against den seat holder (2) so that the holes align.
- Screw the back cushion (37) at seat holder (2) tightly by using screws (14) and washers (15).
Step 8: Attach the power with adaptor (29).
- Please insert the cable plug of adaptor (29) into the DC cable plug (89) at end of chain guard (55).
- Please insert the adaptor (29) into a well installed socket with wall power (230V 50Hz)
Step 9: Checks
- Check the correct installation and function of all screwed and plug connections. Installation is thereby complete.
- When everything is in order, familiarise yourself with the machine at a low resistance setting and make your individual adjustments.
Note: Please keep the tool set and the instructions in a safe place as these may be required for repairs or spare parts orders becoming necessary later.

| Level 20RP | M▼WATT | 30RPM▼WATT | 40RPM▼WATT | 50RPM▼WATT | 60RPM▼WATT | 70RPM▼WATT | 80RPM▼WATT | 90RPM▼WATT | 100RPM▼WATT |
| 1 4 6 11 17 | 22 30 37 42 48 | ||||||||
| 2 5 8 15 24 | 31 42 51 60 70 | ||||||||
| 3 | 6 | 11 | 19 | 31 | 40 | 54 | 65 | 78 | 92 |
| 4 7 13 24 38 | 50 66 81 96 | 114 | |||||||
| 5 8 16 29 45 | 60 80 98 115 136 | ||||||||
| 6 | 9 | 19 | 35 | 52 | 70 | 94 | 114 | 134 | 158 |
| 7 10 22 40 | 60 80 108 132 | 154 180 | |||||||
| 8 | 11 | 25 | 45 | 67 | 90 | 121 | 150 | 174 | 202 |
| 9 13 28 50 | 75 100 134 168 194 224 | ||||||||
| 10 | 14 | 31 | 54 | 83 | 110 | 148 | 184 | 214 | 247 |
| 11 16 34 59 | 90 120 162 200 233 269 | ||||||||
| 12 | 17 36 64 98 | 130 175 217 | 252 292 | ||||||
| 13 | 19 | 39 | 69 | 106 | 140 | 190 | 234 | 272 | 314 |
| 14 | 20 | 42 | 75 | 113 | 150 | 204 | 252 | 292 | 337 |
| 15 | 21 | 45 | 79 | 121 | 160 | 218 | 270 | 312 | 360 |
| 16 | 22 | 48 | 84 | 129 | 170 | 232 | 286 | 333 | 382 |
| 17 | 24 | 51 | 90 | 137 | 180 | 246 | 304 | 354 | 404 |
| 18 | 25 54 94 144 | 190 | 258 322 373 | 425 | |||||
| 19 | 26 56 98 151 | 200 | 271 340 393 | 447 | |||||
| 20 | 27 | 59 | 102 | 158 | 210 | 283 | 356 | 414 | 470 |
| 21 | 29 | 62 | 107 | 165 | 220 | 296 | 371 | 432 | 492 |
| 22 | 30 | 65 | 113 | 172 | 230 | 309 | 386 | 451 | 515 |
| 23 | 31 | 68 | 118 | 179 | 240 | 323 | 402 | 470 | 537 |
| 24 | 33 | 71 | 123 | 186 | 250 | 336 | 418 | 490 | 560 |
Remarks:
- The power consumptions (Watt) are calibrated by measuring the driving speed (min-1) of axle and the braking torque (Nm).
- Your equipment was calibrated to fulfill the requirements of its accuracy classification before shipment. If you have doubts about the accuracy, please contact with your local retailer or send it to accredited test laboratory to ensure or calibrate it.
(Pleases note that a deviation tolerance as noted on page 15, is permissible.)
Computer Instructions
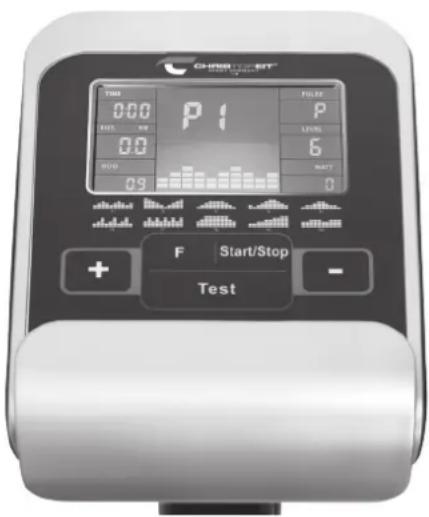
The computer on your ERGOMETER is very easy to use. By displaying all functions at the same time, there is no need to switch back and between the individual functions and you are always fully informed about your training process at a glance. This device is a speed-independent device. In order to achieve the performance you want, the computer regulates the resistance independently of the cadence in the watt program (P16).
Turn on:
1) Insert the connection plug into the adapter connection socket on the device. An acoustic signal sounds - all LCD display segments appear for 2 seconds and are set to 00.
or
2) The power plug is already in the socket / device has automatically switched off.
By pressing any key - or with at least one turn of the pedal - the computer switches itself on.
Turn off:
As soon as the device is not used for more than approx. 4 minutes, the computer switches off automatically. After finishing the training, pull out the mains plug.
KEYS
A total of 5 buttons: START / STOP, FUNCTION (F), UP (+), AB (-), and fitness test (TEST).
"START/STOP"
Training start or interruption in the selected program. The computer only starts counting when the START / STOP button has been pressed before. If the START / STOP button is pressed for more than 3 seconds, all values are reset to 00:00 in the starting position.
F^ : You can switch from one input field to the next with the input and confirmation key (F). The selected function flashes. Enter the values with the + / - key and confirm them by pressing the F^ key again. At the same time, the flashing display jumps to the next input field. During training, the functions UPM and calories, as well as speed and distance can be displayed permanently or alternately by pressing the F key.
^ + "And 一 ^ : Use the + / - buttons to change the values - only flashing values Information can be changed in value.
Test: With this button you can determine your fitness grade.
DISPLAY
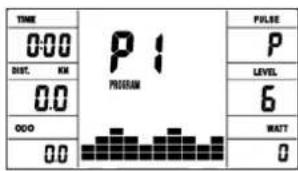
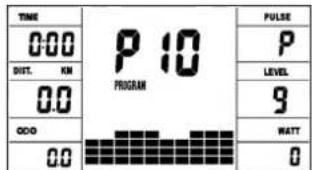
Program:
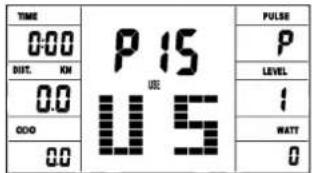
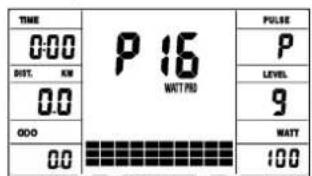
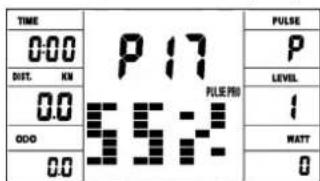
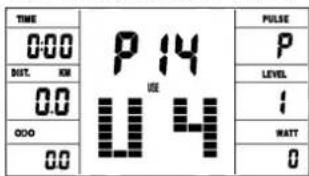
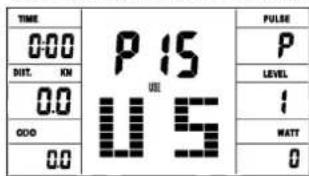
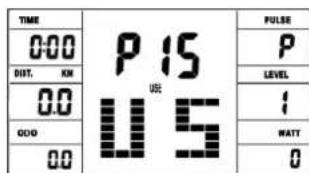
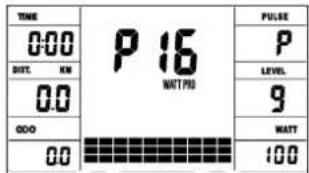
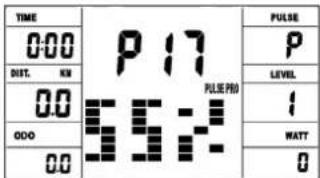
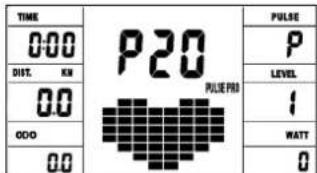
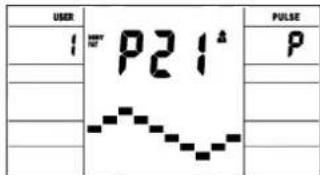
Display of set program 1-21. (Manual, Progr. 1 - 10 = fitness program; Progr. 11-15 = individual user program; Program 16 = watt program; Progr. 17-20 = pulse program; Progr. 21 = body fat program)
Resistance level:
Display of the resistance from level 1 - 24. The higher the number, the higher the resistance. The bar graph hat 12 bars available. Each bar shows two values (e.g.: 3 bars are level 5 or 6) You can see the exact value on the
LEVEL display. The resistance can be changed in every program (except WATT program P16) by pressing the + and - keys.
TIME/WATT:
For setting / displaying the time in minutes and seconds up to a maximum of 99:00 minutes.
Preselection in minute steps / counting up + down in second steps. In the programs 1 - 20 min. default time is set to 5 minutes. Setting range 5-99 min. The computer precisely measures the performance achieved during training. The performance displayed in watts. Setting range 30-350 watt. In program 16 consider the display of the target value. Display of time and watt alternating automatically. Or permanent by pressing the F key.
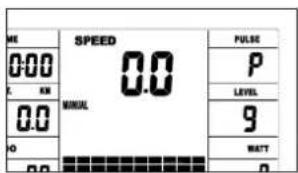
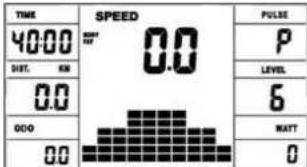
RPM / SPEED (km/h):
Display of pedal revolutions per minute and speed in km / h in automatic change. Or permanent by pressing the F key.
DIST (distance KM) / CAL (calories kcal):
Display and default for distance and restrictions. The distance can be from 1 - 999 km. Using the average values, the computer calculates the calories that are displayed in KCal. To convert the binding unit of measurement for energy „Joule" in the general target specification use this formulas: 1 Joule = 0.239 cal , or 1 cal = 4.186 J .
The loss calories consumption can be set from 10 - 990 kcal. The up / down counting takes place in 0.1 steps. Display of distance and approx. calories alternating automatically. Or permanent by pressing the F key.
KM Total (ODO):
The distance in km of all training units is displayed. It is not possible to specify. The OD O display can be reset to zero at any time. To do this, press the F-key and the Start / Stop-key at once for 2 seconds.
The currently measured pulse is displayed here. If an upper heart rate limit is set, the display flashes when the set value is reached.
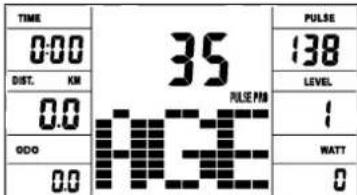
PULSE LIMIT / AGE: Available in programs 17-20.
Program 17 - 19 are training programs with calculated max heart rate of 55% / 75% or 95% . As soon as you enter your age, the computer will calculate your max. pulse value that you should never exceed (formula: (220 - age) x 0.80). When this value is reached, the pulse display starts to flash and you should then immediately reduce the speed or the load level.
Age setting range: 10-100.
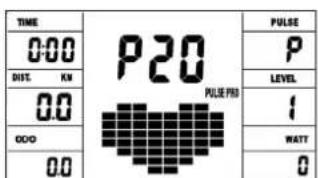
In program 20: Display of the individual target heart rate you have specified. Pulse setting range: 60-240
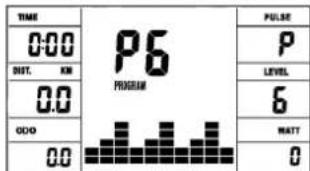
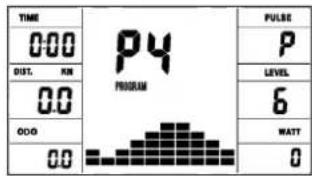
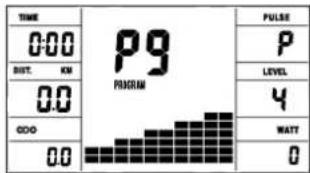
RESISTANCE PROFILE:
The desired training duration can be preset in the TIME area. The system divides this preset time into 10 sub-intervals. Each bar on the time axis (horizontal) = 1/10 of the specified time, e.g.: training time = 5 min = each bar is 30 seconds, training time = 10 min = each bar = 1 min. Each of the 10 bars corresponds to such a time interval. The current time bar is indicated by FLASHING. If no time is specified, each time bar means 3 minutes of training, ie after 3 minutes the flashing display jumps from bar 1 to bar 2, etc. up to a total of 30 minutes. If the program is stopped in the meantime with the start / stop button, the Time to continue counting from there after pressing the Start / Stop button again.
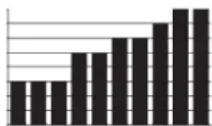
PEDAL RESISTANCE:
You can use the + / - button to adjust the pedal resistance at any time - in all programs, except in the watt program P16. You can see the change in the height of the bar and in the LEVEL display - the higher the bar, the higher the resistance and contrariwise. Each bar segment stands for 3 levels (e.g. 3 segments stand for levels 7, 8 + 9 or 7 segments stand for levels 19, 20 + 21). The selected value is shown on the LEVEL display.
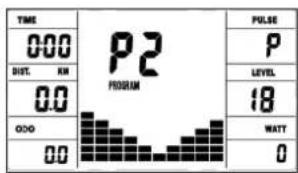
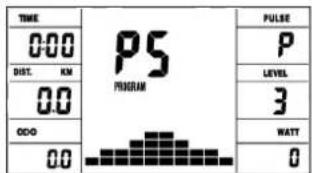
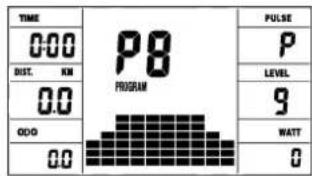
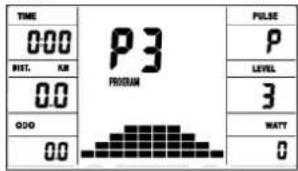
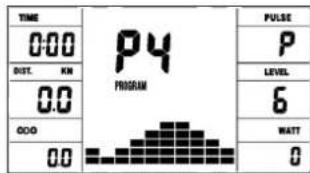
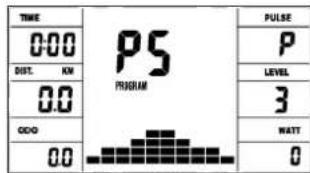
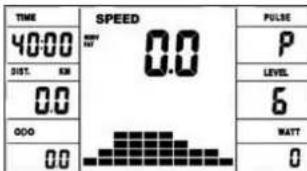
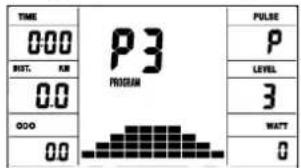
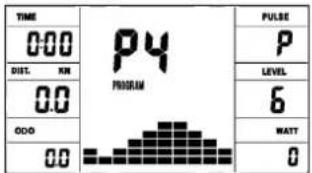
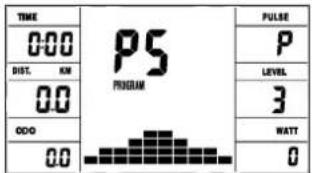
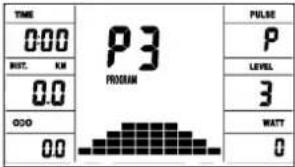
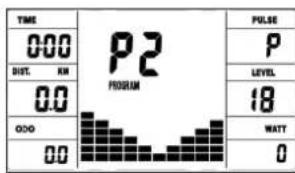
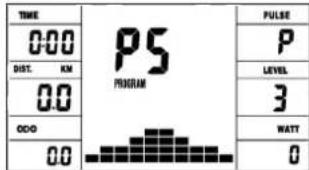
The change affects the current and subsequent time position. The height of the bars indicates the load, not a terrain profile. Program sequences are shown graphically on the display. The individual programs run as shown in the bar diagram in the display field, e.g. program 5 = mountain / program 2 = valley etc. (where the bar height = resistance, the time is distributed over the bar width)
- After setting the program, it is essential to press the "START / STOP" button if you want to start training. In principle, all determined and displayed values are not suitable for medical evaluations.
Manual Program Program 1 Rolling Program 2 Valley

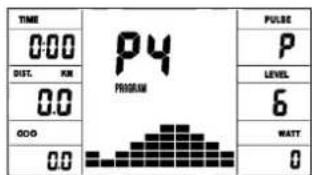
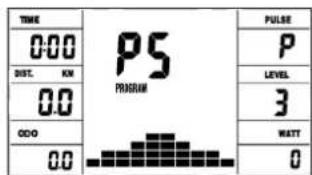
Program 3 Fatburn Program 4 Ramp Program 5 Mountain
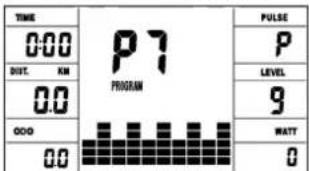
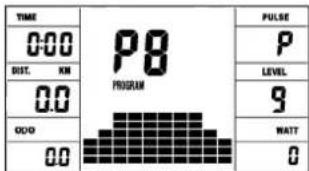
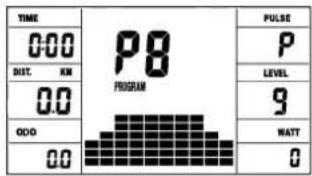
Program 6 Interval Program 7 Cardio Program 8 Endurance
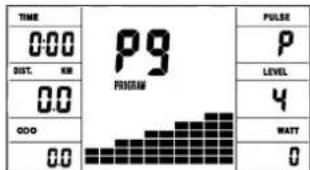
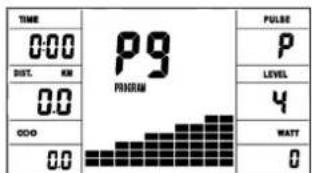
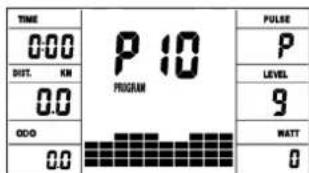
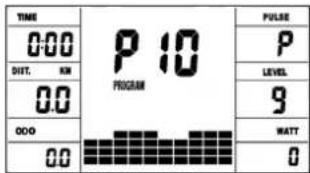
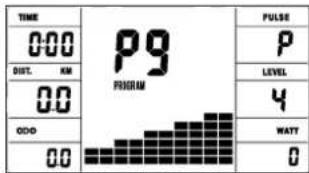
Program 9 Slope Program 10 Rally
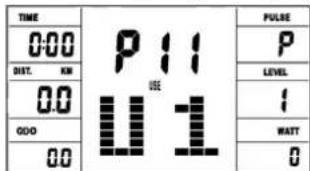
User Setting Program 11 (U1)
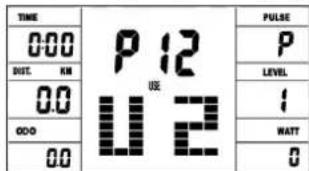
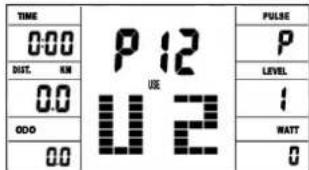
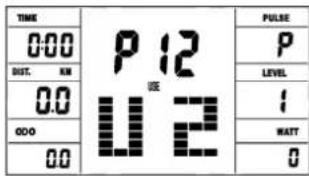
User Setting Program 12 (U2)
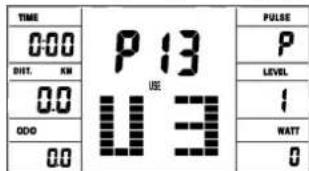
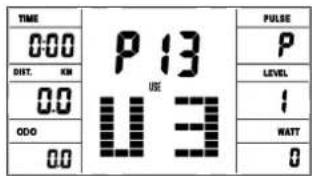
User Setting Program 13 (U3)
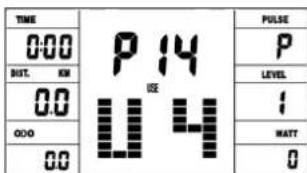
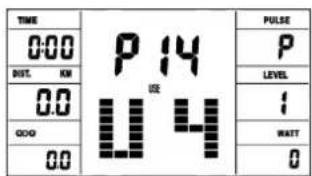
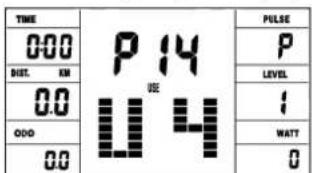
User Setting Program 14 (U4)
User Setting Program 15 (U5)
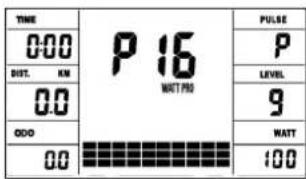
Program 16 Watt Control

Program 17 HRC (55%) Program 18 HRC (75%)
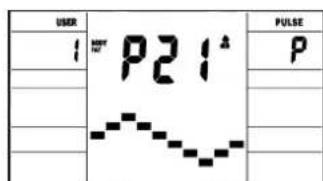
Program 19 HRC (95%) Program 20 HRC Program 21 Body Fat

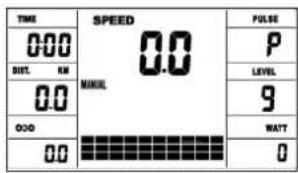
Manual program:
this program corresponds to the functions of a normal exercise bike. The time, the speed, the rpm, the distance, the wattage, the Kcal and the current pulse are shown permanently in the display. The pedal resistance can be set manually using the + and - keys. All values are to be operated manually - there is none automatic regulation. Setting of the training parameters time / distance / calories / upper pulse limit by pressing the F key.
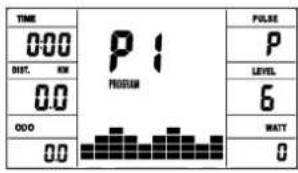
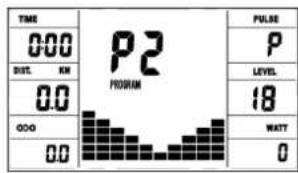
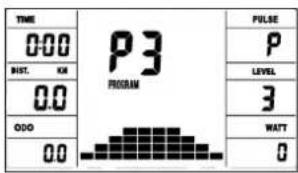
Programs 1 - 10: Fitness
Various training programs are given here. If one of these programs is selected, the program runs automatically and includes various intervals. The division is made in difficulty levels and in time intervals. However, you can intervene in the program at any time to change the pedaling resistance or the duration. In addition, there is a corresponding bar display in the display field. Setting of the training parameters time / distance / calories / upper pulse limit by pressing the F key.
Program 11-15: individual training programs
Here you can enter and train your various resistance profiles (U1-U5). Setting of the training parameters time / distance / calories / upper pulse limit by pressing the F key.
Program 16: Watt program
Here you can enter your individual watt specification. The pedaling resistance is automatically adjusted within a certain tolerance range by the computer, regardless of the pedaling frequency, so that you are always in the specified zone. Setting of the training parameters time / distance / calories / upper pulse limit / watt by pressing the F key.
Program 17 - 19:
Here the computer automatically calculates your maximum heart rate after entering your age and, depending on the program, the corresponding training target heart rate will be adjusted to 55% / 75% or 95% . This target value is displayed. The pedaling resistance is automatically adjusted by the computer in order to stay at this target frequency.
Program 20: Target training heart rate THF
Here you can specify your optimal training pulse rate THF. The pedal resistance is within a certain tolerance range automatically readjusted by the computer so that you are always in the specified pulse zone.
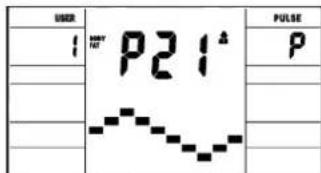
Program 21: Body Fat Program
Here you can get a body fat analysis and get exercise suggestion.
Use the F key to access the different data (user no.) = 1-8, height = 120-250 cm, gender = male / female, age = 10-99 years, weight = 20 -200kg) one after the other and set them to your data using the +/- buttons.
Then press the Start / Stop key and grab the hand pulse sensors to measure your body fat.
After about 10 seconds, the deisplay show body your fat in%, BMI and BMR as well as a suggested exercise program. Press start/stop key to exit body fat test and press again to start exercising this program.
Body fat table
| Gender/Age Underweight/Obese | ||||
| Gender/Age Underweight/Obese | Overweight | Overweight | Overweight | Obese |
| Male/≤30 < 14% | 14%~20% 20.1%~25% 25.1%~35% > 35% | |||
| Male/>30 < 17% | 17%~23% 23.1%~28% 28.1%~38% > 38% | |||
| Female/≤30 < 17% | 17%~24% 24.1%~30% 30.1%~40% > 40% | |||
| Female/>30 < 20% | 20%~27% 27.1%~33% 33.1%~43% > 43% | |||
Remark:
- During body fat test, it will display Err2 if hand pulse sensors get no input.
- According to test result, 10 seconds have no operation or operation arbitrarily key, will get into system recommendation to toughen program.
ERROR MESSAGES:
Each time the computer is restarted, it will run a quick test for functionality. If something is not in order, it indicates possible errors:
E1 This symbol and a warning tone appear if the wiring is incorrectly connected or there is a fault in the resistance setting. Check all cable connections, especially at the connectors. After eliminating the error, press and hold the "Start / Stop" button for 3 seconds to reset the system.
FITNESS NOTE / RECOVERY PULSE FUNCTION
Your ergometer offers the option of evaluating your individual fitness in the form of a "fitness grade". The measuring principle is based on the fact that in healthy, well-trained people, the pulse rate drops faster within a certain period of time after training than in healthy, less well-trained people. To determine the fitness level, the difference between the pulse rate at the end of the training (start pulse) and the pulse rate one minute after the end of the training (end pulse) is used. Do not start this function until you have trained for some time. Before starting the recovery pulse function, you must have your current pulse rate displayed by placing your hands on the hand pulse sensors.
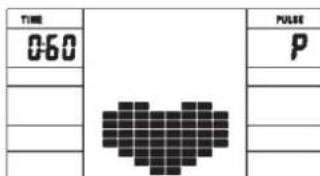
- Press the "Test" button and then place both hands on the sensors to measure your heart rate.
- The computer goes into STOP mode, a large heart symbol is shown in the middle of the display and the automatic recovery pulse measurement is initiated.
- The time in the display starts counting down at 0:60
- The start pulse at the beginning of the measurement is shown in the display. It is the average of the four highest heart rate values in the last 20 sec, before pressing the fitness button.
- The currently measured pulse value is displayed in the "Pulse" field.
- After one minute has elapsed, the time is reduced to 0:00 and an acoustic signal sounds. The end pulse at the time 0:00 is displayed in the "Pulse" field. You can now take your hands off the heart rate sensors. After a few seconds, your fitness grade from F 1.0 - F 6.0 (school grade system) appears in the middle of the display.

HEART RATE MEASUREMENT
Heart rate measurement using a heart rate belt:
For reliable heart rate monitoring during training, we recommend wearing a suitable chest belt. The computer has a built-in receiver, so you can use a heart rate belt, such as the Christopeit Sport heart rate belt (item no.: 9309). If you moisten the heart rate belt a little before you put it on, the computer should record and display the heart rate data within 60 seconds. The range of the heart rate belts is 1 to 2 m depending on the model.
Hand pulse measurement:
The hand pulse sensors are located on the left and right seat grips. Please make sure that both palms always rest on the sensors at the same time with normal force. As soon as the pulse decreases, a value is shown in the pulse display. (The hand pulse measurement is only for orientation, since movement, friction, sweat, skin texture and blood circulation, etc. can lead to individual deviations from the actual pulse.)
Note: If both pulse measurement methods are used at the same time, the hand pulse measurement has priority.
Attention! Heart rate monitoring systems may be inaccurate. Excessive exercise can cause serious injury or death. If you feel
Training area in mm
(for home trainer and user)
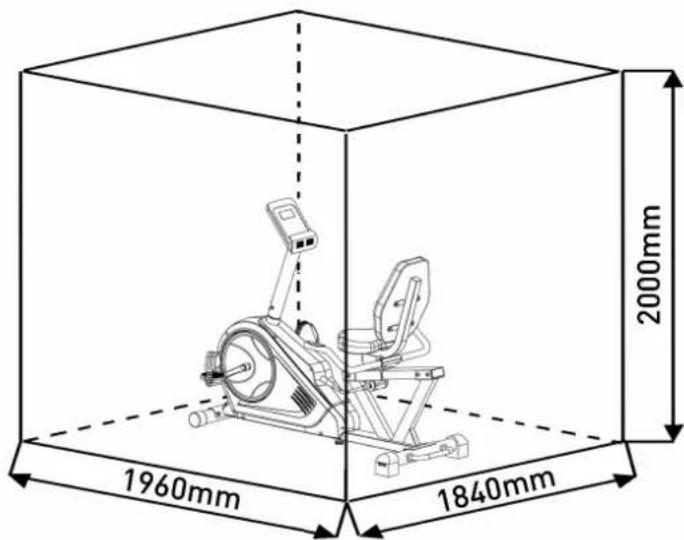
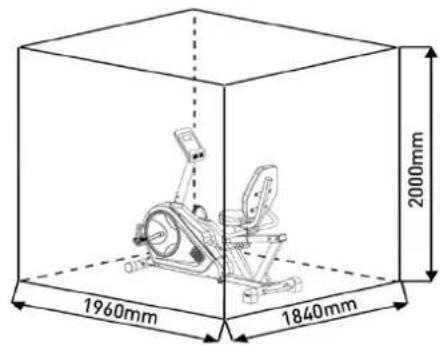
Free area in mm
(Training area and security area
(rotating 60cm )
Cleaning, Checks and Storage of the Ergometer bike:
1. Cleaning
Use only a less wet cloth for cleaning. Caution: Never use benzene, thinner or other aggressive cleaning agents for surface cleaning as this damage caused.
The device is only for private home use and for use suitable indoors. Keep the unit clean and moisture from the device.
2. Storage
Plug out the power supply unit while intending the unit for more than 4 weeks not to use. Choose a dry storage in-house and put some spray oil to the pedal bearings left and right. Cover the bike to protect it from being discolor by any sunlight and dirty through dust.
3. Checks
We recommend every 50 hours to review the screw connections for tightness, which were prepared in the assembly. Every 100 operating hours, you should put some spray oil at the pedal bearings left and right.
Troubleshooting
If you cannot solve the problem with the following information, please contact the authorized service center.
| Problem Possible | Cause Solution | |
| Computer has no value at Dis-play if you press any key. | No power adapter is well plugged or wall power is without power. | Check that the power adapter is properly plugged in, possibly with another electric device check if the wall power is fine. |
| Computer is not counting data and do not switch on after start cycling. | Sensor impulse missing base on not well plugged connection | Check the plug connections at computer and inside of handle-bar support. |
| Computer is not counting data and do not switch on after start cycling. | Sensor impulse missing base on not correct position of sensor. | Take off the cover and check the distance between magnet and Sensor. The magnet at turning belt wheel should have only less than < 5mm distance against the sensor position. |
| No pulse value Pulse cable is not plugged in. | Check the separately pulse cable is well connected with computer. | |
| No pulse value Pulse sensors not well connected | Screw out the screw for pulse measurement and check if plugs are well connected and no damage at pulse cable. |
You must consider the following factors in determining the amount of training effort required in order to attain tangible physical and health benefits.
1. INTENSITY:
The level of physical exertion during training must exceed the point of normal exertion, without going beyond the point of breathlessness and/or exhaustion. A suitable reference value can be the pulse. With each training session, the condition increases and therefore the training requirements should be adjusted. This is possible by extending the duration of the training, increasing the level of difficulty or changing the type of training.
2. TRAINING HEART RATE
To determine the training heart rate, you can proceed as follows. Please note that these are guide values. If you have health problems or are unsure, consult a doctor or fitness trainer.
01: Maximum heart rate calculation
The maximum pulse value can be determined in many different ways, since the maximum pulse depends on many factors. You can use the main-formula for the calculation (maximum heart rate = 220 - age). This formula is very general. It is used in many home sport products to determine the maximum heart rate. We recommend the Sally-Edwards-formula. This formula calculates the maximum heart rate more precisely and takes gender, age and body weight into account.
Sally-Edwards-formula:
Men:
Maximum heart rate = 214 - (0.5 × age) - (0.11 × body weight) Women:
Maximum heart rate = 210 - ( 0.5 × age) - ( 0.11 × body weight)
02: Training heart rate calculation
The optimal training heart rate is determined by the goal of the training. Training zones were defined for this.
Health - Zone: Regeneration and Compensation Suitable for: Beginners / type of training: very light cardio training / goal: recovery and health promotion. Building the basic condition.
Training heart rate = 50 to 60% of the maximum heart rate
Fat-Metabolism - Zone: Basics endurance training 1
Suitable for beginners and advanced users / type of training: light cardio training / goal: activation of fat metabolism (calorie burning). improvement in endurance performance. Training heart rate = 60 to 70% of the maximum heart rate
Aerobic - Zone: Basics endurance training 1 to 2
Suitable for beginners and advanced / type of training: moderate cardio training. / Aim: Activation of the fat metabolism (calorie burning), improving aerobic performance, Increase in endurance performance.
Training heart rate = 70 to 80% of the maximum heart rate
Anaerobic - Zone: Basics endurance training 2 Suitable for advanced and competitive athletes / type of training: moderate endurance training or interval training / goal: improvement of lactate tolerance, maximum increase in performance. Training heart rate = 80 to 90% of the maximum heart rate
Competition - Zone: Performance / Competition Training Suitable for athletes and high-performance athletes / type of training: intensive interval training and competition training / goal: improvement of maximum speed and power. ATTENTION! Training in this area can lead to overloading of the cardiovascular system and damage to health.
Training heart rate = 90 to 100% of the maximum heart rate
Sample calculation:
Male, 30 years old and weighs 80kg . I am a beginner and would like to lose some weight and increase my endurance.
01: Maximum pulse - calculation
Maximum heart rate = 214 - (0.5 × age) - (0.11 × body weight) Maximum heart rate = 214 - (0.5 × 30) - (0.11 × 80)
Maximum pulse = approx. 190 beats/min
02: Training heart rate calculation
Due to my goals and training level, the fat metabolism zone suits me best.
Training heart rate = 60 to 70% of the maximum heart rate Training heart rate = 190× 0.6 [60%]
Training heart rate = approx. 114 beats/min
After you have set your training heart rate for your training condition or Once you have identified goals, you can start training. Most of our products have heart rate sensors or are heart rate belt compatible. So you can check your heart rate on the monitor during the workouts. If the pulse rate is not shown on the computer display or you want to be on the safe side and want to check your pulse rate, which could be incorrectly displayed due to possible application errors or similar, you can use the following tools:
a. Pulse measurement in the conventional way (sensing the pulse beat, e.g. on the wrist and counting the beats within a minute).
b. Heart rate measurement with suitable and calibrated heart rate measuring devices (available from medical supply stores).
c. Heart rate measurement with other products such as heart rate monitors, smartphones....
3. FREQUENCY:
Most experts recommend the combination of a health-conscious diet, which must be adjusted according to the training goal, and physical exercise three to five times a week. A normal adult needs twice a week exercise to maintain its current condition. To improve his condition and change his body weight, he needs at least three training sessions per week. Ideal of course is a frequency of five training sessions per week.
4. TRAINING PLAN
Each training session should consist of three training phases: "warm-up phase", "training phase" and "cool-down phase". In the "warm-up phase" the body temperature and the oxygen supply should be increased slowly. This is possible through gymnastic exercises over a period of five to ten minutes. After that you start with actual training "training phase". The training load should be adapted according to the training heart rate. In order to support the circulation after the training phase and to preventching or strained muscles later, it is necessary to follow the training phase with a cool-down phase. This should be consist of stretching exercises and/ or light gymnastic exercises for a period of five to ten minutes.
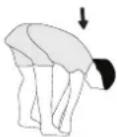
Example - stretching exercises for the warm-up and cool-down phases
Start your warm up by walking on the spot for at least 3 minutes and then perform the following gymnastic exercises to the body for the training phase to prepare accordingly. The exercises do not overdo it and only as far run until a slight drag felt. This position will hold a while.

Reach with your left hand behind your head to the right shoulder and pull with the right hand slightly to the left elbow. After 20sec. switch arm.
Bend forward as far forward as possible and let your legs almost stretched. Show it with your fingers in the direction of toe. 2 x 20sec.
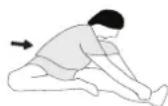
Sit down with one leg stretched out on the floor and bend forward and try to reach the foot with your hands. 2 x 20sec.
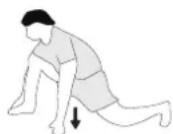
Kneel in a wide lunge forward and support yourself with your hands on the floor. Press the pelvis down. Change after 20 sec leg.
5. MOTIVATION
The key to a successful program is regular training. You should set a fixed time and place for each day of training and prepare yourself mentally for the training. Only train when you are in the mood for it and always have your goal in view. With continuous training you will be able to see how you are progressing day by day and are approaching your personal training goal bit by bit.

Sommaire
Chere cliente, cher client,
DUREE (Time) / WATT:
Program 3 Fatburn Program 4 Ramp Program 5 Mountain
Program 6 Interval Program 7 Cardio Program 8 Endurance


Program 9 Slope Program 10 Rally
User Setting Program 13 (U3)
User Setting Program 11 (U1)

User Setting Program 12 (U2)

User Setting Program 14 (U4)
User Setting Program 15 (U5)

Program 18 HRC (75%)
Program 16 Watt Control

Program 17 HRC (55%)
Program 19 HRC (95%)

Program 20 HRC

Program 21 Body Fat

PROGRAMME 1:Manuel
Program 3 Fatburn Program 4 Ramp Program 5 Mountain

Program 6 Interval Program 7 Cardio Program 8 Endurance

Program 9 Slope Program 10 Rally


User Setting Program 11 (U1)
User Setting Program 12 (U2)
User Setting Program 14 (U4)
User Setting Program 15 (U5)
Program 16 Watt Control
Program 17 HRC (55%)

Program 19 HRC (95%)
Program 20 HRC

User Setting Program 13 (U3)
Program 18 HRC (75%)
| TIME | P13 U3 | FULSE |
| 000 | P | |
| SET. KM | LEVEL | |
| 00 | I | |
| 000 | WATT | |
| 00 | O |
Program 21 Body Fatt
Programma manual:handmatig
Programma's 1-10: fitness
02: Training hartslagberekening
Anaeroob - Zone: Basis - Duartraining 2
Competitie - Zone: Prestaties / Competitie Training
02: Training hartslagberekening
Oboyehne nloaadb: He MeHee 2,5 M
ChyB ynakobky, npoBepbTe no cnNcKy, BCE nn DeTaNn Ha MeCTe. Ecnn Bce B nopAKe, To MOxHO HauHnHaTb c6OpKy. Ecn KaKo-NH-6yDb arperat He B nopAKe IIN OTcyTCTByET, ObaPsaaiTecb K Ham:
BbIe 6anKa = BbIe Harpy3ka HnK3aB 6anKa = HnK3aHarpy3ka KaKdHcERMeHT 6anKn coepknt 3-e REINHHHb
KaKdAa 10 6anok cootbETcByet 1/10-na daHoro TpeHHPOBOHOro BpEMeH
LEVEL/HARPY3KA:
PnnoMoOn KnaBn + / - Bo3MOxHO yCTaHOBnHeH ONTMaNbHOH HArpy3Kn BO Bcex npOrpamMax. N3MeHeHne BnHO NO Bbcote 6aIOK n no INdkaun LEVEL/CTENEHb HAPy3KN - cem BblSe KOHOKN, TEm Bblse HApY3kn Hao6Opot. K KaXdomy CeMeHTy KOHOKN OTHocTcB De BeJINuHNb (Hapnpem, 3 cerMeHT COOTBeTcByet CTeHEn 7, 8 n 9, nn CerMeHT 7 COOTBeTcByET CTeHEn 19, 20 n 21). Bb6paHHa BEJINuHa BnDa h OKoUKe LEVEL/CTENEHb HAPy3KN. N3MeHeHne BnHReT Ha JeIcTBYoUHy n nocJeDyoUOHe No3mUnn BpeMeHN. Bbcota KOnHOK yKa3bBaEt BeJINuHy
Harpy3kn, Ho He npocfnb DOpOrn. IpoxokdHe nporpammbi Noka3BaHTcRa Ha Dncnlee rpaqneueckn. KaDaa nporpamma npoteKaet no yka3aHHoCxeme Ha DnCnlee, Hapnpmep nporpamma 5 = ropa / Hn3Ha = 2 n T.D. (pn3TOM Blicota Cermenta = Harpy3ka, BpeMa pacnPepenreTcno Bcei uKane).Nocne HactpoKn nporpammbi O6raTeNbHo nepeh Hauanom TpeHNPoBn Haxatb KnaBnuy „Start/Stop". Hn Ondho n3 onpepeHbixN oTo6pakaembIX 3NaueHn He npOxDnT dJa MeduHnHCKNXNCNoB3OBaHn.
Manual Program Program 1 Rolling Program 2 Valley
Program 3 Fatburn Program 4 Ramp Program 5 Mountain
Program 6 Interval
Program 7 Cardio
Program 8 Endurance

Program 9 Slope Program 10 Rally


User Setting Program 13 (U3)
User Setting Program 11 (U1)

User Setting Program 14 (U4)
User Setting Program 15 (U5)
Program 16 Watt Control

Program 17 HRC (55%)
Program 18 HRC (75%)
Program 19 HRC (95%)
Program 20 HRC
Program 21 Body Fat
CINCOK BO3MOXHbIX HENCPABHOCTE:
Nocne KaJdoRo HOBOrO CTapTa KOMbIOTep NpOBoNT 6BicTpbl Tect Ha cyHKUHOHbHOCtB. PnO bHApXeHHN HecOoTBcTbN NMeIOCTPn CnHrHa HeCNpabHOCTn:
E1 3OT CnHn, COpOBoXdAIOUINc3BvKOM, NOBnIeTc, ecN n cctb HEnCnpaBOHcTn B KaBeNbHbIX CoeINHeHNx. IpOBePte BCE KaBeNbHbIe CoeINHeHNy N OcO6eHNO WTekebpI. Pocne yCTpaHENHn HEnCnpaBOHcTn HaxmTE KnaBnUy Start/Stop" INepknte bOonee 3ceynD nra toro, YTOsbI CNCTMY yCTaHOHTb B HONb.
TEST-FITNESS NOTE (TecT-ΦNTHEC-OLUEHKA)
PacnTBaTak Ha3bBAeMyo FmTHec-0ueHKy, Bau TpeHaeKep npOn3BOJNT OueHKy coCTOHaNRA BaWe cnOpTNBHO pOpMbI. PnHcun pacYe ta OCHOBa H aTO, YTO y 3DopOBoro TpeHPOBaHHORO YeNoBeka YaCTota NylbcA Ha ONpeDeHemO Tpe3Ke BpeMeHN CHNkaeTc8 b6ICTpee, Yem y 3DopOBoro HeTpeHPOBaHHORO. Dnra ONpeDeHnna NOKaTeTnEaFtHHeC-0ueHKn KOMNbIoTeP pacuTbBAeT pa3Hnuy Mekdy YactOTOn NylbcA B KOHe TpeHPOBKn (HaaynbHbN Pylbc) u NaCTOTo Nylbca Ype3 OHy MNHTy Nocne oKOHuaHHr TpeHPOBKn (KoHehbl Nylbc). NpIb3yTEcB 3tof PkyHcJeN Nocne TOR, KAK Bb HeKoTopoe BpeMa TpeHPOBaNcB. Npeed HAaJIOM BoCTaHOBITBeHbNay3b Bbl DoNkHbN I3MepNTb TeKyuN Nylbc. Dnla 3TO Rbl DonxHbN NoONKtB pyKn Ha CeHCOPbl.
H3MEPEHNEIYJbCA
1
H3mepeHne NylbCa C NOMOUBIO NylbCOMeTpA:
Hn HnHnHO MOHOTOPHRA cepDeyHOro pITMa BO BpEmr TpeHnpOBKn Mbl peKOMeHJeM HOCHTb NOxOJaUH HarpydHbI PEMHeB. KOMNbTOpe IMeET BCTPOEHHBn PIPHEMNHK, N0TOMY Bbl MoKeTe HCNoB3OaTB KapDnonepeDaTHK Bluetooth, HanPnMeP KapDnonepeDaTHK Christopeit Sport BT (apTKyI: 2209). Ecnbl BBn HemHoro CMOHTe KapDnonepeDaTHK nePeT TEM, KAK HApETb ERO, KOMNbTOep DOnJHexH 3AnCaTaB No OTo6pa3ntb DaHHbO aCtoTe OynBa C TeYeHe 60 cekyHa. DnAnaOH NylbCOMETPOB OT 1 Do 2 M. B 3abNCUMOCTN OT MOdEN.
H3mepeHHe IyIbca Ha pyke:
JaTchnynyIbca pacnoIooKeHbI cIeBa n cnpaba Ha pyka pyna. NoxanyIcTa, y6eIntecb, yTO o6e naOHO h Bcerda OnnpaOTcHa DaTHNK ONDHOpeMeHCO HOPMaIbHOu CInoN. KaK ToJIbKO pYbC yMeHbWaeTCA, 3HAueHne OToBpaKaTeCra Ha DCnIe ne lybc. (n3MepeHne nybc pa Kyk ToJIbKO dIopHeNTauHH, TAK KAc DBNXeHne, TpeHne, NT, CTpykTypa KOHN KPOBOO6paUeHne H T.D. Moryt pNBcTe KINHDbNduAylbHbIM OTKIOHEHMOT OF AOKTNueCKOrO NybcA.)
I\PmueaHHe: Ecmn 06a MeToDa N3MepeHn YnBcA NcNoB3yOHTcO ONDOpBeMeHHo, N3MepeHne YnBcA H yPeK nMeet npOnpNTe.
BHHMaHHe! CnTeMb MoHHTOpINrA cepDeHoro pNTMa MOryt 6bItb HeToOHbIMN. Qpe3MepHbIe Φh3uYeCKne Harpy3Kn MOryt npNBecT N Cepe3HOJ TpABMe IIN CMEpTN. Ecn Bbl YCbCTByeTe rOIOBokpyKeHne INI cnaBoCTb, HemeJeHNO PpeKpatTE TpeHNPBOkY. 3HaueHnnyIbCa He NOxOaDT JAE MEnuHNCHKIX CEJIe.
ObnactbObyeHnB MM (IpyctpoCTBaNIOJIb3OBaTeJRA
BecnnaThbI NOBepxHocTb B MM (PiouaIbOByeHneN30hbl 6e3oNaChocTn (Bpaauoune60cm))
Ynctka, TexHueckoe 6cnyxuBaHne n XpaHeHne TpeHaXepa
1. Ynctka
IyNCTKINcONb3yIteYnCTyIOBnaXHyocFcy.BHmAHHe: HIKoRda He NcONb3yIte DnIyNCTKn 6eHN,pa3abNTeNBnn Ipyrne arpeccnBHbIe YnCTaUne CpeCDTa, KOtOpBle MOrYT NobpeDnTb NOBepxHocTb. TpeHaxep npEHa3HaueH ToJIbKO dIy DomauHero NcONb3OBAHnB INomeuHn. PpeOxpanTe TpeHaxep oT cbIpOCTN nPiIN.
2. XpaHeHne TpeHaxKepa
Pn He nCnoB3OBAHm TpeHaepe 60JIbwe 4 HeDenb, HeoXoDIMO OTKIOUHTb ERO O T CETn. NocTAbTe TpeHaepe B cyXoe NOMEuEHeNe I paCblNTte HEMHO rMaHa Na NoDUnHnKn NeJaIe CNpaBa I cIeBa.HakpoIte TpeHaepe, YTObI 3aunITb ERO O T COJHeuBIX LyueN II bIIN I 3TNM PpeObPaTb NImHeHne OKpackn
3. TexHnueckoe 06cIyKnBaHne
Mb pekomehyem nocne kaskdbix 50 cacob noIb3oBaHn npOBepaTb 6oITObIe coedHHeHn u nocne kaskdbix 1oo cacob noIb3oBaHn cMa3bIBaTb NOdUnNHKn NeDanei CnBea nCnpaba.
IcnpaBHeHn HeNoJaDOK:
Ecn npo6nema He moKet 6bIbpeWeHa C nOMOuBIO HNKeCTOaHx yka3aHnn, noKaJyNCta, o6paTntecb B ueHTp, rDe Bbl Kynnn TpeHaxke.
Iybc BO Bpemr TpeHnpOBKn = ot 50 do 60% ot MaKcMaJIbHO rnybc.
30Ha-JKpOBoN 6MeH: OChOBbl -TpeHnpOBKa Ha BbIHOCLINBOCTb1
NoxodnHaNaHaouxNOnbTHbIXNoIb3OBaTeNei/Tn TpeHNPBKn:JeKraTpeHNPbKaHa BbIHOCNBOCTb/ZeIb:AKTBaunzJxnpoBOO6MeHa(CKrAHe NaOpn).UyUweHne NOKa3aTeNeBbHOCNBOCTn。
Iybc BO Bpemr TpeHnpOBKn = OT 60 do 70% OT MaKcMaJIbHO rnybc.
30Ha-A3pO6nKa: OCHoBbl -TpeHnpOBKa Ha BbIHOCNlBOcTB 1/2 PdoXoHITI HauHHaOuXn npOoBHNyTbIX / TIn TpeHnpOBKn: ymepeHHa TpeHnpOBKa Ha BbIHOCNlBOcTB. / UeIb: AkTnBaUria JnpoBOrO oMeHa (CxHraHne KaIOpn), ynuJeHne a3pO6Ho npon3BOOnTeJbHOCT, NObBIweHne BbIHOCNlBOcTH.
Iybc BO Bpemr TpeHnpBKN = ot 70 do 80% ot MaKcMaJbHorO nybc.
30ha-AhApobka: OCHOBI - TpeHnOBKa Ha BbIHOCINBOCTb 2 IdoXoHT dIy npOBDHybIX H COPEBHYUxXcra CnOpTcMeHOB / TIn TpeHnOBKn: yMepeHHa TpeHnOBKa Ha BbIHOCINBOCTb NII INHeTpBaIbHa TpeHnOBKa / cIeIb: yIyUWeHne TOlepaTHOCTN K NaKAtTy, MaKcMaJIbHOe YBeLIuYeHne npOn3BOJNTeIbHOCTN. Pylbc BO BpEMr TpeHnOBKn = OT 80 Do 90% OT MaKcMaJIbHorO nyIbca.
30ha-CopeBBOHAn: TpeHnpOBKa IJn CopeBHOBAHn
IooXoHT nIcOpTcMeHOB nCnpTcMeHOB C BbICOKMn
NokaTeaAMn /TN TpeHnpBOKn: INHTeHCNBHa INHTepBaJIbHa
TpeHnpOBKa I COpeBHOBeJIbHa TpeHnpOBKa /UeIb: yIyUweHne
MAKCMAbHO KcOPOCTn MOnuHOctn. OctopoXHo! TpeHnpBOKn
B 3ToI o6NaCTn MOrT pNpBEcTH N Kepepy3Ke cepDeHOCocSyDcTOI CNCTeMbI uYue6By IJn 3DopOBBa.
Nylbc BO BpeMa TpeHnpOBKn = ot 90 do 100% oT MaKcMmaIbHO rO npBa.
PpMep paueeta:
MyyHnHa, 30 neT, Bec 80 Kr, r HOBNyOK, XOuy NOxUyDeTB n NOBbICHTb BblHOcNlBOCTb.
01:pacuet MaKcImaIbHOro nylbca.
MaKcMaJIbHbI nIyIbc = 214 - (0,5 x Bo3pact) - (0,11 x MaCCaTeNa)
MaKcMmaHbHn npIbc = 214 - (0,5x30) - (0,11x80)
MaKcHMaIbHbIyNbc= npMepHo 190 yd/MnH.
02:PaCHTyIbCa BO BPeM TpeHnpOBKn
B cnly monx uei npOBHn noDROTOBm MHe 60JIbwe BCero nOxDXoNDT 3OHa JnPOBOrO o6MeHa.
Iybc BO Bpemra TpeHnpBn =OT 60do 70% OT MaKcMaJIbHorO nybcA.
TpeHnpOBOuHbIyIbc=190x0,6[60%]
TpeneHPOBOHybIyNbc=114yMmH.
Iocne toro, kak Bby yctahOBnIny cactOry cepdeHbIX cokpaueHn IJN TpeHnpOBKn B COOTBETCTBn C YCIOBnMn TpeHnpOBKn IJN ONpeHnB CEIN, MOxHO pncTyNaTb K TpeHnpOBkAM. BoIbUnHCTBO HaunxpOdyKTOB OcHauSeHbI DaTuNKaMn CactOToB CepdeHbIX COKPAeHHN IN COBMectMbI C NORcAMn IJN 3MepeHHN AactOToB cepDeHbIX cokpaueHHN. TaKIM o6pazOM, BblMOKeTe KOHTPOIpOBaTb qactOry cepdeHbIX cokpaueHHN BO BpeM TpeHnpOBKn. Ecn YacToTA NybcA He OTO6paKaTaCn HA DnCnIee KOMNbIoTepa IN N Bl XOTNepeCtPaXOBaTcN PNOBepHb CBOHO aactOry PyNbca, KOTopar MoXeT OTO6paKaTc HnPabNtBHO n3-3a BO3MOKbHX OuNbOcK npUloKeHHN IN NOobhix BeueN, Bbl MOxTe NCNoB3ObaTc NeedyUoine IHCTpymEnhti:
a.ИЗмерени пььса obчнбим cnocobm (оуценпулбca, Hanpnmep,Ha3anctbe,NIOdchET yapOB B Teeyehne MnHytbl).
6.ИЗмеренueчсTobl cepdychbIX cokpaeeHn c nomoobnoNoxOДиux INOTkaIINbPoBaHHbIX yCtpoCTB nlaN3MpeHnueAChTObIcpeDyhbx COKpaeeHn (OocTyHbIB MaRa3InHax MeDInCHkNXTOBAPOB).
Program 17 HRC (55%)

Program 19 HRC (95%) Program 20 HRC Program 21 Body Fat

UživotelùProgram 13 (U3)
Program 18 HRC (75%)
Manuálni program:
Program 16: Program Watt
Zde muzete zadat individualln specifikaci vykonu. Odpor pri slapani je poiclaem automaticy upravovan urcitem tolerancnim Rozmezi bez ohledu na frekvenci slapani, takze se vzydny pohybujete v zadanem pasmu. Nastaveni tréninkovych parametru cas /vzdalenost / kalorie / horni hranice pulsu / watt stiskutim lacitka F.
Program 17-19:
Soutež - zona: Performance / Competition Training
EN IEC 61000-6-3:2021
EN IEC 61000-6-1:2019
EN IEC 61000-3-2:2019/A1:2021
EN61000-3-3:2013/A1:2019+A2:2021
EN ISO 20957-1:2013
EN ISO 20957-5:2016
EC-DECLARATION OF CONFORMITY
declares, in our sole responsibility, that the products:
Article:
RS 3 Art.-No. 1826
Product description:
Ergometer - stationary training equipment
comply with the following essential requirements of the following EU directives
2014/53/EU (RED) Radio Equipment Directive
2011/65/EU (RoHS) Directive to Restriction of Hazardous
Substances
and additionally standards, guidelines and regulations:
ETSI EN 303 447 V1.3.1
ETSI EN 300 330 V2.1.1
EN301489-1V2.1.1
EN301489-3V2.1.1
EN 55032:2015/A1:2020+A11:2020
EN 55035:2017/A11:2020
ENIEC62368-1:2020+A11:2020
EN 62479:2010
EN 50663:2017
ENIEC61000-6-3:2021
EN IEC 61000-6-1:2019
ENIEC61000-3-2:2019/A1:2021
EN 61000-3-3 :2013/A1:2019+A2:2021
EN ISO 20957-1:2013
EN ISO 20957-5:2016
The notified body TÜV SÜD Product Service GmbH (identification number 0123) has issued the EU type-examination certificate No. TPS-RED500792 i01 for the requirements of Article 3(2) of the RED (2014/53EU).
(General Agent / Prokurist)
