
Deebot OZMO 950 - Robot vacuum ECOVACS - Free user manual and instructions
Find the device manual for free Deebot OZMO 950 ECOVACS in PDF.
| Product type | Robot vacuum and mop |
| Brand | ECOVACS |
| Model | Deebot OZMO 950 |
| Dimensions (L x W x H) | Approximately 350 x 350 x 100 mm |
| Weight | Approximately 3.5 kg |
| Dustbin capacity | 300 ml |
| Water tank capacity | 180 ml |
| Battery life | Approximately 120 minutes |
| Charging time | Approximately 4 hours |
| Dock input voltage | 100-240 V~, 50-60 Hz |
| Dock output voltage | 20 V, 1 A |
| Battery type | Lithium-ion rechargeable |
| Noise level | ≤ 65 dB |
| Main functions | Vacuuming, mopping (OZMO), scheduling, mobile app, auto-return to dock |
| Cleaning modes | Automatic, spot, edge, MAX (via app) |
| Navigation system | Laser (LDS) and sensors |
| Filter | High efficiency + washable sponge filter |
| Main brush | Yes, with direct suction option for hair |
| Side brushes | 4 (two pairs) |
| Wi-Fi connectivity | Yes, 2.4 GHz band |
| Included accessories | Docking station, microfiber cloth, filter, side brushes, cleaning tool |
| Regular maintenance | Weekly cleaning of brushes and filters, empty dustbin |
| General information | Indoor use only, do not use on wet surfaces |
Frequently Asked Questions - Deebot OZMO 950 ECOVACS
User questions about Deebot OZMO 950 ECOVACS
0 question about this device. Answer the ones you know or ask your own.
Ask a new question about this device
Download the instructions for your Robot vacuum in PDF format for free! Find your manual Deebot OZMO 950 - ECOVACS and take your electronic device back in hand. On this page are published all the documents necessary for the use of your device. Deebot OZMO 950 by ECOVACS.
USER MANUAL Deebot OZMO 950 ECOVACS
Congratulations on the purchase of your ECOVACS ROBOTICS DEEBOT! We hope it brings you many years of satisfaction. We believe that your new robot will help keep your home clean and give you more quality time to do other things.
Live Smart. Enjoy Life.
Should you encounter situations that have not been properly addressed in this Instruction Manual, please contact our Customer Service Center where a technician will be able to help you with your specific problem or question.
For more information, please visit the ECOVACS ROBOTICS official website: www.ecovacs.com
The company reserves the right to make technological and/or design changes to this product for continuous improvement.
Thank you for choosing DEEBOT!
Contents
- Important Safety Instructions 4
- Package Contents 8
- Operating and Programming 11
- Maintenance 19
- Indicator Light. 24
6.Troubleshooting 25 - Technical Specifications 28
1. Important Safety Instructions
IMPORTANT SAFETY INSTRUCTIONS
When using an electrical Appliance, basic precautions should always be followed, including the following:
READ ALL INSTRUCTIONS BEFORE USING THIS APPLIANCE SAVE THESE INSTRUCTIONS
-
This Appliance can be used by children aged from 8 years and above and persons with reduced physical, sensory or mental capabilities or lack of experience and knowledge if they have been given supervision or instruction concerning use of the Appliance in a safe way and understand the hazards involved. Children shall not play with the Appliance. Cleaning and user maintenance shall not be made by children without supervision.
-
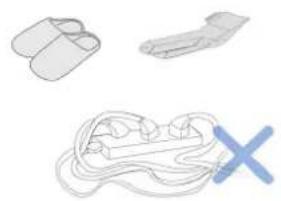
Clear the area to be cleaned. Remove power cords and small objects from the floor that could entangle the Appliance. Tuck rug fringe under the rug base, and lift items such as curtains and tablecloths off the floor.
-
If there is a drop off in the cleaning area due to a step or stairs, you should operate the Appliance to ensure that it can detect the step without falling over the edge. It may become necessary to place a physical barrier at the edge to keep the unit from falling. Make sure the physical barrier is not a trip hazard.
-
Only use as described in this manual. Only use attachments recommended or sold by the manufacturer.
-
Please make sure your power supply source voltage matches the power voltage marked on the Docking Station.
-
For INDOOR household use ONLY. Do not use the Appliance in outdoor, commercial or industrial environments.
-
Use only the original rechargeable battery and Docking Station provided with the Appliance from the manufacturer. Non-rechargeable batteries are prohibited. For battery information, please refer to Specifications section.
1. Important Safety Instructions
- Do not use without dust bin and/or filters in place.
- Do not operate the Appliance in an area where there are lit candles or fragile objects.
- Do not use in extremely hot or cold environments (below -5^ / 23^ or above 40^ / 104^ ).
- Keep hair, loose clothing, fingers, and all parts of body away from any openings and moving parts.
- Do not operate the Appliance in a room where an infant or child is sleeping.
- Do not use Appliance on wet surfaces or surfaces with standing water.
- Do not allow the Appliance to pick up large objects like stones, large pieces of paper or any item that may clog the Appliance.
- Do not use Appliance to pick up flammable or combustible materials such as gasoline, printer or copier toner, or use in areas where they may be present.
- Do not use Appliance to pick up anything that is burning or smoking, such as cigarettes,
matches, hot ashes, or anything that could cause a fire.
- Do not put objects into the suction intake. Do not use if the suction intake is blocked. Keep the intake clear of dust, lint, hair, or anything that may reduce air flow.
- Take care not to damage the power cord. Do not pull on or carry the Appliance or Docking Station by the power cord, use the power cord as a handle, close a door on the power cord, or pull power cord around sharp edges or corners. Do not run Appliance over the power cord. Keep power cord away from hot surfaces.
- If the power cord is damaged, it must be replaced by the manufacturer or its service agent in order to avoid a hazard.
- Do not use the Docking Station if it is damaged. The power supply is not to be repaired and not to be used any longer if it is damaged or defective.
- Do not use with a damaged power cord or receptacle. Do not use the Appliance or Docking Station if it is not working properly,
1. Important Safety Instructions
has been dropped, damaged, left outdoors, or come in contact with water. It must be repaired by the manufacturer or its service agent in order to avoid a hazard.
- Turn OFF the power switch before cleaning or maintaining the Appliance.
- The plug must be removed from the receptacle before cleaning or maintaining the Docking Station.
- Remove the Appliance from the Docking Station, and turn OFF the power switch to the Appliance before removing the battery for disposal of the Appliance.
- The battery must be removed and discarded according to local laws and regulations before disposal of the Appliance.
- Please dispose of used batteries according to local laws and regulations.
- Do not incinerate the Appliance even if it is severely damaged. The batteries can explode in a fire.
-
When not using the Docking Station for a long period of time, please unplug it.
-
The Appliance must be used in accordance with the directions in this Instruction Manual. ECOVACS ROBOTICS cannot be held liable or responsible for any damages or injuries caused by improper use.
- The robot contains batteries that are only replaceable by skilled persons. To replace the robot's battery, please contact Customer Service.
- If the robot will not be used for a long time, power OFF the robot for storage and unplug the Docking Station.
- WARNING: For the purposes of recharging the battery, only use the detachable supply unit CH1822 provided with the Appliance.
1. Important Safety Instructions
To disable Wi-Fi module on DEEBOT, power the robot ON.
Place the robot on the Docking Station making sure the Charging Contacts on DEEBOT and the Docking Station Pins make a connection.
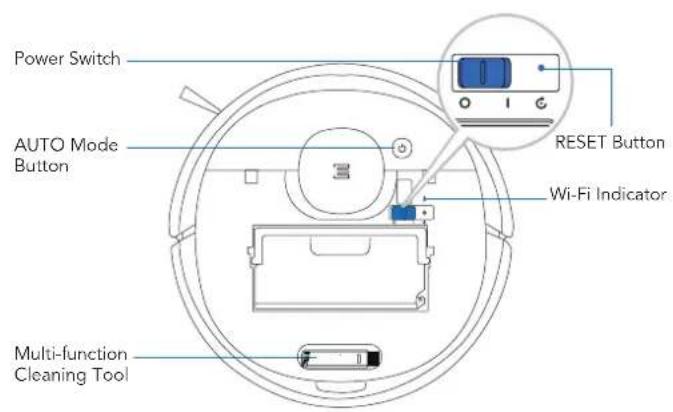
Press and hold the AUTO Mode Button on the robot for 20 seconds until DEEBOT emits 3 beeps.
To enable Wi-Fi module on DEEBOT, power the robot OFF and then power ON. The Wi-Fi module is turned on when DEEBOT is restarted.
| Class II |
| Short-circuit-proof safety isolating transformer |
| Switch mode power supply |
| For indoor use only |
For EU Countries
For EU Declaration of Conformity information, visit https://www.ecovacs.com/global/compliance
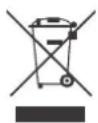
Correct Disposal of this Product
This marking indicates that this product should not be disposed of with other household waste throughout the EU. To prevent possible harm to the environment or human health from uncontrolled waste disposal, recycle it responsibly to promote the sustainable reuse of material resources. To recycle your used device, please use the return and collection systems or contact the retailer where the product was purchased. They can safely recycle this product.
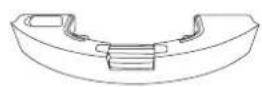
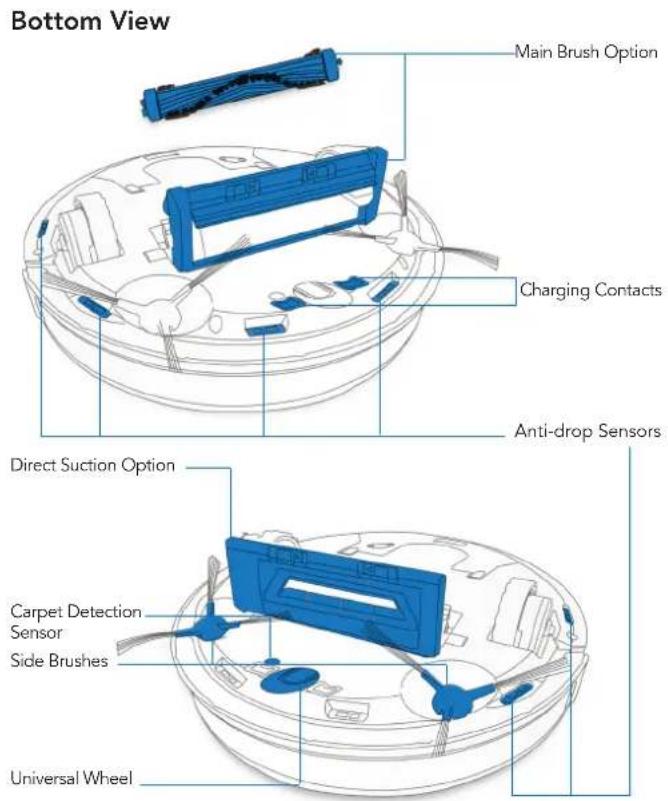
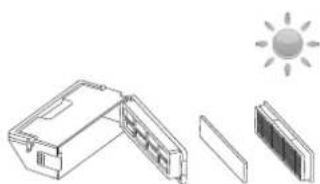
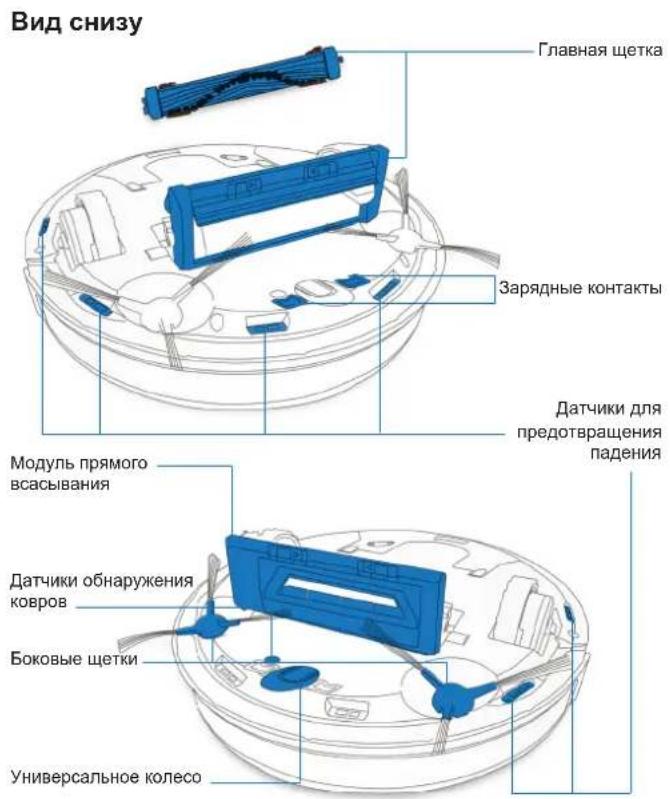
2. Package Contents
2.1 Package Contents
Robot Quick Start Guide


Instruction ManualDocking Station
(4) Side Brushes

Main Brush Option (Pre-installed)
Direct Suction Option
Reservoir
Washable/Reusable Microfiber Cleaning Cloth
Disposable Cleaning Cloth Cleaning Cloth Plate
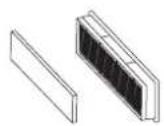
Washable High Efficiency Filter and Sponge Filter
Note: Figures and illustrations are for reference only and may differ from actual product appearance. Product design and specifications are subject to changes without notice.
2. Package Contents
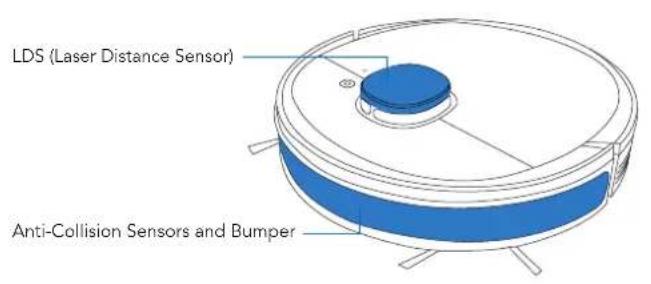
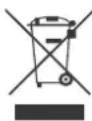
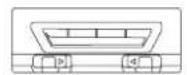
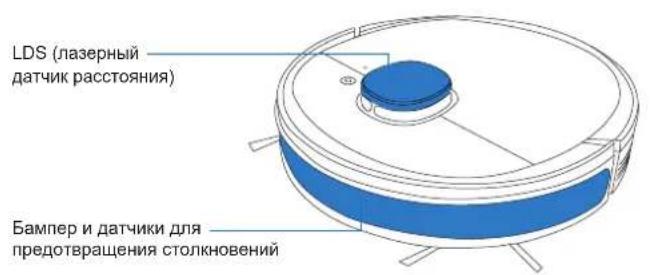
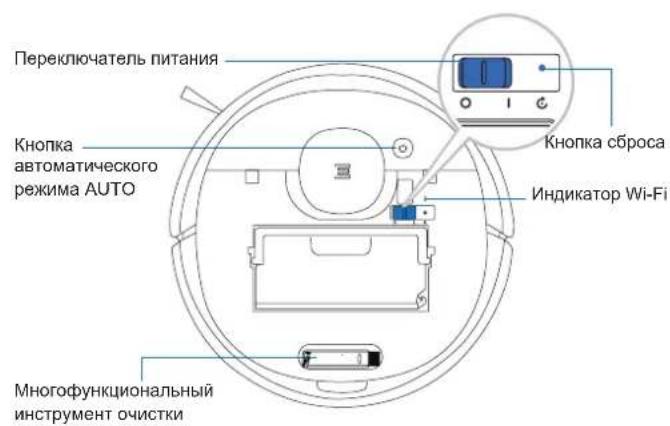
2.3 Product Diagram Robot
2. Package Contents
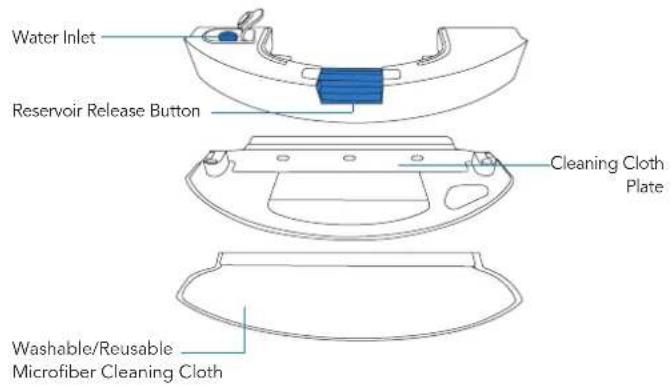
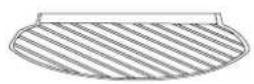
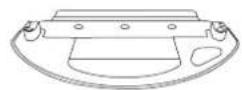
Reservoir
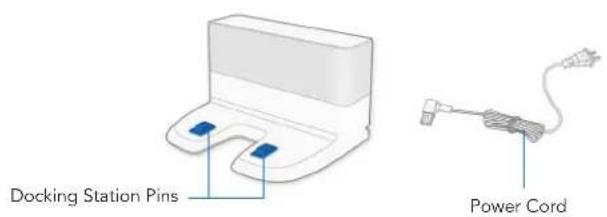
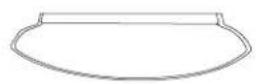
Docking Station
3. Operating and Programming
3.1 Notes Before Cleaning
WARNING: Do not use DEEBOT on wet surfaces or surfaces with standing water.

Before using the product on a rug with tasseled edges, please fold the rug edges under.
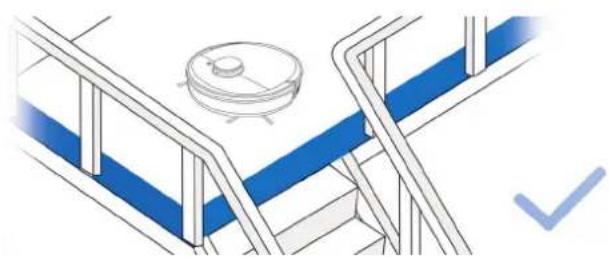
It may be necessary to place a physical barrier at the edge of a drop to stop the unit from falling over the edge.

Tidy up the area to be cleaned by putting furniture, such as chairs, in their proper place.
Remove power cords and small objects from the floor that the robot could be obstructed by.
3. Operating and Programming
3.2 Preparation
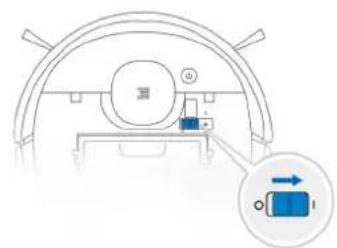
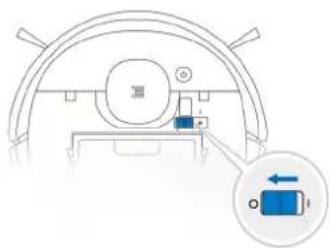
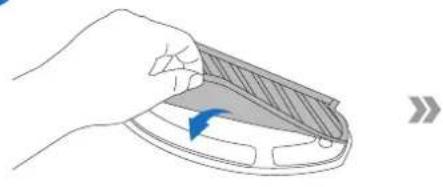
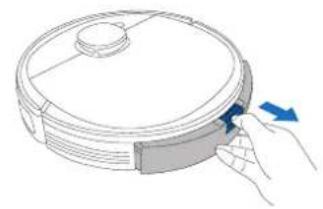
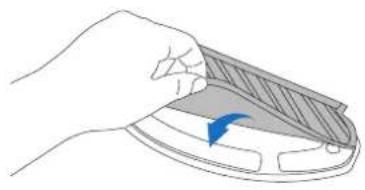
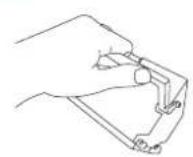
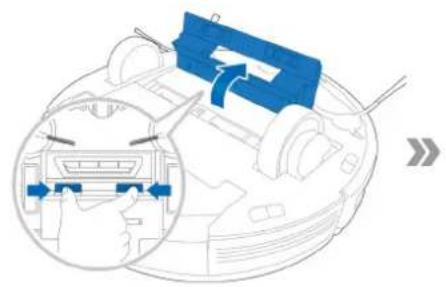
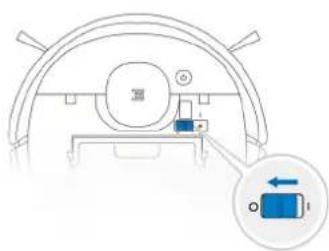
1 Remove Protection Strip
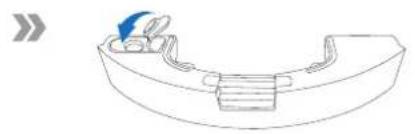
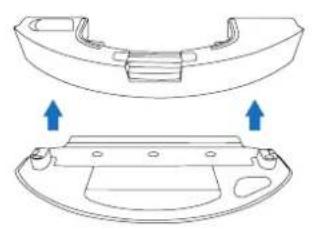
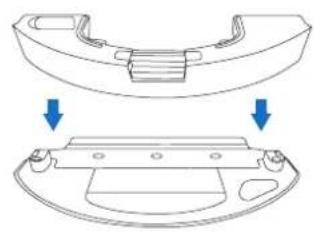
2 Assemble Docking Station
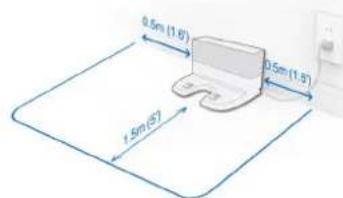
3 Docking Station Placement
Please place the Docking Station on a hard floor surface.

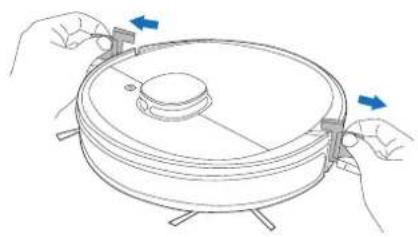
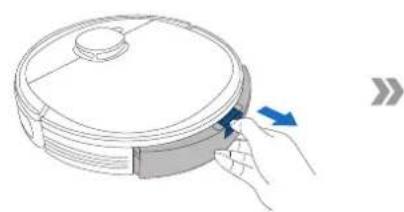
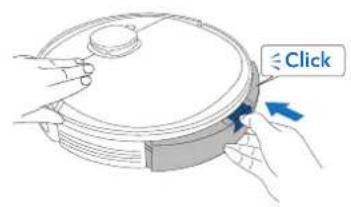
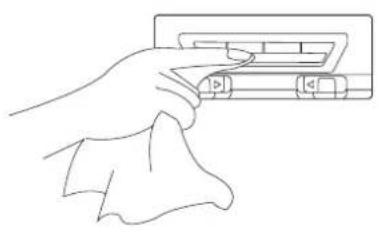
Install Side Brushes
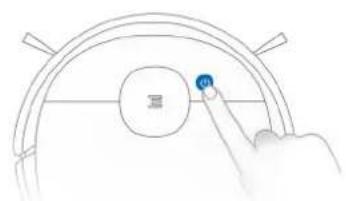
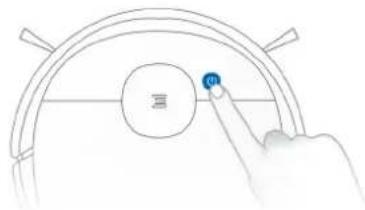
5 Power ON
3. Operating and Programming
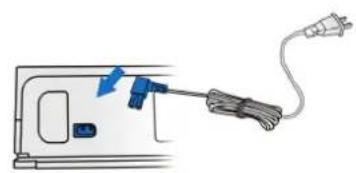
Charge DEEBOT
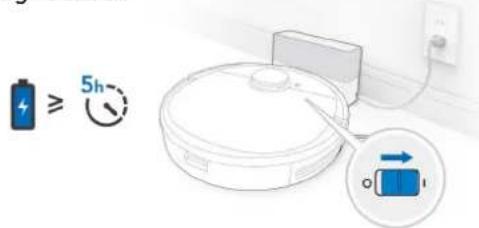
Note: When DEEBOT completes the cleaning cycle or when the battery gets low, DEEBOT automatically returns to the Docking Station to recharge itself. DEEBOT can also be sent back to the Docking Station at any time by using the ECOVACS App or by pressing the AUTO Button on the robot for 3 seconds.
Empty remaining water from the Reservoir and remove the Cleaning Cloth Plate before charging DEEBOT.
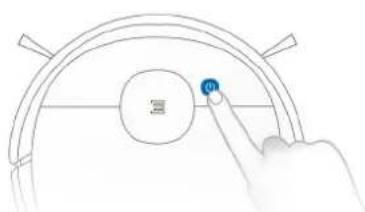
7 Pause
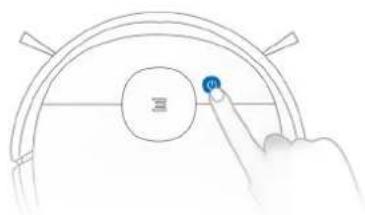
Note: The robot's Control Panel stops glowing after the robot is paused for a few minutes. Press the AUTO Mode Button on DEEBOT to wake up the robot.

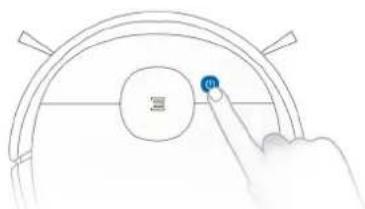
Start

Power OFF
Note: When DEEBOT is not working, it is recommended to keep it switched ON and charging.
3. Operating and Programming
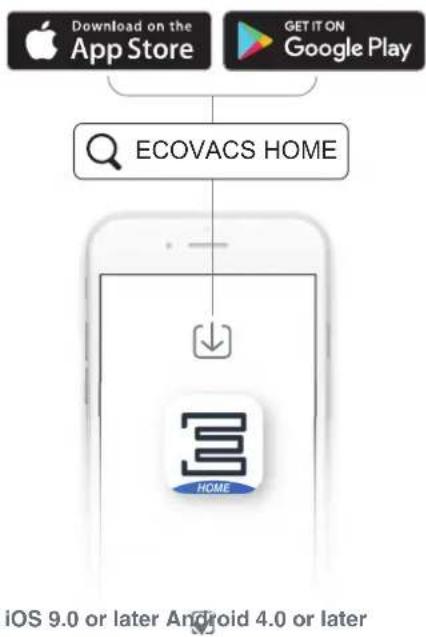
All the functions mentioned above can be enabled on the App. Download ECOVACS App to access more features, including MAX Mode, Scheduled Cleaning, etc.
EN
3. Operating and Programming
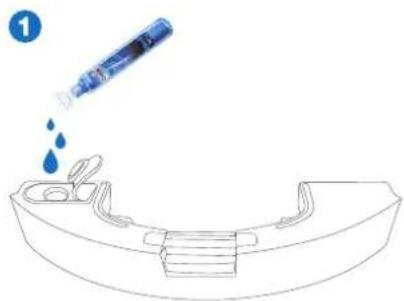
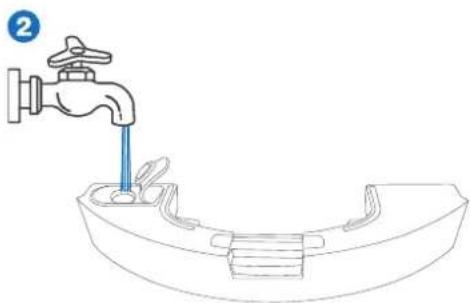
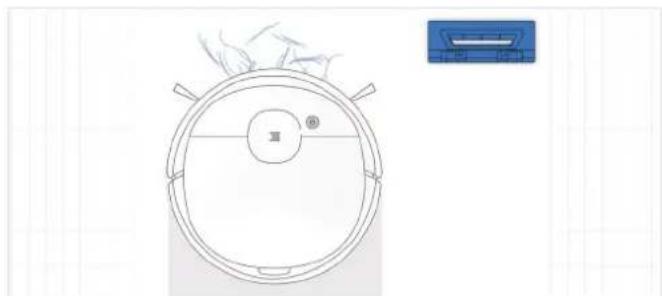
3.3 OZMO Mopping System
1

2
3
Note: To add water into the Reservoir when DEEBOT is cleaning, pause the robot, press the Reservoir Release Button, draw out the reservoir, and add water.
3. Operating and Programming
3.4 Floor Cleaner Recommendation
Try BotClean, a high-performance floor cleaner recommended by Ecovacs. Experience a premium cleaning performance, shine and unique scent.
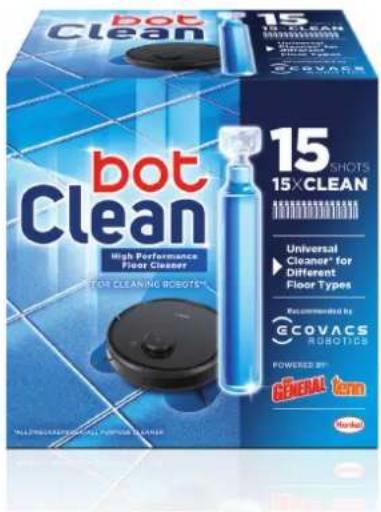
Note*:
- For optimal cleanliness, first pour the entire liquid into the empty water tank.
-
Then fill the tank with water.
-
The product is available on German and Spanish market
3. Operating and Programming
3.5 Choosing a Suction Option
Main Brush Option: The best choice for deep cleaning, with a combination of the Main Brush and strong suction.

Direct Suction Option: The best choice for daily cleaning. This Suction Option is specifically designed to pick up hair without getting clogged by it, and is ideal for pet owners.
3. Operating and Programming
Install the Direct Suction Option
1
2
3
Install the Main Brush Option
1
2
3
Before performing cleaning and maintenance tasks on DEEBOT, turn the robot OFF and unplug the Docking Station.
4.1 OZMO Mopping System
1
2
3
4
5
6
4. Maintenance
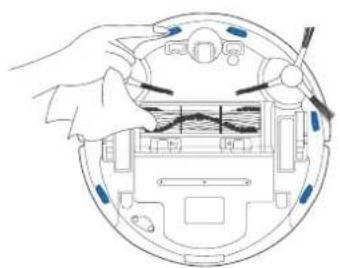
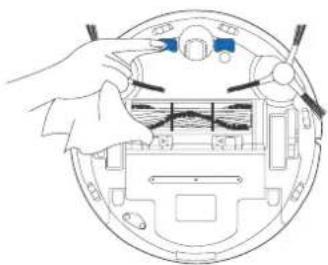
4.2 Dust Bin and Filters Dust Bin

1

2

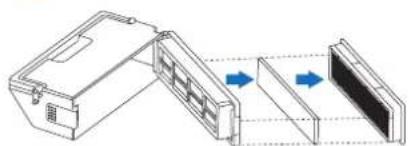
3
4

5
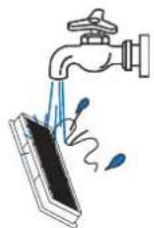
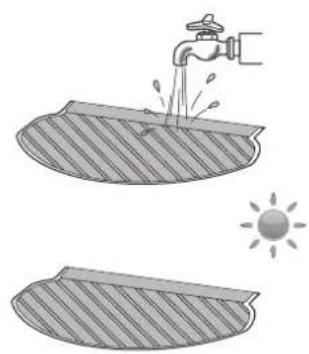
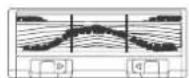
Note: 1. Please rinse the filter with water as shown above. 2. Do not use finger or brush to clean the filter. 3. Be sure to dry out the filter for at least 24 hours after washing.
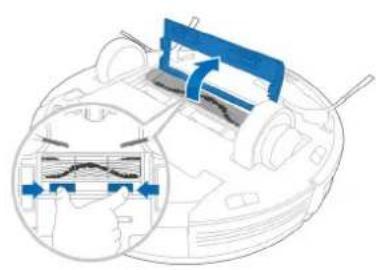
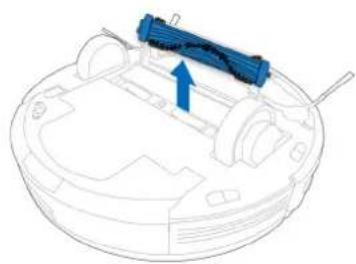
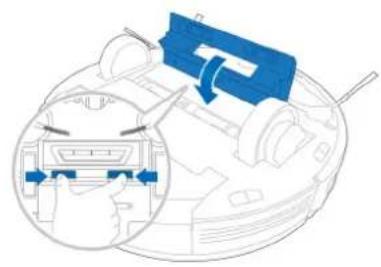
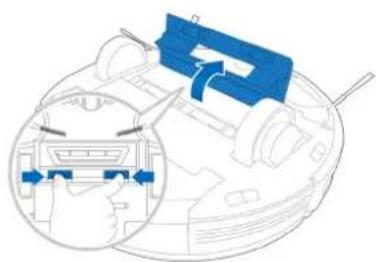
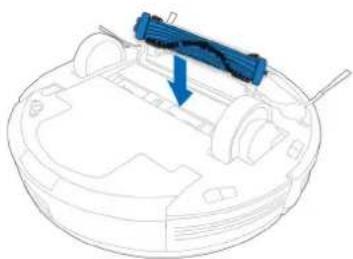
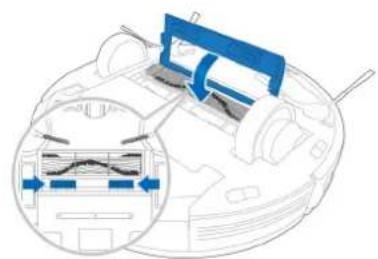
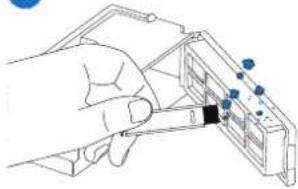
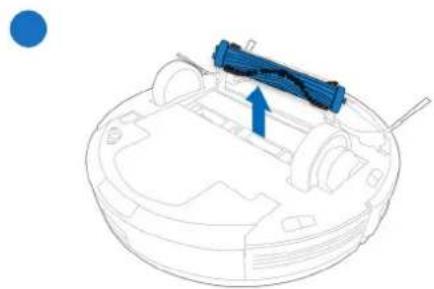
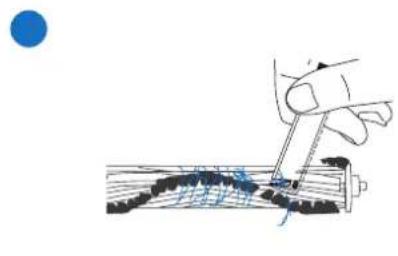
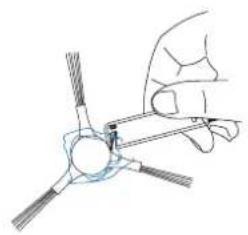
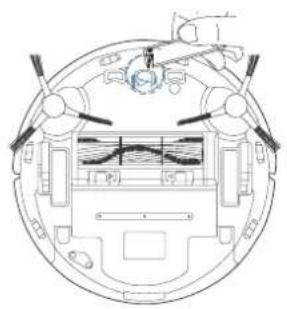
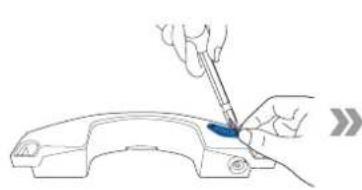
4.3 Main Brush, Direct Suction Option and Side Brushes
Note: A Multi-Function Cleaning Tool is provided for easy maintenance. Handle with care, this cleaning tool has sharp edges.
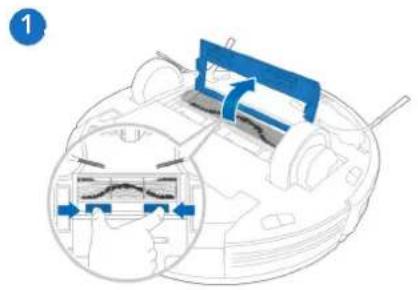
Main Brush
SideBrushesDirectSuctionOption
4. Maintenance
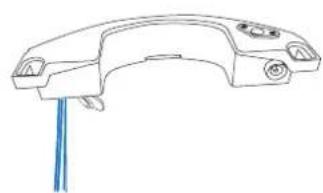
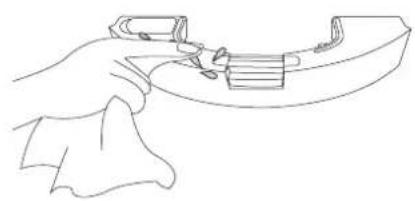
4.4 Other Components
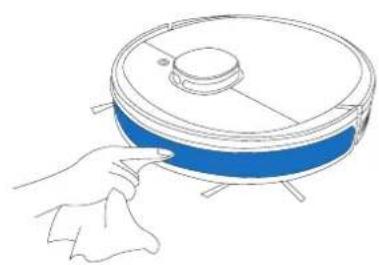

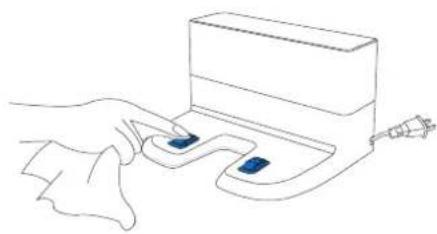
Note: Before cleaning the robot's Charging Contacts and Docking Station Pins, turn the robot OFF and unplug the Docking Station.
4.5 Regular Maintenance
To keep DEEBOT running at peak performance, perform maintenance tasks and replace parts with the following frequencies:
| Robot Part Maintenance | Frequency Replacement Frequency | |
| Cleaning Cloth After each use | Every 50 washings | |
| Reservoir/Cleaning Cloth Plate After each use / | ||
| Side Brush Once every 2 weeks | weeks Every 3-6 months | |
| Main Brush Once per week | Every 6-12 months | |
| Sponge Filter/ High Efficiency Filter Once per week | Once per week Every 3-6 months | |
| Universal Wheel Anti-Drop Sensors Bumper Charging Contacts Docking Station Pins | Once per week / |
A multi-function Cleaning Tool is provided for easy maintenance. Handle with care, this cleaning tool has sharp edges.
Note: ECOVACS manufactures various replacement parts and fittings. Please contact Customer Service for more information on replacement parts.
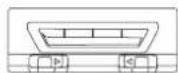
5. Indicator Light
DEEBOT will tell you something is wrong with an indicator light and voice report. More detailed support is available through the ECOVACS HOME and online website.
| Indicator Light Scenario | |
| AUTO Mode Button glows a solid WHITE | The robot is cleaning |
| The robot is paused while cleaning | |
| AUTO Mode Button flashes WHITE | The robot is charging |
| The robot is starting | |
| The robot is relocating | |
| AUTO Mode Button glows a solid RED The robot has low battery | |
| AUTO Mode Button flashes RED The robot has a problem |
6. Troubleshooting
| No. | Malfunction Possible Causes Solutions | ||
| 1 | DEEBOT is not charging. | DEEBOT is not switched ON. Switch ON DEEBOT. | |
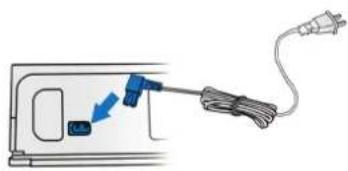
| DEEBOT has not connected to the Docking Station. | Be sure that the robot's Charging Contacts have connected to the Docking Station Pins. | ||
| The Power Cord is not connected to the Docking Station. | Make sure the Power Cord is firmly connected to the Docking Station. | ||
| The battery is completely discharged. | Re-activate the battery. Switch ON. Place DEEBOT on the Docking Station by hand, remove after charging for 3 minutes, repeat 3 times; then charge normally. | ||
| Make sure the Docking Station is connected to the power supply. | The Docking Station is not connected to the power supply. | ||
| 2 | DEEBOT cannot return to the Docking Station. | The Docking Station is not correctly placed. | Refer to section 3.2 to correctly place the Docking Station. |
| 3 | DEEBOT gets stuck while working and stops. | DEEBOT is tangled with something on the floor (electrical wires, curtains, carpet fringing, etc.). | DEEBOT will try various ways to free itself. If it is unsuccessful, manually remove the obstacles and restart. |
| 4 | DEEBOT returns to the Docking Station before it has finished cleaning. | When the battery gets low, DEEBOT automatically switches to Return to Charger Mode and returns to the Docking Station to recharge itself. | This is normal. No solution necessary. |
| Working time varies according to floor surface, room complexity and the Cleaning Mode selected. | This is normal. No solution necessary. | ||
6. Troubleshooting
| No. | Malfunction Possible Causes Solutions | ||
| 5 | DEEBOT does not clean automatically at the scheduled time. | Time Scheduling function is cancelled. | Program DEEBOT to clean at specific times using the ECOVACS App. |
| The Continued Cleaning function is turned ON and DEEBOT has just finished cleaning the scheduled cleaning area. | This is normal. No solution necessary. | ||
| DEEBOT is switched OFF. Switch ON DEEBOT | |||
| The robot's battery is low. | Keep DEEBOT switched ON and connected to the Docking Station to make sure it has a full battery to work at any time. | ||
| The robot's Suction Intake is blocked and/or there is debris stuck in its components. | Power OFF DEEBOT, clean the Dust Bin and invert the robot. Clean the robot's Suction Intake, Side Brushes and the Main Brush as described in section 4. | ||
| 6 | DEEBOT does not clean the whole area. | The cleaning area is not tidy. | Remove small objects from the floor and tidy up the cleaning area before DEEBOT starts cleaning. |
| 7 | The water is not coming out of the Reservoir when DEEBOT is mopping. | The water inlet filter on the bottom of Reservoir is clogged. | Unscrew the water inlet on the bottom of Reservoir and clean the filter. |
| The Reservoir runs out of water. Add water into the Reservoir. | the Reservoir. | ||
| The water outlets on the bottom of DEEBOT are clogged. | Check the water outlets on the bottom and clean. |
6. Troubleshooting
| No. | Malfunction Possible Causes Solutions | ||
| 8 | DEEBOT is not able to connect to the home Wi-Fi network. | Incorrect home Wi-Fi username or password entered. | Enter the correct home Wi-Fi username and password. |
| DEEBOT is not within range of your home Wi-Fi signal. | Make sure DEEBOT is within range of your home Wi-Fi signal. | ||
| Network setup started before DEEBOT was ready. | Turn ON Power Switch. Press the RESET Button for 3 seconds. DEEBOT is ready for network setup when it plays a musical tune and its Wi-Fi Indicator light flashes slowly. | ||
| Your smartphone's operating system needs to be updated. | Update your smartphone's operating system. The ECOVACS App runs on iOS 9.0 and above, Android 4.0 and above. |
7. Technical Specifications
| Model DX9G | |||
| Rated Input 20 V, 1 A | — | ||
| Docking Station Model CH1822 | |||
| Rated Input 100-240 V | ~, 50-60 Hz, 0.5 A Rated Output 20 V, 1 A | — | |
| Laser | Max. Power (mW) 2.5 mW | ||
| Frequency (KHz) 1.8 KHz | |||
| Rotate Speed (circle/min) 300±5 circle/min | |||
| Frequency bands 2.400~2.4835 | GHz | ||
| Off Mode Power Less than 0.50 | W | ||
| Networked Standby Power | Less than 2.00 W | ||
Output power of the WIFI module is less than 100mW
Note: Technical and design specifications may be changed for continuous product improvement.
https://www.ecovacs.com/global/compliance
7. Specifications techniques
https://www.ecovacs.com/global/compliance
2 Montare la Docking Station
5 Accensione (ON)

HCHCTPYKLIINIPO TEXHNIKE B3OPACHOCTN
Pn nCnoB3OBAHn 3neKtpnuecknx np6opOB Heo6xOaMo Bcerda co6IouDaTb CneDyUoJe MepbI ppeOCTOpOXHOCTN:
IPEP3KCPYATAUENDAHHO10PNBOPA O3HAKOMbTECb COBCEMN HCHTPyKUJAMNCOXPAHNTE DAHHYIO NHOPMAUIO
1.Данньи npibop Moryt nCnoJb3ObaTb DeTn CTapwe 8 let n Iina c OgpHnueHHbIMn Φn3nueckmN, ceHcOpHbIMn IIn YMCTBeHHbIMn Cnoc6hOCTaMn, a TAKKe Iina, He oblaadouune DoctatochbIM OnbITOM n 3HaHnMaN, B cnyae, ecNI OHn HaxoJrTcN IOd HaIeKaunm npncmOTpom, Jn6o 6bln npOHCTpykTnpOBaHbIO npabINbHom NcNoJIb3OBaHn DaHHoro np6opa nOC03HaIOT BO3MOxHbIe pUCKn. DeTI He doJXhbI rpaTb C np6obopom. OuncTa n NOlb3OBaTeNbCKoe TexHnueckoe 6cbNyKnbAHne He doJXhbI BblONHrTbc DeTbMn 6e3 npncMoTpa.
2.Ocbo6oIte NOBepxHocTb,NOJnEkaUO ouNCTke.Y6epnte c nola npoBoa n He6oJIbIwe ppeMeTbI,KOTOpBie MOryT nomeWATb NpeDBrXKeHNIO np6opa. 3anpaBbTe 6axpomy KOBpa NoKOBep I NOHMITE 3aHaBeCKN IN CkATEPTN HAD noIOM.
3. Ecnn nobepxnoctb dna ounctkn nmeet nepenadbl Blicot, Hanpimep ctyneHn, ynpabnIte np6opom, yto6bl y6eINTbcra, yTO OH pacno3haet nx n He naaet c kpa. Bo3moXHO, Heo6xOIMO 6ydet ycTaHOBntb fN3Nueckoe npenrTcTBne, yTO6bl npedOTbpaTntb naeHne np6opa. Fn3Nueckoe npenrTcTBne He doJxHo npedCTabnTb onachoct b naeHnra dnayeNoBeka.
4.ИспоьзунTe npибopToькВ COOTBETCTBnCДaHHbIMpykoBOdCTBOM.Icnoь3ynteToьКTe KOMПЕКТУОUNe,KOTOpblpekeMehDoBaHbI NII NOCTABJIYOTcN3ROTOBHTeJEM.
DpyrHx npEaMeTOB, KOTOpbIe MOryT Bbl3BaTb BO3ropaHne.
- He nomeuTe npedMeTbI BO BCacbHaOooe OTBepCTne. He nCnoJIb3yIe np6Op, ecn BcacbHaOooe OTBepCTne 3a6nKnpoBaHO. Bo BCacbHaOooem OTBepCTnn He DoJxHo 6bIb Nbln, BOPca, BOLOc nn Dpyrnx o6beKToB, KOtOpBle MOryt npenrTCTBOBaTb NOTOKy BO3dyxa.
- Co6JIHOdaIte octopoxKHOCTb, yTO6bl He NOBpeIb Ka6eIb NITaHnI. He TAHnTe n He Iepenocite np6Op nn DOK-CTaHcIIO 3a Ka6eIb NITaHnI, He NOLb3yIteCb Ka6eIem NITaHnI KAKpyko, He 3axmuaTe erO CTBOPkAMn DBepeN He TAHnTe npOBoD no OCTpbIM Kpaam nn yrJam. He 3anyckaTe np6Op Ha Ka6eIb. Depxnte Ka6eIb NITaHnI BdAnl OT ropqux NOBepxHOCTeI.
-
B uejx oecneuehen 6e3oacnoctn npi noBpeJdeHn Ka6eI nTuHn erO 3ameHy dOJIkeH BbINOJIHrTb IpeDCTaBtTeIb N3ROTOBtEJI nn ABTOpN3OBaHHoro cepBucHO ceHTpa.
-
He noIb3yItec b OK-CTaHcnei, ecn oHa noBpeJdeHa. NcToUHK nITaHnA He npDJIeXHT peMOHTu INCNoJIb3OBAHnIO npN erO noBpeJdeHN INI NOPue.
- He noIb3yItecB noBpeJdeHHbIM Ka6eIem nIITAHn IIN po3etKoH. He noIb3yItecB np6opom IIN DOK-CTaHcnei np HApUWeHN INx OYHKcUNOHropOBaHnA, a TaKke NocJe NaDeHn, NOBpeXdEHN, Ppe6bIBaHn Ha OTKpbITOM BO3dyXe IIN IONaDaHn B BODy. B cIeJx ObecneueHn 6e3OaNacHOcTn peMOHT np6opa DoJIKeH BblIOJIHTbc npedctabnteMe m 3rotobTeJIe IIN ABTOP30BaHHoro cepBNCHO ceHTpa.
- OtknouaTe np6op neped ero ouncTkoi nn o6cnykBaHneM.
23.перд оочькоилл поведенемпразур texo6cnyxubahnaДOK-CTaHUN HeobxOIMO n3Bnueb BnIky n3 po3etkn. - Chmnte np6op cdoK-ctaHcnn n OTKnIOHTe nITaHne Ha np6ope, npexJe yem n3Bnueb aKKyMnyTOp dJa yTuNn3aCnn np6opa.

PykoBOCTBO no 3KcnnyTaun

(4)Бokobblie ueTkn
Tnabhaa 电Ka (npedctahOBnHa)
Moynb npmoro BCaCbIBAHIN
nnyuueHNOBnaxHO/cxOy6OpKn
Moouaacra/Mhoropa30Ba 女Tua caFetka 13 MKNPOOIN6pbI

OdHopa3OBbIe YnCTraa caIpeTka
Пл actHaДЯчсTae caTpeKn

MoouuNCBbICOKo3cfoekTNBbIbNtbpnry6aTbnP
PpmeHne. PcyHKn n NJIIOCTpaun npBHeHbO 3NtAOKMTeNbHbIX cIeJX mOryT OTNtUaTbcr O pAKTNueckoro BHeuHero Bua n3dEINNA. KOHcTpyKUN texHNueckme xapaKtepcntkN u3dEINNA MOYr 6bITb N3MeHHebl 6e3 npeBaPntelBOHOyBeOMNEHn.
2. Kompaneя
2.3 Cxema n3dennia Po60T
2. Kompanečna
PnnoctaHObKa pa6oTbi
PpmeaHne. Naenb ynpabneneHH po60ta nepectaet CBeHTbcra no npoeCTBm HecKoIbKx MmHyT nocNe npnoctahOBKn pa60tbi po60ta. HaxMnte KhoNky ABTomuheckoro pexkmaUTO ha po60te DEEBOT, YTo6bl BkNIOHTb erO.

3anyck

BbIKIOeHne nTaHn
PpmeaHne. KoIpa po6oT DEEBOT He nCnOJIb3yeTcR, peKOMeHdyETcR OCTABNTb ERO BKNIOUeHHbIM Ha 3apJHO CTAHUN.
6. YcTpaHenne HeNCnPaBHOCTeI
6. YcTpaHenne HeNCnPaBHOCTeI
6. YcTpaHenne HeNCnPaBHOCTeI
No. 18 You Xiang Road, Wuzhong District, Suzhou City,
Jiangsu Province, P.R.China
DX9G-EU01-IM2019R02