
1389A - Elliptical bike ARIETE - Free user manual and instructions
Find the device manual for free 1389A ARIETE in PDF.
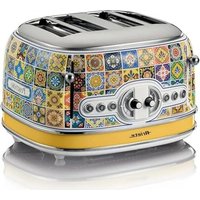
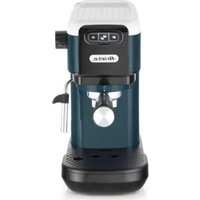
| Product type | Espresso machine with integrated cappuccino maker |
| Brand | Ariete |
| Model | 1389A |
| Dimensions (approx.) | 30 x 25 x 30 cm |
| Weight (approx.) | 5 kg |
| Mains voltage | 220-240 V ~ 50/60 Hz |
| Power consumption | 1100 W |
| Water tank capacity | 1 liter (retractable) |
| Pump system | Pressure pump (approx. 15 bar) |
| Housing material | Plastic, stainless steel |
| Filter sizes | 1 cup, 2 cups, portion packs (E.S.E.) |
| Special features | Thermocream® system, Maxi Cappuccino, automatic shut-off after 30 min. |
| Safety instructions | Child lock, overheating protection, drip stop |
| Cleaning and maintenance | Clean filter, silicone disc, water tank, appliance body regularly; descaling with NOCAL |
| Included accessories | Filter holder, 1-cup filter, 2-cup filter, portion pack filter, silicone disc, measuring spoon, cappuccino maker |
| Warranty | 2 years (see manufacturer) |
Frequently Asked Questions - 1389A ARIETE
User questions about 1389A ARIETE
0 question about this device. Answer the ones you know or ask your own.
Ask a new question about this device
Download the instructions for your Elliptical bike in PDF format for free! Find your manual 1389A - ARIETE and take your electronic device back in hand. On this page are published all the documents necessary for the use of your device. 1389A by ARIETE.
USER MANUAL 1389A ARIETE
Even if the appliances are made in conformity with the European regulatory specifications in force and therefore all potentially hazardous parts are protected. Carefully read these warnings and use the appliance only for the use it is designed for in order to prevent accidents and damage. Keep this manual close by for future consultation. If you should decide to give this appliance to other people, remember to also include these instructions.
The information provided in this manual is marked with the following symbols indicating:

Danger for children Warning of burns

Danger due to electricity Warning - material damage

Danger of damage originating from other causes
INTENDED USE
You can use your Café Retro to prepare coffee and cappuccino; and thanks to the possibility of dispensing hot water, you can also prepare tea and tisanes. This appliance is designed only and solely for private use, and is therefore to be considered unsuitable for industrial or professional purposes. No other use of the machine is contemplated by the manufacturer, which is exempt from any liability for all types of damages caused by improper use of the machine. Improper use also results in any form of warranty being forfeited.
RESIDUAL RISKS
The constructive characteristics of the appliance, covered by this publication, do not allow to protect the user from direct jet of steam or hot water.

Warning!
Burn Hazards - When hot water and steam are dispensed, do not direct the jets towards others or towards yourself. Hold only the plastic part of the tube.
IMPORTANT SAFEGUARDS
READ THESE INSTRUCTIONS CAREFULLY.
- This appliance is designed only for private use, and is therefore to be considered unsuitable for commercial or industrial purposes.
- We decline any responsibility resulting from misuse or any use other than those covered in this booklet.
- We suggest you keep the original box and packaging, as our free-of-charge service does not cover any damage resulting from inadequate packaging of the product when this is sent back to an Authorised Service Centre.
- The appliance complies with Regulation (EC) No 1935/2004 of 27/10/2004 on the materials in contact with food.
Danger for children
- The appliance can be used by children aged 8 years and up only if they are
monitored by a responsible person or if they have received instructions regarding the appliance safe use and if they have understood the dangers which may arise during the appliance use.
- Cleaning and maintenance by the user must not be carried out by children unless they are older than 8 years and are monitored during the operation. Children must supervised at all times to ensure they do not play with the appliance.
- Always keep the appliance and the power cord out of the reach of children under the age of 8 years.
- Do not leave the packaging near children because it is potentially dangerous.
- In the event that this appliance is to be disposed of, it is suggested that the power chord is cut off. It is also recommended that all potentially dangerous components are rendered harmless to prevent children hurting themselves when playing with the apparatus.
Danger due to electricity
- This appliance can be used by persons who have reduced physical sensory or mental capabilities, or lack of experience and knowledge, only if they are monitored by a responsible person or if they have received and understood instructions regarding the appliance safe use and if they have understood the dangers which may arise during the appliance use.
- Before connecting the appliance to the mains check that the voltage shown on the label located underneath the machine corresponds to the voltage of the local mains.
- The use of extensions not approved by the manufacturer can result in damage to property and personal injury.
- Before filling the tank with water, unplug the appliance from the power outlet.
- If the power cord is damaged, it must be replaced by the manufacturer or by its Technical Assistance Service or by a similarly qualified person in order to avoid any hazard.
- Never put live parts into contact with water: It can cause a short circuit!
- Remove the plug from the power outlet before cleaning or maintenance.
- Do not immerse the appliance in water or other liquids.
- Always turn off the power and unplug the power cord plug from the power outlet before filling the tank with water.
Danger of damage originating from other causes
- Do not lift the appliance by grasping its water tank or its tray, but only by grasping its body.
- Choose an adequately illuminated and clean room with easily accessible power outlet.
- Avoid pouring an excessive amount of water into the tank.
-
Never leave the appliance unattended when it is connected to the power supply
-
The appliance must be used and left at rest on a stable surface.
- The appliance must not be used if it has been dropped, if there are visible signs of damage or leaks of water. Do not use the appliance if the power cord or the plug are damaged, or if the appliance is faulty. To prevent any accident, all repairs, including the replacement of the power cord, must be carried out by an Authorised Service Centre or, in any case, by qualified personnel.
Warning of burns
- Never direct steam or hot water towards parts of the body; handle the steam/hot water spout with care: Burns hazard!
- The external metallic parts of the appliance and the filter holder must not be touched with the equipment in operation, as it could cause burns.
- If water does not come out of the filter holder, it may be because the filter is clogged. Stop the brewing and wait ten seconds. Remove and disconnect the filter holder because any remaining pressure could cause splashes or squirts. Then clean as explained in the relevant paragraph.
Warning - material damage
- Place the machine on a steady surface where it can not be overturned.
- Never put any object other than the pods in the pod filter holder. This could cause serious damage.
- Use only pods that show the E.S.E. standard brand.
- Do not use the machine without water because in this case the pump will burn.
- Never fill the water tank with hot or boiling water.
- Do not place the machine on very hot surfaces or near open flames to prevent the body from being damaged.
- The cable must not touch the hot parts of the machine.
- Do not use sparkling (carbonated) water.
- Never put substances other than coffee powder in the filter. This could cause serious damage.
- Do not leave the machine at temperatures below 0^ / 32^ , as the remaining water in the boiler could freeze and cause damage.
- Do not use the appliance outdoors.
- Do not expose the appliance to atmospheric agents (rain, sun ...).
- After disconnecting the power plug and after the hot parts have cooled, the appliance must be cleaned only with a non-abrasive cloth slightly moistened by adding a few drops of mild, non-aggressive detergent (never use solvents that damage plastic).
- For proper disposal of the product in accordance with the European Directive 2012/19/EC please read the dedicated leaflet attached to the product.
SAVE THESE INSTRUCTIONS FOR FUTURE REFERENCE
A - Filter holder
B - Drain pan
C - Perforated silicone disc (Thermocream ®)
D - 1 cup filter/pod
E - 2 cup filter
F - Power cord + Plug
G - Removable water tank
H - Maxi Cappuccino attachment and wand for water and steam supply
I - Removable cups grill
J - On/Off button
K - Drip basin
L - Coffee measure/pressor
M - Steam dispensing knob
N - Boiler temperature light
O - Steam function switch
P - Boiler temperature thermometer (^ and F^
Q - Coffee dispensing switch
R - On light
Identification data
In the label located under the support base of the machine there is the following identification data of the machine:
- manufacturer and CE marking - electrical supply voltage (V) and frequency (Hz)
- model (Model.) - electrical power consumption (W)
- serial number (SN) - assistance toll-free phone number
When ordering at Authorized Service Centers, indicate the model and serial number.
PRELIMINARY PHASES FOR USE
Starting the appliance
Check that the domestic mains voltage is the same as the voltage indicated on the label of the device. Then place the machine on a flat surface. Wash the tank when used for the first time and fill it with cool tap water (MAX 1 litre), and then carefully push it into its seat (Fig. 3). The suction tube must be inside the tank.
First start-up
After filling the tank with cool tap water, plug it into the electrical outlet, which must be equipped with grounding unit. Switch on the machine by pressing the button (J) Fig. 1. The light (R) will turn on to indicate that the machine is on.
If you are starting the machine for the first time or after a period of time during which it has not been used, it is recommended that at least one cup of water be allowed to pass through the boiler's hydraulic circuit.
Place a container with a capacity of at least half a litre under the coffee spout and Maxi Cappuccino device (Fig. 5). Put switch (Q) on the coffee position () . Wait that water comes out from the
coupling seat of the filter holder. Open the steam knob (M) and make water come out of the Maxi Cappuccino device.
Stop dispensing setting the switch (Q) in the upper position. Close the steam knob. Wait for the light (N) to turn on. At this point the coffee maker is ready to brew coffee.
HOW TO MAKE COFFEE
With powder coffee
Insert the dripper (B), the perforated silicone disc (C) and the 2 cup (E) or 1 cup (D) filter, in the filter holder (A) (Fig. 6). The perforated silicone disc can be inserted only in one direction on the dripper. Measure out the coffee in the filter and lightly press with the specially provided presser: for two coffees completely fill two measuring units, while for one coffee fill only one. Insert the filter holder into its seat. Tighten it securely by turning it from left to right, making sure it is correctly fitted to the flange (Fig. 8).
If too much ground coffee is put inside the filter, turning the filter holder may prove difficult and/or you may get leaks from the filter holder when the coffee is being dispensed.
The filter ring should be preheated for a few minutes to ensure a nice, hot cup of coffee. This will not be necessary for the following coffees.
Wait for the light (N) to turn on. Position the switch (Q) to coffee brewing () : coffee will flow from the spouts of the filter holder. Stop dispensing setting the switch (Q) in the upper position. The minimum serving of coffee is 50~ml .

Warning!
As in professional coffee machines, do not remove the filter holder when the dispensing switch is ON (in coffee position)

Warning!
After dispensing coffee wait about ten seconds before removing the filter holder. To remove it, turn it slowly from right to left so as to prevent splashes or spurts of water or coffee.
When warming up, your appliance may release small puffs of steam from the filter holder; this is perfectly normal.
The indicator light (N) will switch off and on periodically, showing the intervention of the boiler thermostat, which serves to maintain the best water temperature (around 100^ / 210^ for making coffee, and about 150^ / 300^ to dispense steam).
When using the coffee maker for the first time and thereafter, it is best to begin brewing coffee only when the light (N) is on.
How to make coffee with pods
To make coffee with pods it is necessary to install the 1 cup/pod filter (D), supplied with the machine, as follows:
1 Place the pod in the filter ring (Fig. 17).
2 Push the pod with your fingers inward. The pod must be well centred and placed inside the filter.
3 Now it is possible to put the filter holder in its seat. Tighten the filter holder making sure it is securely fitted to the flange (Fig. 8).
4 The pod could remain stuck in the upper part of the machine after making the coffee and when removing filter holder. To remove it, tilt the filter holder (Fig. 18) so the pod can fall onto it. To always have a good coffee, you must purchase pods that show the E.S.E. compatibility mark.
If the pod is not inserted well, or if the filter holder is not tightened firmly, a few drops of water could leak from the filter holder.
Auto-off function
If the machine is turned on but not in use, the auto-off function operates after about 30 minutes. This function puts the machine in standby. The ON indicator light (R) is off. To restart the machine press again the power button (J).
Filling the water tank during use
No special operation is necessary when the water in the tank runs out as the machine is equipped with a special self-priming device. Just unplug the machine, pull out the tank and fill it with fresh cool water again.
HOW TO MAKE CAPPUCCINO
To prepare cappuccino, hot chocolate, or heat any other beverage, turn the switch (O) to the steam position (and wait that the indicator light (N) turns on to indicate that the boiler has reached the right temperature to dispense steam (about 150^ / 300^ ).
When warming up, your appliance may release small puffs of steam from the filter holder; this is perfectly normal.
Place a glass under the Maxi Cappuccino device (H). Turn the steam knob (M): at first a little water will come out, immediately followed by a strong jet of steam.
Close the dispensing knob (M) to stop the jet of steam and put the pot of milk to be whipped under the Maxi Cappuccino device (Fig. 12). Plunge the wand all the way into the pot of milk and again open the steam dispensing knob (M) until you get the result you want. During these operations, you will see that the indicator light (N) turns on and off periodically, indicating the action of the thermostat which maintains the proper temperature of the boiler for steam dispensing.
It is opportune you start dispensing the steam only when the lamp is on. After each use, dispense the steam for a few seconds to clear the outlet from any milk residue.
Close the steam knob (M). After preparing the cappuccino return the switch (O) in the upper position to exclude the steam function.
MAKING FURTHER CUPS OF COFFEE
To prepare a cup of coffee right after making cappuccino, it is necessary to bring the boiler back to the coffee preparation temperature by performing these operations: return the switch (O) in the upper position to cool the boiler and wait that the light (N) goes out and comes on again. To cool the heating unit more quickly, proceed as follows: place a glass under the Maxi Cappuccino device (H). Turn the switch (Q) to position turn the steam knob (M): this will cause water to flow out, until the warning light (N) turns back off. Now close the steam dispensing knob (M) and return the switch (Q) in the upper position. Wait for the light (N) to turn on. The coffee maker is now ready to brew coffee again.
After the steps described in chapter "Preliminary phase prior to use", place a cup under the Maxi Cappuccino device (H). Put the coffee switch (Q) in position (Turn the steam knob (M); in this way hot water will come out of the Maxi Cappuccino device. The maximum quantity for two cups is 200ml
TIPS TO ACHIEVE A GOOD ITALIAN ESPRESSO
The ground coffee in the filter holder must be pressed slightly. A stronger or weaker coffee depends on the coffee grinding level, on the quantity put into the filter holder and the pressing. A few seconds are required for the coffee to be dispensed into the cups. If the dispensing time is longer, this means that the coffee is ground too fine or that the coffee put into the filter holder has been pressed too much.
CLEANING THE APPLIANCE

Warning!
All cleaning operations described below must be carried out with the machine off and with the plug disconnected from the outlet.

Warning!
Regular maintenance and cleaning preserve and keep the machine efficient for a longer amount of time. Never wash machine components in the dishwasher. Do not use direct jets of water.

Warning!
Any intervention must be carried out with cold machine.
Cleaning the coffee filters
Check that the holes are not clogged and if so, clean them with a small brush (Fig. 13). Let boiling water flow from the filter holder with the filter inserted without the powder to dissolve or remove any coffee residue or impurities.

Warning!
Remove and disconnect the filter holder slowly because any remaining pressure could cause splashes or sprays.
It is advisable to thoroughly clean the filter about every 3 months using Ariete COFFEE CLEAN detergent tabs, which can be found at retail stores and the Authorised Service Centres, following the instructions inside the package. As an alternative, you can use a simple dishwasher detergent tab (without added rinse aid or other chemical additives) as follows:
- Place a tablet of dishwasher detergent into the filter (without coffee) when the machine is very hot (at least 5 minutes after heating).
- Connect the filter holder to the machine and place a container under the filter holder.
- Put the switch (Q) in the coffee position ( ) to start dispensing water, then dispense water for 15-20 seconds.
- Stop the dispensing and let the tablet work for at least 15 minutes, keeping the filter holder inserted
on the machine.
- Repeat the water dispensing operation making the pump run for about 15-20 seconds and then let it rest for another 15-20 seconds until two tanks of water have been used.
- Remove the filter holder from the machine, remove the filter and rinse well under running water.
- Switch off the machine, unplug the power cord from the power outlet and wipe the filter holder hooking seat with a sponge to remove any detergent residue from the spray.
- Restart the machine, attaching the filter holder again and still dispensing at least 2 cups of water to complete rinsing.
If the coffee machine is used daily, it is recommended to carry out the cleaning operation at least every three months.
Cleaning the silicone disc
Wash the silicone disc (C) under running water, bending it slightly on the sides in order to free the centre hole of any residue of coffee grounds that could clog it (Fig. 14).
Cleaning the filter holder seat
With use, it may occur that in the filter holder seat there is a sedimentation of coffee grounds, which can be removed with a toothpick, a sponge (Fig. 15), or letting water run through without fitting the filter holder (Fig. 4).
Cleaning the Maxi Cappuccino device

Warning!
Perform the operation when the chrome-plated tube is cool to avoid burns.
Unscrew the device (H) from the small pipe and wash it with running water. The small pipe can be cleaned with a non-abrasive cloth. Screw the cappuccino maker back on as far as it will go. If necessary, clean the small steam outlet hole again with a pin. After each use, dispense steam for a few seconds to clear the outlet from any residues.
Tank cleaning
It is advisable to periodically clean inside the tank with a sponge or damp cloth.
Cleaning the grill and the drip tray
Remember to empty the drip tray from time to time (K).
Remove the grill (I) and wash it under running water; remove the tray (K) from the machine, empty it and wash it under running water.
Cleaning the machine body

Warning!
Clean the fixed parts of the machine using a damp non-abrasive cloth to avoid damaging the body.
DESCALING
Good maintenance and regular cleaning preserve and keep the machine efficient for a longer period, greatly reducing the risk of scale formation into the appliance. If despite this, after some time, the appliance operation should be compromised, due to the constant use of hard and very hard wa
ter, it is possible to carry out the machine descaling operation in order to eliminate the malfunction. For this purpose use only the citric acid-based descaling product NOCAL by Ariete. This product can be easily found in the Ariete technical assistance service centres. Ariete is not liable for damage to internal components of the coffee machine caused by the use of non-compliant products due to the presence of chemical additives. If a descaling is required, observe the directions on the instruction sheet of the descaling product.
SETTING THE MACHINE OUT OF SERVICE
If it is required to set the machine out of service, disconnect it electrically, empty the water tank and the drip tray and clean it (see the "Appliance cleaning" chapter).
In case of scrapping it is necessary to provide for the separation of the various materials used in the construction of the machine and dispose of them according to their composition and the provisions of law in force in the country of use.
TROUBLESHOOTING

Warning!
If there are problems with operation, immediately turn off the machine and unplug it from the socket-outlet.
| Problems Causes | Remedies | |
| The coffee maker does not supply boiling water for tisanes. | Air has probably entered the circuit and deactivated the pump. | Make sure the tank is properly inserted and that the water is not below the minimum level. Repeat the operations described in the “Preliminary phases for use” paragraph. |
| The steam exit hole on the dispenser wand is clogged. | Unclog any deposits that may have formed in the hole of the dispenser wand with a pin. | |
| The machine does not dispense steam. | There is little water and the pump does not suck. | Check that the water level in the tank is correct. If necessary, fill it with cool tap water. |
| The steam exit hole on the dispenser wand is clogged. | Unclog any deposits that may have formed in the hole of the dispenser wand with a pin. | |
| Coffee overflowing from the filter edges. | Probably too much ground coffee has been put into the filter holder that has prevented to fully tighten the filter holder in its housing. | Remove and disconnect the filter holder slowly because any remaining pressure could cause splashes or sprays. Clean the coupling seat with a sponge (Fig. 15). Repeat the operation placing the correct amount of coffee in the filter. |
| Ground coffee has remained on the filter holder connection seat. | Clean the seal with a toothpick or a sponge (Fig. 15). | |
| Coffee overflow-ing from the filter edges. | The exit holes of the filter containing coffee grounds are clogged. | Remove and disconnect the filter holder slowly because any remaining pressure could cause splashes or sprays. Clean the clogged filter holes with a small brush or a pin. Clean the filter using Ariete COFFEE CLEAN tabs following the instructions in the package. |
| Faulty pod. Replace the pod in | the filter holder. | |
| Coffee is not dispensed or is dispensed too slowly. | The holes of the perforated disc in the filter holder coupling seat are clogged. | Operate the machine without the filter holder making water flow. If the water is still not flowing uniformly through all holes, descale using the NOCAL Ariete product available in the Ariete service centres following the instructions in the package. |
| The exit holes of the filter containing coffee grounds are clogged. | Remove and disconnect the filter holder slowly because any remaining pressure could cause splashes or sprays. Clean the clogged filter holes with a small brush or a pin. Clean the filter using Ariete COFFEE CLEAN tabs following the instructions in the package. | |
| Too fine ground coffee blend. Try using coarser coffee blends. | ||
| Too pressed coffee blend. Press the coffee inside the filter using less pressure. | ||
| The tank is not fully inserted. Fit the tank correctly push it completely down. | ||
| There is little water and the pump does not suck. | Check that the water level in the tank is correct. If necessary, fill it with cool tap water. | |
| Faulty pod. Replace the pod in | the filter holder. | |
| Broken pod. Remove the pod filter holder, clean the seat with a sponge, and put a new pod inside. | ||
| The coffee is too watery and cold. | The mixture was ground too coarsely. | To obtain a more concentrated and hot-ter coffee, you must use a more finely grounded blend. Anyhow, this problem is easily solved thanks to the Thermocream® System, which always guarantees hot coffee accompanied by a reach cream, even with coarsely ground beans. |
A PROPOS DU MANUEL
LISEZ ATTENTIVEMENT CES INSTRUCTIONS.
BESCHRIJVING VAN HET APPARAAT
IOBTOPHOE IcnoJb3OBAHNE IJI PnIroTOBJeHnKoΦE
Дя npiroTOBHeHЯ Kofoe nocJe kannyUHHo Heo6xOIMo DOBeCTn Do HxHoi TemnepaTpybI KOtEi, npOBdA CNeDyUOuHe Oepaun: NOBepHInTe BbIKNIOuATeNB (O) BBepx DnOxJaXKeHn 6oJIepe a NpOJXInTe POKa CBeTOBOH INDINKAtop (N) NorachET N BHOBb 3aOpNTc. YTo6bl 6bl- cTpee OCTyIDHT HarpeBaTeNb MOxHO DeNCTBOBaTb CNeDyUOuMm O6pa3OM:: IomeCTnTe cTaKaH NOD yCTPOIcTB MoXI Cappuccino (H). NpeBecTN PepeKlIOuATeNB (Q) B NoIooXeHne (); TIO-BepHyTB pykny POnaunnapa (M): Heo6xOIMo DaTb BOte BbITEkaTb DoTex nop, Noka He NoracHT CBETOBH INDINKAtop (N). B 3OT MOMENT ONyCTnTe pykny POnaunnapa (M), NOBepHyB BbIKNIOuAtel (Q) BBepx. NpOJXDaTb NOKa 3aXkEtCBA ToBTOBn INDINKAtop (N). TeNPb KofoeBapka Choba RTOBA K npiroTOBHeHIO Kofoe.
KAK DEJIATb YAIMHACTOJKN
BbINOHNVB Ce DeiCTBn, OINcaHhIe B pa3dJe " POnrTOBka K 3KcPiyaTaun", NOMeCTte Yawky noJ yctpoJcTBO Maxi Cappuccino (H). IpeBeCTn pykU yctpoJcTBA nOaUn KoFe (Q) B noLoXeHne ()IOBepHyTB pykU yctpoJcTBA o6pa3OBaHnna npa (M); TaKIM o6pa3OM n3 yctpoJcTBA Maxi Cappuccino BbiJET HeMHoro ropuee BODbl. MaKcImaJIbHa J03a Ha DBe YawKn paBaHa 200 mI.
COBETbI IIO IPNIROTOBJIeHnIO XOPOWERO NTAJbHCKOFO 3CINPECCO
Heobxodmo cnerka ynpntb mootbikkoe B depkatele pfntpa.Kpenoctb noIyuaemoro Kofo 3aBnCT OT CTeneHn NOMOA, KOJIueCTBa Cmecn B depkatele fNtpa,a TAKKe OT TORO, KaK OH cnpcecoBaH. Kofo nocTynaet B uAkn, kak npabnlo, uepe3 HeckoIbKO ceKynd. EcnBpeMBAixOda Kofo 60nbwe npedyctMOTpeHHoro,TO 3TO 3NaHT, YTO NOMOI Kofo cNIuKOM MeIKn IINJKE KOFe 6bl CNiUkOM CNlBHO ppeccOBaH.
OuHCTKA IPNBOPA

Bнманne!
Bce DeiCTBnI NO YNCTKe DOJXHbI OcyueCTBnTbcr TOnbKO pN IOnHOCTbIO BblIOUeHHOM Pn6ope N BblTauneHHoN 3 PO3eTKN BNKe.

BHMaHne!
PeryIpaHoe Texo6cnyKbAHne n OuchTka 3000eKTHBHO NOdepKbBAHTn COxpaHOT MaunHy Ha dInTeJbHbI nepNo. He peKomeHdyetcMbITb Yactn np6opa B NocydomoeyHoMaunHe. HeIb3r nCnoJIb3O-
BaTb npMble cTpyn BODbl.

BHMaHne!
JIIObIe DeiCTBnA NO yXoDy 3a npu6OpOM DoJxHbI POn3BOiNTbcr Prn IOJIHOCTbIO OXJaXDeHHOM npu6ope.
Ynctka KoΦeHbIX ΦnIbTpOB
Y6eIntecb B TOM, yTO OTBepCTnHe 3aKynOpuINcB n, eCIn 3TO CnyuINOCb, npOunCTnTe nx npn NOMoU NToCK (Pnc. 13). IpnocTb KInyau BoDy Upe3 DepeXaTeNb fNtpa CO BCTaBJIeHHbIM fNtbpom 6e3 KoPeHOn CMeCN, YTObI pAcTBOpHTb INI yDaJIbTb BO3MOxHbIE OCTaTKN KoPe INI dpyrne 3aRpy3HeHnA.

BHMaHne!
OcToPoxHo ChrTb DepeXaTeIb 0nIbTp a, TaK KaK OCTaTOUHoe DaBJIeHne MoXe TnpINBeCTN K BO3HNKHOBeHIO 6pbl3r rOpJyEe BODbl.
PekomeHnyetcKaKdbie 3 Meca TuaTeNbHO uCTnTb CnIbTp, CneDy HNCTpyKUaM, BLOXeHbIM B yNaKOBky NcNoJIb3yur cHCTaUe Ta6IeTKu COFFEE CLEAN MapKn Ariete, KOTOpBie MoxHo npnoBpeCtn B ToproBbIX ToKax N B aBTOpN3ObaHHbIX cepBnchbIX cHTpax, IIn6o, B KaueCTBe aIb-TePhaTNBbl, ObUHbIe UcHCTaUe Ta6IeTKn (6e3 6IeCKoo6pa3ObaTeIaN dpyrnx XmMuecknx Do6aBOK) DnI NocyDOMoeHbIX MaINH CNeDuOzIM o6pa30M:
BCTaBnTB uHCTaIyU TaBneTky IINI NOcyDOMoeHOn MaunHbI BΦnIbTp (6e3 Kope) B HarpetbI npnbop (noCne MInHMym 5 MNHyT pa3OrpeBa).
- Pnikpenb depkataeb pfnbtpa K npnbopy n pa3mecntb noHm emKocTb dIy Kope.
-Перевсанпегкючateь(Q)В поожене"kope"()ДяТOrO,HTo6bI 3anyctntb npoccc BbIXOda BOdbI N DaTb eN BbITEkaTb B TeueHne 15-20 cek.
- BbIKHouHTb NOaCy BOdbI CO BCTabJIeHHbIM cINbTpOHOCHTeJEM B MaUNHy, OCTaBnJa npn 3TOM TabNetKy dny BO3dEInCTBnXOTy 6bl Ha 15 MNHyT.
- Повторь onepaцию подачи BODы, вклочая haboc на 15-20 cekyнд, за tem otknочая erо на 15-20 cekyнд, до Тх пор, пoka He 3akOHHTcR BODa B pe3epByapax.
BbHytbΦnIbTpOHOCTeIb I3 MaunHbI IN XopoIo pPOMbITb eRo I3 IOd KpaHa cTpyEi BODbl.
- BbIKHouHTb MaunHy, OTKIOUHTb npOBoI NITaHnI 3 3JIeKTPuYeCKoP03eTKN I npOuHCTNb npINOMOUI rY6Kn MeCTOBCTABNeHnIΦNJbTPOHOOCHTeJI dIyCtpaHEnr KaKnx-JI6O OCTaTKOBnopouka Ha duWe.
BknIOHTb npnbop, npnKpeNTb depXaTeNb cnilbTpa N daTb Bbltey eue XOTaBm yAam BoIbI, YTO6bl NOJIHOCTbIO IpOMblb erO.
Ecn np6op nCnoB3yeTcKaKdbI DeH, TO onepaunIO no YnCTKe Heo6xOIMO NOBTOpTa KaKdIe TPN Meca.
OuHCTKa CNTa H3 CNJINKOHa
Прмытсинкоюе сnto(C)пдTekушьоД,лгкоганбая no 6okam,чTOБI OCBO6DnTbцHTpaNBHoe OTBepCTne OT BO3MOxHbIX OTLOXKeHm KoФeHOn ПblN,КOTOPaR MoIIa erO 3a6nTb(Pnc.14).
OuHcTka rHe3da depXaTeIaФnIbTpTa
B npouecce 3kcnnyataun npnbopa Ha konbue depkaTea moryr noBntcbra 3acoXnne octatkn Kofoe, KOtOpbIe Heo6xOdImo ydaNTb C nOMOu bIO 3yboocnTKn, r6Kn (Pnc. 15) nn npo
MbITb KOJIbIcO NOd IpoToUHoi BOIo, PpeBaPteIbHO CnRb DePkaTeIb φnIbTp a (Pnc. 4).
Ynctka yctpoiCTBa Maxi Cappuccino

BhimaHne!
Bo n36eXaHne BO3HnKHOBeHnO XoROB DaHHyU OpeaunO Heo6xOIMo OcyuIeCTBJIaTb Pn OXJaXdEHHoXpOMIpOBaHHo Tpy6Ke.
OTBeHTnTe yCTpoiCtBO (H) ot Tpy6bl, n npomoe ero tekyue BDOJ. 3Ty Tpy6ky pekomeHyETcra YNCTNTb Pn NOMOuM MrgKoT KAHNI. IIOTHO 3aФNKCuPOBaT bYCTPOIcTBO NOCJIe OKOHuaHnBbITEKaHn BObl. Pn HeobxOIMocTN IpOuNCTNb INlOIN OTBepCTne DnBbIXoJa npa. NocJIe KaJDoRo HcNoJIb3OBaHnN Pnp6opa peKOMeHdyETcB BbInyckaTb HEMHO npa dIy OUnIeHnO rTBePCTnO T Bo3MOXHBIX OCTaTKOB Kope.
OuHueHne 6aka
PekomeHnyeTc npnoDnueckn npOn3BODntb OunchTy BHyTpHeN chTn pe3epByapa npn NOMO- nIy6Kn IIN BnaXHoMATEpnn.
OuHcTka peWeTKN-NOCTaBKn IJRA YaWeK N NODoHa IJRA c6opa XnIkoCTN
PeKOMeHdyetc npnOnduYeCKn ocBooXdaTb nOdoH dIa c6opa KndKocTn (K).
CHTb peWetky (I) n npomblb noD npoToHNOBdo; OTcoeHHnTb noDoH dJa c6opa XndKocTN (K) ot KoΦeBaPkn, Bblntb n3 HrO BOy n npomblb erO noD cTpye BObl.
Чистka kopnya相关内容


BhimaHne!
Ipn3BeDnTe YnCTky HeCbeMHbIX YacTei yCTpoNCTBa Pn NOMOuMRAKoYBnaXeHHHO TkaHn BO n36exKaHne NOBpeJdEHNr KOpnyCa.
DEKAJIbCUNHINPOBAHNE
IpaBnIbHoe Texo6cnyKINBaHne n peryIaRnay uNCTka yCTpoiCTBa no3BOJrT ppeOxpanIt b erO OT BO3HKnHOBeHn IOBpeXdEHN I NOdEprXnBaTb B pa6OeM COCTOHN B TeueHne dIInTeJIb-Horo nepnoDa BPemH, CHIXa DO MHNIMyMa BO3MOXhBn PnCK o6pa3OBaHn B np6ope n3-BeCTKOBO HaneTa. Ecn, HeCMOTpy Ha 3TN DeICTBn, Upez HeKOTOpoe Bpem 3KcPiNyatauN prn6opa 3atpyndHare TcBNECTBn IOCTOHNHO ICNOJB3OBaHn JecTKo KaJIbUHPOBAHHo BObl, TO peKOMeHdyETc IPOBecTu DEKaJIbCUNHPOBAHn YCTPOiCTBa. DIA 3TO CEIN peKOMeHdyETc NcNoJIb3OBaTb CpeDCTBO DnI DEKaJIbCUNHPOBAHn OTAriete Ha OCHOBe LIMOHHO KNCIO-TbI (NOCAL). 3To CpeDCTBO MOxHo HaiTN B ceHTpax cepBnCHoro obcnyXnBAHn Ariete. Ariete He 6epet Ha c6b HnKaOK OTBeTCTBEHHOCTN 3a BO3MOXhBle IOBpeXdEHN BHyTpEHNX deTalei prn6opa, Bbl3BaHHbIe PrimeHeHm BeIeCTB C XIMNUeCKMn Do6ABkAMn. B clyuae Heo6xOnMoCTN pOBoDeHn DEKaJIbCUNHPOBAHn, Heo6XODIMO O3HaKOMITbcra C INHCTpyKcNeI PO IcNoJIb-3OBAHIO CpeDCTBa DnI DEKaJIbCUNHPOBAHn.
BbIBOДИЗКСПЛYATAЦИ
B cnyuae noIomkn, Heo6xOdImo OTcoeHNHTb OT 3neKtpnueCTBa MaunHy, onyctOuHTb BODHO 6ak n KaJIpeHaKoONTeJbHyU BaHHouky N OChNTb (CMOTpeTb naparpaΦ «OUnCTka annapata»).
IpepeyTuN3auee np6opaa Heo6xOIMO paccoptnoBaTb eTo qactn B COOTBeTCTBm C BnDAMMATEpnaIOB,NCNoJIb30BaHHbIX dnn IX N3ROTOBJeHnA,a 3aTeM nPcHcyNTb K eTo yTuN3aUIn,pyKOBODCTByrCb COOTBeTCTByUOUMN NOLOXKeHnA Mn HOpMaTHNBbIX aKTOB,piHnAeTBix B CTpaHe EKcNlyaTaunu yCTPOJCTBA.
KAK ICINPABNTb CJEduOuNE HENCINPABHOCTN

Bhimahne!
B cnyuae HnpaBbHoro yHKuOHPOBaHn, BblKlOHTb cpa3y Ma- uHy n BbItauntb wTeNcEh n3 3JKeKtpueeCKo p03eTKn.
JooeWJU JooeJoooJoooJoooJoo.
111 3 a 1
aaii jy aai i 1
1g6bAaBabg rV/1.1r...ε 23
.
Jabla de jbs
JLgWyI eI I Jn nnrnnn nnnn nnnn nnnn nnnn nnnn nnnn nnnn nnnn nnnn nnnn nnnn nnnn nnnn nnnn nnnn nnnn nnnn nnnn nnnn nnnn nnnn nnnn nnnn nnnn nnnn nnnn nnnn nnnn nnnn nnnn nnnn nnnn nnnn nannn nnnn nnnn nnnn nnnn nnnn nnnn nnnn nnnn nnnn nnnn nnnn nnnn nnnn nnnn nnnn nnnn nnnn nnnn nnnn nnnn nn
j 1
J 1 J 1 1 1 1 1 1 1 1 1 1 1 1 1 1 1 1 1 1 1 1
4
jI 155 155 155 155 155 155 155 155 155 155 155 155 155 155 155 155 155 155 155 155 155 155
JooWyI cI Jn
aui 15
111 111 111 111 111 111
J 1
s
15 15
Ariete 55
Ariete 5
y
151
g j 1j j j j j j j j j j j j j j j j j j j j j j j j j j j j j j j j j j j j j j j j j j
a111 1 a111 1
.15 15
lalbo Josu y) jg g uo a bio no no 1bll sfo! gao. fckybl b y
()
a 19/1
J/10g Maxi CappuccinoH
JL 1
Jj
Jb all gaoo - K
a1 = 2,a2 = - 4
Jg- M
A 1
21 × 21
()
0gai jzjgljyklj 1 -Q
Jzulglu afoo JL 1 R
a
:aa aaii iaii iaii iaii iaii iaii iaii iaii iaii iaii iaii iaii iaii iaii iaii iaii iaii iaii iaii iaii iaii iaii iaii iaii iaii iaii iaii iaii iaii iaii iaii iaii iaii iaii i
.
aui51b1
J 1) jIbIy I bI y aol o Jg dI y Jg Jg Jg Jg Jg Jg Jg Jg Jg Jg Jg Jg Jg Jg Jg Jg Jg Jg Jg Jg Jg Jg Jg Jg Jg Jg Jg Jg Jg Jg Jg Jg Jg Jg Jg Jg Jg Jg Jg Jg Jg Jg Jg Jg Jg Jg Jg Jg Jg Jg J g
00g51
J 1 J 1 J 1 J 1 J 1 J 1 J 1 J 1 J 1 J 1 J 1 J 1 J 1 J 1 J 1 J 1 J 1 J 1 J 1 J 1 J 1 J 1 J 1 J 1 J 1 J 1 J 1 J 1 J 1 J 1 J 1 J 1 J 1 J 1 J
J 1 1 1 1 1 1 1 1 1 1 1 1 1 1 1 1 1
G .(0 J5) 10 S J L aas Bg Maxi Cappuccino 1s f c g gagg E g
Maxi Cappuccino 15 (M)
Jusyly 1 1b1 b1 jzjI do
Maxi Cappuccino 5 (M) jLjLjLjLjLjLjLjLjLjLjLjLjLjLjLjLjLjLjLjLjLjLjLjLjLjLjLjLjLjLjLjLjLjLjLjLjLjLjLjLjLjLjLjLjLjLjLjLjLjLjLJ Ljj (N) aagg Jn Jn Jn Jn Jn Jn Jn Jn Jn Jn Jn Jn Jn Jn Jn Jn Jn Jn Jn Jn Jn Jn Jn Jn Jn Jn Jn Jn Jn Jn Jn Jn Jn Jn
J 1.
ab = 11
J 15
gKssu
aagaae aee eae 100000000000000000000000000000000000000000000000000
( 1 ≤ x < 2)
Jolal Jolo 0o a
JL 1000
(εJ) jIJI J0e ksh jg yj g (10 J) jaiw! aasog jiaWJ jSj dJos
Maxi Cappuccino
A
14

.
J 1.
.
jJ
a 1
aBgoo goo o 45
Jg (K) 1000000000000000
aI aI 1 (K) I I I I I I I I I I I I I I I I
S = 2b - a : 1
auiuui
!
auiuie 1

AeKJU JIJI JIJI JIJI JIJI JIJI JIJI JIJI JIJI JIJI JIJI JIJI JIJI JIJI JIJI JIJI JIJI JIJI JIJI JIJI JIJI JIJI JIJI JIJI JIJI JIJI JIJI JIJI JIJI JIJI JIJI JIJI JIJI JIJI JIJI
Joo
g 111 111 111 111 111 111 111 111 111 111 111 111 111 111 111 111 111 1
!
1 1

- INTENDED USE
- RESIDUAL RISKS
- Warning!
- IMPORTANT SAFEGUARDS
- READ THESE INSTRUCTIONS CAREFULLY.
- Danger for children
- Danger due to electricity
- Danger of damage originating from other causes
- Warning of burns
- Warning - material damage
- Identification data
- PRELIMINARY PHASES FOR USE
- Starting the appliance
- First start-up
- HOW TO MAKE COFFEE
- With powder coffee
- How to make coffee with pods
- Auto-off function
- Filling the water tank during use
- HOW TO MAKE CAPPUCCINO
- MAKING FURTHER CUPS OF COFFEE
- TIPS TO ACHIEVE A GOOD ITALIAN ESPRESSO
- CLEANING THE APPLIANCE
- Cleaning the coffee filters
- Cleaning the silicone disc
- Cleaning the filter holder seat
- Cleaning the Maxi Cappuccino device
- Tank cleaning
- Cleaning the grill and the drip tray
- Cleaning the machine body
- DESCALING
- SETTING THE MACHINE OUT OF SERVICE
- TROUBLESHOOTING
- A PROPOS DU MANUEL
- LISEZ ATTENTIVEMENT CES INSTRUCTIONS.
- BESCHRIJVING VAN HET APPARAAT
- IOBTOPHOE IcnoJb3OBAHNE IJI PnIroTOBJeHnKoΦE
- KAK DEJIATb YAIMHACTOJKN
- COBETbI IIO IPNIROTOBJIeHnIO XOPOWERO NTAJbHCKOFO 3CINPECCO
- OuHCTKA IPNBOPA
- Bнманne!
- BHMaHne!
- Ynctka KoΦeHbIX ΦnIbTpOB
- OuHCTKa CNTa H3 CNJINKOHa
- OuHcTka rHe3da depXaTeIaФnIbTpTa
- Ynctka yctpoiCTBa Maxi Cappuccino
- BhimaHne!
- OuHueHne 6aka
- OuHcTka peWeTKN-NOCTaBKn IJRA YaWeK N NODoHa IJRA c6opa XnIkoCTN
- Чистka kopnya相关内容
- DEKAJIbCUNHINPOBAHNE
- BbIBOДИЗКСПЛYATAЦИ
- KAK ICINPABNTb CJEduOuNE HENCINPABHOCTN
- 4
- a
Brand : ARIETE
Model : 1389A
Category : Elliptical bike