Cardio Fit mini bike M30 - Exercise bike TUNTURI - Free user manual and instructions
Find the device manual for free Cardio Fit mini bike M30 TUNTURI in PDF.

User questions about Cardio Fit mini bike M30 TUNTURI
0 question about this device. Answer the ones you know or ask your own.
Ask a new question about this device
Download the instructions for your Exercise bike in PDF format for free! Find your manual Cardio Fit mini bike M30 - TUNTURI and take your electronic device back in hand. On this page are published all the documents necessary for the use of your device. Cardio Fit mini bike M30 by TUNTURI.
USER MANUAL Cardio Fit mini bike M30 TUNTURI
Please read this assembly manual carefully prior to assembling this product.
Cardio Fit M30
A

text_image
361 SCAN TIME COUNT CAL TTR OUTPUTB
Cardio Fit M30
C
text_image
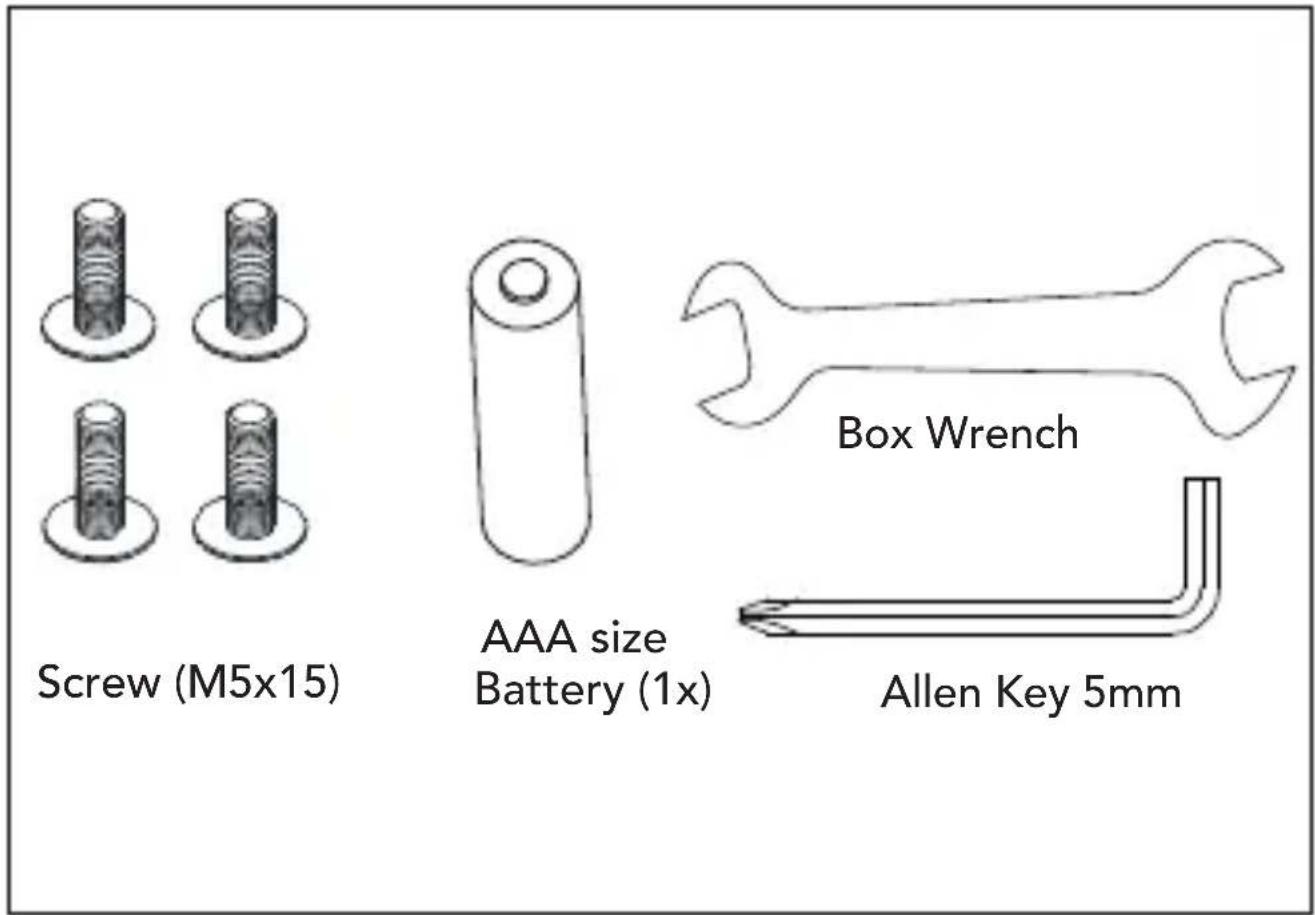
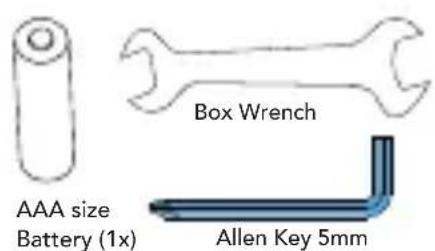
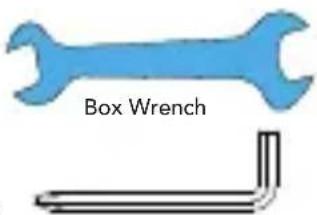
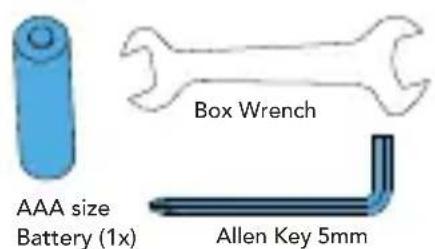
Screw (M5x15) AAA size Battery (1x) Box Wrench Allen Key 5mmD
text_image
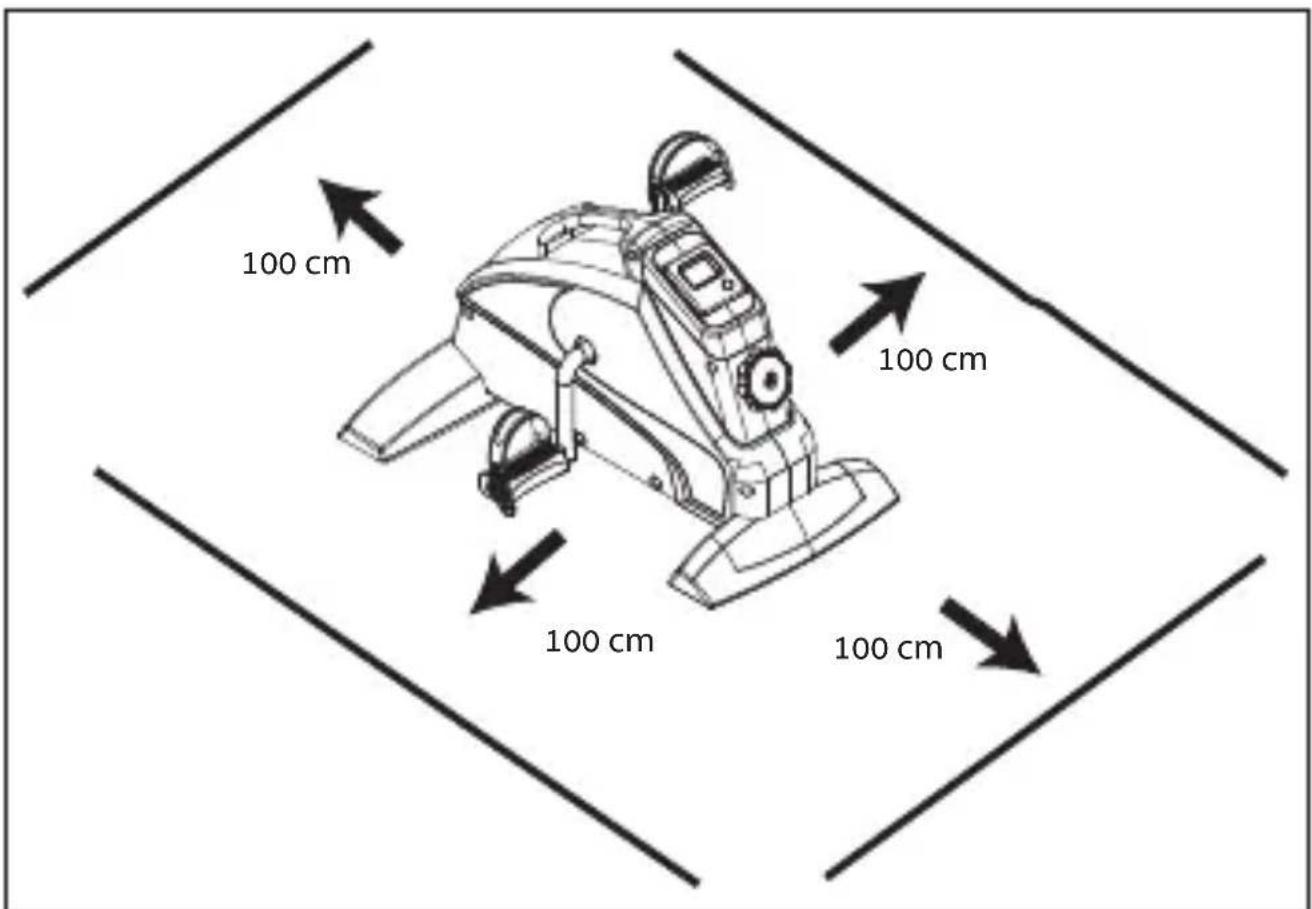
100 cm 100 cm 100 cm 100 cmD-01
text_image
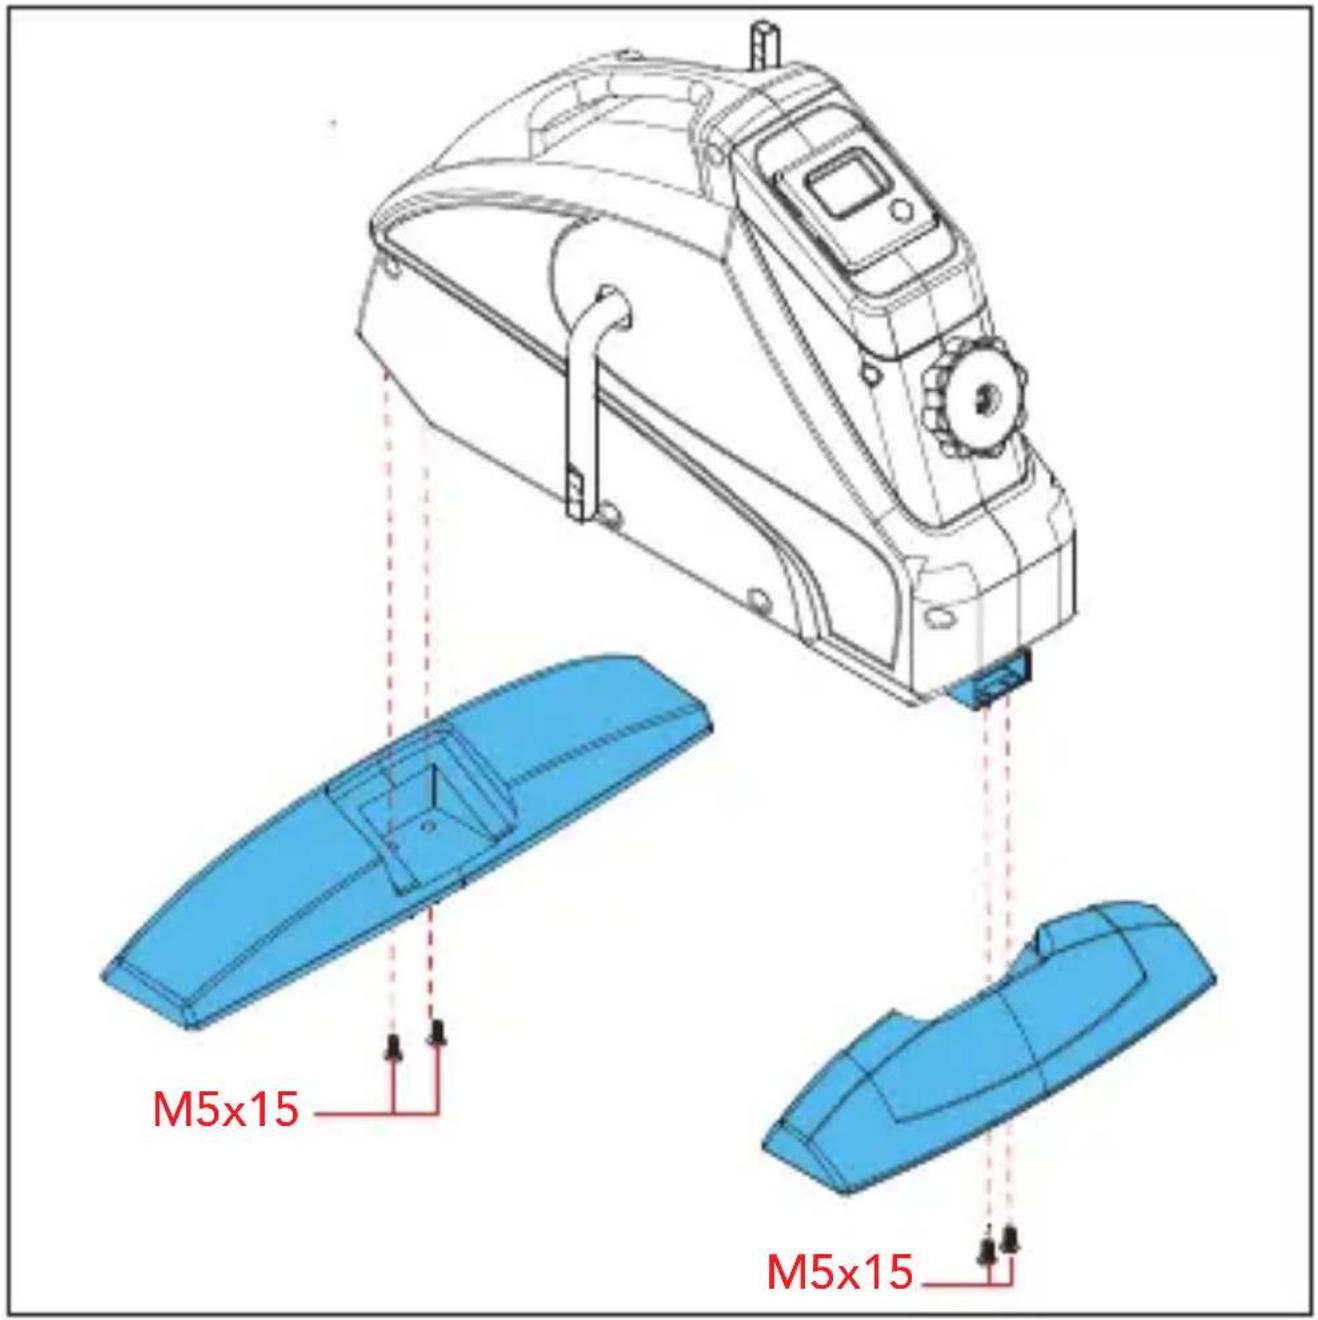
M5x15 M5x15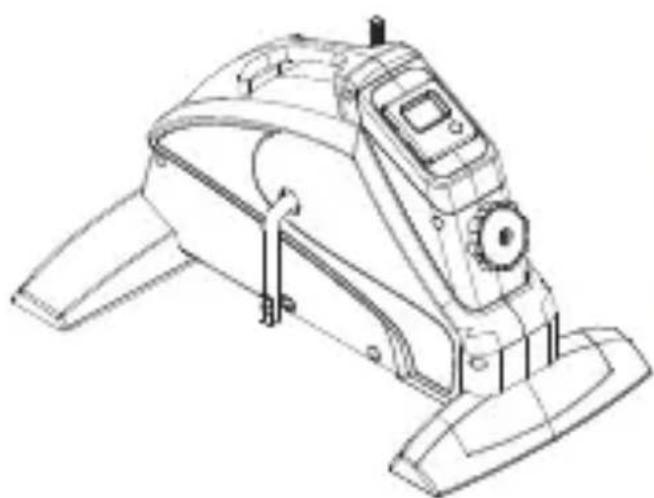
natural_image
Line drawing of a mechanical device with no visible text or symbols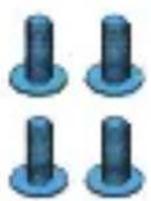
Screw (M5x15)
text_image
Box Wrench AAA size Battery (1x) Allen Key 5mmD-02
natural_image
Line drawing of a mechanical device with no visible text or symbolsScrew (M5x15)
AAA size
Battery (1x)
text_image
Box WrenchAllen Key 5mm
D-03
natural_image
Line drawing of a futuristic vehicle with visible components and blue accents (no text or symbols)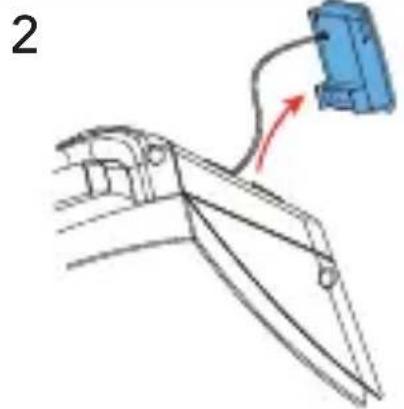
natural_image
Diagram of a mechanical device with a blue component and red arrow indicating motion (no text or symbols)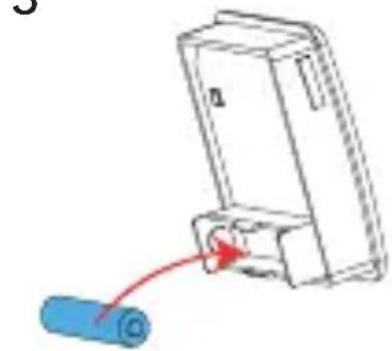
natural_image
Diagram of a battery holder with an open casing and a blue cylindrical component, showing a red arrow indicating direction (no text or symbols)
natural_image
Diagram of a mechanical clamp or bracket with a blue component being inserted, showing no text or symbols.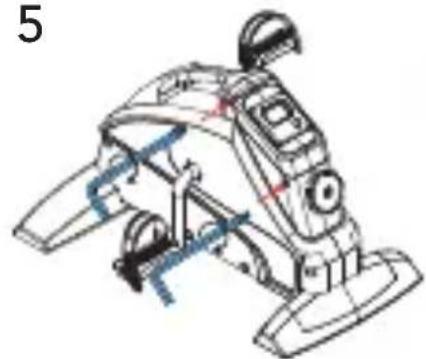
natural_image
Line drawing of a futuristic vehicle with visible structural components and no text or symbols
natural_image
Line drawing of a mechanical device with no visible text or symbolsScrew (M5x15)
text_image
Box Wrench AAA size Battery (1x) Allen Key 5mmE
 | 2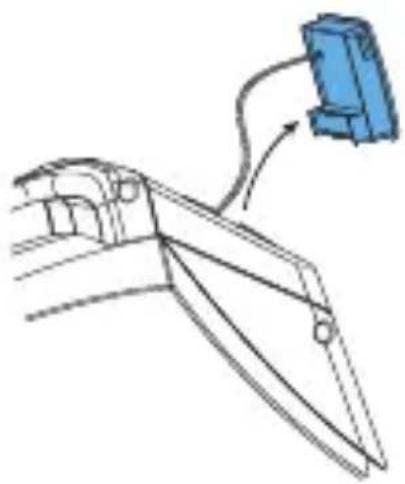 |
3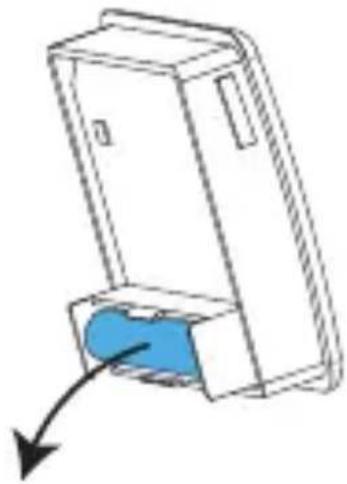 | 4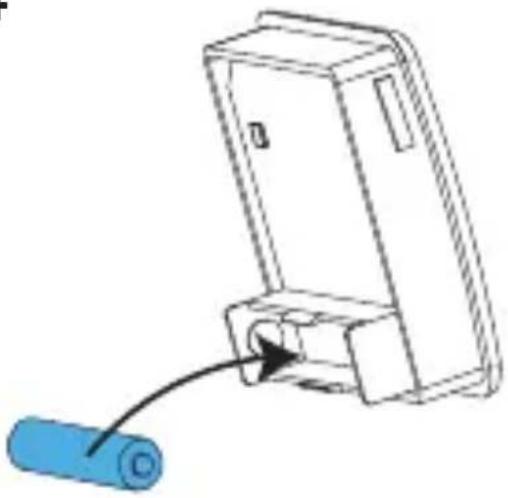 |
5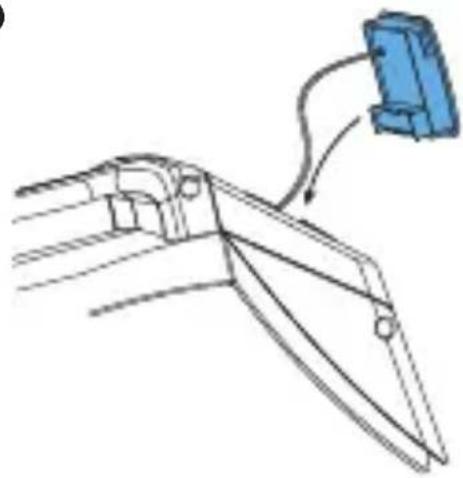 | 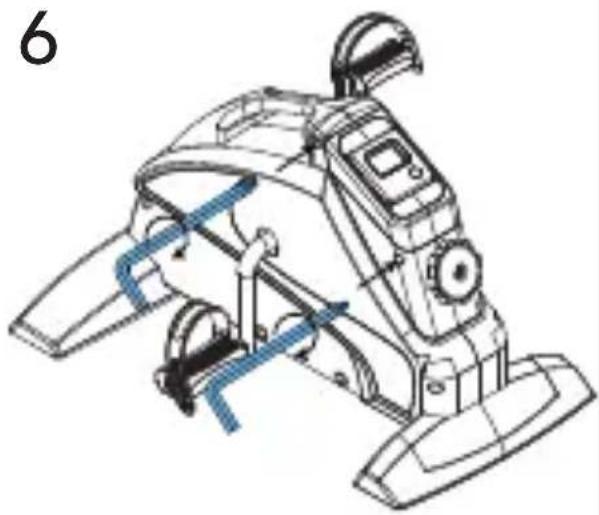 |

natural_image
Green recycling symbol with leafy tree and circular recycling element (no text or symbols)USER MANUAL ON OUR WEBSITE
To reduce the impact on the environment, you will only find the assembly steps in this manual. To learn how to use and maintain this product, please download the user manual from: manuals.tunturi.com
Index
Welcome 9
Safety warnings 10
Assembly instructions 11
Description illustration A 11
Description illustration B....11
Description illustration C 11
Description illustration D 11
Additional assembly information. 12
Use 13
Replacing the batteries (Fig. E)....13
Additional environmental information....13
Warranty 14
Declaration of the manufacturer 14
Disclaimer 15
Welcome
Important Safety Instructions
This manual is an essential part of your training equipment please read all instructions in this manual before you start using this equipment. The following precautions must always be followed:
Safety warnings
⚠ WARNING
- Read the safety warnings and the instructions. Failure to follow the safety warnings and the instructions can cause personal injury or damage to the equipment. Keep the safety warnings and the instructions for future reference.
-The equipment is suitable for domestic use only. The equipment is not suitable for commercial use.
-Max. usage is limited to 2 hrs. a day.
-The use of this equipment by children or persons with a physical, sensory, mental or motorial disability, or lack of experience and knowledge can give cause to hazards. Persons responsible for their safety must give explicit instructions or supervise the use of the equipment.
-Before starting your workout, consult a physician to check your health.
-If you experience nausea, dizziness or other abnormal symptoms, immediately stop your workout and consult a physician.
-To avoid muscular pain and strain, start each workout by warming up and finish each workout by cooling down. Remember to stretch at the end of the workout.
-The equipment is suitable for indoor use only. The equipment is not suitable for outdoor use.
-Only use the equipment in environments with adequate ventilation. Do not use the equipment in draughty environments in order not to catch a cold.
-Only use the equipment in environments with ambient temperatures between 10 °C and 35 °C. Only store the equipment in environments with ambient temperatures between 5 °C and 45 °C.
-Do not use or store the equipment in humid surroundings. The air humidity must never be more than 80%.
-Only use the equipment for its intended purpose. Do not use the equipment for other purposes than described in the manual.
-Do not use the equipment if any part is damaged or defective. If a part is damaged or defective, contact your dealer.
-Keep your hands, feet and other body parts away from the moving parts.
-Keep your hair away from the moving parts.
-Wear appropriate clothing and shoes.
-Keep clothing, jewellery and other objects away from the moving parts.
-Make sure that only one person uses the equipment at a time.
The equipment must not be used by persons weighing more than 100 kg (220 lbs).
-Do not open equipment without consulting your dealer.
Assembly instructions
Description illustration A
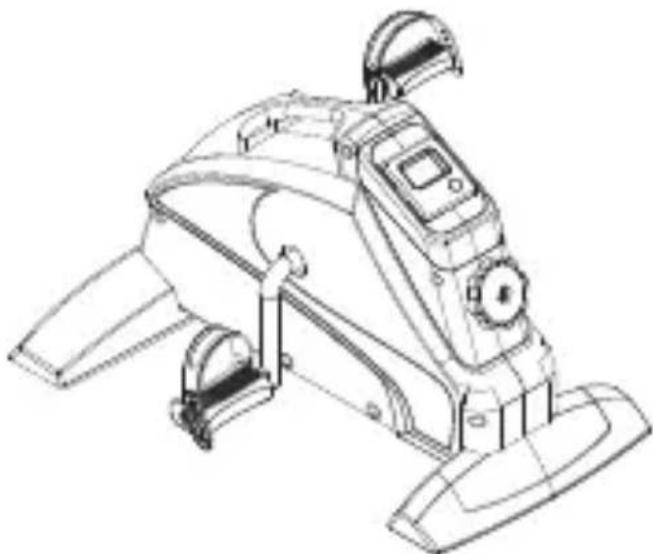
The illustration shows what the trainer will looks like after the assembly is completed.
You can use this as a reference during your assembly, but do follow the assembly steps always in the correct sequence as showed in the illustrations.
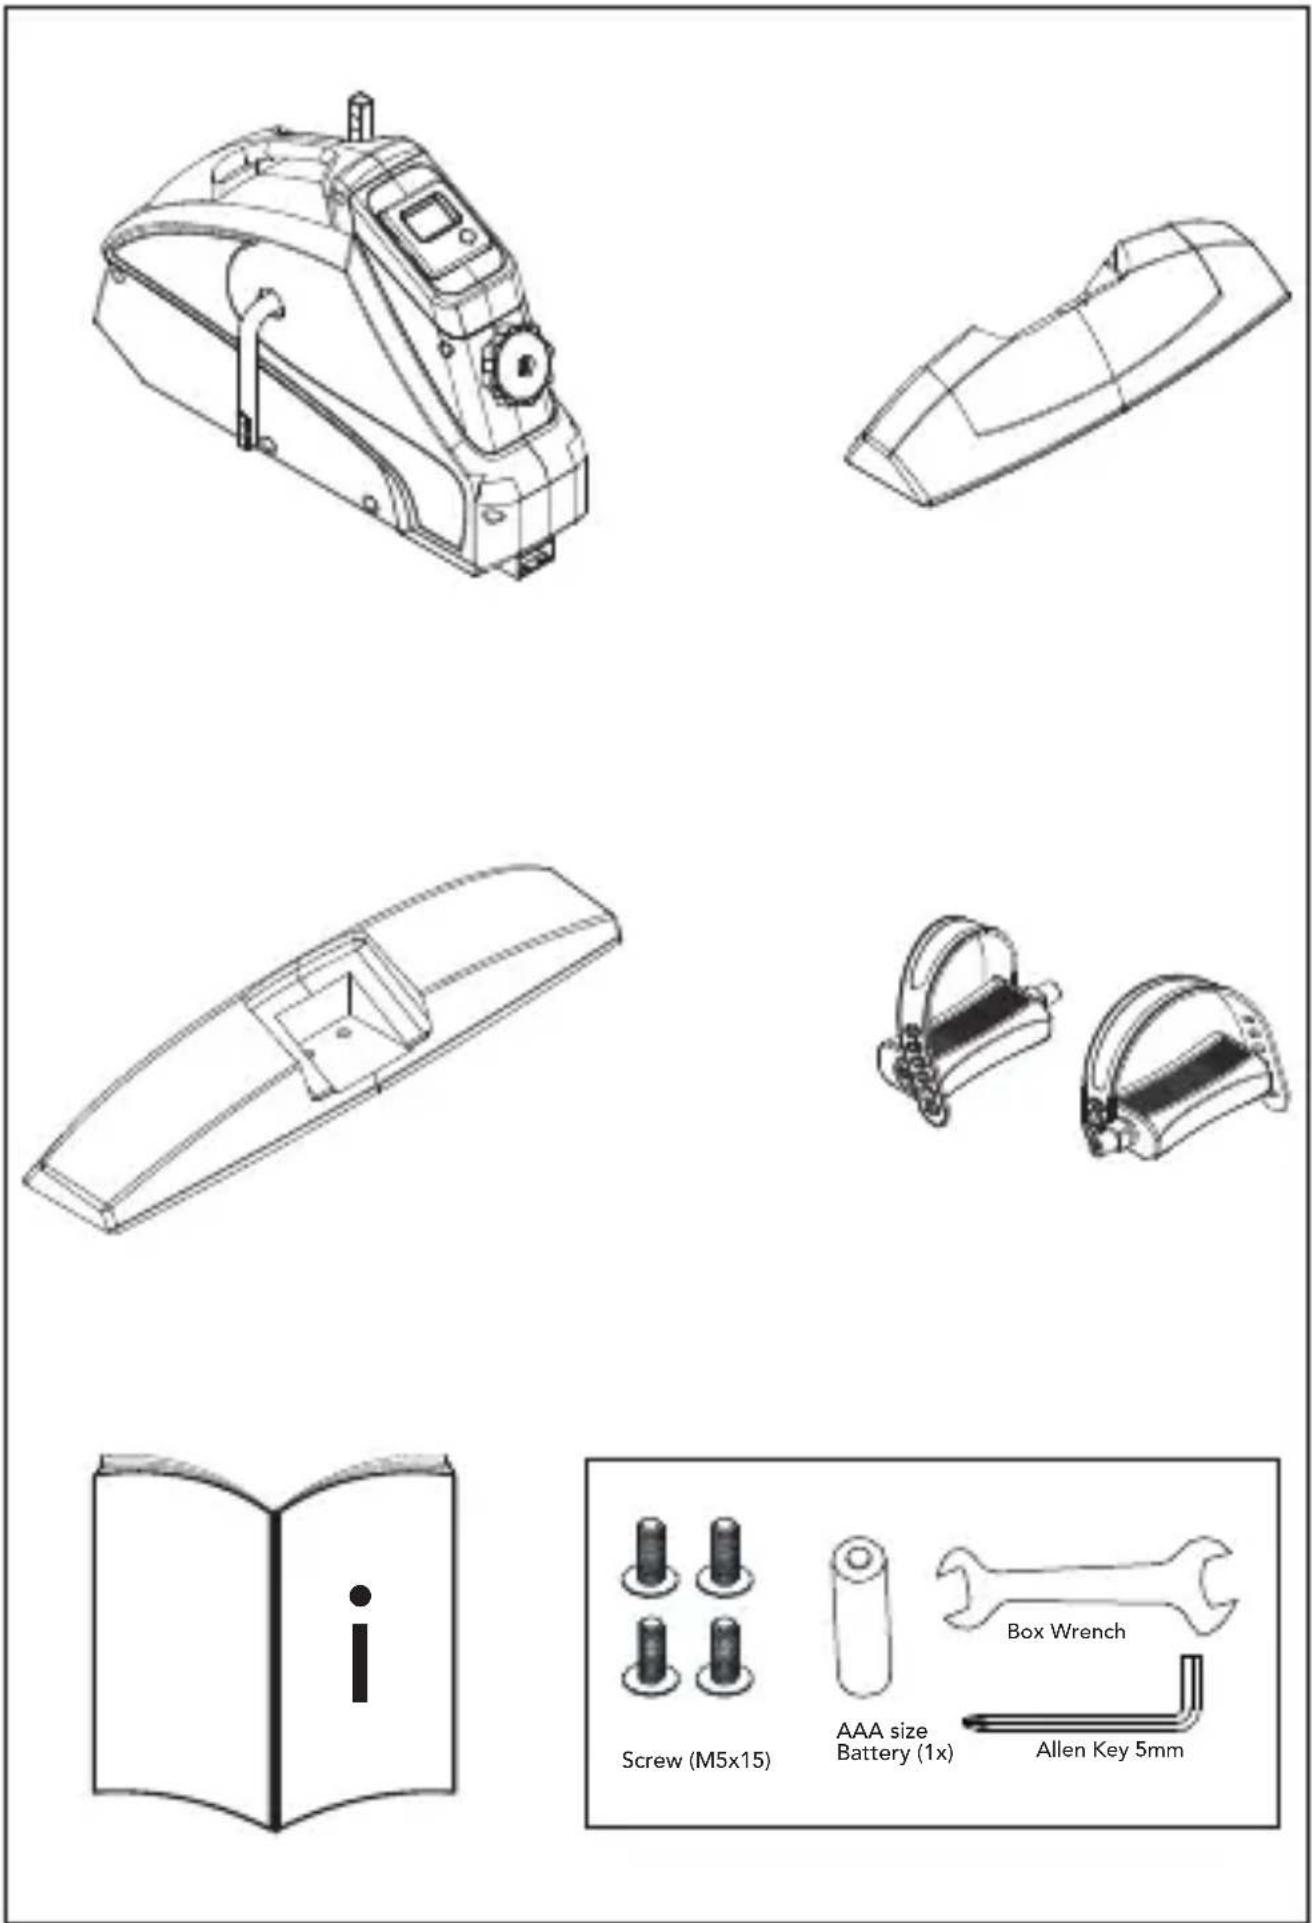
Description illustration B
The illustration shows what components and parts you should find when un-boxing your product.
!! NOTE
- Small parts can be hidden/ packed in hollow spaces in the Styrofoam product protection
- If a part is missing, contact your dealer.
Description illustration C
The illustration shows the hardware kit that comes with your product. The hardware kit contains bolts, washers, screws nuts etc. and the required tools to properly fit your trainer.
Description illustration D
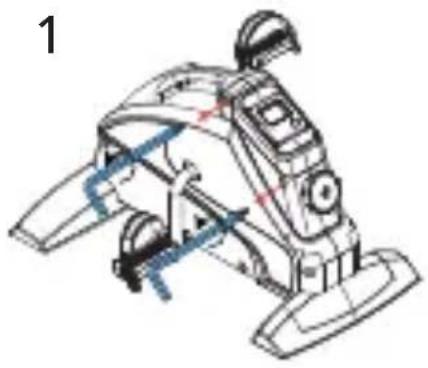
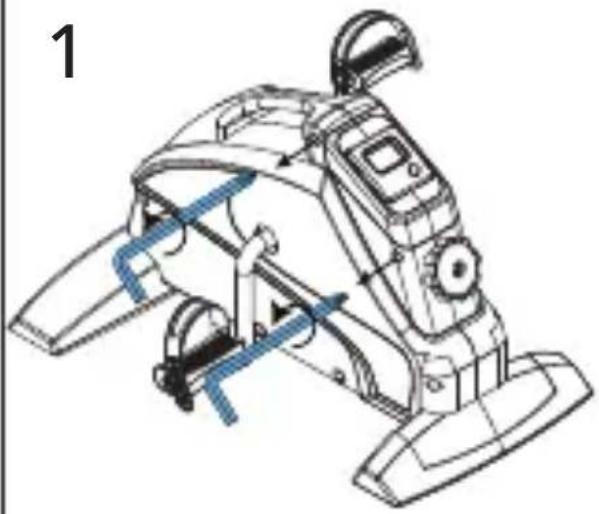
The illustrations shows you in the correct following order how to assembly your trainer best.
English
⚠ WARNING
- Assemble the equipment in the given order.
- Carry and move the equipment with at least two persons.
CAUTION
- Place the equipment on a firm, level surface.
- Place the equipment on a protective base to prevent damage to the floor surface.
- Allow at least 100 cm of clearance around the equipment.
- Refer to the illustrations for the correct assembly of the equipment.
Additional assembly information.
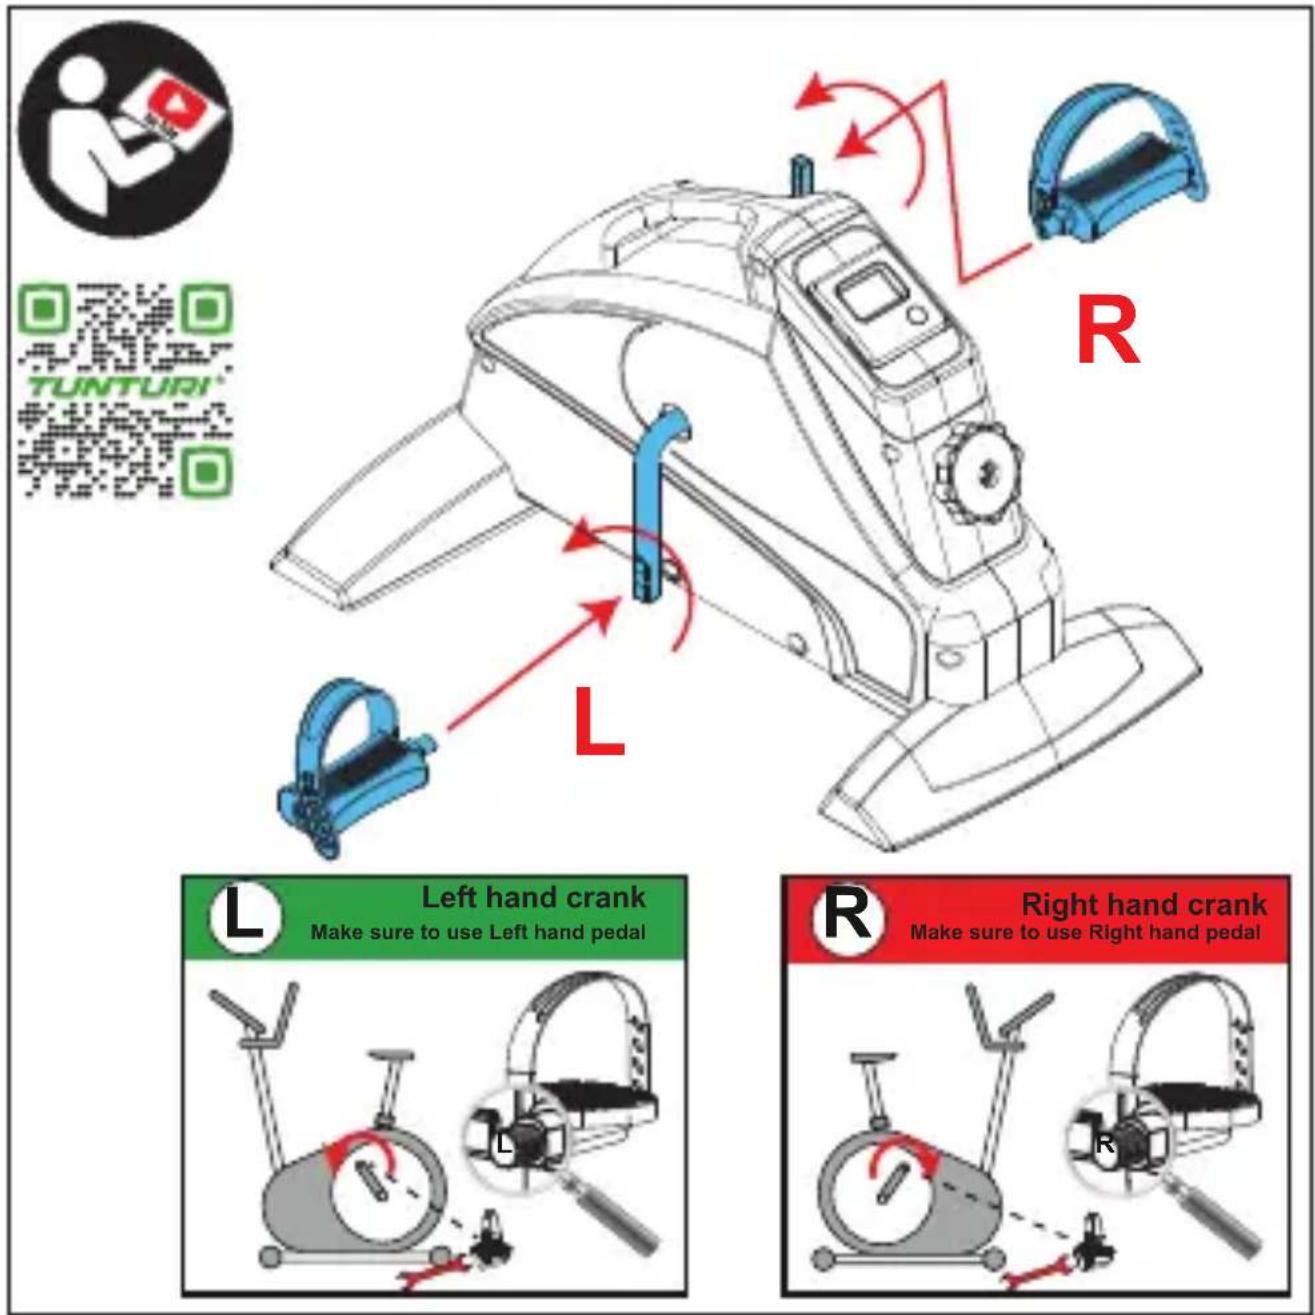
D2 How to fit the pedals correctly
!! NOTE
- Right and left side are determined from an exercising positions perspective.
Right hand pedal
Find the "R" or "L" mark on the pedal axle
-Fit the right hand pedal "R" into the right hand crank.
-Firstly turn the pedal axle in clockwise direction by hand.
-Use the wrench to fully tighten the pedal.
Left hand pedal
-Fit the left hand pedal "L" into the left hand crank.
-Firstly turn the pedal axle in counter-clockwise direction by hand.
-Use the wrench to fully tighten the pedal.

Click to see our supportive YouTube video https://youtu.be/Devel2ZhCAc
!! NOTE
- Save the tools provided with this product, after you completed the product assembly, for future service purposes.
Use
Adjusting resistance
To increase or decrease resistance, turn the adjustment knob at the top of the handlebar support tube clockwise (+ direction) to increase resistance and counter-clockwise (- direction) to decrease resistance.
Replacing the batteries (Fig. E)
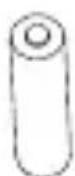
The console is equipped with 1 AAA batteries at the rear of the console.
-Loosen the two screws.
-Remove the console.
-Remove the old batteries.
-Insert the new batteries. Make sure that batteries match the (+) and (-) polarity markings.
-Mount the console.
-Fasten the two screws
!! NOTE
- Empty batteries should always be recycled per your Local legal regulations to save the environment.
⚠ WARNING
- Do not expose batteries to big temperature changes to prevent the batteries from leaking.
• 'To prevent your batteries from leaking, take them out if you plan on not using your device for longer periods of time. - When inserting multiple batteries into a device, always use the same brand, the same type, and the same energy level.
Additional environmental information
Packaging disposal
Government guidelines ask that we reduce the amount of waste material disposed of in land fill sites. We therefore ask that you dispose of all packaging waste responsibly at public recycling centres.
English
End of life disposal
We at Tunturi hope you enjoy many years of enjoyable use from your fitness trainer. However, a time will come when your fitness trainer will come to the end of its useful life.
Under 'European WEEE Legislation you are responsible for the appropriate disposal of your fitness trainer to a recognised public collection facility.
Warranty
Tunturi purchaser's warranty
Warranty terms
The consumer is entitled to the applicable legal rights stated in the national legislation concerning the commerce of consumer goods. This warranty does not restrict these rights. The Purchaser's Warranty is only valid if the item is used in an environment approved by Tunturi New Fitness BV, and is maintained as instructed for that particular equipment. The product-specific approved environment and maintenance instructions are stated in the "user manual" of the product.
The "user manual" can be downloaded from our website. http://manuals.tunturi.com
Declaration of the manufacturer
Tunturi New Fitness BV declares that the product is in conformity with the following standards and directives:
- 2014/30/EU - ElectroMagnetic Compatibility (EMC)
The product therefore carries the CE label.
The Declaration of Conformity including all standards and directives can be downloaded on our website:
https://doc.tunturi.com
04-2020
Tunturi New Fitness BV
Purmerweg 1
1311 XE Almere
The Netherlands
Disclaimer
© 2020 Tunturi New Fitness BV All rights reserved.
-The product and the manual are subject to change.
-Specifications can be changed without further notice.
-Check our website for the latest user manual version.
Deutsch

natural_image
Green recycling symbol with a tree and recycling symbol inside an open book (no text or symbols)Tunturi New Fitness BV
Purmerweg 1
1311 XE Almere
The Netherlands
Haftungsausschluss
natural_image
Green recycling symbol with a tree and recycling symbol inside an open book (no text or numbers)Tunturi New Fitness BV
Purmerweg 1
1311 XE Almere
Pays-Bas
© 2020 Tunturi New Fitness BV
natural_image
Green recycling symbol with a tree and recycling symbol inside an open book (no text or symbols)Tunturi New Fitness BV
Purmerweg 1
1311 XE Almere
The Netherlands
Disclaimer
© 2020 Tunturi New Fitness BV
natural_image
Green recycling symbol with a tree and recycling arrow inside an open book (no text or symbols)Tunturi New Fitness BV
Purmerweg 1
1311 XE Almere
Paesi Bassi
© 2020 Tunturi New Fitness BV
Tunturi New Fitness BV
Purmerweg 1
1311 XE Almere
The Netherlands
© 2020 Tunturi New Fitness BV
natural_image
Green recycling symbol with a tree and recycling icon inside an open book (no text or symbols)Tunturi New Fitness BV
Purmerweg 1
1311 XE Almere
Nederländerna
Friskrivning
© 2020 Tunturi New Fitness BV
natural_image
Green recycling symbol with a tree and recycling arrow, enclosed in a partial square frame (no text or symbols)Tunturi New Fitness BV
Purmerweg 1
1311 XE Almere
Alankomaat