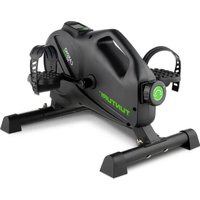
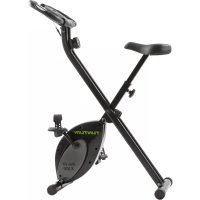
Cardio Fit S20 - Exercise bike TUNTURI - Free user manual and instructions
Find the device manual for free Cardio Fit S20 TUNTURI in PDF.

User questions about Cardio Fit S20 TUNTURI
0 question about this device. Answer the ones you know or ask your own.
Ask a new question about this device
Download the instructions for your Exercise bike in PDF format for free! Find your manual Cardio Fit S20 - TUNTURI and take your electronic device back in hand. On this page are published all the documents necessary for the use of your device. Cardio Fit S20 by TUNTURI.
USER MANUAL Cardio Fit S20 TUNTURI
natural_image
Exterior view of a black Tunturi exercise bike with green circular logo and 'CARDIO' branding (no text-heavy elements)Attention, Achtung, Attention, Attentie, Attenzione, Atención, Giv akt, Huomio
- Please read this assembly manual carefully prior to assembling this product.
- Lesen Sie sich vor der Montage des Produkts diese Montageanleitung sorgfältig durch.
- Veuillez lire attentivement le présent manuel d'assemblage avant de monter ce produit.
- Lees deze montagehandleiding zorgvuldig voordat u dit product in elkaar gaat zetten.
- Leggere attentamente questo manuale di montaggio prima di montare il prodotto.
- Antes de montar este producto, lea atentamente este manual de montaje.
- Läs den här monteringshandboken noggrant före användning av den här produkten.
- Lue tämä asennusohje huolellisesti ennen tämän tuotteen asennusta.
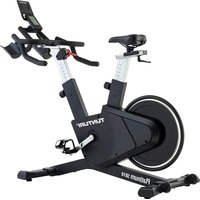
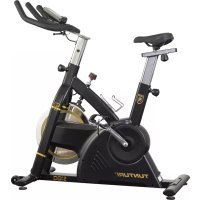
Cardio Fit S20 Sprinter Bike
A

natural_image
Black TUNTURI stationary bike with green circular logo, displayed against a white background (no text or symbols on the bike itself)B
text_image
Technical diagram illustrating various fitness equipment including stationary bikes, flip-flops, and mobility devices with Chinese labels.Cardio Fit S20 Sprinter Bike
C
text_image
Technical line drawing of a wrench with labeled parts and exploded view, including a circular component and various spring-loaded components.D

text_image
100 cm 100 cm 100 cm 100 cmD-1
text_image
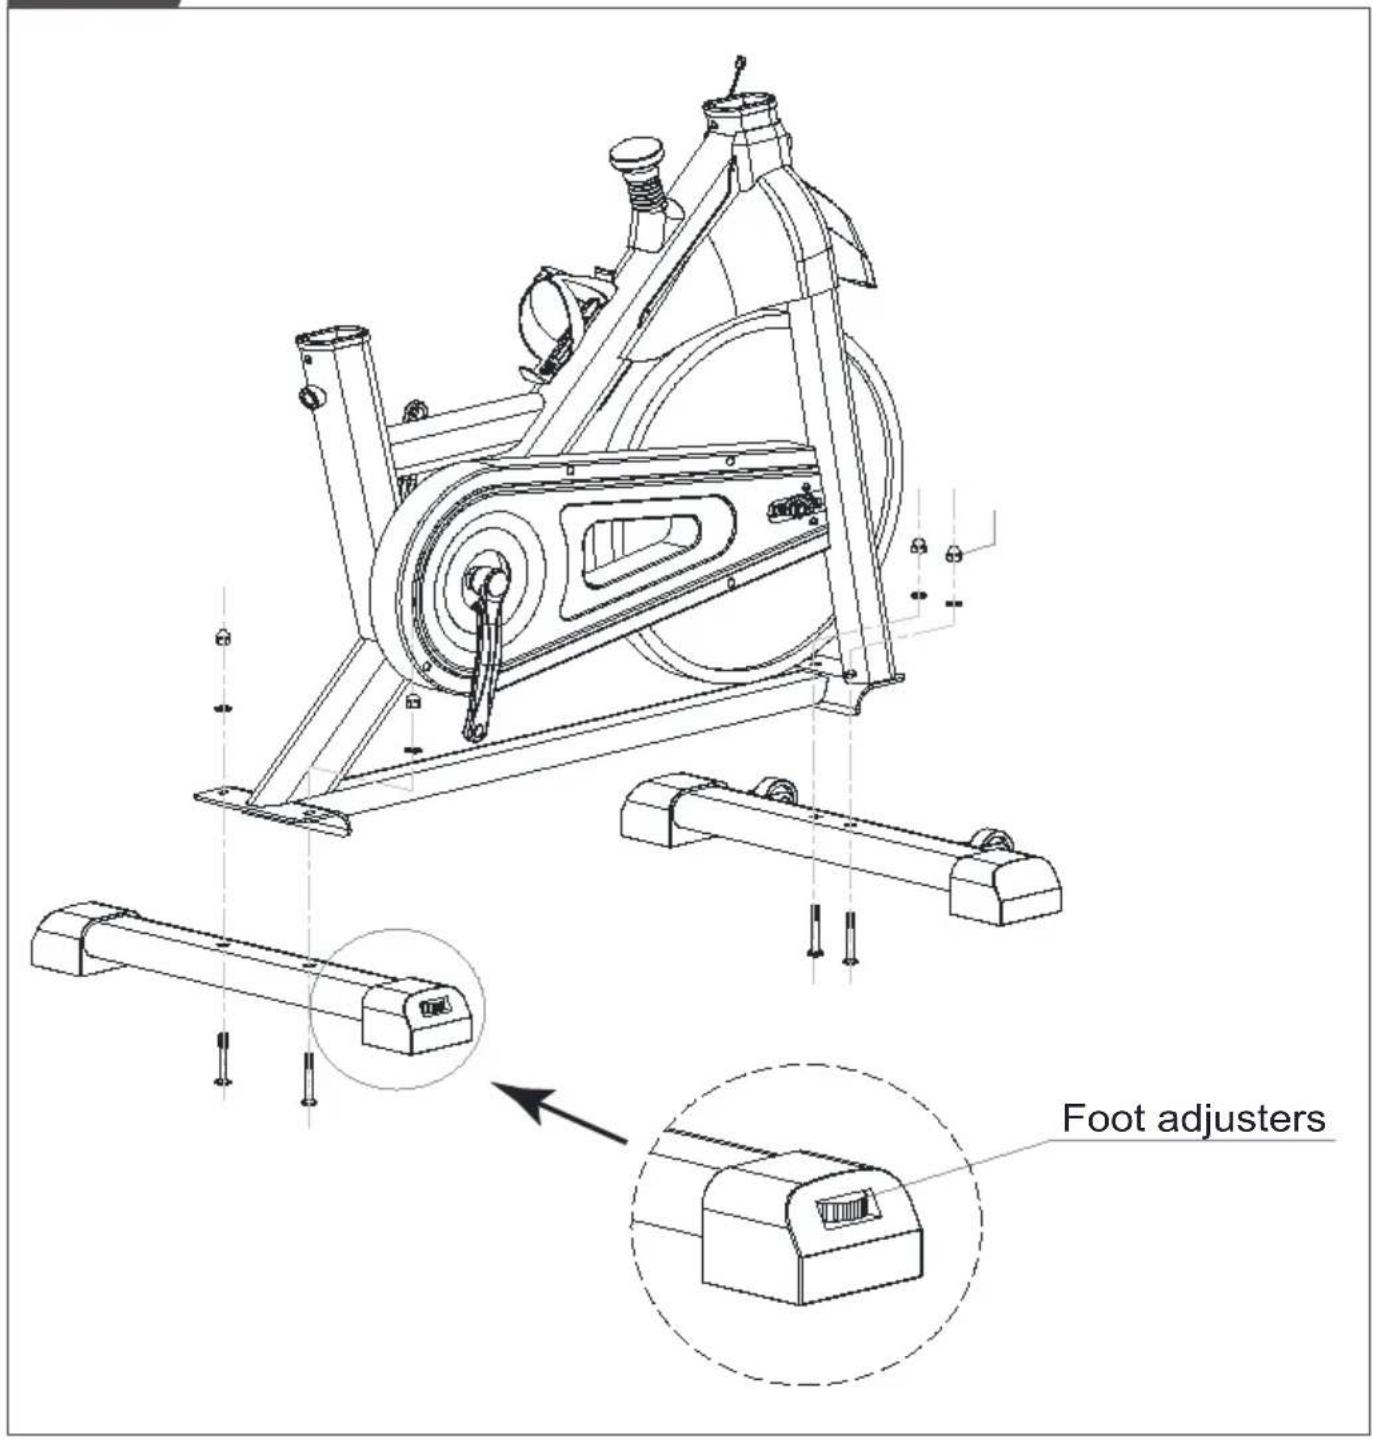
Foot adjusters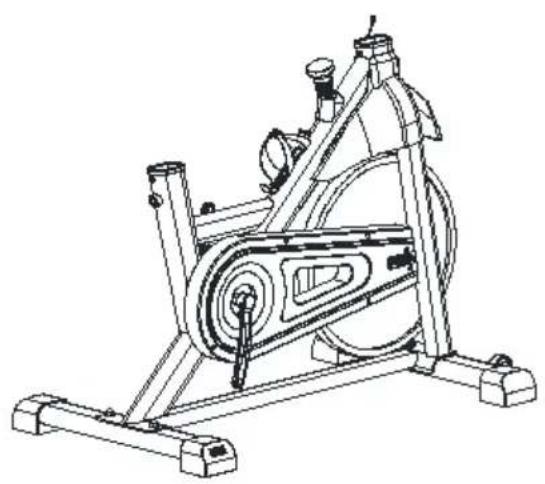
natural_image
Line drawing of a stationary exercise machine with rotating body and wheels (no text or symbols)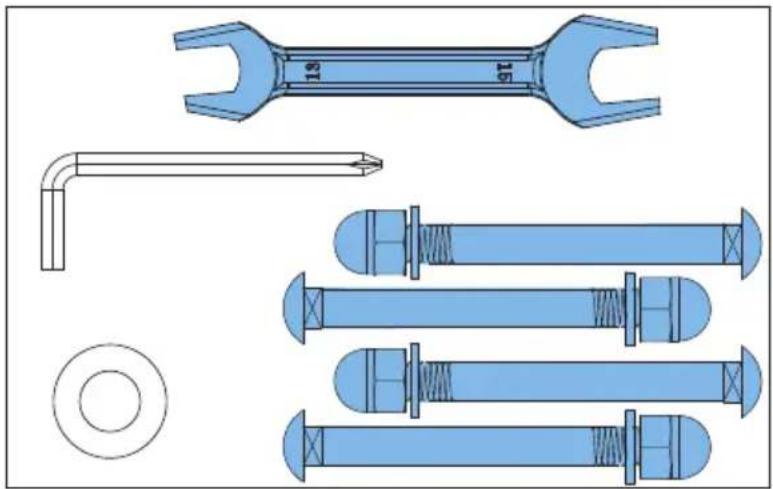
natural_image
Technical illustration of a wrench and four bolted fasteners with no text or symbolsD-2
text_image
Left hand crank Make sure to use Left hand pedal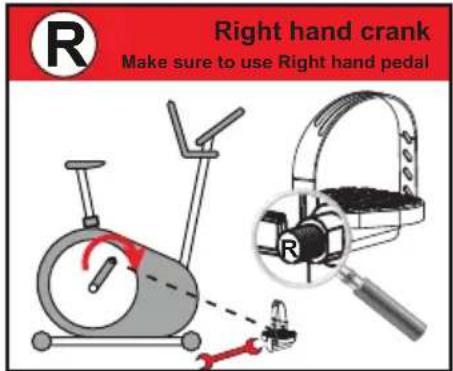
text_image
Right hand crank Make sure to use Right hand pedal
text_image
Scan to see YouTube tutorial
text_image
TUNTURI®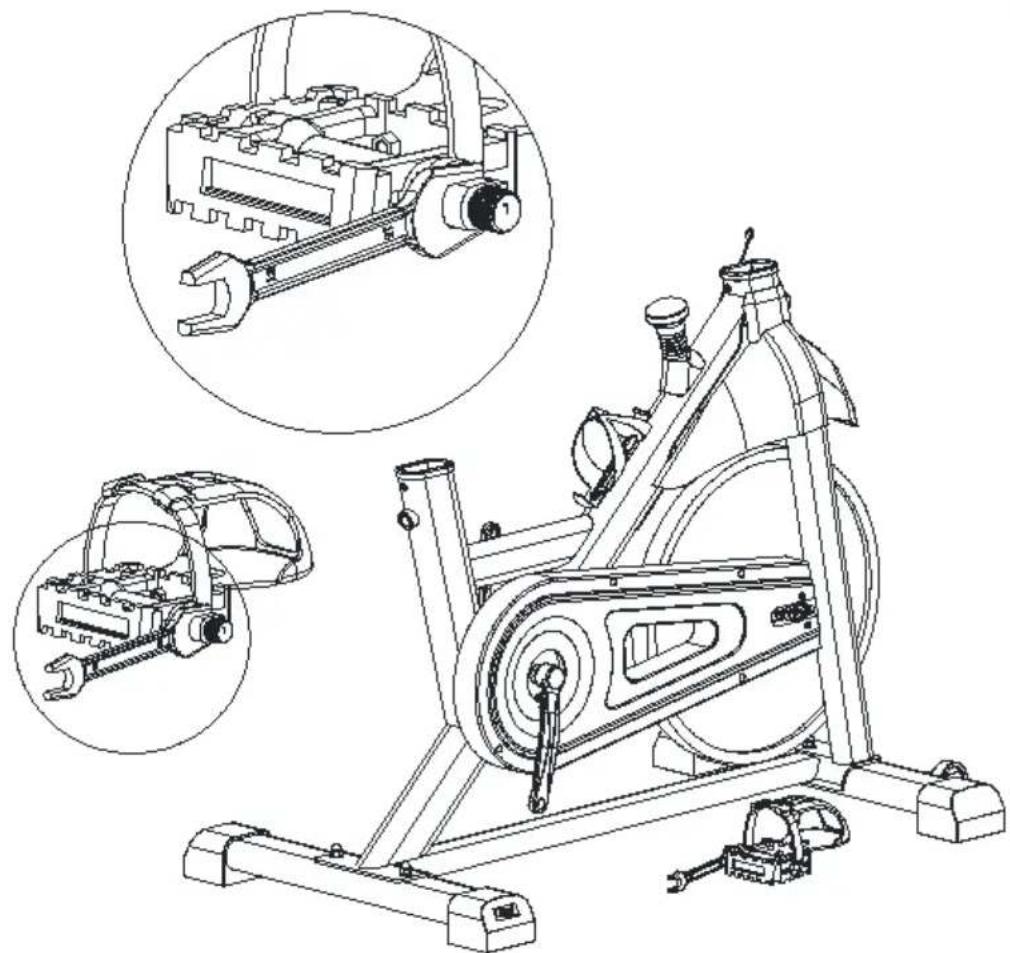
natural_image
Technical line drawing of a stationary exercise bike with internal components and close-up insets (no text or labels)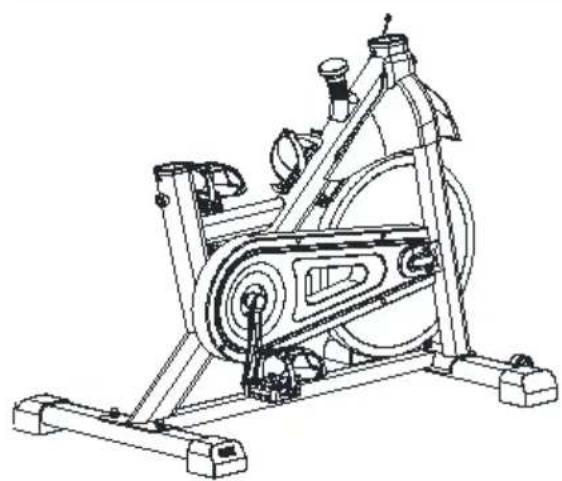
natural_image
Line drawing of a stationary exercise machine with rotating wheels and support legs (no text or symbols)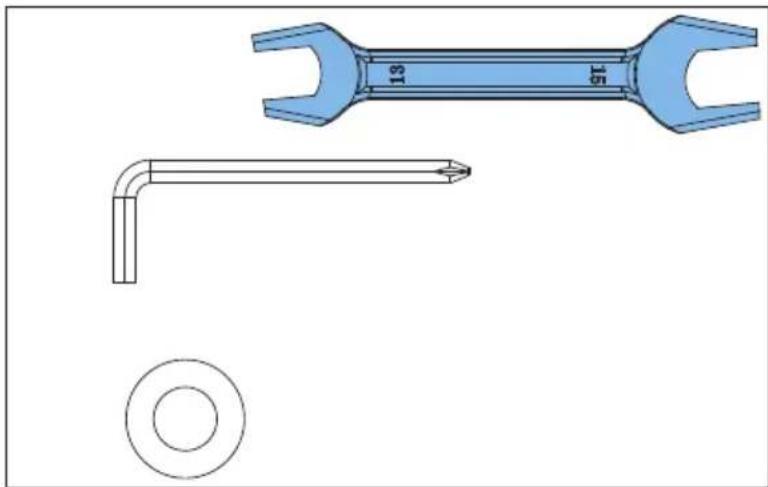
natural_image
Technical illustration of a wrench and a circular component with a side view (no text or symbols)D-3
natural_image
Technical line drawing of a stationary exercise bike with visible components and suspension parts (no text or labels)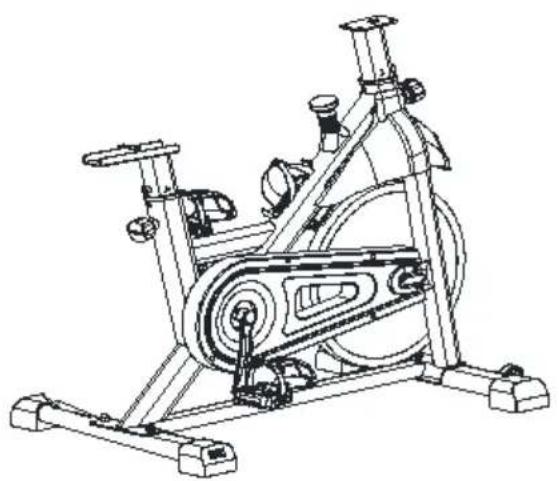
natural_image
Line drawing of a stationary exercise bike with rotating wheel and side-mounted arms (no text or symbols)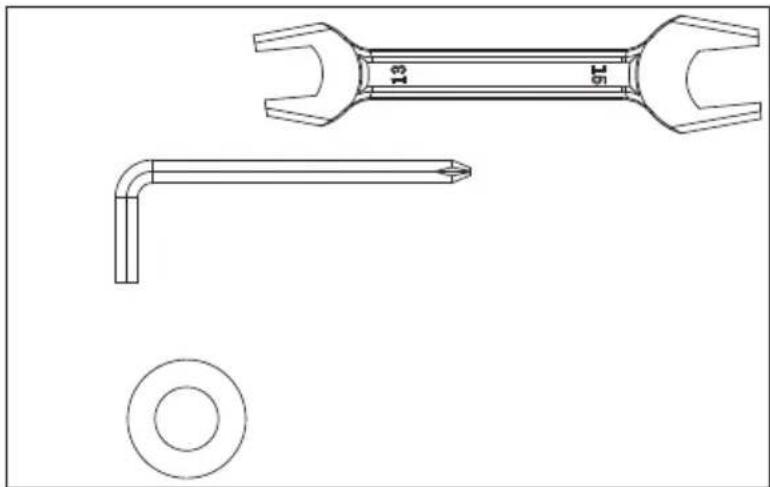
text_image
13 15Cardio Fit S20 Sprinter Bike
D-4
natural_image
Technical line drawing of a stationary exercise bike with visible components and motion arrows (no text or labels)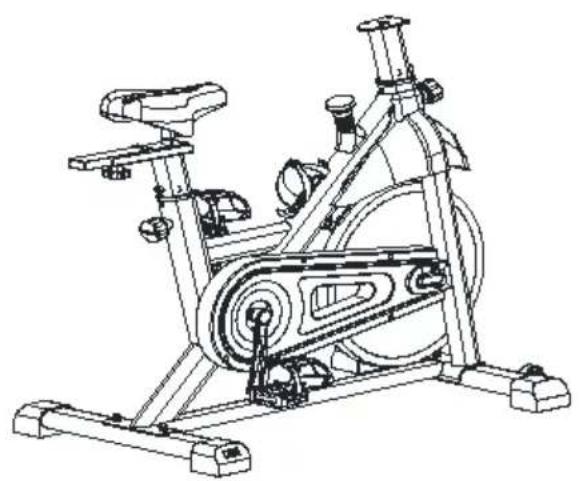
natural_image
Line drawing of a stationary exercise bike with rotating wheel and side-mounted legs (no text or symbols)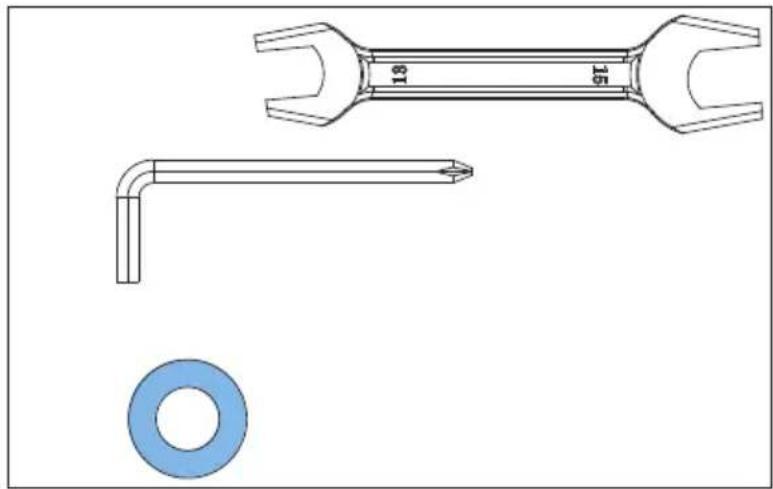
text_image
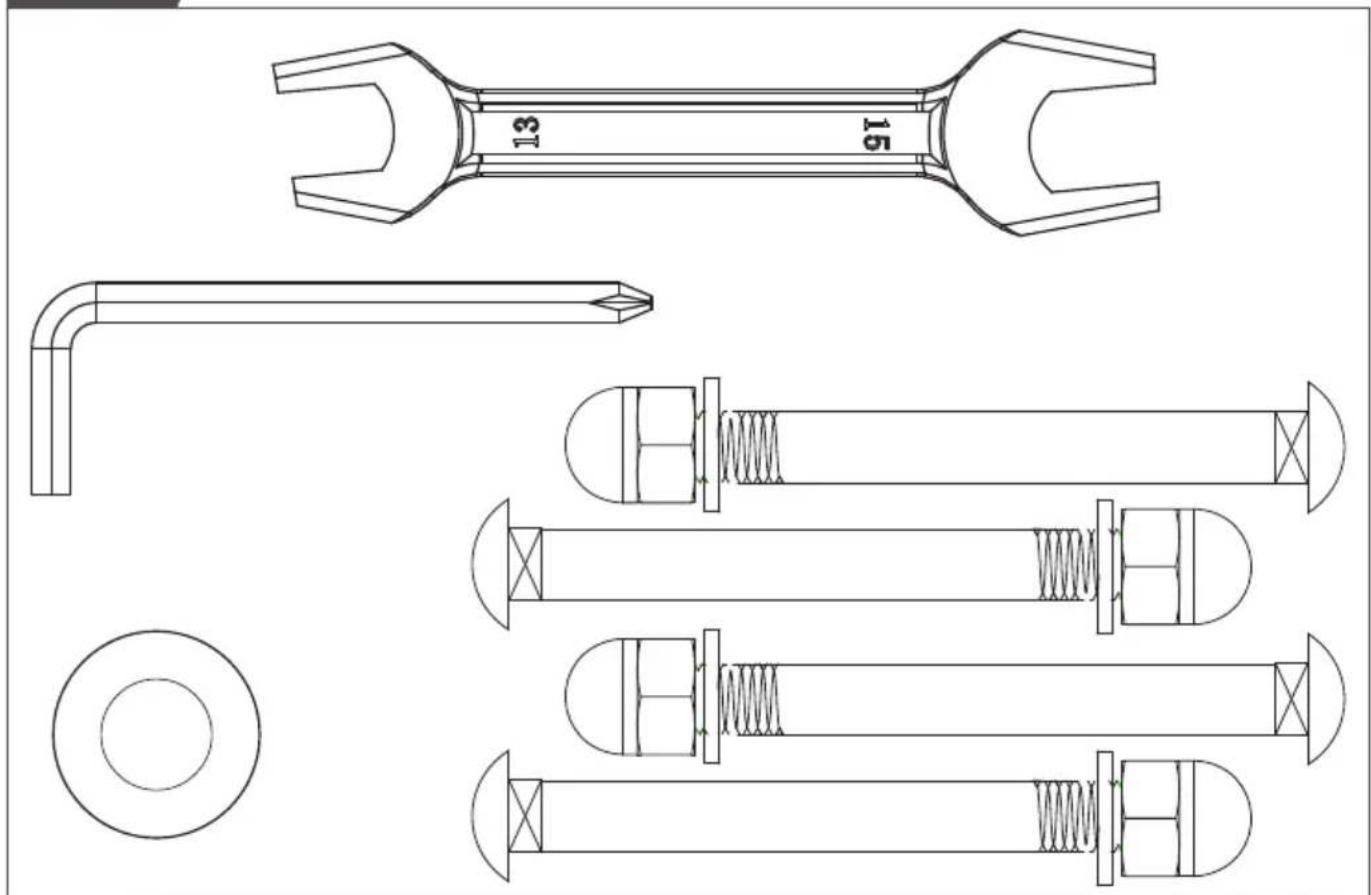
Technical diagram showing three types of wrenches and a washer: a double-ended wrench, a straight-angle wrench, and a circular washer.D-5
natural_image
Line drawing of a stationary exercise bike with visible components and suspension mechanism (no text or labels)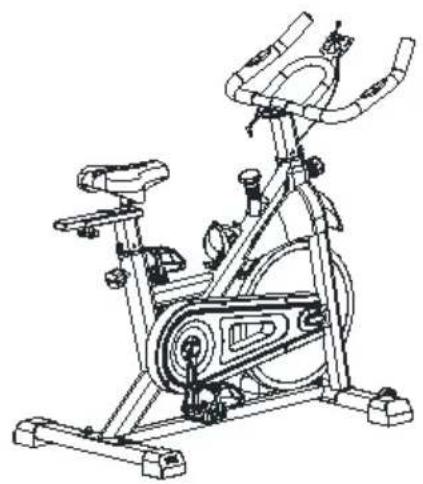
natural_image
Line drawing of a stationary exercise bike with visible legs, arms, and front-mounted legs (no text or symbols)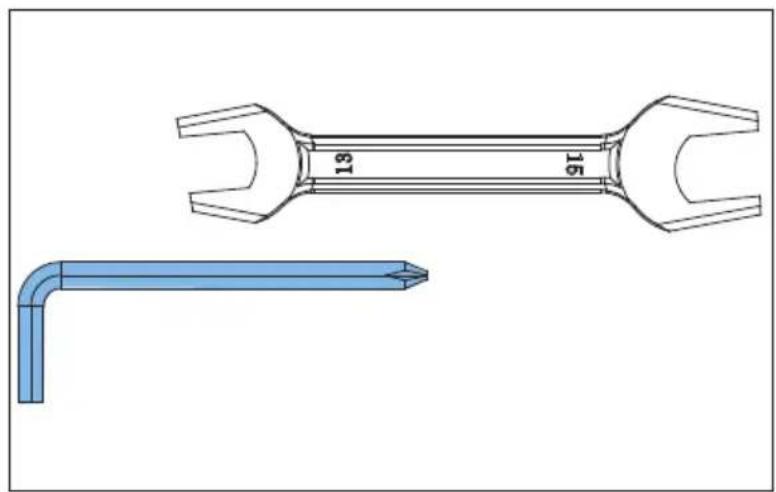
natural_image
Technical illustration of a two-wheeled wrench and a bent tool (no text or symbols)Cardio Fit S20 Sprinter Bike
D-6
text_image
Figure 2 Figure 1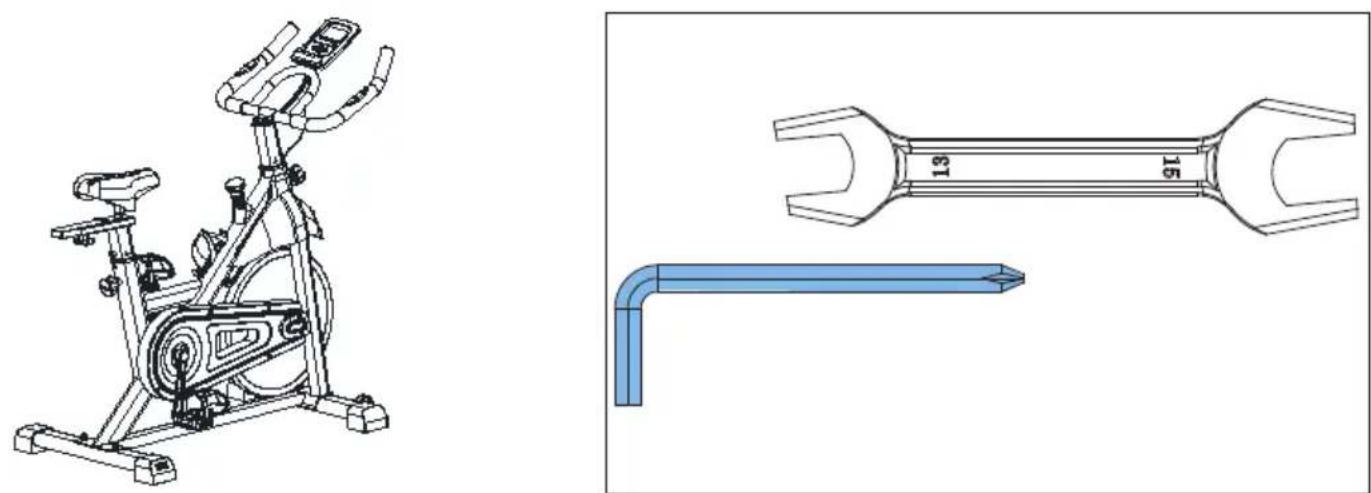
natural_image
Technical line drawings of a stationary exercise bike and a multi-wen wrench (no text or symbols)D-7
natural_image
Line drawing of a stationary exercise bike with visible components and suspension (no text or symbols)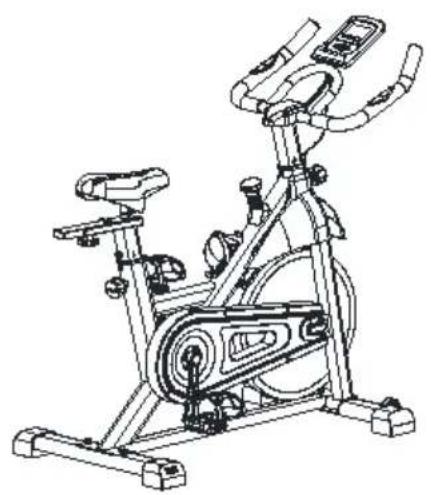
natural_image
Line drawing of a stationary exercise bike with visible legs, arms, and control panel (no text or symbols)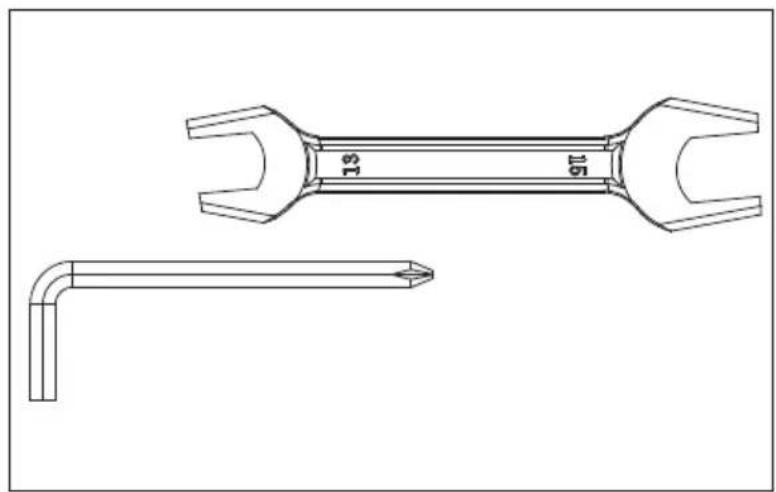
text_image
15 16Cardio Fit S20 Sprinter Bike
E-1
natural_image
Illustration of a hand pressing a button on a stationary exercise machine (no text or symbols present)E-2
text_image
80W CALORIES DISTANCE FUSE TIME SPEED TOTAL DISTANCE RESET MODE SET →F-1
natural_image
Technical line drawing of a mechanical assembly with no visible text or symbolsF-2
natural_image
Technical line drawing of a mechanical assembly with a red arrow indicating a specific component (no text or symbols present)
natural_image
Green recycling symbol with leafy tree and recycling arrow inside a book (no text or symbols)USER MANUAL ON OUR WEBSITE
To reduce the impact on the environment, you will only find the assembly steps in this manual. To learn how to use and maintain this product, please download the user manual from:
manuals.tunturi.com
Index
Welcome 14
Safety warnings......14
Assembly instructions......15
Description illustration A 15
Description illustration B.... 15
Description illustration C 15
Description illustration D 15
Additional assembly information....15
Additional environmental information....16
Use.... 16
Adjusting the support feet (Fig. E-1)....16
Adjusting the horizontal seat position.... 16
Adjusting the vertical seat position....16
Adjusting the handlebar 16
Adjusting resistance (Fig. F-1) 16
Emergency break knob (Fig. F-2)....16
Replacing the batteries (Fig. E-2) 16
Cleaning and maintenance......17
Warranty......17
Declaration of the manufacturer .... 17
Disclaimer 17
Welcome
Important Safety Instructions
This Owner's Manual is an essential part of your training equipment: reading all instructions in this manual before you start using this appliance. The following precautions must always be followed:
Safety warnings
WARNING
- Read the safety warnings and the instructions. Failure to follow the safety warnings and the instructions can cause personal injury or damage to the equipment. Keep the safety warnings and the instructions for future reference.
WARNING
-
Heart rate monitoring systems may be inaccurate.
• Over exercise may result in serious injury or death. If you feel faint stop exercising immediately. -
The equipment is suitable for domestic use only. The equipment is not suitable for commercial use.
- Max. usage is limited to 2 hrs a day.
- This appliance can be used by children aged from 8 years and above and persons with reduced physical, sensory or mental capabilities or lack of experience and knowledge if they have been given supervision or instruction concerning use of the appliance in a safe way and understand the hazards involved.
- Children should be supervised to ensure that they do not play with the appliance.
- Before starting your workout, consult a physician to check your health.
- If you experience nausea, dizziness or other abnormal symptoms, immediately stop your workout and consult a physician.
- To avoid muscular pain and strain, start each workout by warming up and finish each workout by cooling down. Remember to stretch at the end of the workout.
-
The equipment is suitable for indoor use only. The equipment is not suitable for outdoor use.
-
Only use the equipment in environments with adequate ventilation. Do not use the equipment in draughty environments in order not to catch a cold.
- Only use the equipment in environments with ambient temperatures between 10 °C and 35 °C. Only store the equipment in environments with ambient temperatures between 5 °C and 45 °C.
- Do not use or store the equipment in humid surroundings. The air humidity must never be more than 80%.
- Only use the equipment for its intended purpose. Do not use the equipment for other purposes than described in the manual.
- Do not use the equipment if any part is damaged or defective. If a part is damaged or defective, contact your dealer.
- Keep your hands, feet and other body parts away from the moving parts.
- Keep your hair away from the moving parts.
- Wear appropriate clothing and shoes.
- Keep clothing, jewellery and other objects away from the moving parts.
- Make sure that only one person uses the equipment at a time.
The equipment must not be used by persons weighing more than 100 kg (220 lbs).
- Do not open equipment without consulting your dealer.
Assembly instructions
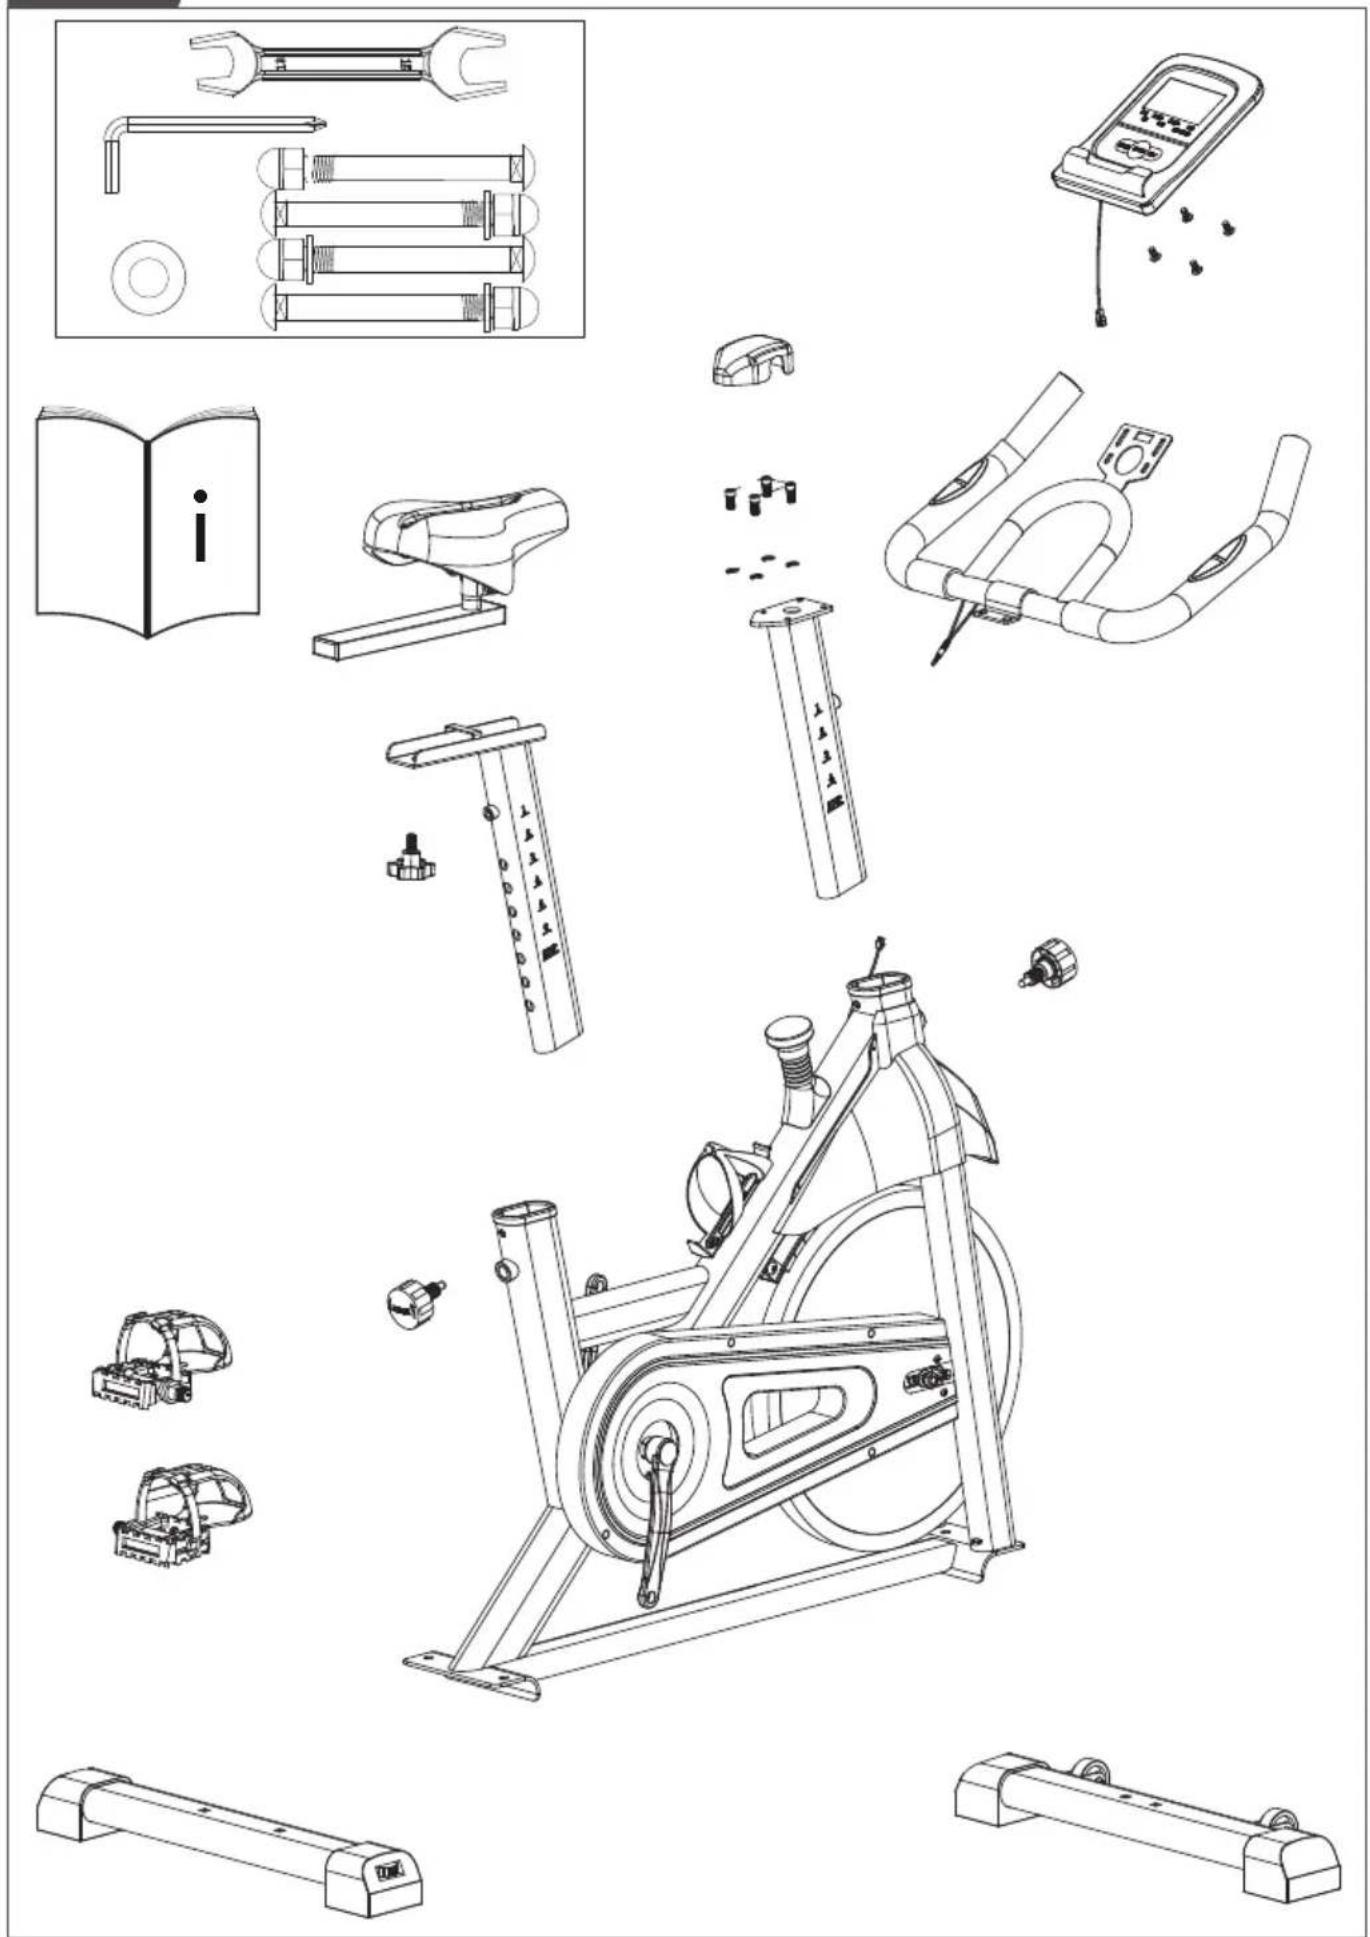
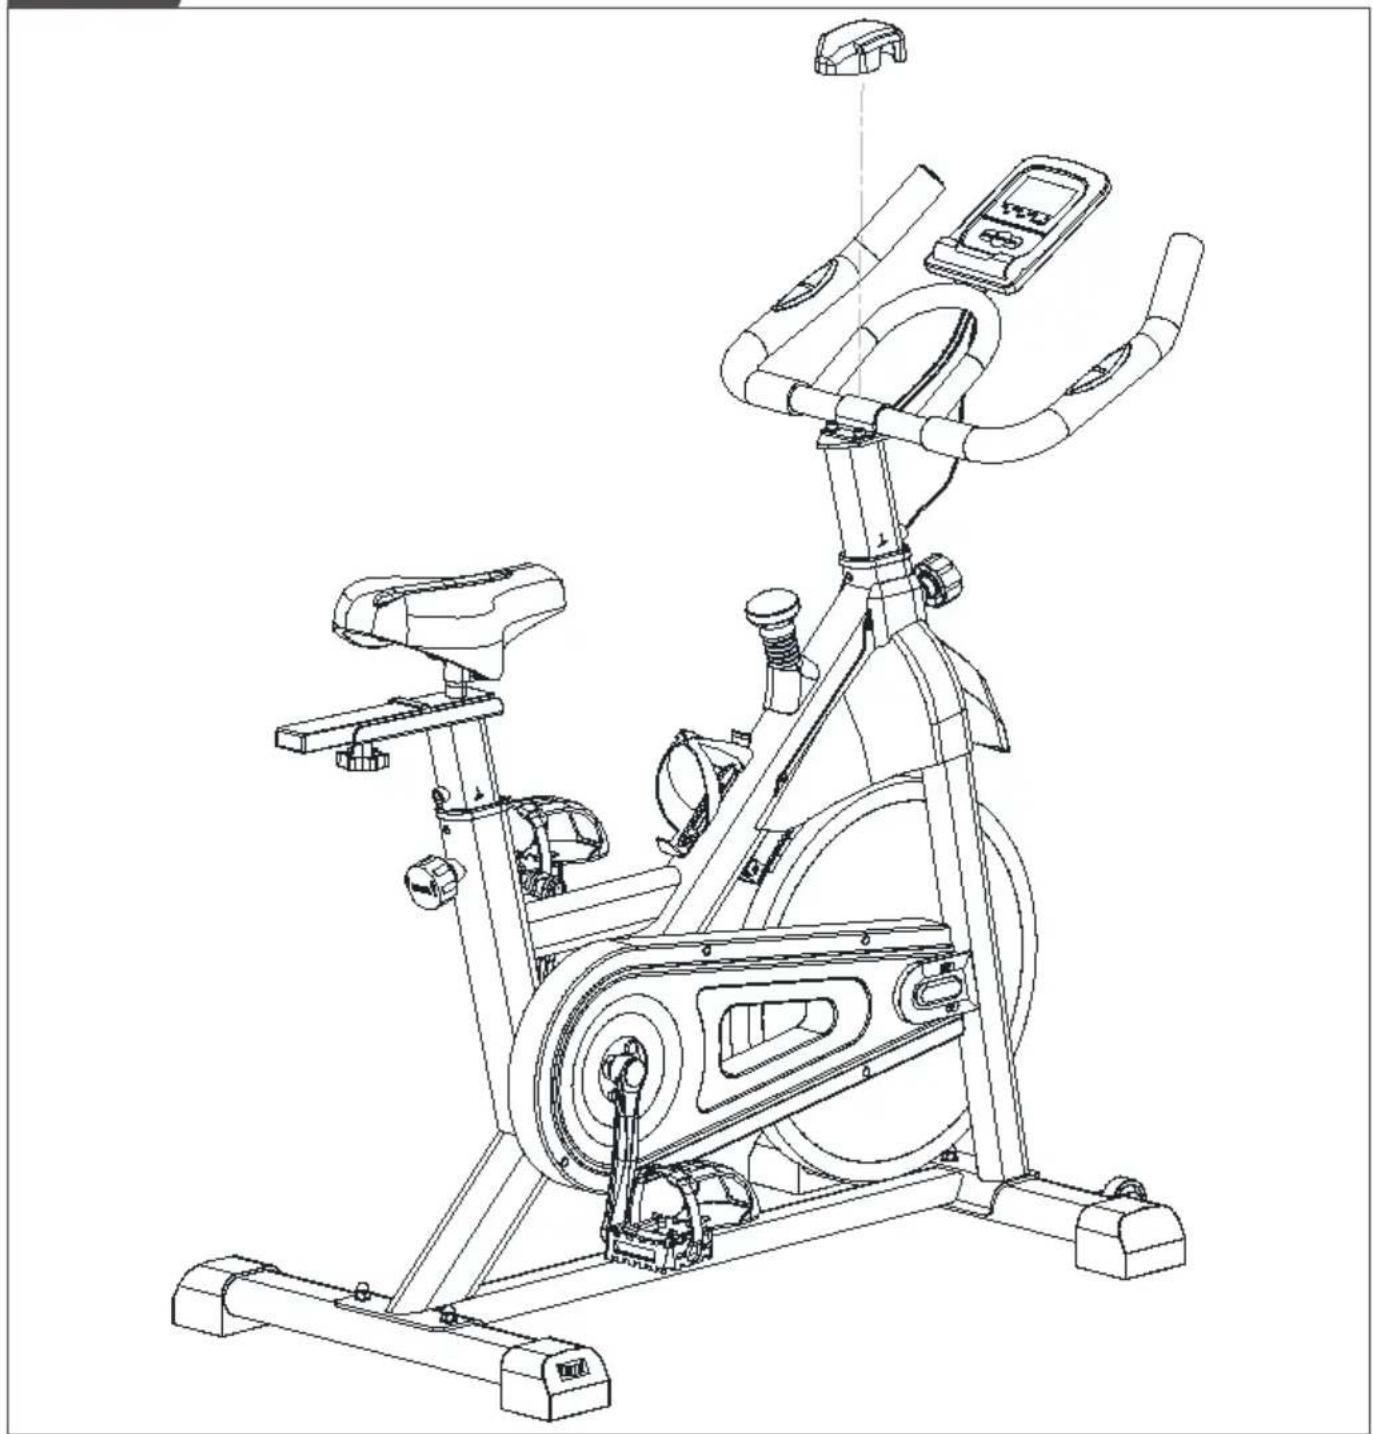
Description illustration A
The illustration shows what the trainer will looks like after the assembly is completed.
You can use this as a reference during your assembly, but do follow the assembly steps always in the correct sequence as showed in the illustrations.
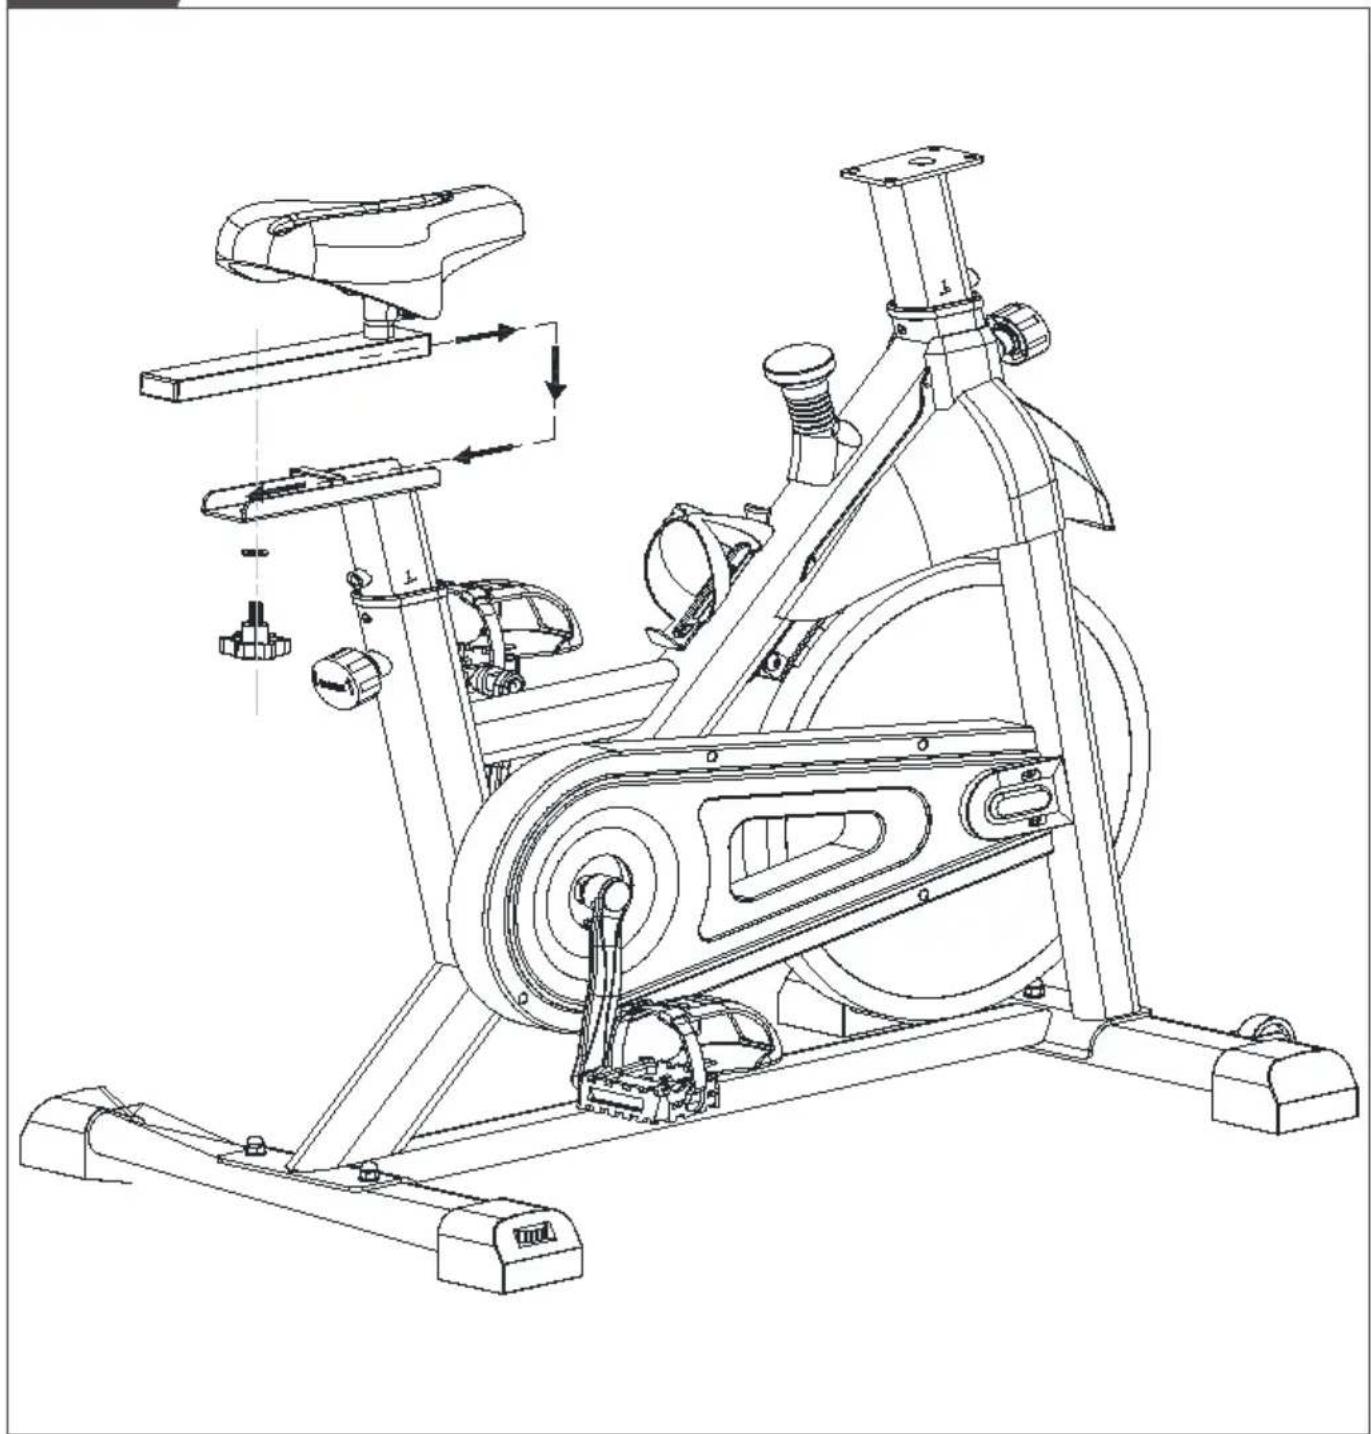
Description illustration B
The illustration shows what components and parts you should find when un-boxing your product.
!! NOTE
- Small parts can be hidden/ packed in hollow spaces in the Styrofoam product protection
- If a part is missing, contact your dealer.
Description illustration C
The illustration shows the hardware kit that comes with your product.
The hardware kit contains bolts, washers, screws, nuts etc. and the required tools to properly fit your trainer.
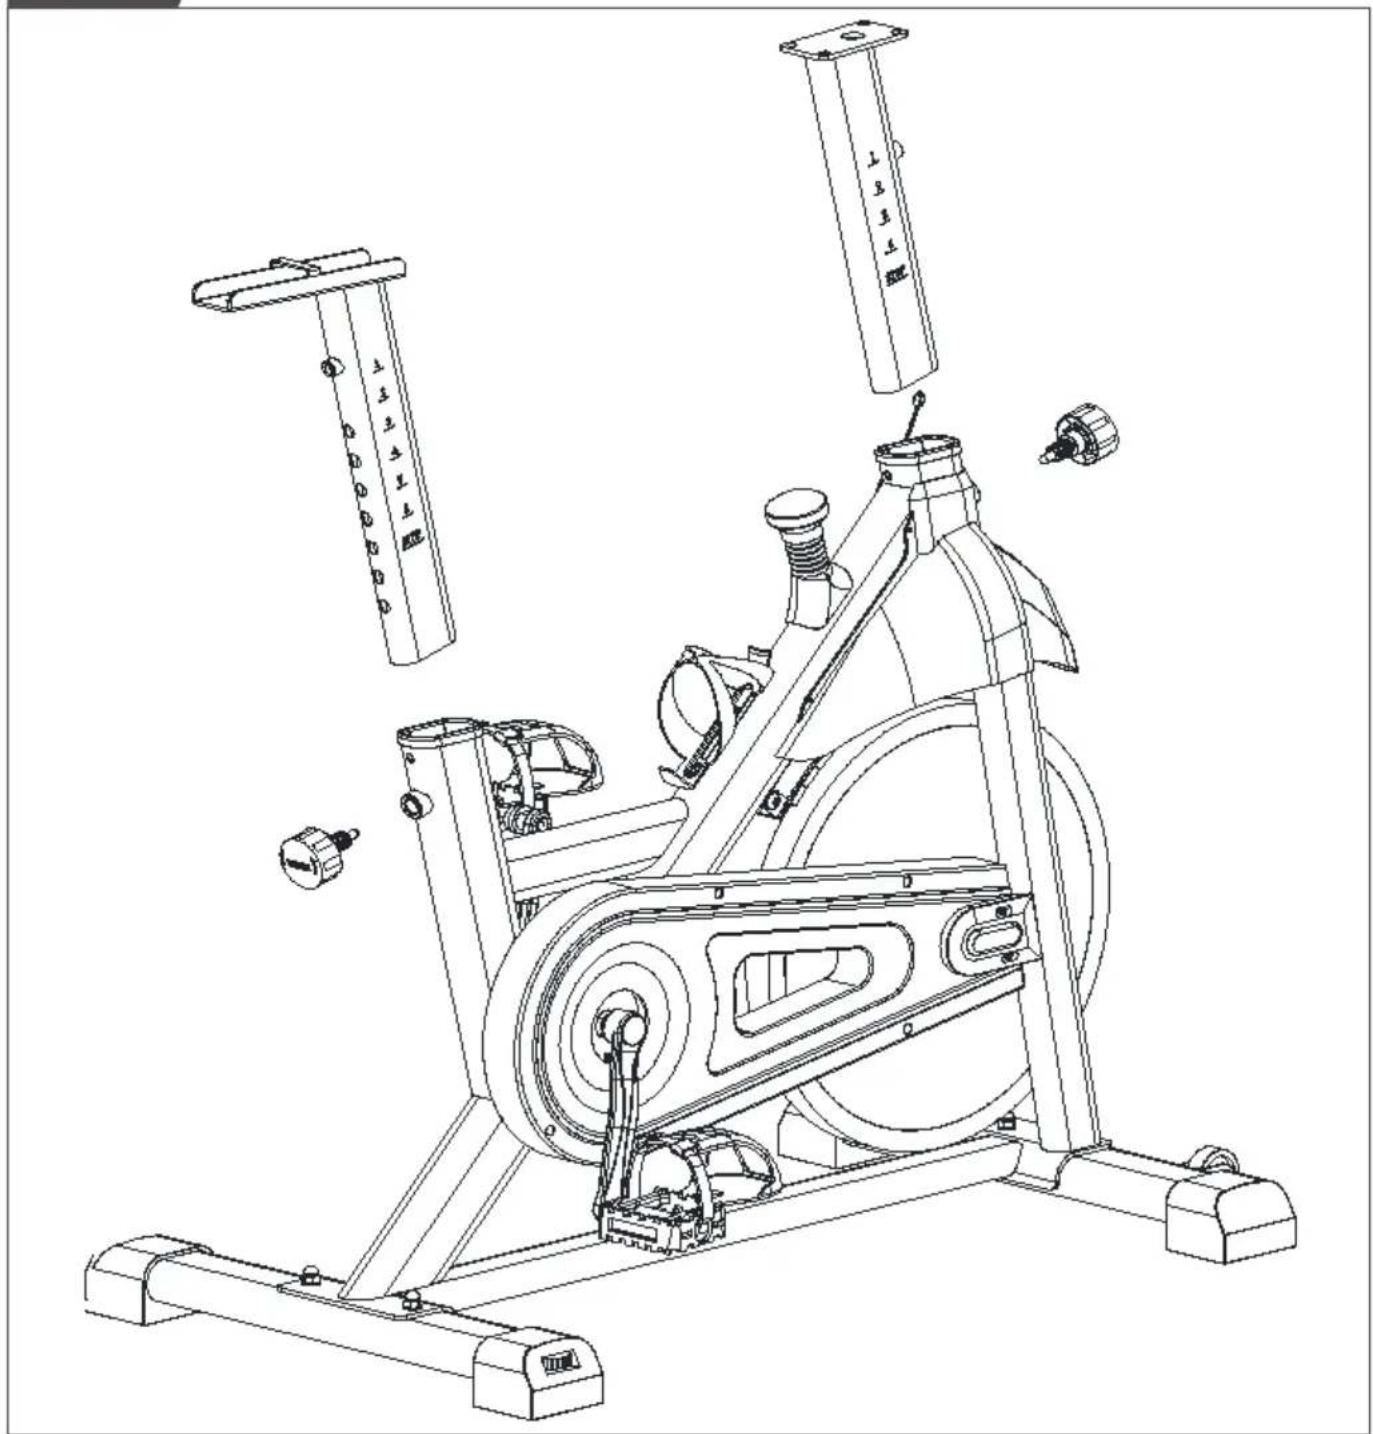
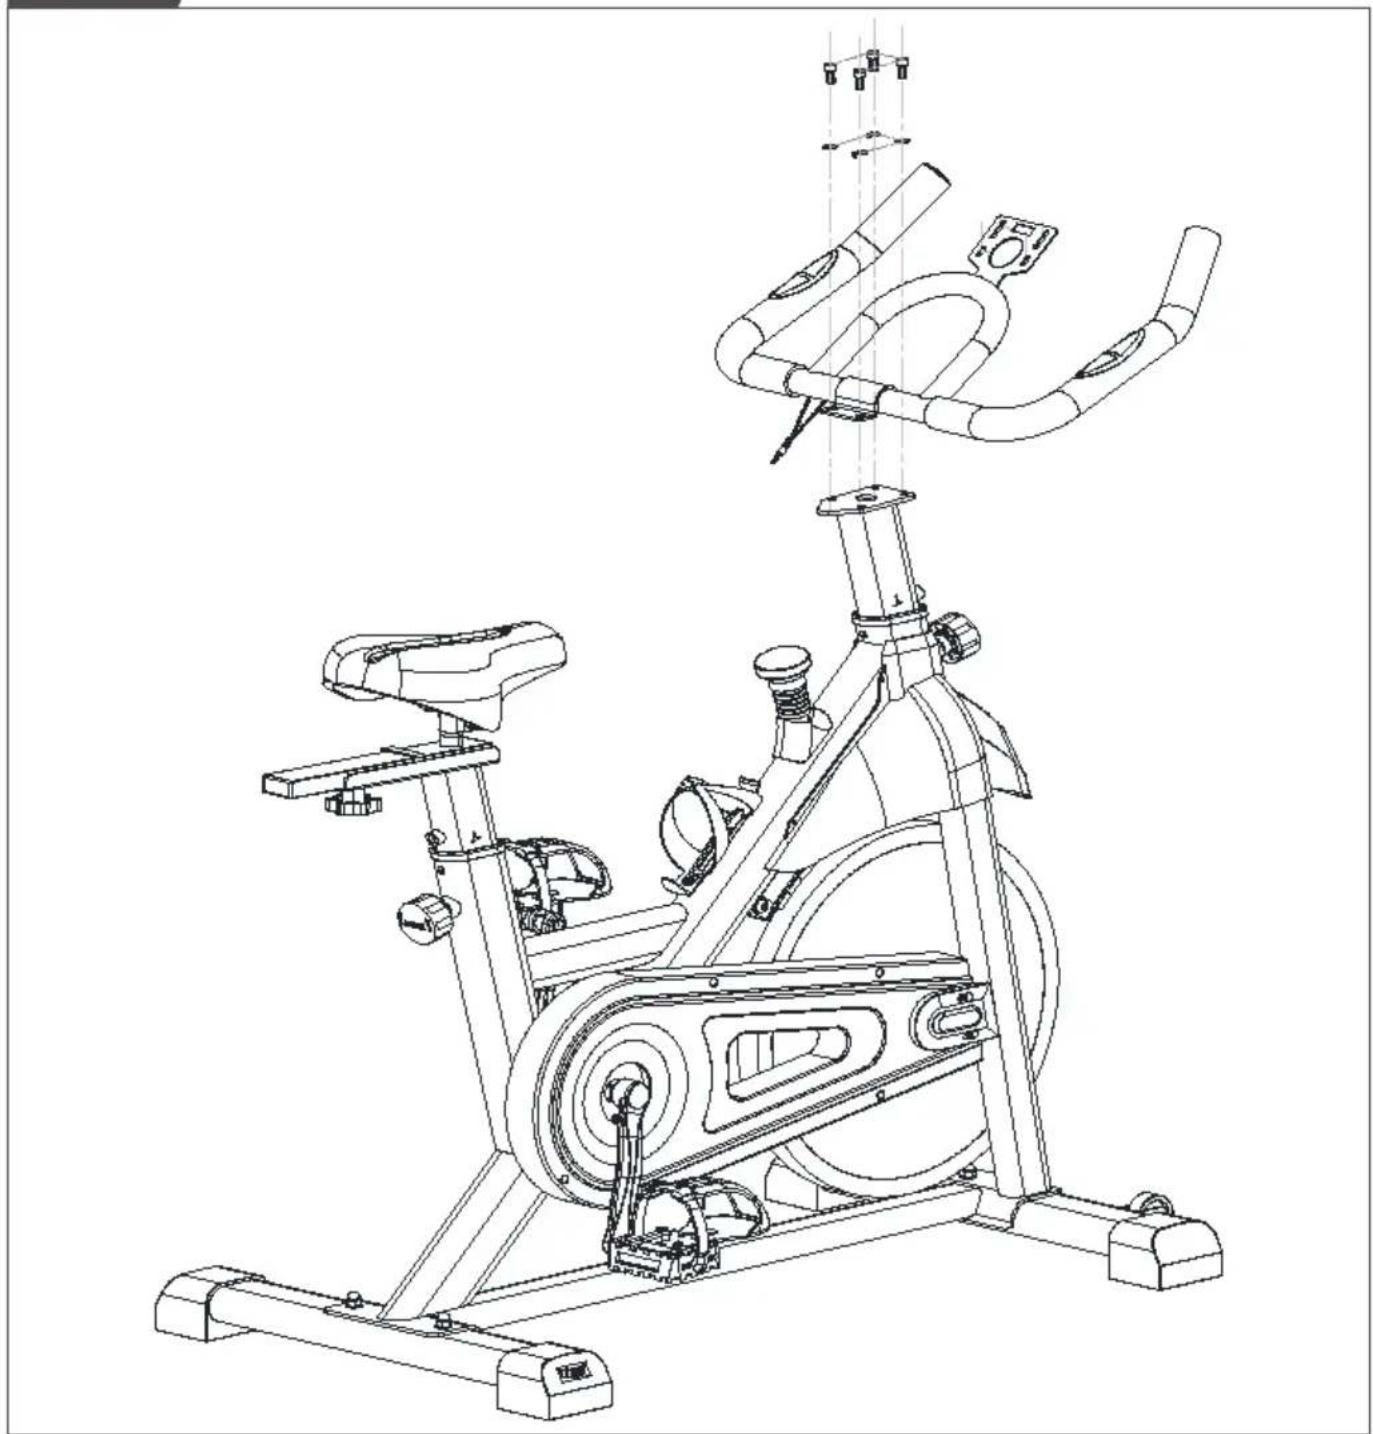
Description illustration D
The illustrations shows you in the correct following order how to assembly your trainer best.
WARNING
- Assemble the equipment in the given order.
- Carry and move the equipment with at least two persons.
CAUTION
- Place the equipment on a firm, level surface.
- Place the equipment on a protective base to prevent damage to the floor surface.
- Allow at least 100 cm of clearance around the equipment.
- Refer to the illustrations for the correct assembly of the equipment.
Additional assembly information
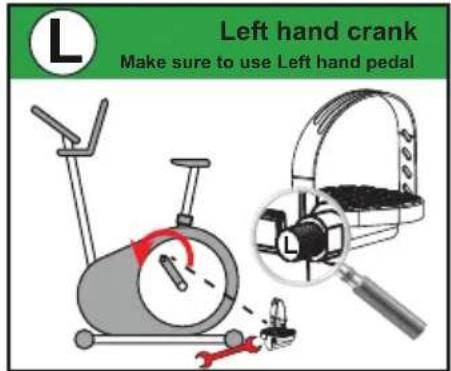
Assembly step D2
How to fit the pedals correctly.
!! NOTE
- Right and left side are determined from an exercising positions perspective.
Right hand pedal
Find the "R" or "L" mark on the pedal axle
- Fit the right hand pedal "R" into the right hand crank.
- Firstly turn the pedal axle in clockwise direction by hand.
- Use the wrench to fully tighten the pedal.
Left hand pedal
- Fit the left hand pedal "L" into the left hand crank.
- Firstly turn the pedal axle in counter-clockwise direction by hand.
- Use the wrench to fully tighten the pedal.
English

Click to see our supportive YouTube video https://youtu.be/Devel2ZhCAc
!! NOTE
- Save the tools provided with this product, after you completed the product assembly, for future service purposes.
Additional environmental information
Packaging disposal
Government guidelines ask that we reduce the amount of waste material disposed of in land fill sites. We therefore ask that you dispose of all packaging waste responsibly at public recycling centres.
End of life disposal
We at Tunturi hope you enjoy many years of enjoyable use from your fitness trainer. However, a Time will come when your fitness trainer will come to the end of its useful life. Under 'European WEEE Legislation you are responsible for the appropriate disposal of your fitness trainer to a recognised public collection facility.
Use
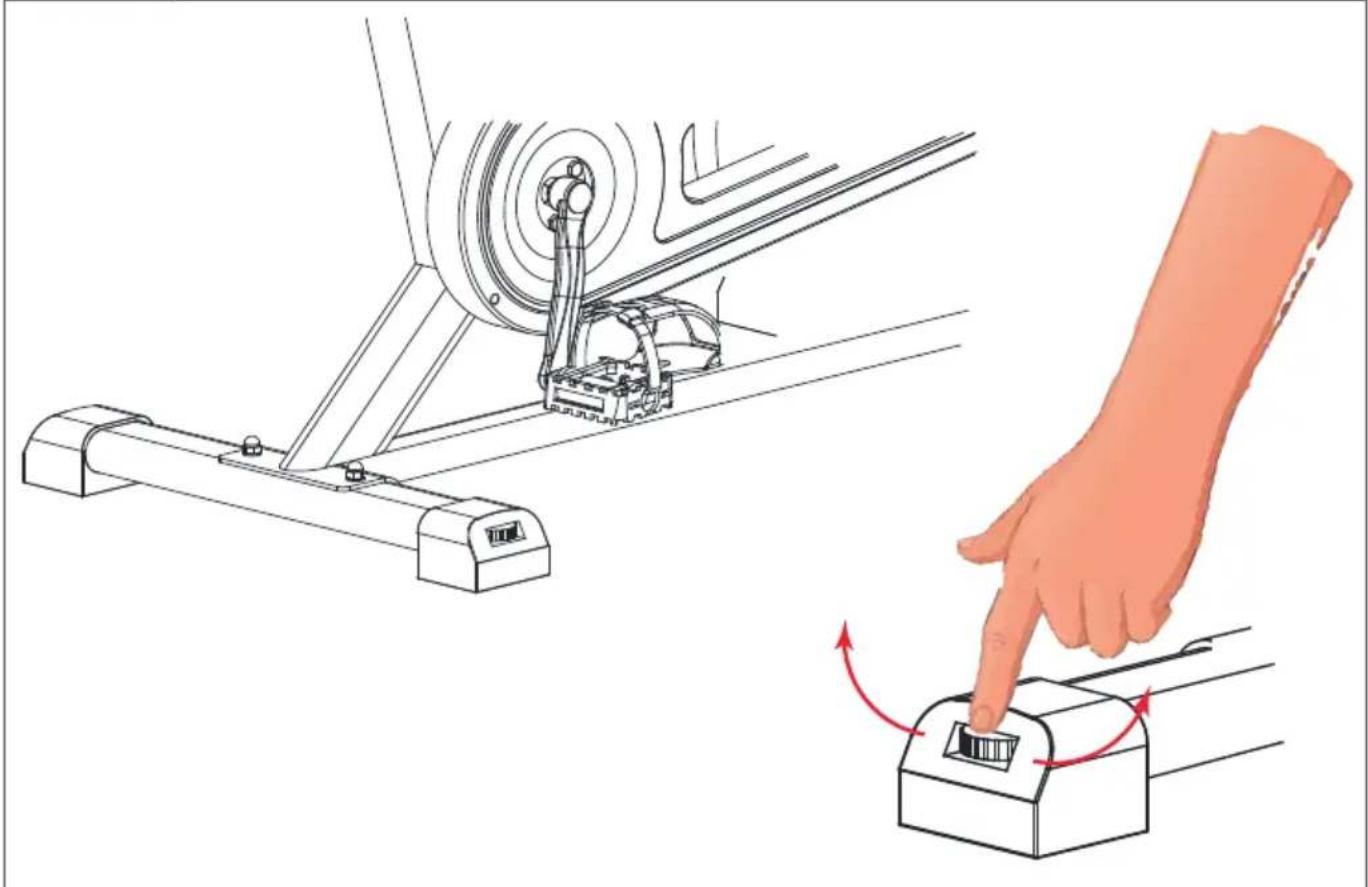
Adjusting the support feet (Fig. E-1)
The equipment is equipped with adjustable support feet.
If the equipment feels unstable, wobbly, or not levelled well, these support feet can be adjusted to make the required corrections.
- Turn the support feet in/ out as required to put the equipment in a stable and as well possible levelled position.
!! NOTE
- The machine is the most stable when all support feet are turned fully in. Therefore start to level the machine by turning all support feet fully in, before turning out the required support feet to stable the machine.
Adjusting the horizontal seat position
The horizontal seat position can be adjusted by setting the seat to the required position.
- Loosen the seat adjustment knob.
- Move the seat to the required position.
- Tighten the seat adjustment knob.
Adjusting the vertical seat position
The vertical seat position can be adjusted by setting the seat tube to the required position. With the leg almost straight, the arch of the foot must touch the pedal at its lowermost point.
- Loosen the seat tube adjustment knob.
- Move the seat tube to the required position.
- Tighten the seat tube adjustment knob.
Adjusting the handlebar
The handlebar can be adjusted according to the height and the exercise position of the user.
- Loosen the handlebar adjustment knob.
- Move the handlebar to the required position.
- Tighten the handlebar adjustment knob.
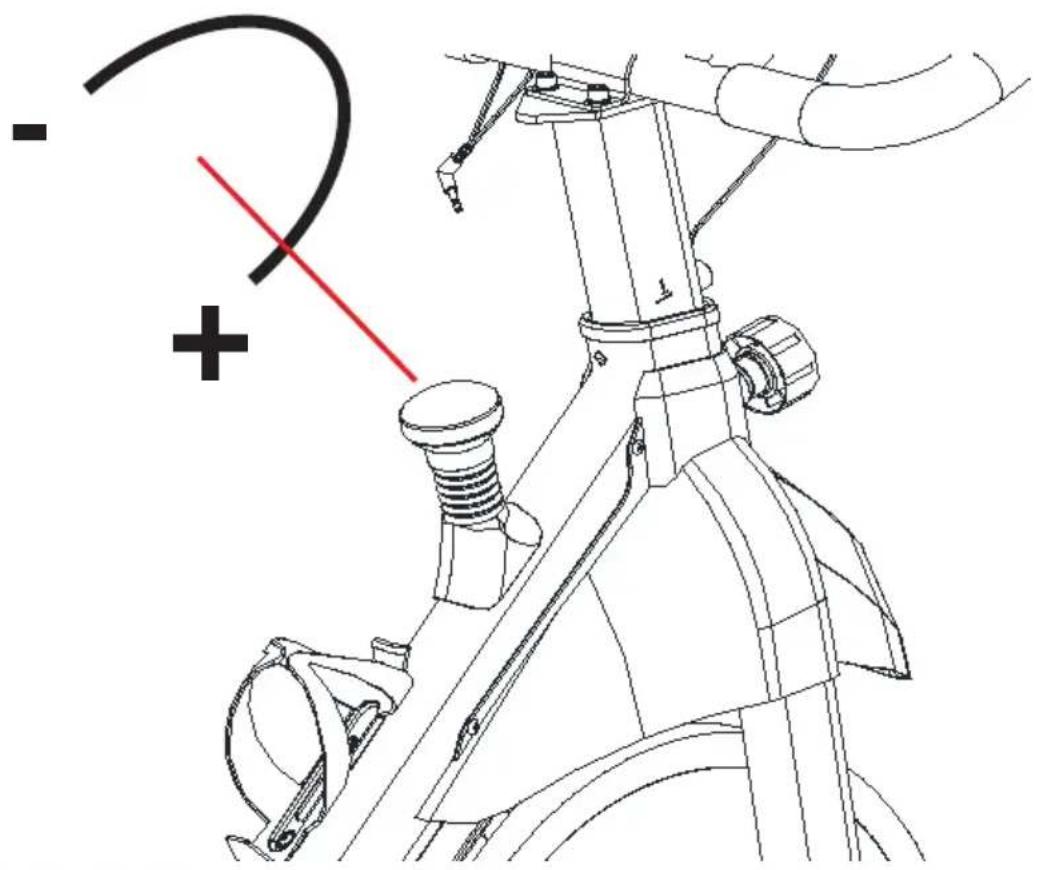
Adjusting resistance (Fig. F-1)
To increase or decrease resistance, turn the adjustment knob at the top of the handlebar support tube clockwise (+ direction) to increase resistance and counter-clockwise (- direction) to decrease resistance.
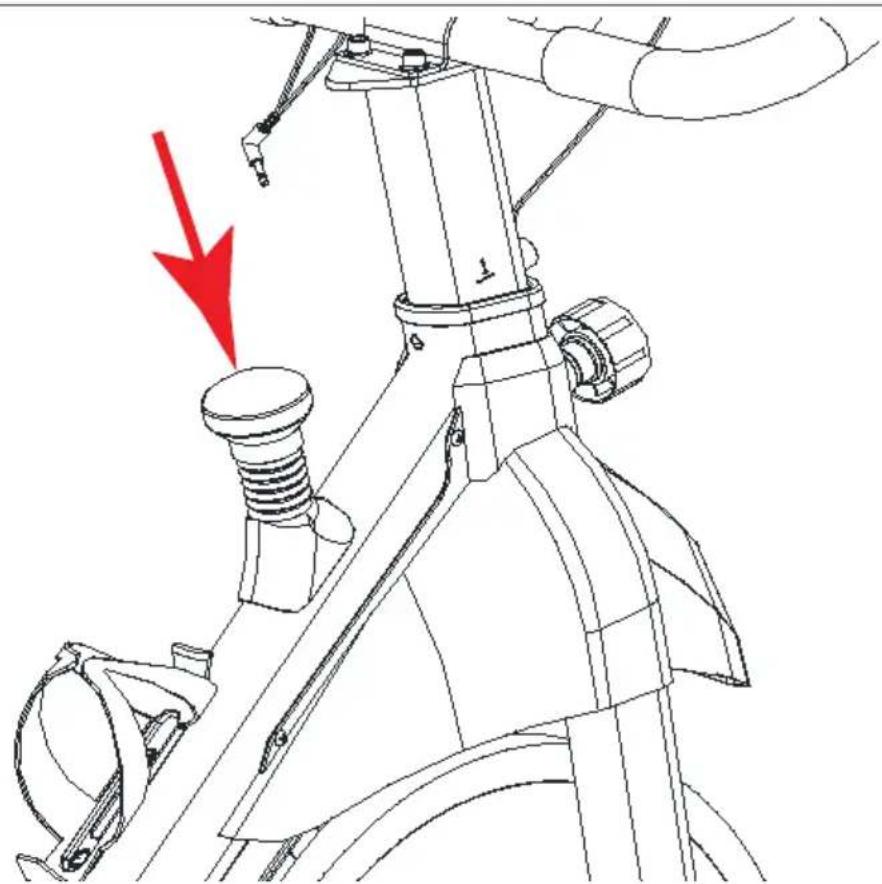
Emergency break knob (Fig. F-2)
To apply the brake, press down on the brake tension knob.
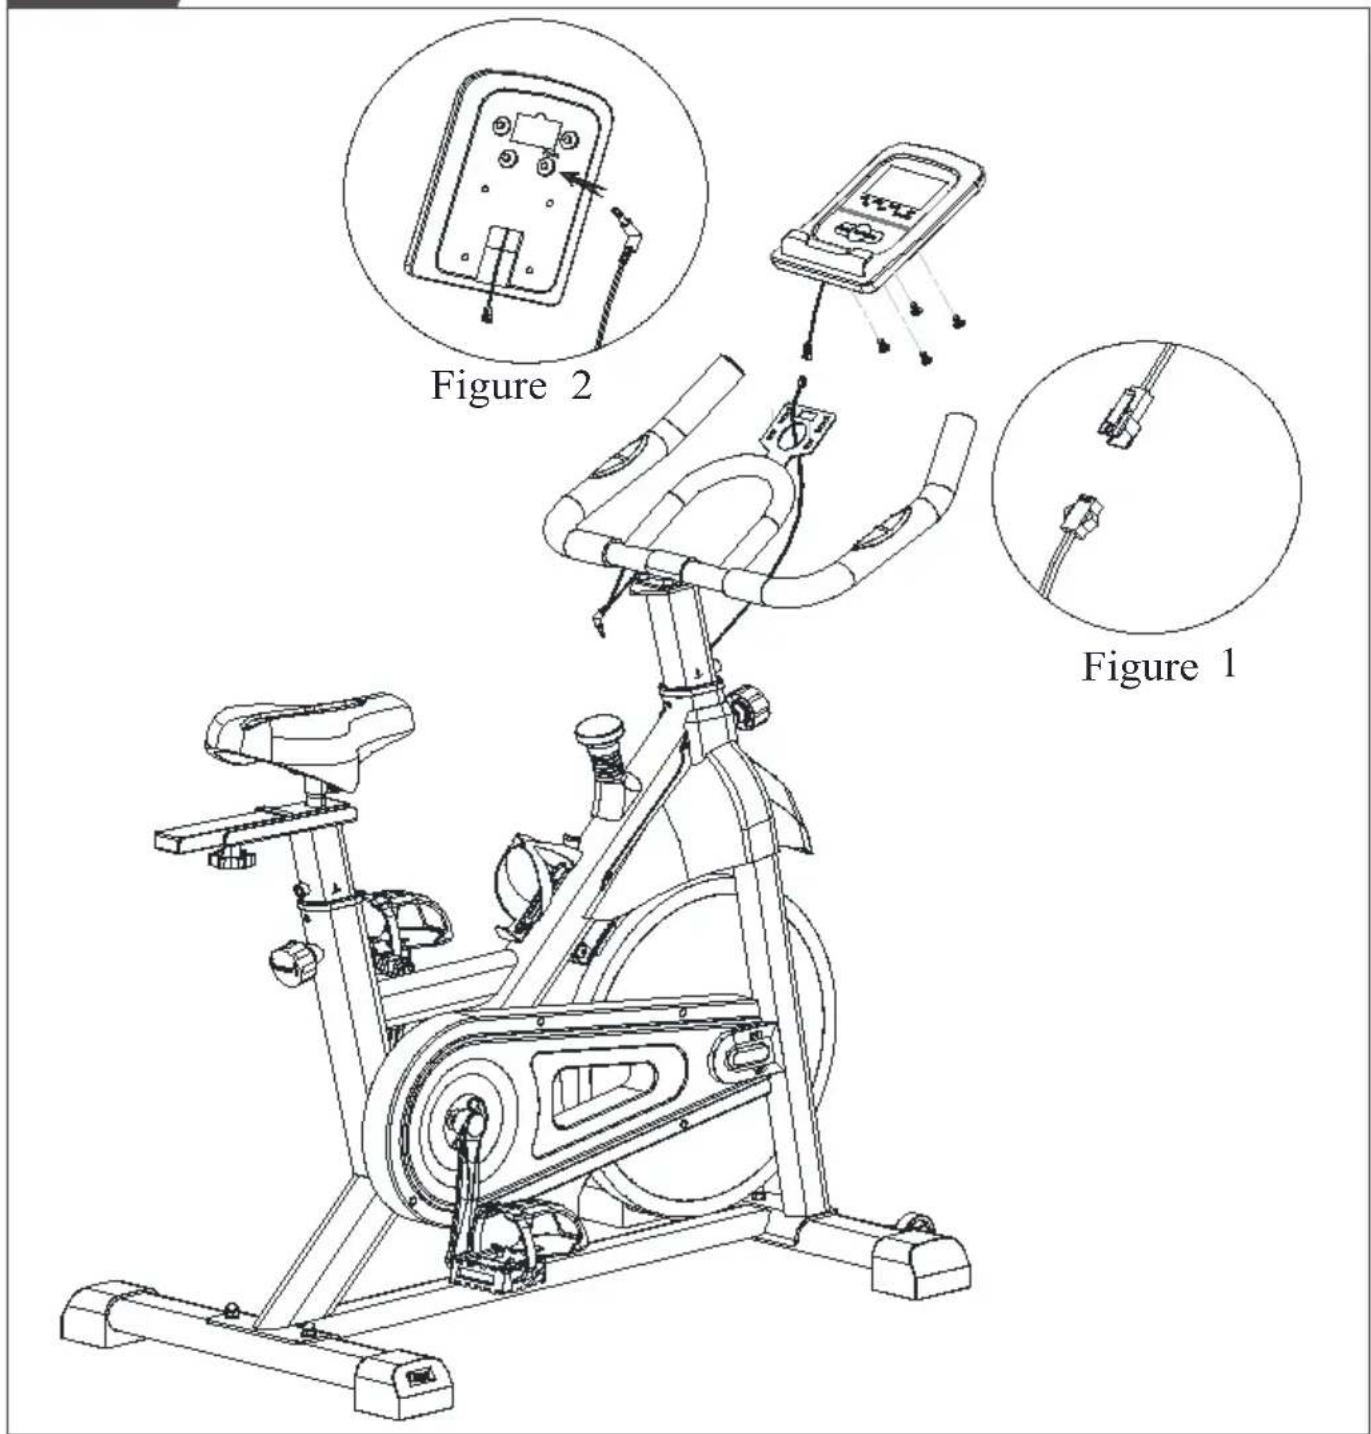
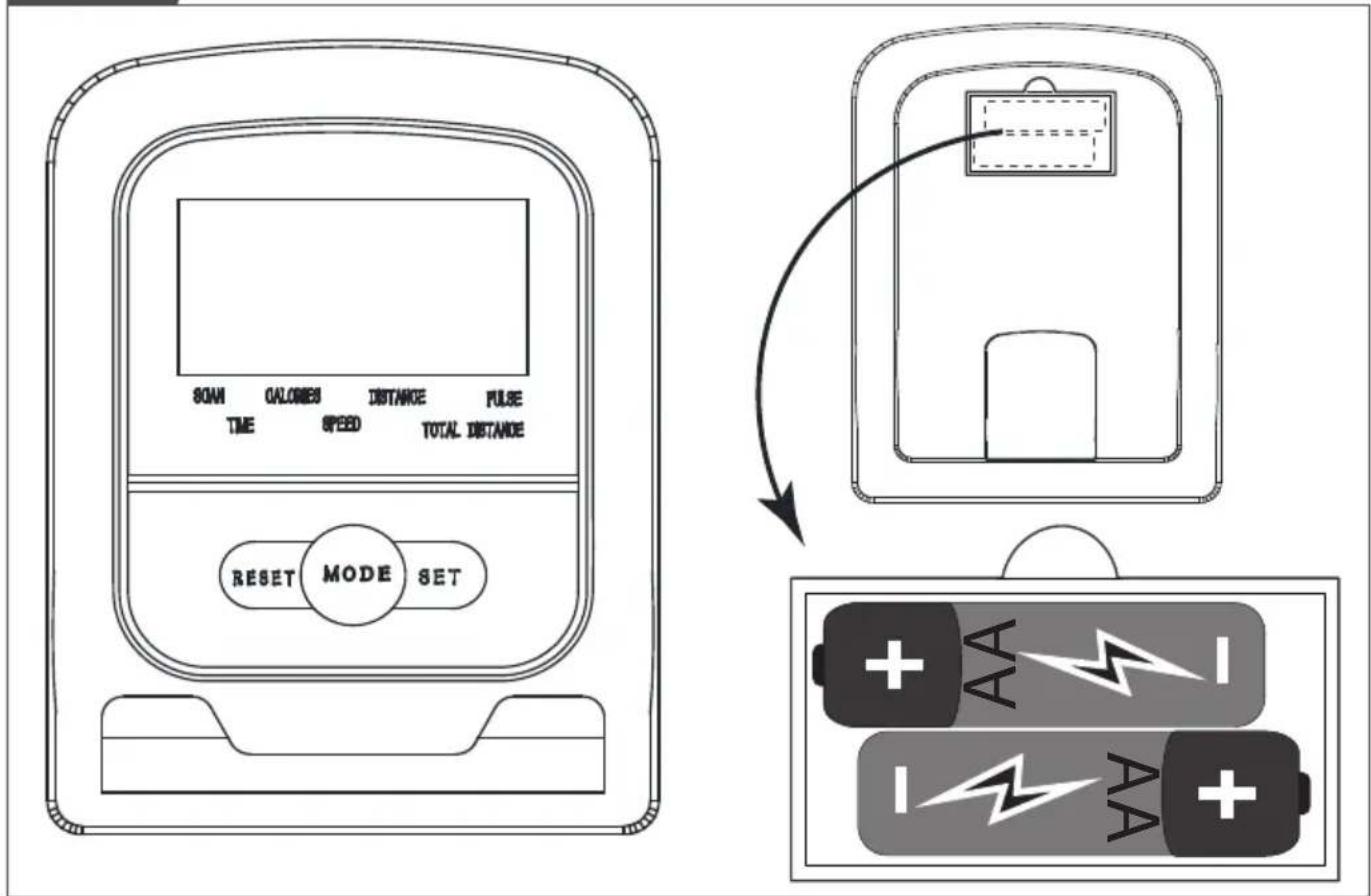
Replacing the batteries (Fig. E-2)
The console is equipped with 2 AA batteries at the rear of the console.
- Remove the console.
- Remove the old batteries.
- Insert the new batteries. Make sure that batteries match the (+) and (-) polarity markings.
- Mount the console.
Cleaning and maintenance
The equipment requires very little maintenance, please follow up on below instructions. The equipment does not require recalibration when it is assembled, used and serviced according to the instructions.
WARNING
- Do not use solvents to clean the equipment.
- Clean the equipment with a soft, absorbent cloth after each use.
- Regularly check that all screws and nuts are tight.
- If necessary, lubricate the joints.
- Cleaning and user maintenance shall not be made by children without supervision.
Warranty
Tunturi purchaser's warranty
Warranty terms
The consumer is entitled to the applicable legal rights stated in the national legislation concerning the commerce of consumer goods. This warranty does not restrict these rights. The Purchaser's Warranty is only valid if the item is used in an environment approved by Tunturi New Fitness BV, and is maintained as instructed for that particular equipment. The product-specific approved environment and maintenance instructions are stated in the "user manual" of the product. The "user manual" can be downloaded from our website. http://manuals.tunturi.com
Declaration of the manufacturer
Tunturi New Fitness BV declares that the Cardio Fit S20 Racing bike is in conformity with the following standards and directives:
- RoHS Directive (2011/65/EU)
- General Product Safety Regulation (GPSR) – (EU) 2023/988
- Battery Regulation (EU) 2023/1542.
Hereby, Tunturi New Fitness BV declares that the radio equipment type Cardio Fit S20 Racing bike is in compliance with Directive 2014/53/EU.
The full text of the EU declaration of conformity is available at the following internet address: https://doc.tunturi.com
Tunturi New Fitness BV
Purmerweg 1
1311 XE Almere
The Netherlands
Disclaimer
© 2025 Tunturi New Fitness BV All rights reserved.
- The product and the manual are subject to change.
- Specifications can be changed without further notice.
- Check our website for the latest user manual version.

natural_image
Green recycling symbol with leafy branches and a circular recycling arrow inside an open book (no text or symbols)Tunturi New Fitness BV
Purmerweg 1
1311 XE Almere
Die Niederlande
Haftungsausschluss
natural_image
Green recycling symbol with a tree and recycling arrow inside a partial square frame (no text or symbols)Tunturi New Fitness BV
Purmerweg 1
1311 XE Almere
Pays-Bas
© 2025 Tunturi New Fitness BV
natural_image
Green recycling symbol with a tree and recycling arrow inside a book (no text or symbols)Tunturi New Fitness BV
Purmerweg 1
1311 XE Almere
Nederland
Nederlands
Disclaimer
© 2025 Tunturi New Fitness BV
natural_image
Green recycling symbol with a tree and recycling arrow inside a partial square frame (no text or symbols)Tunturi New Fitness BV
Purmerweg 1
1311 XE Almere
Paesi Bassi
natural_image
Green recycling symbol with a tree and recycling arrow inside a book (no text or symbols)Tunturi New Fitness BV
Purmerweg 1
1311 XE Almere
Los países bajos
Español
natural_image
Green recycling symbol with a tree and recycling arrow inside a partial square frame (no text or symbols)Tunturi New Fitness BV
Purmerweg 1
1311 XE Almere
Nederländerna
Friskrivning
natural_image
Green recycling symbol with a tree and recycling arrow inside a partial square frame (no text or symbols)Tunturi New Fitness BV
Purmerweg 1
1311 XE Almere
Alankomaat