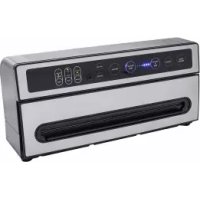
Chamber Vac Pro 5702 - Vacuum packaging machines Solis - Free user manual and instructions
Find the device manual for free Chamber Vac Pro 5702 Solis in PDF.


User questions about Chamber Vac Pro 5702 Solis
0 question about this device. Answer the ones you know or ask your own.
Ask a new question about this device
Download the instructions for your Vacuum packaging machines in PDF format for free! Find your manual Chamber Vac Pro 5702 - Solis and take your electronic device back in hand. On this page are published all the documents necessary for the use of your device. Chamber Vac Pro 5702 by Solis.
USER MANUAL Chamber Vac Pro 5702 Solis
5 Taste Vacuum & Seal
5 Touche Vacuum & Seal
env. 37,0 x 27,0 x 42,0 cm
Poids
env. 14,4 kg
IMPORTANT SAFETY PRECAUTIONS
Please read through this user manual thoroughly before using your Solis vacuum sealer, so that you become familiar with your appliance and can use it safely. We thoroughly recommend that you keep these instructions and, if you pass the appliance on, that you also hand these instructions to the new owner.
For your own safety, please observe the following safety measures when using electrical appliances:
- To prevent electric shock, neither the vacuum sealer nor the power cord and the power plug must come into contact with water or any other liquids. Risk of electric shock! Water might get into the casing and damage the appliance! Should the appliance resp. the power cord or the power plug come into contact with water, use dry rubber gloves to immediately pull the power plug from the socket. Do not start using it again before having it checked for functionality and safety by Solis or a service centre authorized by Solis.
- Do not operate the appliance resp. pull or connect the plug with wet or moist hands or feet.
- Before using the appliance, check that the voltage stated on the type plate of your appliance matches your mains voltage. We do not recommend operating the appliance with a multiway plug adapter.
- Do not make any adjustments to the appliance, cable, plug or accessories.
- Use the appliance only as described in this manual to vacuum seal food. Do not use the appliance outdoors and protect it from moisture and wetness.
-
Do not leave the power cable hanging over table edges to prevent the appliance from being pulled down. Make sure that neither the appliance nor the power cord or plug comes into contact with hot surfaces, such as hotplates or a radiator, or that they come into contact with the appliance itself.
-
Install the power cord so that nobody can trip over it. Keep clear of pointed objects.
- Do not roll or tie the power cord up.
- Never carry the appliance by the power cord and do not place anything on the power cord. Never pull on the power cord to disconnect the appliance from the power mains. Only pull on the plug.
- We recommend that you do not use an extension cable with this appliance. Do not place the appliance directly underneath a power socket.
- Keep the appliance away from hot gas, hot ovens and other heat-emitting appliances or heat sources. Never use the appliance on a hot or wet surface. Never place the appliance near moisture, heat and naked flames. Keep the appliance away from moving parts or appliances.
- The appliance has to be placed on a solid, level, dry, stable and moisture resistant work surface. Never use the vacuum sealer near the edge of a table.
- Keep a minimum safety distance of 20~cm between the appliance and walls, curtains or other materials and objects and make sure that the air around the appliance can circulate freely.
- Never cover the appliance with cloths or the like while it is in use. Do not place anything on top of the vacuum sealer.
- Never place the appliance in such a way that it might fall into water or come into contact with water (e.g. in or next to a sink).
- The appliance is not designed for outdoor use. The appliance must not come into contact with rain. Do not use in vehicles or on boats.
- Never submerge the appliance, power cord or plug in water, or bring it into contact with water or other liquids.
- Unplug the appliance when it is not in use or unattended, and before cleaning. We recommend the use of a residual current
device (RCD safety switch) to ensure additional protection during the use of electrical appliances. It is advisable to use a safety switch with a rated residual operating current of 30mA maximum. For professional advice consult an electrician.
- Always make sure that the appliance is not in use and that it has been switched off with the ON/OFF switch before disconnecting the power plug from the power socket.
- Do not make any adjustments to the appliance, the power cord, the plug or the accessories.
- Never leave the vacuum sealer unsupervised during use! Incorrect use may cause injury!
- Never reach for an appliance that has fallen into water or other liquids. Always use dry rubber gloves to pull the plug before taking it out. Do not start using it again before having it checked for functionality and safety by Solis or a service centre authorized by Solis.
- Place the appliance so that it is never exposed to direct sunlight.
- Never insert any objects or tool into appliance openings. The appliance may become damaged - danger of electric shock!
- Always disconnect the power plug before attaching or removing parts.
- Never use the appliance while the vacuum chamber is empty, meaning never let the appliance run idly.
- Always make sure that the appliance is correctly assembled before connecting it to a power socket and starting to use it.
-
Do not shake or move the appliance while it is in use. Never move the appliance while it is plugged in! Before moving the appliance, you should switch it off with the ON/OFF switch and pull the power plug.
-
Only use the appliance as described in this manual. Only use with the provided accessories or accessories recommended by Solis, incorrect accessories or misuse can lead to damage of the appliance, fire, electric shock or personal damage.
- Never use the appliance with an external timer switch or remote control.
- The appliance is only suited for household use and not for commercial use.
- Remove and discard all packaging materials and potential stickers or labels (except for the type plate) before using the appliance for the first time.
- Check your vacuum sealer before every use to make sure that the appliance, the power cord and the power plug are without damage and no parts have come loose.
- To prevent electric shock, do not use the appliance if cord or power plug are damaged or if the appliance has other faults, has fallen down resp. is damaged in any other way or if parts have come loose. Never attempt repairs yourself but take the appliance to Solis or a service centre authorized by Solis in order to get it inspected, repaired or mechanically and electrically maintained, in order to avoid a hazard.
-
People with limited physical, sensorial or mental capabilities as well as unknowing or inexperienced people and children must not use the vacuum sealer except when supervised or thoroughly instructed on how to use the appliance by a person responsible for their safety. Additionally, they must be aware of the dangers arising from the appliance and know how to operate it safely. Cleaning and maintenance of the appliance must not be done by unsupervised children. Under no circumstances must the appliance be used or cleaned by children under the age of 8. The appliance and its power cord have to kept away from children under the age of 8.
-
Keep the appliance and the power cord away from children and pets.
- Children must be supervised, so that they do not play with the vacuum sealer.
- To prevent the sealing bar from overheating, a cool down time of at least 1 minute has to be kept after each sealing resp. vacuum sealing process.
- Before using, always check that your hands are clean and dry.
- Please use only the vacuum bags specifically manufactured by Solis for this appliance. Use the appliance only for vacuuming and sealing resp. marinating, never use the device for any other purpose.
- Do not place anything on the appliance while it is in use or in storage.
- Switch the appliance off after every use with the ON/OFF switch and pull the power plug. Only then is the appliance definitely switched off.
- The appliance has to be cleaned after every use. Please refer to the notes given in the section "Cleaning and Care" on page 130 of this manual.
- When cleaning the casing and the vacuum chamber, please use nothing more than a dry or slightly moist towel. Never use aggressive, abrasive or acidic detergents for cleaning.
- Always hold the vacuum sealer by its grips on the left and right side when lifting or moving the appliance. Always switch the appliance off first, pull the power plug and remove foods potentially left in the vacuum chamber. Always take great care when moving the appliance and do not shake or throw it. It might be damaged.
-
Keep your fingers and hands clear of the hinge of the lid when opening or closing the lid.
-
Should you notice a strange smell or sound, pull the plug. Do not start using the appliance again before having its functionality and safety checked by Solis or a service centre authorised by Solis.
- Oils or lubricants must not be used with this appliance.
- Never touch the sealing bar shortly after a vacuum sealing process! The sealing bar is strongly heated and could injure you!
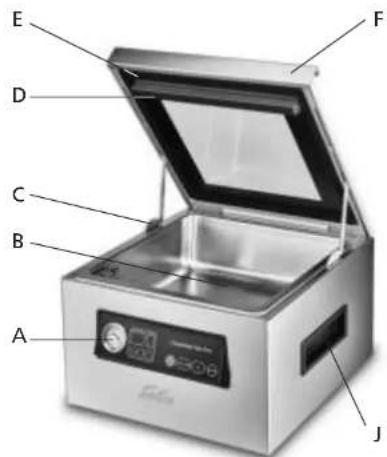
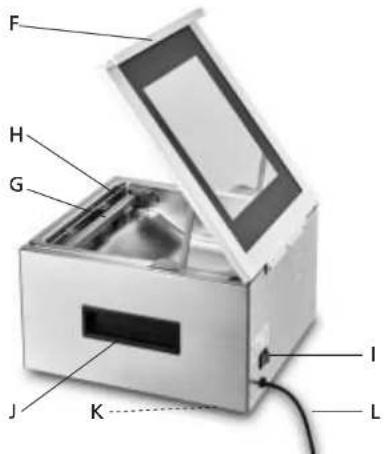

APPLIANCE DESCRIPTION
A Control panel with touch sensitive sensor buttons, display and vacuum pressure gauge
You can find a full description of the buttons and their functions as well as information on the displays on pages 114 and 115.
The needle of the vacuum pressure gauge indicates the current vacuum pressure in the vacuum chamber.
B Vacuum chamber
The bag with the food that is to be sealed resp. the container with the food you wish to marinate is placed in the vacuum chamber.
C Lid hinge
The lid hinges are equipped with a shock absorbing mechanism, cushioning and slowly lowering the lid.
D Rubber contact strip
The rubber contact strip is the counterpart to the sealing bar, pressing the bag end evenly against the sealing bar and optimally sealing it.
E Gasket
Thanks to the gasket, the lid air-tightly seals the vacuum chamber. The gasket has to be clean and dry at all times, if it is damaged, it has to be replaced.
F Appliance lid with handle and window
G Sealing bar, removable
The sealing bar heats up and seals the bag end. The duration of the sealing process can be adjusted manually.
H Bag fixation clamp with 2 metal surfaces
The bag end has to be clamped in under the liftable clamp; when folded down, the clamp is held against the two metal surfaces by two magnets, holding the bag end in place and preventing it from shifting. When vacuuming, the upper bag end has to be placed on the two metal surfaces, the lower bag end has to be placed under the two metal surfaces.
I ON/OFF switch on the appliance back side
J Carrying handles on the left and right of the appliance
K Slip-safe rubber feet
L Power cord
THE FUNCTION BUTTON AND THE DISPLAYS
GB

For your control, the control light of the Vacuum & Seal, Seal or Marinate buttons lights up, depending on the function you have selected by touching the corresponding button. Once a function has been completed, the corresponding control light goes out.
- Additionally, the displays for the set Vacuum Time and the set Seal Time light up in the display. During the vacuuming and sealing processes, the time counts down to "0", indicating the current progress.
1 Set button
You can use the Set button to select the parameters for changing the Vacuum Time and Seal Time settings.
Each press of the Set button switches between the two settings, the adjustable time parameter flashes.
Vacuum Time: adjustable between 20 and 99 seconds
(Standard setting: 50 seconds)
Seal Time:adjustable between 3 and 9 seconds
(Standard setting: 5 seconds)
2 + button
You can use the + button to set a Vacuum Time up to 99 seconds (in 5 second intervals resp. in 4 second intervals between 95 and 99) resp. a Seal Time up to 9 seconds (in 1 second intervals).
3 - button
You can use the - button to set a Vacuum Time down to 20 seconds (in 5 second intervals resp. in 4 second intervals between 95 and 99) resp. a Seal Time down to 3 seconds (in 1 second intervals).
4 Cancel button
If you touch the Cancel button during use, the current vacuuming, marinating and sealing processes are immediately interrupted.
5 Vacuum & Seal button
This button starts the vacuuming process first and then automatically seals the bag. The displays count down both time settings until they reach "0". During the vacuuming process, only the Vacuum & Seal control light is lit up, once the sealing process starts, the light next to Seal lights up as well. When the process is finished, both control lights keep flashing for a few seconds, once both processes have ended, both lights go out.
Note: A break of at least 1 minute should be taken between two vacuuming and sealing processes.
6 Seal button
This button serves 2 functions:
- For manually sealing film bags, e.g. if you want to make a bag yourself from a roll of film and require to seal one bag end first.
Note: Even if you merely want to seal a bag, the appliance starts the vacuuming process for 20 seconds in any case before the sealing process starts. This is to make sure that the seal is air-tight. - For premature termination of the vacuuming process, if the bag contains especially sensitive or pressure sensitive food. In this case, wait for a vacuum pressure of -25^ to form (You can tell the pressure from the needle in the vacuum pressure gauge) and then touch the Seal button. The evacuation pump stops immediately and the sealing process starts. As long as the appliance is sealing, the control light next to Seal is lit up and the Seal Time display is counting down the time. After that, the Seal control light flashes a few times, once it goes out completely, the process is completed.
Note: A break of at least 1 minute should be taken between two sealing processes.
7 Marinate button
You can use this button to marinate foods covered in marinade on a plate or in a container in the vacuum chamber. The appliance produces a vacuum in the standard setting of 99 seconds but does not start the sealing process afterwards. The Marinate control light lights up during the marinating process, the display next to Vacuum Time counts down from 99 to "0". After that, the control light continues to flash a few times. Once the process is completed, the control light goes out. We recommend performing the marinating process 3 times in total.
SETTING THE VACUUM TIME
After plugging the machine in and switching it on with the ON/OFF button, touch the Set button multiple times until the Vacuum Time display starts flashing. Now, use the + and - buttons to set a vacuum time between 20 and 99 seconds.
Depending on the food and the bag size, the vacuum time can be adjusted. The longer the vacuum time, the stronger the food will be vacuumed. The table shown below gives recommendations to that:
| For Examples Vacuum | Time | (in sec.) |
| General usage Standard | setting, suitable for nor-mal sized bags and all kinds of meat and vegetables | 50 |
| Soft or fragile foods and those that need to be vacuum sealed gently | Bread, potato chips, fruit etc. | 20-40 |
| Normal bag sizes All bag sizes with a format smaller than 22 x 30 cm (approx. DIN A4) | 40-60 | |
| Large bag sizes, larger foods | Large bags with approx. 30 x 33 cm, filled | 60-80 |
| Foods that need to be vacuumed strongly, liquids | Soups, sauces | 60-80 |
| Foods that need to be vacuumed extremely strong | Marinating foods | 99 |
SETTING THE SEAL TIME
After plugging the machine in and switching it on with the ON/OFF button, touch the Set button multiple times until the Seal Time display starts flashing. Now, use the + and - buttons to set a sealing time between 3 and 9 seconds.
Depending on the ambient temperature and the moisture content of the food, the recommended seal times vary. The table shown below gives recommendations to that:
| For Examples Seal Time | (in sec.) | |
| Normal vacuum bags No | normal vacuum bag with dry con- tents, at ambient temperature | 6 |
| Wet vacuum bags Wet PE-bags or thin vacuum bags | 4-6 | |
| Normal vacuum bags at cold or wet conditions | Usage in rooms below 12°C | 6-7 |
| Moist/wet bags or cold conditions | Wet bags with moist resp. liquid foods | 7-8 |
GENERAL INFORMATION:
- Always slightly squeeze the remaining air out of the bag before closing the appliance lid and starting the vacuuming process.
- Always place the bag end straight, flat and without folds on the sealing bar. The bag end should be held in place by the bag fixation clamp.
- Large and fairly empty bags always need a bit more vacuum time than small bags.
- The stronger you wish to vacuum the bag, the longer the vacuum time should be.
- Fresh fruit and vegetables always emit gases and therefore should not be vacuumed. Additionally, the vacuum pressure could squeeze and damage them.
- To achieve best results when marinating, you should perform the marination process 3 times in a row.
- Always make sure that the seal runs the length of the bag and that it is flat and uniform. For safety, the seal time can always be increased by 1 or 2 seconds.
- Generally when using the appliance in cold conditions, set the seal time 1 or 2 seconds longer.
- The bag end should always be clean and dry, increase the seal time by 2 seconds if the bag end is wet or if the bag contains liquid.
OPERATION
Caution: Before using the appliance always make sure that the appliance and the bags are absolutely clean and free of damage so that food does not get contaminated.
Appliance installation
Place the appliance on a suitably large, stable, horizontal, clean, moisture resistant and dry work surface.
Connecting the power plug / Switching the appliance on
Connect the power plug to a suitable power outlet and switch the appliance on with the ON/OFF switch on the appliance back side. The two displays light up: 60 in the Vacuum Time display and 5 in the Seal Time display (standard setting).
Note: Should you use ready made vacuum bags, you can proceed directly to point II. of these instructions.
I. MAKING A BAG FROM VACUUM FILM: SEAL FUNCTION (6)
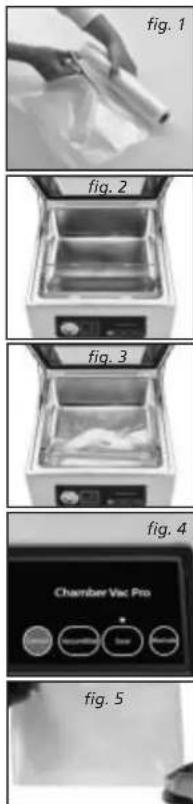
- Use scissors to cut a sufficiently large length of film. (See fig. 1)
- Open the lid of the appliance wide enough to lock it into place. Fold up the bag fixation clamp (H), the clamp stays up. (See fig. 2)
- Place an open bag end on the sealing bar (G) and under the bag fixation clamp. Make sure that the bag end is flat and without folds on the sealing bar.
- Fold the bag fixation clamp back down, the two magnets hold the bag fixation clamp in place on the metal surfaces and the bag end is firmly placed on the sealing bar. (See fig. 3)
- Close the lid so that it lies in place on the chamber. If required, change the sealing time by first touching the Set button until Seal Time is displayed and then using the + and - buttons to adjust the time.
- Touch the Seal button to seal the bag end, the control light next to Seal lights up (see fig.4). The Vacuum Time display states "0" and the evacuation pump starts up to evacuate the air between the bag and the sealing bar. Then, the Seal Time starts counting down to "0". Afterwards, the control light next to Seal flashes for a few seconds. Only when the control light stops flashing and has gone out is the sealing process complete.
Caution: To make sure that no air can get from the edge of the lid into the vacuum chamber, we recommend pushing the lid down for the first few seconds of the sealing process.
- Once the control light next to Seal has gone out, open the appliance lid. Fold the bag fixation clamp up and remove the bag with the sealed end.
- Make sure that the seal is straight and without folds. Should this not be the case, cut the seal off and repeat the process. (See fig. 5)
II. AUTOMATIC VACUUMING AND SEALING OF A BAG: FUNCTION VACUUM & SEAL (5)
- Open the lid of the appliance wide enough to lock it into place.
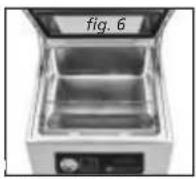
- Fold up the bag fixation clamp, it stays up. (See fig.6)
- Place the fresh food into the bag. Please use the original Solis vacuum bags or vacuum film exclusively to avoid damage to the appliance and to ensure best results.
For item-numbers and descriptions, please read the enclosed order form. You can purchase accessories for your vacuum sealer in good retailers or you get them from Sofis. You can find the contact addresses at the end of this manual.
4. Clean the open bag end on the inside and the outside and smooth out the creases. The end has to be free of dust and without folds. Gently push down on the bag so that the excess air can escape from the bag and the evacuation pump has less pumping to perform.
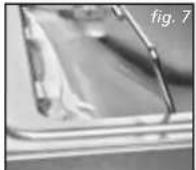
5. Place the open bag end on the sealing bar. Important: Make sure that the upper bag end lies above the two metal surfaces of the bag fixation clamp and the lower bag end underneath the two metal surfaces so that the bag end basically embraces the two metal surfaces. This is to make sure that the air can be fully evacuated from the bag. (See fig.7)
6. Fold the bag fixation damp back down, the two magnets hold the clamp firmly against the metal surfaces and the bag end is firmly placed on the sealing bar.
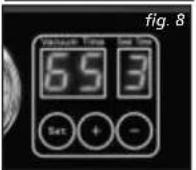
7. Close the lid so that it is placed on the chamber. If required, adjust the vacuum and seal times by touching the Set button until either the Vacuum Time or the Seal Time displays start flashing and then use the + or - button to adjust the time in the corresponding position (see fig.8) (please refer to the tables on pages 116 and 117).
- Then, touch the Vacuum & Seal button. Now, your appliance vacuums and seals the bag automatically. First, the control light next to Vacuum & Seal lights up, once the sealing process starts, the control light next to Seal lights up as well. The Vacuum Time display counts down to "0", then, the Seal Time display counts down to "0" as well. Afterwards, the two control lights next to Vacuum & Seal and Seal flash for a few seconds. Once the entire process has been completed, these two control lights go out.
Caution: To make sure that no air can get from the edge of the lid into the vacuum chamber, we recommend pushing the lid down for the first few seconds of the vacuuming process.
Note: The appliance creates a high pressure vacuum in the bag. The pressure could easily squeeze fragile foods. When vacuuming fragile foods, we recommend either setting the vacuum time to 30 - 40 seconds or touching the Seal button once the needle in the vacuum pressure gauge has reached -25^ . The appliance then automatically switches off the evacuation pump and starts sealing the bag.
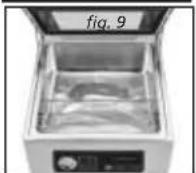
- When vacuuming and sealing are completed, meaning when no lights are flashing next to the Seal and the Vacuum & Seal buttons, you can open the lid up all the way and remove the vacuumed and sealed bag. (See fig. 9)
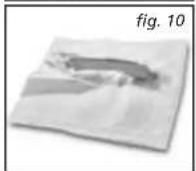
- Check whether the new seal seam is straight and uncreased (see fig. 10). Should this not be the case, repeat the process after cutting off the weld.
GOOD TO KNOW:
In order for the appliance to perform best, it should be left for at least 1 minute to cool before you inserting the next bag. Wipe away potentially escaped liquid in the vacuum chamber after each use.
If you do not keep the cool down time of at least 1 minute in the vacuum chamber of the appliance and try to keep on vacuuming, the sealing bar will overheat, possibly sustaining permanent damage.
Only Solis vacuum bags or films should be used, please do not use any other bags in order to achieve optimal results and prevent damage to the appliance. Defects caused by the use of improper accessories and supplies have to be fixed at the owner's expense even within the warranty period.
There are Solis vacuum bags in different sizes or vacuum bag film with which you can set the bag size. Always choose a bag size appropriate for the food. Keep in mind that the bag should be at least 8 cm larger than the food and you will need an additional 2 cm for the weld. For item numbers and descriptions, please refer to the enclosed order form. You can purchase accessories for you vacuum sealer in good stores or you get them from Solis. You can find the contact addresses at the end of this manual.
- Use scissors to open a vacuum sealed bag and take out the food.
- If you vacuum slightly moist foods or liquids, moisture can get into the vacuum chamber. Clean the vacuum chamber with a slightly moist towel and dry it afterwards.
III. MARINATING FOODS: MARINATE FUNCTION (7)
- With the marinating function, you can marinate foods such as meat and fish. In the marinate function, the vacuuming process is switched on for 99 seconds before the appliance switches off. The sealing process is not started.
- Place the marinade-covered foods in an open container or on a plate that fits the size of the vacuum chamber.
- Open the lid of the appliance all the way to lock it into place.
- Place the container or plate in the vacuum chamber.
- Close the lid.
- Touch the Marinate button, the standard setting of 99 seconds lights up in the Vacuum Time display. You should not change this setting.
- The Marinate control light lights up, the display Vacuum Time counts down to "0". Afterwards, the control light next to Marinate flashes for a few seconds. Once the marinating process is completed, the control light goes out.
- Repeat this marinating process (steps 5 and 6) two more times to optimally marinate the food.
- Open the lid and remove the plate resp. the container.
TIPS FOR OPTIMAL VACUUMING
- Do not overfill the bag. Always leave enough empty space on the open bag end to allow the bag end to be easily positioned around the metal surfaces and under the bag fixation clamp. Calculate with 8 cm of space between the bag contents and the bag end plus 2 cm for the seal and additional 2,5 cm for each time you plan to open and vacuum the bag again.
- The open bag end should not be wet, as wet bags can not be sealed tightly. If you wish to vacuum liquids, increase the vacuum time to 60 - 80 seconds and the seal time to 8 seconds.
- Clean the open bag end and pull it straight, before you seal it. Make sure that there is no food residue on the end of the bag and that there are no creases in the end of the bag. The sealed weld must be completely smooth, otherwise it will not be airtight.
- Never leave too much air in the bag. Press on the bag a little to get most of the air out before vacuuming. Too much air in the bag means more work for the evacuation pump, which could overload the motor. The consequence could be that not all of the air is vacuumed out of the bag.
- Do not vacuum foods with sharp edges, like e.g. fish bones and mussels. The sharp edges could perforate the film and impair its tightness. Wrap the sharp edges and ends with folded kitchen paper to prevent them from damaging the film resp. causing holes.
- You should wait for at least 1 minute after every vacuum programme before you vacuum the next bag, so that the appliance can cool down.
- If the necessary vacuum pressure has not been reached after two minutes for any reason, the appliance switches off automatically. In this case, please check if the lid does not shut tightly and if the seals are dirty or impaired due to an age-related issue.
- During the vacuuming process, small amounts of liquid, crumbs or other parts of food can be sucked into the vacuum chamber. Clean the vacuum chamber if necessary after every vacuuming process. When vacuuming powdery or finely ground foods, please note: Do not overfill the bag and insert a piece of kitchen paper as a border before vacuuming the bag.
- In general fruits should be pre-frozen and vegetables blanched before vacuuming in order to achieve best results.
-
Sensitive foods like pastry or berries should be vacuumed with a lower vacuum time setting (30 - 40 seconds). Alternatively, they have to be pre-frozen for 24 hours before being vacuum sealed in the bag.
-
Liquids must always be cooled before vacuuming. Hot liquids foam or form bubbles and increase in volume if they are vacuumed.
- Keep perishable foods in the freezer or fridge. Vacuum packing extends the life of food, but does not turn it into a "preserve", e.g. a stable product at ambient temperature.
- Fill a bag 2/3 full with water, seal the end of the bag (do no vacuum!) and lay the bag in the freezer. You can use the ice for cooling drinks but also for sporting injuries.
- Many foods are already vacuum packed when bought. With our vacuum sealer, you can vacuum them again (in Solis bags!), if the packaging has been opened, so that it stays fresh and retains it's full flavour. However, these foods should still be consumed up until the date printed on the original packaging.
- Cereals such as flour, rice and cake mixes stay fresh longer if they are vacuum packed. Nuts and spices hold their flavour better and will not go rancid. Ideal for long journeys.
- Foods with sharp edges and points, such as bones or dry pasta should be wrapped in kitchen paper so that they can no longer damage the bag or cause punctures.
- You can also vacuum pack more than just food. Camping products such as matches, first aid bandages or clothing stay clean and dry when vacuum packed. Vacuum packed silverware doesn't tarnish, a vacuum packed candle is always advisable.
- The main use of the vacuum sealer is to conveniently keep many foods fresh for longer without losing their flavour. In general you could say that vacuum packing quadruples the shelf life of foods in comparison to traditional storage methods. Once you have enjoyed the advantages of this appliance, it will soon become indispensable to you and you will have to throw much less food away and thereby save money.
Sensible ideas:
a) Cook larger portions in advance and vacuum into individual portions or meals.
b) Vacuum packing is excellent for keeping pre-prepared foods fresh for pick nicks, camping expeditions and barbecues.
c) Vacuum packing reduces freezer burn.
d) Vacuum pack meat, fish, poultry and seafood before you put them in the fridge or freeze them.
e) Also keeps dried fruits, beans, nuts and cereals fresh for longer.
- Vacuum packing enables you to live health consciously, or pre-cooking meals specifically with suitable ingredients if you suffer from allergies; you can weigh ingredients exactly if you want to diet and have to work in an office, or if you would like to take vacuumed home-made meals in, without any hassle.
- Always use the freshest possible foods.
- Delicate products such as meat, fish, berries etc. should be pre-frozen so that they are not crushed during vacuuming. Foods can be frozen for up to 24 hours without freezer burn occurring - this fact is something we will make use of. Ideally food should be split into portions before freezing. As soon as they are frozen (after about 24 hours) vacuum them in Solis vacuum bags and return them to the freezer.
- Soups, stews or foods with a high liquid content can be vacuumed without problem in the chamber vacuum sealer.
- If you wish to vacuum and freeze foods without pre-freezing them, the length of the bag should be 5cm longer than would normally be required since food expands when frozen.
- Fresh vegetables should be cleaned or peeled and before vacuuming they should be blanched in boiling water (or if necessary a microwave oven can be used). This ensures that the vegetables remain fresh. After allowing the food to cool, it can be split into suitable portions and frozen in Solis vacuum bags.
- If you wish to vacuum and freeze meat or fish without pre-freezing them, then we recommend that you line the Solis vacuum bag with kitchen roll so that the kitchen roll will catch any escaped moisture. Foods that are meant to be vacuum sealed in a number of layers (e.g. hamburgers, crêpes or tortillas) are best placed in the bag separated by a sheet of baking paper.
DEFROSTING FROZEN SOLIS VACUUM BAG
Defrosting meat, fish, fruit, vegetables and other delicate foods: These foods should be defrosted slowly in the refrigerator.
Defrosting bread and pastry: These foods can be defrosted at room temperature. You should cut open the bag to allow the steam to escape.
Always consume food immediately after defrosting and do not re-freeze.
WHY DO VACUUM PACKED FOODS LAST LONGER?
- Chemical reactions in food with air, ambient temperature and dampness, enzym-reactions, the formation of micro-organisms or contamination by insects can spoil food.
- The main reason why food nutrients lose their firmness and flavour is the oxygen in the air. The formation of micro-organisms is usually caused by air, because this removes the moisture of the foods, on the other hand, it also transports ambient moisture back into the food if they are not hermetically sealed. Frozen foods get in the freezer air, often the freezer burn.
- The vacuuming system removes the air from the packaging. As air consists to roughly 21% of oxygen, this means that practically no oxygen remains in a vacuum sealed bag or container. However in an oxygen content of less than 5% , most micro-organisms cannot multiply.
- In general, micro-organisms can be divided into three categories: mould, yeasts and bacteria, they are present everywhere, but can only cause damage in certain conditions.
- In an environment with little air or moisture, mould cannot develop.
- In moisture, sugar and warmth, yeast can spread with or without air, cooling slows the growth of yeast and freezing stops it altogether.
- Bacteria can spread with or without air. One of the most dangerous bacteriums is Clostridium botulinum which can, under certain conditions, spread without air - it only needs a temperature of between 4^ and 46^ . It spreads in food without acid, in environments with little acid and in temperatures that are above 4^ for long periods of time.
The bacterium Botulinum cannot do any harm to frozen, dried or acid rich foods or foods with a high salt or sugar content.
The following foods can be lightly infected with Botulinum:
- Acid free foods like meat, seafoods, poultry, fish, eggs and pickled olives
- Foods with little acid like most vegetable
Medium-acid foods like tomatoes, chilli peppers, figs and cucumbers.
For storage, the above-mentioned, compromised foods (the list is not complete) should be placed in the fridge for short storage periods resp. frozen for longer storage periods and be consumed right after heating. Soft cheese, smoked fish, garlic, onions, mushrooms and raw milk should not be vacuum sealed or stored for longer periods of time due to their sensitivity to anaerobic bacteria even under vacuum.
- Soft cheese and smoked fish should not be vacuum sealed, as this can cause the development of anaerobic bacteria of the Listeria species, which in turn can cause food poisoning resp. listeriosis. This also applies to garlic, onions, mushrooms and raw milk.
- Some enzymes in foods can change the colour, texture and flavour of foods, which depends on storage time, storage temperature and oxygen. To prevent this enzyme reaction, vegetable should be blanched or steam cooked for a short time, or cooked in the microwave. Foods with a high acid content such as most fruits, must not be blanched. In this case, vacuum packing is enough to slow or inhibit the enzyme reaction.
- Some dry foods, such as flour and cereals, contain insect larvae. If the food isn't vacuum packed, these can hatch during storage, making the food inedible. To prevent this these foods should be vacuurned.
- Generally, foods should be stored at low temperatures since most micro-organisms can also spread without air.
- If the temperature in your fridge is above 4^ then this can, most of all during long-term storage, support the growth of dangerous micro-organisms. Therefore the temperature setting in your fridge should be max. 4^ or less.
- If the temperature in your freezer is -17^ or less, it is ideal for storing food, but remember: freezing does not kill micro-organisms, it only slows their growth.
- The shelf life of vacuum packed dried foods is also longer, the cooler the storage temperature is: For every 10^ cooler the storage temperature, the shelf life extends by 3 - 4 times.
FURTHER TIPS FOR SUCCESSFUL VACUUMING:
- Always wash your hands before preparing and vacuuming, equally the materials and appliance which you use, should be absolutely clean.
- As soon as the foods have been vacuumed, put them in the fridge or freezer, do not leave them to sit at room temperature. Make sure that the temperature in the refrigerator or freezer does not increase.
- Vacuum packing extends the shelf life of dried foods, foods with high fat content quickly become rancid in warm temperatures and oxygen. Vacuum packing extends the shelf life of nuts, coconuts or cereals. Store these in a cool, dark place.
- Vacuum packing does not extend the shelf life of fruit and vegetables such as apples, bananas, potatoes and root vegetables, unless they are peeled first!
- Cabbage vegetables such as broccoli, cauliflower or cabbage give off gas when vacuum packed fresh for refrigeration. To preserve them, they must be first blanched, then frozen before packing.
WHAT YOU SHOULD GENEALLY KNOW WHEN PROCESSING FOOD:
The following food safety instructions are based on scientific findings and experience and are important for your health and optimal storage of foods:
- As soon as you heat, defrost or remove foods from the fridge, consume them immediately.
- Canned or ready vacuum packed foods can be vacuum packed again after opening (in new Solis bags). Follow the instructions, storing foods in a cool place once opened (not at room temperature!) and treating vacuumed foods just as carefully as fresh foods. Take note of the use by date printed on the original packaging.
- Never defrost foods in warm water or with the help of other heat sources (e.g. microwave), regardless of whether they are vacuum packed or not. Foods are most gently defrosted in the fridge.
- Do not consume highly perishable foods that have been stored for hours at room temperature. This is especially dangerous if they are in a thick sauce, if they are vacuum packed, or if they are kept in a low oxygen environment.
- Distribute vacuum bags evenly in the refrigerator or freezer so that they freeze or cool down as quickly as possible.
CLEANING AND CARE
Please proceed as follows to clean your vacuum sealer:
- Switch the appliance off with the ON/OFF button and always disconnect the power plug from the power socket.
- Do not dip the appliance, the cord or the plug in water or any other liquid and do not hold it under running water.
- Do not use any aggressive detergents or solvents or any scratching materials to clean the appliance, this might damage the surfaces.
- Open the lid and fold the bag fixation clamp up. You can yank the sealing bar out of its holder. Beneath it, you can find a yellow filter lid. You can pull it up and away as well.
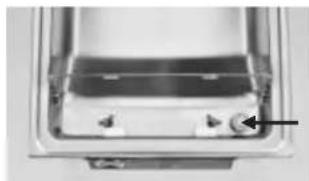
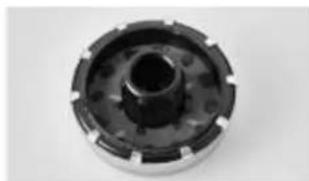
- On the underside of the filter lid, there is a fine air filter which cleans the air before it is sucked in. You can clean this air filter with a slightly moist towel or a soft brush.
- Clean the vacuum chamber, the appliance lid on the inside and the outside and the outside of the appliance with a mild detergent and a soft, moist towel.
-
After that, push the dry filter lid back onto the air intake.
-
Push the sealing bar back into the holder so that it locks into place. Also, fold the bag fixation clamp back down.
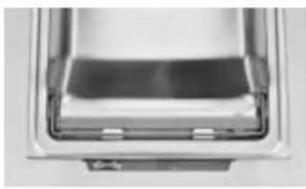

Note: The rubber contact strip above the sealing bar can be easily removed from the holder for easy manual cleaning in warm dishwater. Let the rubber contact strip air dry completely before correctly reinserting it.
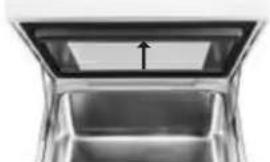
- Let the appliance air dry completely before storing it or using it again.
- The appliance does not need to be oiled.
APPLIANCE STORAGE
Store the appliance in a flat, dry place, outside of the reach of children and best keep it in the original packaging.
Do not place anything on the appliance so that no pressure is applied to the seals. Seals and the sealing bar are consumable materials and are not covered by warranty.
PROBLEMS AND POSSIBLE CAUSES
THE APPLIANCE DOESN'T WORK
- Make sure that the power plug is properly connected to the power socket and that the ON/OFF switch is set to position "1".
- Check whether the power cable is damaged. If this is the case, bring the appliance to Solis or a Solis approved service centre to get the cable replaced.
- Check whether the socket is working by connecting another electrical device.
- Make sure that the bag end is smooth, dry and clean.
- Wait at least 1 minute before starting to use the appliance again.
THE APPLIANCE IS NOT SEALING AN EMPTY BAG
Make sure that the bag end is correctly positioned on the sealing bar and under the bag fixation clamp.
THE AIR IS NOT COMPLETELY Sucked OUT OF THE BAG
- To ensure that the bag is firmly sealed, the open end of the bag must wrap around the two metal surfaces and be completely and evenly placed on the sealing bar. Additionally, it has to be held in place by the bag fixation clamp.
- Check whether the bag has a hole in it. To do this, seal the bag with some air in it and submerge it in water. If bubbles rise from it, it is leaking, use another bag
- Use bags and films from Solis exclusively!
- Perhaps the bag is not completely sealed, because of crumbs, fat or liquid in the seal or the bag was not flat and has wrinkles or creases. Open the bag, clean and dry the inside of the bag end and make sure that the bag end is absolutely straight when it is placed on the sealing bar and under the bag fixation clamp. Then, start the vacuuming process again.
- Make sure that the vacuum time is sufficiently high. If necessary, increase the vacuum time.
- Do the foods you wish to vacuum have sharp edges? If they do, the bag might have a hole. Change the bag, cushion the food with kitchen paper and try vacuuming the bag again.
THE APPLIANCE DOES NOT SEAL AFTER VACUUMING
- There is a vacuum pressure sensor inside the appliance. If this pressure is not high enough, the sealing process is not automatically started and the appliance switches off after approx. two minutes. Check if the lid does not shut tightly and if the seals are dirty or impaired due to an age-related issue.
- Perhaps the bag is not completely sealed, because of crumbs, fat or liquid in the seal or the bag was not flat and has wrinkles or creases. Open the bag, clean and dry the inside of the bag end and make sure that the bag end is absolutely straight when it is placed on the sealing bar and under the bag fixation clamp. Then, start the vacuuming process again.
- Make sure that the sealing time is sufficiently high. If necessary, increase the sealing time.
- Is the sealing bar damaged and properly positioned? If necessary, replace the sealing bar and make sure that it is correctly positioned.
- Is the rubber contact strip damaged and properly positioned? If necessary, replace the rubber contact strip and make sure that it is correctly positioned.
- Check if the bag end is wet. If yes, dry the bag end and reseal the bag.
AIR GOES BACK INTO THE BAG AFTER IT HAS BEEN SEATED
- Perhaps the bag is not completely sealed, because of crumbs, fat or liquid in the seal or the bag was not flat and has wrinkles or creases. Open the bag, clean and dry the inside of the bag end and make sure that the bag end is absolutely straight when it is placed on the sealing bar and under the bag fixation clamp. Then, start the vacuuming process again.
- Some foods produce natural gasses or ferment, such as e.g. fresh fruit and vegetables. If you suspect this to be the case, open the bag and check the food. If it is fermenting, throw the bag away. Temperature fluctuations in refrigerators can also spoil vacuum packed foods. If in doubt, always throw the food away.
- Check if the bag has a hole which has let air in. Sharp edges of foods should be covered or "padded" with folded kitchen paper, so that the edges cannot cause holes.
- Did you vacuum fresh vegetables resp. fresh fruit and did not place it in the refrigerator immediately? Vegetables and fruit have to be stored cold immediately, as photosynthesis occurs at room temperatures, causing them to emit gases.
THE BAG MELTS OR DOES NOT SEAL PROPERLY
- Should the sealing bar overheat, the bag can melt. In this case, unplug the appliance, open the lid and allow these parts to cool for a few minutes. As a basic principle, always keep a 1 minute pause between two vacuuming processes.
- Was the sealing time set too long? Try again with a shorter sealing time.
ACCESSIONS:
| Item-No | tem | ||
| 922.52 | Vacuum films | ||
| 2 rolls 15 x 600 cm | |||
| 922.51 | 2 rolls 20 x 600 cm | ||
| 922.50 | 2 rolls 30 x 600 cm | ||
| 922.61 | Vacuum bags | ||
| 50 bags 20 x 30 cm | |||
| 922.64 | 50 bags 30 x 40 cm | ||
*food safe
You can purchase accessories for your vacuum sealer in good stores or from Solis. You can find the contact addresses at the end of this manual.
STORAGE TIMES
| Storage type Food | Tempera-ture | Normal storage time | Storage time with vacuum packing in Solis bags | |
| Refrigerator | raw, red meat | 5±2 °C 2-3 days 8-9 days | ||
| raw, white meat | 5±2 °C 2-3 days 6-9 days | |||
| Game meat | 5±2 °C 2-3 days 5-7 days | |||
| Salami, sliced | 5±2 °C 4-6 days 20-25 days | |||
| Hard cheese | 5±2 °C | 15-20 days | 25-60 days | |
| Fresh fish Seafood | 5±2 °C 1-3 days 4-5 days | |||
| Cooked meat | 5±2 °C 3-5 days 10-14 days | |||
| Vegetables 5 | ±2 °C 1-3 days | 7-10 days | ||
| Fruit | 5±2 °C 5-7 days 14-20 days | |||
| Freezer | Meat | -18±2 °C | 3-5 months >1 year | |
| Fish | -18±2 °C | 3-4 months >1 year | ||
| Seafood | -18±2 °C | 3-5 months >1 year | ||
| Storage type Food | Tempera- ture | Normal storage time | Storage time with vacuum packing in Solis bags | |
| Room- temperature | Bread 25 | \( \pm {2}^{ \circ }\mathrm{C}1 - 2 \) days 6-8 days | ||
| Sponge 25 | \( \pm {2}^{ \circ }\mathrm{C}4 - 6 \) months \( > 1 \) year | |||
| Flour/Rice 25 | \( \pm {2}^{ \circ }\mathrm{C}4 - 5 \) months \( > 1 \) year | |||
| Pasta 25 | \( \pm {2}^{ \circ }\mathrm{C}5 - 6 \) months \( > 1 \) year | |||
| Peanuts Pulses | \( {25} \pm {2}^{ \circ }\mathrm{C}3 - 6 \) months \( > 1 \) year | |||
| Medical supplies | \( {25} \pm {2}^{ \circ }\mathrm{C}3 - 6 \) months \( > 1 \) year | |||
| Tea 25 | \( \pm {2}^{ \circ }\mathrm{C}5 - 6 \) months \( > 1 \) year | |||
| Coffee, ground | \( {25} \pm {2}^{ \circ }\mathrm{C}2 - 3 \) months \( > 1 \) year | |||
TECHNICAL INFORMATION
Model no. Type 5702
Product Vacuum sealer
Voltage/frequency 220-240V/50Hz
Power 350 Watt
Dimensions (lxhxd) approx. 37.0× 27.0× 42.0cm
Weight approx. 14.4kg
Technical changes reserved.
DISPOSAL

EU 2012/19/EU
Information for correct disposal of the product in accordance with the European Directive EU 2012/19/EU.
At the end of its working life this equipment must not be disposed of as an household waste. It must be taken to special local community waste collection centres or to a dealer providing this service. Disposing of electrical and electronic equipment separately avoids possible negative effects on the environment and human health deriving from an inappropriate disposal and enables its components to be recovered and recycled to obtain significant savings in energy and resources. In order to underline the duty to dispose of this equipment separately, the product is marked with a crossed-out dustbin.
Solis of Switzerland Ltd reserves the right to carry out technical and visual changes and modifications to improve the product at any time.
SOLIS HELPLINE
This item stands out due to its long-life cycle and reliability. Despite this though, if a malfunction ever occurs, simply give us a call. Often a breakdown can be easily and quickly remedied with the right tip or technique without having to straight away send off the device for repair. We will give you all the advice and practical support you require. The contact addresses can be found at the end of this manual.
Keep the original packaging in a safe place so that you may use it in the event that transportation or shipping of the product becomes necessary.
APPPARAATBESCHRIJVING
5 Knop Vacuum & Seal
Afmetingen (b x h x d) onc. 37,0 x 27,0 x 42,0 cm
Gewicht 14,4 kg
Solis customer service
Please contact us in advance of sending in products for return or repair. We will gladly give you the respective address. Alternatively, you can simply visit www.solis.com.
Solis Klantendienst Helpline
Address for return shipment of goods differs - please refer to www.solis.com
+41-91-802 90 10
@ support.ch@solis.com
www.solis.com