VSZ7442S - Vacuum Cleaner SIEMENS - Free user manual and instructions
Find the device manual for free VSZ7442S SIEMENS in PDF.

User questions about VSZ7442S SIEMENS
0 question about this device. Answer the ones you know or ask your own.
Ask a new question about this device
Download the instructions for your Vacuum Cleaner in PDF format for free! Find your manual VSZ7442S - SIEMENS and take your electronic device back in hand. On this page are published all the documents necessary for the use of your device. VSZ7442S by SIEMENS.
USER MANUAL VSZ7442S SIEMENS
Bagged vacuum cleaner

natural_image
Pure electrical circuit symbol for a microchip (no text or labels)https://ium-pim.bsh-digital.com/8001250811
[de] Weitere Informationen und Erklärungen finden Sie online. Scannen Sie den QR-Code auf der Titelseite.
[en] You can find additional information and explanations online. Scan the QR code on the title page.
[fr] Vous pouvez trouver d'autres informations et explications en ligne. Scannez le code QR sur la page de titre.
[nl] U kunt online aanvullende informatie en uitleg vinden. Scan de QR-code op de titelpagina.
[da] Der findes yderligere oplysninger og forklaringer online. Skan QR-koden på forsiden.
[no] Du kan finne mer informasjon og forklaringer på Internett. Skann QR-koden på tittelsiden.
[sv] Det finns mer information och förklaringar online. Scanna QR-koden på omslaget.
[fi] Löydät lisälietoja ja selityksiä verkosta. Skannaa QR-koodn sivun otsikosta.
[el] Μπορείτε να βρείτε επιπλέον πληροφορίες και εξηγήσεις στο διαδίκτυο (online). Σαρώστε τον κωδικό QR στη σελίδα τίτλου.
[tr] Ek bilgi ve açıklamaları çevrimiçi olarak bulabilirsiniz. Başlık sayfasındaki QR kodunu tarayın.
text_image
Labeled diagram of a vacuum cleaner with numbered parts for identification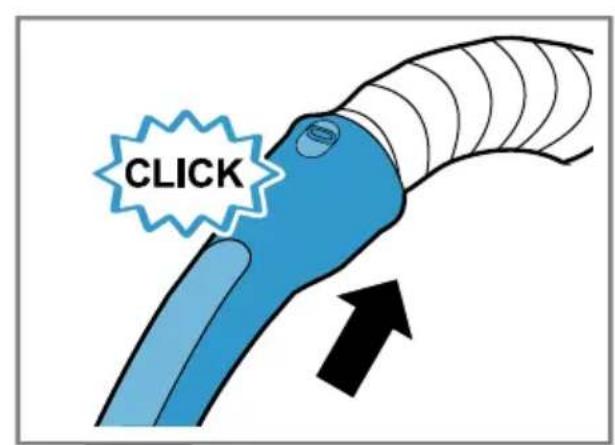
text_image
CLICK2
text_image
CLICK3
text_image
CLICK4
text_image
CLICK5
text_image
Diagram showing four types of electronic components with bidirectional arrows indicating direction, likely illustrating a circuit or signal flow.6
natural_image
Illustration of a hand pressing a blue circular button on a car's seat (no text or symbols)7
text_image
min max8
text_image
Diagram illustrating a mechanical or electrical process with labeled components and directional arrows indicating motion or feedback.9

natural_image
Diagram showing a rotating mechanical component with a blue sensor or sensor, enclosed in a black circular ring (no text or symbols)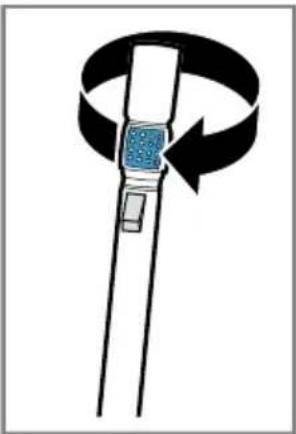
natural_image
Diagram of a mechanical device with a rotating arrow and blue square component, no text or symbols present10
natural_image
Diagram of a robotic arm gripping a car interior, with a downward arrow indicating force or motion (no text or symbols present)11
natural_image
Diagram of a car interior showing a blue mechanical device with a downward arrow indicating motion (no text or symbols present)12
text_image
Diagram showing two labeled parts (① and ②) with arrows indicating direction of flow or movement between them.13
text_image
Diagram illustrating fluid flow around a pipe with labeled arrows and directional arrows[Non-Text]
natural_image
Illustration of a hand holding a blue object with black arrows indicating upward and downward motion (no text or symbols)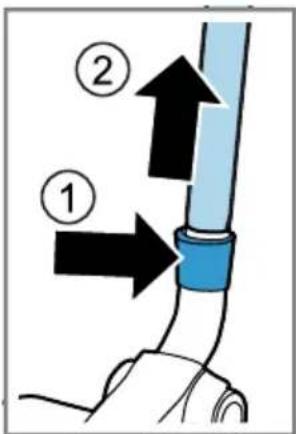
text_image
Diagram showing two labeled parts (① and ②) of a pipe or tube with directional arrows indicating flow or movement.14
text_image
Diagram showing a blue tool interacting with a car's head, labeled with numbered parts and directional arrows.15
natural_image
Diagram of a mechanical device with a tool and blue component, showing motion direction (no text or symbols)16
natural_image
Diagram of a blue car gear shift lever inside a vehicle intake manifold, with an arrow indicating the direction (no text or symbols present)17
natural_image
Diagram showing a blue car interior with a downward arrow and a gear icon, no text or symbols present.18
natural_image
Diagram of a car gear shift lever with a black arrow indicating the process (no text or symbols present)19
text_image
Diagram showing car interior components with numbered annotations and directional arrows indicating assembly or installation steps.20
natural_image
Diagram of a drain drain with a blue funnel pouring liquid into a fan structure (no text or symbols)21
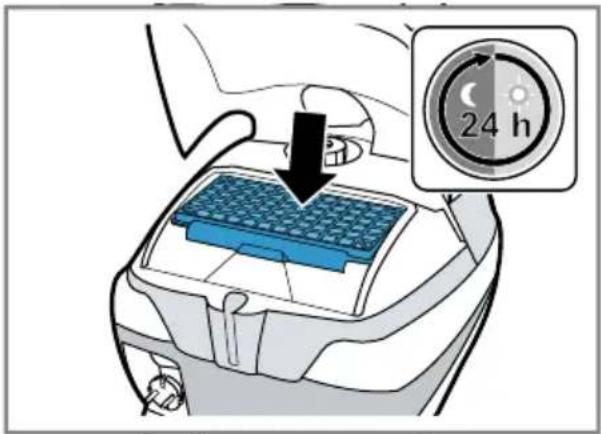
text_image
24 h ① ② ②22
natural_image
Illustration of a blue and white robotic device with a black arrow indicating rotation or movement (no text or symbols)23
text_image
Diagram of a car interior showing labeled components with arrows indicating flow or movement, including numbered parts 1 and 2.24
flowchart
graph TD
    A["Grid"] --> B["Rectangular Block"]
    B --> C["Arrow ①"]
    C --> D["Arrow ②"]
25
natural_image
Illustration of a showerhead spraying water onto a rectangular surface (no text or symbols)26

flowchart
graph TD
    A["Initial Setup"] --> B["Processing Step"]
    B --> C["Output Grid"]
    style A fill:#f9f,stroke:#333
    style B fill:#bbf,stroke:#333
    style C fill:#dfd,stroke:#333
The image is too blurry to recognize any text content.

natural_image
Illustration of a blue faucet spraying water onto a grid-patterned surface (no text or symbols)28
text_image
24 h29
natural_image
Diagram of a mechanical component with a blue cover and black arrow indicating direction (no text or symbols)30
Sicherheit
- Read this instruction manual carefully.
- Keep the instruction manual and the product information safe for future reference or for the next owner.
■ Do not connect the appliance if it has been damaged in transit.
Only use this appliance:
■ with genuine parts and accessories. Damage caused by using third-party products is not covered under the warranty.
■ for cleaning surfaces.
■ in private households and in enclosed spaces in a domestic environment at room temperature.
■ up to an altitude of max. 2000 m above sea level.
Do not use the appliance:
■ for vacuum-cleaning persons or animals.
■ for vacuuming up harmful, sharp-edged, hot or burning substances.
■ for vacuuming up damp substances or liquids.
■ for vacuuming up highly flammable or explosive materials and gases.
■ for vacuuming up ash or soot from stoves and central heating systems.
■ for vacuuming up toner dust from printers and photocopiers.
■ for vacuuming up building rubble.
Disconnect the appliance from the power supply when:
■ cleaning the appliance.
This appliance may be used by children aged 8 or over and by people who have reduced physical, sensory or mental abilities or inadequate experience and/or knowledge, provided that they are supervised or have been instructed on how to use the appliance safely and have understood the resulting dangers.
Do not let children play with the appliance.
Cleaning and user maintenance must not be performed by children unless they are being supervised.
- Repairs to the appliance should only be carried out by trained specialist staff.
▶ Only use genuine spare parts when repairing the appliance.
If the power cord of this appliance is damaged, it must be replaced by the manufacturer, the manufacturer's Customer Service or a similarly qualified person in order to prevent any risk.
▶ Never operate a damaged appliance.
▶ Never operate an appliance with a cracked or fractured surface.
▶ Never pull on the power cord to unplug the appliance. Always unplug the appliance at the mains.
▶ Never pull or carry the appliance by the power cord.
▶ If the appliance or the power cord is damaged, immediately unplug the power cord or switch off the fuse in the fuse box.
▶ Call customer services.→Page 15
▶ Only use the appliance in enclosed spaces.
▶ Never expose the appliance to intense heat or humidity.
- Do not use steam- or high-pressure cleaners to clean the appliance.
▶ Never let the power cord come into contact with hot appliance parts or heat sources.
▶ Never let the power cord come into contact with sharp points or edges.
▶ Never kink, crush or modify the power cord.
- Connect and operate the appliance only in accordance with the specifications on the rating plate.
- Connect the appliance to a power supply with alternating current only via a properly installed socket with earthing.
- The protective conductor system of the domestic electrical installation must be properly installed.
- Do not apply flammable substances or substances containing alcohol to the dust bag or filter.
- When cleaning the appliance, do not use flammable substances or substances that contain alcohol.
▶ Pull out the power cord completely.
- Keep clothing, hair, fingers and other body parts away from the openings on the appliance and the moving parts.
▶ Never point the pipe or the nozzles towards eyes, hair, ears or mouths.
- When vacuuming stairs, ensure that there are no persons underneath the appliance.
- When taking a break from vacuuming, switch off the appliance and pull out the mains plug.
▶ Retract the power cord.
- When the cord is being rewound automatically, ensure that the mains plug is not thrown in the direction of persons, body parts, animals or objects.
- Keep packaging material away from children.
▶ Do not let children play with packaging material.
Preventing material damage
▶ Never place the appliance on the hose.
▶ Regularly check the running surfaces of the nozzles for wear.
▶ Replace worn nozzles.
▶ Never operate the appliance without a dust bag.
▶ Never operate the appliance without the motor protection filter.
▶ Never operate the appliance without the exhaust filter.
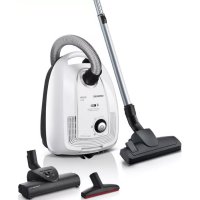
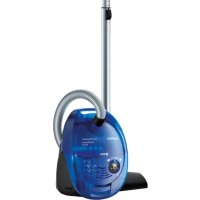
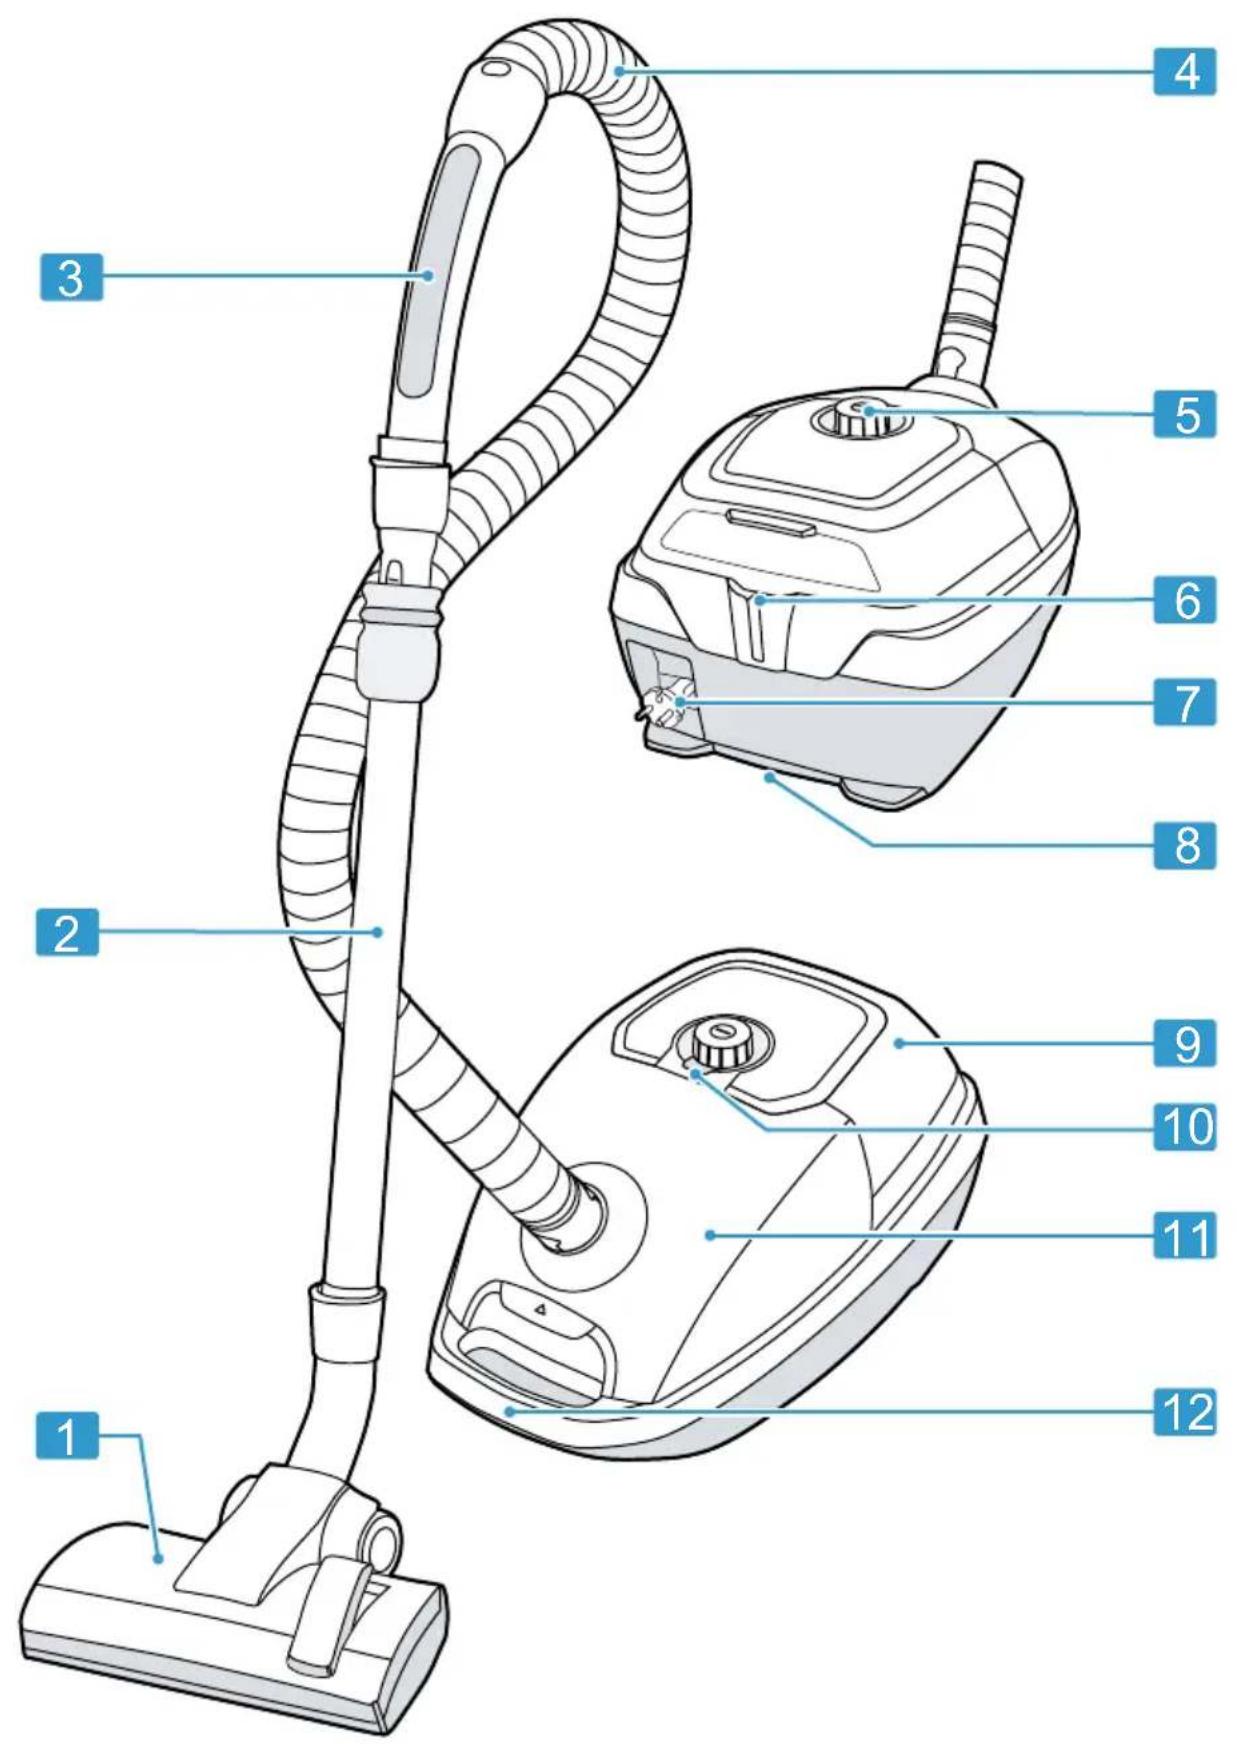
Overview
You can find an overview of the parts of your appliance here.
→Fig. 1
| 1 | Adjustable floor tool ^1 |
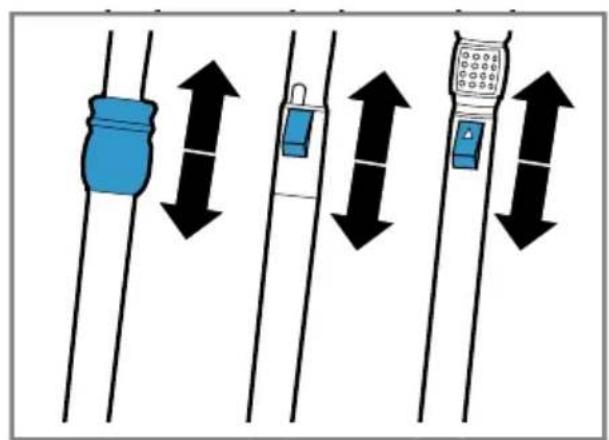
| 2 | Telescopic tube with adjusting sleeve ^1 |
| 3 | Handle ^1 |
| 4 | Hose |
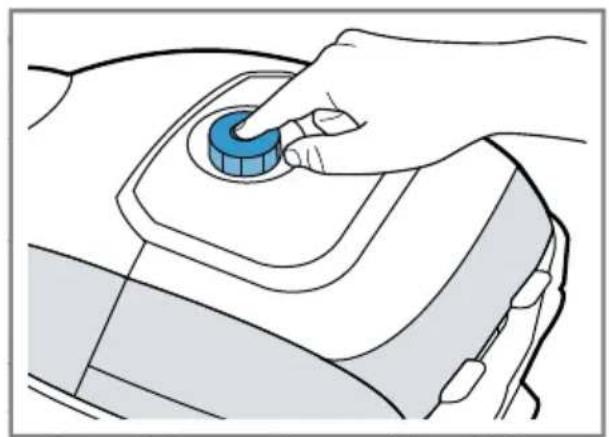
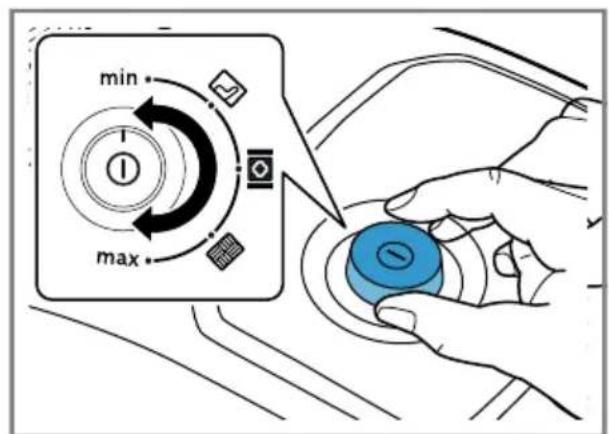
| 5 | Power control and on/off switch |
| 6 | Parking aid |
| 7 | Power cord |
| 8 | Storage aid |
| 9 | Rear flap |
| 10 | Bag change indicator |
| 11 | Lid |
| 12 | Handle |
powerSensor Technology ^1
You can find out the essentials of how it works here.
With powerSensor Technology ^1 , the appliance works at its optimum performance level. The function is automatically activated.
Tip: Use the indicated dust bag to save energy at the same time.
Operation
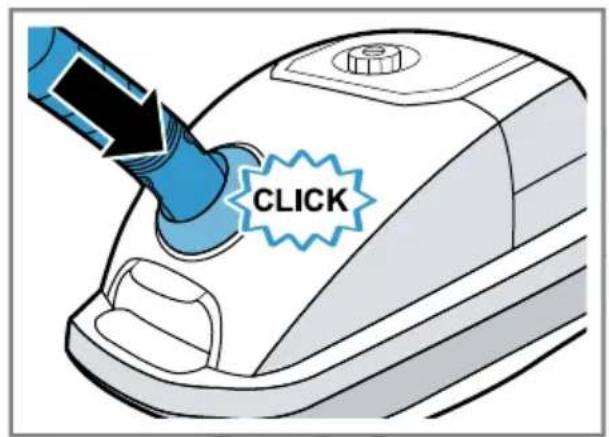
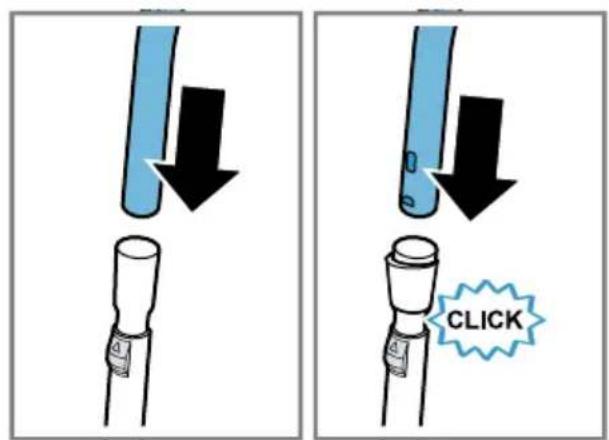
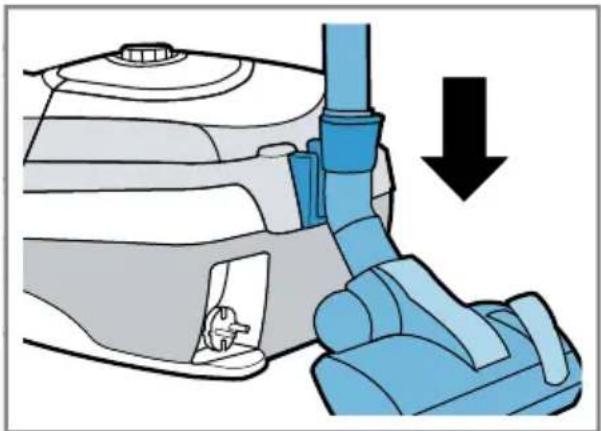
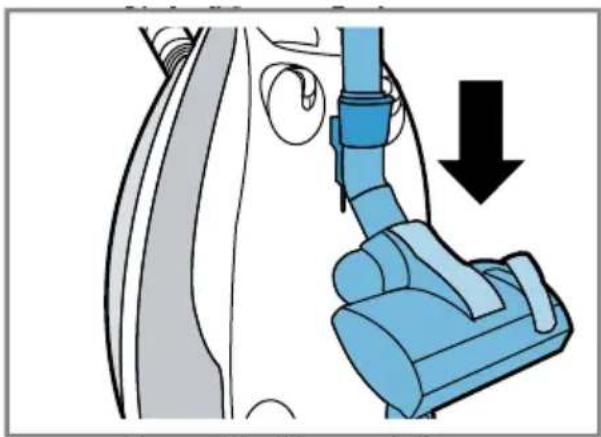
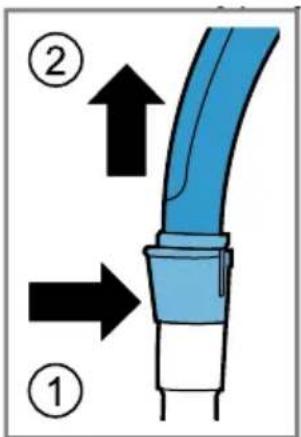
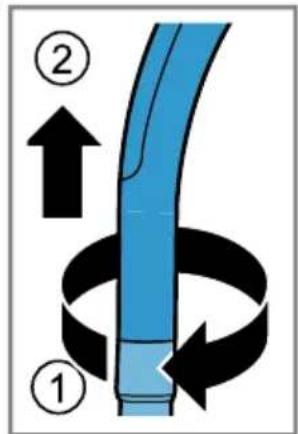
Installing the appliance
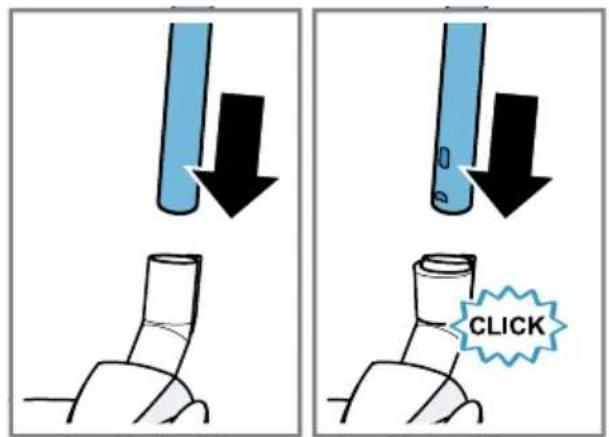
→Fig. 2 - 5
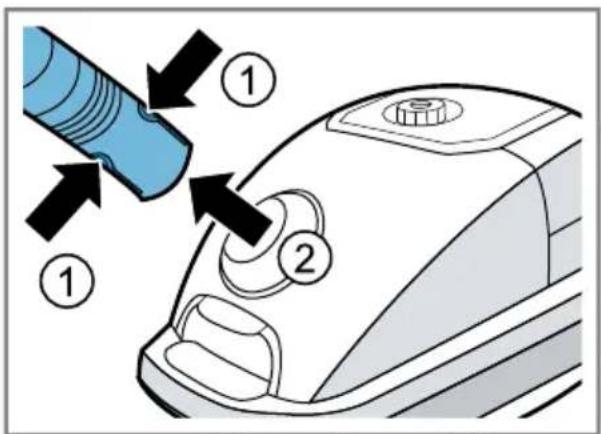
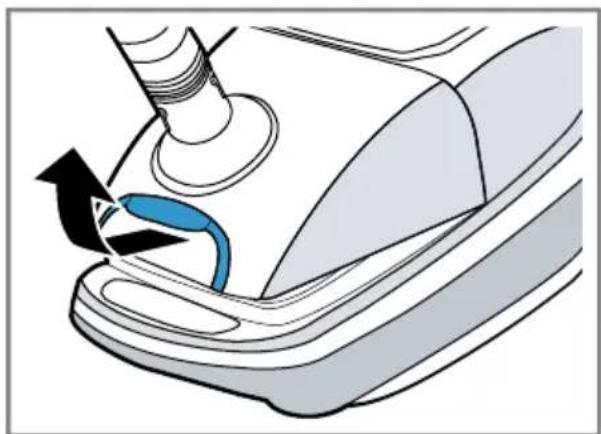
Operating the appliance ^1
→Fig. 6 - 12
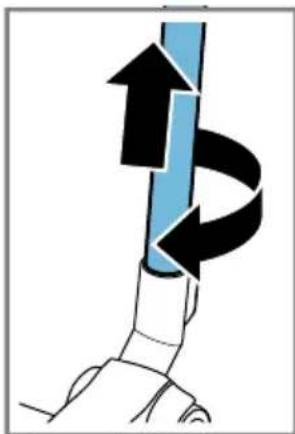
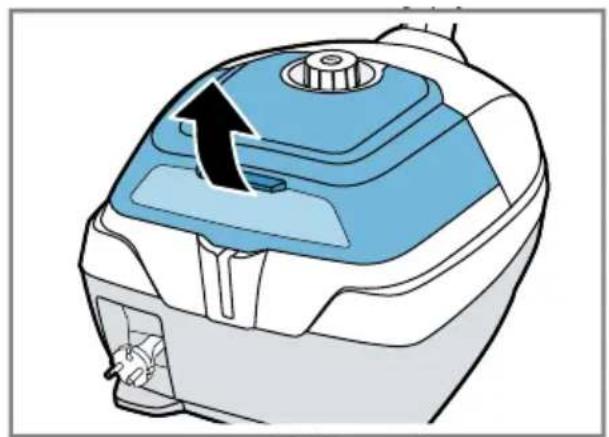
Removing the appliance
→Fig. 13 - 15
Cleaning and servicing
To keep your appliance working efficiently for a long time, it is important to clean and maintain it carefully.
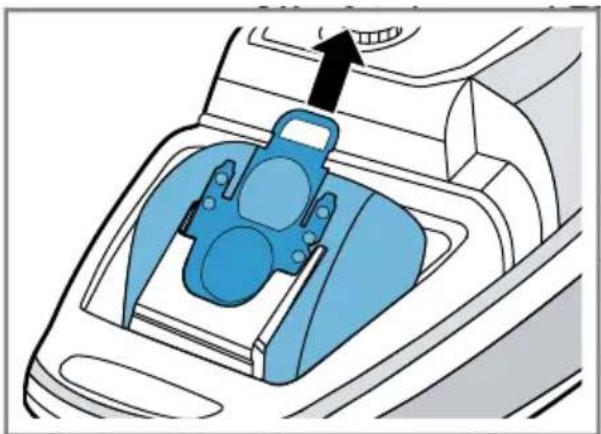
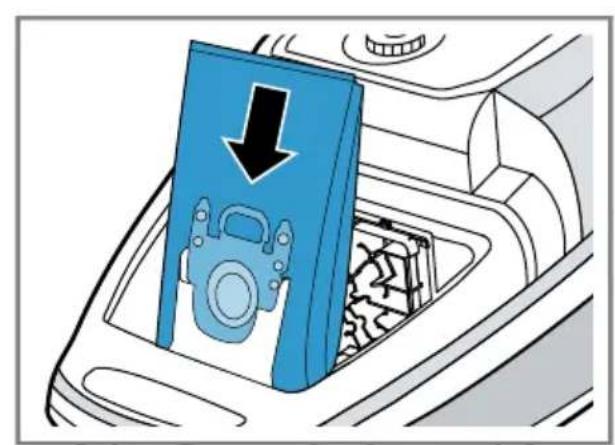
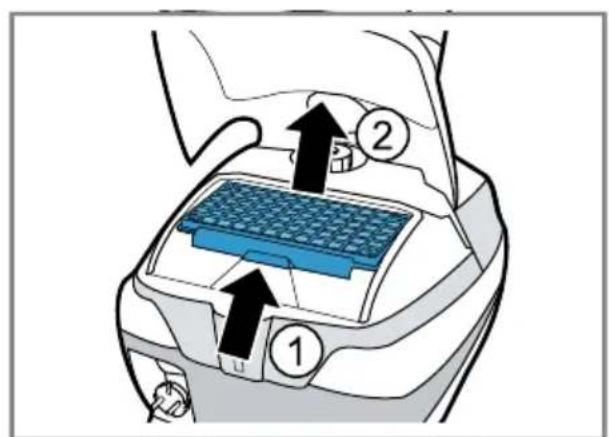
Changing the dust bag
→Fig. 16 - 19
Cleaning the motor protection filter
→Fig. 20 - 22
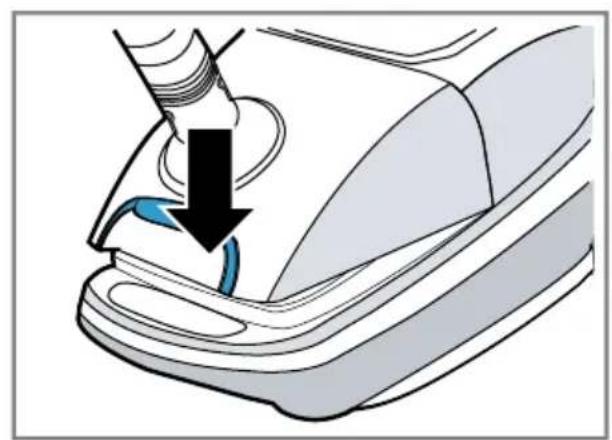
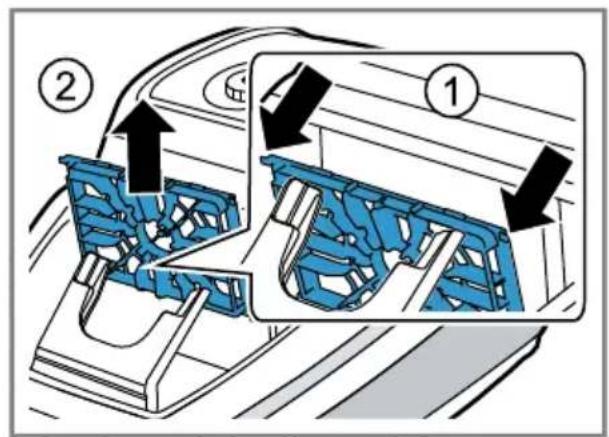
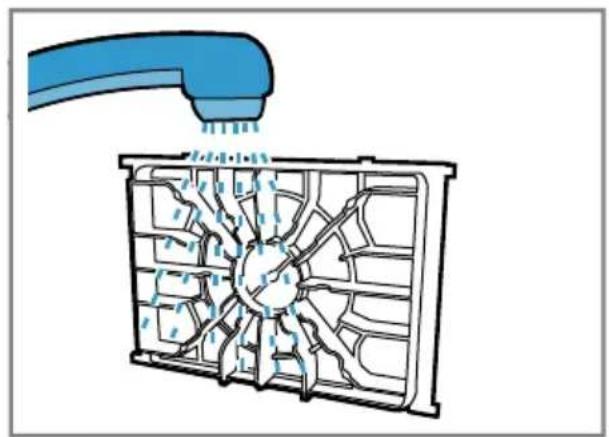
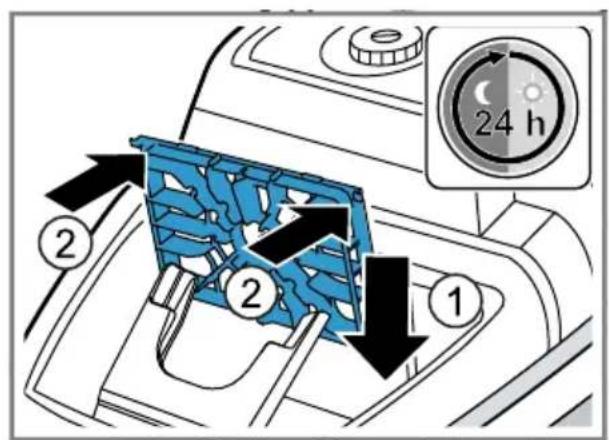
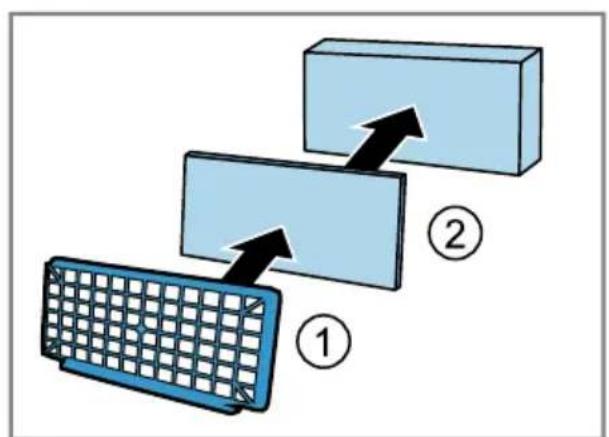
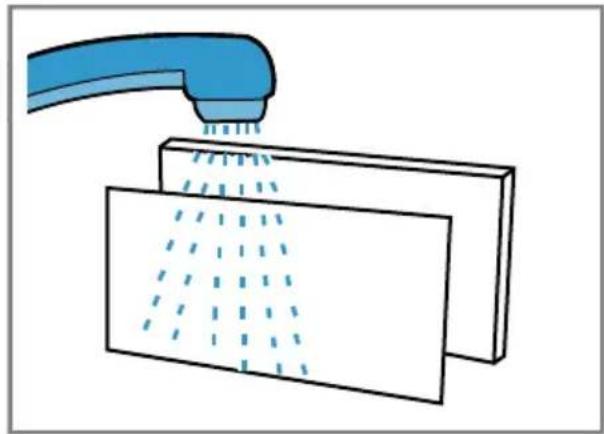
Cleaning the exhaust filter
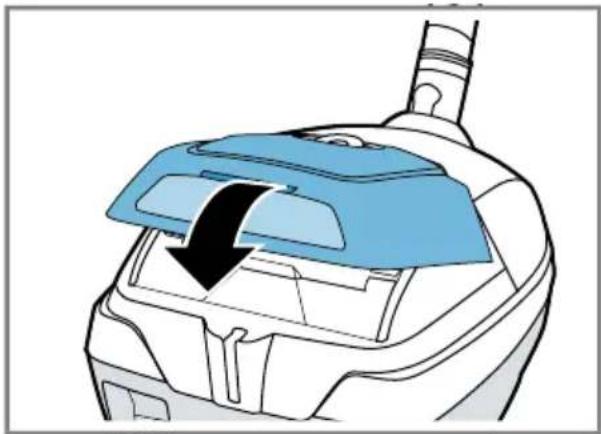
→Fig. 23 - 30
Troubleshooting
▶ Repairs to the appliance should only be carried out by trained specialist staff.
▶ Only use genuine spare parts when repairing the appliance.
If the power cord of this appliance is damaged, it must be replaced by the manufacturer, the manufacturer's Customer Service or a similarly qualified person in order to prevent any risk.
The household fuse trips when the appliance is switched on.
Several appliances are operated simultaneously at an electrical mains supply.
-
Switch on the household fuse.
-
Set the lowest performance level.
- Switch the appliance on.
Suction is reduced.
Nozzle, telescopic tube or hose are blocked.
- Dismantle the appliance.
- Remove the blockage.
The dust bag is full.
▶ Change the dust bag.
Exhaust filter is dirty.
▶ Clean the exhaust filter.
The motor protection filter is dirty.
▶ Clean the motor protection filter.
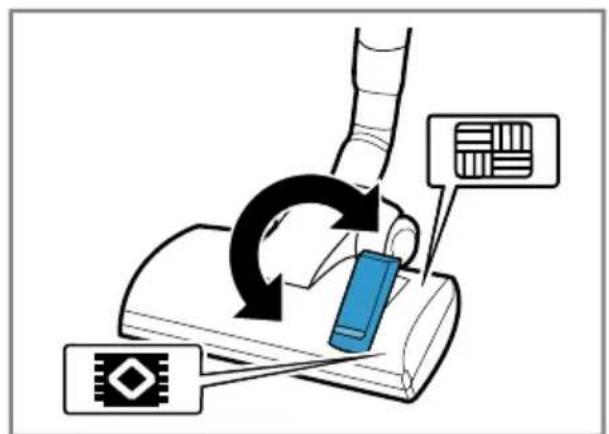
Brush on the turbo nozzle does not turn.
Brush roller is soiled.
▶ Clean the brush roller.
Suction power is too low.
▶ Turn the power controller to maximum suction power.
Disposing of old appliance
- Dispose of the appliance in an environmentally friendly manner.
Information about current disposal methods are available from your specialist dealer or local authority.
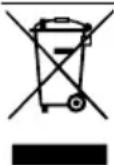
This appliance is labelled in accordance with European Directive 2012/19/EU concerning used electrical and electronic appliances (waste electrical and electronic equipment - WEEE).
The guideline determines the framework for the return and recycling of used appliances as applicable throughout the EU.
Customer Service
You can obtain function-relevant and storable genuine spare parts from our Customer Service for up to 10 years from the date on which your appliance was placed on the market.
For more information, please contact our Customer Service team.
Detailed information about the warranty period and the warranty conditions in your country is available via the QR code on the enclosed document on service contacts and warranty conditions, from our customer service or on our website.
You can find the contact details for our customer service via the QR code on the enclosed document on service contacts and warranty conditions or on our website.
You can find the information required as per Regulation (EU) 2023/826 online at siemens-home.bsh-group.com on the product and service pages for your appliance, in the area of user manuals and additional documents.
Sécurité
Zuigvermogen is te gering.
siemens-home.bsh-group.com
Valid within Great Britain:
Imported to Great Britain by
BSH Home Appliances Ltd.
Grand Union House
Old Wolverton Road
Wolverton, Milton Keynes
MK12 5PT
United Kingdom
BSH Hausgeräte GmbH
Carl-Wery-Straße 34
81739 München, GERMANY
siemens-home.bsh-group.com

8001346249 (051205)
de, en, fr, nl, da, no, sv, fi, el, tr