Hello Kitty HEC080L - Camera INGO - Free user manual and instructions
Find the device manual for free Hello Kitty HEC080L INGO in PDF.
User questions about Hello Kitty HEC080L INGO
0 question about this device. Answer the ones you know or ask your own.
Ask a new question about this device
Download the instructions for your Camera in PDF format for free! Find your manual Hello Kitty HEC080L - INGO and take your electronic device back in hand. On this page are published all the documents necessary for the use of your device. Hello Kitty HEC080L by INGO.
USER MANUAL Hello Kitty HEC080L INGO
- Main Functions.... 2
- Profile.... 2
- Operation.... 3
• Power on....3
• Power off....3 - Mode Switching.... 3
- Single Shooting....3
- Continuous Shooting....4
- Self-timer....4
- Delete All....4
- Delete One....4
- Resolution....4
- Image Quality....5
• Light Source Frequency....5 - Playback....6
- Install Driver....6
- Connecting to a PC....7
- Download Photos....7
- Using the PC Camera.... 11
- Installing and Using Photolmpression 5....12
- Installing Photolmpression5....12
- Running Photolmpression5....12
- Technical Parameters....16
- Accessional explain....18
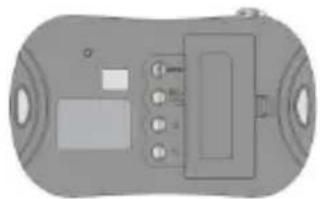
1. Main Functions
Shooting, Playback and PC Camera.
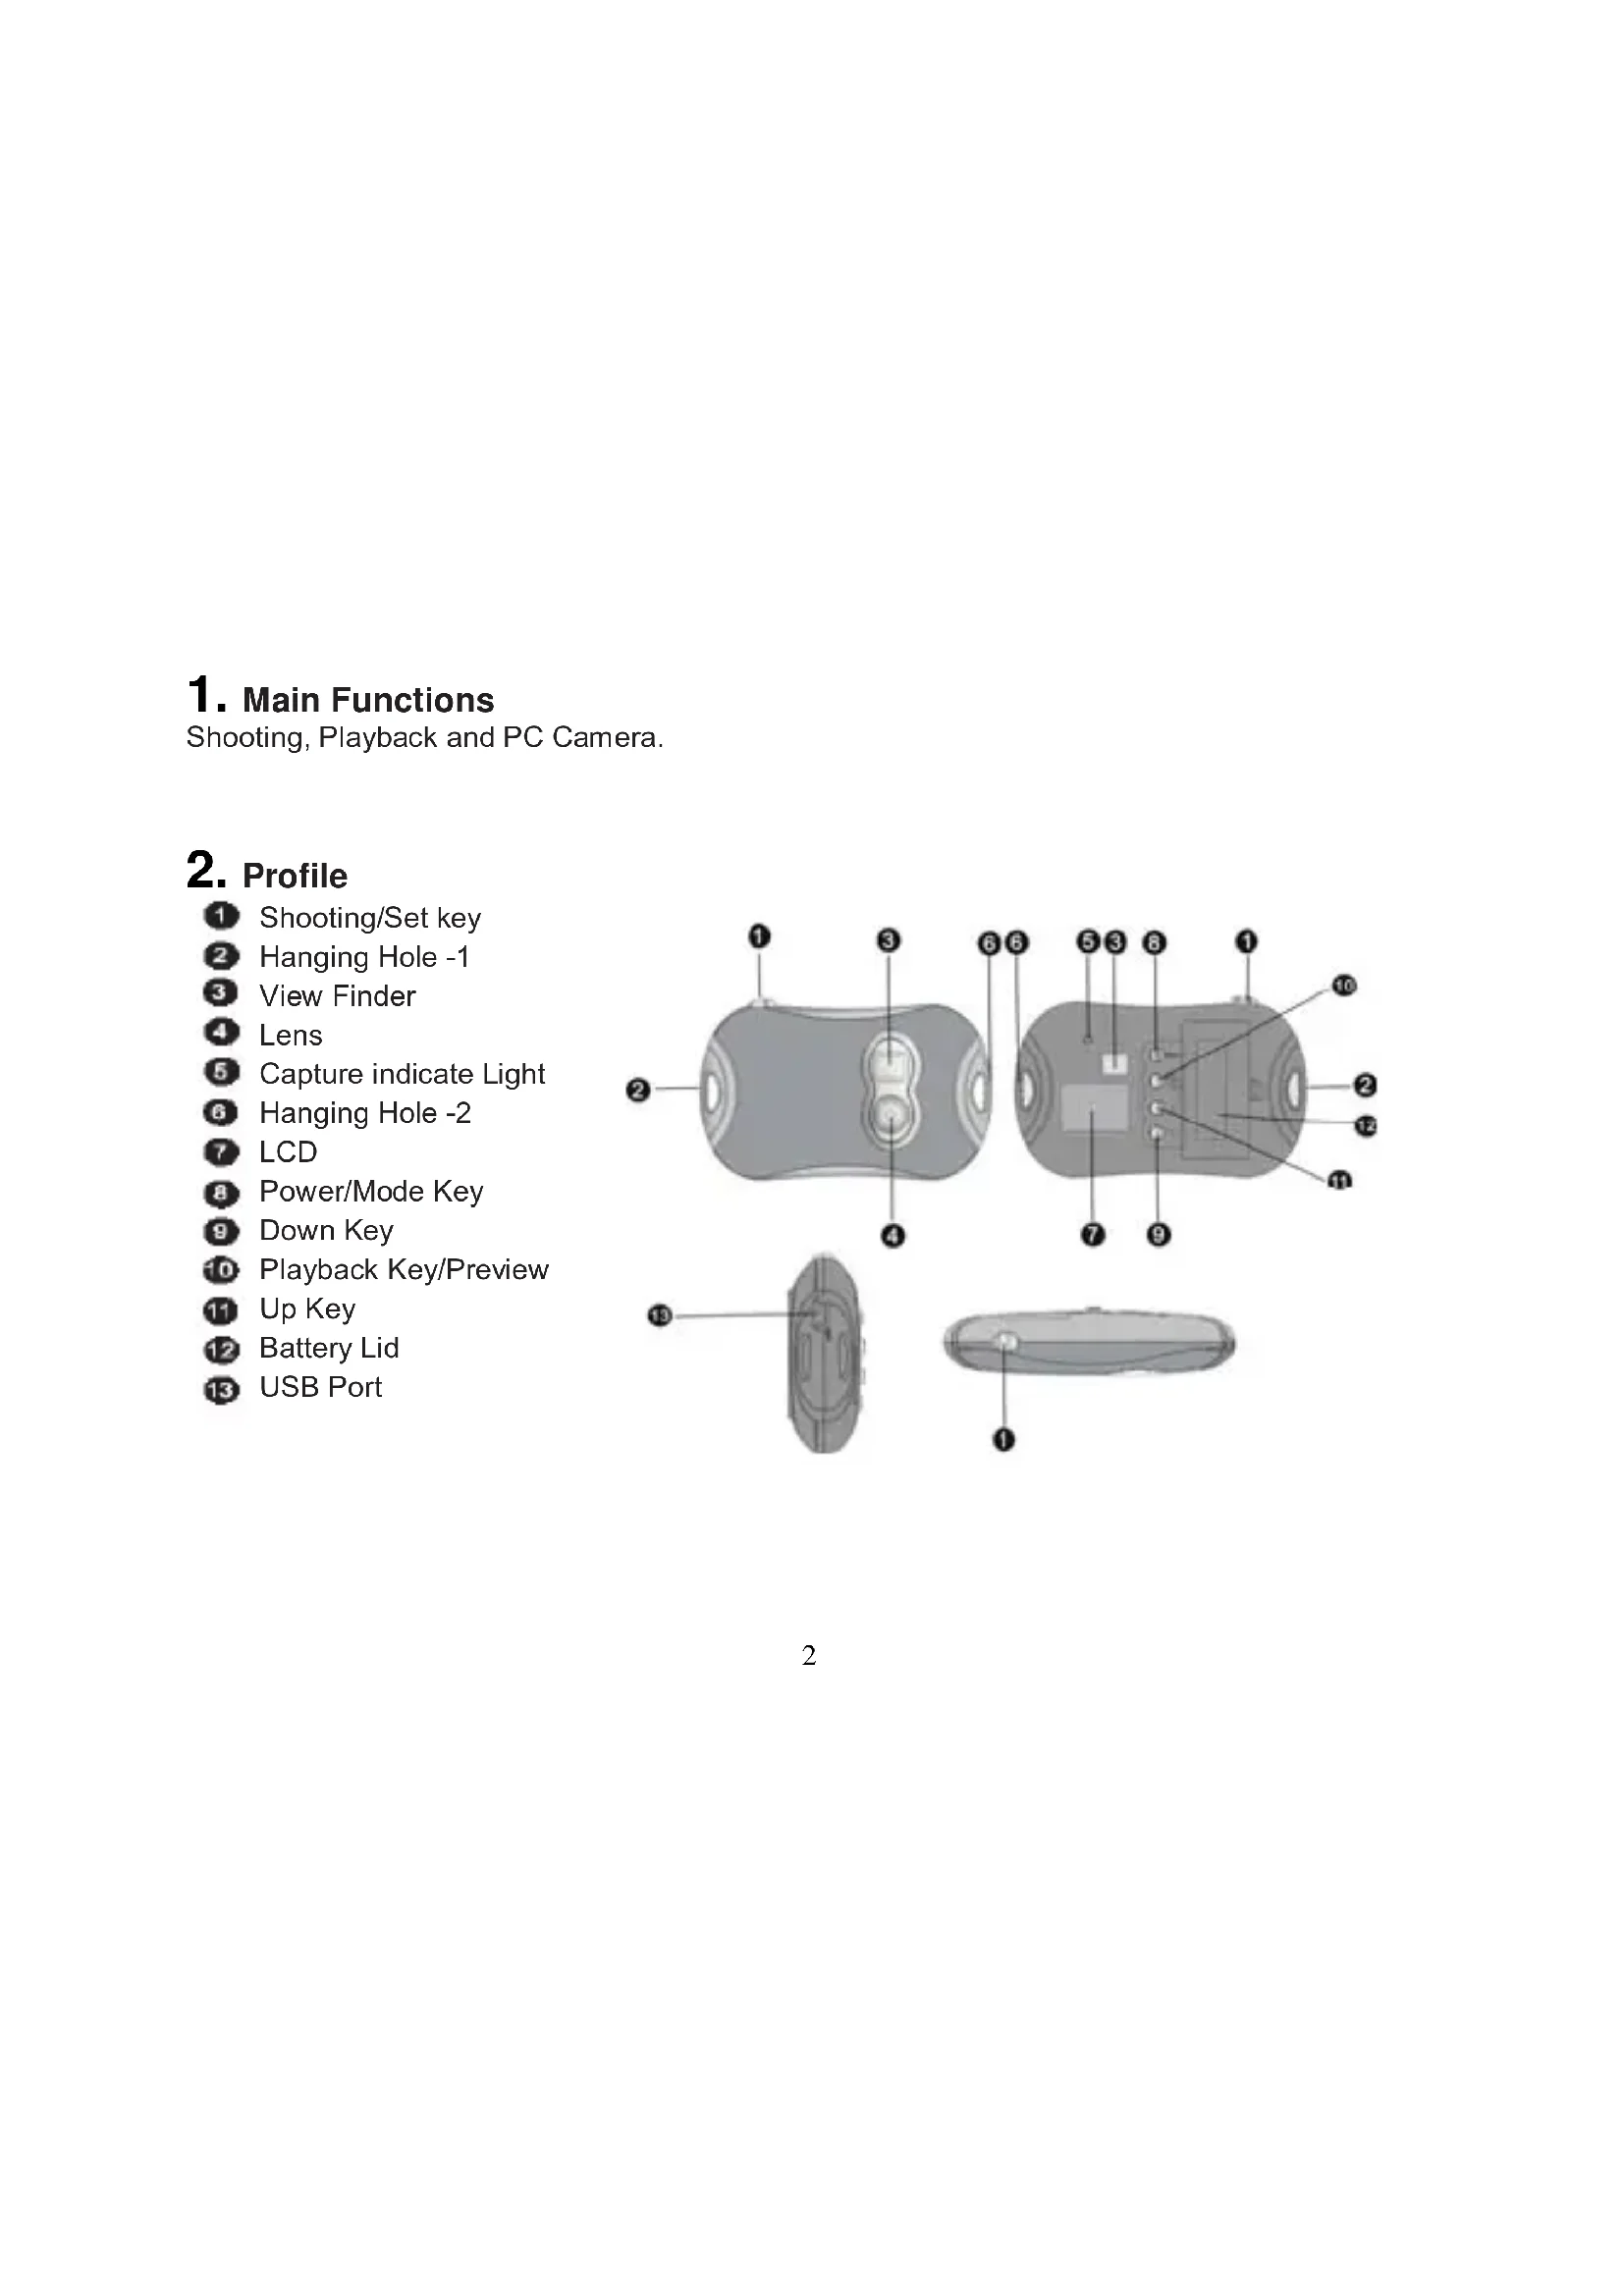
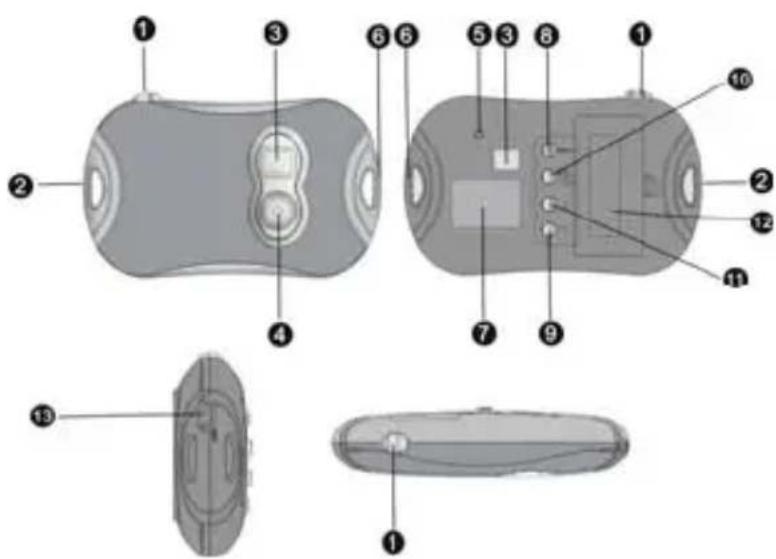
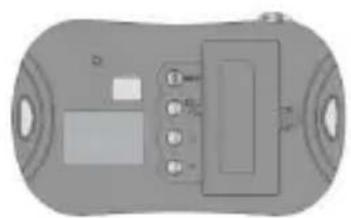
2. Profile
1 Shooting/Set key
2 Hanging Hole -1
3 View Finder
4 Lens
5 Capture indicate Light
6 Hanging Hole -2
7 LCD
Power/Mode Key
9 Down Key
10 Playback Key/Preview
11 Up Key
12 Battery Lid
13 USB Port
text_image
Exploded view diagram of a device with numbered parts for identification3.Operation
- Power On
Press 8 Power/Mode Key to turn the camera on.
- Power Off
Hold down 8 Power/Mode Key until the screen turns off.
The camera will turn off automatically after 60 seconds if it is left idle while turned on.
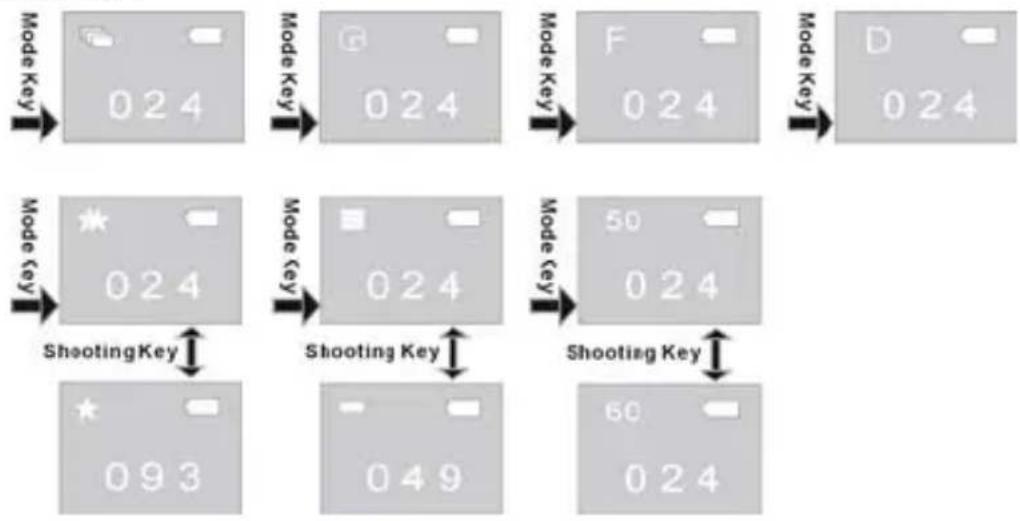
- Mode Switching
After power on, the camera will enter the single shooting mode.
Press ⑧ Power/Mode Key to switch between "Single Shooting", "Continuous Shooting", "Self-timer", "Delete All", "Delete One", "Resolution", "Image Quality" and "Light Source Frequency".
flowchart
graph TD
    A["Mode Key 024"] --> B["Shooting Key"]
    C["Mode Key 024"] --> D["Shooting Key"]
    E["Mode Key F 024"] --> F["Shooting Key"]
    G["Mode Key D 024"] --> H["Shooting Key"]
    I["Mode Key 024"] --> J["Shooting Key"]
    K["Mode Key 50 024"] --> L["Shooting Key"]
    M["Mode Key 60 024"] --> N["Shooting Key"]
- Single Shooting
After turning the camera on and entering the Single Shooting mode, press ① Shooting/Set Key to take a single photo.
• Continuous Shooting
After turning the camera on, press ⑧ Power/Mode Key to switch to Continuous Shooting mode, then the icon will appear on the top left corner of the screen; within 3 seconds, press ① Shooting/Set Key to take 3 photos continuously.
- Self-timer
After turning the camera on, press Ⓤ Power/Mode Key to switch to Self Timer mode, then the icon Ⓖ will appear on the top left corner of the screen; within 3 seconds, press ⏻ Shooting/Set Key to start a countdown of 10 seconds, after 10 seconds, the camera will take one photo automatically.
- Delete All
After turning the camera on, press ⑧ Power/Mode Key to switch to the Delete All mode, then the icon F will appear on the top left corner of the screen; within 3 seconds, press ① Shooting/Set Key to confirm deleting all the photos in the camera. If you don't want to delete the photos, wait until the icon disappears or press ⑪ Up Key or ⑨ Down Key to go back to Single Shooting mode.
Note: After choosing Delete All and confirming, all photos in the camera will be lost completely. Be careful when using this operation!
- Delete One
After turning the camera on, hold down ⑧ Power/Mode Key to switch to Delete One mode, then the icon D will appear on the top left corner of the screen; within 3 seconds, press ① Shooting/Set Key to confirm deleting the last photo. If you don't want to delete the photos, wait until the icon disappears or press ⑪ Up Key or ⑨ Down Key to go back to Single Shooting mode.
- Resolution
After turning the camera on, Press 8 Power/Mode Key to switch to Resolution mode, then the
icon ★ or ★ will appear on the top left corner of the screen; within 3 seconds, press Shooting/Set Key to switch resolutions.
This camera has two resolutions: high resolution (640×480) and low resolution (320×240); the defaulted one is high resolution. In Resolution mode, when the icon 🙏 appears on the top left corner of the screen, it indicates the current resolution is high. Press ⚠ Shooting/Set Key to switch to the low resolution; when the icon 🙏 appears on the top left corner of the screen, it indicates the current resolution is low; press ⚠ Shooting/Set Key to switch to the high resolution.
- Image Quality
After turning the camera on, hold down ⑧ Power/Mode Key to switch to Image Quality mode, then the icon ☐ or ☐ will appear on the top left corner of the screen; within 3 seconds, press ① Shooting/Set Key to switch to Image Quality. This camera has two kinds of quality: High Quality and Low Quality, the defaulted one is high quality. In Image Quality mode, when the icon ☐ appears on the top left corner of the screen, it indicates the current quality is high; press ①
Shooting/Set Key to switch to the low quality. When the icon 📋 appears on the top left corner of the screen, it indicates the current resolution is low; press ⏻ Shooting/Set Key to switch to the high quality.
• Light Source Frequency
After turning the camera on, hold down ⑧ Power/Mode Key to switch to Light Source Frequency mode, then the icon 50 or 60 will appear on the top left corner of the screen; within 3 seconds, press ① Shooting/Set Key to switch to light source frequencies.
In Light Source Frequency mode, when the icon 50 appears on the top left corner of the screen, it indicates the current light source frequency is 50Hz, press ① Shooting/Set Key to switch to 60Hz.
When the icon 60 appears on the bottom left corner of the screen, it indicates the current light source frequency is 60Hz, press ⏻ Shooting/Set Key to switch to 50Hz.
- Playback
Press 10 Playback Key to enter Playback mode.
Press ⑪ Up Key or ⑨ Down Key to choose the desired file. Hold down ① Shooting/Set Key twice to delete the current photo.
In Play mode, press 10 Playback Key to go back to the shooting mode.
4. Install Driver
Before connecting to PC, be sure to install the desired driver.
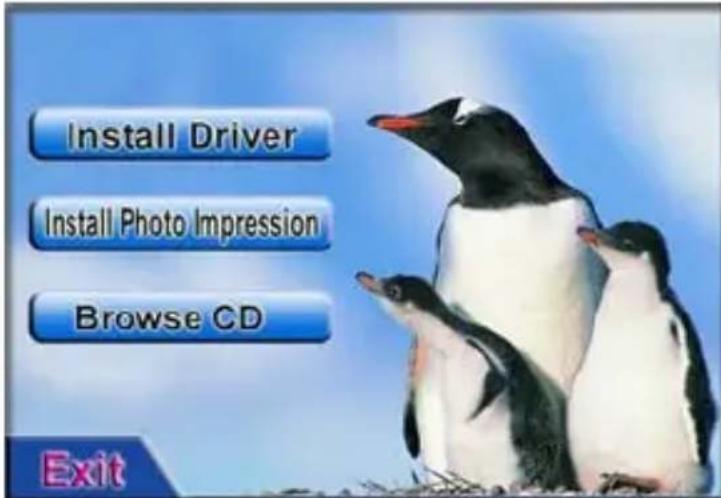
1) Insert the attached CD into the CD-ROM of the computer.
2) The system will automatically execute the installation procedure, and the guide window as follows will occur:
text_image
Install Driver Install Photo Impression Browse CD ExitIf your CD-ROM does not have automatic installation function or this function is off, please
directly click the autorun.exe program under the root directory of the CD.
3) Click Install Driver button and conduct the installation according to the hints as occurring. After the installation is over, restart the computer.
4) After the driver is installed, a folder named as "913D Camera" will occur on the desktop.
5. Connect to PC
Before connecting to PC, be sure to install the desired driver.
Connect the camera to the USB port of the computer with USB cable. For the first connection, the system will search the driver.
Note: Before connecting the computer and downloading photos, do not take down the battery, otherwise, the photos in the camera will be lost!
Download Photos
Open the folder "913D Camera" on the desktop, double click 213D Camera icon to open the window to download photos.
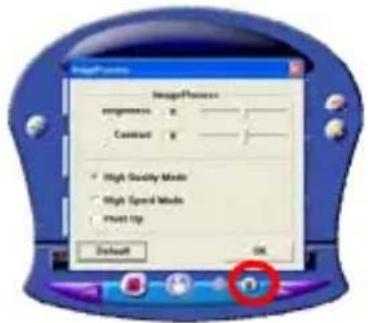
Click the photo adjustment button 📄 to open the window to process photos, and then you can set the contrast, brightness etc for photos. When downloading photos, the software will process them according to these settings.

natural_image
Blue ergonomic computer interface with grid layout and control buttons (no readable text or symbols)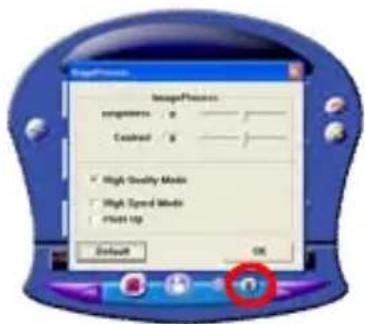
text_image
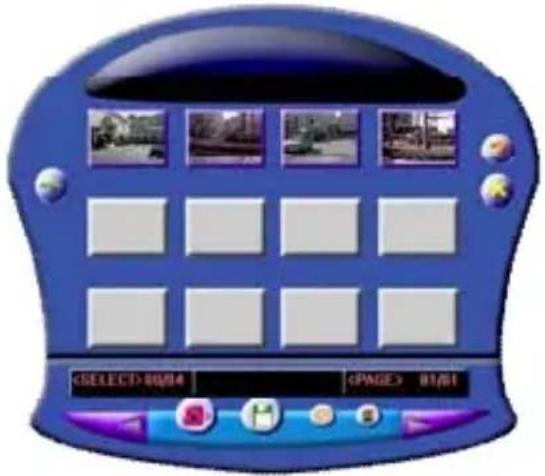
ImageProcess angements / 0 Clead / 0 ✓ High Quality Mode ✓ High Speed Mode ✓ Quick Top Default OKClick the photo download button 📄 to introduce the photos in the camera into the window. If the photos are above 12pcs, display them in multiple pages, click and 🎨 button to switch different pages.
Click the chosen photo with the left key of the mouse; the chosen photo is in a red frame. Or click button to choose all photos on a page.
text_image

text_image
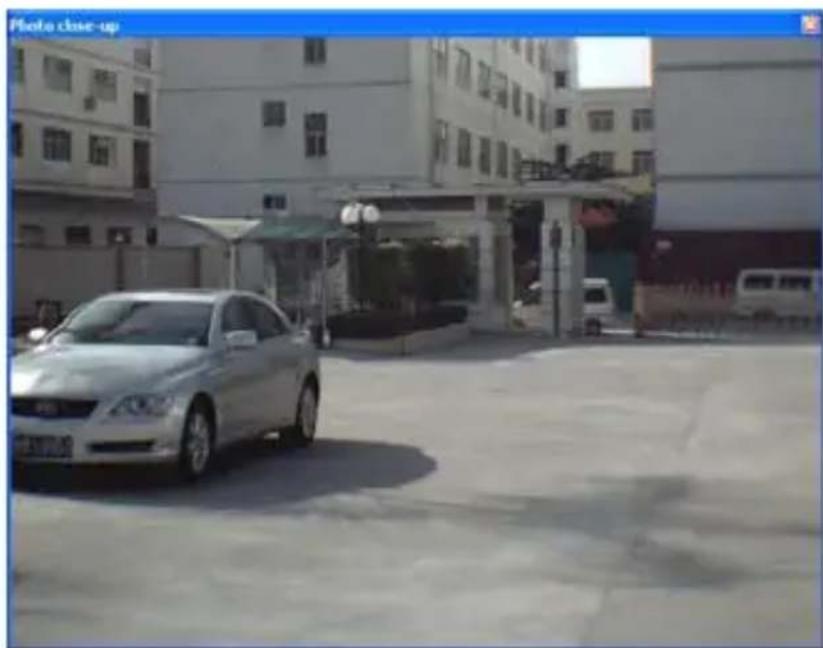
SELECT>8404Click the photos in the window with the right key of the mouse to zoom in photos:
natural_image
Exterior view of a residential street with a silver sedan parked in front, buildings and a parking lot in the background (no signage)Click

button to save the chosen photo into PC.
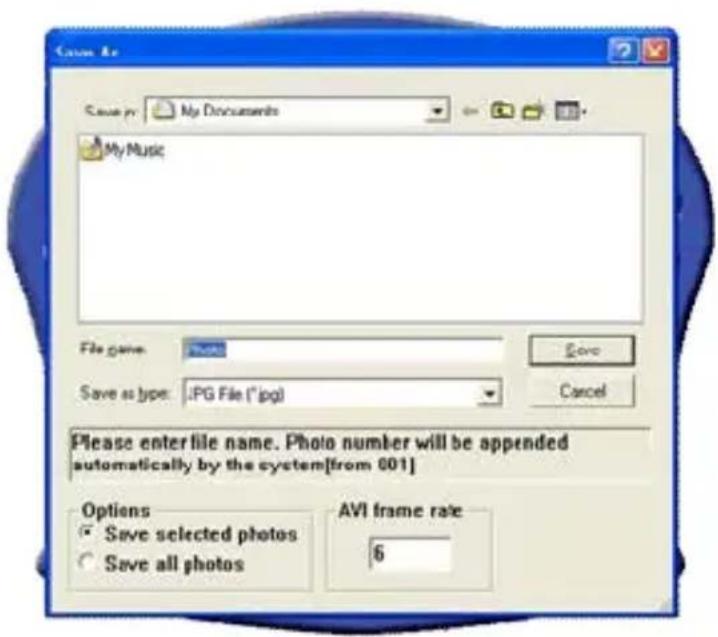
text_image
Cassay 8x Case by: My Documents My Music File name: PNG Save as type: JPG File (*.jpg) Save Cancel Please enter file name. Photo number will be appended automatically by the system[from 001] Options Save selected photos Save all photos AVI frame rate 6After download is over, click

button to close the photo download window.
Use PC Camera

PCC am
Open the folder "913D Camera" on the desktop, double click icon to open the PC cam window, then you can display the photos corresponding to the lens with the function of PC Camera.
When PC Camera function is used, the icon ☐ will occur on the top left corner of the camera screen.
If the window does not display any photos, check whether corresponding ticks are made before the settings in the following figures:
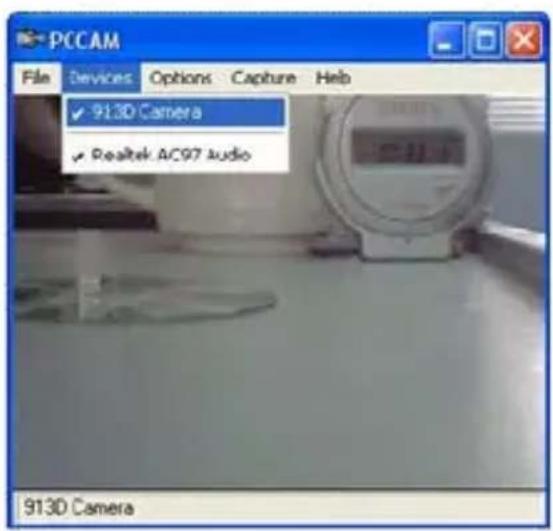
text_image
PCCAM File Devices Options Capture Help ✓ 913D Camera ✓ Realtek AC97 Audio 913D Camera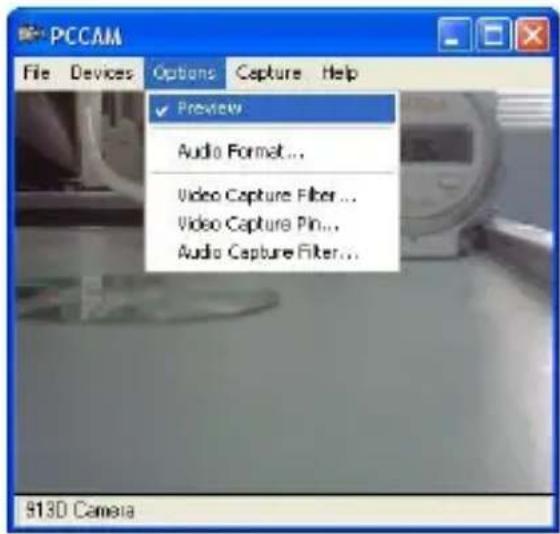
text_image
PCCAM File Devices Options Capture Help Preview Audio Format... Video Capture Filter... Video Capture Pin... Audio Capture Filter... 913D Camera6. Install and Use PhotolImpression 5:
Install PhotolImpression5:
In the CD installation guide window, click Install Photo Impression button and complete the installation step by step according to the hints.
After the installation is over, click Exit button to turn off the window and restart the computer.
Run PhotolImpression5:
On the desktop, double click Photo impression icon, or open PhotoImpression 5 via "Start → Programs".
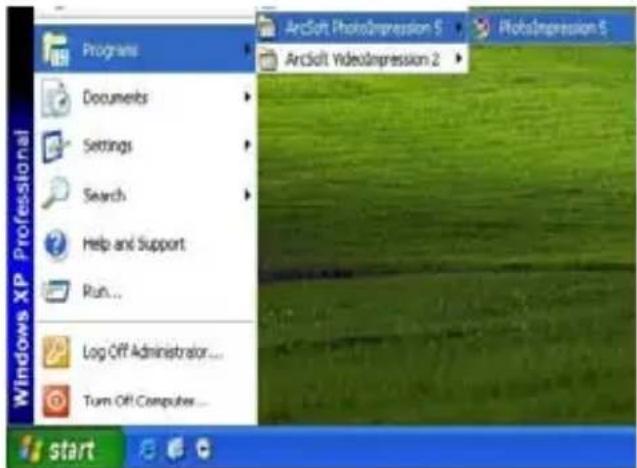
text_image
Windows XP Professional Programs Documents Settings Search Help and Support Run... Log Off Administrator... Turn Off Computer... ArcSoft PhotoImpression 5 ArcSoft VideoImpression 2 PhotoImpression 5 startWhen PhotoImpression5 is opened, the following window will occur. Click the center of the window with the left key of the mouse to shut off the window. You cannot open
PhotoImpression until this window is closed.
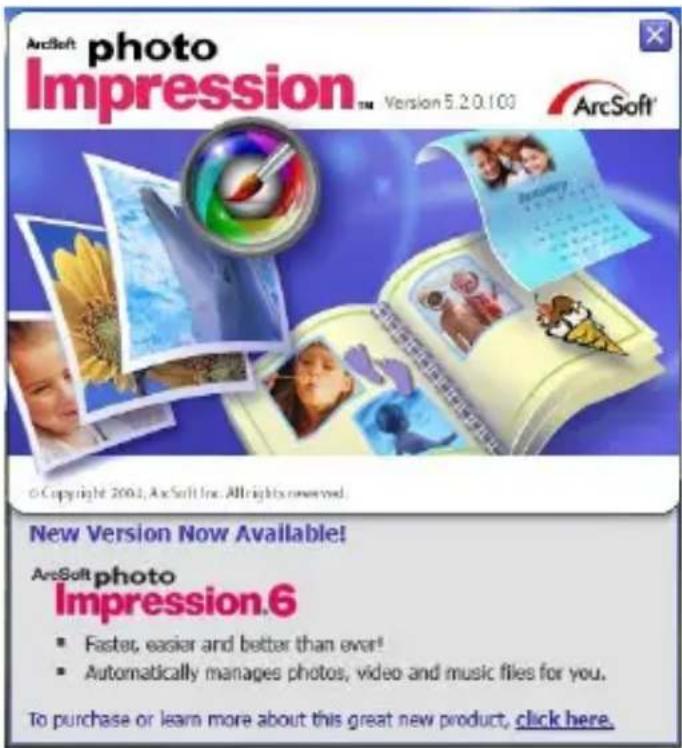
text_image
ArcSoft photo Impression™ Version 5.20.103 ArcSoft® © Copyright 2003, ArcSoft Inc. All rights reserved. New Version Now Available! ArcSoft photo Impression.6 ■ Faster, easier and better than ever! ■ Automatically manages photos, video and music files for you. To purchase or learn more about this great new product, click here.After PhotoImpression is opened, "Get Photo" window will occur:
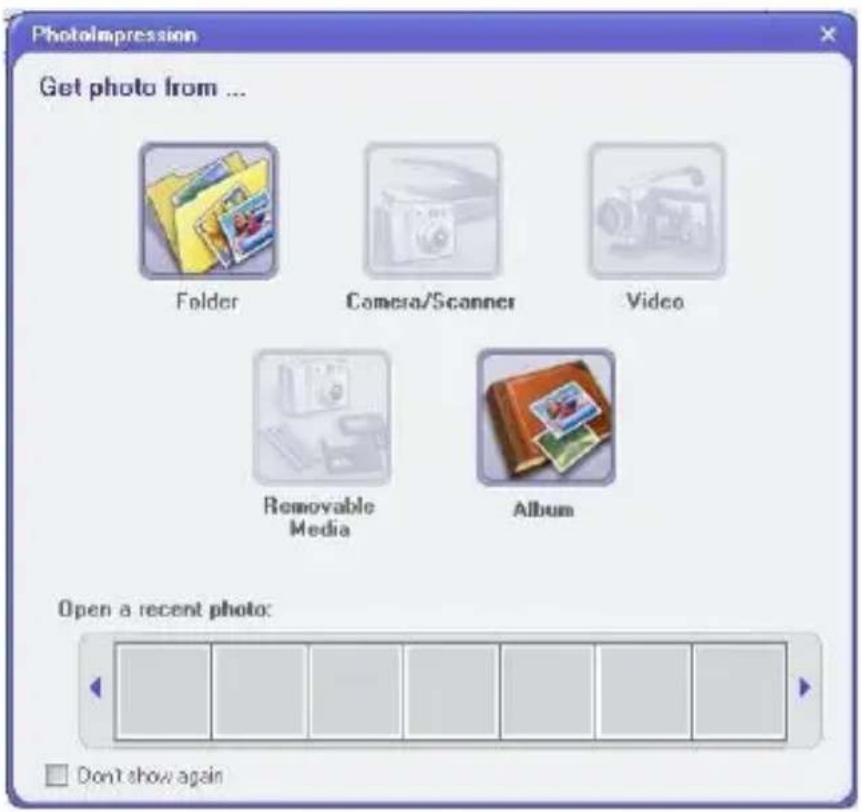
text_image
Photolimpression Get photo from ... Folder Camera/Scanner Video Removable Media Album Open a recent photo: Don't show againAfter having the desired selection and opening the desired photo in "Get Photo" window, the selected photo will occur in the central area of the program. After that, you can edit
the selected photo.
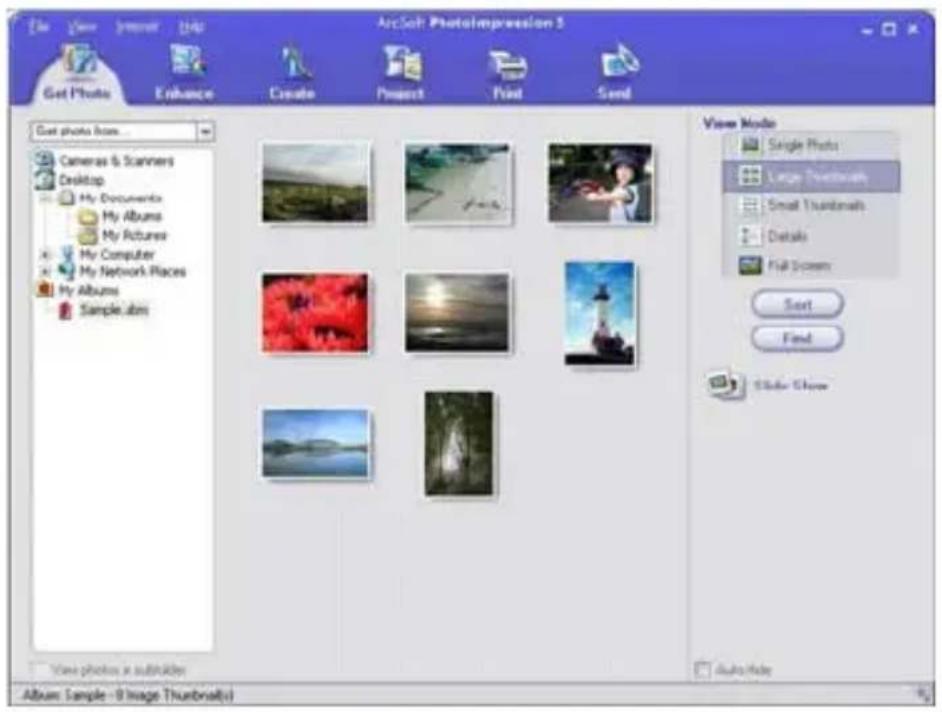
text_image
Get Photo Enhance Create Project Find Send Get photo items... Cameras & Scanners Desktop My Documents My Albums My Pictures My Computer My Network Places My Albums Sample Jobs View Photo Single Photo Large Touchbrush Small Touchrails Details Full Screen Sort Find Slider Style Album Sample -9 Image Thumbra(s) Auto HideAbout the detailed use instructions of Photolmpression, please refer to "Help" in the program (as following figure).
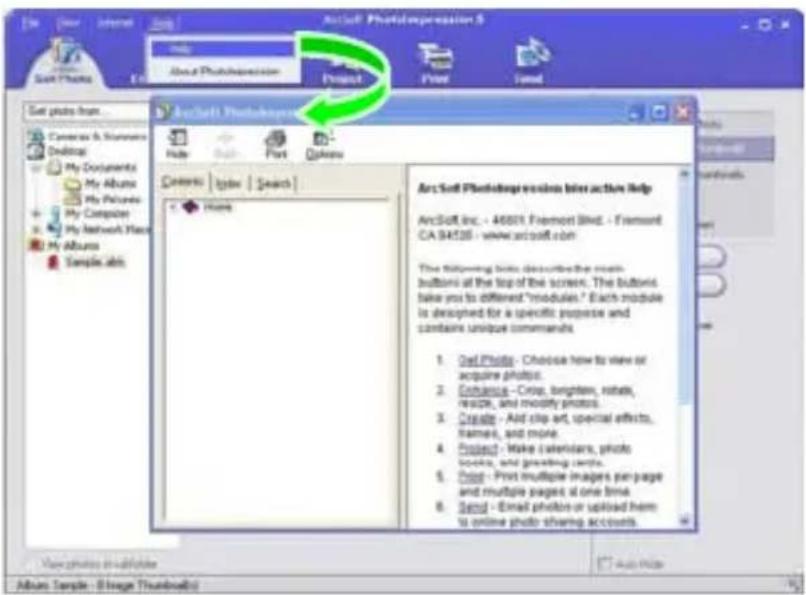
text_image
ArcSoft Photolopressor 5 File Edit View Insert Help About Photolopressor Project Print Send Set photos from... Camera & Instruments Desktop My Documents My Albums My Pictures My Computer My Network Maps My Albums Samples ads ArcSoft Photolopressor Help Print Questions Centers: Topics Search Home ArcSoft Photolopressor Interactive Help ArcSoft Inc. - 46001, Fremont Blvd. - Fremont CA 94138 - www.acsoft.com The following bits describe the most buttons at the top of the screen. The buttons take you to differ 'modules.' Each module is designed for a specific purpose and contains unique commands. 1. Oral Photo - Choose how to view or acquire photos. 2. Enhance - Crop, brightness, noise, noise, and modify photos. 3. Create - Aid clip art, special effects, frames, and more. 4. Project - Make calendars, photo books, and greeting cards. 5. Drop - Print multiple images per page and multiple pages at one time. 6. Send - Email photos or upload them to online photo sharing accounts. View photos in profile About Samples - Image Thumb(s)7. Technical Parameters
Image sensor: 300KPX CMOS sensor
Image resolution 1.3MPX (interpolated)
Lens: F2.8, f=3.6mm
Screen: 1.1" LCD.
Memory: Inbuilt 8MB SDRAM
Work mode: Shooting, playback
Resolution: QVGA: 320×240, VGA: 640×480
File format: JPEG
Communications interface: USB1.1
Power supply: 2 batteries type AAA (LR03)
Power control: Manual power-on/off, automatic power-off
Self timer 10s
Auto power-off: 60s
Exterior dimensions: 100x60x23mm
Weight: 48g
Note:

Electricalandelectronicequipment(EEE)containsm aterials,partsand substanceswhichcanbedangeroustotheenviromentandharmfultohuman healthifwasteofelectricalandelectronicequipment(WEEE)isnotdisposed ofcorrectly.
Equipments which are marked with the WEEE logo (as shown on the left), should not be thrown away with your household waste. Contact your Local Authority Waste Disposal Department as they will be able to provide details of therecycling options available by your area.
Accessional explain
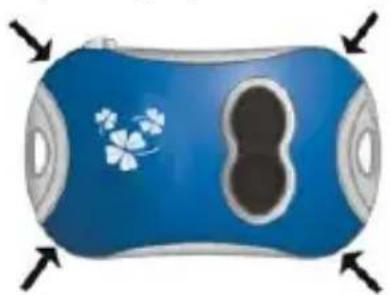
n Change the Shell:
Lightly pull outside the holes on four angles of the front cover of the camera with hands to remove the front cover to be replaced. Put the new front cover according to the button positions and press lightly:
natural_image
Blue cylindrical object with floral and double-hole design, no visible text or symbols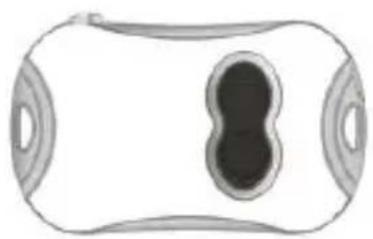
natural_image
Simple line drawing of a rounded rectangular object with internal oval and circular features (no text or symbols)
natural_image
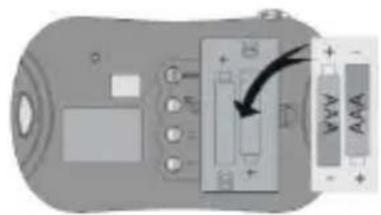
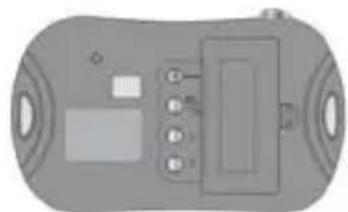
Illustration of a cylindrical object with floral pattern and double bottom opening, surrounded by directional arrows (no text or symbols)n Battery installation:
natural_image
Top-down view of a gray electronic device casing with buttons and display panel (no visible text or symbols)
natural_image
Top-down view of a handheld electronic device with buttons and display (no visible text or symbols)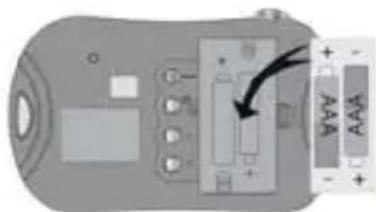
natural_image
Close-up of a handheld electronic device with a battery and indicator lights, no visible text or symbolsIngo Devices assumes no responsibility for any errors that may appear in this manual.
Due to our continuous improvement, Ingo Devices reserves the right to change without notice, product offerings, specifications and compatibility.
Contenido
text_image
Exploded view diagram of a device with numbered parts for identification3. Funcionamiento
- Encender
text_image
Install Driver Install Photo Impression Browse CD Exitnatural_image
Blue electronic device with grid layout and control buttons (no readable text or symbols)
text_image
Image Process Component: 0 Contest: 0 High Quality Mode High Speed Mode Reset Up Default OKnatural_image
Exterior view of a commercial building with a silver sedan parked in front (no visible signage or text)text_image
Save As Save as: My Documents My Music File name: Save Save as type: JPG File (*.jpg) Cancel Please enter file name. Photo number will be appended automatically by the system[from 001] Options Save selected photos Save all photos A/I frame rate $text_image
ArcSoft photo Impression™ Version 5.2.0.103 ArcSoft New Version Now Available! ArcSoft photo Impression.6 • Faster, easier and better than ever! • Automatically manages photos, video and music files for you. To purchase or learn more about this great new product, click here.text_image
Photoimpression Get photo from ... Folder Camera/Scanner Video Removable Media Album Open a recent photo: Don't show againtext_image
ArcSoft Photopressors 8 Get Photo About Photopressor Project Print Send Get photo items Cameras & Scasters Desktop My Documents My Accounts My Pictures My Computer My Network Place My Albums Sample ads ArcSoft Photopressor Help Hide Paste Print Options Contents Update Search Home ArcSoft Photopressor Interactive Help ArcSoft, Inc. - 40001 Fromont Group - Fromont CA 94530 - www.arcsoft.com The following links describe the main buttons at the top of the screen. The buttons take you to different "modules." Each module is designed for a specific purpose and contains unique comments. 1. Get Photo - Choose how to view or acquire photos. 2. Enhance - Crop, brighten, roble, resize, and modify photos. 3. Create - Add clip art, special effects, frames, and more. 4. Project - Make calendars, photo books, and greeting cards. 5. Print - Print multiple images per page and multiple pages at one time. 6. Send - Email photo or upload them to online photo sharing accounts.natural_image
Blue cylindrical can with floral and butterfly design, no text or symbols visible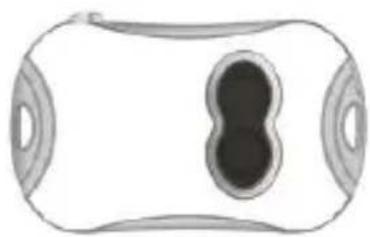
natural_image
Simple line drawing of a rounded rectangular object with a central oval and two side circular features (no text or symbols)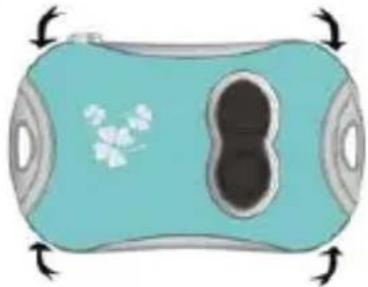
natural_image
Illustration of a stylized blue cylindrical object with floral patterns and directional arrows (no text or symbols)natural_image
Top-down view of a gray electronic device casing with buttons and a central panel (no text or symbols visible)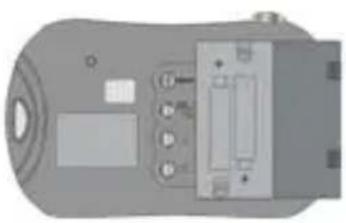
natural_image
Close-up of a gray electronic device with buttons and a central display (no visible text or symbols)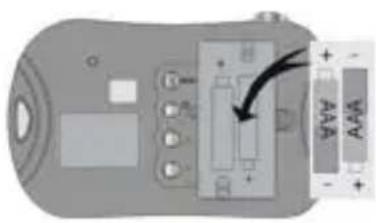
text_image
Diagram of a device control panel with labeled buttons and an arrow indicating a process or operation.text_image
Exploded view diagram of a device with numbered parts for identification3. Operação
• Ligar
text_image
Install Driver Install Photo Impression Browse CD Exitnatural_image
Blue and gray electronic device with grid layout and control buttons (no visible text or symbols)
text_image
ImageProvnics Properties: 0 Custom: 0 High Quality Media High Speed Media PS681.13p Default OKnatural_image
Exterior view of a residential street with parked cars and apartment buildings (no visible signage or text)Clique a tecla

text_image
Save As Save in: My Documents My Music File name: 2015 Save as type: JPG File (*.jpg) Save Cancel Please enter file name. Photo number will be appended automatically by the system[from 001] Options Save selected photos Save all photos AVI frame rate 6Clique a tecla download.

text_image
PCCAM File Desirves Options Capture Help ✓ 913D Camera ✓ Reatek AC97 Audio 913D Camera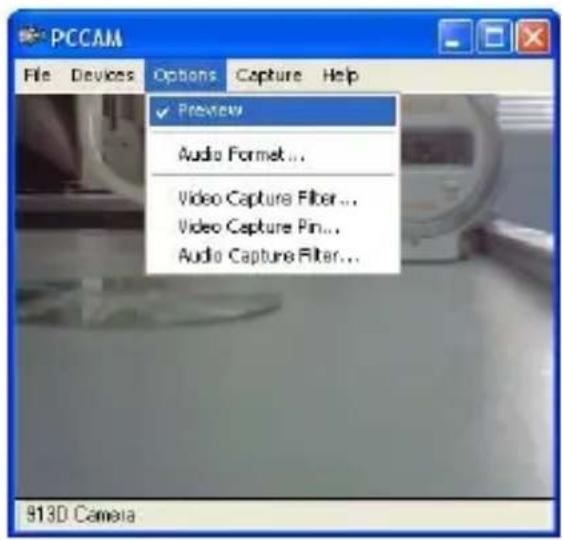
text_image
PCCAM File Devices Options Capture Help ✓ Preview Audio Format... Video Capture Filter... Video Capture Pin... Audio Capture Filter... 913D Camera6. Instalar e usar Photolmpression 5:
Instalar Photolmpression5:
text_image
ArcSoft photo Impression™ Version 5.2.6.103 ArcSoft® New Version Now Available! ArcSoft photo Impression 6 • Faster, easier and better than ever! • Automatically manages photos, video and music files for you. To purchase or learn more about this great new product, click here.text_image
Photompression Get photo from ... Folder Camera/Scanner Video Removable Media Album Open a recent photo: Don't show againtext_image
Get Photo Exhibits Create Project Point Send Get photo from ... Camera & Scanners Desktop My Documents My Albums My Pictures My Computer My Network Places My Albums Sample.htm View Photo as tablators ArcSoft Photomicrovision 5 View Mode Single Photo Large Thumbnails Small thumbnails Details Full Screen Set Find Units View Album: Sample - E Image Thumbnail(s) Auto Helptext_image
ArcSoft Photography Help ArcSoft, Inc. - 180021 Frontend (Ext. - Frontend CA54536 - www.arcsoft.com) The following lists describe the best button at the top of the screen. The buttons take you to different "modes." Each module is designed for a specific purpose and contains unique comments. 1. Dot Photo - Choose how to use or acquire photos. 2. Enhance - Crop, brightness, noise, reset, and movement photos. 3. Create - Add clip of, special effects, frames, and more. 4. Print - Make calendars, photo boxes, and greeting cards. 5. Print - Print multiple images per page and multiple pages at one time. 6. Send - Email photo or upload them to online photo sharing accounts.natural_image
Blue cylindrical object with floral and butterfly design, no visible text or symbols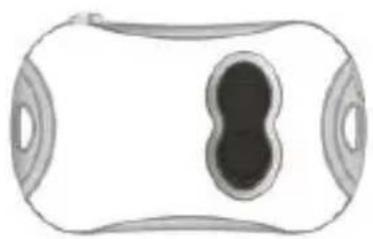
natural_image
Simple line drawing of a rounded rectangular object with internal oval and circular features (no text or symbols)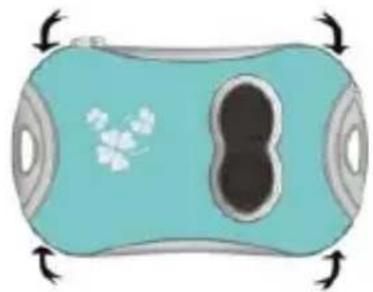
natural_image
Illustration of a cylindrical object with floral patterns on its side, surrounded by directional arrows (no text or symbols)natural_image
Top-down schematic of a device casing with buttons and display panel (no text or symbols)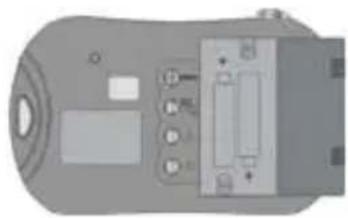
natural_image
Top-down view of a handheld electronic device with buttons and a central display (no visible text or symbols)
text_image
Diagram of a device control panel with labeled buttons and an arrow pointing to a componenttext_image
Exploded view diagram of a device with numbered parts for identification3. Opération
- Allumer
text_image
Install Driver Install Photo Impression Browse CD Exitnatural_image
Blue and white digital display device with grid layout and control buttons (no readable text or symbols)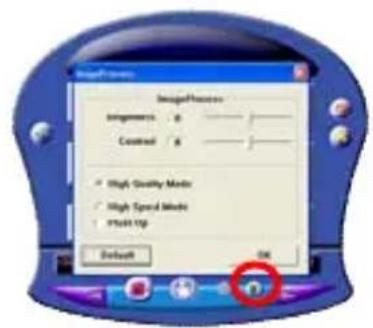
text_image
ImageProcess Images: 0 Control: 0 High Quality Mode High Speed Mode Startup Top Default OKnatural_image
Blue mobile phone interface with grid of photo thumbnails and control buttons (no readable text or symbols)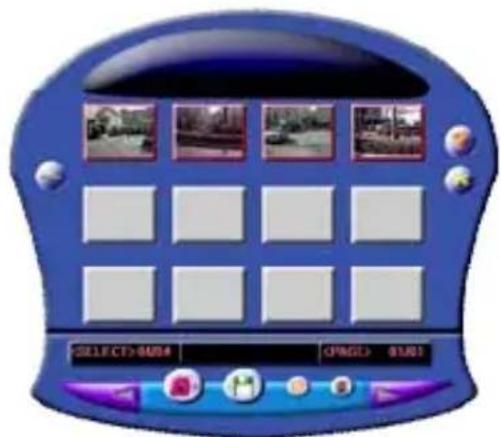
text_image
SELECT>BABAnatural_image
Exterior view of a residential area with a silver sedan parked in front and buildings in the background (no visible text or signage)Cliquer sur

text_image
Save As Save in My Documents My Music File name: Save as type: JPG File (*.jpg) Cancel Please enter file name. Photo number will be appended automatically by the system[from 001] Options Save selected photos Save all photos Art frame rate 6text_image
PCCAM File Devices Options Capture Help ✓ 913D Camera ✓ Realtek AC97 Audio 913D Camera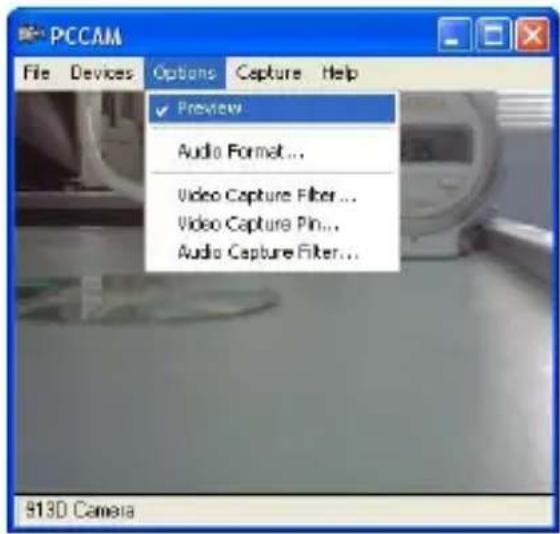
text_image
PCCAM File Devices Options Capture Help Preview Audio Format... Video Capture Filter... Video Capture Pin... Audio Capture Filter... 913D Camera6. Installer et Utiliser Photolmpression 5:
Installer PhotolImpression5:
text_image
ArcSoft photo Impression™ Version 5.20.100 © Copyright 2004, ArcSoft Inc. All rights reserved. New Version Now Available! ArcSoft photo Impression.6 • Faster, easier and better than ever! • Automatically manages photos, video and music files for you. To purchase or learn more about this great new product, click here.text_image
Photolmpression Get photo from ... Folder Camera/Scanner Video Removable Media Album Open a recent photo: Don't show againtext_image
ArcSoft PhotoImpression 8 Get Photo from... Canerat & Scamers Desktop My Documents My Office My Pictures My Computer My Network Place My Archive Sample info About Photo About Photo About Photo About Photo About Photo About Photo About Photo About Photo About Photo About Photo About Photo About Photo About Photo About Photo About Photo About Photo About Photo About Photo About Photo About Photo About Photo About Photo About Photo About Photo About Photo About Photo About Photo About Photo About Photo About Photo About Photo About Photo About Photo About PhotoInterface de communication: USB1.1
natural_image
Blue cylindrical object with floral and butterfly design, no visible text or symbols
natural_image
Top-down schematic of a device casing with internal components (no text or symbols)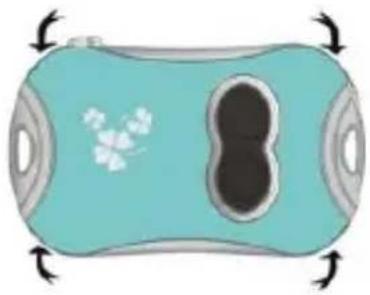
natural_image
Illustration of a cylindrical object with a butterfly design and directional arrows (no text or symbols)n Installation de batterie:
natural_image
Top-down view of a gray electronic device casing with buttons and display (no visible text or symbols)
natural_image
Top-down view of a handheld electronic device with buttons and ports (no visible text or symbols)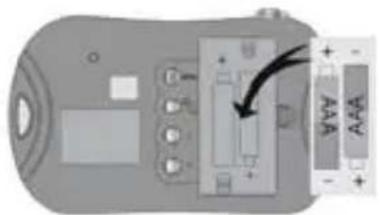
text_image
Diagram of a device control panel with labeled buttons and an arrow pointing to a component, showing 'AAA' and 'AAA' labels.text_image
Exploded view diagram of a device with numbered parts for identification3. Operazione
- Accendere
text_image
Install Driver Install Photo Impression Browse CD Exitnatural_image
Blue and white electronic device with grid layout and control buttons (no readable text or symbols)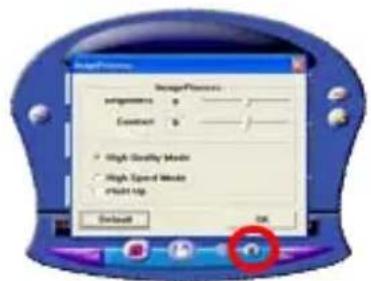
text_image
Image Process Properties Properties: 0 Creation: 0 High Quality Mode High Speed Mode Quick Top Default OKnatural_image
Exterior view of a residential street with parked cars and apartment buildings (no visible signage or text)text_image
Save As Save in My Documents My Music File name: Save Save as type: JPS File (*.jpg) Cancel Please enter file name. Photo number will be appended automatically by the system[from 001] Options Save selected photos Save all photos All frame rate 6text_image
PCCAM File Devices Options Capture Help ✓ 913D Camera ✓ Realtek AC97 Audio 913D Camera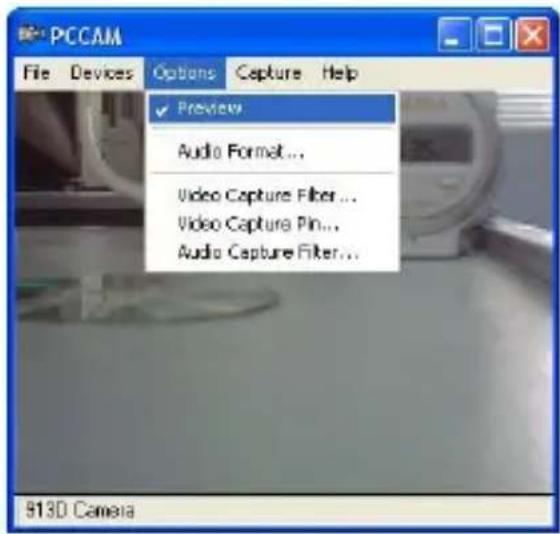
text_image
PCCAM File Devices Options Capture Help ✓ Preview Audio Format... Video Capture Filter... Video Capture Pin... Audio Capture Filter... 913D Camera6. Installare e Usare PhotoImpression 5:
Installare PhotolImpression5:
text_image
ArcSoft photo Impression™ Version 5.2.0.103 ArcSoft® New Version Now Available! ArcSoft photo Impression.6 • Faster, easier and better than ever! • Automatically manages photos, video and music files for you. To purchase or learn more about this great new product, click here.text_image
Photolimpression Get photo from ... Folder Camera/Scanner Video Removable Media Album Open a recent photo: Don't show againtext_image
Get Photo About Photopression Project Print Send Get photo from... Commerce & Restaurants Desktop My Documents My Albums My Pictures My Computer My Network Files My Albums Sample.htm AirSoft Photopression Hide Break Print Sphere Contents types Search Home AcSoft Photopression Interactive Help ArcSoft, Inc. - 65021 FreightBlvd. - Fromout C# 94538 - www.acssoft.com The following hike describes the main buttons at the top of the screen. The buttons take you to different "modules." Each module is designed for a specific purpose and contains unique comments. 1. Get Photo - Choose how to view or acquire photos. 2. Enhance - Crop, brighten, rotate, resize, and modify photos. 3. Create - Add clip art, special effects, frames, and more. 4. Project - Make calendars, photo books, and greeting cards. 5. Print - Print multiple images per page and multiple pages at one time. 6. Band - Email photo or upload them to online photo sharing accounts.natural_image
Blue cylindrical object with floral and petal design, no visible text or symbols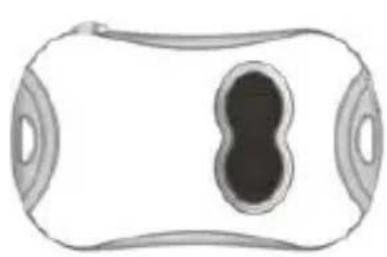
natural_image
Top-down schematic of a cylindrical device with internal oval structure (no text or symbols)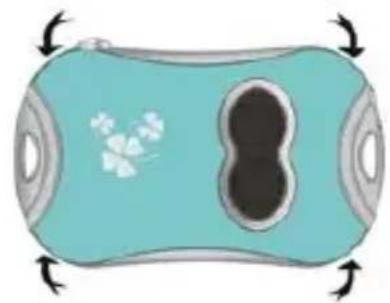
natural_image
Illustration of a teal cylindrical device with a butterfly-shaped logo and central black oval, surrounded by directional arrows (no text or symbols)natural_image
Top-down view of a gray electronic device casing with buttons and ports (no visible text or symbols)
natural_image
Diagram of a handheld electronic device with ports and a battery pack (no text or symbols)
text_image
Diagram of a device control panel with labeled buttons and an arrow pointing to a componenttext_image
Exploded view diagram of a device with numbered parts for identification3. Anwendungen
- Einschaltung
text_image
Install Driver Install Photo Impression Browse: CD Exit6
natural_image
Blue gaming console interface with 3x5 grid layout and control buttons (no readable text or symbols)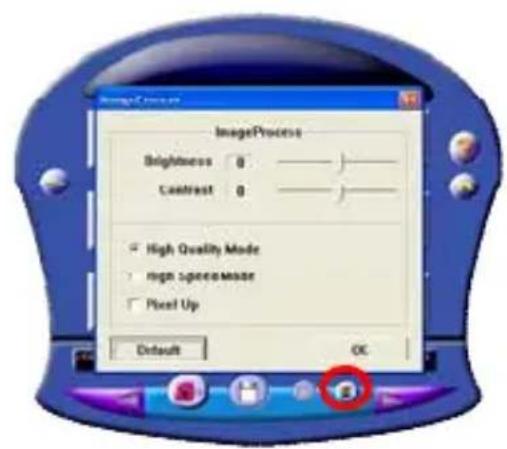
text_image
ImageProcess Brightness 0 Contrast 0 High Quality Mode high space/mass Pixel Up Default OKnatural_image
Exterior view of a commercial street with parked cars and buildings (no visible signage or text)text_image
Save As Save as: My Documents My Music File name: Save as type: JPG File (*.jpg) Cancel Please enter file name. Photo number will be appended automatically by the system(from 001) Options Save instructions prints Save all photos All frame rate 6text_image
Programs Documents Settings Search Help and Support Plan... Log Off Administrator... Turn Off Computer... ArcSoft Photoclimpression S ArcSoft Videoimpression 2 Photosimpression C Windows XP Professional starttext_image
Arifish photo Impression™ Version 5.2.0.10 ArcSoft® © Copyright 2016: Arifish Inc. All rights reserved. New Version Now Available! Arifish photo Impression.6 • Faster, easier and better than ever! • Automatically manages photos, video and music files for you. To purchase or learn more about the great new product, click here.text_image
Photoexpression Get photo from ... Folder Camera/Scanner Videos Removable Media Album Open a recent photo. Don't show againtext_image
AutoSoft Photograph Help AutoSoft Photograph Search Post Google Get photos from... Commercial & Restaurants Details My Documents My Articles My Pictures My Computer My Network Place My Albums Sample dates Get photos from... AutoSoft Photograph Search Update Search Home AutoSoft Photograph Interactive Help AutoSoft, Inc. - 66021 FairmontBlind - Fairmont CA 56138 - www.acsoft.com. The following times prescribe the main buttons active by order screen. The buttons take you to different "modules." Each module is designed for a specific purpose and contains unique commands. 1. Get Photo - Choose how to view or access photos. 2. Embossie - Cross, blisters, rotate, rests, and modify photos. 3. Create - Add click art, special effects, frames, and more. 4. Project - Raise calendars, photo books, and posting rights. 5. Print - Print multiple images per page and multiple pages at one time. 6. Email - Email photos or upload flows to online photo sharing accounts.7. Technische Daten
Bildsensor:
300KPX CMOS Sensor
Bildauflösung
1.3MPX (interpolated)
Objektiv:
F2.8, f=3.6mm
Bildschirm:
1.1" LCD.
natural_image
Blue cylindrical object with floral and butterfly motifs, no text or symbols visible
natural_image
Top-down view of a rounded rectangular object with a central dark oval and two side handles (no text or symbols)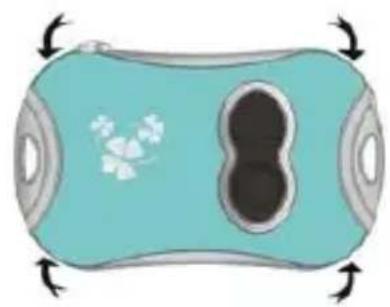
natural_image
Illustration of a teal cylindrical device with a black double-hole button and floral decoration, surrounded by directional arrows (no text or symbols)natural_image
Top-down view of a gray electronic device casing with buttons and display (no visible text or symbols)
natural_image
Top-down view of a handheld electronic device with control panel and buttons (no visible text or symbols)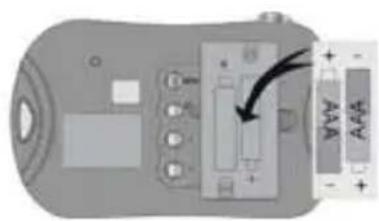
text_image
Diagram of a device control panel with labeled buttons and an arrow indicating action or movementtext_image
Labeled diagram of a device showing internal components with numbered parts for identification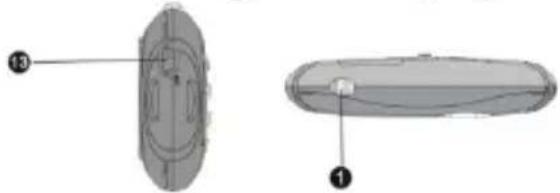
natural_image
Technical diagram of a cylindrical object with internal structure, shown from two views (labeled 1 and 3), no text or symbols present.3. Bediening
text_image
Install Driver Install Photo Impression Browse CD Exitnatural_image
Blue and white stylized device with grid layout and control buttons (no readable text or symbols)
text_image
DesignProportion engrenere: 0 Custom: 0 • High Specify Mode • High Spend Mode • Mold Top Enable OKtext_image
Blue digital display interface with multiple thumbnail thumbnails and control buttons, likely a mobile app or navigation system.
text_image
SELECT 0x04 OPEN 2 STARTnatural_image
Exterior view of a residential courtyard with a silver sedan parked in front, buildings and a van in the background (no visible text or signage)text_image
Save As Save as: My Documents My Music File name: Save Save as type: JPEG File (*.jpg) Cancel Please enter file name. Photo number will be appended automatically by the system[from 001] Options Save selected photos Save all photos AVI frame rate 6text_image
ArcSoft photo Impression™ Version 5.2.0.103 ArcSoft® © Copyright 2004, ArcSoft Inc. All rights reserved. New Version Now Available! ArcSoft photo Impression.6 • Faster, easier and better than over! • Automatically manages photos, video and music files for you. To purchase or learn more about this great new product, click here.text_image
Photoexpansion Get photo from ... Folder Camera/Scanner Video Removable Media Album Open a recent photo: Don't show againtext_image
ArtSoft Photodepress 5 Get photo from... Cameras & Scammers Buildings My Documents My Albums My Pictures My Computer My Network Files My Albums Sample files About Photo About Photopression Photo Print Send Aircraft Photodepress Contents | View | Search None ArcSoft Photodepress Interaction Help ArcSoft Inc. - 48005 Fremont Blvd. - Fremont CA 94506 - www.arcsoft.com The following link describes the main buttons at the top of the screen. The buttons beaver you to differ? Modules? Black module is designed for a specific purpose and contains unique commands. 1. Get Photo - Choose how to view or inquire photos. 2. Enhance - Crop, springen, rotals, noise, and modify photos. 3. Create - Add clip art, special effects, fames, and more. 4. Create - Make calendars, photo books, and greeting cards. 5. Print - Print multiple images per page and multiple pages at one time. 6. Send - Email photo or upload them to online photo sharing accounts. New movie in subscale Auto Media Album Sample - Image Thumbnails7. Technische parameters
Beeldsensor:
300KPX CMOS sensor
Beeldresolutie
1.3MPX (interpoleert)
Lens:
F2.8, f=3.6mm
Beeldscherm: 1.1" LCD.
Communicatie-interface: USB1.1
Stroomvoorziening: 2 batterijen type AAA (LR03)
Stroombediening: Handmatig spanning aan/uit, automatisch spanning
uit.
Zelftimer 10s
Auto power-off: 60S
natural_image
Blue cylindrical object with floral design and black arrows pointing to corners (no text or symbols)
natural_image
Top-down view of a cylindrical device with a central black oval and four side ports (no text or symbols visible)
natural_image
Illustration of a stylized blue cylindrical object with floral and double-bond patterns, no text or symbols present.n Batterijinstallatie:
natural_image
Top-down view of a gray electronic device casing with buttons and ports (no visible text or symbols)
natural_image
Top-down view of a gray electronic device with buttons and a central indicator (no visible text or symbols)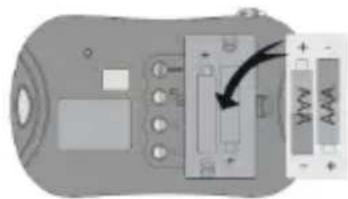
text_image
Diagram of a device control panel with labeled buttons and an arrow indicating direction, alongside a vertical scale labeled 'AAA' and 'WW'.text_image
Exploded view diagram of a device with numbered parts for identification3.Użytkowanie
Włączanie
text_image
Install Driver Install Photo Impression Browse CD Exitnatural_image
Blue gaming console with 3x5 grid layout and control buttons (no readable text or symbols)
text_image
BumpProcess Brightness: B Coast: B High Quality Mode High Speed Mode Pixel Up Default OKnatural_image
Exterior view of a modern building with a parked car in front (no visible signage or text)text_image
Save As Save in: My Documents My Music File name: Photo Save as type: JPG File (*.jpg) Cancel Please enter file name. Photo number will be appended automatically by the system[from 001] Options Save selected photos Save all photos AVI frame rate 6text_image
PCCAM File Devices Options Capture Help ✓ 913D Camera ✓ Realtek AC97 Audio 913D Camera
text_image
PCCAM File Devices Options Capture Help Preview Audio Format... Video Capture Filter... Video Capture Pin... Audio Capture Filter... 913D Cameratext_image
ArcSoft photo Impression™ Version 5.2.0.103 ArcSoft® January 2014 New Version Now Available! ArcSoft photo Impression.6 • Faster, easier and better than over! • Automatically manages photos, video and music files for you. To purchase or learn more about this great new product, click here.text_image
Photompression Get photo from ... Folder Camera/Scanner Video Removable Media Album Open a recent photo: Don't show againtext_image
Get Photo Get photo from ... Cameras & Scanners Desktop My Documents My Albums My Pictures My Computer My Network Place My Albums Sample.htm ArcSoft Photolimpression Help About Photolimpression Project Hide Back Print Options Contents Index Search Home ArcSoft Photolimpression Interactive Help ArcSoft, Inc. - 46801 Fremont Blvd. - Fremont CA 9453B - www.arcsoft.com. The following links describe the main buttons at the top of the screen. The buttons take you to different"modules." Each module is designed for a specific purpose and contains unique commandos. 1. Get Photo - Choose how to view or acquire photos. 2. Enhance - Crop, brighten, rotate, resize, and modify photos. 3. Create - Add clip art, special effects, frames, and more. 4. Project - Make calendars, photo books, and greeting cards. 5. Print - Print multiple images per page and multiple pages at one time. 6. Send - Email photos or upload them to online photo sharing accounts. View photos as folders Auto Hide Albums (sample - Image Thumbnail(s)natural_image
Blue beverage can with floral design and black lid, no text or symbols visible
natural_image
Top-down view of a rounded rectangular object with internal oval and circular features (no text or symbols)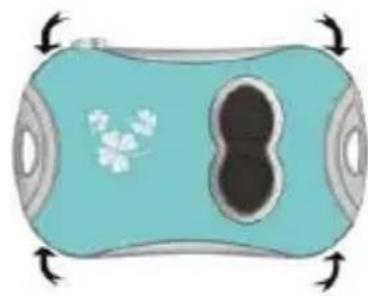
natural_image
Illustration of a stylized blue cylindrical device with floral and double-bonded sections, surrounded by directional arrows (no text or symbols)■ Wymiana baterii:
natural_image
Top-down view of a handheld electronic device with buttons and display (no visible text or symbols)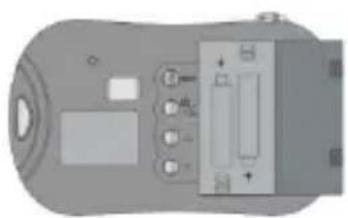
natural_image
Diagram of a handheld device with control panel and buttons (no text or symbols)