
BGS5KSILS - Vacuum Cleaner BOSCH - Free user manual and instructions
Find the device manual for free BGS5KSILS BOSCH in PDF.

User questions about BGS5KSILS BOSCH
0 question about this device. Answer the ones you know or ask your own.
Ask a new question about this device
Download the instructions for your Vacuum Cleaner in PDF format for free! Find your manual BGS5KSILS - BOSCH and take your electronic device back in hand. On this page are published all the documents necessary for the use of your device. BGS5KSILS by BOSCH.
USER MANUAL BGS5KSILS BOSCH
text_image
Technical diagram of a vacuum cleaner with numbered parts and exploded view annotationsEnf. addidae by a bono, mcr) or the apical form of skin.
natural_image
Three-panel image showing a vacuum cleaner, a close-up of a lamp, and a potted plant in an indoor setting (no visible text or symbols)BG95.
Boaxx x
BOSCH
de 14.5.0.00
in 10.24/2017
It breaks per dose
de Drawniers
-
陈东明的议
-
-
- 10.
-
n. 107489
p. mit vokl de stk
[Unreadable]
p101642192
In the world, we
H. 2014年1月1日
-
1月2日
-
4-10-20

Sicherheit 2
Safety information ....4
en Instructions for use 42
Please keep this instruction manual. When passing the vacuum cleaner on to a third party, please also pass on this instruction manual.
Intended use
This appliance is intended for domestic use only. This appliance is intended for use up to a maximum height of 2000 metres above sea level. Only use this vacuum cleaner in accordance with the instructions in this instruction manual.
In order to prevent injuries and damage, the vacuum cleaner must not be used for:
■ Vacuum-cleaning persons or animals
■ Vacuuming up:
- hazardous, sharp-edged, hot or glowing substances.
- damp or liquid substances.
- highly flammable or explosive substances and gases.
- ash, soot from tiled stoves and central heating systems.
- toner dust from printers and copiers.
Spare parts, accessories, dust bags
Our original spare parts, original (special) accessories and original dust bags are designed to work with the features and requirements of our vacuum cleaners. We therefore recommend that you only use our original spare parts, original (special) accessories and original dust bags. This will ensure that your vacuum cleaner has a long service life and that the quality of its cleaning performance will remain consistently high throughout.
Please note:
Using unsuitable or inferior-quality spare parts, (special) accessories and dust bags can damage your vacuum cleaner. Damage caused by the use of such products is not covered by our guarantee.
Safety information
This vacuum cleaner complies with the recognised rules of technology and the relevant safety regulations.
■ The appliance may be used by children over the age of 8 years and by persons with reduced physical, sensory or mental capacity or by persons with a lack of experience or knowledge if they are
supervised or have been instructed on the safe use of the appliance and the have understood the potential dangers of using the appliance.
■ Children must never play with the appliance.
■ Cleaning and user maintenance must never be carried out by children without supervision.
■ Plastic bags and films must be kept out of the reach of children before disposal.
= Risk of suffocation.
Proper use
■ Only connect and use the vacuum cleaner in accordance with the specifications on the rating plate.
■ Never vacuum without the dust bag or dust container, motor protection or exhaust filter.
= This may damage the vacuum cleaner.
■ Always keep the vacuum cleaner away from your head when using nozzles and tubes.
= This could cause injury!
■ When vacuuming stairs, the appliance must always be positioned below the user.
■ Do not use the power cord or the hose to carry or transport the vacuum cleaner.
■ For safety reasons, if this appliance's mains power cable becomes damaged, it must be replaced by the manufacturer, their after-sales service department or a similarlyqualified person.
■ If using the appliance for longer than 30 minutes, pull out the power cord completely.
■ When disconnecting the appliance from the mains, pull on the plug itself to remove it; do not pull on the power cord.
- Do not pull the power cord over sharp edges or allow it to become trapped.
■ When the cable is being automatically rewound, ensure that the mains plug is not thrown towards persons, body parts, animals or objects.= Use the mains plug to guide the power cord.
■ Pull out the mains plug before carrying out any work on the vacuum cleaner.
■ Do not operate the vacuum cleaner if it is damaged. Unplug the appliance from the mains if a fault is detected.
■ For safety reasons, only authorised after-sales service personnel are permitted to carry out repairs and fit replacement parts to the vacuum cleaner.
■ Protect the vacuum cleaner from the weather, moisture and sources of heat.
■ Do not pour flammable substances or substances containing alcohol onto the filters (dust bag, motor protection filter, exhaust filter, etc.).
■ The vacuum cleaner is not suitable for use on construction sites.
= Vacuuming up building rubble could damage the appliance.
■ When not in use, switch off the appliance and pull out the mains plug.
At the end of its life, the appliance should immediately be rendered unusable, then disposed of in an appropriate manner.
Please note
The mains socket must be protected by at least a 16 amp circuit breaker.
If a circuit breaker is tripped when you switch on the vacuum cleaner, this may be because other electrical appliances which have a high current draw are connected to the same power circuit.
To prevent the circuit breaker from tripping, select the lowest power setting before switching the appliance on, and increase the power only once it is running.
Disposal information
Packaging
The packaging is designed to protect the vacuum cleaner from being damaged during transportation. It is made of environmentally friendly materials and can therefore be recycled. Dispose of packaging that is no longer required at an appropriate recycling point.
■ Old appliance
Old appliances still contain many valuable materials. Therefore, please take appliances that have reached the end of their service life to your retailer or recycling centre so that they can be recycled. For current disposal methods, please enquire at a retailer or your local council.
■ Disposal of filters and dust bags
Filters and dust bags are manufactured from environmentally friendly materials. Provided they do not contain substances that are not permitted in household waste, you can dispose of them with your normal household waste.
Notes on the energy label
This vacuum cleaner is a general purpose vacuum cleaner with a primary hose.
To achieve the declared energy efficiency and cleaning performance class on carpet and hard floor, please use the interchangeable universal nozzle.
Please use the enclosed "powerClean Stone & Co" hard-floor tool to achieve the specified energy-efficiency level and cleaning class on hard floors with joints and gaps.
These calculations are based on the Commission Delegated Regulation (EU) No. 665/2013 of 3rd May 2013 supplementing Directive 2010/30/EU.
Unless otherwise stated, all the procedures referred to in these instructions were carried out in accordance with the EN 60312-1:2017* standard.
*As the motor service test is carried out with the dust collector empty, the stated motor service life must be increased by 10% for tests with the dust collector half filled.
fr
= Fare for kvelning!
natural_image
Simple line drawing of an open book with a right-pointing arrow indicating the page direction (no text or symbols)Gerätebeschreibung
natural_image
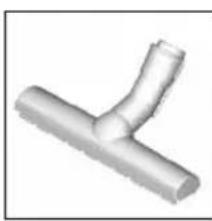
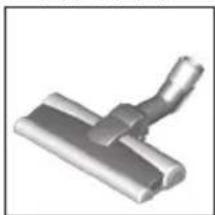
3D rendered Y-shaped pipe fitting (no text or symbols)Zum Saugen glatter Böden (Parkett, Fliesen, Terracotta,...)
natural_image
3D rendered image of a metallic mechanical clip or bracket (no text or symbols visible)Congratulations on your purchase of the Bosch Relaxx' x vacuum cleaner. This instruction manual describes various Relaxx' x models, which means that some of the equipment features and functions described may not apply to your model. You should only use original Bosch accessories, which have been specially developed for your vacuum cleaner, to achieve the best possible vacuuming results.
Fold out the picture pages.
natural_image
Simple line drawing of an open book with a curved arrow indicating rotation (no text or symbols)Your vacuum cleaner
1 Adjustable floor tool with accessory connection
2 Telescopic tube with sliding switch and accessory connection
3 Accessories holder
4 Flexible hose
5 Handle
6 Brush ring (to fit on the upholstery nozzle)*
7 Parking aid on the side of the appliance
8 Power cord
9 Dust container
10 Upholstery nozzle
11 Crevice nozzle
12 "Clean" filter cleaning button*
13 Power level indicator
14 On/Off button with electronic suction regulator
15 Appliance lid
16 Carrying handle
17 Storage aid on the underside of the appliance
18 Plate filter
19 Fluff filter
20 Floor tool for delicate hard floors, e.g. parquet
21 "powerClean Stone & Co" floor tool for hard floors with joints and gaps, e.g. tiles and floorboards
Replacement parts and special accessories
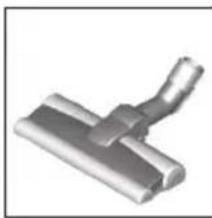
A Hard-floor nozzle BBZ123HD
natural_image
3D rendering of a Y-shaped pipe fitting (no text or symbols)For vacuuming hard floors (parquet, tiles, terracotta, etc.)
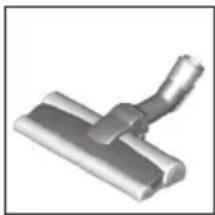
B Hard-floor nozzle BBZ124HD
natural_image
Metallic mechanical component with a protruding rod (no visible text or symbols)With 2 rotating brush rollers For caring for expensive hard floors and for the improved collection of coarse dirt.
Before using your appliance for the first time
Fig. 1
●Push the handle onto the flexible hose and lock it in place.
Initial use
Fig. 2
a) Push the flexible tube adapter into the air intake opening on the appliance and lock it in place. You will hear an audible 'click'.
b) To remove the flexible hose, press the two catches together and pull out the hose.
Fig. 3\*
a) Push the handle into the telescopic tube. To remove it, turn the handle slightly and pull it out of the tube.
b) Push the handle into the telescopic tube until it locks into place. To release the connection, squeeze the collar sleeve and pull the handle out.
Fig. 4
a) Insert the telescopic tube into the connecting piece of the floor tool. To release the connection, turn the tube slightly and pull it out of the floor tool.
b) Push the telescopic tube into the connecting piece of the floor tool until it locks in place. To release the connection, press on the locking collar and pull out the telescopic tube.
Fig. 5\*
- Unlock the telescopic tube by moving the sliding switch in the direction of the arrow and adjust to the desired length. The slide resistance on carpet is at its lowest when the telescopic tube has been completely pulled out.
Fig. 6\*
a) Place the accessories holder in the required position on the telescopic tube.
b) Use some pressure to insert the upholstery nozzle with brush ring and the crevice nozzle into the accessories holder from above or below.
Fig. 7
- Holding the power cord by the plug, pull out to the required length and insert the plug into the mains socket.
Fig. 8
To switch the vacuum cleaner on or off, press the ON/OFF button.
Controlling the suction level
Fig. 9
Turn the rotary control to infinitely adjust the suction level to the level required.
min - For vacuuming curtains and delicate textiles

- For vacuuming upholstered furniture and cushions

- For vacuuming delicate rugs and for daily vacuuming of lightly soiled floors

- For vacuuming durable floor coverings
max - For vacuuming hard floors and heavily soiled rugs and carpets
Vacuuming
Caution
Floor tools are subject to a certain amount of wear, depending on the type of hard floors you have (e.g. rough, rustic tiles). Therefore, you must check the underside of the floor tool at regular intervals. Worn undersides of floor tools may have sharp edges that can damage sensitive hard floors, such as parquet or linoleum. The manufacturer does not accept any responsibility for damage caused by worn floor tools.
Fig. 10
Set the adjustable floor nozzle:
■ Rugs and carpets =>
■ Hard floors/parquet =>


If you are vacuuming up larger particles, make sure that you vacuum them up successively and carefully to ensure that the vacuum channels of the floor tool do not become blocked.
If necessary, you should raise the nozzle in order to better vacuum up the dirt particles.
Vacuuming with accessories
Fig. 11
Attach the nozzles to the suction pipe or hand grip as required:
a) Crevice nozzle for vacuuming crevices and corners, etc.
b) Upholstery nozzle for vacuuming upholstered furniture, curtains, etc.
c) Upholstery nozzle with fixed brush ring for vacuuming window frames, cupboards, profiles, etc. After use, reinsert the crevice nozzle and upholstery nozzle into the accessories holder.
d) Floor tool for delicate hard floors, e.g. parquet
e) "powerClean Stone & Co" floor tool for hard floors with joints and gaps, e.g. tiles and floorboards
Fig. 12
You can use the parking aid on the side of the vacuum cleaner if you wish to stop vacuuming for a short time.
●After switching off the appliance, slide the hook on the floor tool into the parking aid.
Fig. 13\*
When vacuuming stairs, the appliance must be positioned at the bottom of the stairs. If it does not reach far enough, the appliance can also be carried using the carrying handle.
When your work is finished
Fig. 14
●Switch off the appliance.
- Pull out the mains plug.
- Briefly pull the power cord and release. (The power cord retracts automatically).
Fig. 15
- Unlock the telescopic tube by moving the sliding switch in the direction of the arrow and slide one tube into the other.
Fig. 16
To store the appliance, use the storage aid on the underside.
a) Stand the appliance up by the handle.
b) Slide the hook on the floor tool into the storage aid.
Emptying the dust container
Fig. 17
In order to achieve good vacuuming results, the dust container should be emptied after every use or, at the latest, when dust or dirt has visibly collected on the fluff filter or when dust at one point in the container has reached the height of the marking.
When emptying the dust container, always check how dirty the fluff filter is and, if necessary, clean it as detailed in the "Cleaning the fluff filter" instructions.
Fig. 26
Fig. 18
a) Open the appliance lid by pulling the locking tab.
b) Use the handle to remove the dust container from the appliance.
Fig. 19
a) Release the filter unit of the dust container by pressing the release button.
b) Take the filter unit out of the dust container and empty the dust container.
Fig. 20
a) Insert the filter unit into the dust container, making sure it is correctly seated. The arrow on the filter cover must point in the direction of the locking tab.
b) Press on the container lid until you hear it click into place.
c) When reinserting the dust container into the appliance, make sure it is correctly seated. Close the appliance lid until the locking tab clicks into place again.
Caution
- If you notice any resistance when closing the lid, check that the filter is complete and that the filter and dust container are correctly seated. Cleaning and care
Filter care
Cleaning the plate filter
Your appliance is equipped with a "Sensor Control"
Function. Fig. 21* + Fig. 23*
This function constantly monitors whether your vacuum cleaner is reaching its optimum power level. The indicator light lets you know when you need to clean the plate filter, so that the vacuum cleaner can reach its optimum power level once more.
Vacuum cleaner with "RotationClean" function
Fig. 21\*
The indicator lights up blue when the appliance is working at its optimum level. Once the indicator turns red and flashes, the plate filter must be cleaned. The appliance is automatically adjusted back to the lowest power setting.
Fig. 22\*
- Switch the appliance off in order to clean the plate filter.
! Caution: the filter can only be cleaned if the appliance is switched off.
- Open the appliance lid by pulling the locking tab.
- To clean the plate filter, turn the knob at least three turns through 180^ .
You can also clean the filter if the suction is becoming less powerful, even if the indicator has not lit up. We recommend that you clean the plate filter each time before emptying the dust container. It must be cleaned at the latest when the "Sensor Control" indicator lights up.
If the indicator flashes three times in quick succession, even though the plate filter is clean, this is probably due to a dirty fluff filter or a blockage. In this case, the appliance automatically adjusts to the lowest power setting and the indicator lights up red permanently.
- Switch the appliance off, empty the dust container and clean the fluff filter according to the instructions in "Cleaning the fluff filter". Fig. 26
Vacuum cleaner with "SelfClean" function
Fig. 23\*
The indicator lights up blue when the appliance is working at its optimum level. Once the indicator turns red and flashes, the appliance switches off automatically
Filter cleaning is activated and performed by the integrated cleaning motor.
If the appliance cleans three times in quick succession, this is probably due to a dirty fluff filter or a blockage. In this case, the appliance automatically adjusts to the lowest power setting and the indicator lights up red.
- Switch the appliance off, empty the dust container and clean the fluff filter according to the instructions in "Cleaning the fluff filter". Fig. 26
Fig. 24\*
If required, you can also activate the cleaning procedure manually by pressing the "Clean" filter cleaning button when the appliance is switched on.
If suction power is reducing, you can also clean the filter even if the indicator has not lit up. We recommend that you clean the plate filter each time before emptying the dust container.
Tapping out the plate filter
Fig. 25
If the plate filter is particularly dirty, the dirt can also be tapped out.
●Tap out the filter over a dustbin.
The dirt will fall down out of the filter.
Cleaning the fluff filter
The fluff filter should be cleaned at regular intervals in order to ensure optimum operation of the vacuum cleaner.
Fig. 26
- Open the appliance lid and remove the dust container from the appliance. Fig. 18
a) Take the filter unit out of the dust container.
b) It is usually sufficient to lightly shake or tap out the whole filter unit when the dust container is emptied in order to dislodge any particles of dirt.
- If this is not sufficient, you can use a dry cloth to remove dirt particles from the fluff filter.
Cleaning the motor protection filter
The motor protection filter should be cleaned regularly by knocking out the dirt and rinsing.
Fig. 27
a) Open the appliance lid and remove the motor protection filter.
b) Clean the motor protection filter by tapping out the dirt. If it is very dirty, the motor protection filter should be rinsed. Then allow the filter to dry completely.
c) After cleaning the motor protection filter, reinsert it into the appliance and close the appliance lid.
Cleaning the exhaust filter
The exhaust filter is designed so that it does not need to be replaced, provided the appliance is used as intended in the household.
To ensure that the vacuum cleaner is working at its optimum power level, the exhaust filter should be rinsed out after 1 year. The filtering action of the filter remains intact, even if the filter surface becomes discoloured.
Cleaning the HEPA filter
Fig. 28
- Open the appliance lid and remove the dust container. Fig. 18
a) Use the locking tab to open the side flap.
b) Pull the two locking tabs to unlock the filter unit with HEPA filter and remove it from the appliance.
c) Tap out the filter unit and rinse it under running water.
d) Only reinsert the filter unit into the appliance after it has dried completely and ensure that it audibly clicks into place.
e) Close the side flap until you hear the locking tab click into place again.
f) Insert the dust container into the appliance and close the appliance lid.
Cleaning the micro filter
Fig. 29
- Open the appliance lid and remove the dust container. Fig. 18
a) Use the locking tab to open the side flap.
b) Pull the two locking tabs to unlock the filter unit with foam filter and micro filter and remove it from the appliance.
c) Remove the foam filter and micro filter from the filter frame.
d) Foam filter and micro filter and rinse it under running water.
e) Do not re-insert the foam filter and the micro filter into the filter frame until it has dried completely
f) Insert the filter unit in the appliance and ensure that the locking tabs audibly click into place.
g) Close the side flap until you hear the locking tab click into place.
h) Insert the dust container into the appliance and close the appliance lid.
Cleaning instructions
Always switch off the vacuum cleaner and disconnect the power cord from the mains before cleaning the vacuum cleaner. The vacuum cleaner and plastic accessories can be cleaned with an ordinary plastic cleaner.
Caution:
- Do not use a scourer, glass-cleaning agent or multipurpose cleaning product. Never immerse the vacuum cleaner in water.
Subject to technical modifications.
fr
natural_image
Simple line drawing of an open book with a right-pointing arrow indicating the page direction (no text or symbols)natural_image
3D rendered Y-shaped pipe fitting (no text or symbols)natural_image
3D rendered mechanical component with a lever and flange (no text or symbols)natural_image
Simple line drawing of an open book with a right-pointing arrow indicating the page (no text or symbols present)natural_image
3D rendered Y-shaped pipe fitting (no text or symbols)natural_image
3D rendered mechanical component with a lever and flange (no text or symbols visible)natural_image
Simple line drawing of an open book with a right-pointing arrow indicating the page (no text or symbols present)natural_image
3D rendered Y-shaped pipe fitting (no text or symbols)natural_image
3D rendered image of a mechanical clamp or bracket component (no text or symbols visible)natural_image
Simple line drawing of an open book with a right-pointing arrow indicating the page direction (no text or symbols)Beskrivelse
natural_image
3D rendered Y-shaped pipe fitting (no text or symbols)Til støvsugning af glatte gulve (parket, fliser, terrakotta osv.)
natural_image
3D rendered mechanical component with a lever and flange (no text or symbols visible)natural_image
Simple line drawing of an open book with a right-handled arrow indicating rotation (no text or symbols)natural_image
3D rendered image of a Y-shaped pipe fitting (no text or symbols)natural_image
3D rendered mechanical component with a lever and flange (no text or symbols visible)natural_image
Simple line drawing of an open book with a right-handled arrow indicating rotation (no text or symbols)Produktbeskrivning
natural_image
3D rendered Y-shaped pipe fitting (no text or symbols)natural_image
3D rendered mechanical component with a lever and flange (no text or symbols)natural_image
Simple line drawing of an open book with a right-handled arrow indicating rotation (no text or symbols)Laitteen kuvaus
natural_image
3D rendering of a Y-shaped pipe fitting (no text or symbols)Sileiden lattioiden imurointiin (parketti, laatat, terrakotta, ...)
B Kovien lattioiden suulake BBZ124HD
natural_image
Metal mechanical component with a lever and flange (no text or symbols visible)natural_image
Simple line drawing of an open book with a curved arrow indicating rotation (no text or symbols)natural_image
3D rendering of a Y-shaped pipe fitting (no text or symbols)natural_image
3D rendered mechanical component with a lever and flange (no text or symbols)natural_image
Simple line drawing of an open book with a right-pointing arrow indicating the page direction (no text or symbols)natural_image
3D rendered Y-shaped pipe fitting (no text or symbols)natural_image
3D rendered mechanical component with a lever and flange (no text or symbols)natural_image
Simple line drawing of an open book with a right-pointing arrow indicating the page direction (no text or symbols)Περιγραφή συσκευής
natural_image
3D rendering of a Y-shaped pipe fitting (no text or symbols)natural_image
3D rendered image of a metallic mechanical clip or bracket (no text or symbols visible)natural_image
Simple line drawing of an open book with a right-pointing arrow indicating the page direction (no text or symbols)Cihaz açıklaması
natural_image
3D rendered Y-shaped pipe fitting (no text or symbols)natural_image
3D rendered mechanical component with metallic parts and a protruding rod (no text or symbols visible)natural_image
Simple line drawing of an open book with a right-pointing arrow indicating the page direction (no text or symbols)Opis urządzenia
natural_image
3D rendering of a Y-shaped pipe fitting (no text or symbols)natural_image
3D rendered image of a metallic mechanical component with a protruding rod (no text or symbols visible)natural_image
Simple line drawing of an open book with a right-pointing arrow indicating the page (no text or symbols present)A készülék leírása
natural_image
3D rendering of a Y-shaped pipe fitting (no text or symbols)natural_image
3D rendered mechanical component with a lever and flange (no text or symbols visible)natural_image
Simple line drawing of an open book with a curved arrow indicating rotation (no text or symbols)Описание прибора
natural_image
3D rendering of a Y-shaped pipe fitting (no text or symbols)natural_image
3D rendered image of a metallic mechanical clip or bracket (no text or symbols visible)natural_image
Simple line drawing of an open book with a right-pointing arrow indicating the page (no text or symbols present)natural_image
3D rendered image of a metallic mechanical component with a lever (no text or symbols visible)natural_image
Simple line drawing of an open book with a curved arrow indicating rotation (no text or symbols)您的吸塵器
1 可調式地板吸頭,包括配件接頭
2 伸縮管,含滑動按鈕與配件接頭
3 配件固定座
4 伸縮軟管
5 把手
6 環狀刷頭(適接室內吸嘴)*
7 辅助掛槽(在吸塵器側面)
8 電源線
9 集塵容器
10 室内吸嘴
11 尖頭吸嘴
12 「Clean」濾網清潔按鈕*
13 吸力指示器
14 開關按鈕,附電子吸力調節器
15 機殼蓋
16 搬運把手
17 吸塵器底部的貯存輔助設計
18 葉片式濾網
19 棉絮濾網
natural_image
3D rendered Y-shaped pipe fitting (no text or symbols)硬質地板吸塵專用
(實木地板、瓷磚、紅瓦等)
B 硬質地板吸嘴BBZ124HD
natural_image
3D rendered mechanical component with a lever and flange (no text or symbols)配備2個旋轉刷頭
natural_image
Simple line drawing of an open book with a right-handled arrow indicating rotation (no text or symbols)natural_image
3D rendered Y-shaped pipe fitting (no text or symbols)natural_image
Metallic mechanical component with a lever and flange (no text or symbols visible)natural_image
3D rendering of a Y-shaped pipe fitting (no text or symbols)A
natural_image
3D rendered image of a metallic mechanical component with a handle and flange (no text or symbols visible)B
التشغيل
1 صورة
natural_image
Simple line drawing of an open book with a right-pointing arrow on the page (no text or symbols)وصف الجهاز
Jebel Ali Free Zone – Dubai
Tel.: 04 881 4401
mailto:service.uae@bshg.com
www.bosch-home.com/ae
AL Republika e Shqiperise, Albania
ELEKTRO-SERVIS sh.p.k
Rr. Shkelqim Fusha, Selite,
Pallati "Matrix Konstruksion",
Kati 0 dhe +1
1023 Tirane
Tel.: 4 2278 130,-131
Fax: 4 2278 130
mailto:info@elektro-servis.com
EXPERT SERVIS
Rruga e Kavajes,
Kulla B Nr 223/1 Kati I
1023 Tirane
Tel.: 4 480 6061
Tel.: 4 227 4941
Fax: 4 227 0448
Cel: +355 069 60 45555
mailto:info@expert-servis.al
Gate 1, 1555 Centre Road
Clayton, Victoria 3168
Tel.: 1300 369 744*
Fax: 1300 306 818
mailto:aftersales.au@bshg.com
www.bosch-home.com.au
*Mo-Fr: 24 hours
01/17
BA Bosna i Hercegovina, Bosnia-Herzegovina
"HIGH" d.o.o.
Gradačačka 29b
71000 Sarajevo
Tel.: 061 10 09 05
Fax: 033 21 35 13
mailto:bosch_siemens_sarajevo@
yahoo.com
European Trade Center Building, 5th floor
1784 Sofia
Tel.: 0700 208 17
Fax: 02 878 79 72
mailto:informacia.servis-bg@bshg.com
www.bosch.home.bg

Khalaifat Est.
P.O. Box 5111
Manama
Tel.: 01 7400 553
mailto:service@khalafat.com
To arrange an engineer visit, to order spare parts and accessories or for product advice please visit
www.bosch-home.co.uk
or call Tel.: 0344 892 8979*
*Calls are charged at the basic rate, please check with your telephone service provider for exact charges
GR Greece, Ελλάς
BSH Ikiakes Siskeves A.B.E.
Central Branch Service
17 km E.O. Athinon-Lamias &
Potamou 20
14564 Kifisia
Unit 1 & 2, 3rd Floor,
North Block, Skyway House,
3 Sham Mong Road
Tai Kok Tsui, Kowloon
Hong Kong
Tel.: 2565 6151
Fax: 2565 6681
mailto:bosch.hk.service@bshg.com
www.bosch-home.cn
HR Hrvatska, Croatia
BSH kućni uređaji d.o.o.
Kneza Branimira 22
10000 Zagreb
Tel.: 01 552 08 88
Fax: 01 640 36 03
mailto:informacije.servis-hr@bshg.com
www.bosch-home.com/hr
www.bosch-home.com/hu
IE Republic of Ireland
BSH Home Appliances Ltd.
Unit F4, Ballymount Drive
Ballymount Industrial Estate
Walkinstown
Dublin 12
Service Requests, Spares and Accessories
Tel.: 01450 2655*
Fax: 01450 2520
www.bosch-home.co.uk
*0.03 € per minute at peak.
Off peak 0.0088 € per minute.
IL Israel,
C/S/B/ Home Appliance Ltd.
1, Hamasger St.
North Industrial Park
Lod, 7129801
Tel.: 08 9777 222
Fax: 08 9777 245
mailto:csb-serv@csb-ltd.co.il
www.bosch-home.co.il
IN India, Bhārat, भारत
BSH Household Appliances
Mfg. Pvt. Ltd. Arena House, Main Bldg, 2nd Floor,
Plot No. 103, Road No. 12,
MIDC, Andheri East
Mumbai 400 093
Toll Free 1800 266 1880*
www.bosch-home.com/in
* Mo-Sa: 8.00am to 8.00pm
(exclude public holidays)
IS Iceland
Smith & Norland hf.
Noatuni 4
105 Reykjavik
Tel.: 0520 3000
Fax: 0520 3011
www.sminor.is
IT Italia, Italy
www.bosch-home.com/it
IP Turebekov Yerzhan
Nurmanovich
Jangeldina str. 15
Shimkent 160018
Tel.: 0252 31 00 06
mailto:evrika_kz@mail.ru
LB Lebanon
Teheni, Hana & Co.
Boulevard Dora 4043 Beyrouth
P.O. Box 90449
Jdeideh, 1202 2040
Tel.: 01 255 211
mailto:Info@Teheni-Hana.com
LT Lietuva, Lithuania
Senuku prekybos centras UAB
Jonavos g. 62
44192 Kaunas
Tel.: 0372 12146
Fax: 0372 12165
www.senukai.lt
UAB "AG Service"
R. Kalantos g. 32
52494 Kaunas
Tel.: 0700 556 55
Fax: 037 331 363
mailto:servisas@agservice.lt
www.agservice.lt
Baltic Continent Ltd.
Lukšio g. 23
09132 Vilnius
Tel.: 05 274 1788
Fax: 05 274 1722
mailto:info@balticcontinent.lt
www.balticcontinent.lt
LU Luxembourg
S.R.L. "Rialto-Studio"
ул. Щусева 98
2012 Кишинев
Unit F 2, 4 Orbit Drive
Mairangi Bay
Auckland 0632
Tel.: 0800 245 700*
Fax: 0800 256 535
mailto:aftersales.nz@bshg.com
www.bosch-home.co.nz
* Mo-Fr: 8.30am to 4.00pm
(exclude public holidays)
PL Polska, Poland
SA Kingdom Saudi Arabia,
and Airconditioning Co. Ltd.
BOSCH Service centre,
Kilo 5 Old Makkah Road
(Next to Toyota), Jamiah Dist.
P.O.Box 7997
Jeddah 21472
Tel.: 800 244 0043
mailto:kunnumalsp@alj.com
www.aljelectronics.com.sa
SE Sverige, Sweden
BSH Home Appliances AB
Landsvägen 32
169 29 Solna
Tel.: 0771 11 22 77 local rate
mailto:Bosch-Service-SE@bshg.com
www.bosch-home.se
SG Singapore新加坡
BSH Home Appliances Pte. Ltd.
Block 4012, Ang Mo Kio Avenue 10
01-01 Techplace 1
Singapore 569628
Tel.: 6751 5000*
Fax: 6751 5005
mailto:bshsgp.service@bshg.com
www.bosch-home.com.sg
* Mo-Fr: 8.30am to 7.00pm, Sa: 8.30am to 5.30pm
(exclude public holidays)
SI Slovenija, Slovenia
BSH Hišni aparati d.o.o.
Litostrojska 48
1000 Ljubljana
Tel.: 01 583 07 00
Fax: 01 583 08 89
mailto:informacije.servis@bshg.com
www.bosch-home.com/si
SK Slovensko, Slovakia
www.bosch-home.com/tr
BSH Home Appliances Private Limited
台北市內湖區洲子街80號11樓
11F., No.80, Zhouzi St., Neihu Dist.
Taipei City 11493
Tel.: 0800 368 888
Fax: 02 2627 9788
mailto:bshtzn-service@bshg.com
Service-General SH.P.K.
Rruga Mag Prishtine-Ferizaj
70000 Ferizaj
Tel.: 0290 321 434
Tel.: 0290 330 723
mailto:a_service@
gama-electronics.com
XS Srbija, Serbia
BSH Kućni aparati d.o.o.
15th Road Randjespark
Private Bag X36, Randjespark
1685 Midrand – Johannesburg
Tel.: 086 002 6724
Fax: 086 617 1780
mailto:applianceserviceza@bshg.com
www.bosch-home.com/za
natural_image
Symbol of a trash bin crossed with two diagonal lines, no text or numbers presentde
This appliance is labelled in accordance with European Directive 2012/19/EU concerning used electrical and electronic appliances (waste electrical and electronic equipment - WEEE). The guideline determines the framework for the return and recycling of used appliances as applicable throughout the EU.
fr
natural_image
Symbol of a trash bin crossed with no text or numbers, representing waste sorting or restriction (no text present)pt
GB Conditions of guarantee
For this appliance the guarantee conditions as set out by our representatives in the country of sale apply. Details regarding same may be obtained from the dealer from whom the appliance was purchased. For claims under guarantee the sales receipt must be produced.
FR Conditions de garantie
www.bosch-home.com/tr
www.bosch-yetkiliservisi.com
bosch-infoteam@bshg.com


