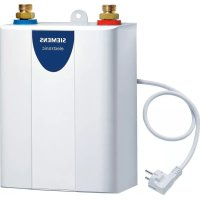
DH12103 - Boiler SIEMENS - Free user manual and instructions
Find the device manual for free DH12103 SIEMENS in PDF.
User questions about DH12103 SIEMENS
0 question about this device. Answer the ones you know or ask your own.
Ask a new question about this device
Download the instructions for your Boiler in PDF format for free! Find your manual DH12103 - SIEMENS and take your electronic device back in hand. On this page are published all the documents necessary for the use of your device. DH12103 by SIEMENS.
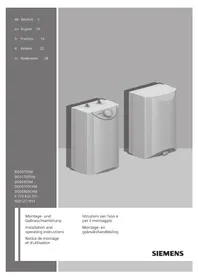
USER MANUAL DH12103 SIEMENS
operating instructions
Notice de montage
et d'utilisation
Montage-en
gebruikshandleiding
HCTpykunno MOHTaKy
N3KcPnPyTaaun
nunnnnnnnnnnnnnnnnn
同日的月坛
Sicherheitshinweise
Eine Störung, was tun?
This appliance is intended for domestic use or for household-based, non-commercial applications. Household-based applications include, e.g. usage in employees catering facilities for shops, offices, agricultural and other commercial operations, as well as usage by guests of guest houses, small hotels and similar residential establishments.
Install and operate the appliance as described in the text and illustrations. We do not accept liability for damage resulting from failure to heed these instructions.
This appliance is intended for use up to an altitude of 2000m above sea level.
The appliance may only be installed and stored in a frost-free room (due to residual water).
Risk of electric shock! Switch off the mains voltage supply immediately if a fault occurs. Immediately shut off the cold water supply to the appliance should it leak.
The continuous-flow heater may only be connected and put into operation by a qualified professional.
In order to avoid potential sources of danger, repairs and maintenance may only be undertaken by a suitably qualified specialist.
Never open the appliance without disconnecting the power supply beforehand.
The statutory regulations of the respective country, as well as those of the local electricity and water suppliers, must be adhered to.
The continuous-flow heater is a Class I appliance and must be connected to the protective earth.
The appliance must be permanently connected to installed pipes. The conductor cross-section must comply with the installed appliance power.
Caution: Earthy water pipes may give the appearance of a connected protective earth.
To guarantee compliance to relevant safety regulations, an all-pole separator must be fitted during installation. The contact opening must be at least 3mm
The continuous-flow heater is only suitable for closed (pressurised) operation.
The tap and outlet fittings must be approved for operation with closed (pressurised) continuous-flow heater systems.
Only connect the continuous-flow heater to a cold water line. A non-return valve must NOT be connected to the cold water.
Do not use plastic pipes. Steel or copper pipes are suitable for the cold-water supply. Insulated copper pipes are particularly suitable for the hot-water pipes.
The appliance should be installed close to the tap that is used the most frequently.
Disconnect the electrical connection cable from the supply and shut off the water supply before connecting the appliance!
Connect the water supply and then connect the electrical supply.
Only make the openings which are required for installation on the rear of the appliance. If the appliance is reinstalled, the unused openings must be provided with watertight sealing.
Do not touch electrically live parts after installation.
The appliance should be disconnected from the electrical mains supply when working on the water supply. After service work is complete, proceed as during the first-time appliance start-up.
No changes may be made to the appliance.
The appliance may only be used for heating drinking water for household use.
This appliance can be used by children aged 8 years and older as well as by persons with diminished bodily, sensory or mental perception, or those who lack knowledge or experience, if they are monitored or have received instruction concerning use and comprehend the possible dangers that can result. Children may not play with the appliance. Cleaning and maintenance by the user may not be performed by unsupervised children.
Keep children away from the appliance.
Please monitor children to ensure that they do not play with the appliance.
The mixer and the warm water pipe may be hot. Please inform and instruct children appropriately.
- Do not use aggressive or abrasive cleaning detergents!
Do not use a steam cleaner.
The appliance is only to be descaled by a suitably qualified specialist.
Congratulations on purchasing this Siemens appliance. You have acquired a top-quality product, which will give you a lot of enjoyment.
Please read this installation and operating instruction manual carefully, then act accordingly! Store for future reference.
Installation instructions
Install the continuous-flow heater as described in the illustrated section. Observe the instructions in the text.
The illustrations can be found in the centre of the instruction manual.
Installation

List of items supplied
1 Continuous-flow heater
2 Installation template
3 Connection piece for hot water
4 Washer, red 0 15 mm
5 Connection piece for cold water
6 Washer, 0 24 mm
7 Mounting bolt
8 Wall plug
9 Securing nut
10 Threaded bushing
11 Cable grommet

Wall mounting
There are two ways in which the continuous-flow heater can be mounted on the wall:
- Using the mounting bolt. Unevenness in the wall up to a depth of 25mm can be compensated for.
- Making use of the holes that were drilled for the old heater: Use the mounting template to establish whether the existing holes line up properly.
The following describes the installation procedure using the mounting bolt.
Marking the point for mounting the heater and selecting the opening for the connecting cable (Fig. A)

Important!
Make sure that the connecting cable is isolated from the mains electricity supply!
Place hole 3 in the mounting template over the cold-water inlet.
Select the most suitable hole through which the connecting cable is be fed. The connecting cable must pass through one of the six holes marked 14... Terminal BZ 45Z20 can be used if the cable is fed into the continuous-flow heater through one of the bottom holes marked 14a.
Mark the point 12 at which the mounting bolt is to be inserted.
Fitting the mounting bolt and attaching the pipe connecting pieces (Fig. B)
Open up the heater (Fig. C)
Punching out the holes at the rear of the heater for the mounting bolt and the connecting cable
Important: When mounting the appliance, only the holes actually required should be punched out. Any other holes that are not going to be used must be sealed watertight.
Inserting the connecting cable (Fig. D)
Push the grommet 11 over the end of the connecting cable.
Note: Do not use the grommet for a cable with a cross-section of 16mm^2 . The appliance must then be installed flush with the wall.
Place the heater over the connecting cable.
Press the grommet into the hole in the rear wall of the heater through which the cable should be fed. Ensure that the edges of the grommet are flush with the hole all the way round.
Fit the heater onto the threaded bushing 8 and secure it in place with the nut 9.
Compensating for unevenness in the wall (Fig. E)

Water connection
Using the locking screw 15, the water connection can be aligned by ± 10mm vertically.
Adapt the bend in the "hot" pipe so that it lines up with the hot-water outlet. In doing so, make sure that the "cold" elbow connection is not bent.
Attention: Ensure that a distance of at least 6mm is maintained to live parts of the heater.
Connect the water outlet and inlet and tighten the securing nut on the mounting bolt.
Checking for leaks and flushing the heater:
Turn on the hot-water tap.
Check that all pipe joints are properly sealed.
IV. Electrical connection
As a matter of principle, the water connections must be completed first of all before the heater is connected to the electricity supply. The appliance should be wired up according to the circuit diagram on the inside of the cover.
Circuit as delivered:
12 kW Y 400 V 3 ~ (11 kW Y 380 V 3 ~)
Connection Options:
-8.0kW230V\~(7.4kW220V\~)
- 6.0kW230V (5.5kW220V) (The required optional bridge can be found under accessories.)
To guarantee compliance to relevant safety regulations, an all-pole separator must be fitted during installation. The contact opening must be at least 3mm
Terminal BZ 45Z20 (special accessories) can be used if the connecting cable is fed into the continuous-flow heater via one of the bottom holes 14a!
The wires must not interfere with the operation of release button A on the safety temperature limiter.
Connection Options (Fig. A)
Definitiv wiring diagram in the appliance:
f1 Safety temperature limiter with mains terminals 1-3-5
12 Change-over terminal strip (The required optional bridge for the 6kW230V /5.5kW220V circuit can be found under accessories.)
Installation note
The installation of non plug-in ready appliances must be undertaken by the respective utility operator or by a qualified specialist company, who can also assist you when you are requesting the approval of the utility company for installation of the appliance.
Mounting the cover onto the heater
VI. Startup
The device is compliant to IEC 61000-3-12.
Switch on via the heater fuses in the domestic wiring.
Turn on the hot water tap and check the water temperature.
Explain the appliance to the user and please give him the operating instructions.
Priority switch for combination with electric storage heaters (Fig. A)
If the heater is going to be operated in this way, a priority switch must be connected into the line connecting the L2 phase to the appliance. It should be mounted on the meter or distribution panel.
a, b Control line for the electricity supply company connected to the coil input on the charging contactor
f1 Safety temperature limiter with mains terminals
f3 Priority switch (current relay)
Specifications
| DH12103 | |
| Rated power as delivered [kW] / Rated voltage | 12 kW Y 400 V3 ~ (11 kW Y 380 V3 ~) |
| Connection Options | 8.0 kW 230 V ~ (7.4 kW 220 V ~)6.0 kW 230 V ~ (5.5 kW 220 V ~) |
| Switch-on point [l/min] | 3.6 |
| Mixed water [l/min] at rated powerapprox. 38 °C 6.5approx. 50 °C(supply temperature 12 °C) | 4.4 |
| Minimum flow pressure of appliance* [MPa (bar)]with flow limiter 0.3 (3)without flow limiter 0.2 (2) | |
| Energy efficiency class | A |
| Load profile | XS |
| Annual energy consumption [kWh] | 474 |
| Daily energy consumption [kWh] | 2.178 |
| Sound power level [dB] | 15 |
| Hot water heating energy efficiency [%] | 38.9 |
- Plus any pressure loss at the tap mixer

Dimensions
Special accessories
BZ 45K24 Pipe set: for use of the continuous-flow heater as an under sink appliance
Intermediate terminal block BZ 45Z20: Required when the mains connecting cable is fed in through the bottom access hole 14a.
Truncated connecting piece sealed at rear for water connection from below (e.g. cold water connection via fitting mounted below heater):
Elbow joint, "cold" (right) Order no. 056169
Elbow joint, "hot", (left) Order no. 255568
Operating instructions
Please read and observe the detailed safety instructions at the start of these instructions!
Important: The appliance may never be exposed to frost!

Risk of electric shock!
Switch off the mains voltage supply immediately if a fault occurs.
- Immediately shut off the cold water supply to the appliance should it leak.
Getting to know your appliance
The continuous-flow heater heats the water as it flows through the appliance. The appliance only consumes power during this period.
This appliance can supply hot water to taps in several different locations. It should be installed close to the tap that is used the most frequently. This will enable you to reduce energy consumption.
Operating the appliance
Turn on the hot-water tap.
The continuous-flow heater switches on automatically and heats the water as it flows through the appliance.
The heater switches off again when you turn off the tap.
Increasing the water temperature
When the tap is turned on fully, it is possible that the heater capacity is not sufficient to heat the water to the required temperature.
Turn the tap off slightly. The water flows through the appliance more slowly and reaches a higher temperature as a result.
Decreasing the water temperature
Mix with cold water.
Saving energy
To minimise energy consumption when turning off the hot water:
- Turn off the hot-water tap slowly in order to use the residual heat of the continuous-flow heater.
- This also prevents the water temperature from briefly increasing above the preselected temperature if the hot-water tap is turned on again within the next few minutes.
To obtain particularly uniform hot-water temperatures, it is recommended to use thermostatically-controlled premixers.
The thermostatically-controlled premixer must be suitable for hydraulically controlled continuous-flow heater.
Winter operation
Note: It is possible in winter that the supply temperature of the water is reduced and the required outlet temperature is no longer achieved.
In order to compensate for this temperature reduction, please reduce the water quantity on the tap until the required water temperature is achieved.
Cleaning
Simply wipe the appliance with a damp cloth. Do not use acidic or abrasive cleaning materials.
Notes: It is normally not necessary to descale the appliance. However, extremely hard water and the frequent flows of very hot water can cause the appliance to scale up. In this case please contact our after-sales service.
A fault, what to do?

Attention!
Repairs must only be carried out by an authorised technician. Improper repairs can lead to risk of serious injury to the user.
If your appliance does not operate as required, it is often due to a very minor problem. Please check whether you can remedy the fault yourself by using the following guidelines. You will save yourself the costs of an unnecessary visit by customer service personnel.
The water does not heat up or not enough water flows out of the tap:
Check the fuse in the fusebox.
- Drop in pressure in the water mains. If the pressure is too low, the appliance will not switch on.
The strainer on the tap or shower head is blocked. Unscrew the strainer and either clean or descale it.
The corner valve is clogged. Turn on the hot-water tap fully and open and close the corner valve several times. Then clean the filter in the water tap.
The heater needs descending. Arrange for a service engineer to visit.
The continuous-flow heater switches off during the drawing-off of water, resulting in a reduction in the watertemperature:
The washer inside the hot-water tap must be a non-swelling type.
If you cannot resolve the problem yourself, switch off the heater via the fuse in the domestic wiring. Arrange for a service engineer to visit.
After-sales service
If you call the after-sales service for assistance, please specify the E no. and FD no. of your appliance.
These numbers can be found on the underside of the continuous-flow heater.
Disposal
This appliance is labelled in accordance with European Directive 2012/19/EU concerning used electrical and electronic appliances (waste electrical and electronic equipment - WEEE).
The guideline determines the framework for the return and recycling of used appliances as applicable throughout the EU.
Please ask your specialist retailer about current disposal facilities.
Guarantee
The guarantee conditions for this appliance are as defined by our representative in the country in which it is sold.
Details regarding these conditions can be obtained from the dealer from whom the appliance was purchased. The bill of sale or receipt must be produced when making any claim under the terms of this guarantee.
Subject to change without notice.
Sous reserve de modifications.
BHHMaHHe:JnKpennHeNn BDOHaRpeBaTeNa Bam cneDyET BbIaMbIBaTb TOnbKO ppeDymCOTpeHHbIe OTBepCTNa Ha 3aJHei CteHKe np6opa. BblIOMaHbIe, Ho He HcNoJIb3YeMble OTBepCTNa, CneDyeT repMeTuHO 3aKpbITb.
IoiBOD coeHHHtbnHo Ka6eJ (pncyHok D)
HaTaNHe HacaKy dJa Ka6eJ 11 Ha coeHHTeHbHbI Ka6eJb.
PnmeaHne: Ecn cTeBoi Ka6eB NMeet nNooaaNb no- nepeuHorO ceehn 16 MM², He yCTaHaBnBaIte HacaKy dna Ka6eBn. B 3TOM cnyae BOHOarpeBaTeB cIeMyet ycTaHabNBAbTB BnIOTHyO K CTeHe.
BHHMaHHe:Be3 HacaKn Dnla Ka6eN BdoHaRpeBaTeNb DH12103 KnaCcnΦuCypeTc TOnbKO Ka yctpoiCTBO B 6pb3ro3aunueHHom nCnonHeHn (IP 24).
HaTeB BOHOHaPeBaTeNb Ha coeHNHtEnbHbI Ka6enb.
BkaTb HacaKy IJNA KabeN B 3aHIOU CTeHKy np60pa. YnIOTHeBhIe KpOMKn DoJIKHBI npInerA Tb K HacaKe IO BCEN OKpyxHocTH.
YcTaHOBHTe BOHOHaPeBaTeIb Ha pe3b6OByo Btynky 8 n 3aKpeHnTe raIKoN 9.
KOMnHeHcaaHn HepOBBocTe CTeHbI (pncyHOK E)
Ⅲ. IOBOD BOdbI
Pn NOMOUI yCTaHOBOUHOro BNHTa 15 NOJCOeINHeHne BObl MOKHO peryIIpOBaTb NO BEPTNkAHI 山 ± 1 0 MM.
IIOJROHHe Cn6《Ropuee》Tpy6bl, TaK UTo6bl OHa COBMeCTnAcb C BbIXoOM Tropae BoDbl. PpN 3Tom «XoONHa» CoedHHTeBbHaa Tpy6a He DoJnxHa 6blb corHyta.
BHHMaHHe:Y6eInTeCb,HTO o6cneuNbaeTcpaCtToHHe MNHMym 6 MM DO TOKOpopoBdoJnx Detanei.
CINHTTE BIXO IN BXOD BOBIO 3aTAHNTe KpeENKHyo raKy Ha MOHTAXHOM 6ONTe.
PpOBepKaHa repMeTuHocTh n PpOmbiBka BDOHaRpeBaTeIa:
BkJIIOUHTe KpaH rOpaYe BObI.
IpoBepbTe BcCTbIKn Tpy6 Ha repMeTnHocTh.
IV. 3neKtpoNodknHoueHne
IpoKluoyeHne 3JekTpOnnTaHn npHnHnHaJIbHo DoJIKHO pOn3BOIDTcra Nocne NOCoEINHeHn K BOIOIpOBOy.3JekTpueckn MOtax BDOHaRpeBaTeNa OcyuEcTBnAeTCB COOTBeTCTBnC pNnHnHnHaJIbHO CXEmo, npBedeHHo Ha o6NoKe.
3aBODCKoe NOdkJIOUeHHe: 12 KBT, coeINHeHne 3Be3doi, 400 B, tpexpa3Hoe nepemehHoe HapjxHne (11 KBT, 380 B)
Bo3MOxHbIe BapnaHTbI NOdKJIoueHn:
-8,0 KBT,230B(7,4 KBT,220B) nepemehhoe HanpjaKeHne
-6,0KBT,230B(5,5KBT,220B) nepemehhoe HanpjaKeHne (Heo6xoImma dononHntbHaanpembuKa HaxoHntc B npnaadnexKHOCTx.)
IyBbINOHHeHcOoTBcTByIOuHX HOpM TexHKn 6eONaCHOCTHa MeCeYcTaHOBKN DoJXHO 6bITb BceNoHIOChoe pa3dEJIHOUe yCtPOiCTBO.PactBOP KOHTAKTOB DOnJKeH CoCTaBnTb MNHMym 3 MM.
Ecnn CoeHHntbHbI Ka6eB BBOHITcB BOHOHaPeBaTeNb uepe3 OJHO I3 HNIXHx OTBepCTn C MapKInPOBkoI 14a, MoKeT NcIOJIb3OBAtbcr IpOMeKyTOUHbI 6JOK KOHTkTHbIX 3aXIMOB BZ 45Z20.
IpoBoJa He DoJXHbMeWaTb Cpa6aTaBbAHHIO KHOJIKNOTKIIouHeHnA Ha 3aunTHOM OrpaHnHTeTe TEMpeAtpybl.
BapnHTbI NOKIIoueHn(pncyHOK A)
OkoHcATEbHaJa nIa co6JIIOeHHa CXema HaxoJNTcB npH6ope:
f1 3aunTHbI orpaHnHTeB TempepaTypbl C cTeBbIMN Bbl-BoaMn 1-3-5
12 KJIeMMHnK nepeKnOueHnA (Heo6xoImma nepembUka dI na peKeKnOueHnA 6KBt 230B\~5,5KBt 220B\~ haxoDntcB npHaadNeKHOCTaX.)
Yka3aHne no MOHTaKy
MoHTaX He rTOBbIX K NOkKnOueHnO np6OpOB BblONJI HReTc COOTBeCTByIOUzIM CeTeBBIM NOCTaBUNKOM IABTOPIN3OBaHHo CneuHaN3IPOBaHHo KOMNaHHe, KOtOPaI NOMoKET BaM IN B NOJyueHn COrJaCnHa MoHTaX np6Opa OT COOTBeCTByIOUeRO ceTeBOrO NoCTaBUnKa.
V. MoHTaJ KpbIiKn Ha BODoHaRpeBaTeJIb
VI. BBOD B 3Kcnpnyatauio
YcTpoIcTBo COOTBcTbByET cTaHdapTy IEC 61000-3-12.
BknHouHTe npedoxpaHntEn npotouHoro BOHOHaRpeBaTeJI BDOMaWHe 3NeKtpuecko CeTn.
OTkpOHTe KpaH rOpAeH BOdbI IN pOBepbTe TeMnepaTypy BOdbI.
06barchnte noIb3oBaTeHnKakpa6oTaETBoOnHaRpeBaTeNb, npepaTe emy HnCTpykUIO NO 3Knnyatau.
Pn KOM6HHPOBAHn C HAKONHTeHBHbIM 3JNEKTPnueCKHM BDOHaRpeBaTeEN CNeDyET HCNOB3OBAbT nPHOpNTeT- HbI BbIKHOaTeB (pncyHOK A)
PnHcNoIb3OBAHH B TaKOM peXHMe, B IINHH, CoeINHIO- ue 3y L2 CBOHOHarpeBaTeenM, CneJyET yCTaHOHTb npOpInTeHbBiklHouaTeNb. OH yCTaHaBnBaetc H acTuKe N6o pacnPepdEnTebHom unte.
a,b KOHTpObnHnIHHnIgKOMnHaHnNo 3JKeHNIO,KOTopA NOkKnHoueHa KOBxOy O6MOTKn Ha 3apAnHom KOHTaKTope.
f1 3aunThbI OpaHnHTeJIb TeMnepaTypbIC ceTeBbIMN BblBOdaMn.
f3 PnpOpnteThbBbIKIOuATenb (peTeKa)
TexHnueckne daHHble
Pn NONHOCTbO OTKpbITOM KpaHE MOUHOCTH BOHOHaPeBaTeJI MOKET HeIOCTaBaTb DII HAReBaHHaBOBbl DO XeJaEMoI TEMNEpApTybl.
Clerka npKpoTe kpaH.Boa 6ydt npoteKaTb no BOHOHaRpeBaTeIIO MeIeHHee n cTaHET rOpAee.
Понижени TemпераТурьHaRpeBa BODы
CmeuBaTcXoJIoHOBoJo.
3KOHOMN 3JIeKTPo3HepnN
UTo6bIMHHMn3HPOBaTb paCXoD 3neKtpo3HeprHn npu BblKJIIOueHHN TOpAeY BObl:
-3aKpbBaIte KpaH ropaye BoBb MeIeHHO, yTo6bl NcNoIb3OBAt b octaTOuHoe TeNIO npOTUHoro BOHOHaRpeBaTeIa.
- Tem caMbIM npeIoTbpaUaetc KpaTKOBpeMeHHoe NOBblweHne TemnepaTypbI Bblwe BblbpHoro 3HaueHn prn NobTOPHom OTKpbITnnpraue BoDbI B TeueHne 6bnkaiXnx HeckOJIbKnMnHyT Nocne 3AkpbBaHn.
Дяобсесуеня paBHomepHOn TemnepaTpyb BOdbl peKoMeHDoBaHo INONb3OBaHne TepMOCTaTHbIX CMEcHTeJIe.
TepmoctaThbIe cmecntEn IOnXHbI 6bItb npirodHbI dIpyoTuHbIX BDOHaRpeBaTeJe C rIpaBnueckm UnpaBHeHHem.
3mHHn peKIM
Yka3aHHe:B 3nMHe Bpemr TempepaTpa BoBbHa BxOde MOKET NOHHKaTbC, H B pe3yIbTaTe 3TOrHO He 6yDcTIOCTnHyTa HyKHra TempepaTpa Ha BbxOnde.
UTo6bI KOMnEHCnPOBaT NOHKeHHe TEMnpaTpbl, HeO6xoJIMo yMeHbShaTb KOINueCTBO BObl C NOMOuBIOKpaHa Do Tex nop, NOKa He 6yDet DOCTnHyTa Heo6xoJIMa TemnepaTypa ropuee Bobl.
UncTkHaHarpBaTeJIa
NobepxHocbHarpeBaTeJcneyetnWb npoTnpaBbnaXHO TpAnKO.HnB KOeM clyuae He NcNoJIb3yIteDnA uCTKnOcTpblpePmeTbI nn a6pa3HBbIe uNCTaUne cpeCTBA!
Yka3aHn: Pn o6bHbix 06CTOReTbCTBax HArpeBaTeN he HyxHO ouHuaTb OT haknn. Ho B cnyuae C oueH jckToK BoDo n np uactom OT6ope oueh ropuey BoDbl HArpeBaTeNb MoKeT NOKpbITbcra HaKnIbIO. Ecn 3TO cnyuInocb, To o6paauaTeCB b Hauy cepBnchHyo cnyk6y.
HencnpaBnOcTb,чTo DeJaTb?

BHMaHne!
JIIO6bIe pa6Otbl No peMOHTy DOJIKHb I BbINONHrTbcra TOnbKO CneuHaNCTaMn. HeKBaHnΦnCnPobAHHO OTpeMOHTnpOBaHHb HArpeBaTeB MoKeT cTaTb dJa Bac nCTouHNKOM cepbe3HOI onaCHOCTH.
Ecnn np60p He pa6oTaet TaK KaK HxHNo, pnpuHno qacto MoXeT 6b1b KaKaar-Hn6yDb MeNoOy. IpoBepbTe, BO3MOxHNO nn camocToaTeNbHO yCTpaHtB HenCnpaBHocTb Ha OCHOBaHHn DaHHbIX yka3AHN. TaKIM o6pa3OM MOxHO cOKpaTNTb pacxoAbI Ha HeHyxHHe NCnonb3OBaHne cepBnchbIX ycnyr.
Boda He harpeBaetc Hn H3 KpaHa TeueT HeoctaTouHO BObl:
IpoBepntb npedoxpaHnten B Domaun He yctaHOBe.
Ipaenhe daBneHn B BOOnpOBOHOcTn. Pn Hn3KOM daBneHH np6op He BKIOuaeTc.
3acopnncsceouhbnKpaHeHnB roIOBKe nywa.OTbHTntb ceouhbnHnBtp NouCTntbeero n6o ydaNTb HaKnib.
YrnoBoI perynpyoosn Knaan 3a6nt. NnHocTbO OTKpoTe KpaH ropaye BOdbi H HeCKoNbKO pa3 OTBnHTte n CHOba 3aBnHTte yrnoBoi Knaan. Nocne 3Toro npouHCTnte qnlbtp B KpaHe.
N3 BOHOHaPeBaTeTpe6yEtcaYdaJIHTb HaKINb. Bbl0BNTecneuaJIInCTa.
BDOHaRpeBaTeIb BbIKHouaTc npn OT6ope BoIb, Temnepatypa BObl nadaet:
IpoKnaBHytpn KpaHa ropaey BoDbldoJHKHa 6bItb Heha6yxaUojo Tnna.
EcIn BbI He MoXeTe yCTpaHnTB 3Ty HEnCnpaBHOCTb Camn, BbIKIOHTe npEdoxpaHnTeB DOMaWHei cETn 3NeKTPoNtAHn. BbIOBte CneuaJIInCTa.
CepBnchna cnyk6a
PnBbIOBe cepBnCHOn CnyxkbI Ha3OBnTe E-No FD-No BaWero HarpeBaTeJI.
3TN HOMepa Bbl MoKTe HaHTn C HIXKHei CTOpOHbI nPoTOUHOro BOHOHaRpeBaTeJI.
YTNIN3aun OTXOIOB

ДаннblпрбopИМeETOTMeTkyO COOTBETCTBnEBPoneckmHOpMaM 2012/19/EU ytunnaциЗлктчecknx ИлкtpoHHbIX np6obopw(wasteelectrical and electronic equipment - WEEE).ДаньыHopMbI oppeJЯHT DeiCTByuOuine HaTeppntOpNn EbpocOHa npaBnla Bo3Bpata nytln3aun CTapbix np6obopB.
HOpMaIHO6aKtayabHbIXBO3MOXHOCTx yTnnaCmN Bbl MoKeTe Noluyntb B MaRa3nHe, B KOTOPOM Bbl npHo6peN npH6op.
YcnoBra rapaHTnHoro 06CnyXnBaHHa
IOnyHtbcNcepnblBaIOUIO HΦopMauio 6ocOBn-ax rapaHTnHOrO o6cnyKbAHnB Bbl MoKeTe B BaWem 6nnKaJWeM aBTOpN3OBaHHOM cepBCHOM ceHTpe HIN B cepBCHOM cHTpe ot npOn3BoDnten OOO «BCX bItobAa Texnka》,a TaKke HaTn BΦnpMeHHOM rapaHTnHOM TaHOe,BldaBAEMo Prn PpOdaKe.
MblOCTaBnAeM3aCobO npaBOHa BHeceHne H3MeHeHn.
a
nnnnnnnnnnnnnnnnnnnnnnnnnnnnnnnnnnnnnnnnnnnnnnnnnnnnnnnnnnnnnnnnnnnnnnnnnnnnnnnnnnnnnnnnnnnnnnnnnnnnnnnnnnnnnnnnnnnnnnnnnnnnnnnnnnnnnnnnnnnnnnnnnnnnnnnnnnnnnnnnnnnn nn nannn nannn nannn nannn nannn nannn nannn nannn nannn nannn nannn nannn nannn nannn nannn nannn nannn nannn nannn nannn nannn nannn nannn nannn nannn nannn nannn nannn nannn nannn nannn nannn nannn nannn nn ann
European Trade Center Building, 5th floor
1784 Sofia
Tel.: 02 892 90 47
Fax:028787972
mailto:informacia.servis-bg@bshg.com
www.siemens-home.bg
CH Schweiz, Suisse, Svizzera, Switzer
BSH Hausgeräte AG
Central Branch Service
17 km E.O. Athinon-Lamias &
Potamou 20
14564 Kifisia
Unit 1 & 2, 3rd Floor
North Block, Skyway House
3 Sham Mong Road
Tai Kok Tsui, Kowloon
Hong Kong
Tel.: 2565 6151
Fax: 25656681
mailto:siemens.hk.service@bshg.com
www.siemens-home.com.hk
HR Hrvatska, Croatia
BSH kučni uredaj di.o.o.
Kneza Branimira 22
10000 Zagreb
Tel.: 016403609
Fax:016403603
mailto:informacije.servis-hr@bshg.com
www.siemens-home.com/hr
LU Luxembourg
www.siemens-home.com/lu
ME Crna Gora, Montenegro
Elektronika komerc
UI.Slobode 17
84000 Bijelo Polje
Tel./Fax: 050 432 575
Mobil: 069324812
mailto:ekobosch.servis@t-com.me
MK Macedonia,Makeonna
GORENEC
Jane Sandanski 69 lok.3
1000 Skopje
Tel.: 022 454 600
Mobil:070 697 463
mailto:gorenec@yahoo.com
PH Philippines
Hafele Philippines, Incorporated
Levi Mariano Avenue, Brgy. Ususan,
Taguig City 1632
Metro Manila
Tel.: 0842 3353
Fax:05713662
mailto:siemens-home@hafele.com.ph
PL Polska, Poland
TH Ratcha Anachak Thai,
BSH Home Appliances Limited
2034/1-5 Ital Thai Building,
1st Floor, New Petchburi Road
Bangkapi, Huaykwang,
Bangkok, 10310
Tel:027697970
Fax:02769797
Service Call Center 02 351 8995
Spareparts 02 769 7975
www.siemens-home.com/th
TR Türkiye, Turkey
BSH Ev Aletleri Sanayi
ve Ticaret A. S.
Fatih Sultan Mehmet Mahallesir
Balkan Caddesi No: 51
34771 Umraniye, Istanbul
Tel.: 02164446688*
Fax: 0 216 528 9188
mailto:careline.turkey@bshg.com
www.siemens-home.com/tr