DO05754 - Boiler SIEMENS - Free user manual and instructions
Find the device manual for free DO05754 SIEMENS in PDF.
User questions about DO05754 SIEMENS
0 question about this device. Answer the ones you know or ask your own.
Ask a new question about this device
Download the instructions for your Boiler in PDF format for free! Find your manual DO05754 - SIEMENS and take your electronic device back in hand. On this page are published all the documents necessary for the use of your device. DO05754 by SIEMENS.
USER MANUAL DO05754 SIEMENS
operating instructions
Mounting Instructions
Dispose of the packaging and old unit, if necessary, in an environmental friendly manner.
Install the small water heater as shown in the illustrations.
Observe the instructions in the text.
The illustrations can be found in the centre of the instruction manual.
Safety instructions
Risk of electric shock!
Disconnect the power supply immediately if a fault occurs!
Have the small water heater connected only by a specialist.
Observe the legal regulations as well as the connection conditions of the electrical power company and the water works.
Caution!
Fill the unit completely with water first and then plug in the mains plug. Otherwise, the resettable safety temperature limiter will trip.
Connect the unit only to a mains socket with protective contact that is installed according to regulations. Do not use an extension cord. If necessary, equip the unit with a longer cord (see Section I).
The small water heater may be used only open (unpressurised) and for one tapping point. The warm water outlet serves for pressure equalisation and may be connected only to the mixing battery provided (Order No. BZ 13051 or BZ 13061 [below basin] or AM 010100 [above basin]).
The outlet of the battery must always be free.
Do not use a aerator (air mixer).
During heating, expansion water drips from the outlet.
The supply cord should not touch hot parts. The insulation could be damaged.
The unit is to be mounted only in frost-free rooms.
After mounting, please give the instructions for use to the owner and explain the unit to him.
Maintenance and repair work should only be performed by a qualified professional.
The appliance should not be supplied power via a timer switch. Otherwise, there is a risk of an unintentional reset of the protection temperature limiter during a malfunction.
Disconnect the power supply before opening the appliance.
A Items Supplied/Dimensions
Mounting DO 05704, DO 05754, DO 10702, DO 10753, DO 3170D4 and DO 3175D4
B Water Connection
Caution!
Do not allow the existing mixing battery to become calcified. A reduced flow rate will ruin the water heater.
c Wall Mounting
For mounting without the wall hooks, observe the differ-ent dimensions!
D Screw on the connection hoses
Fit the sealing gasket.
Place the sleeve nuts onto the threads and screw on by hand.
IbIehtteetreeedfittings on the water heater with a spanner. Do not lubricate the thread!
After the unit has been used to heat water a few times, retighten the screw fitting.
Replacement for a damaged threaded fitting is available from customer service.
Mounting DO 05804, DO 05854, DO 10802, DO 10852 and DO 3185D4
E Wall Mounting
For mounting without the wall hooks, observe the different dimensions!
F Connecting the Mixing Battery
G Water Connection
Caution!
Do not allow the existing mixing battery to become calcified. A reduced flow rate will ruin the water heater.
Insert the connection pipes into the mixing battery.
Hang the water heater on the wall.
Screw the connection pipes onto the heater and the mixingbattery.
Hold the threaded fittings on the heater with a spanner. Do not lubricate the thread!

Putting into Operation
- Open the angle valve (only DO 05704, DO 05754, DO 10702, DO 10753, DO 3170D4 and DO 3175D4). The mains plug must not be plugged insein.
- Completely fill the heater's reservoir with water.
DO 05704, DO 05754, DO 10702, DO 10753
DO 3170D4 and DO 3175D4:
Set the flow on the angle valve.
DO 05804, DO 05854, DO 10802, DO 10852 and DO 3185D4:
Set the flow with the adjustment screw on the mixing battery.
5 Litre unit: 5 l/min = 1 l in 12 seconds
10 Litre unit: 10 l/min = 1 l in 6 seconds
- Only after steps 1 and 2 have been completed:
Insert the mains plug.
Turn the temperature selector to "III" (approx. 85^ ).
Observe the heating until the control lamp goes off.
Heating time:
5-litre unit: 12-18 minutes
10-litre unit: 25-35 minutes
Check the temperature.
Caution: if the safety temperature limiter has switched off the small water heater, disconnect the mains plug, open the hot water tap, allow approx. 4 litres of water to run through and then reconnect the mains plug. The unit is now ready for operation again.
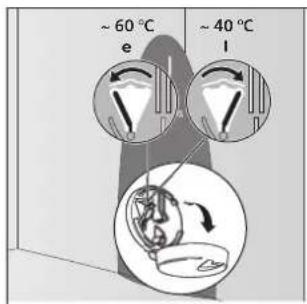
- Limiting of the Outlet Temperature
The outlet temperature of the water heater can be mechanically limited to Step "I" (approx. 40^ ) or Step "e" (approx. 60^ ).
Information on temperature limiting can be found in the instructions for use.
- Saving Energy
Set the temperature selector to "e".

Replacing the Power Supply Cord
The power supply cord must be replaced by our customer service only in order to avoid a hazard.
The mains plug must be pulled before replacing.
Instructions for Use
Please read the operating instructions carefully before you use the appliance!
Safety instructions

This appliance is intended for domestic use or for household-based non-commercial applications. Household-based applications include, e.g. usage in employees catering facilities for shops, offices, agricultural and other commercial operations, as well as usage by guests of guest houses, small hotels and similar residential establishments.
Risk of electric shock!
Disconnect the power supply immediately if a fault occurs!
The mixing battery can be hot!
This appliance is not intended for use by persons (including children) with reduced physical, sensory or mental capabilities, or lack of experience and knowledge, unless they have been given supervision or instruction concerning use of the appliance by a person responsible for their safety.
■children should be supervised to ensure that they do not play with the appliance
More detailed information is available in the installation instructions.
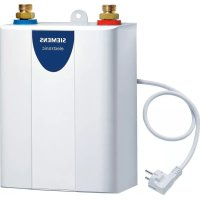
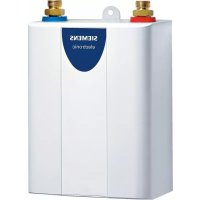
he small water heater heats and stores drinking water up to approx. 85^
he warm water outlet of the small water heater serves for pressure equalisation and my be connected only to the pressureless batteries BZ 13051 or BZ 13061 (below basin) or AM 010100 (above basin).
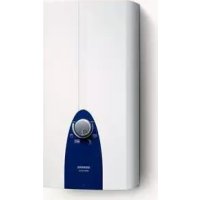
The outlet temperature can be limited to approx. 40^ (Position "I") or approx. 60^ (Position "e").
The temperature selector also switches on the heating system.
Position:
Cold
- Frost protection
I Approx. 40^
(light detent)
e Energy saving position approx. 60^ (light detent)
III Hot water approx. 85^
During heating, the control lamp lights and expansion water drips from the outlet.
At higher temperatures, the unit calcifies more quickly.
Tip: set the temperature selector to "e" in order to operate the unit economically and reduce limescale.
Cleaning
Wipe off the unit and the battery with a damp cloth or with some vinegar, if necessary.
Decalcifying
Decalcify the outlet pipe with commercially available decalcifier or vinegar.
When decalcifying, observe the warning notices of the manufacturer.
When the water runs significantly slower with the tap fully open, the heater and mixing battery is to be decalcified by a specialist. Otherwise, a pressure that is higher than allowed can be produced.
Fault
Set the temperature selector to "e" and disconnect the mains plug if the water is no longer being heated. Open the hot water tap and allow approx. 4 litres of water to run through. Then reconnect the mains plug.
Maintenance and repair work should only be performed by a qualified professional.

Disconnect the power supply before opening the appliance.
Customer Service
To avoid unnecessary costs for a customer service visit when a malfunction occurs, check first if the unit has been operated improperly or if a mains fuse has failed.
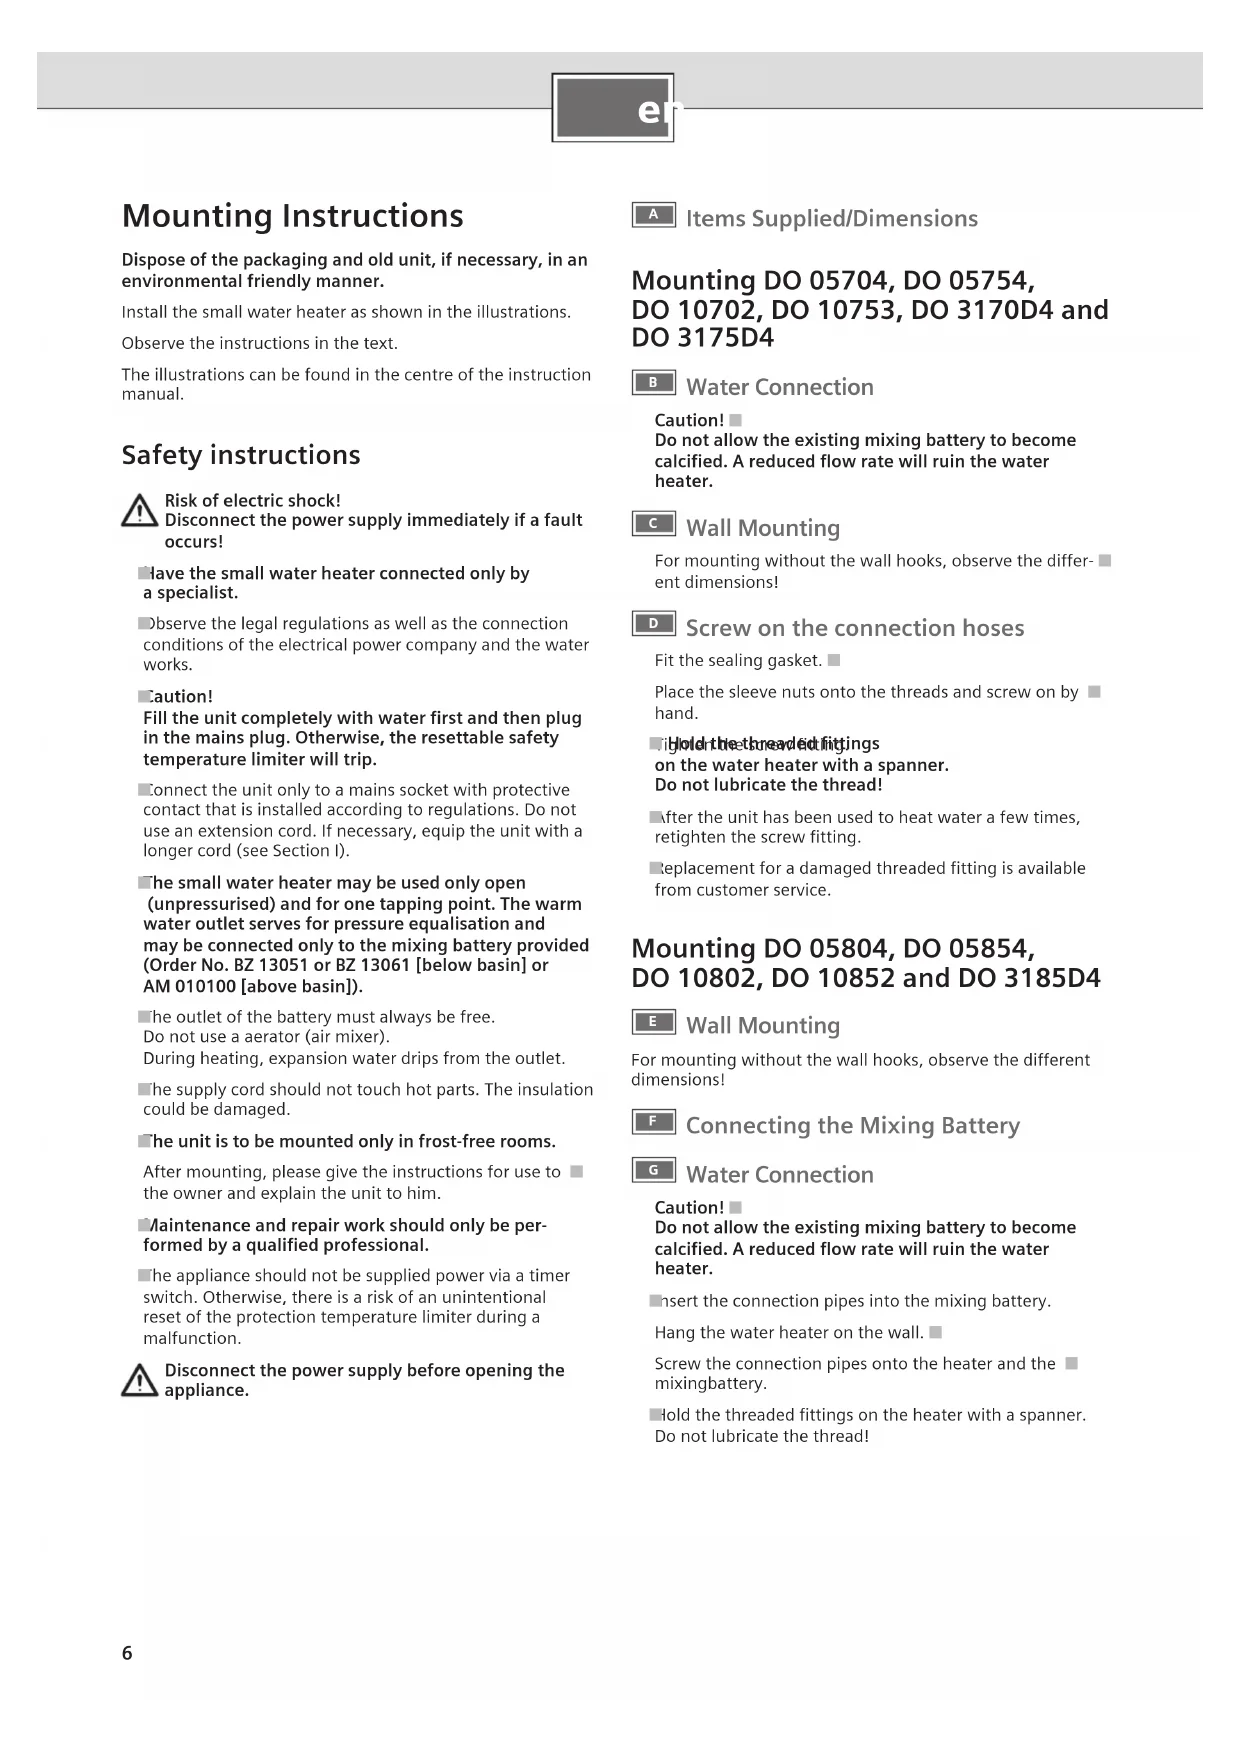
We ask you to always provide the E-No. and the FD-No. of your appliance when calling in a customer service engineer.
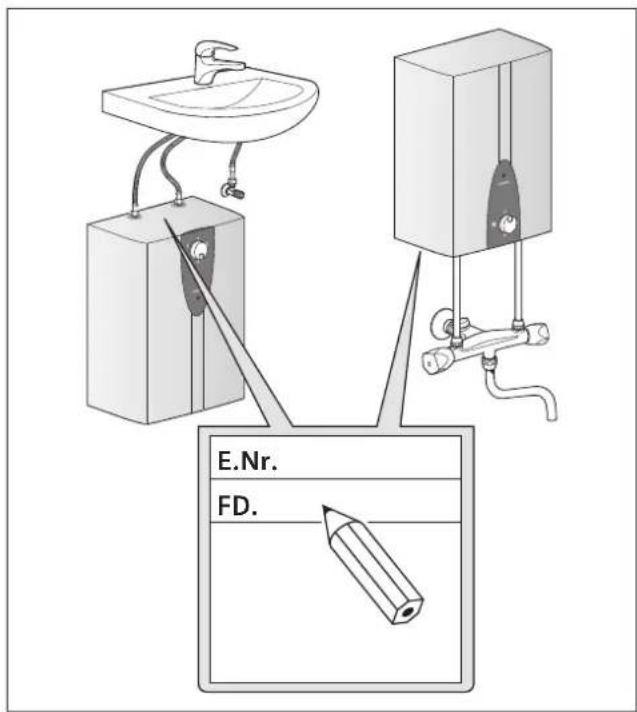
Temperature Limiting
$$ I = \text {a p p r o x .} 4 0 ^ {\circ} C $$
$$ e = a p p r o x. 6 0 ^ {\circ} C $$
- Set the temperature selector to "●".
- Hinge open the cover over the temperature selector.
- Select:
- Close the cover.
DO..8.. DO..7..
Disposal
This appliance is labelled in accordance with European Directive 2002/96/EG concerning used electrical and electronic appliances (waste electrical and electronic equipment - WEEE).
The guideline determines the framework for the return and recycling of used appliances as applicable throughout the EU.
Please ask your specialist retailer about current disposal facilities.
Guarantee
The guarantee conditions for this appliance are as defined by our representative in the country in which it is sold.
Details regarding these conditions can be obtained from the dealer from whom the appliance was purchased. The bill of sale or receipt must be produced when making any claim under the terms of this guarantee.
Subject to change without notice.
Vent the unit completely!
Vent the unit completely!
AE United Arab Emirates,
BSH Home Appliances FZE
Round About 13, Plot Nr MO-0532A
Jebel Ali Free Zone - Dubai
Tel.: 04 881 4401
mailto:service-ua@bshg.com
www.siemens-home.ae
OOO"BCX BbITOBaTExHnka
ten: 4957372962
mailto:mok-kdhl@bshg.com
CH Schweiz, Suisse
20/F, CN International Mansion
No. 129 Zhongshan Road
210005 Nanjing, Jiangsu Province
Service Tel: 400 889 9999
Central Branch Service
17 km E.O. Athinon-Lamias &
Potamou 20
14564 Kifisia
Greece - Athens
Tel: 2104 277 701
Fax:2104277669
North-Greece-Thessaloniki
Tel.: 2310497200
Fax: 2310497220
South-Greece - Heraklion/Kreta
Tel.: 2810325403
Fax:2810324
Central-Greece - Patras
Tel.: 2610330478
Fax: 2610331832
mailto:cs_gr_helpdesk@
bshg.com
www.siemens-home.com
HK Hong Kong, 香港
BSH Home Appliances Limited
Unit 1 & 2, 3rd Floor
North Block, Skyway House
3 Sham Mong Road
Tai Kok Tsui, Kowloon
Hong Kong
Tel.: 2565 6151
Fax: 25656681
mailto:service.siemens@
bshg.com
www.siemens-home.com.hk
KW Kuwait.
Ali Abdulwahab, Sons & Co.
Shuwaukh Industrial Area
Kuwait
Hotline 022 261 850
mailto:servicecenter@aaw.com
www.aaw.com
LU Luxembourg
OOO"BCX BbITOBaTExHnKa
CepBnC OT npOn3BOUnteJRA
Manay Kanyckkay 19/1
119071MockBa
ten.: 4957372962
mailto:mok-kdhl@bshq.com
www.siemens-home.com
SG Singapore,新加坡
BSH Home Appliances Pte. Ltd.
37 Jalan Pemimpin
Union Industrial Building
Block A.#01-03
577177 Singapore
Tel.: 6751 5000
Fax: 6751 5005
mailto:bshsgp.service@
bshg.com
SI Slovenija, Slovenia
BSH Hišni aparati d.o.o.
Litostrojska 48
1000 Ljubljana
Tel.: 015830887
Fax:01583(
TH Prathet Thai, Thailand
BSH Home Appliances Limited
TPS Building
- 1st floor, Pattanakarn Road
Suan Luang, Suan Luang
Bangkok 10250
Service Call Center 02 351 8995
Spareparts Tel.: 02 769 7975
Tel.: 027697970
Fax: 027697971
www.siemens-home.com
TR Türkiye, Turkey
BSH Ev Aletleri Sanayi
ve Ticaret A. S.
Cakmak Mahallesi.
Balkan Caddesi No: 51
34770 Umraniye, Istanbul
Tel.: 0216446688
Fax:02165289188
mailto:careline.turkey@
bshg.com
www.siemens-home.com
TW Taiwan,台湾
Achelis Taiwan Co. Ltd.
6th floor, No 2. Sec. 3
Min Sheng E. Road
Taipei ROC 100
Tel.: 02 2321 6222
www.siemensevaletleri.com
UA Ukraine, YkpaHa
TOB "BCX NoyoToBa TexHika"
ten.:044 4902095
www.siemens-home.com
VN Viet Nam, Vietnam
T&C Co. Ltd.
34 Ngu Truong To St.
Ba Dinh District
Hanoi
Tel:48230407
Fax:48437873
mailto:siemens-hcm@
bdyn ynd.net
XS Srbija, Serbia
15th Road, Randjespark
Private Bag X36, Randjespark
1685 Midrand-Johannesburg
Tel.: 086 002 6724
Fax:0866171780
mailto:applianceserviceza@
bshg.com
www.siemens-home.com
www.siemens-homeappliances.com
9000748159