RSH17 - Heating SunRed - Free user manual and instructions
Find the device manual for free RSH17 SunRed in PDF.
User questions about RSH17 SunRed
0 question about this device. Answer the ones you know or ask your own.
Ask a new question about this device
Download the instructions for your Heating in PDF format for free! Find your manual RSH17 - SunRed and take your electronic device back in hand. On this page are published all the documents necessary for the use of your device. RSH17 by SunRed.
USER MANUAL RSH17 SunRed
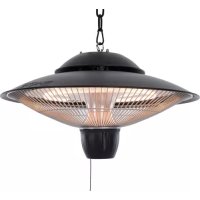
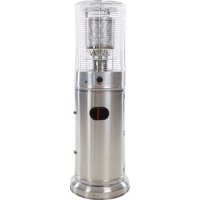
Electric Heater (Ceiling Type) RSH17 (UK)
Electric Heater (Ceiling Type) RSH17 (NL)
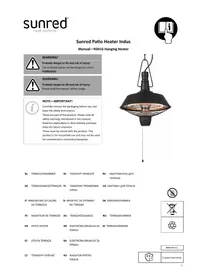
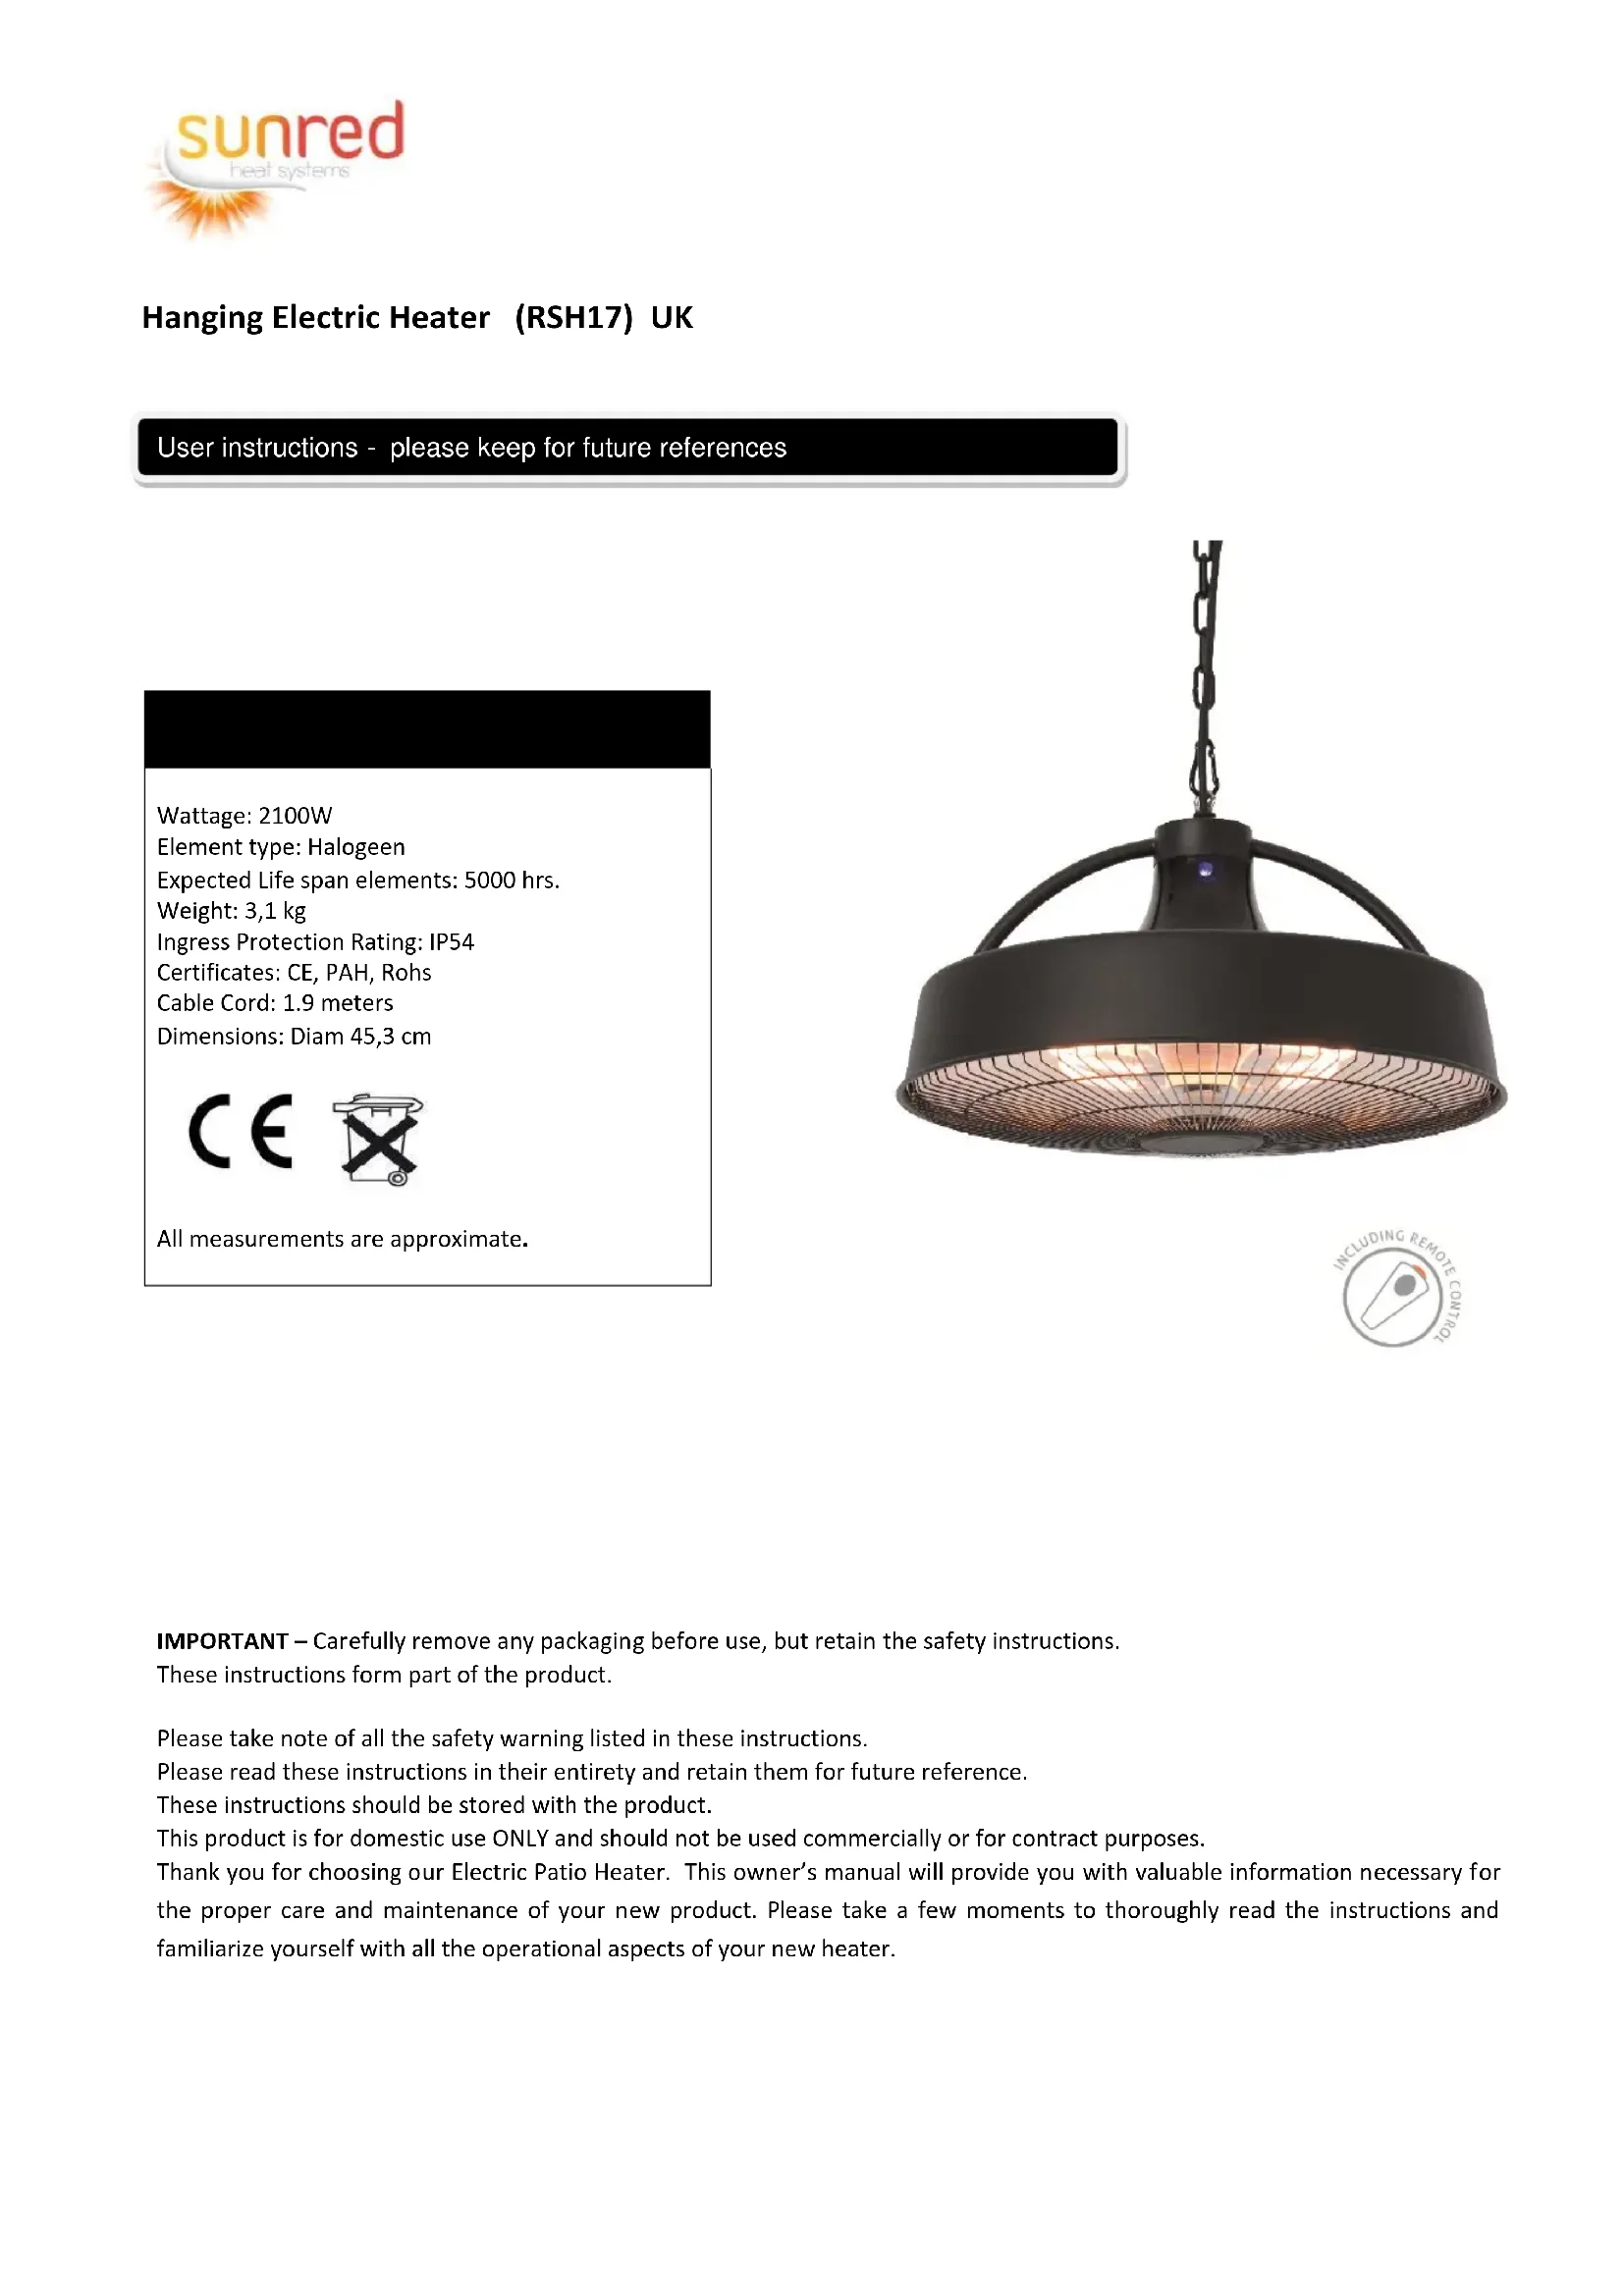
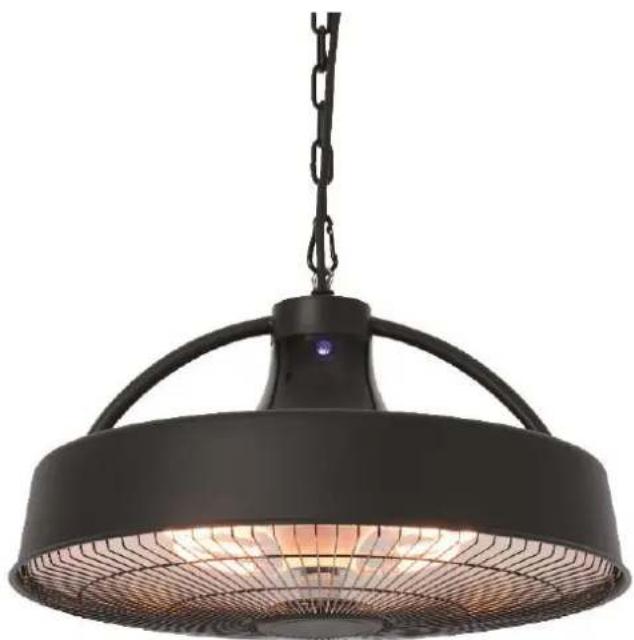
RSH17 Hanging Electric Heater 2100W

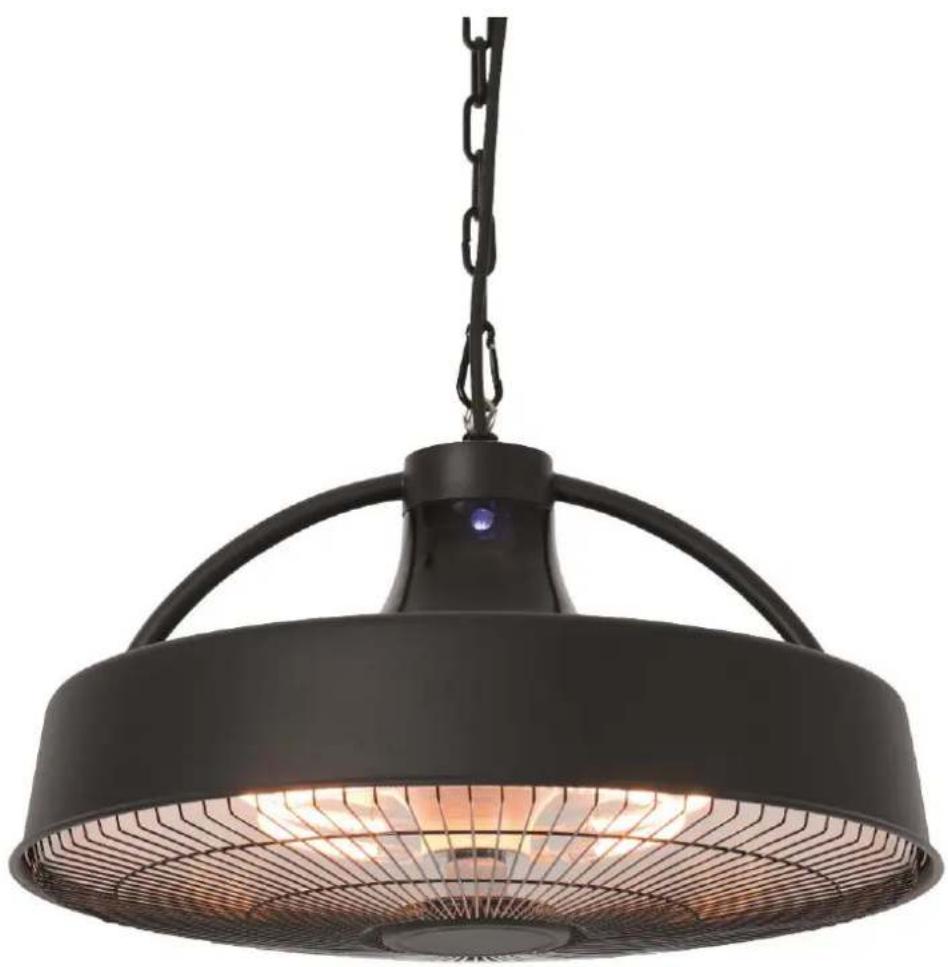
Hanging Electric Heater (RSH17) UK
User instructions - please keep for future references
Wattage: 2100W
Element type: Halogeen
Expected Life span elements: 5000 hrs.
Weight: 3,1 kg
Ingress Protection Rating: IP54
Certificates: CE, PAH, Rohs
Cable Cord: 1.9 meters
Dimensions:Diam 45,3 cm


All measurements are approximate.

IMPORTANT - Carefully remove any packaging before use, but retain the safety instructions.
These instructions form part of the product.
Please take note of all the safety warning listed in these instructions.
Please read these instructions in their entirety and retain them for future reference.
These instructions should be stored with the product.
This product is for domestic use ONLY and should not be used commercially or for contract purposes.
Thank you for choosing our Electric Patio Heater. This owner's manual will provide you with valuable information necessary for the proper care and maintenance of your new product. Please take a few moments to thoroughly read the instructions and familiarize yourself with all the operational aspects of your new heater.
IMPORTANT INSTRUCTIONS
When using this electric unit, basic safety precautions should be followed to reduce the risk of fire, electric shock, and in jury to persons, including the following.
-
Read ALL instructions before using this unit.
-
CAUTION: Risk of Electric Shock.. DO NOT open or try to repair the heater yourself.
-
This heater may get hot when in use. To avoid burns, DO NOT let bare skin touch hot surfaces. If provided, use handles when moving this heater.
-
Keep combustible materials, such as furniture, pillows, bedding, paper, clothes, and curtains at least 3 ft from the front of the heater and keep them away from the sides, top and rear. DO NOT place towels or other objects on the heater.
-
Extreme caution is necessary when any heater is used by or near children or the disabled, or when the heater is left operating and unattended.
-
DO NOT operate any heater with a damaged cord or after the heater malfunctions, has been drooped or damaged in any manner. Return heater to authorized service facility for examination.
-
This heater is not intended for use in bathrooms, laundry areas and similar indoor locations. NEVER locate heater where it may fall into a bathtub or other water container. To protect against electrical hazards, DO NOT immerse in water or other liquids.
-
DO NOT touch the control panel or plug with a vet hand.
-
DO NOT run cord under carpeting. DO NOT cover cord with throw rugs, runners, or similar coverings. Arrange cord away from traffic area and where it will not be tripped over.
-
DO NOT insert or allow foreign objects to enter any ventilation or exhaust opening as this may cause an electric shock or fire, or damage the heater.
-
To prevent a possible fire, DO NOT block the air intakes or exhaust in any manner. DO NOT use on soft surfaces, like a bed, where openings may become blocked.
-
A heater has hot and arcing or sparking parts inside. DO NOT use in areas where gasoline, paint, explosive and/or flammable liquids are used or stored. Keep unit away from heated surfaces and open flames.
-
Avoid the use of an extension cord because the extension cord may overheat and cause a risk of fire. However, if you have to use an extension cord, the cord shall be NO.13 AWG minimum size.
-
To avoid fire or shock hazard, plug the unit directly into a 240V AC electrical outlet.
-
To disconnect heater, turn controls to OFF, then remove plug from outlet. Pull firmly on plug, DO NOT unplug by pulling on the cord.
-
Always unplug the unit before moving or cleaning, or whenever the heater is not in use.
-
Use only for intended household use as described in this manual, Any other use not recommended by the manufacturer may cause fire, electric shock, or injury to persons. The use of attachments not recommended or sold by unauthorized dealers may cause hazards.
-
Always use on a dry, level surface. Use on ceiling only.
-
WARNING: To reduce the risk of fire or electric shock, DO NOT use this unit with any solid- state speed control device.
-
DO NOT attempt to repair or adjust any electrical or mechanical functions on this unit. Doing so will void your warranty, The is side of the unit contains no user serviceable parts. Qualified personnel should perform all servicing only.
-
Connect to properly grounded outlets only.
-
This appliance is not intended for use by persons (including children) with reduced physical. Sensory or mental capabilities, or lack of experience and knowledge, unless they have been given supervision or instruction concerning use of the appliance by a person responsible for their safety.
-
Children should be supervised to ensure that they do not play with the appliance.
- The marketing concerning covering shall be visible after the heater has been installed
SAVE THESE INSTRUCTIONS.
Technical specification
Power supply 220-240V 50-60Hz
Wattage 2100W
Net weight 3.5kg
Insulation class I
Size 47.5cm× 31cm
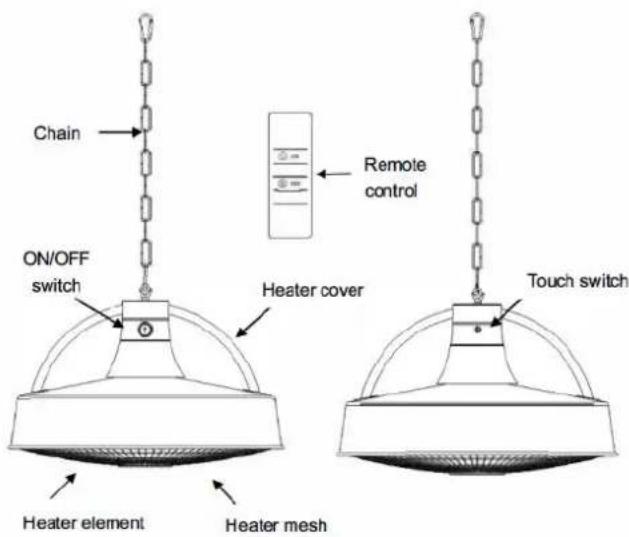
PRODUCT DIAGRAM
BE CAREFUL
The power cord should be tide up with the chain by using the plastic band provided. The power cord should not touch the edge of the heater cover.
OPERATING INSTRUCTIONS
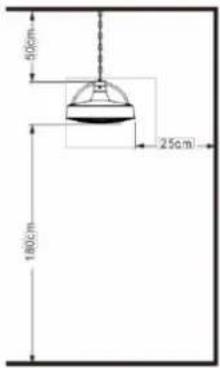
A. Place the heater on a firm, level ceiling surface;
B. The Hook on the ceiling hanging the Patio Heater must be able to undertake a weight 3 or 4 times that of the Patio Heater itself.
C. Place the Hook A around the Ceiling Hook and clip on any Ring of the Chain to adjust the height of the patio Heater to the Floor.
D. The distance between the bottom of the Patio Heater to the Floor must be over 1.8 M.
E. Plug the Patio Heater into a grounded 240V 50Hz power outlet.
F. Only operate the heater when it is in the upright position.
Minimum Required Distances
- 25cm from the side wall
- 50cm from the ceiling
- installation height above 180cm
OPERATING INSTRUCTIONS
WARNING: The heater must be properly installed before it is used. This unit is equipped with one heat setting On/ Off.
- Plug the Patio Heater into a grounded 220-240V 50-60Hz power outlet.
- Only operate the heater when it is in the upright position.
- Our Electric Patio Heater is equipped with Three heat settings.
Remote control
A. Press on the On/Off switch to activate the heater.
B. To operate the heater on 900W, press on the button "LOW" of the remote control.
C. To operate the heater on 1200W, press on the button "HIGH" of the remote control.
D. To operate the heater on 2100W, press both the button.
"LOW" and "HIGH" of the remote control.
Touch switch
A. Press on the On/Off switch to activate the heater
B. Touch the touch switch once to operate the heater on 900W power.
C. Touch the touch switch twice to operate the heater on 1200W.
The main power switch must be turned on to operate the heater
MAINTENANCE
Unplug the unit and let it cool completely.
To keep the heater clean, the outer shell may be cleaned with a soft, damp cloth. You may use a mile detergent if necessary. After cleaning, dry the unit with a soft cloth.
DO NOT use alcohol, gasoline, abrasive powders, furniture polish, or rough brushes to clean the heater. This may cause damage or deterioration to the surface of the heater.
- Although this heater is outdoor approved, DO NOT immerse the heater in water for your safety. Wait until the unit is completely dry before use.
STORAGE
If the heater will not be used for a long period of time, store it in a cool, dry location when not in use. To prevent dust and dirt build-up, use the original packaging to repack the unit.
TROUBLE SHOOTING
If the heater will not operate, please check the following before seeking repair of service:
- Check if the power cord is plugged into an electrical outlet, if not plug in.
- Check if electricity to the main fuse is working.
Make certain the power switch is turned on. If not, choose a setting.
Specifications Techniques
- Alimentation 220-240V 50-60Hz
Puisance 2100W - Poids net 3.5kg
- Coupe Isolation I
Distances minimales requires
Kabellength: 1.9 meter
Afmetingen: 47.5cm× 31cm
Electric Heater (Ceiling Type) RSH17 (UK)
Electric Heater (Ceiling Type) RSH17 (NL)

OutTrade BV
De Grift 1A
7711EP Nieuwleusen
Tel: +31 (0)529-482808
Fax: +31 (0)529-484910
Email: info@outtrade.eu
Website: www.outtrade.eu
RSH17 21-11-2017