KM 1598 - Hi-fi system Krüger&Matz - Free user manual and instructions
Find the device manual for free KM 1598 Krüger&Matz in PDF.

| Product type | Hi-Fi system |
| Brand | Krüger&Matz |
| Model | KM 1598 |
| Power supply | 220 V, 50 Hz |
| Power consumption | 50 W |
| Output power | 2 x 75 W RMS |
| Total harmonic distortion (THD) | <1% |
| Speaker impedance | 4 Ω |
| USB port | 5 V, 1 A |
| FM frequency range | 87.5 – 108 MHz |
| Player dimensions | 245 x 138 x 300 mm |
| Speaker dimensions | 158 x 270 x 207 mm |
| Audio sources | CD, USB, Bluetooth, FM, AUX (RCA), Audio In (3.5 mm) |
| Bluetooth | Yes, range 10 m |
| USB/CD playback formats | MP3, WMA |
| Equalizer | 5 preset modes |
| Sound settings | Bass, treble, volume, mute |
| Additional functions | Timer, alarm, clock (RDS), dimmer |
| Included accessories | Remote control, FM antenna, 2 AAA batteries |
| Safety | Class 1 laser protection, electric shock warning |
| Maintenance | Soft dry cloth, no liquids |
| Repairability | Refer to a professional, do not open |
| Manufacturer | LECHPOL Zbigniew Leszek, Garwolin, Pologne |
Frequently Asked Questions - KM 1598 Krüger&Matz
User questions about KM 1598 Krüger&Matz
0 question about this device. Answer the ones you know or ask your own.
Ask a new question about this device
Download the instructions for your Hi-fi system in PDF format for free! Find your manual KM 1598 - Krüger&Matz and take your electronic device back in hand. On this page are published all the documents necessary for the use of your device. KM 1598 by Krüger&Matz.
USER MANUAL KM 1598 Krüger&Matz
WITH CD, USB, BLUETOOTH,
NFC AND FM RADIO
KM1598

line
| x | y | |---|---| | 0.0 | 0.0 | | 0.1 | 0.1 | | 0.2 | 0.2 | | 0.3 | 0.3 | | 0.4 | 0.4 | | 0.5 | 0.5 | | 0.6 | 0.6 | | 0.7 | 0.7 | | 0.8 | 0.8 | | 0.9 | 0.9 | | 1.0 | 1.0 | | 1.1 | 0.9 | | 1.2 | 0.8 | | 1.3 | 0.7 | | 1.4 | 0.6 | | 1.5 | 0.5 | | 1.6 | 0.4 | | 1.7 | 0.3 | | 1.8 | 0.2 | | 1.9 | 0.1 | | 2.0 | 0.0 |BEDIENUNGSANLEITUNG
OWNER'S MANUAL
MODE D'EMPLOI
GEBRUIKSAANWIJZING
INSTRUKCJA OBSŁUGI
MANUAL DE UTILIZARE
Bevor Sie beginnen
CLASS 1 LASER PRODUCT
Achtung:
natural_image
Illustration of a blue-handled washing machine with blue arrows indicating airflow or movement (no text or symbols)natural_image
Diagram of a device with a blue cylindrical component and directional arrows, no text or symbols presentnatural_image
Diagram of a device with a blue cover and directional arrow indicating motion (no text or symbols)text_image
20° 30° 30°Hinweis:
natural_image
Diagram of a device with a cable inserted into a housing, showing internal components and wiring (no text or symbols)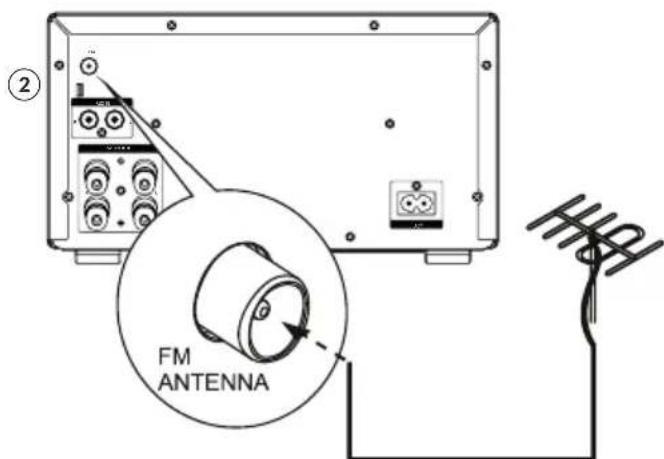
text_image
FM ANTENNAtext_image
Diagram showing two audio/video audio equipment setups with labeled components and wiring connectionstext_image
Diagram showing connections between a device, cable, and printer with labeled components and wiring.natural_image
Diagram of an electrical outlet connected to a plug, showing internal components and wiring (no text or labels)ECO-POWER/BEREITSCHAFTSMERKMALE
Thank you for purchasing this system. Please read these operating instructions before operating the unit. The operating instructions should be retained for future reference.
For your safety
Before operating this system, check the voltage of this system to see if it is identical with the voltage of your local power supply.
Don't obstruct the ventilation openings of the equipment with items such as newspaper, table-cloths, curtains, etc.. Overheating will cause damage and shorten the life of the equipment.
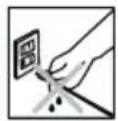
When you disconnect the power cord, always pull the plug, never the cable.

NEVER let anyone especially children push anything into holes, slots or any other opening in the case - this could result in a fatal electrical shock;
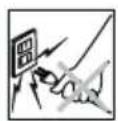
Protect the power cord from being walked on or pinched, particularly at plugs, convenience receptacles, and the point where they exit from the device.
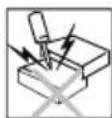
Never hitting the product use the sharp objects.
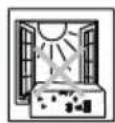
Never place the product and accessories near naked flames or other heat sources, including direct sunlight.
Laser Product
This product is equipped with low power laser equipment. For your own safety do not remove any covers or take the product apart. Repair work must be carried out by qualified personnel.

To avoid electric shock, do not open the cabinet. Refer all servicing to qualified service personnel.
CLASS 1 LASER PRODUCT

Never expose the product and accessories to rain or water. Never place liquid containers, such as vases, near the product.
Caution:
This product is equipped with low power laser equipment inside, for your safety, don't open the laser radiation protective equipment. Don't look at the laser radiation district when the equipment is operating.
WARNING:
TO PREVENT FIRE OR SHOCK HAZARD, DO NOT EXPOSE THIS APPLIANCE TO DRIPPING OR SPLASHING.
CAUTION:
TO REDUCE THIS RISK OF ELECTRIC SHOCK DO NOT REMOVE COVER (OR BACK), NO USER SERVICEABLE PARTS INSIDE, REFER SERVICING TO QUALIFIED SERVICE PERSONNEL.

CAUTION
RISK OF ELECTRIC SHOCK DO NOT OPEN


This symbol indicates that dangerous voltage constituting a risk of electric shock is present within this unit.

This symbol indicates that there are important operating and maintenance instructions in the literature accompanying this unit.
Hearing safety
Listen at a moderate volume.
* Using headphones at high volume can impair your hearing. This product can produce sounds in decibel ranges that may cause hearing loss for a normal person, even for exposure less than a minute. The higher decibel ranges are offered for those that may have already experienced some hearing lose.
* Sound can be deceiving. Over time your hearing “comfort level” adapts to higher volumes of sound. So after prolonged listening, what sounds “normal” can actually be loud and harmful to your hearing. To guard against this, set your volume to a safe level before your hearing adapts and leave it there.
To establish a safe volume level:
* Set your volume control at a low setting.
* Slowly increase the sound until you can hear it comfortably and clearly, without distortion.
Listen for reasonable periods of time:
* Prolonged exposure to sound, even at normally “safe” levels, can also cause hearing lose.
* Be sure to use your equipment reasonably and take appropriate breaks.
Be sure to observe the following guidelines when using your headphones.
* Listen at reasonable volumes for reasonable periods of time.
* Be careful not to adjust the volume as your hearing adapts.
* Do not turn up the volume so high that you can't hear what's around you.
* You should use caution or temporarily discontinue use in potentially hazardous situations. Do not use headphones while operating a motorized vehicle, cycling, skateboarding, etc.; it may create a traffic hazard and is illegal in many areas.
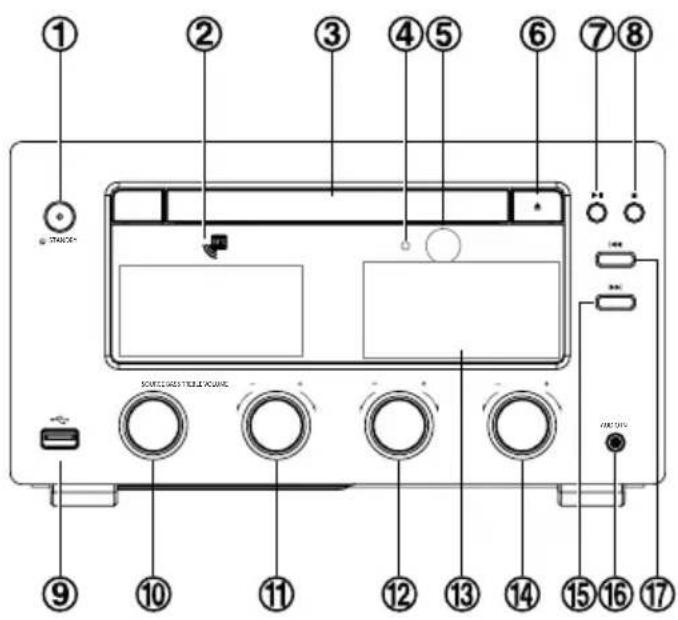
PRODUCT DESCRIPTION
text_image
Diagram of a device front panel with numbered labels pointing to various control buttons and indicators.
text_image
18 19 20 21- ⏻Standby Button
- NFC area
- Disc Tray
- Bluetooth indicator light
- Remote Sensor
- Open/Close Button ▲
- Play/Pause Button ▶
- Stop Button ■
- USB Socket
- Source Knob
-
Bass Knob
-
Treble Knob
- Liquid Crystal Display Lens
- Volume Control Knob
- Next Button ▶
- Audio Input Socket
- Previous Button
- FM Antenna Socket
- AUX Input Sockets (L&R)
- Speaker Output Sockets (L&R)
- AC Power Socket
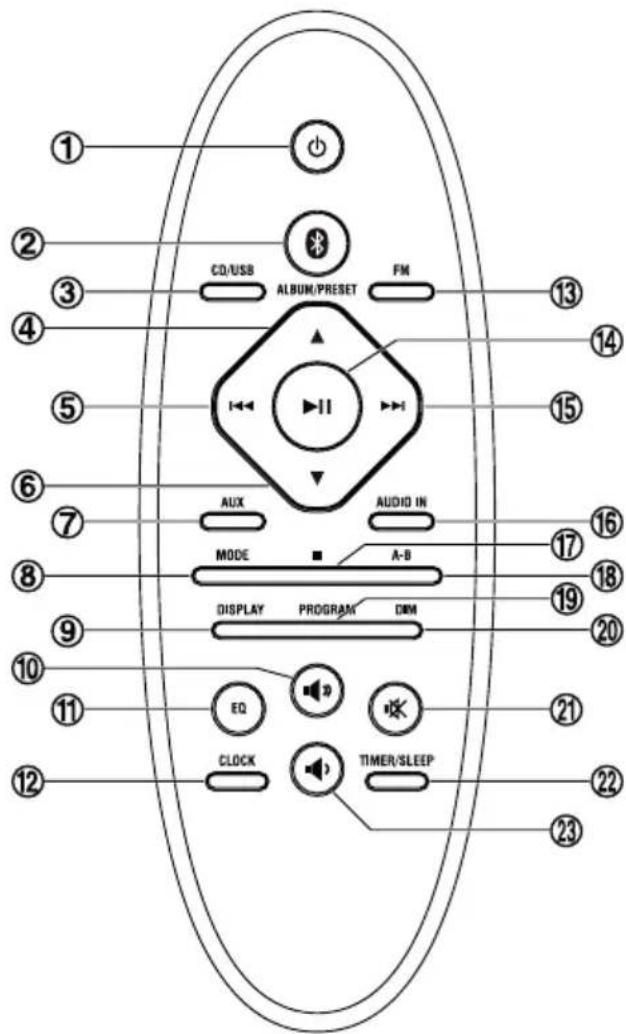
REMOTE CONTROL OVERVIEW
text_image
① ② ③ ④ ⑤ ⑥ ⑦ ⑧ ⑨ ⑩ ⑪ ⑫ ⑬ CD/USB ALBUM/PRESET FM AUDIO IN AUX MODE A-B DISPLAY PROGRAM DIM ⑰ ⑱ ⑲ ⑳ ⑴ ⑵ ⑶ ⑷ ⑧ ⑨ ⑩ ⑪ ⑫ ⑬ ⑭ ⑮ ⑯ ⑰ ⑱ ⑲ ⑳ ㉑ ㉒ ㉓ ㉔ ㉕ ㉖ ㉗ ㉘ ㉙ ㉚ ㉛ ㉜ ㉝ ㉟ ㉓ ㉔ ㉕ ㉖ ㉗ ㉘ ㉙ ㉚ ㉛ ㉜ ㉝ ㉟ ㉞- ⏻Standby Button
- Bluetooth Function Button
- CD/USB Function Button
- Album Up Button Preset Up Button
- Previous Button Tuning Backward Button
- Album Down Button Preset Down Button
- AUX Function Button
- Mode Button
- Display Button
- Volume Up Button
- Preset Equalizer Button
- Clock Button
- FM Function Button
- Play/Pause Button
- Next Button Tuning Forward Button
- AUDIO IN Function Button
- Stop Button
- Repeat A-B Button
- Program Button Memory Button
- Dimmer Button
- Mute Button
- Timer Button Sleep Button
- Volume Down Button
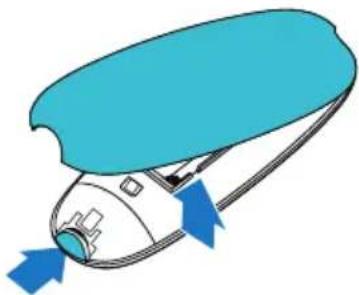
Installation of Batteries
- Open the battery cover.
natural_image
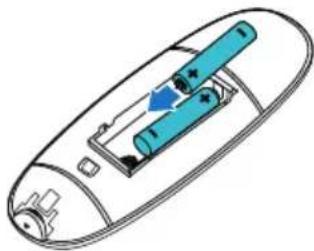
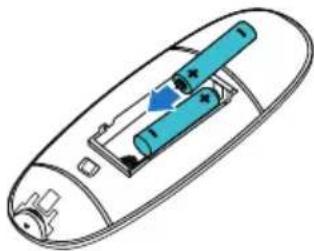
Illustration of a blue-handled vacuum cleaner with airflow arrows (no text or symbols)- Insert 2 AAA batteries with correct polarity (+/-) as indicated.
natural_image
Diagram of a device inside an oval casing with a blue cylindrical component inserted, showing internal structure and no text or symbols.- Close the battery cover.

natural_image
Illustration of a blue and white object with a blue arrow indicating direction (no text or symbols)Handling the Remote Control
- Remove the batteries if the remote control is not going to be used for an extended period of time.
- To avoid possible failure, read the following instructions and handle the remote control properly.
- Do not drop or cause impact to the remote control.
- Do not spill water or any liquid on the remote control.
- Do not place the remote control on a wet object.
- Do not place the remote control under the direct sunlight or near sources of excessive heat.
- Do not use caustic cleaners (porcelain, stainless steel, toilet, or oven cleaner etc.) on the remote, as it may suffer damage.
Note:
Remove the battery from remote control handset when it is not to be used for a long period. Otherwise it can be damaged due to leakage of battery.
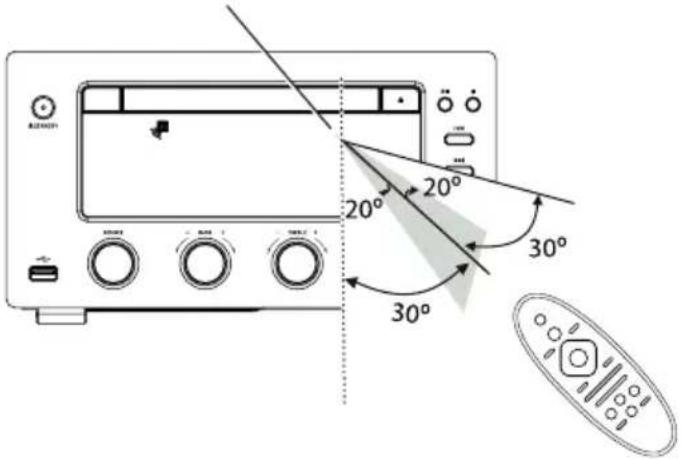
Remote Control Operation Range
Point the remote control to the unit no more than 6 meters from the remote control sensor and within 60^ horizontally and 40^ vertically of the front of the unit. The operating distance may vary according to the brightness of the room.
text_image
20° 30° 30°Note:
• Make sure that there is no obstacle between the infrared remote sensor of the unit and remote control, as the remote controllable range may decrease
- Do not expose the infrared remote sensor to direct sunlight or other strong light, such as inverter fluorescent light.
CONNECTIONS
Caution: Make all connections before plugging the unit into the AC Power outlet.
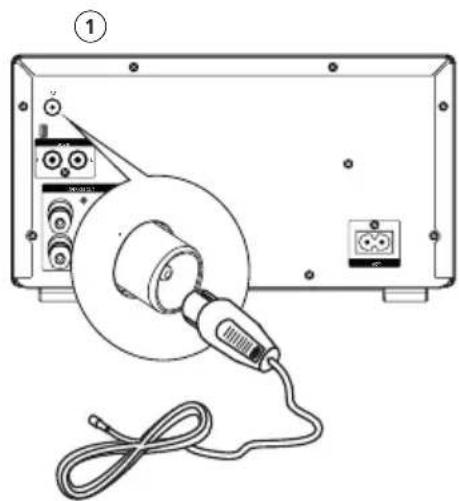
Connecting the FM Antenna
- Connect the supplied FM Antenna to the FM Antenna socket on the rear of the unit.
- For better FM stereo reception, connect an outdoor FM antenna to the FM Antenna socket.
Caution:
To avoid noise, keep Antenna away from the unit, the connecting cable and the AC power cable.
natural_image
Diagram of a device with a cable inserted into a housing, showing ports and wiring (no text or symbols)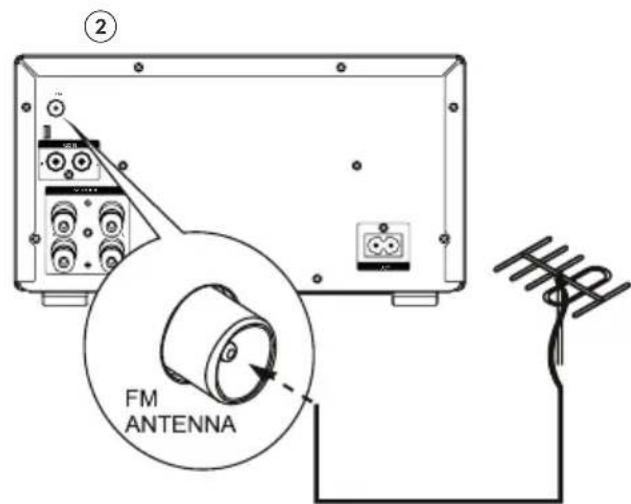
text_image
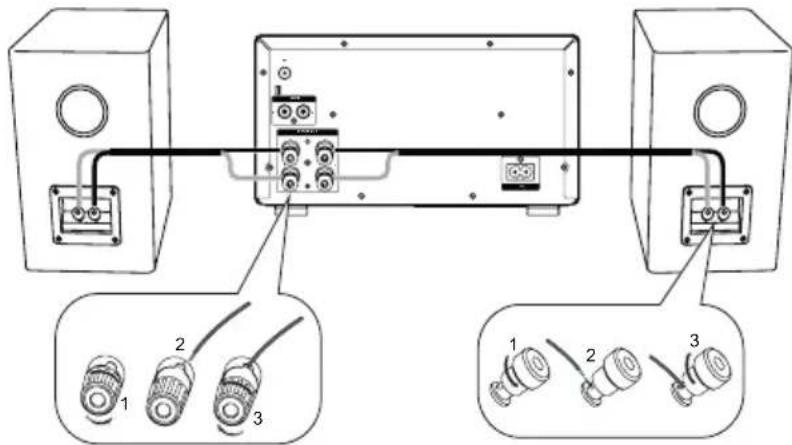
② FM ANTENNAConnecting the Speakers
Connect the speaker cords between the terminals as shown below.
Connect the cable with a sliver head to the (-) terminals and cable with a gold head to the (+) terminals.
How to connect:
- Turn the terminal cap counterclockwise to loosen it. The speaker terminal caps cannot be fully removed from the base.
- Insert the wire into the terminal fully.
- Turn the terminal cap clockwise to securely connect it.
text_image
Diagram showing three connected audio equipment units with labeled connectors and wiring, including two separate sensor placements.Connecting Auxiliary Equipment
Connect the AUX IN sockets on the rear of the unit to the AUX output sockets on the auxiliary equipment with an audio cable illustrated below.
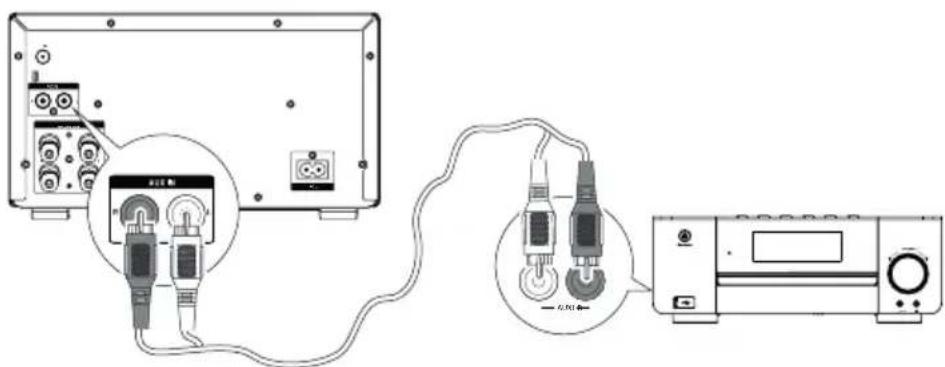
text_image
Diagram showing connections between a device, cable, and a microwave oven with labeled components- Rotate the SOURCE knob on the unit or press the AUX button on the remote control to select the AUX source.
- Start play on the audio player.
Connect the AUDIO IN socket on the front of the unit to the headphone socket on an external device with an audio cable, as illustrated below:
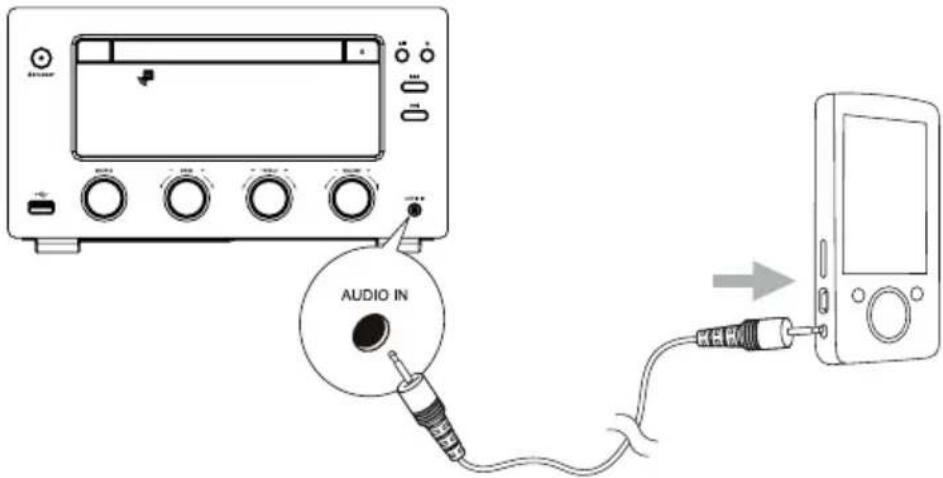
text_image
AUDIO IN- Rotate the SOURCE knob on the unit or press the AUDIO IN button on the remote control to select the AUDIO IN source.
- Start to play the device.
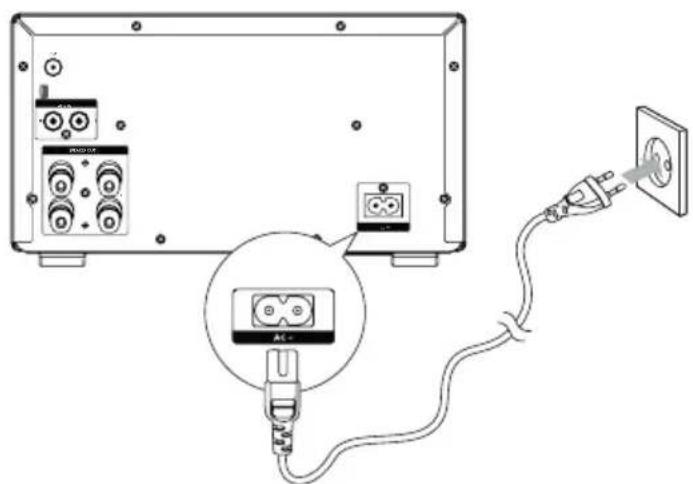
Connecting the AC Power Cable
Insert the AC Power cable into a wall outlet, then your unit is ready to use.
Caution:
- Be sure to unplug the power plug from the outlet when the unit is not in use for an extended period of time.
text_image
Diagram showing connections between a device panel with labeled ports and an electrical outlet, including a magnified inset of the device.ECO-POWER/STANDBY FEATURES
Powering ON/OFF
When you insert the AC power cable into a wall outlet, the unit will be in standby mode.
- Press the ⓍSTANDBY button to switch the unit on. The word "HELLO" will show in the display.
A countdown of 10 seconds starts for preheating of the system. Then, the system will switch to the last selected source.
- Press the ⏻STANDBY button to switch the unit back to standby mode. The words "BYE BYE" will scroll across the display.
Switching the system to ECO Power/Standby mode
Press and hold the ⏻standby button for 2 seconds or more to switch to ECO Power Standby or normal standby.
• ECO Power standby mode
The clock will not be displayed. Press the CLOCK button to display the clock on the LCD (if set).
• Normal standby mode
The clock (if set) display on the LCD.
SETTING THE CLOCK
Setting the Clock Manually
- Set the unit in standby mode.
- Press and hold the CLOCK button to activate the clock setting mode, [24] begins to blink on the LCD.
- Set the 12/24 hour format with the / (VOLUME UP/DOWN) buttons.
- Press the CLOCK button, hour indicator will blink.
- Set the hour with the ⏻ (VOLUME UP/DOWN) buttons.
- Press the CLOCK button, minute indicator will blink.
- Set the minute with the 🔔 (VOLUME UP/DOWN) buttons.
- Press the CLOCK button, the built-in clock starts operating.
Note:
- To exit clock setting mode without storing, press the STOP button.
- The clock must be set in standby mode and if the set-up time for each step is longer than 90 seconds, set-up will be cancelled.
- If a power failure occurs or the unit is disconnected from the mains, the clock setting will be lost.
Setting the Clock Automatically
When the RDS station display the time, press and hold the DISPLAY button on the remote control, the clock will automatically sync time of RDS.
Display the Clock
In any source mode, press the CLOCK button to display the clock.
SOUND QUALITY
Adjusting the Volume
To increase or decrease the volume, rotate the VOLUME control knob on the unit or press the 🔊 VOLUME +/- buttons on the remote control.
Mute sound
During play, press the MUTE button to mute or un-mute sound.
Adjusting the Bass
Rotate the BASS knob on the unit to adjust the intensity of the bass output sound. Note: Bass adjusted, preset equalizer function is not available.
Adjusting the Treble
Rotate the TREBLE knob on the unit to adjust the intensity of the treble output sound. Note: Treble adjusted, preset equalizer function is not available.
Presetting Equalizer
You can adjust the sound reproduced simply by choosing from 5 preset equalizers. Press the EQ button repeatedly to scroll through the following options:
$$ F L A T > P O P > J A Z Z > R O C K > C L A S S I C (\text { looped }) $$
Changing the Front Panel Darkness
To dim or brighten the display, press the DIM button repeatedly on the remote control to the desired brightness.
FM RADIO OPERATION
Note: Before operating the radio, please check that the FM Antenna is correctly connected and adjusted for length and direction.
Tuning in to a Station
-
Rotate the SOURCE knob on the unit or press the FM button on the remote control to select tuner source.
-
Select a station using one of the following methods.
- Auto Tuning
Press and hold the √ button, the frequency changes down or up automatically until a station is found.
- Manual Tuning
Repeatedly press the ◀◀/▶◀ buttons to change the frequency until you find the station you want.
- Preset Tuning (Available only after the stations are preset)
Repeatedly press the PRESET ▲/▼ (UP/DOWN) buttons on the remote control to select the desired preset number. Its band and frequency are displayed on the front panel.
Program radio stations
- Automatically
Press and hold the PROGRAM button on the remote control for 2 second or more to activate automatic program mode. [SCANING] is displayed.
The unit stores all the FM radio stations automatically and then broadcasts the first preset radio station.
- Manually
- Tune to the desired station:
- Press the PROGRAM button on the remote control to activate program mode.
- Press the PRESET ▲ / ▼ (UP/DOWN) buttons on the remote control to select the preset number.
Note: If you select more than 20, the preset number will be changed to "1" automatically.
- Press the PROGRAM button again to store the station.
- Repeat above steps 1-4 for each station you want to store in memory with a preset number.
Note: If the unit is unplugged or if a power failure occurs, the preset stations will not be erased after being stored.
RDS RECEPTION
FM Display Modes
Every time you press the DISPLAY button, the display will cycle through the following display modes: Station Name, Programme Type, Time, Radio Text, Frequency (looped). The information is displayed on the lower segment of the display.
CD OPERATION
CD Playing
-
Rotate the SOURCE knob on the unit or press the CD/USB button on the
-
remote control to select disc source.
- Press the▲button to open the disc door and place the disc on the disc tray (with the printed side up).
- Press the▲button to close the disc door, the unit will read the disc and play it automatically.
Note: If in stop mode, please press the ▶ button to start playing the disc.
-
Press the button to pause the playing, press again to continue play.
-
Press the button to stop the disc playing.
To Skip or Search and Play
- Press the ◀◀/▶◀ button once or more to skip backward/forward one or more tracks on the disc.
- Press and hold the ◀◀/▶◀ buttons to search for the position that you intend to start playing. Release to resume normal play.
Programme Play
You can programme up to 20 tracks to play in any desired order. The player must be in STOP mode only with a CD inserted.
- Insert a disc and press the STOP button when it starts playing.
- Press the PROGRAM button, the LCD will display "I"-and"". PROG
- Press the ◀◀/▶◀ buttons on the remote control to select the desired track number.
- Press the PROGRAM button to confirm the track number to be stored.
- Repeat steps 3-4 to select and store all desired tracks.
- Press the button to start programme play.
- Press the button once to stop the programme play. Press the button twice to clear programme.
Playing Repeatedly (CD)
ONE and ALL Repeat Play can be set by pressing the MODE button.
- First press: To repeat the same track, the words "TRK" will blink and "REP" will stay lit.
- Second press: To repeat playing all tracks on a disc, the words "TRK" and "REP ALL" will stay lit.
- Third press: To play tracks randomly, the words "TRK" and "SHUF" will stay lit.
- Fourth press: To cancel the repeat playing, the word "TRK" will stay lit.
Repeat A-B can be set by pressing the A-B button.
- First press: Select the start point, the words "REP A-" will stay lit.
- Second press : Select the end point, the words "REP A-B" will stay lit.
- Third press: To cancel repeat play, the word "REP A-B" will disappear.
Note: The section A and B can be set only within the same track.
Text Display During Playback (CD disc)
Repeatedly press the DISPLAY button on the remote control to show the current track number and single elapsed time or single remain time or total elapsed time or total remain time.
MP3/WMA DISC PLAYING
- Rotate the SOURCE button on the unit or press the CD/USB button on the remote control to select disc source.
- Press the▲button to open the disc door and place the MP3/WMA disc on the disc tray (with the printed side up).
- Press the▲button on the unit to close the disc door, the unit will read the disc and play it automatically.
Note: If in stop mode, please press the ▶ button to start playing the disc.
-
Press the button to pause the playing, press again to continue play.
-
Press the button to stop the disc playing.
Text Display During Playback (MP3/WMA discs)
- If playing file contains the ID3 information, when start playing, the file name will be scroll on the screen automatically.
- If playing file is no ID3 information, press the DISPLAY button on the remote control, the current track and track of time will be displayed.
- Press the DISPLAY button on the remote control to enter or exit the ID3 playing mode.
To Select Album
- Press the ALBUM ▲ /▼ (UP/DOWN) buttons on the remote control to select the next/previous album, and play the first track of this album.
- If the playing has ended, press the ALBUM ▲ / ▼ (UP/DOWN) buttons on the remote control to select the next/previous album.
Playing Repeatedly (MP3/WMA disc)
ONE and ALL Repeat Play can be set by pressing the MODE button.
- First press: To repeat the same track, the words "TRK" will blink and "REP" will stay lit.
- Second press: To repeat playing album, the words "ALB" will blink and "TRK", "REP ALL" will stay lit.
- Third press: To repeat playing all tracks on a disc, the words "TRK" and "REP ALL" will stay lit.
- Fourth press: To play tracks randomly, the words "TRK" and "SHUF" will stay lit.
- Fifth press: To cancel the repeat playing, the word "TRK" will stay lit.
Repeat A-B can be set by pressing the A-B button.
- First press: Select the start point, the words "REP A-" will stay lit.
- Second press : Select the end point, the words "REP A-B" will stay lit.
- Third press: To cancel repeat play, the word "REP A-B" will disappear.
Note: The section A and B can be set only within the same track.
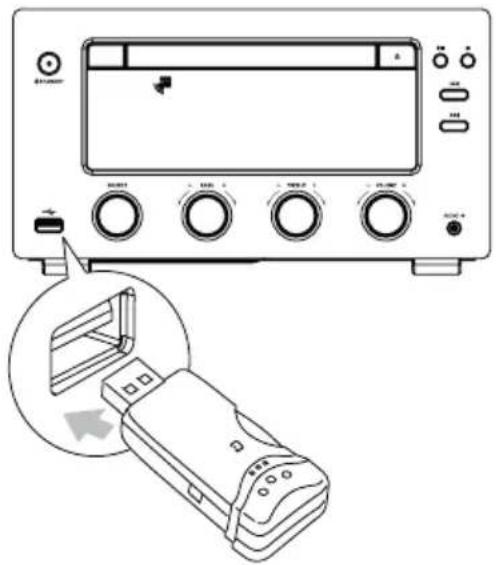
USE THE USB
By connecting an USB mass storage device (including USB flash memory, USB flash players or memory cards) to this unit, you can enjoy the device's stored music through the unit.
- Insert the USB device's USB plug into the socket on the front of unit.
- Press the CD/USB button on remote control or rotate the SOURCE knob on the unit to select the USB source.
- Press the ALBUM ▲ /▼ (UP/DOWN) buttons on the remote control to select a folder.
- Press the◀buttons to select a file.
- Press the button to start play.
Note: The player support the USB music file format of MP3, WMA only.
natural_image
Line drawing of a vintage electronic device with control knobs and a close-up of its internal components (no text or symbols visible)For devices with USB Cables:
- Insert one plug of the USB cable (not supplied) to the socket on the unit.
- Insert the other plug of the USB cable to the USB output terminal of the USB device.
For memory Cards:
- Insert the memory card into a card reader (not supplied).
- Use a USB cable (not supplied) to connect the card reader into the socket on the unit.
USB Storage Device Data Protection
• Always insert the USB device in the correct direction. Failure to do so may result in damage to the USB device and this unit.
- Do not remove the USB device while it is being accessed.
- Electrical interference and electrostatic discharges may cause the USB device to malfunction and suffer damage, resulting in data loss.
It is strongly recommended that any important data is backed up on a PC to protect against corruption, data loss or device malfunction. Please note that our
company shall not accept any liability for damage or loss of stored data.
Note: USB connection may not compatible with all hard drive models.
PLAY FROM BLUETOOTH DEVICE
Pairing bluetooth-enabled devices
To connect your Bluetooth device to the unit, you need to pair the device to the unit. Pairing needs to be done only once.
- Press the Bluetooth button on the remote control or rotate the SOURCE on the front panel.
- Turn on the Bluetooth function on your device.
- Search for other Bluetooth device with your device.
- Select "KM1598" in the pairing list.
- Enter default password "0000" if necessary.
- Start music play on your Bluetooth device, you can use this unit's remote to control the function to your Bluetooth device.
Note:
- The device will also be disconnected when the device is moved beyond the operation range.
- If you want to reconnect the device to the unit, place it within the operational range.
- The operational range between this unit and a Bluetooth device is up to 10 meters.
- Compatibility with all Bluetooth devices is not guaranteed.
- Any obstacle between this unit and a Bluetooth device can reduce the operational range.
- Keep this unit away from any other electronic device that may cause interference.
SET SLEEP TIMER
This unit can switch to standby mode automatically after a set period.
When the unit is turned on, press TIMER/SLEEP button repeatedly to select a preset period (in minutes):
$$ 1 2 0 > 9 0 > 6 0 > 4 5 > 3 0 > 1 5 $$
When sleep timer is activated, the "SLEEP" is displayed.
To deactivate the sleep timer, press TIMER/SLEEP button repeatedly until [SLEEP OFF] is displayed.
SET THE ALARM TIMER
This unit can be used as an alarm clock. You can select DISC, USB or TUNER as alarm source.
Note: Ensure that you have set the clock correctly.
- In standby mode, press and hold the TIMER/SLEEP button until [TIMER SET] (set timer) scrolls on the display.
- Press VOLUME UP/DOWN 🎨 / 🎨 button on the remote control to select source.
- Press TIMER/SLEEP button, the hour indicator will blink.
- Set the hour with the VOLUME UP/DOWN / buttons on the remote control.
- Press TIMER/SLEEP button, the minute indicator will blink.
- Repeat above steps 4-5 to set the minute.
- Repeat above steps 4-5 to set the alarm volume.
Activate / deactivate alarm timer
In the standby mode, press TIMER/SLEEP button repeatedly.
- If timer is activated, the Icon is displayed.
- If timer is deactivated, the Gicon disappears.
Note:
- To exit timer setting mode without storing, press the STOP button.
- If no button is pressed in 90 seconds, the unit exits clock setting mode automatically.
- If DISC/USB source is selected and the audio cannot be played, TUNER is activated automatically.
PROTECT THE DISC
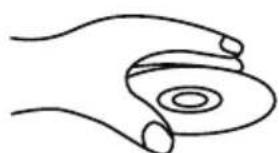
- To keep the disc clean, please don't touch the disc's surface when you are holding it. You should hold the edge.
- If the disc is dirty, it will affect the sound quality. Please use the clean and soft cloth to wipe the disc from inside to outside. Don't wipe the disc in circular motion.
natural_image
Simple line drawing of a hand holding a circular object (no text or symbols)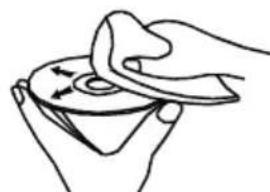
natural_image
Line drawing of hands cleaning a circular object with a cloth (no text or symbols)- Don't stick paper on the disc.
• After you have finished with the disc, please place it back in its original case. To avoid warping or damage, do not stack discs. - Don't play the disc which has flaw or deformation, in case of damaging this player.
- Clean your discs using only a soft dry cloth. Do not use any chemicals such as benzine, thinner, antistatic or record sprays as these can damage the disc surface.
TROUBLESHOOTING
If you are having a problem with your system, check this list for a possible solution before calling for service.
If you can not solve the problem from the hints give here, or the system has been physically damaged, call a qualified person, such as your dealer, for service.
No power
- Ensure that the AC adaptor plug of the unit is connected properly.
- Ensure that there is power at the AC outlet.
• To save power, the unit switches to standby automatically 15 minutes after a play reaches the end and no control is operated.
No disc detected
- Insert a disc.
- Check if the disc is inserted with the print side facing inward.
- Wait until the moisture condensation at the lens has cleared.
- Replace or clean the disc.
- Use a finalized CD or correct format disc.
USB device not supported
The USB device is incompatible with the unit. Try another one.
Poor radio reception
- Increase the distance between the unit and your TV or VCR.
- Fully extend and adjust the FM antenna.
No sound
Adjust the volume.
Timer does not work
- Set the clock correctly.
- Switch on the timer.
Clock timer setting erased
• Power has been interrupted or the power cord has been disconnected.
- Reset the clock/timer.
Cannot display some file in USB device
- The number of folders or files in the USB device has exceeded a certain limit. This phenomenon is not a malfunction.
- The formats of these files are not supported.
Remote control does not work
- Before pressing any function button, first select the correct source with the remote control instead of the main unit.
- Reduce the distance between the remote control and the unit.
- Insert the battery with its polarities (+/- signs) aligned as indicated.
- Replace the batteries.
- Aim the remote control directly at the sensor on the front of the unit.
SPECIFICATIONS
Power Requirements: 220 V; 50 Hz
FM Tuning Range: 87.5\~108 MHz
Power Consumption:....50 W
Output Power: 2 x 75 W RMS
THD:≤1%
USB Port: 5 V, 1 A
Impedance: 4 Ω
Input Power: 75 W
Dimensions:....(Unit) 245(W) x 138(H) x 300(D) mm
(Speaker) 158(W) x 270(H) x 207(D) mm
Specifications are subject to change without prior notice.
"The Lechpol company declares that product KM1598 is consistent with the essential requirements and other relevant provisions of directive 1999/5/EC. The proper declaration for download from www.lechpol.eu"
English
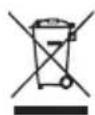
Correct Disposal of This Product
(Waste Electrical & Electronic Equipment)

(Applicable in the European Union and other European countries with separate collection systems) This marking shown on the product or Its literature, indicates that It should not be disposed with other household wastes at the end of its working life. To prevent possible harm to the environment or human health from uncontrolled waste disposal, please separate this from other types of wastes and recycle it responsibly to promote the sustainable reuse of material resources. Household users should contact either the retailer where they purchased this product, or their local government office, for details of where and how they can take this item for environmentally safe recycling. Business users should contact their supplier and check the terms and conditions of the purchase contract This product should not be mixed with other commercial wastes for disposal.
Made in China for LECHPOL Zbigniew Leszek, Miętne, 1 Garwolińska Street, 08-400 Garwolin.
Avant l'utilisation
CLASS 1 LASER PRODUCT
Noter :
natural_image
Illustration of a blue-handled vacuum cleaner with airflow arrows (no text or symbols)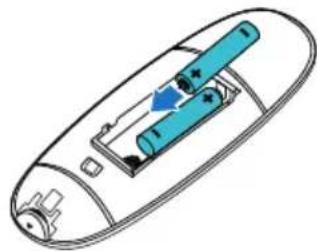
natural_image
Diagram of a remote control panel with blue battery and indicator lights (no text or symbols)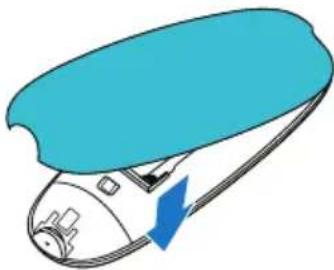
natural_image
Illustration of a blue and white object with a blue arrow indicating direction (no text or symbols)Veuillez noter
text_image
20° 30° 30°natural_image
Diagram of a device with a cable inserted into a housing, showing ports and wiring (no text or symbols)
text_image
② FM ANTENNAtext_image
Diagram of a device connection showing two speakers connected to an audio jack, with three labeled connectors and cable routing.text_image
Diagram showing connections between an electronic device, cable, and a printer with labeled components.text_image
Diagram showing connections between an open device with labeled components and a plug inserted into a socket, including a magnified inset of the socket.FONCTIONS D'ECONOMIE D'ENERGIE (ECO-POWER / STANDBY)
Alimentation on /off
natural_image
Line drawing of a vintage electronic device with ports and a close-up of its internal component (no text or symbols visible)CLASS 1 LASER PRODUCT
Let op:
natural_image
Illustration of a blue ergonomic device with directional arrows indicating movement or force (no text or symbols)natural_image
Diagram of a device casing with internal components and a blue arrow indicating direction (no text or symbols)natural_image
Illustration of a blue and white object with a blue arrow indicating direction (no text or symbols)Let op:
text_image
20° 30° 30°AANSLUITEN
natural_image
Line drawing of an electronic device with a bulb and cable, no text or symbols present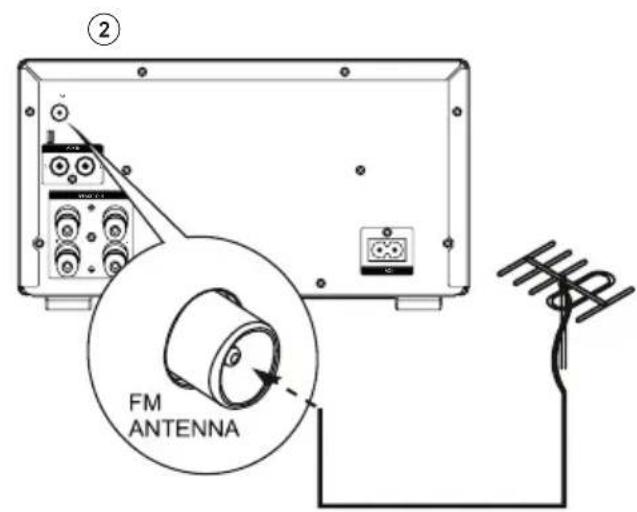
text_image
② FM ANTENNAtext_image
Diagram showing audio equipment connection with three speakers and labeled pins, including two separate devices with numbered connectors.Z
text_image
Diagram showing connection between a device with audio jack and audio jack connected to a microwave unit, with labeled ports and cable connections.natural_image
Diagram of an electrical outlet connected to a plug, showing internal components and wiring (no text or labels)natural_image
Line drawing of a vintage electronic device with control knobs and a close-up of its internal components (no text or symbols)CLASS 1 LASER PRODUCT
Uwaga:
text_image
Diagram of a device control panel with numbered labels pointing to various function buttons and indicators.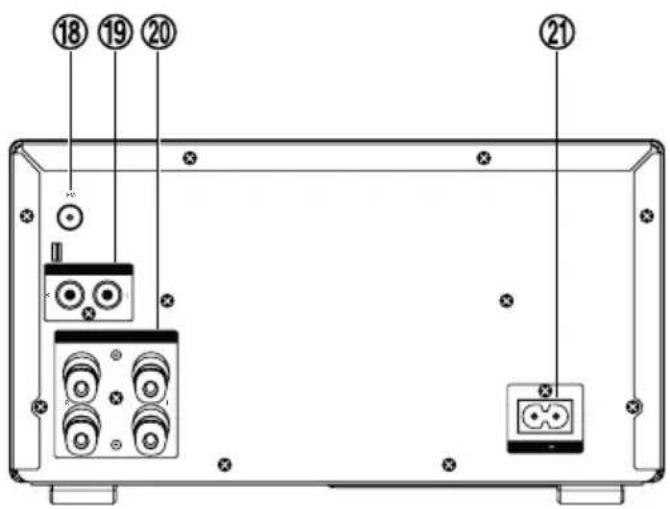
text_image
18 19 20 21natural_image
Illustration of a blue-handled vacuum cleaner with airflow arrows indicating movement (no text or symbols)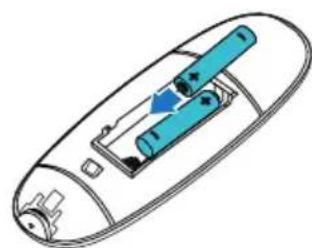
natural_image
Diagram of a remote control panel with blue cylindrical device and directional arrows (no text or symbols)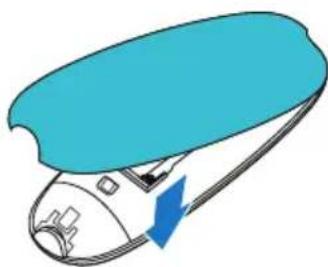
natural_image
Illustration of a blue ergonomic device with a blue arrow indicating direction (no text or symbols)PL
Uwaga:
text_image
20° 30° 30°text_image
Diagram showing two setups for an antenna installation, one with a cable and plug, the other with an antenna connected to a high-voltage power outlet.text_image
Diagram showing audio connection between two speakers with labeled components and wiring connectionstext_image
Diagram showing connection between a device with labeled components and cable connections, including a logo and power supply unit.P
natural_image
Diagram showing connections between an open device and a cable with a plug, no text or symbols presentnatural_image
Line drawing of a portable electronic device with control knobs and a close-up of its internal components (no text or symbols)natural_image
Simple line drawing of a hand holding a circular object (no text or symbols)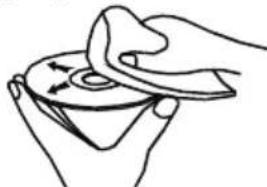
natural_image
Line drawing of hands holding a circular object with arrows indicating motion (no text or symbols)CLASS 1 LASER PRODUCT
Atentie:
text_image
Diagram of a device front panel with numbered labels pointing to various control buttons and indicators.
text_image
18 19 20 21- Buton ⏻STANDBY
- NFC area
- Compartimentul CD
- Led Indicator Bluetooth
- Senzor telecomanda
- Buton deschidere/inchidere ▲
- Buton Redare/Pauza
- Buton Stop ■
- USB
- Buton Sursa
-
Buton Bass
-
Buton Treble
- Ecran cu cristale lichide
- Buton Control Volum
- Buton Urmatorul
- Intrare Audio
- Buton Anterior
- Antena FM
- Intrare AUX (L & R)
- Iesire Difuzor (L & R)
- AC Power Socket
TELECOMANDA

text_image
① ② ③ ④ ⑤ ⑥ ⑦ ⑧ ⑨ ⑩ ⑪ ⑫ CD/USB ALBUM/PRESET FM AUX AUDIO IN MODE A-B DISPLAY PROGRAM DIM EQ CLOCK TIMER/SLEEP ⑬ ⑭ ⑮ ⑯ ⑰ ⑱ ⑲ ⑳ ㉑ ㉒ ㉓ ㉔- Buton STANDBY
- Buton Bluetooth
- Buton CD/USB
- Buton Album + / Buton Presetare +
- Buton Anterior / Derulare Rapida Inapoi /
- Buton Album – / Buton Presetare –
- Buton functie AUX
- Buton Mod
- Buton Ecran
- Buton Volum +
- Buton Egalizator (presetat)
- Buton Ceas
- Buton Functie FM
- Buton Redare/Pauza
- Buton Urmatorul/ Derulare Rapida Inainte /
- Buton Functia Audio IN
- Buton Stop
- Buton A-B
- Buton Program / Buton Memorie
- Buton Luminozitate
- Buton Silentios
- Buton Timer / Buton Sleep
- Buton Volum-
Instalare baterii
natural_image
Illustration of a blue-handled vacuum cleaner with airflow arrows indicating motion (no text or symbols)- Introduceti 2 baterii AAA respectand polaritatea corecta, ca si in figura
natural_image
Diagram of a device inside an oval casing with a blue cylindrical component and directional arrow (no text or symbols)- Inchideti compartimentul bateriilor

natural_image
Illustration of a blue and white object with a blue arrow indicating direction (no text or symbols)Utilizare telecomanda
text_image
20° 30° 30°Nota:
natural_image
Diagram of a device with a cable and connector inserted into a rectangular enclosure (no text or symbols)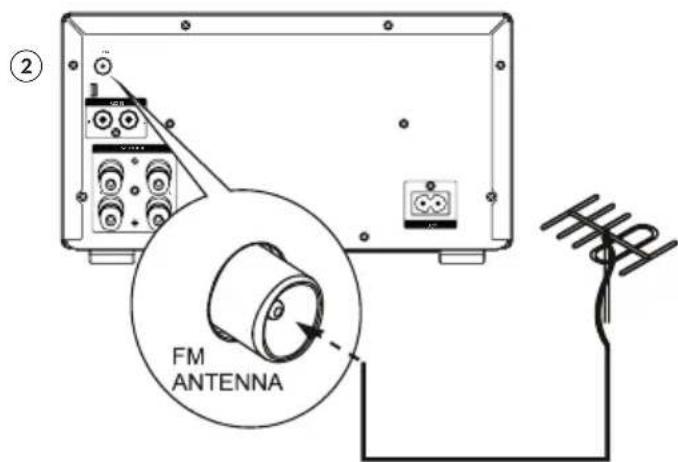
text_image
FM ANTENNAConectarea difuzoarelor
text_image
Diagram showing two speakers connected to a device with three labeled connectors, illustrating audio or sensor wiring connections.natural_image
Diagram showing connections between an electronic device, cable, and a radio unit (no text or symbols present)text_image
Diagram showing connections between an electronic device panel and a power outlet, with labeled components and wiring.RO
FUNCTIA ECO/STANDBY
Pornire / Oprire
text_image
Diagram showing a device with labeled ports and an inset image of a USB flash drive connected to a USB port.Protectie Date USB
natural_image
Simple line drawing of a hand holding a circular object (no text or symbols)
natural_image
Line drawing of a hand holding a circular object with a bandage, no text or symbols presentnatural_image
Completely dark image with no visible content, text, or symbols.
line
| X | Y | |---|---| | 0.0 | 0.0 | | 0.1 | 0.1 | | 0.2 | 0.2 | | 0.3 | 0.3 | | 0.4 | 0.4 | | 0.5 | 0.5 | | 0.6 | 0.6 | | 0.7 | 0.7 | | 0.8 | 0.8 | | 0.9 | 0.9 | | 1.0 | 1.0 | | 1.1 | 0.9 | | 1.2 | 0.8 | | 1.3 | 0.7 | | 1.4 | 0.6 | | 1.5 | 0.5 | | 1.6 | 0.4 | | 1.7 | 0.3 | | 1.8 | 0.2 | | 1.9 | 0.1 | | 2.0 | 0.0 |www.krugermatz.com
Krüger&Matz is a registered trademark