SBCSC450 - Bluetooth speaker PHILIPS - Free user manual and instructions
Find the device manual for free SBCSC450 PHILIPS in PDF.

| Product type | Audio baby monitor |
| Brand | Philips |
| Model | SBC SC450 |
| Outdoor range | Up to 200 meters in open space |
| Indoor range | Up to 50 meters maximum (depending on obstacles) |
| Baby unit power supply | Mains (9V DC adapter included) or 4 AA 1.5V batteries (not included) |
| Main parent unit power supply | Mains (9V DC adapter included) or 4 AA 1.5V batteries (not included) |
| Secondary parent unit power supply | Rechargeable NiMH battery included (charger provided) |
| Battery life (baby and main units) | Approximately 30 hours with new batteries |
| Secondary unit battery life | 12 hours after full charge |
| Channel selection | 3 channels, manual via selector on each unit |
| Microphone sensitivity adjustment | Yes, on the baby unit |
| Integrated nightlight | Yes, on the baby unit (on/off) |
| Connection loss alarm | Optional (switch in battery compartment) |
| LED indicators | Power (green/red), connection (flashing green/red), volume (bars) |
| Transmission frequency | 40.695 - 40.675 MHz |
| Operating temperature | 10°C to 40°C |
| Cleaning | Damp cloth |
| Safety | Place more than 1 meter away from baby, do not cover, do not open the housing |
Frequently Asked Questions - SBCSC450 PHILIPS
User questions about SBCSC450 PHILIPS
0 question about this device. Answer the ones you know or ask your own.
Ask a new question about this device
Download the instructions for your Bluetooth speaker in PDF format for free! Find your manual SBCSC450 - PHILIPS and take your electronic device back in hand. On this page are published all the documents necessary for the use of your device. SBCSC450 by PHILIPS.
USER MANUAL SBCSC450 PHILIPS
Instructions for use
English 4
Nederland (Netherlands)
0900-8406
Norge (Norway)
47-22-748 250
Danmark (Denmark)
808 82814
natural_image
Abstract geometric arrow shape with curved and straight lines (no text or symbols)
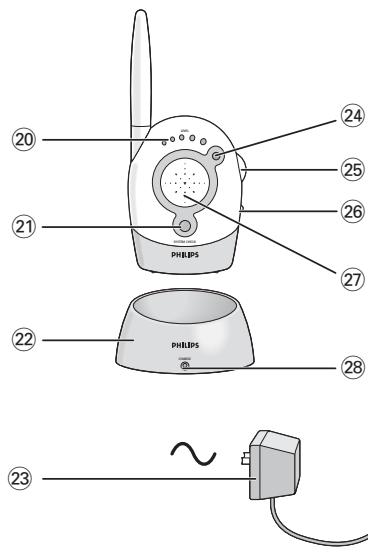
A) Baby Unit
B) Big Parent Unit
natural_image
Diagram of a hairdryer with a connector inserted, showing body structure and cable connection (no text or symbols)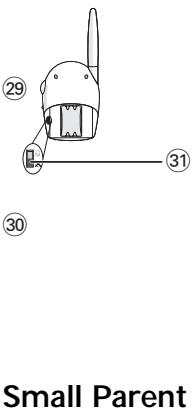
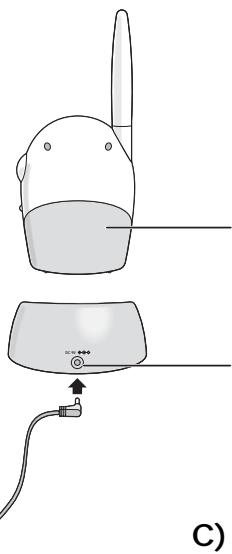
C) Small Parent Unit
Your baby monitor
SBC SC450
Philips is dedicated to producing caring, reliable products that new mothers and fathers really need. Products whose reliability and operating quality bring reassurance. You can trust this Philips baby monitor to provide round-the-clock support by ensuring that you can always hear your baby clearly, no matter where you are in the house.
Philips Baby Care, Taking care together
Important information
Please read this guide carefully before using the baby monitor, and keep it for future reference. This baby monitor is intended as an aid. It is not a substitute for responsible and proper adult supervision and should not be used as such.
- Make sure the Baby Unit and adapter cable are always out of reach of the baby, at least 3 feet (one metre) away.
- Never place the Baby Unit inside the baby's bed or playpen.
- Never cover the baby monitor (with a towel, blanket, etc.).
- Clean the baby monitor with a damp cloth.
- Never use the baby monitor near water.
- Radio equipment for wireless applications is not protected against interference from other radio services.
Safety precautions
- Check if the voltage indicated on the type plate of the adapters corresponds to the local mains voltage before connecting to the mains power supply.
- Do not use the set in damp places or close to water.
- Do not expose the set to extreme heat or light (e.g. direct sunlight).
- To prevent electric shock, do not open the cases of the Baby Unit, Parent Units and charger.
- Avoid metallic contact (e.g. metal clips, keys) between the battery contacts and the contacts in the charging base.
- Risk of explosion if battery in small Parent Unit is replaced by an incorrect type.
Never use non-rechargeable batteries for the small Parent Unit. - NiMH batteries must be disposed of in accordance with applicable waste disposal regulations.
Environmental information
No unnecessary packaging material has been used. We have tried to make the packaging easy to separate into two mono-materials cardboard (box), and polyethylene.
Please observe the local regulations regarding the disposal of packaging materials, exhausted batteries and old equipment.
Contents
Help line 2
Illustrations 3
General 4
Important information 4-5
Functional overview 5-6
Getting your baby monitor ready 7
Using your baby monitor 8
Features explanation 8-9
Using batteries 10-11
Technical specifications 11
Problem solving 12-13
Functional overview
Product illustration on inside flap:
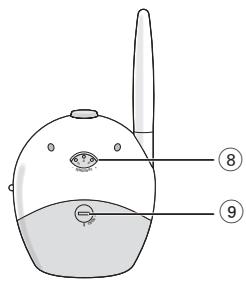
A) Baby Unit
1 Night light
2 DC power supply socket
3 Power button
Switches the Baby Unit on and off.
4 Power light
- Flashes green when the unit is switched on.
– Flashes red when batteries are almost empty.
- Flashes yellow when a sound is picked up.
5 Channel selection switch
Selects the required channel.
6 Microphone
7 AC power adapter
8 Microphone sensitivity control
Adjusts the microphone sensitivity of the Baby Unit.
9 Battery compartment cover
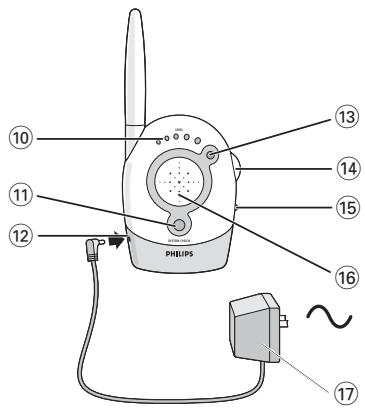
B) Big Parent Unit
10 Sound-level lights
Visually indicate baby's sound.
11 System check light
- Flashes green when the units have proper contact.
- Flashes red when the units are out of range or when connection is not reliable anymore.
12 DC power supply socket
13 Power light
– Lights up green when the unit is switched on.
- Flashes red when batteries are almost empty.
14 Volume control - on/off switch
Switches the unit on/off and controls the volume.
15 Channel selection switch
Selects the required channel.
16 Loudspeaker
17 AC power adapter
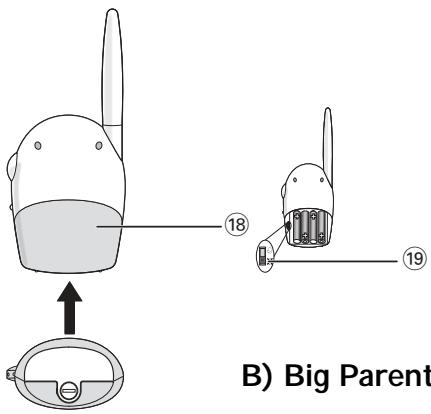
18 Battery compartment cover
19 System check alarm switch
Switches the System Check Alarm on and off.
The alarm beeps when the units are not in contact.
C) Small Parent Unit
20 Sound-level lights
Visually indicate baby's sound.
21 System check light
– Lights up green when the units have proper contact.
- Flashes green when the units are out of range or when connection is not reliable anymore.
22 Charging base
23 AC power adapter
24 Power light
– Lights up green when the unit is switched on.
– Flashes green when batteries are almost empty.
25 Volume control - on/off switch
Switches the unit on/off and controls the volume.
26 Channel selection switch
Selects the required channel.
27 Loudspeaker
28 Charging light
Lights up red when the unit battery is being charged.
29 Battery compartment cover
30 DC power supply socket
31 System check alarm switch
Switches the system check alarm on and off.
The alarm beeps when the units are not in contact.
Getting your baby monitor ready
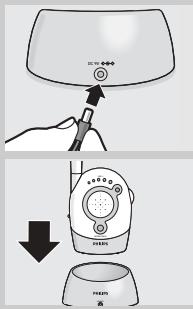
Baby Unit
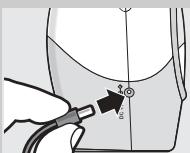
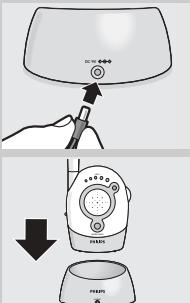
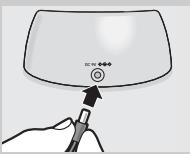
- Connect the AC power adapter (7) to an AC mains socket, and then connect the cord to the DC power supply socket (2) of the Baby Unit.
Note: To switch off the Baby Unit completely, press the POWER button (3).
Big Parent Unit
- Connect the AC power adapter (17) to an AC mains socket, and then connect the cord to the DC power supply socket (12) of the big Parent Unit.
Note: To switch off the big Parent Unit completely, switch the Volume control - on/off switch (14) to Off.
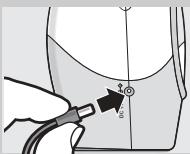
Small Parent Unit
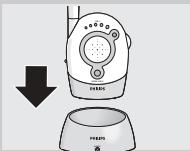
The small Parent Unit uses a rechargeable battery pack. This is already installed, but first it must be charged for at least 14 hours as follows before using the unit outside the charging base:
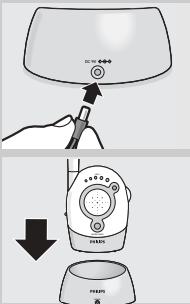
1 Connect the AC power adapter (23) to an AC mains socket, and then connect the cord to the DC power supply socket (30) of the charging base (22).
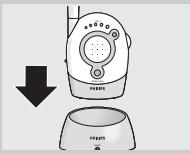
2 Place the small Parent Unit inside the charging base.
The red charging light (28) lights.
The small Parent Unit can be operated now but you should leave it in the charging base until the batteries are fully charged (at least 14 hours). When the batteries are fully charged, take the small Parent Unit out of the charging base and use cordlessly for up to 12 hours.
When the Power light (24) flashes green, the battery power is low. Place the small Parent Unit inside the charging base to recharge the batteries.
Avoiding interference
- If there is interference or if sound reception is poor, switch all units to another channel.
Always make sure that the Channel selection switches (5, 15, 26) on all units are set to the same position.
Near a window, the Parent Unit picks up interferences from further away. Move Parent Unit away from window.

natural_image
Illustration of a hand holding a pen and a small device with a downward arrow, no text or symbols present.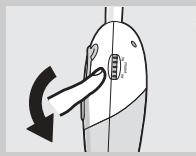
natural_image
Diagram of a hand pressing down on a device component with a black arrow indicating rotation (no text or symbols)
natural_image
Illustration of a hand pressing down on a computer mouse (no text or symbols)Using your baby monitor
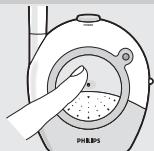
Listening to your baby
Both Parent Units can be used at the same time.
To use the units to listen to your baby:
1 Position the Baby Unit at least 3 feet (1 metre) away from the baby so that the microphone (6) can pick up baby's sounds.
2 Set the Channel selection switches (5, 15, 26) to the same position on all units.
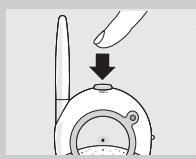
3 Press the Power button (3) on the Baby Unit to turn it on.
The power light (4) lights up (green).
4 Switch on the big Parent Unit using the Volume control - on/off switch (14) and adjust the volume to the level you prefer.
5 Switch on the small Parent Unit using the Volume control - on/off switch (25) and adjust the volume to the level you prefer.
6 Allow 10-30 seconds for the units to establish a link.
The green SYSTEM CHECK lights (11,21) show a steady light when the Parent Units and the Baby Unit are in touch with each other.
7 Adjust the microphone sensitivity of the Baby Unit to a level you prefer (using your own voice as a sound reference).
8 Move away from the Baby Unit with the Parent Units.
Features explanation

Monitoring baby silently
- Adjust the volume on the Parent Units to the lowest level using the Volume control - on/off switch (14, 25 - do not switch off).
The sound-level lights (10, 20) visually alert you to the baby's sounds. The more sound your baby makes, the more lights light up.
When no sound is detected, all lights will be off.
The sound-level lights (10, 20) visually alert you to the baby's sounds. The more sound your baby makes, the more lights light up. When no sound is detected, all lights will be off.

Checking that the units are in touch
- Check that the digital SYSTEM CHECK lights (11, 21) on the Parent Units show a steady light (green) to confirm that the connection between all units is reliable.
If the lights lights up green, move the Parent Units closer to the Baby Unit. The lights flash if the units are out of range for more than 30 seconds or if there is interference.
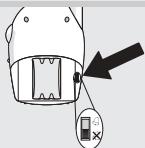
Switching on the system check alarm
You can switch on the system check alarm on the Parent Units that beeps when the units are not in touch. By default, the system check alarm is switched off.
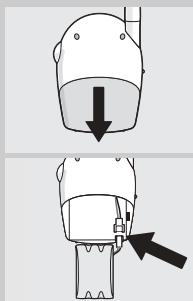
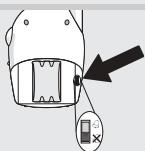
1 Open the big Parent Unit's battery compartment cover (18), using a coin.
2 Set the switch (19) inside the compartment to the ON position (💡).
3 Close battery compartment cover.
The system check light (11) will remain active, independent of the switch setting.
4 Open the small Parent Unit's battery compartment cover (29).
5 Set the switch (31) inside the compartment to the ON position (☐).
6 Close battery compartment cover.
The system check light (21) will remain active, independent of the switch setting.
Switching on the night light
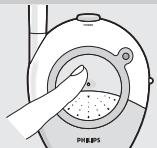
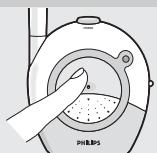
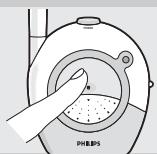
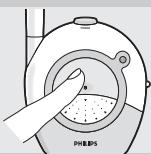
- Press the Baby Unit night light (1) to switch it on and off.
- When operating the Baby Unit on batteries, switch off the night light to save power.
Range 200m in open air
The baby monitor has an operating range of up to 650 feet (200 metres) in ideal open-air conditions. Indoors the range is limited to a maximum of 150 feet (50 metres). Walls, ceilings, large objects and even glass affect the operating range. The more obstacles there are in between, the shorter the operating range.
Using batteries
Operating the Baby Unit cordlessly
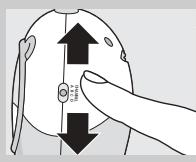
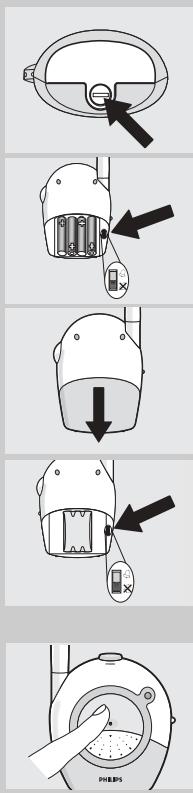
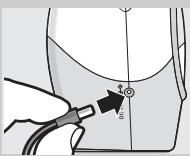
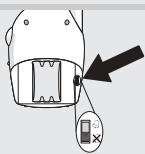
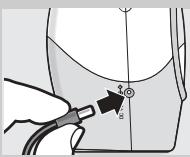
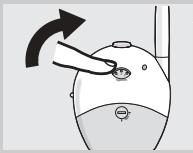
1 Remove the battery compartment cover (9), using a coin.
2 Insert four 1.5V AA batteries noting the + and - configuration inside the battery compartment.
Batteries are not included; we recommend non-rechargeable Philips alkaline batteries.
3 Put the cover (9) back in place and secure, using a coin.
The Baby Unit operates cordlessly for up to 30 hours on fresh batteries. The POWER light (4) lights up red when battery power is low. If this happens install new batteries.
Note: Do not use rechargeable batteries. The Baby Unit will not function on rechargeable batteries.
natural_image
Simple line drawing of a circular object with a black arrow pointing to its bottom surface (no text or symbols)Operating the big Parent Unit cordlessly
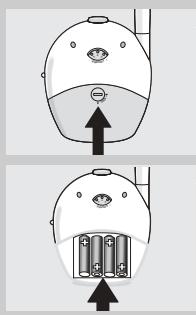
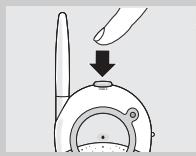
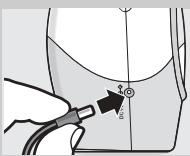
1 Open the battery compartment cover (18), using a screwdriver.

natural_image
Diagram of a mechanical component with an arrow pointing upward, no text or symbols present2 Insert four 1.5V AA batteries noting the + and - configuration inside the battery compartment.
Batteries are not included; we recommend non-rechargeable Philips alkaline batteries.
3 Put the cover (18) back in place and secure), using a screwdriver.
The big Parent Unit operates cordlessly for up to 30 hours on fresh batteries. The Power light (4) flashes red when battery power is low. If this happens install new batteries.
Notes:
- Do not use rechargeable batteries.
The Baby Unit will not function on rechargeable batteries. - When rechargeable batteries are used in the Baby Unit, they will not be charged.
- As soon as the batteries are inserted, battery back up will be activated. In the event of mains failure during mains operated use, the unit will automatically switch to battery operated use. As soon as the mains supply is back on, the unit switches to mains operated operated use again.

Replacing the small Parent Unit's battery pack
1 Open the small Parent Unit's battery compartment cover (29).
2 Disconnect the old battery pack from the power plug and remove.
3 Carefully connect the new battery pack to the power plug and place inside the battery compartment.
4 Close battery compartment cover (29).
- Remove the battery-pack from the Parent Unit if it is not used for long periods of time.
Batteries
Dispose of used batteries in an environmentally friendly manner.
Do not mix old and new batteries, or different types of batteries.
Remove Baby Unit batteries if the baby monitor is not to be used for long periods.
Technical specifications
| Power supply: | - Battery pack; rechargeable NiMH for small Parent Unit (included).- Optional batteries 4x 1.5V; AA for Baby Unit and big Parent Unit (not included)- AC power adapter 230V AC, 50 Hz (three included): - Output voltage 9V DC, 200mA. |
| Operating range: | Up to 200 metres in ideal conditions (walls, floors, etc. can limit this distance). |
| Operating temperature: | 10 °C to 40 °C |
| Digital pilot tone: | Continuous communication link (hidden signal helps reduce interference and ensures a continuous link between both units so you only hear your baby's sounds). |
| Transmission frequencies | SBC SC450/00/05/84:from 40.695 to 40.675 MHz |
| Problem solving | ||
| Problem | Possible cause | Solution |
| Power light does not light up | Parent Unit(s): Unit(s) not turned on. | Turn the Volume control on/off switch control (14, 25) downwards. |
| Power adapter(s) not plugged in or batteries are exhausted. | Plug in power adapter(s) (17, 23) or replace/recharge batteries. | |
| Baby Unit: Unit is not turned on. | Connect BU to mains supply/insert batteries and push power button (3). | |
| Power adapter is not plugged in or batteries are exhausted. | Plug in power adapter (7) or replace batteries. | |
| Small Parent Unit batteries do not charge | Battery life is at an end. | Connect charging base (22) to mains, power. Replace battery pack. |
| No sound | Volume on Parent Unit(s) is set too low. | Turn the Volume control on/off switch control (14, 25) downwards. |
| Microphone sensitivity on Baby Unit is set too low. | Adjust the microphone sensitivity of the Baby Unit, using the Microphone sensitivity control (8). | |
| Power light lights up red | Batteries are low or empty. | Big Parent Unit -replace batteries or connect to mains power. Small Parent Unit: - recharge battery pack. Baby Unit: - replace batteries or connect to mains power. |
| Interference or poor reception | Mobile or cordless phones too close to the baby monitor. | Move phones away from the units. Move Parent Unit(s) closer to Baby Unit. |
| Parent Unit(s) too close to a window. | Move Parent Unit(s) away from windows. | |
| Pick-up from another baby monitor | Both systems are operating on the same frequency. | Switch channels. |
| System check lights (11, 21) flashing green/red | Units are out of range or there is interference from another FM source. | Move units closer together to restore the link and wait 10-30 seconds for confirmation (green SYSTEM CHECK lights (11,21) give a steady light). Remove the other FM source. |
| Baby Unit is not switched on. | Press Power button (3). | |
| Parent Unit reacts tooslow/late on baby's sound | Microphone sensitivity on Baby Unit is set too low. | Adjust the microphone sensitivity of the Baby Unit to a higher level, using the microphone sensitivity control (8). |
| Baby Unit too far away from baby. | Move Baby Unit closer to baby. | |
| Parent Unit reacts too quickly on other ambient sounds | Microphone sensitivity on Baby Unit is set too high. | Adjust the microphone sensitivity of the Baby Unit to a lower level, using the microphone sensitivity control (8). |
| Baby Unit too far away from baby. | Move Baby Unit closer to baby. | |
Philips Consumer Electronics, B.U. Peripherals & Accessories, hereby declares that this SBC SC450 is in compliance with the essential requirements and other relevant provisions of Directive 1999/5/EC.
Need Help?
If you have any questions about the SBC SC450, please contact our helpline for assistance! You can find the number in the list on page 2.
Before you call, please read this manual carefully. You will be able to solve most of your problems.
The model number of the baby monitor is SBC SC450.
Date of purchase: ____ /____ /____ day /month /year
Philips Baby Care, Taking care together
Important

natural_image
Illustration of a hand holding a pen and a dial indicator (no text or symbols)
natural_image
Diagram of a hand pressing down on a device with a curved arrow indicating rotation (no text or symbols)
natural_image
Illustration of a hand pressing a button on a computer mouse (no text or symbols)
natural_image
Diagram of a hand pressing down on a device component with an arrow indicating rotation (no text or symbols present)

natural_image
Simple line drawing of a steering wheel with a black arrow pointing to the dial (no text or symbols)natural_image
Diagram of a robot head with internal battery pack and upward arrow (no text or symbols)

natural_image
Illustration of a hand holding a pen and a small device with a downward arrow, no text or symbols present.
natural_image
Diagram of a hand pressing down on a device component with a black arrow indicating rotation (no text or symbols)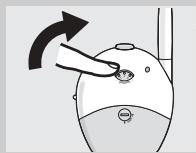
natural_image
Illustration of a hand pointing to a small object on a device, with no visible text or symbols.
natural_image
Diagram of a hand pressing down on a device component with an arrow indicating rotation (no text or symbols present)Uso del vigilabebés
Escuchar al bebé

natural_image
Illustration of a hand pressing down on a circular device with a dotted pattern, labeled 'PHILIPS' at the bottom (no other text or symbols)natural_image
Simple line drawing of a stylized eye mask with a black arrow pointing to the center (no text or symbols)natural_image
Diagram of a robot head with internal components and an upward arrow indicating motion (no text or symbols)


Babyeinheit

natural_image
Illustration of a hand holding a pen and a dial indicator (no text or symbols)
natural_image
Diagram of a hand pressing down on a device component with a curved arrow indicating rotation (no text or symbols)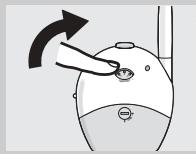
natural_image
Illustration of a hand pressing a button on a computer mouse (no text or symbols)natural_image
Diagram of a hand pressing down on a device with a curved arrow indicating rotation (no text or symbols)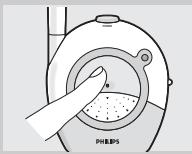
natural_image
Illustration of a hand pressing down on a device labeled 'PHILIPS' with no visible text or symbols beyond the label.natural_image
Simple line drawing of a circular object with a handle and arrow pointing to the center (no text or symbols)natural_image
Diagram of a robot head with internal battery pack and upward arrow (no text or symbols)
natural_image
Simple line drawing of a trash bin with a crossed X mark and a circular base (no text or symbols)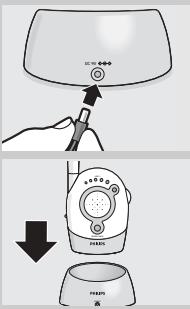
natural_image
Illustration of a hand using a dial to measure a device, showing a downward arrow (no text or symbols present)natural_image
Diagram of a hand pressing down on a device with a curved arrow indicating rotation (no text or symbols)natural_image
Illustration of a hand inserting a small object into a device (no text or symbols)natural_image
Diagram of a hand pressing down on a device with an arrow indicating rotation (no text or symbols present)


natural_image
Illustration of a hand pressing down on a mechanical component labeled 'PHILIPS' (no text or symbols beyond label)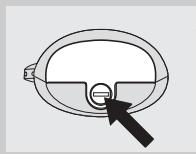
natural_image
Simple line drawing of a circular object with a handle and arrow pointing to the center (no text or symbols)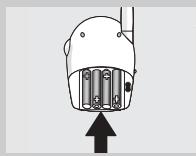
natural_image
Diagram of a mechanical component with an arrow pointing upward (no text or symbols present)

Unità Baby

natural_image
Illustration of a hand holding a pen and a small device with a downward arrow, no text or symbols present.
natural_image
Diagram of a hand pressing down on a device component with a black arrow indicating rotation (no text or symbols)
natural_image
Illustration of a hand pressing down on a computer mouse (no text or symbols)


natural_image
Simple line drawing of a trash bin with a crossed X mark and circular base (no text or symbols)
Unidade do bebé

natural_image
Illustration of a hand holding a pen and a small device with a downward arrow, no text or symbols present.
natural_image
Diagram of a hand pressing down on a device component with a black arrow indicating rotation (no text or symbols)
natural_image
Illustration of a hand pressing down on a computer mouse (no text or symbols)Utilizar o monitor para bebé
Ouvir o bebé
natural_image
Diagram of a hand pressing down on a device component with an arrow indicating rotation (no text or symbols present)
natural_image
Simple line drawing of a steering wheel with a black arrow pointing to the dial (no text or symbols)natural_image
Diagram of a robot head with internal battery pack and upward arrow (no text or symbols)
Μονάδα μωρού
natural_image
Illustration of a hand pointing to a small circular object on a device (no text or symbols visible)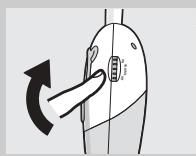


Χρήση των μπαταριών

natural_image
Simple line drawing of a trash bin with a crossed X mark and circular base (no text or symbols)Philips Baby Care, Taking care together
Viktig information

Babyenhet

natural_image
Illustration of a hand holding a pen and a small device with a downward arrow, no text or symbols present.
natural_image
Diagram of a hand pressing down on a device component with a black arrow indicating rotation (no text or symbols)
natural_image
Illustration of a hand pressing down on a computer mouse (no text or symbols)Använda babyvakten
Lyssna på barnet


natural_image
Illustration of a hand pressing down on a mechanical component labeled 'PHILIPS' (no text or symbols beyond label)natural_image
Simple line drawing of a circular object with a handle and arrow pointing to the center (no text or symbols)natural_image
Diagram of a robot head with internal battery pack and upward arrow (no text or symbols)
natural_image
Simple line drawing of a trash bin with a crossed X mark (no text or symbols)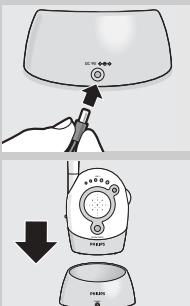
Babyenhed
natural_image
Illustration of a hand holding a pen and a small device with a downward arrow, no text or symbols present.natural_image
Diagram of a hand pressing down on a device component with a black arrow indicating rotation (no text or symbols)natural_image
Illustration of a hand pressing down on a device with an arrow indicating rotation (no text or symbols)natural_image
Diagram of a hand pressing down on a device component with an arrow indicating rotation (no text or symbols present)

natural_image
Simple line drawing of a circular object with a handle and arrow pointing to the center (no text or symbols)natural_image
Diagram of a mechanical component with an arrow pointing upward (no text or symbols)

Babyapparat
natural_image
Illustration of a hand using a dial to measure a device, showing a downward arrow (no text or symbols present)natural_image
Diagram of a hand pressing down on a device with a curved arrow indicating rotation (no text or symbols)4 Slå på det store foreldreapparatet med volumkontroll - på/av-bryteren (14) og juster lydstyrken til det nivået du vil ha.
5 Slå på det lille foreldreapparatet med volumkontroll - på/av-bryteren (25) og juster lydstyrken til det nivået du vil ha.
natural_image
Illustration of a hand pressing down on a device with an arrow indicating rotation (no text or symbols)
natural_image
Illustration of a hand pressing down on a mechanical component labeled 'PHILIPS' (no text or symbols beyond label)natural_image
Simple line drawing of a circular object with a black arrow pointing to its bottom surface (no text or symbols)natural_image
Diagram of a mechanical component with an arrow pointing upward, no text or symbols present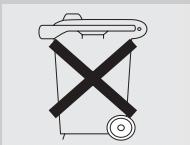
natural_image
Simple line drawing of a trash bin with a crossed X mark and circular base (no text or symbols)
natural_image
Illustration of a hairdryer with a downward arrow indicating compression or cooling (no text or symbols)Lapsen yksikkö
natural_image
Illustration of a hand holding a pen and a small device with a downward arrow, no text or symbols present.natural_image
Diagram of a hand pressing down on a device component with a black arrow indicating rotation (no text or symbols)natural_image
Illustration of a hand pointing to a small object on a computer mouse, with an arrow indicating rotation (no text or symbols)natural_image
Diagram of a hand pressing down on a device with an arrow indicating rotation (no text or symbols present)natural_image
Illustration of a hand inserting granular material into a device labeled 'PHILIPS' (no text or symbols on the diagram itself)natural_image
Simple line drawing of a circular object with a black arrow pointing to its bottom surface (no text or symbols)natural_image
Diagram of a mechanical component with an arrow pointing upward, no text or symbols present