KU100 PRO 1 X A - Basket BERTAZZONI - Free user manual and instructions
Find the device manual for free KU100 PRO 1 X A BERTAZZONI in PDF.
Download the instructions for your Basket in PDF format for free! Find your manual KU100 PRO 1 X A - BERTAZZONI and take your electronic device back in hand. On this page are published all the documents necessary for the use of your device. KU100 PRO 1 X A by BERTAZZONI.
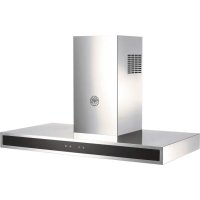
USER MANUAL KU100 PRO 1 X A BERTAZZONI
- Installations instructions
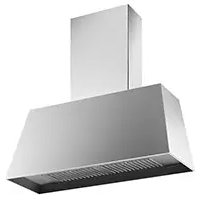
DUNSTABZUGHAUBE
This instruction booklet must be kept together with the appliance for future reference. If the appliance is sold or consigned to other parties, check that the booklet is supplied with it, to ensure that the new user has the correct information on the operation of the range hood and is aware of the warnings. These warnings have been provided for the your safety and the safety of others. As a result, please read them carefully before installing and operating the appliance.
This appliance is not intended for use by persons (including children) with reduced physical, sensory or mental capabilities, or lack of experience and knowledge, unless they have been given supervision or instruction concerning use of the appliance by a person responsible for their safety. Children should be supervised to ensure that they do not play with the appliance.
The appliance must be installed by qualified personnel, in accordance with the standards in force. If the supply cord is damaged, it must be replaced by the manufacturer, its service agent or similarly qualified persons in order to avoid a hazard. Any modifications that may be required to the electrical system for the installation of the range hood must only be made by qualified electricians. It is dangerous to modify or attempt to modify the characteristics of this system. In the event of malfunctions or if repairs are required to the appliance, do not attempt to solve the problems directly.
Repairs performed by unqualified persons may cause damage. For all repair and other work on the appliance, contact an authorised service/spare parts centre.
Always check that all the electrical parts (lights, exhaust device), are off when the appliance is not being used. Read the entire instruction booklet before performing any operations on the range hood.
The range hood must only be used for the exhaust of cooking fumes in home kitchens. The manufacturer disclaims all liability for any other use of the appliance.
The maximum weight of any object placed above the hood, or hung to it (if possible) must not exceed 1,5 kilos. After installing the stainless steel hood, clean it in order to remove any residue of the protective glue, and stains of grease or oil. The manufacturer recommends its cleaning cloth available for purchase. The manufacturer accepts no liability in case of damage caused by the use of different detergent types.
CAUTION:
product must be disposed of at end of life according to the rules in force.
The electrical system features an earth connection in compliance with international safety standards; furthermore, it is compliant with the European standard for electromagnetic compatibility. Do not connect the appliance to flues (from boilers, fireplaces, etc.). Make sure the mains voltage corresponds to the values on the rating plate located inside the range hood.
Never cook on "open" flames under the range hood.
Check deep-fryers during use: superheated oil may be flammable.
-
Ensure there is adequate ventilation of the room when the rangehood is used at the same time as appliances burning gas or other fuels.
-
Do not flambe under the rangehood
-
The exhaust air must not be discharged into a flue which is used for exhausting fumes from appliances burning gas or other fuels.
-
Ensure that all regulations concerning the discharge of exhaust air have been fulfilled before you use the appliance.
Before performing any cleaning or maintenance operations, disconnect the appliance by unplugging it or using the main switch. The manufacturer disclaims all liability for any damage that may be directly or indirectly caused to people, things and animals due to the failure to follow all the instructions provided in this booklet and above all the warnings relating to the installation, operation and maintenance of the appliance.
- there is a fire risk if cleaning is not carried out in accordance with the instructions.
CAUTION: Accessible parts may become hot when used with cooking appliances.
- Max. length screw for fixing the chimney is 10mm (provided by the manufacturer).
WARNING: Failure to install the screws or fixing device in accordance with these instructions may result in electrical hazards.
TECHNICAL SPECIFICATIONS
The technical data pertaining to the electric appliance The technical specifications of the appliance are shown on the rating plates located inside the range hood.
INSTALLATION
The distance between the hob and the lowest part of the rangehood is normally at least 65~cm , if installed on induction hob, or 75~cm if installed on gas hob (Fig. 2). This distance is measured in the lowest part of the rangehood not operating at safety voltage. Based on this detail provided by European Standards, the distance may be reduced in some models as specified in the general catalogue. If the instructions for installation for the gas hob specify a greater distance, this has to be taken into account. In the outside exhaust version, the diameter of the fume discharge duct must be no smaller than the range hood connection.
In the horizontal sections, the duct must slope slightly (around 10% ) upwards, so as to better convey the air outside of the room.
Avoid using angled pipes, make sure that the pipes are at least of the minimum length.
Comply with the current regulations on air discharge into the atmosphere.
If a boiler, stove, fireplace, etc. that uses gas or other fuels is being used at the same time, make sure the room where the fumes are extracted is well ventilated, in compliance with the current regulations.
ELECTRICAL CONNECTIONS
Before doing any work inside the range hood, disconnect the appliance from the mains power supply. Check that the wires inside the range hood are not disconnected or cut; if this is the case, contact your nearest service centre. The electrical connections must be performed by qualified personnel. The connections must be performed in compliance with the legal standards in force. Check that the relief valve and the electrical system are able to support the load of the appliance (see label inside the prodyct). Some types of appliance are supplied with a cable without plug; in this case, "standardised" plugs must be used, keeping in mind that:
-
the yellow-green wire must be used for the earth,
-
the blue wire must be used for the neutral,
-
the brown wire must be used for the phase; the cable must not come into contact with hot parts (over 70^ ).
-
fit a plug that is suitable for the load to the power cable, and connect it to a suitable power outlet.
For appliances that come supplied with cable and plug please ensure they are plugged into a circuit suitable for this appliance.
Please refer to a qualified person.
The manufacturer declines all liability if the safety standards are not observed.
INSTALLATION IN EXHAUST MODE
In this version, the fumes and steam from the kitchen are conveyed outside through an exhaust duct.
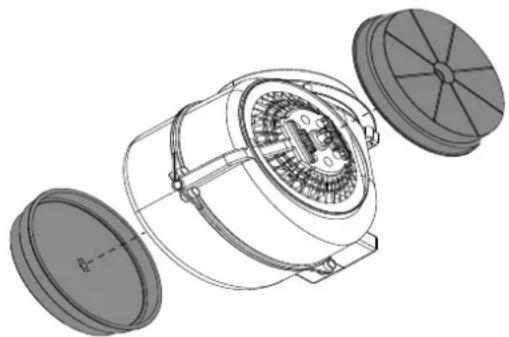
The exhaust conveyor that protrudes from the upper part of the range hood must be connected to a duct that carries the fumes and steam outside. In this version, the charcoal filters, if fitted, should be removed; to do this, see the picture down here. There must be adequate ventilation of the room when the range hood is used at the same time as appliances burning gas or other fuels, according to the standard.
INSTALLATION IN RECIRCULATING MODE
In this version, the air passes through charcoal filters for purification, and is then recirculated back into the kitchen.
Check that the charcoal filters are fitted to the motor, and if not, install them as described in the previous image.
If the hood is of filtering type, remove the non-return valve fitted at the motor's outlet.
For maximum efficiency, the third speed should be used when there are strong odours or a lot of steam, the second speed in normal conditions, and the first speed for keeping the air clean with minimum energy consumption. The range hood should be switched on when starting to cook, and left on until the odours disappear.
OPERATIONS
ELECTRONIC CONTROL PANEL (Fig. 7)
Light pushbutton (1)
-
ON: light on (the pushbutton is lit);
-
OFF: light off;
Pushbutton - (3)
Press to reduce motor speed.
Pushbutton + (3)
Press to increase motor speed.
(In the speed 4 the pushbutton presents an intermittent light. The speed 4 or intensive is timed and after 7 minutes the motor automatically switches to speed 3).
Pushbutton On / Off (2)
Function: it turns hood on and off.
When you switch On the hood the motor starts at first speed.
Pushbutton Timer (4)
This function allows the automatic turning off the hood after 15 minutes for the speeds 1, 2, 3 (the pushbutton is lit).
FILTER REMOVING
METAL FILTERS
Open the panel (Fig. 4). Use handle to remove the metal grease filter.
CHARCOAL FILTERS
To replace the charcoal filters, proceed as follows: remove the metal filters as described above.
The two filters located at the ends of the motor can now be easily accessed.
To install the new fi Iters see picture.
LIGHTING
The hood is equipped with high efficiency, low power consumption LED lighting (light on the work top and decorative light on the glass panes), with high durability under normal use conditions.
On the product there are two leds from 1,1 watts.
MAINTENANCE AND CLEANING
Constant maintenance ensures the correct operation and efficiency of the appliance over time. Special attention should be paid to the metal grease-trapping filters and the charcoal filters. Frequent cleaning of the filters and their supports will ensure that fats and grease do not accumulate on the range hood, with the consequent risk of fire.
1. METAL GREASE-TRAPPING FILTERS
These trap the fat and grease particles suspended in the air, and therefore should be washed every month in hot water and detergent, without bending them. Wait until they are completely dry before repositioning them. This operation should be performed at regular intervals.
2. CHARCOAL FILTERS
These trap the odours present in the stream of air that passes through them. The air is purified by passing a number of times through the filters and being recirculated into the kitchen. The charcoal filters cannot be cleaned, and should be replaced on average every 3-4 months (according to use).
3. CLEANING THE OUTSIDE OF THE APPLIANCE
It is advised to clean the external hood surfaces at least every 15 days in order to avoid that oily or greasy substances affect the steel surfaces.
The outside of the range hhod should be cleaned using a damp cloth and neutral liquid detergent or denatured alcohol.
In case of fingerprint-less finish (fasteel) clean only with water and neutral soap using clean with a soft cloth, rinse and wipe dry thoroughly. Do not use products that contain abrasive substances, rough cloths or cloths specifically designed for cleaning steel. Using abrasive substances or rough cloths will inevitably damage the finish of steel. The steel surface will be irrevocably damaged if the instructions above are not complied with.
Keep these instructions together with the instructions for use of your hood.
The manufacturer accepts no liability for any damage caused by non-compliance with the instructions above.
4. CLEANING THE INSIDE OF THE APPLIANCE
The electrical parts or parts of the motor assembly inside the range hood must not be cleaned using liquids or solvents.
HOOD INSTALLATION
WARNING: Failure to install the screws or fixing device in accordance with these instructions may result in electrical hazards.
In the table in Figure 3 you can verify the model, bought, and identify measures for the holes (H - G, B).
Take measurements from the hob, mark with a pencil on the wall where to drill the points (Fig. 5 Step 1).
Drill, insert the screw anchors 0.8mm and partially tighten the screws (Fig. 5 Step 2-3), Hook the hood to the screws, tighten the screws after checking if the hood is in the bubble.
To prevent the dropping of the hood due to pressure from below, fasten it to the wall with screws (Fig. 6 Step 1 - 2 - 3).