
FDT172 - Refrigerator FAGOR - Free user manual and instructions
Find the device manual for free FDT172 FAGOR in PDF.
| Product type | Refrigerator-freezer |
| Brand | Fagor |
| Model | FDT172 |
| Climate class | N (16°C to 32°C) / ST (18°C to 38°C) / T (18°C to 43°C) |
| Electrical supply | 220-240 V, grounded outlet |
| Freezer category | 4 stars (****) |
| Freezing capacity | 4 kg in 24 hours |
| Refrigerant | R600a (flammable) |
| Refrigerator defrost system | Automatic |
| Freezer defrost system | Manual (defrosting recommended twice a year) |
| Homogeneous cold | Built-in fan for temperature homogenization |
| Interior lighting | Replaceable bulb (same type) |
| Door reversibility | Yes, instructions provided |
| Leveling feet | Adjustable |
| Cleaning | Interior with mild detergent; rear grille with vacuum cleaner once a year |
| Safety | Grounded outlet; do not damage the refrigeration circuit; do not use flames or electrical appliances inside |
| Included accessories | Ice cube trays, vegetable bins, shelves |
Frequently Asked Questions - FDT172 FAGOR
User questions about FDT172 FAGOR
0 question about this device. Answer the ones you know or ask your own.
Ask a new question about this device
Download the instructions for your Refrigerator in PDF format for free! Find your manual FDT172 - FAGOR and take your electronic device back in hand. On this page are published all the documents necessary for the use of your device. FDT172 by FAGOR.
USER MANUAL FDT172 FAGOR
natural_image
Exterior view of a modern stainless steel refrigerator (no signage or text visible)INDICE
Pag.
Instalación....2
natural_image
Symbol of a trash bin with crossed lines indicating no waste or restriction, and a solid black rectangle below (no text or labels)natural_image
Simple 3D diagram of a rectangular block with a vertical seam and shaded side (no text or symbols)natural_image
Simple diagram showing a battery with an electric plug connected to a wire, with arrows indicating flow direction (no text or symbols)natural_image
Close-up of white plastic kitchen cabinets with circular cutouts and a perforated top (no visible text or symbols)natural_image
Diagram of a refrigerator interior with horizontal shelves and ventilation grilles, showing airflow direction (no text or labels)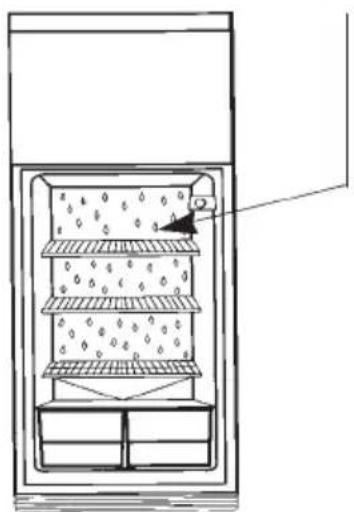
natural_image
Diagram of a multi-tiered storage or drying unit with internal compartments and a label pointing to the top section (no text or symbols present)TIEMPOS DE CONSERVACION
TIPO DE ALIMENTO
Número Meses
| PESCADOS Y MARISCOS | |
| Langosta-Crustáceos 3 | |
| Gambas-Langostinos 3 | |
| Merluza 2 | |
| Pescados grasos 3/4 | |
| Trucha 2/3 | |
| Salmón 2/3 | |
| Lenguado 3 | |
| Rodaballo 2/3 | |
| CARNE | |
| Vacuno mayor 10/12 | |
| Cordero 6/8 | |
| Ternera 9 | |
| Cerdo 6 | |
| Filetes/Chuletas 4 | |
| Higado/Riñones 10 | |
| Seso/Lengua 2 | |
| Carne picada, Salchichas 2 | |
| Conejo 5/7 | |
| AVES Y CAZA | |
| Gallinas-Pollos 10 | |
| Pavo- (troceado) 7 | |
| Pato, Ganso, Oca 5 | |
| Liebre | 6 |
| Perdiz-Codorniz 8 | |
| Faisán | 7/8 |
| Caza Mayor | 10 |
| PLATOS PREPARADOS | |
| Salsa de tomate 3 | |
| Caldo de Carne | 3 |
| Asados: buey, ternera, pollo, cerdo | 2/3 |
| Menestra de verduras | 3 |
| Carne cocida, Estofado | 3 |
| Hamburguesas | 2 |
| Pimientos rellenos | 2 |
| Espinacas 2 | |
| Judías verdes y salteadas 2 | |
| Tartas empanadas, etc. | 5/6 |
| Macedonia de frutas | 3 |
| Sandwiches | 6 |
TIPO DE ALIMENTO
Número Meses
flowchart
graph TD
    A["Raw Food preparation"] --> B["Box with food items"]
    B --> C["Box with cooking pot"]
    C --> D["Box with oven"]
    D --> E["Box with oven"]
    E --> F["Box with microwave"]
    F --> G["Delivery to oven"]
natural_image
Line drawing of two hands holding a grid-patterned object (no text or symbols)natural_image
Simple line drawing of a refrigerator with a tray and door, no text or symbols presentnatural_image
Illustration of a hand inserting a plug into an electrical socket (no text or symbols)natural_image
Illustration of two blocks with a star and cross symbol (no text or labels)natural_image
Diagram of a vacuum cleaner operating a rack-mounted air conditioner unit (no text or symbols visible)PARADA TEMPORAL DEL FRIGORIFICO
natural_image
Simple line drawing of a rectangular box with two vertical slots, no text or symbols present.natural_image
Technical line drawing of a mechanical assembly with rollers and a tool, showing motion directions (no text or symbols)natural_image
Pure technical line drawing of a mechanical component with no text or symbolsESPECIFICACIONES
other
| Dimension | Value | | --------- | ----- | | Height | 598 | | Width | 1.710 | | Base | 1.170 | | Height | 610 |CE
ESTOS APARATOS CUMPLEN CON LAS DIRECTIVAS CEE: 73/23, 93/68, 89/336, 96/57
INDICE
Pag.
Instalação .... 2
Descrição geral 3
natural_image
Simple line drawing of a trash bin with crossed lines indicating no waste or restriction (no text or symbols)natural_image
Simple line drawings of three symbolic elements: a double-headed arrow, a rolled document with flame, and a sun (no text or symbols)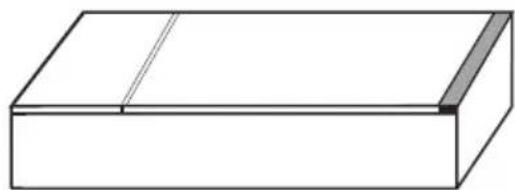
natural_image
Simple 3D diagram of a rectangular block with a diagonal line and shaded corner (no text or symbols)natural_image
Simple diagram of a battery with an electric plug and power cord, showing flow direction (no text or symbols)natural_image
Diagram of a refrigerator interior with cooling fins and heat exchangers, showing airflow direction (no text or labels)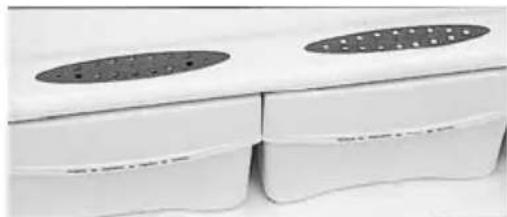
natural_image
Close-up of white plastic cabinets with circular cutouts and a grid pattern on top (no visible text or symbols)natural_image
Diagram of a multi-tiered indoor filtration or drying unit with no visible text or symbolsUTILIZAÇÃO DO CONGELADOR
natural_image
Line drawing of two hands holding a grid-patterned object (no text or symbols)UTILIZAÇÃO DO CONGELADOR
DESGELO E LIMPEZA
natural_image
Diagram of a door with a tray holding a patterned object, no text or symbols presentnatural_image
Illustration of a hand inserting wires into an electrical socket (no text or symbols)natural_image
Illustration of two blocks with a star and crossed-out black cross (no text or symbols)natural_image
Diagram of a vacuum cleaner operating a rack-mounted air conditioner unit (no text or symbols visible)PARADA TEMPORAL DO FRIGORIFICO
natural_image
Simple line drawing of a rectangular box with two horizontal lines and a dashed bottom line (no text or symbols)natural_image
Technical line drawing of a mechanical assembly with rollers and a conveyor belt, showing motion directions (no text or symbols)natural_image
Technical line drawing of a mechanical component with no visible text or symbolsESPECIFICAÇÕES
CE
ESTES APARELHOS CUMPREM AS DIRECTIVAS DA CEE: 73/23, 93/68, 89/336, 96/57
INDEX
Page
Installation....2
natural_image
Symbol of a trash bin crossed out by two crossed lines, with a solid black rectangle below (no text or labels)natural_image
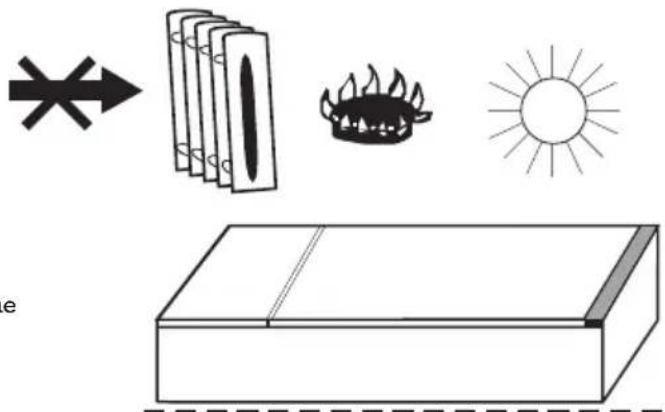
Simple line drawings of three symbolic elements: a crossed arrow, a fire extinguisher with flames, and a sun (no text or labels)
natural_image
Simple 3D line drawing of a rectangular block with a vertical seam and shaded corner (no text or symbols)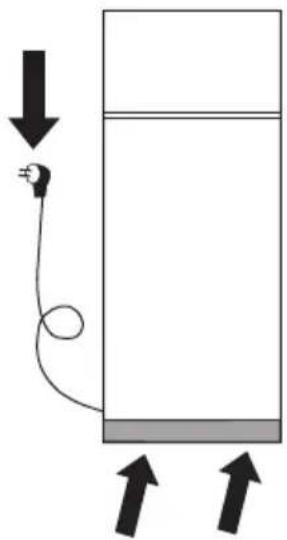
natural_image
Simple diagram showing a battery connected to a plug with arrows indicating flow direction (no text or symbols)ATTENTION AVANT DE CONNECTER
natural_image
Two white plastic waste bins with circular cutouts on top, placed side by side (no text or symbols visible)natural_image
Diagram of a refrigerator interior with cooling fins and ventilation slots, showing airflow direction (no text or labels)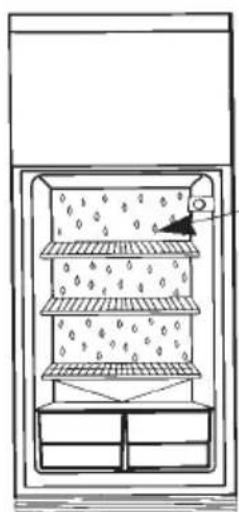
natural_image
Diagram of a multi-tiered indoor storage unit with granular material and a hanging device (no text or symbols)UTILISATION DU CONGELATEUR
CONGELATION D'ALIMENTS FRAIS
NOTE
TIEMPS DE CONSERVATION
TYPE D'ALIMENT
Nombre
de mois
natural_image
Line drawing of two hands holding a grid-patterned object (no text or symbols)UTILISATION DU CONGELATEUR
DEGEL ET NETTOYAGE
natural_image
Diagram of a refrigerator with a tray and door, showing no text or symbolsnatural_image
Illustration of a hand inserting a plug into an electrical socket (no text or symbols)natural_image
Illustration of two blocks with star patterns and a black X symbol (no text or symbols)natural_image
Diagram of a vacuum cleaner operating a rack-mounted device (no text or symbols visible)ARRET PROVISOIRE DU REFRIGERATEUR
REEMPLACEMENT DES AMPOULES
natural_image
Simple line drawing of a rectangular box with two horizontal lines and a dashed bottom line (no text or symbols)natural_image
Technical diagram of a mechanical assembly with rollers and a conveyor belt, showing motion paths without any text or symbols.natural_image
Pure technical line drawing of a mechanical part with no text, numbers, or symbolsSPECIFICATIONS
other
| Dimension | Value | | --------- | ----- | | Top Height | 598 | | Middle Height | 610 | | Bottom Height | 1.710 | | Bottom Width | 1.170 |CE
CES APPAREILS RESPECTENT LES DIRECTIVES CEE: 73/23, 93/68, 89/336, 96/57
CONTENS
Page
Installation 2
General Description 3
Starting up....3
Using the refrigerator 4
Using the freezer....6
Cleaning and Maintenance 10
Changing the direction of the doors .... 11
Problems 13
Specifications 14
INFORMATION FOR THE CORRECT DISPOSAL OF ELECTRICAL AND ELECTRONIC APPLIANCES (RAEE)
When the appliance reaches the end of its service life, you should not dispose of it with the general domestic waste.
It can be taken free of charge to the local administrations' specific selective collection centres, or to distributors who provide this service. Separating a domestic appliance before disposing of it means you will prevent possible negative consequences for the environment and health which may be given rise to by incorrect disposal, and it means the materials making it up can be treated and recycled, obtaining important savings on energy and resources.

natural_image
Symbol of a trash bin with crossed lines indicating no waste or restriction, and a solid black rectangle below (no text or labels)To remind you that you must collaborate with a selective collection scheme, there is a symbol on the product warning you not to dispose of it in traditional refuse containers.
For further information, contact your local authority or the shop where you bought the product.
WARNING
If your old refrigerator has a manual or automatic door locking device DO NOT FORGET TO DESTROY OR INCAPACITATE THE LOCKING SYSTEM before throwing it away, in order to prevent children from locking themselves inside whilst playing.
DO NOT DAMAGE THE PIPES to avoid an uncontrolled leakage of coolant into the atmosphere.
INSTALLATION
RECOMMENDATIONS
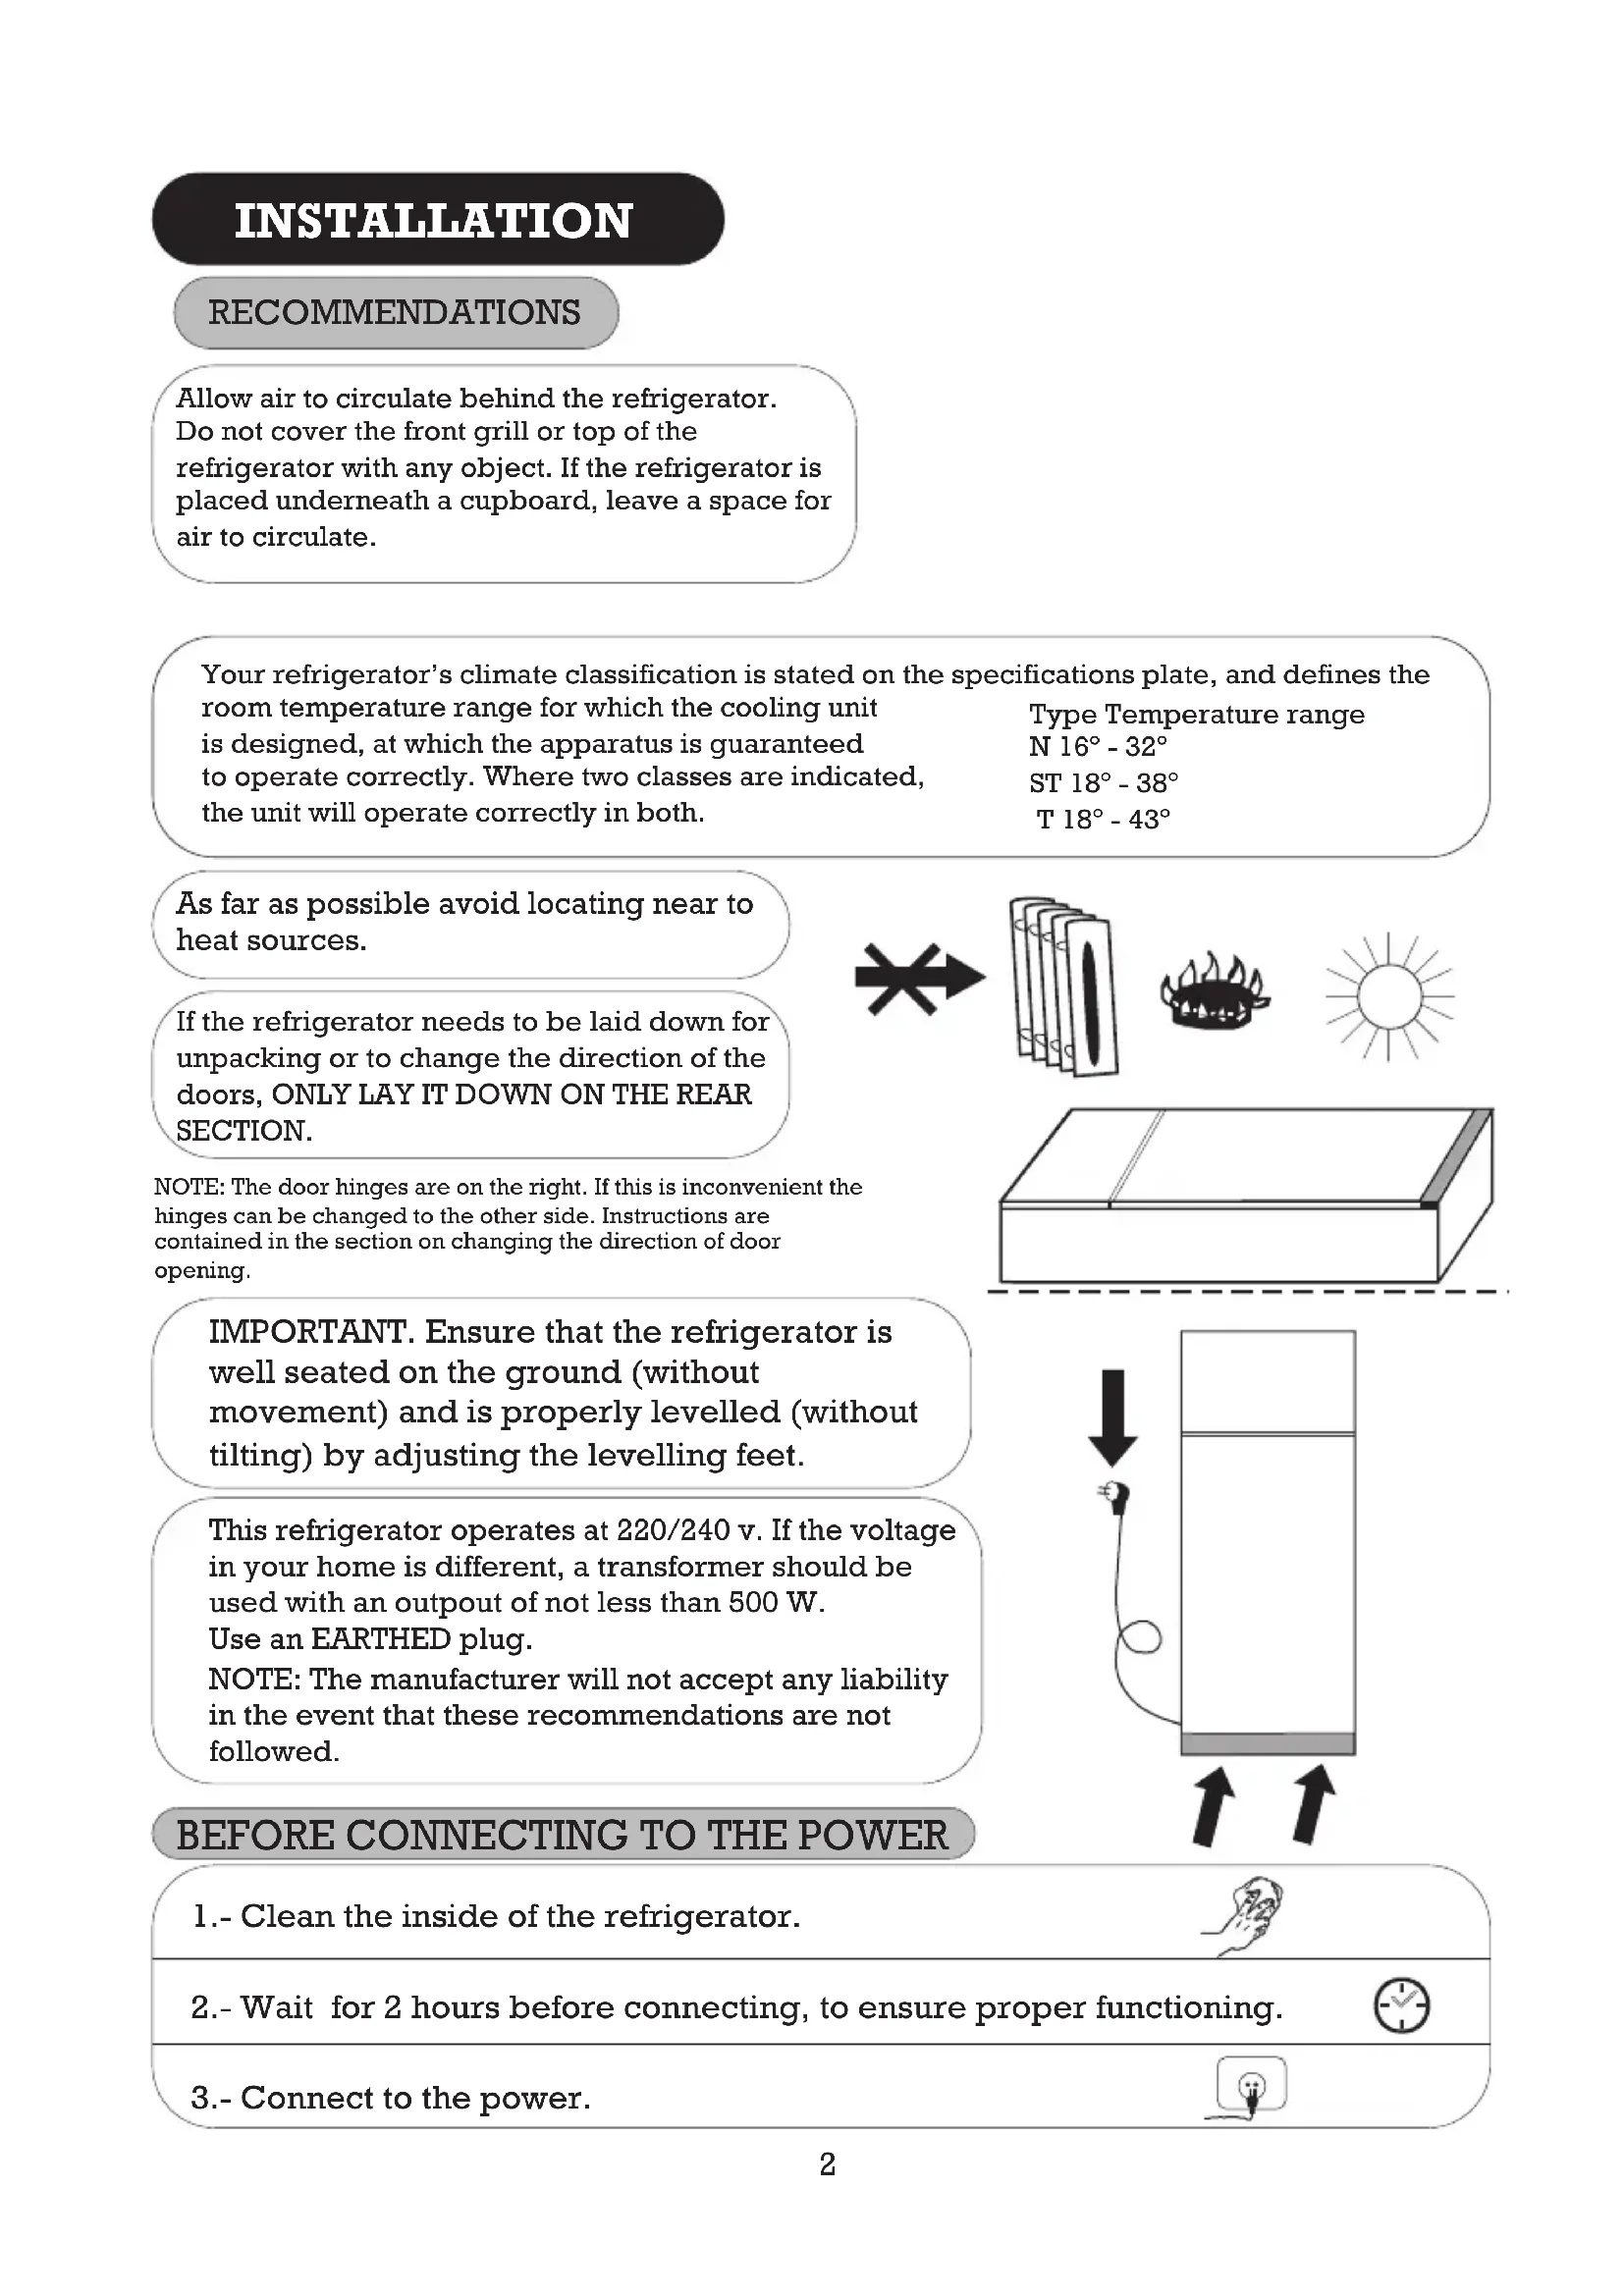
Allow air to circulate behind the refrigerator. Do not cover the front grill or top of the refrigerator with any object. If the refrigerator is placed underneath a cupboard, leave a space for air to circulate.
Your refrigerator's climate classification is stated on the specifications plate, and defines the room temperature range for which the cooling unit is designed, at which the apparatus is guaranteed to operate correctly. Where two classes are indicated, the unit will operate correctly in both. Type Temperature range N 16° - 32° ST 18° - 38° T 18° - 43°
As far as possible avoid locating near to heat sources.
If the refrigerator needs to be laid down for unpacking or to change the direction of the doors, ONLY LAY IT DOWN ON THE REAR SECTION.
NOTE: The door hinges are on the right. If this is inconvenient the hinges can be changed to the other side. Instructions are contained in the section on changing the direction of door opening.
IMPORTANT. Ensure that the refrigerator is well seated on the ground (without movement) and is properly levelled (without tilting) by adjusting the levelling feet.
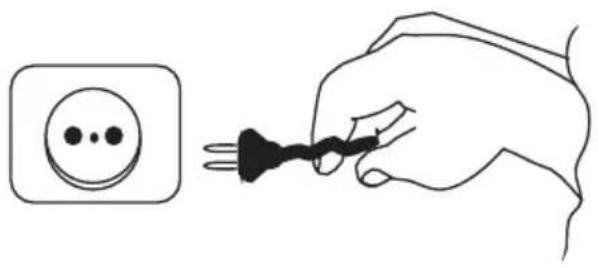
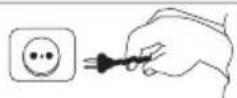
This refrigerator operates at 220/240 v. If the voltage in your home is different, a transformer should be used with an output of not less than 500 W. Use an EARTHED plug.
NOTE: The manufacturer will not accept any liability in the event that these recommendations are not followed.
natural_image
Simple line drawing of a roof with fire, sun, and solar symbols (no text or labels)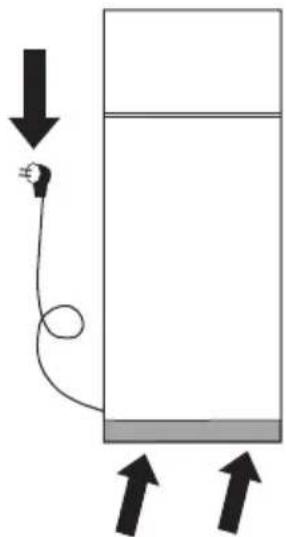
natural_image
Simple diagram of a battery with an electric plug and current flow arrows (no text or labels)BEFORE CONNECTING TO THE POWER
1.- Clean the inside of the refrigerator.
2.- Wait for 2 hours before connecting, to ensure proper functioning.
3.- Connect to the power.


GENERAL DESCRIPTION
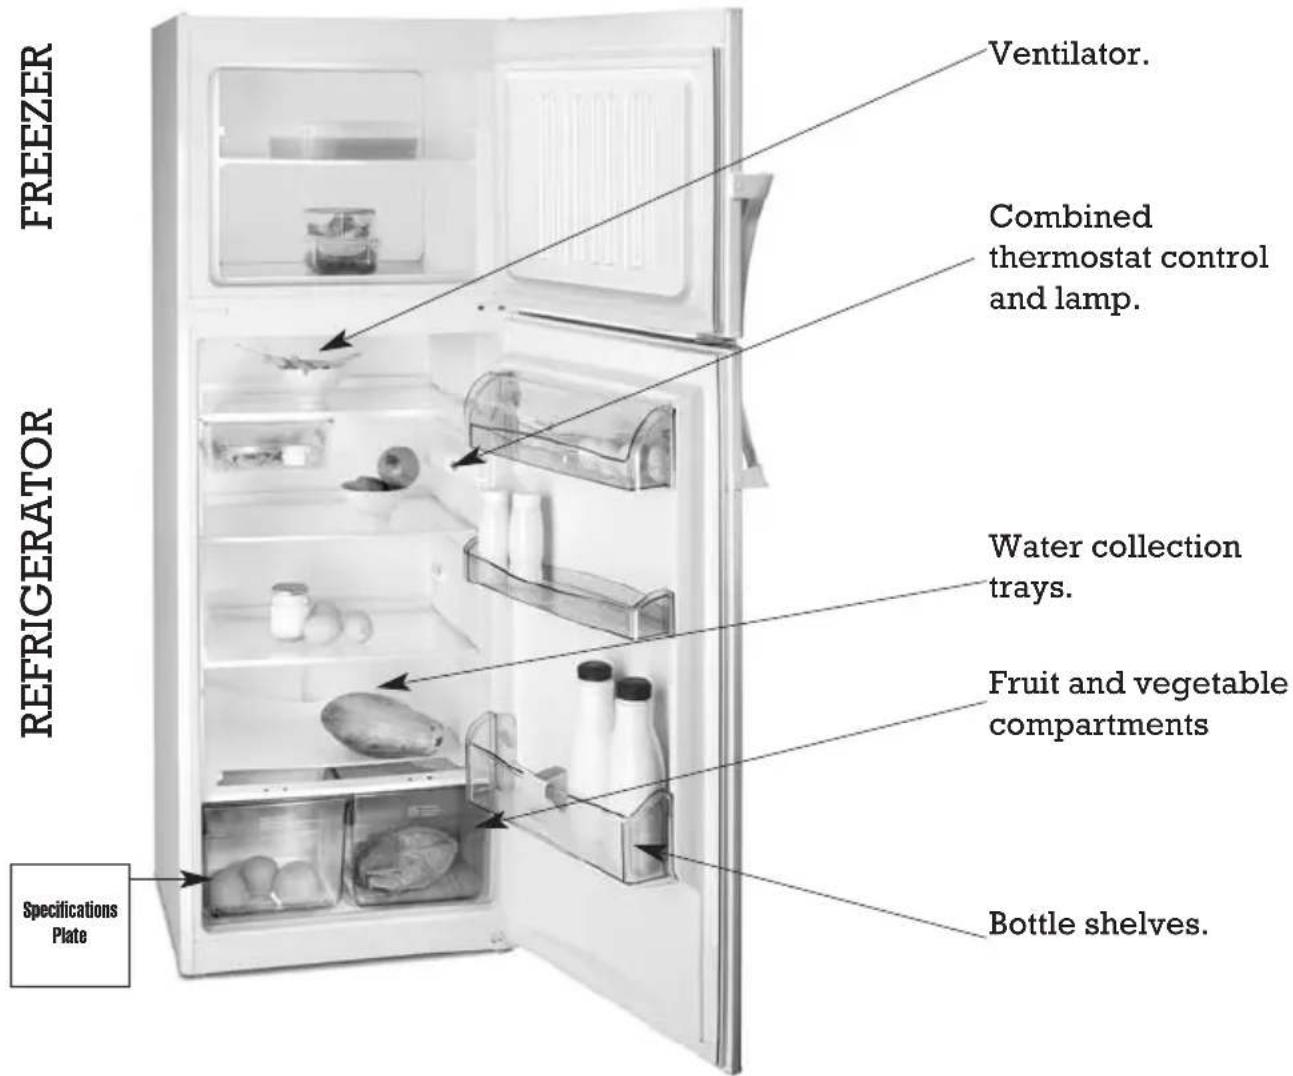
NOTE: On occasions the internal composition of the appliance may not correspond to the enclosed figure.
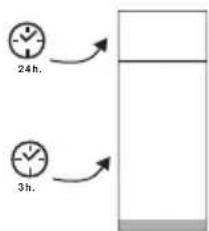
STARTING UP
1 Move the thermostat control to an intermediate position.
2 Close the doors.

3 Food can be placed in the refrigerator three hours later. Wait hor 24 hours before freezing fresh food.
USING THE REFRIGERATOR
FOOD
ATTENTION
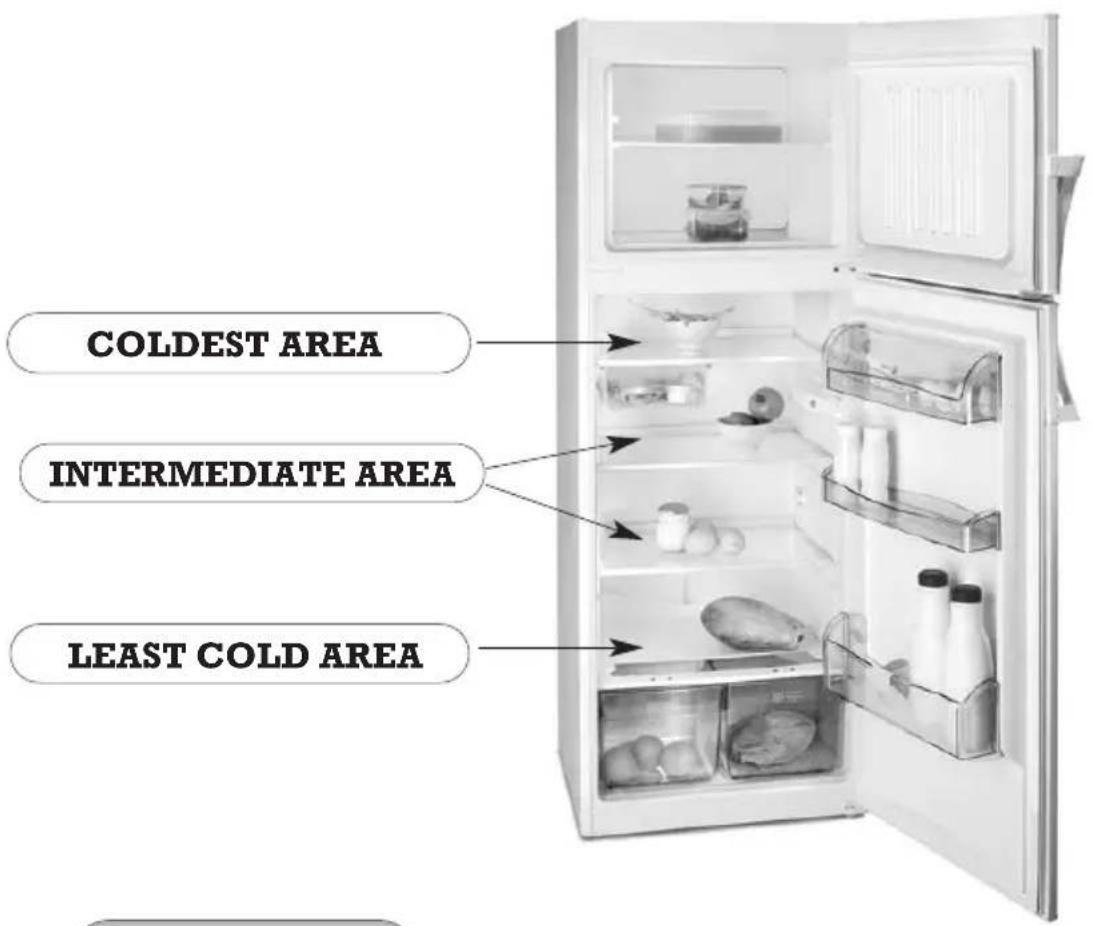
- The temperature inside the refrigerator can be selected by turning the thermostat control.
- Remember that the temperature is not totally uniform within the interior as a whole and different sections are more suitable for different types of food (as shown in the diagram).
- The temperature inside the refrigerator can be affected by the ambient temperature, the location of the refrigerator and the frequency with which the door is opened.
- Do not place uncovered liquids or hot food in the refrigerator.
- NEVER place volatile, inflammable or explosive liquids in the refrigerator, such as solvents, alcohols, acetone or petrol as there will be a risk of explosion.
- Meat and fish should be wrapped to avoid smells developing.
• Under certain relative humidity and ambient temperature conditions, condensation may appear on the inside and the outside of the refrigerator.
USING THE REFRIGERATOR
UNIFORM COLD
The refrigerator compartment of your appliance has a uniform cooling system. This feature is provided by the fan in the top rear part of the compartment. Apart from keeping the temperatures even, it prevents condensation from forming on the trays and it also speeds up the cooling process, meaning optimum food preservation.
DEFROSTING
The refrigerator has an automatic defrosting system and it is not therefore necessary to take any action
SHELVES
Your appliance has several shelves that will be very comfortable and easy to clean for you.
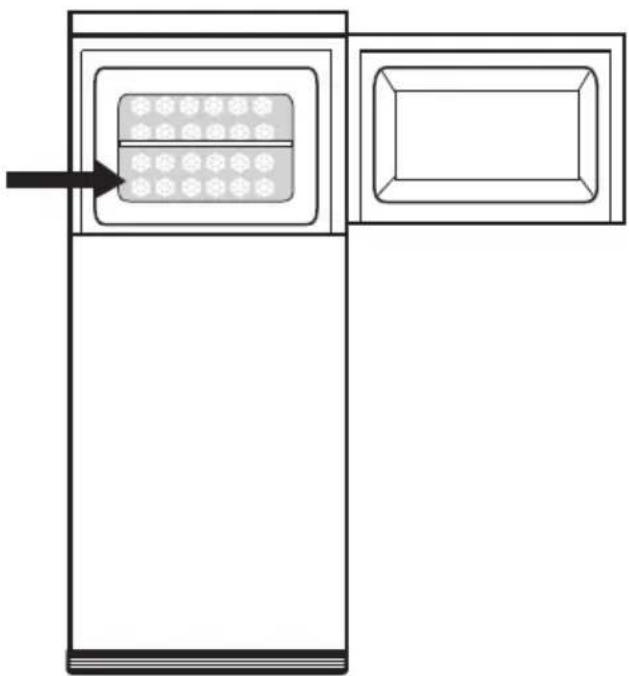
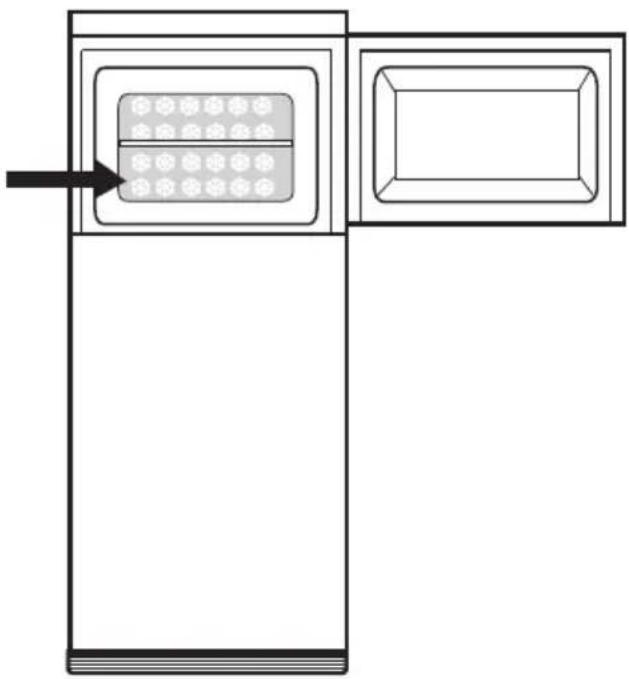
AIR INLET REGULATOR (incorporated in some models)
Air inlet regulator in the salad drawer. This air inlet regulator enables you to select the optimum conservation conditions depending on the food items contained.

natural_image
Two white plastic containers with circular cutouts on top, placed side by side (no text or symbols visible)Ensure that foods does not touch the back wall. The trays have a limit point for this purpose which should not be exceeded.

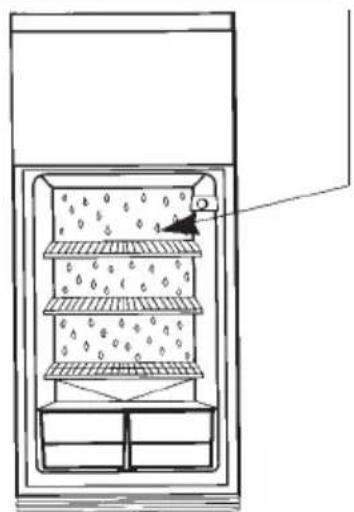
natural_image
Diagram of a refrigerator interior with cooling fins and ventilation slots (no text or labels)The back wall of the refrigerator is normally covered with drops of water or ice. This is completely NORMAL and is part of the automatic defrosting process.
natural_image
Diagram of a multi-tiered indoor appliance with ventilation ducts and a label pointing to the top panel (no text or symbols present)USING THE FREEZER
FREEZING FRESH FOOD
NOTE
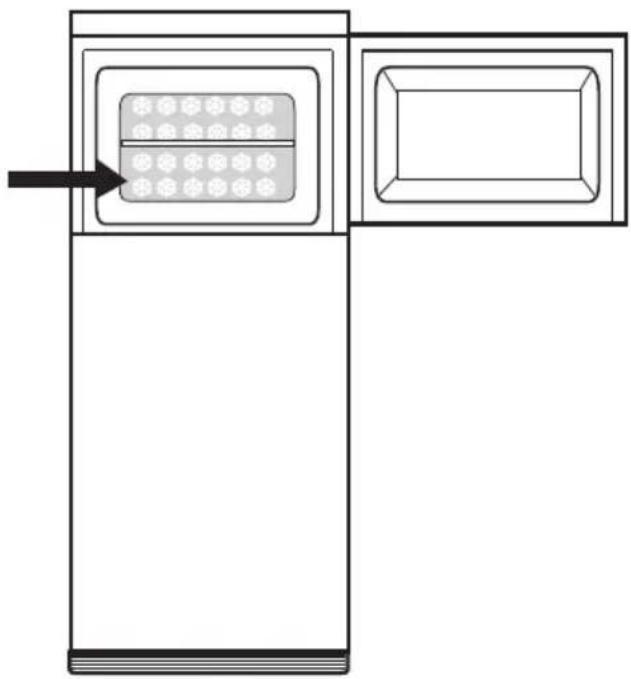
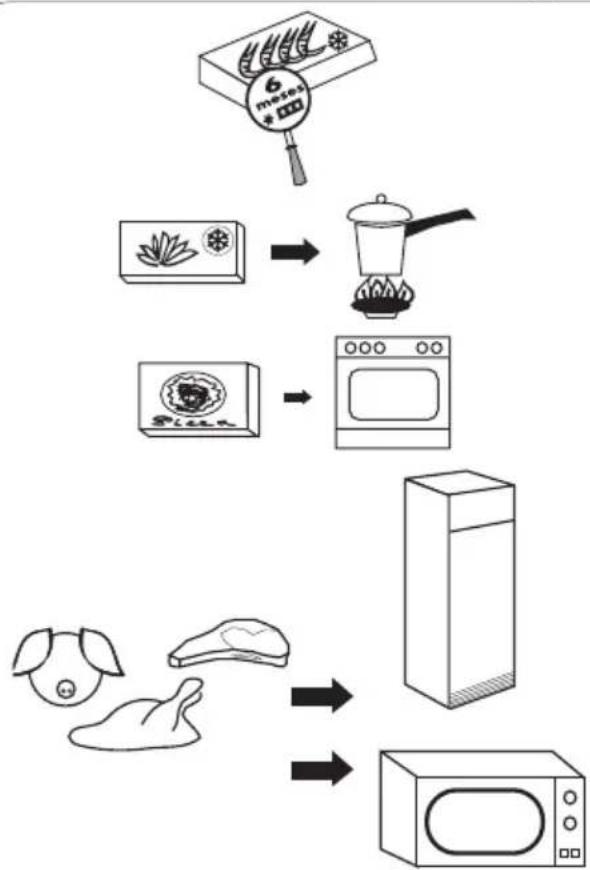
All the baskets in the freezer section of this refrigerator are in the * *** 4 star category and up to 4 kg of fresh food can be frozen in 24 hours.
ADVICE
- Wrap products to be frozen in aluminium foil or place them in sealed containers.
• Prepare foods in single consumption portions. - Never refreeze food which has been defrosted.
- Label food with details of the contents and date frozen.
- Do not place food to be frozen in direct contact with food already frozen.
- Do not place fizzy drinks in the freezer section.
- Ice-cream, etc. should not be consumed at low a temperature.
DIRECTIONS FOR USE YOUR FREEZER
FROZEN FOOD PRESERVATION
A FEW HINTS
- When you buy frozen food in your shop, try to introduce the products into the freezer as soon as possible.
- Observe the preservation time that appear on the product packing, taking into account this a * * * freezer.
- When freezing food by yourself, consult the list of preservation times.
CONSERVATION TIMES
| SORT OF FOOD | Number of months | SORT OF FOOD | Number of months |
| FISH AND SHELLFISH | VEGETABLES | ||
| Lobsters 3 | Salt-wort 12 | ||
| Shrimps 3 | Artichoke 12 | ||
| Cold | 2 | Carrots 12 | |
| Sardines and similar | 3/4 | Cauliflower 6/8 | |
| Trout | 2/3 | Brussels sprouts 6 | |
| Salmon | 2/3 | Asparragus 12 | |
| Sole | 3 | Cabbage 6/8 | |
| Turbot | 2/3 | Beans 12 | |
| MEAT | Mushrooms 6 | ||
| Beef | 10/12 | Parsley 12 | |
| Mutton 6/8 | Peppers 12 | ||
| Veal | 9 | Spinach 12 | |
| Pork | 6 | Broad beans 12 | |
| Fillets/Chops 4 | FRUITS | ||
| Liver/Kidneys | 10 | Apricots 8 | |
| Brain/Tongue | 2 | Cherises, plums, raspberries, gooseberries, blackberries | 10 |
| Mincemeat, sausages | 2 | Peaches 10/12 | |
| Rabbit | 5/7 | Strawberries 12 | |
| POUTRY AND GAME | Stewed fruit (apples, pears) 10 | ||
| Chickens | 10 | Grapes 10/12 | |
| Turkey (in portions) | 7 | Fruit juices 10 | |
| Duck, goose | 5 | Pineapple 10/12 | |
| Hare | 6 | BREAD CONFECTIONERY | |
| Partidrige-Quail 8 | Biscuits-tarts 6 | ||
| Pheasants 7/8 | Flaky pastry tart 1 | ||
| Big game | 10 | Pastry (unbaked) | 3 |
| READY TO SERVE FOOD | Bread and rolls | 2 | |
| Tomato sauce | 3 | EGGS AND DAIRY PRODUCE | |
| Stock | 3 | Eggs (shelled) | 6 |
| Beef, veal pork or chicken stews | 2/3 | UHT Milk | 3 |
| Assorted vegetables | 3 | Burter | 6 |
| Stewed meat | 3 | Cheese (samall portions) | 6/8 |
| Hamburguers | 2 | Fresh cream | 3 |
| Stuffed peppers | 2 | ||
| Espinach | 2 | ||
| Brench beans | 2 | ||
| Tarts, confectionery, etc | 5/6 | ||
| Fruit salad 3 | |||
| Sandwiches | 6 | ||
USING THE FREEZER
DEFROSTING FOOD
The same method should not be used for defrosting all types of food.
flowchart
graph TD
    A["6 meses + 20"] --> B["锅top"]
    B --> C["锅旁烧杯"]
    C --> D[" Oven"]
    D --> E["Box with microwave"]
    E --> F["Box with dough bag"]
    F --> G["Box with bread bag"]
If you purchase frozen food from stores, follow the instructions on the packaging.
Green vegetables should be cooked without defrosting.
Pre-cooked and ready prepared food can generally be cooked without defrosting.
Meat and fish should be slowly defrosted in the refrigerator over several hours. If you have a microwave oven, defrosting can to a large extent be accelerated.
MAKING ICE CUBES
1
Fill the trays inside the freezer three quarters full of water.
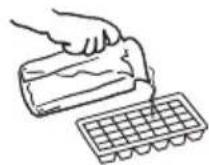
2
Place the trays in the freezer, preferably in the lower section.
3
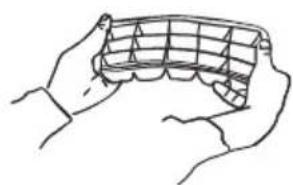
Once frozen, the ice cubes can be removed by gently twisting the trays.
natural_image
Line drawing of two hands holding a grid-patterned object (no text or symbols)USING THE FREEZER
DEFROSTING AND CLEANING

natural_image
Diagram of a refrigerator with a door and window, showing no text or symbolsA layer of ice or frost will in time form on the walls of the freezer.
This will lead to an increased power consumption.
In order to avoid this, the layer of ice should be removed at least twice each year.
| 1 | Move the thermostat control to the STOP position and the freezer will be turned off. | 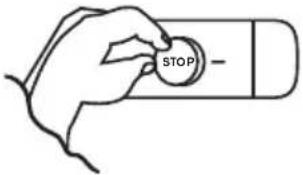 |
| 2 | A scraper can be used to help remove the ice, or a container of hot water can be placed inside. Do not use sharp objects or electric heating devices. | 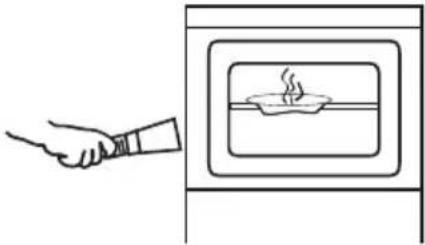 |
| 3 | Collect the water which forms with an absorbent cloth and clean and dry the inside thoroughly. | 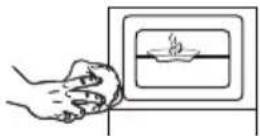 |
| 4 | Move the thermostat control to the normal operating position. | 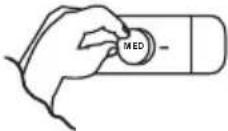 |
| 5 | Two hours later the frozen food can be replaced in the freezer. | 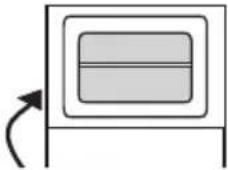 |
CLEANING AND MAINTENANCE
CLEANING
ADVICE
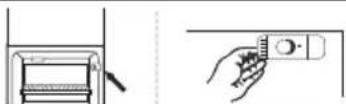
The refrigerator should be disconnected before cleaning the inside.
natural_image
Line drawing of a hand inserting a plug into an electrical socket (no text or symbols)Do not use abrasive products, solvents, metal cleaning products or undiluted detergents.
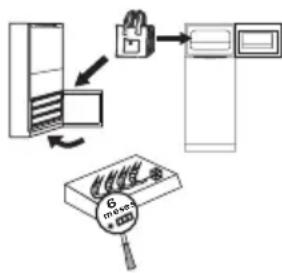
natural_image
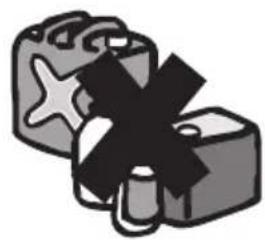
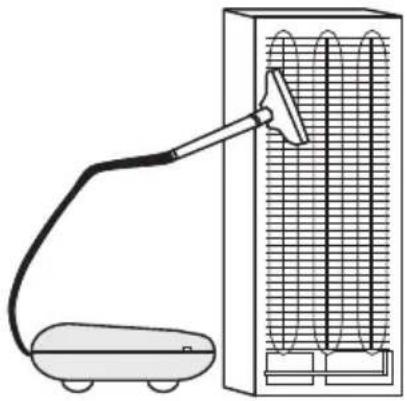
Illustration of two blocks with a star and cross symbol (no text or labels)The grill on the rear part of the refrigerator should be cleaned once a year with a vacuum cleaner. Dirt will prevent proper functioning increase electricity consumption.
natural_image
Diagram of a vacuum cleaner next to a vertical panel with mesh structure (no text or symbols)TEMPORARILY TURNING OFF THE REFRIGERATOR
- Disconnect the refrigerator.
- Remove food and clean and dry the inside.
- Leave the door open to avoid the formation of offensive odours.
- Follow the same procedure in the event of a prolonged power cut or refrigerator breakdown.
CHANGING THE BULB
1- Disconnect the refrigerator.
2- Remove the old bulb and replace with a similar type.
CHANGINC THE DIRECTION OF DOOR OPENING
1
Lay the fridge down on its back.
natural_image
Simple line drawing of a rectangular box with two horizontal cutouts (no text or symbols)2
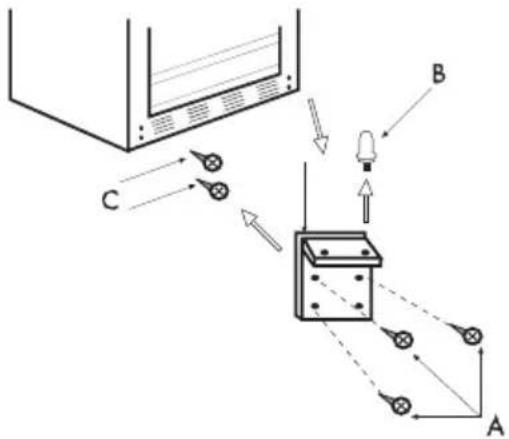
Remove the bottom hinge by undoing the 3 screws (A) holding it in place. Take out the pin (B) on the right-hand side and fit it to the left-hand side of the hinge. Undo the 2 screws (C) and screw them in the right-hand side. Take off the bottom door.
3
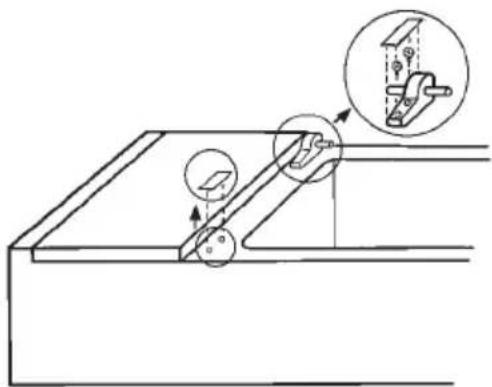
Remove the middle hinge, by removing the strip protecting and hiding the screws and then undoing the screws. Also remove the left-hand side cover and fit it where the hinge was before. Take off the top door.
natural_image
Technical line drawing of a mechanical assembly with rollers and guide rails (no text or symbols)4
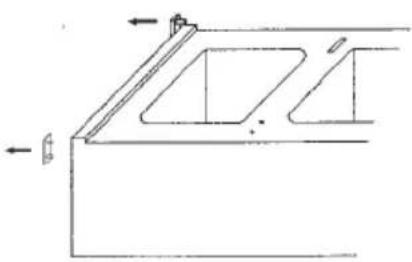
Remove the upper hinge by taking off the protective plate covering the screws, and then remove the screws. Place it on the left hand side. To do this, remove its cover and fit it on the right.
natural_image
Pure technical line drawing of a mechanical component or bracket (no text or symbols)| 5 | If your refrigerator has self-closing devices on the central hinge area of the doors, remove them, turn them and place them on the opposite door and on the opposite side. The fixing points for the screws will be lightly marked in the door turning axis area. | 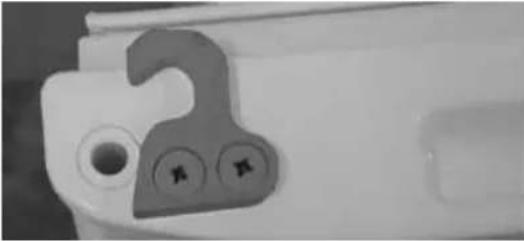 |
| 6 | Cover the holes left visible on the door after the self-closing devices have been changed to the other side, using the caps in the refrigerator documentation bag. Any flash caused by the screws should firstly be removed. | |
| 7 | Put the top door back on, fitting it on the pin on the left-hand side. | 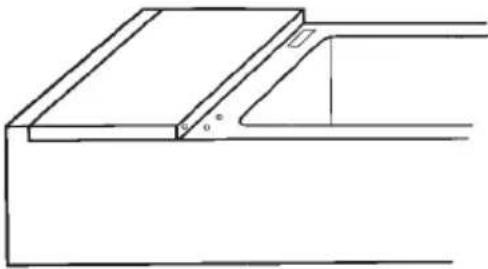 |
| 8 | Fit the middle hinge on the left-hand pin on the top door and screw it to the fridge. Put the bottom door on, fitting it on the middle hinge pin. Then replace the strip to protect and hide the screws. | 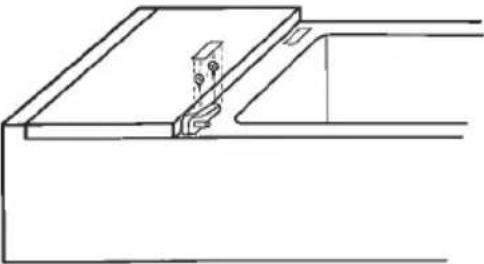 |
| 9 | Fit the bottom hinge on the left-hand side and secure it with the 3 screws. | 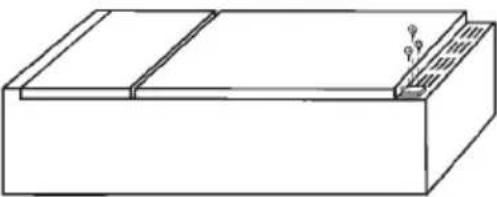 |
| 10 | If your refrigerator has side door handles or is of the panel-mounted type, the handles should be changed to the other side. | 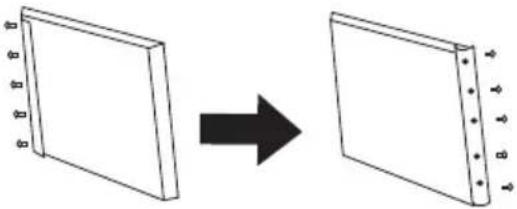 |
PROBLEMS
| PROBLEM POSSIBLE REASON SOLUTION | ||
| The refrigerator is not working | The plug is not properly connected to the power supply. | Connect the plug. |
| Electricity is not reaching the plug because a fuse has blown or an automatic circuit breaker has opened. | Change the fuse or reset the automatic circuit breaker. | |
| The refrigerator does not get properly cold | The thermostat is set too low. | Turn the thermostat to a colder position. |
| The door has not been closed properly or is opened too often. | Ensure that the door does not remain open for too long. | |
| The ventilation grill or the opening to the rear of the rear part of the refrigerator has been obstructed. | Keep these areas free as indicate in the Installation section of this manual. | |
| The refrigerator is in direct sunlight or exposed to a heat source. | Change the location of the refrigerator or protect it from heat sources. | |
| Drops of water on the rear wall of the refrigerator | Automatic defrosting cycle. | Do not worry -this is completely normal (see section on Using the Refrigerator in this manual). |
| Water shows up of the bottom of the refrigerator | Food or a container has been placed in contact with the rear wall of the refrigerator. | Do not place food or containers in contact with the rear wall to avoid spillage of water formed when defrosting. |
| A large amount of ice forms on the walls and shelves of the freezer | The freezer door is obstructed and does not close properly. | Make sure that doors close properly by keeping them free from dirt and obstructions. |
| The refrigerator light does not come on | The plug is not properly connected to the power supply. | Connect the plug. |
| Electricity is not reaching the plug because a fuse has blown or an automatic circuit breaker has opened. | Change the fuse or reset the automatic circuit breaker. | |
| The bulb is loose. | Insert properly. | |
| The bulb has blown. | Change the bulb as indicated in this manual. | |
| Noisy operation | The refrigerator has not been properly levelled. | Level the refrigerator as indicated in the Installation section of this manual. |
| A bubbling noise | Operating cycle. | Do not worry -this is completely normal. |
| Food dries out | Food is not wrapped or placed in a container. | Wrap or place food in sealed containers. |
| Unpleasant shell inside the refrigerator | Food is not properly wrapped or in a container. | Wrap food or place it in a sealed container. |
| The inside of the refrigerator needs cleaning. | Clean the refrigerator as shown in this manual. | |
TECHNICAL SERVICE
If you have carried out the above checks and the problem persists DO NOT CARRY OUT ANY REPAIRS YOURSELF.
Contact your nearest Technical Service.
SAFETY:
- The refrigerator model you have purchased uses the refrigerant R600a. Please bear in mind that:
• This refrigerant does not harm the environment.
- It is inflammable, and as a result you must be certain that the cooling circuit is in good condition. If it has been damaged in any way whatsoever, contact your distributor before connecting it to the power supply.
- This appliance should only be repaired by the official technical assistance service, using original spare parts.
- Do not use elements with a flame or electrical devices inside the refrigerator.
- Do not allow children to play with the appliance.
- Do not allow the lead to come in contact with the compressor.
• Make sure that the lead is not trapped under the appliance.
• To avoid damaging the environment and to contribute to recovering used materials, call your municipal collection service.

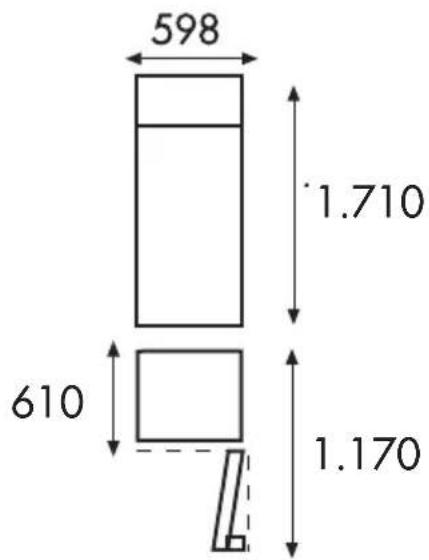
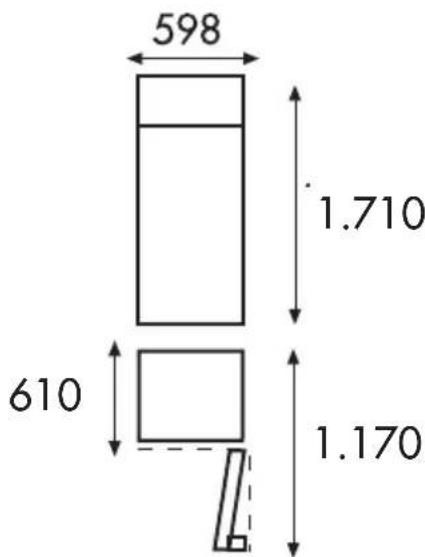
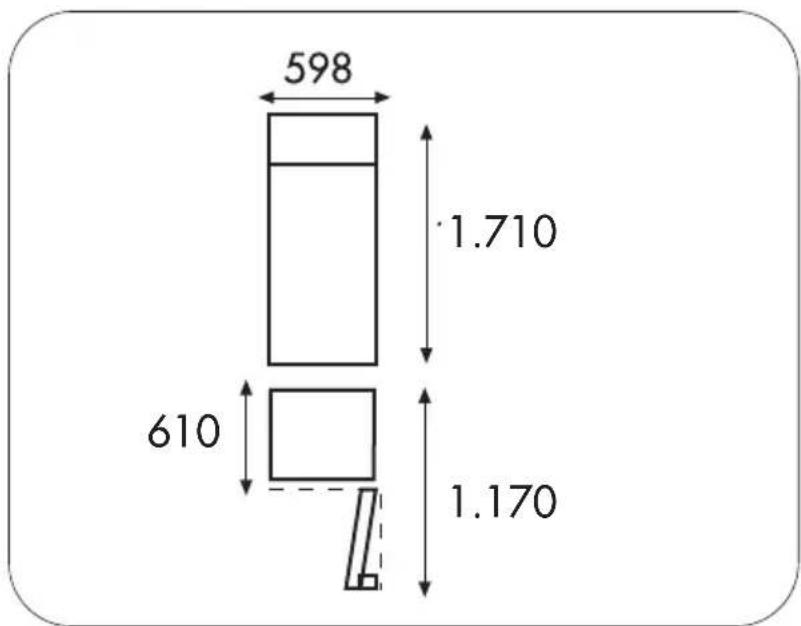
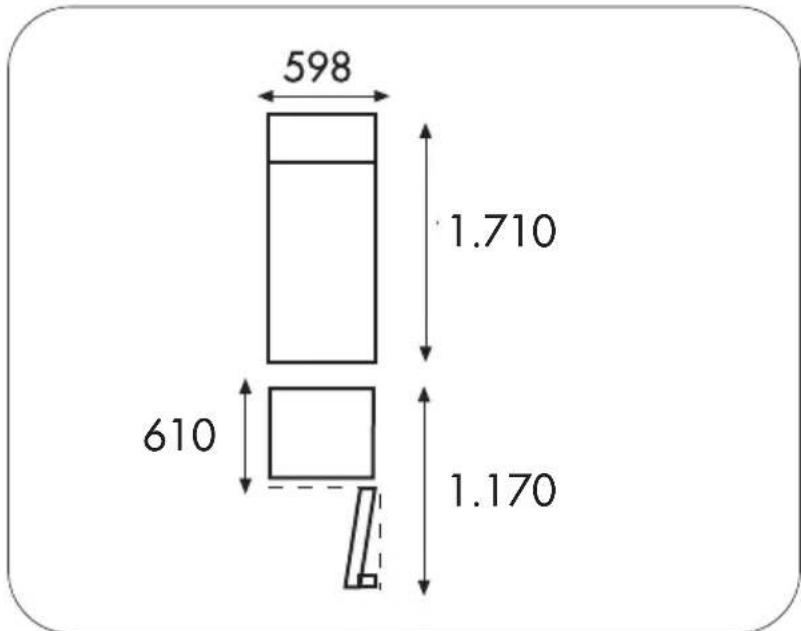
ESPECIFICATIONS
other
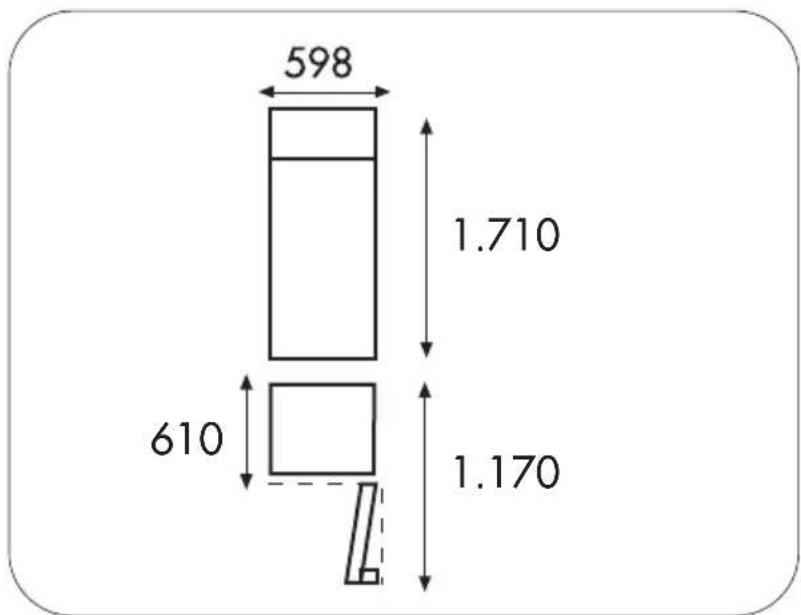
| Dimension | Value | | --------- | ----- | | Top Height | 598 | | Middle Height | 1.710 | | Bottom Height | 610 | | Right Height | 1.170 |CE
THESE APPLIANCES MEET EEC DIRECTIVES: 73/23, 93/68, 89/336, 96/57
INHALT
Seite.
Installierung 2
natural_image
Simple 3D diagram of a rectangular block with a diagonal line and shaded corner (no text or symbols)natural_image
Simple diagram of a battery with an electric plug and current flow arrows (no text or labels)flowchart
graph TD
    A["Clock icon 24h"] --> B["Arrow to top of right"]
    C["Clock icon 3h"] --> D["Arrow to bottom of right"]
natural_image
Technical line drawing of a refrigerator interior with ventilation grilles and a side panel (no text or symbols)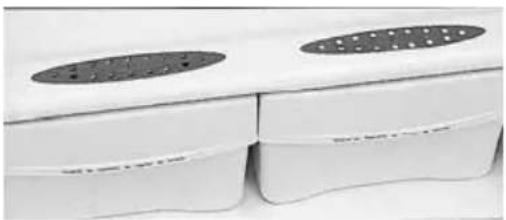
natural_image
Two white plastic containers with circular cutouts, placed side by side on a surface (no text or symbols visible)natural_image
Diagram of a multi-tiered storage or filtration unit with a small container and a hanging object (no text or symbols)flowchart
graph TD
    A["6 menses + 100"] --> B["锅旁烧杯"]
    B --> C[" Oven"]
    C --> D[" Oven with stove"]
    D --> E[" Oven with oven"]
    E --> F[" Oven with microwave"]
    F --> G[" Oven with oven"]
natural_image
Line drawing of two hands holding a grid-patterned object (no text or symbols)natural_image
Simple line drawing of a refrigerator with a door and window, no text or symbols presentnatural_image
Line drawing of a hand pointing at a kitchen appliance with a steaming bowl (no text or symbols)natural_image
Hand washing a cup with a steam rising inside a square frame (no text or symbols)natural_image
Simple line drawing of a container with an arrow indicating rotation (no text or symbols)natural_image
Line drawing of a hand inserting a plug into an electrical socket (no text or symbols)natural_image
Illustration of two blocks with a star and a cross symbol (no text or labels)natural_image
Diagram of a vacuum cleaner emitting air from a rack-mounted unit (no text or symbols visible)natural_image
Simple line drawing of a rectangular box with two vertical slots, no text or symbols present.natural_image
Technical diagram of a mechanical assembly with rollers and guide rails, showing motion paths without any text or symbols.natural_image
Pure technical line drawing of a structural component with no text, numbers, or symbolsTECHSNICHE DATEN
other
| Dimension | Value | | --------- | ----- | | Height | 598 | | Top Width | 1.710 | | Bottom Width | 1.170 | | Total Length | 610 |CE
DER CEE: 73/23, 93/68, 89/336, 96/57
INDICE
Pag.
Installazione ....2
natural_image
Simple line drawing of a solar panel, fire extinguisher, and sun (no text or symbols)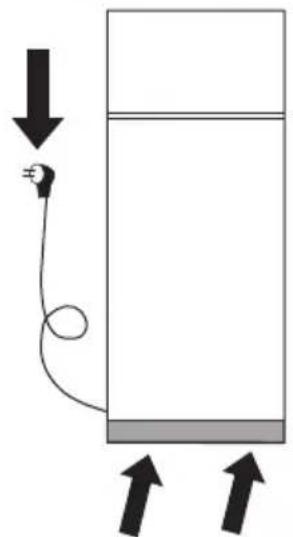
natural_image
Simple diagram of a battery with an electric plug and power cord, showing flow direction (no text or symbols)natural_image
Close-up of white plastic storage bins with circular patterns on top (no text or symbols visible)natural_image
Diagram of a refrigerator interior with cooling fins and ventilation slots, showing airflow direction (no text or labels)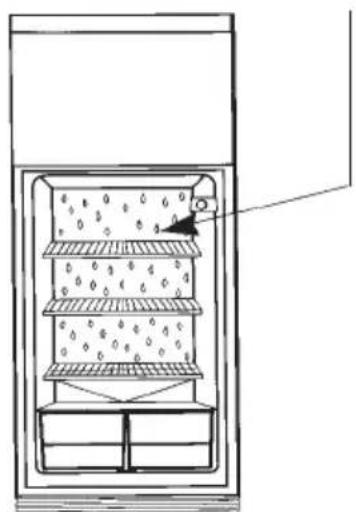
natural_image
Diagram of a multi-tiered indoor storage unit with cooling fins and ventilation ducts (no text or labels)UTILIZZAZIONE DEL CONGELATORE
CONGELAMENTO ALIMENTI FRESCHI
NOTA
natural_image
Line drawing of two hands holding a grid-patterned object (no text or symbols)UTILIZZAZIONE DEL CONGELATORE
SCONGELAMENTO E PULIZIA
natural_image
Diagram of a refrigerator with a tray holding a patterned lid, no text or symbols presentnatural_image
Simple line drawing of a hand pointing at a steaming bowl inside a microwave oven (no text or symbols)natural_image
Hand washing a cup with a steam inside a square frame (no text or symbols)natural_image
Simple diagram of a rectangular box with a horizontal line inside, and an arrow pointing left (no text or symbols)natural_image
Line drawing of a hand inserting a plug into an electrical socket (no text or symbols)natural_image
Illustration of two blocks with star patterns and a crossed-out black cross (no text or symbols)natural_image
Diagram of a vacuum cleaner emitting air from a vertical panel array (no text or symbols)SCONNESSIONE TEMPORANEA DEL FRIGORIFERO
natural_image
Simple line drawing of a rectangular box with two vertical slots, no text or symbols present.natural_image
Technical diagram of a mechanical assembly with rollers and guide rails, no text or symbols presentnatural_image
Pure technical line drawing of a structural component with no text, numbers, or symbolsSPECIFICAZIONI
other
| Dimension | Value | | --------- | ----- | | Top Height | 598 | | Middle Height | 610 | | Bottom Height | 1.710 | | Bottom Line | 1.170 |CE
QUESTI APPARECCHI SODDISFANO I REQUISITI DELLE DIRETTIVE CEE: 73/23, 93/68, 89/336, 96/57
- INDICE
- TIEMPOS DE CONSERVACION
- TIPO DE ALIMENTO
- PARADA TEMPORAL DEL FRIGORIFICO
- ESPECIFICACIONES
- UTILIZAÇÃO DO CONGELADOR
- DESGELO E LIMPEZA
- PARADA TEMPORAL DO FRIGORIFICO
- ESPECIFICAÇÕES
- INDEX
- ATTENTION AVANT DE CONNECTER
- UTILISATION DU CONGELATEUR
- CONGELATION D'ALIMENTS FRAIS
- NOTE
- TIEMPS DE CONSERVATION
- DEGEL ET NETTOYAGE
- ARRET PROVISOIRE DU REFRIGERATEUR
- REEMPLACEMENT DES AMPOULES
- SPECIFICATIONS
- CONTENS
- INFORMATION FOR THE CORRECT DISPOSAL OF ELECTRICAL AND ELECTRONIC APPLIANCES (RAEE)
- WARNING
- INSTALLATION
- RECOMMENDATIONS
- BEFORE CONNECTING TO THE POWER
- GENERAL DESCRIPTION
- STARTING UP
- USING THE REFRIGERATOR
- FOOD
- ATTENTION
- UNIFORM COLD
- DEFROSTING
- SHELVES
- AIR INLET REGULATOR (incorporated in some models)
- USING THE FREEZER
- FREEZING FRESH FOOD
- ADVICE
- DIRECTIONS FOR USE YOUR FREEZER
- FROZEN FOOD PRESERVATION
- A FEW HINTS
- DEFROSTING FOOD
- MAKING ICE CUBES
- 1
- 2
- 3
- DEFROSTING AND CLEANING
- CLEANING AND MAINTENANCE
- CLEANING
- TEMPORARILY TURNING OFF THE REFRIGERATOR
- CHANGING THE BULB
- CHANGINC THE DIRECTION OF DOOR OPENING
- PROBLEMS
- TECHNICAL SERVICE
- SAFETY:
- ESPECIFICATIONS
- INHALT
- TECHSNICHE DATEN
- UTILIZZAZIONE DEL CONGELATORE
- CONGELAMENTO ALIMENTI FRESCHI
- NOTA
- SCONGELAMENTO E PULIZIA
- SCONNESSIONE TEMPORANEA DEL FRIGORIFERO
- SPECIFICAZIONI
Brand : FAGOR
Model : FDT172
Category : Refrigerator