Series 3000 HQ6906 - Shaver PHILIPS - Free user manual and instructions
Find the device manual for free Series 3000 HQ6906 PHILIPS in PDF.
User questions about Series 3000 HQ6906 PHILIPS
0 question about this device. Answer the ones you know or ask your own.
Ask a new question about this device
Download the instructions for your Shaver in PDF format for free! Find your manual Series 3000 HQ6906 - PHILIPS and take your electronic device back in hand. On this page are published all the documents necessary for the use of your device. Series 3000 HQ6906 by PHILIPS.
USER MANUAL Series 3000 HQ6906 PHILIPS
Always here to help you
Register your product and get support at
www.philips.com/welcome

HQ6900
series


ENGLISH 4
DANSK 13
DEUTsCH 22
EAAHNIKA 31
ESPANOL 41
SUOMI 50
FRANÇAIS 59
ITALIANO 69
NEDERLANDS 78
NORSK 87
PORTUGUES 96
SVENSKA 105
TÜRKÇE 114
Introduction
Congratulations on your purchase and welcome to Philips!
To fully benefit from the support that Philips offers, register your product at www.philips.com/welcome.
The Close Cut system ensures a close and easy shave every day.
For the best result, move the shaving heads over your skin in both straight and circular movements.
Important safety information
Read this important information carefully before you use the appliance and its accessories and save it for future reference. The accessories supplied may vary for different products.
Danger
- Keep the appliance and the mains cord dry.
Warning
- This appliance can be used by children aged from 8 years and above and persons with reduced physical, sensory or mental capabilities or lack of experience and knowledge if they have been given supervision or instruction concerning use of the appliance in a safe way and understand the hazards involved. Children shall not play with the appliance. Cleaning and user maintenance shall not be made by children without supervision.
- Always check the appliance before you use it. Do not use the appliance if it is damaged, as this may cause injury. Always replace a damaged part with one of the original type.
Caution
- Only use this appliance for its intended purpose as shown in the user manual.
- For hygienic reasons, the appliance should only be used by one person.
- Never use compressed air, scouring pads, abrasive cleaning agents or aggressive liquids such as petrol or acetone to clean the appliance.
Electromagnetic fields (EMF)
- This Philips appliance complies with all applicable standards and regulations regarding exposure to electromagnetic fields.
General
- The appliance is suitable for mains voltages ranging from 100 to 240 volts .
- Maximum noise level: Lc = 69dB(A)
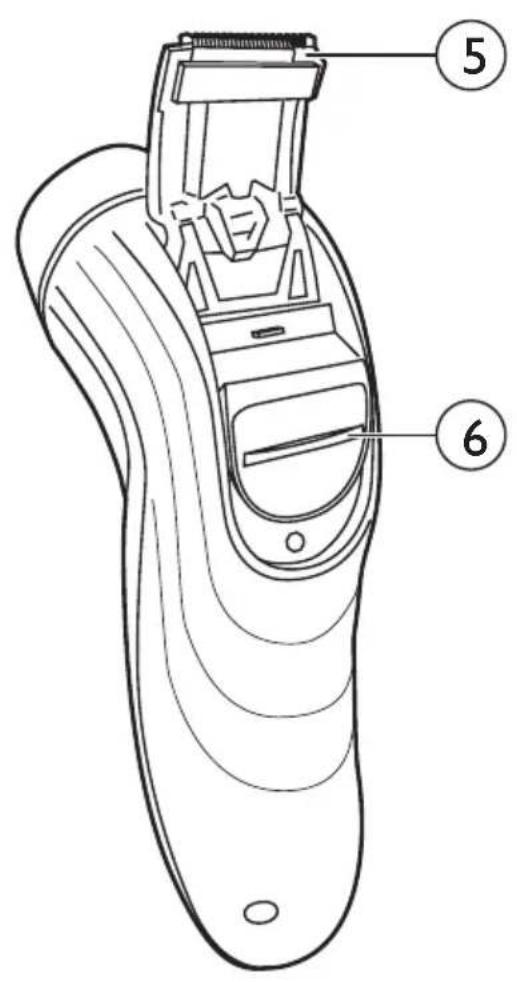
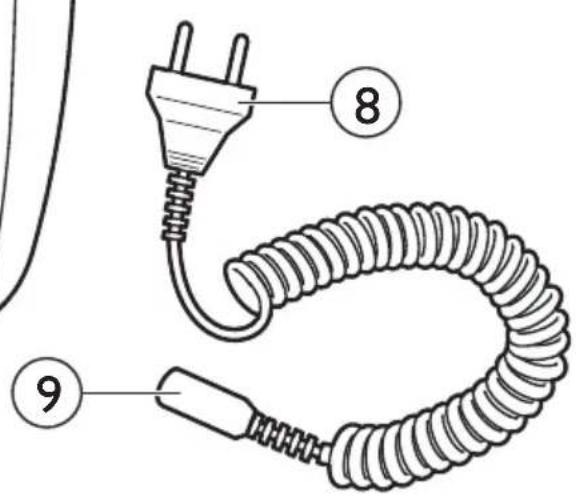
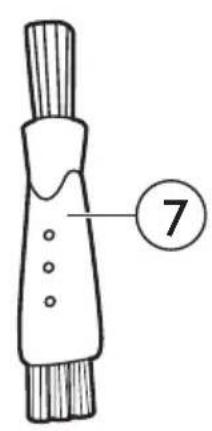
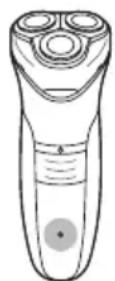
General description (Fig. 2)
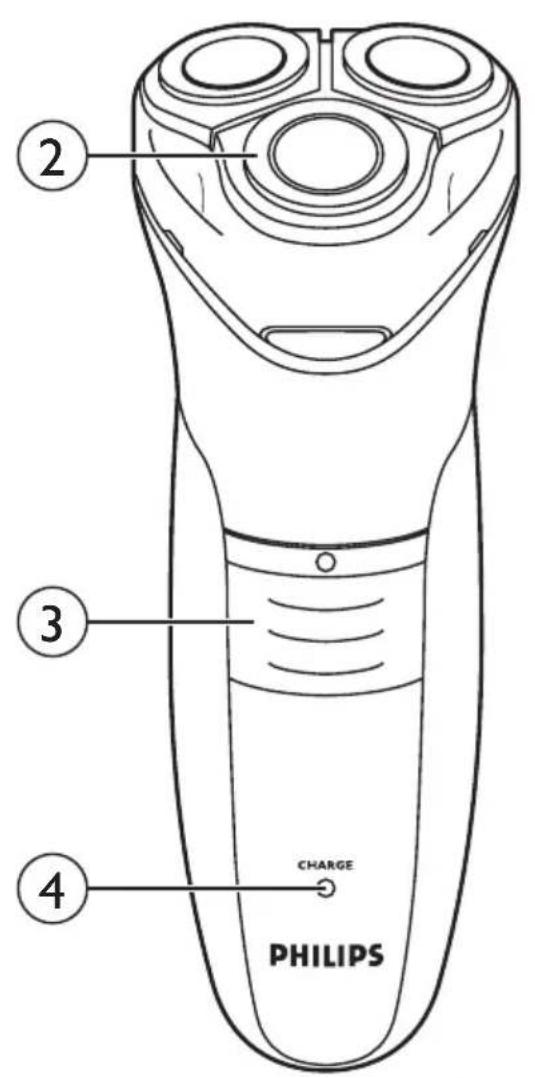
1 Protection cap
2 Shaving unit
3 Shaver on/off slide
4 Charging light (HQ6996, HQ6990, HQ6986, HQ6976, HQ6950, HQ6947, HQ6927, HQ6926, HQ6925, HQ6923 only)
5 Trimmer (HQ6996, HQ6990, HQ6976, HQ6950, HQ6946 only)
6 Trimmer slide (HQ6996, HQ6990, HQ6976, HQ6950, HQ6946 only)
7 Cleaning brush
8 Mains cord with plug
9 Appliance plug
Charging
Charge the appliance:
-
before first use and when you have not used the appliance for a long time
-
when the motor stops or starts running slower
When you have charged the shaver for the first time and after a long period of disuse, optimise the battery capacity in the following way:
1 Fully charge the shaver and then use it normally until the battery is completely empty. Repeat this process two more times. If you optimise the battery capacity in this way, you can also charge the shaver in between shaves, even if the battery is not completely empty yet.
Charging the shaver (HQ6996, HQ6990, HQ6986, HQ6976, HQ6950, HQ6947, HQ6927, HQ6926, HQ6925, HQ6923 only)
Quick charge (HQ6996, HQ6990, HQ6986 only)
After the shaver has charged for 3 minutes, it contains enough energy for one cordless shave.
Charging with the adapter
Put the appliance plug in the shaver.
2 Put the mains plug in the wall socket.
Note: Make sure the shaver is switched off.
The charging light goes on.
HQ6996, HQ6990, HQ6986: Charge the shaver for at least 1 hour, but not more than 24 hours.
When the battery is fully charged, the charging light starts flashing.
HQ6976, HQ6950, HQ6947, HQ6927, HQ6926, HQ6925, HQ6923: Charge the shaver for at least 8 hours, but not more than 24 hours.
The charging light lights up continuously as long as the appliance is connected to the mains.
Note: Do not leave the shaver connected to the mains continuously.
Note: You can also shave without charging. Simply connect the shaver to the mains.
3 Remove the mains plug from the wall socket and pull the appliance plug out of the shaver when the battery is fully charged.
Using the appliance
HQ6996, HQ6990, HQ6986, HQ6976, HQ6950, HQ6947, HQ6927, HQ6926, HQ6925, HQ6923 only: You can use the shaver directly from the mains but also without a cord.
HQ6946, HQ6906, HQ6902: You can only use the shaver directly from the mains.
Preparing for use (HQ6946, HQ6906, HQ6902 only)
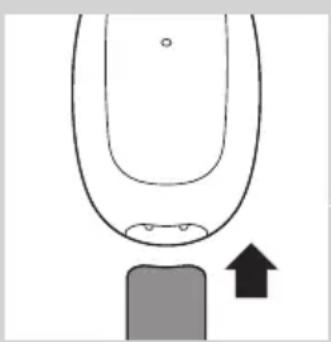
1 Put the appliance plug in the shaver.
2 Put the mains plug in the wall socket.
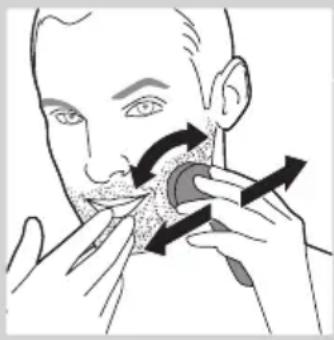
Shaving
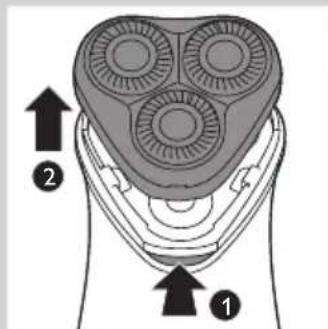
Push the on/off slide upwards to switch on the shaver.
2 Move the shaving heads over your skin. Make circular movements. Shaving on a dry face gives the best results.
Your skin may need 2 or 3 weeks to get accustomed to the Philips shaving system.
3 Push the on/off slide downwards to switch off the shaver.
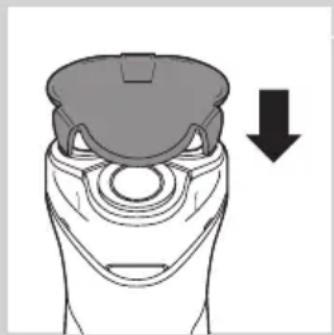
Put the protection cap on the shaver every time you have used it, to prevent damage.
Trimming (HQ6996, HQ6990, HQ6976, HQ6950, HQ6946 only)
You can use the trimmer to trim your sideburns and moustache.
Push the trimmer slide upwards to open the trimmer. The trimmer can be activated while the motor is running.
Cleaning and maintenance
Regular cleaning guarantees better shaving performance.
This appliance is not washable. Never immerse the appliance in water, nor rinse it under the tap.
Never use scouring pads, abrasive cleaning agents or aggressive liquids such as petrol or acetone to clean the appliance.
- For easy and optimal cleaning, Philips Shaving Head Cleaning Spray (type no. HQ110) is available. Ask your Philips dealer for information.
Note: Philips Shaving Head Cleaning Spray may not be available in all countries. Contact the Consumer Care Centre in your country about the availability of this accessory.
You can also clean the shaver in the following way:
Every week: shaving unit and hair chamber
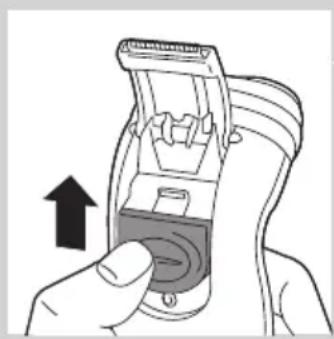
Switch off the shaver. Remove the mains plug from the wall socket and pull the appliance plug out of the shaver.
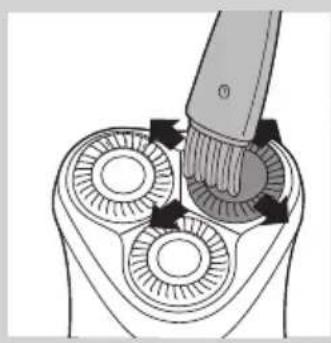
2 Clean the top of the appliance first. Use the cleaning brush supplied.
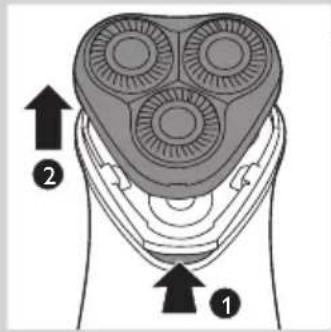
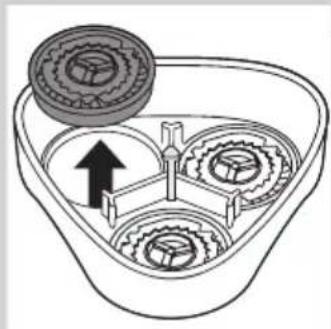
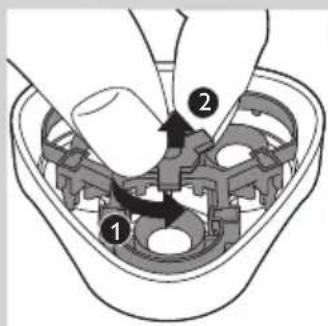
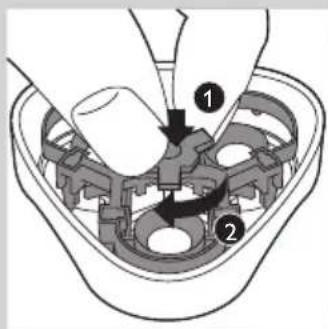
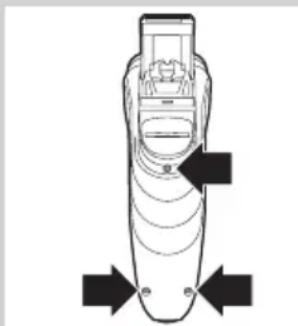
Press the release button (1) and remove the shaving unit (2).
4 Clean the inside of the shaving unit and the hair chamber with the cleaning brush.
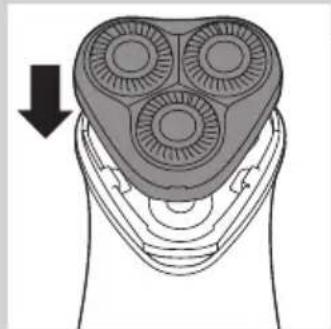
Put the shaving unit back onto the shaver.
Every month: shaving heads
Switch off the shaver. Remove the mains plug from the wall socket and pull the appliance plug out of the shaver.
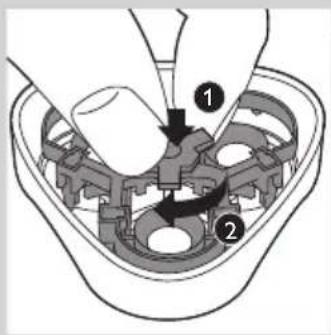
Press the release button (1) and remove the shaving unit (2).
3 Turn the wheel anticlockwise (1) and remove the retaining frame (2).
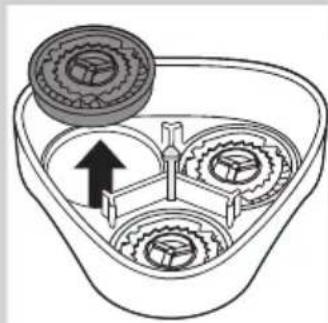
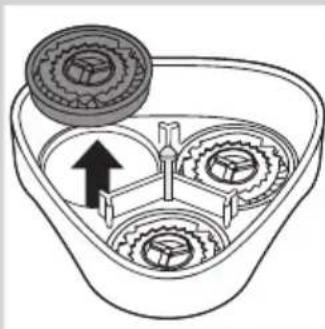
4 Remove the shaving heads (cutters and guards) one by one and clean them with the cleaning brush supplied.
Note: Do not clean more than one cutter and guard at a time, since they are all matching sets. If you accidentally mix up the cutters and guards, it may take several weeks before optimal shaving performance is restored.
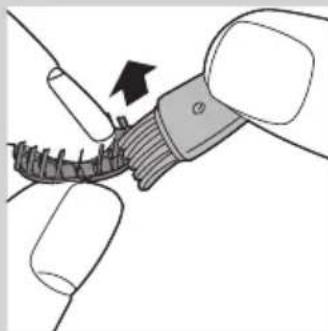
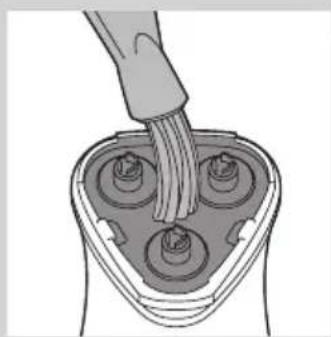
5 Clean the cutter with the short-bristled side of the cleaning brush. Brush carefully in the direction of the arrow.
Brush the guard.
7 Put the shaving heads back into the shaving unit. Put the retaining frame back into the shaving unit, push it down (1) and turn the wheel clockwise (2).
Put the shaving unit back onto the shaver.
Extra-thorough cleaning
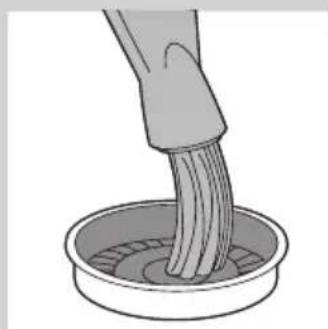
For extra-thorough cleaning, put the shaving heads in a degreasing liquid (e.g. alcohol) every six months. To remove the shaving heads, follow steps 1 to 4 described above. After cleaning, lubricate the central point on the inside of the guards with a drop of sewing machine oil to prevent wear of the shaving heads.
Trimmer (HQ6996, HQ6990, HQ6976, HQ6950, HQ6946 only)

Clean the trimmer every time you have used it.
Switch off the shaver. Remove the mains plug from the wall socket and pull the appliance plug out of the shaver.
2 Clean the trimmer with the cleaning brush supplied.
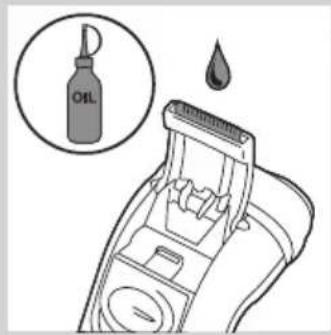
Tip: Lubricate the trimmer teeth with a drop of sewing machine oil every six months.
Storage
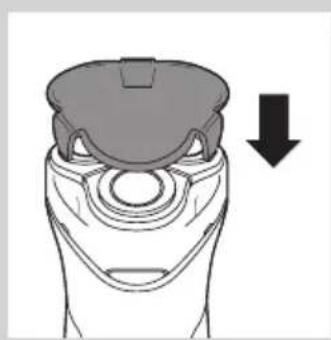
Put the protection cap on the shaver to prevent damage.
Replacement
Replace the shaving heads every two years for optimal shaving results. Replace damaged or worn shaving heads with HQ56 Philips Shaving Heads only.

Switch off the shaver. Remove the mains plug from the wall socket and pull the appliance plug out of the shaver.
Press the release button (1) and remove the shaving unit (2).

3 Turn the wheel anticlockwise (1) and remove the retaining frame (2).
4 Remove the shaving heads and place new ones in the shaving unit.
Put the retaining frame back into the shaving unit, push it down (1) and turn the wheel clockwise (2).
6 Put the shaving unit back onto the shaver.
Ordering accessories
To buy accessories or spare parts, visit www.shop.philips.com/service or go to your Philips dealer. You can also contact the Philips Consumer Care Centre in your country (see the worldwide guarantee leaflet for contact details).
The following accessories are available:
HQ56 Philips Shaving Heads
- HQ110 Philips Shaving Head Cleaning Spray
Recycling

-
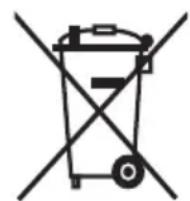
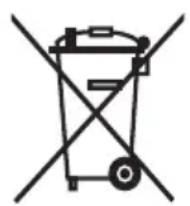
This symbol on a product means that the product is covered by European Directive 2012/19/EU.
-
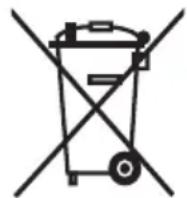
This symbol means that the product contains a built-in rechargeable battery covered by European Directive 2006/66/EC which cannot be disposed of with normal household waste. We strongly advise you to take your product to an official collection point or a Philips service centre to have a professional remove the rechargeable battery.
- Inform yourself about the local separate collection system for electrical and electronic products and rechargeable batteries. Follow local rules and never dispose of the product and rechargeable batteries with normal household waste. Correct disposal of old products and rechargeable batteries helps prevent negative consequences for the environment and human health.
Removing the rechargeable battery
Only remove the rechargeable battery when you discard the shaver.
Make sure the battery is completely empty when you remove it.
Switch off the shaver. Remove the mains plug from the wall socket and pull the appliance plug out of the shaver.
2 Let the shaver run until it stops.
3 Undo the screws at the back of the shaver and open it.
Cut the battery strips with a cutter and pull the battery loose from the glued strip.
The metal battery strips are very sharp.
Do not connect the shaver to the mains again after you have removed the battery.
Guarantee and support
If you need information or support, please visit www.philips.com/support or read the separate worldwide guarantee leaflet.
Guarantee restrictions
The shaving heads (cutters and guards) are not covered by the terms of the international guarantee because they are subject to wear.
Troubleshooting
This chapter summarises the most common problems you could encounter with the appliance. If you are unable to solve the problem with the information below, visit www.philips.com/support for a list of frequently asked questions or contact the Consumer Care Centre in your country.
Problem Possible cause Solution
| Reduced shaving performance. | The shaving heads are dirty. You have not cleaned the shaver well enough or you have not cleaned it for a long time. | Clean the shaver thoroughly before you continue shaving. See chapter 'Cleaning and maintenance'. |
| Long hairs obstruct the shaving heads. | Clean the cutters and guards with the cleaning brush supplied. See chapter 'Cleaning and maintenance', section 'Every month: shaving heads'. | |
| The shaving heads are damaged or worn. | Replace the shaving heads every 2 years for optimal shaving results. See chapter 'Replacement'. | |
| The shaver does not work when I push the on/off slide upwards. | The rechargeable battery is empty. | Charge the battery. See chapter 'Charging'. |
| The shaver is not connected to the mains. | Put the mains plug in the wall socket. | |
| Skin irritation. Your skin needs time to get used to the Philips shaving system. | Skin irritation during the first 2-3 weeks of use is normal. After this period, the skin irritation usually disappears. | |
Introduktion
Commanded accessoires
HQ110 Philips Shaving Head Cleaning Spray (rensespray for skjaerehoder)
Resirkulering

- Dette symbolet på et produit betyr at produits omfattes av EU-direktiv 2012/19/EU.
4 Retire as cabecas de corte e coloque as cabecas novas no acessario de corte.