300182 - USB hub CSL - Free user manual and instructions
Find the device manual for free 300182 CSL in PDF.
| Product type | USB 2.0 to RS232 serial adapter |
| Brand | CSL |
| Model | 300182 |
| Chipset | WCH CH340 |
| Host interface | USB 2.0 (type A male) |
| Device interface | RS232 DB9 female (serial COM) |
| Supported operating systems | Microsoft Windows XP / 7 / 8 / 8.1 / 10 |
| Power supply | Via USB port (bus-powered) |
| Package contents | Adapter, USB extension cable, driver CD, instruction manual |
| Installation | Plug and Play under Windows 8+; manual installation possible via CD or CSL website |
| USB cable length (extension) | Not specified (cable included) |
| Operating temperature | Not specified (avoid extreme temperatures) |
| Permissible humidity | Not specified (protect from high humidity, water, snow) |
| Protection rating | Not specified (not waterproof) |
| Weight (approx.) | Approx. 30 g |
| Dimensions (approx.) | Approx. 55 x 25 x 15 mm |
| Warranty | Manufacturer warranty (conditions not specified) |
| WEEE registration number | 94495668 (WD Plus GmbH) |
| Manufacturer | WD Plus GmbH, Wohlenbergstraße 16, 30179 Hanover |
Frequently Asked Questions - 300182 CSL
User questions about 300182 CSL
0 question about this device. Answer the ones you know or ask your own.
Ask a new question about this device
Download the instructions for your USB hub in PDF format for free! Find your manual 300182 - CSL and take your electronic device back in hand. On this page are published all the documents necessary for the use of your device. 300182 by CSL.
USER MANUAL 300182 CSL
natural_image
Close-up of a black USB connector with metallic pins and metallic body (no text or symbols visible)USB 2.0 - Serial RS232 COM Adapter
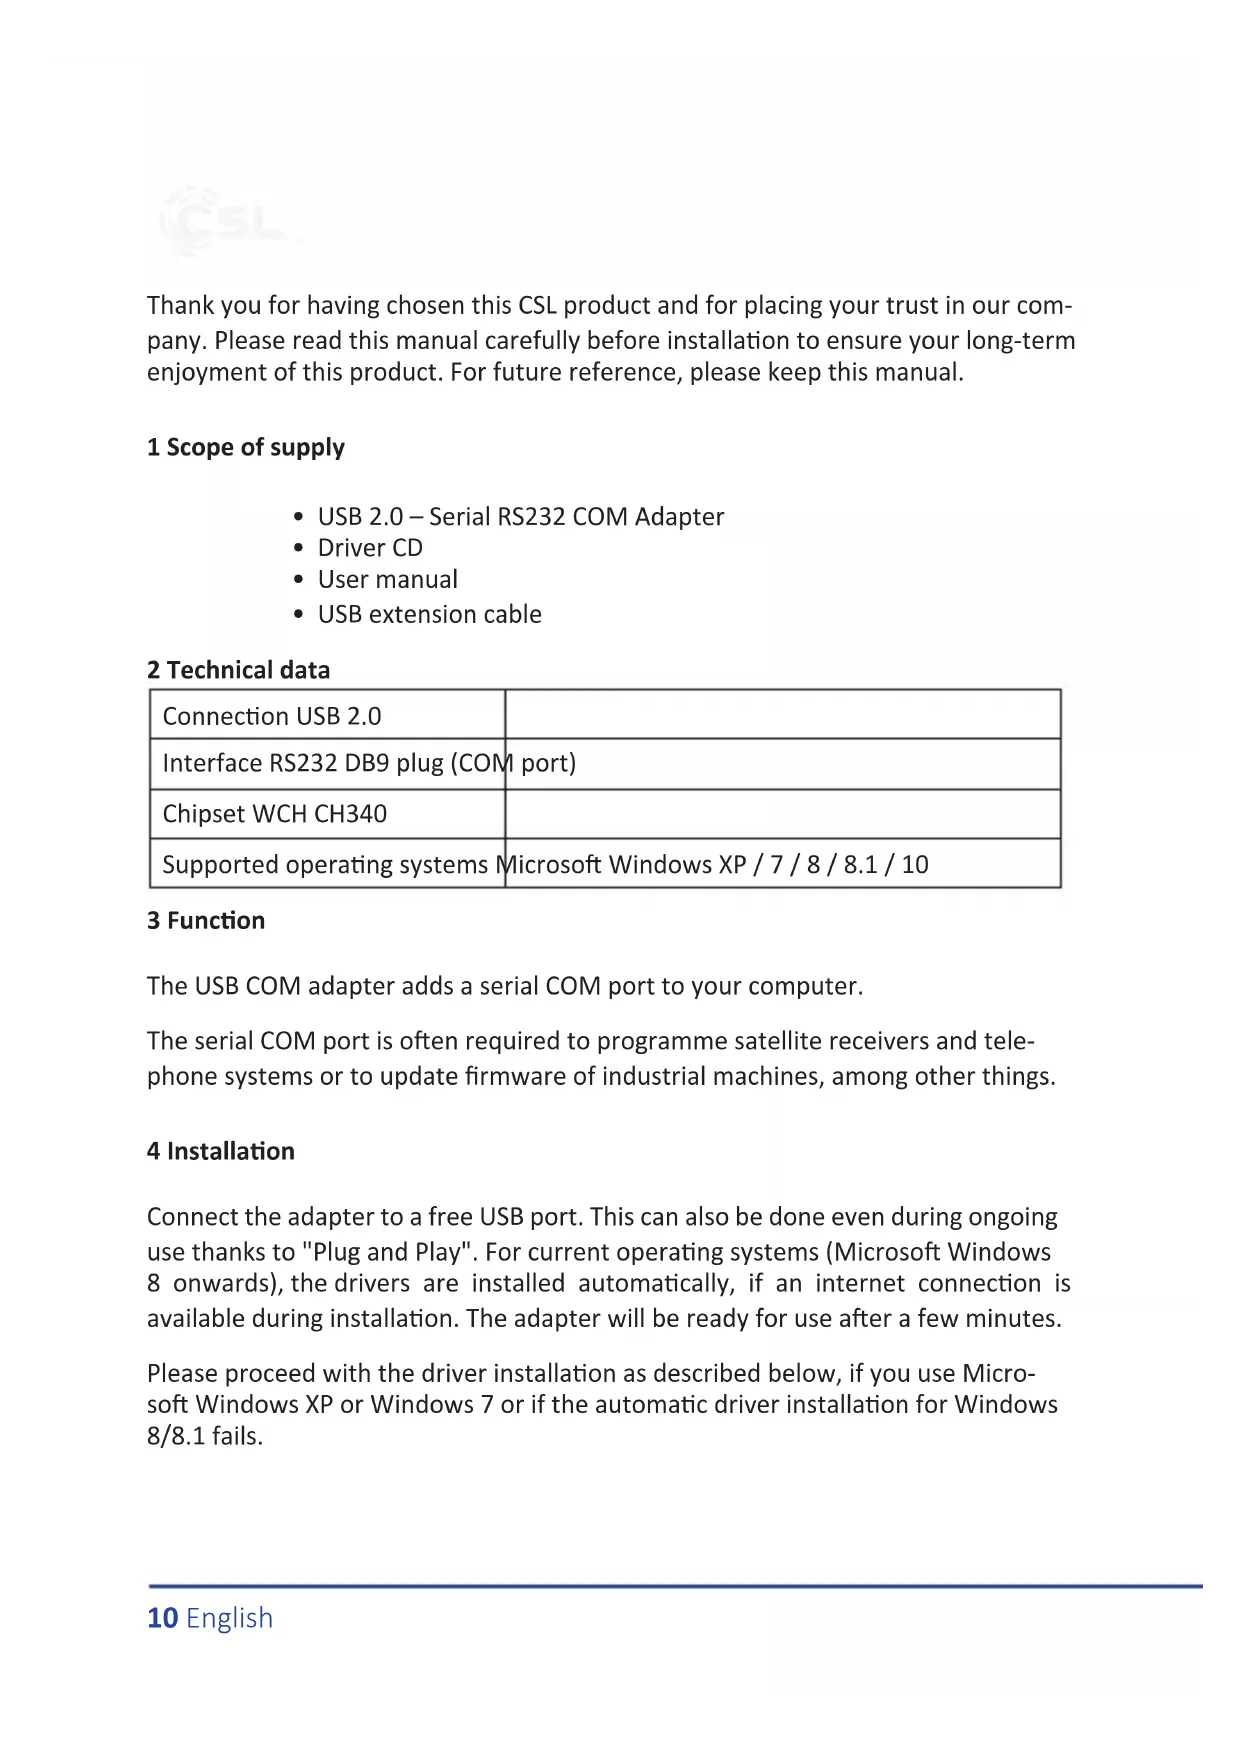
Thank you for having chosen this CSL product and for placing your trust in our company. Please read this manual carefully before installation to ensure your long-term enjoyment of this product. For future reference, please keep this manual.
1 Scope of supply
- USB 2.0 – Serial RS232 COM Adapter
- Driver CD
- User manual
- USB extension cable
2 Technical data
| Connection USB 2.0 | |
| Interface RS232 DB9 plug (COM port) | |
| Chipset WCH CH340 | |
| Supported operating systems | Microsoft Windows XP / 7 / 8 / 8.1 / 10 |
3 Function
The USB COM adapter adds a serial COM port to your computer.
The serial COM port is often required to programme satellite receivers and telephone systems or to update firmware of industrial machines, among other things.
4 Installation
Connect the adapter to a free USB port. This can also be done even during ongoing use thanks to "Plug and Play". For current operating systems (Microsoft Windows 8 onwards), the drivers are installed automatically, if an internet connection is available during installation. The adapter will be ready for use after a few minutes.
Please proceed with the driver installation as described below, if you use Microsoft Windows XP or Windows 7 or if the automatic driver installation for Windows 8/8.1 fails.
5 Driver Installation
Connect the device to a free USB port and insert the accompanying driver CD into your computer's drive. Access the CD content via "My Computer" (Windows Vista onwards: "Computer").
Open the folder "340" on the driver CD and start the "SETUP" application by double-clicking on it.
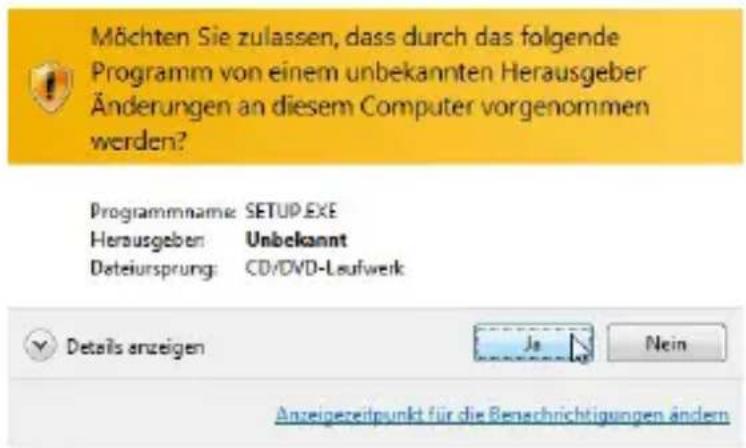
A prompt for confirmation is displayed, which you have to confirm with "Yes" to start the installation program.
After clicking "INSTALL", the driver installation will begin. Please wait until the installation is completed. This may take several minutes.
| INSTALL | 06.04.2013 08:32 | Dateiordner | |
| CH341PT.DLL | 29.07.2005 18:00 | Anwendungserwe... | 7 KB |
| CH341S64.SYS | 02.06.2009 18:00 | Systemdatei | 57 KB |
| CH341S98.SYS | 11.06.2007 18:00 | Systemdatei | 20 KB |
| ch341SER | 27.08.2010 03:25 | Sicherheitskatalog | 10 KB |
| CH341SER | 25.08.2010 03:54 | Setup-Informatio... | 7 KB |
| CH341SER.SYS | 02.06.2009 18:00 | Systemdatei | 39 KB |
| CH341SER.VXD | 17.12.2008 17:00 | Virtueller Gerätetr... | 20 KB |
| SETUP | 01.09.2010 18:00 | Anwendung | 64 KB |
After the installation is completed, a confirmation message is displayed.
Click "OK" to close it. Close the installation programme the same way. The drivers have been fully installed and the device is ready for immediate use.
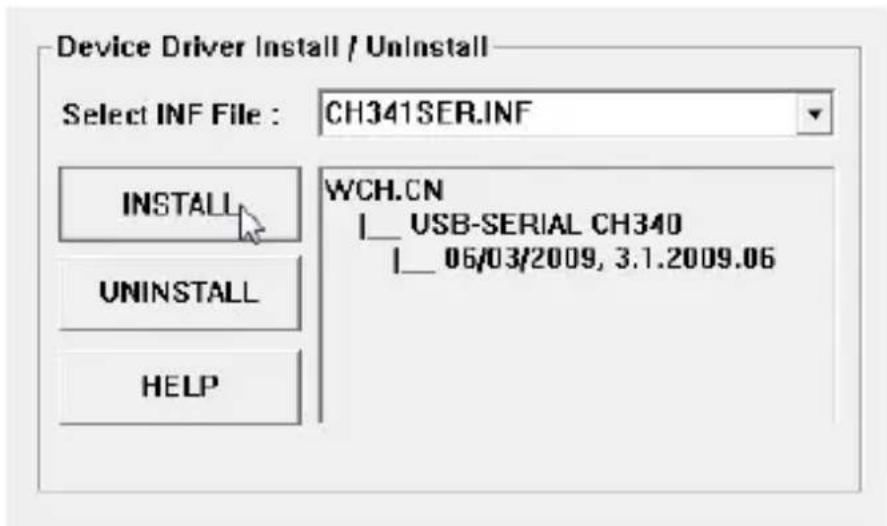
text_image
Device Driver Install / UnInstall Select INF File : CH341SER.INF INSTALL UNINSTALL HELP WCH.CN |__ USB-SERIAL CH340 |__ 06/03/2009, 3.1.2009.06Note: If the installation is not successful, please visit www.csl-computer.com for the latest driver version for your product. To go to the download area directly, enter the following address in your web browser:
https://ftp.csl-computer.com/pub/drivers/usb-adapter/20015-USB_zu_RS232_Adapter_CH340_CH341/
Alternatively, there is also the option to perform the installation manually. Please follow the instructions in Section 5.1 of this Guide.
5.1 Manual Driver Installation
If the installation of the device drivers as described in Section 5 is not successful, then you still have the option of installing the drivers via the Device Manager of your operating system.
Hardware und Sound
Open the Windows Control Panel and select the category "Hardware & Sound".
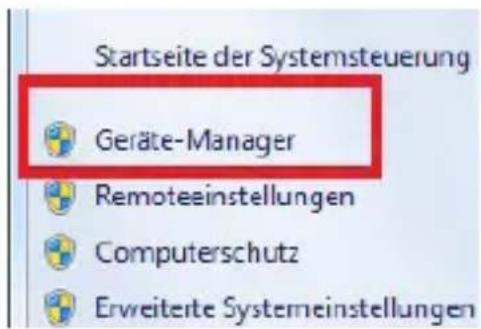
Start the Device Manager via the available interface, which is displayed in the image below. You can also access the Device Manager by simultaneously pressing the Windows and Pause/Break-key on your keyboard and then selecting "Device Manager". The area is marked in red in the bottom image bar.
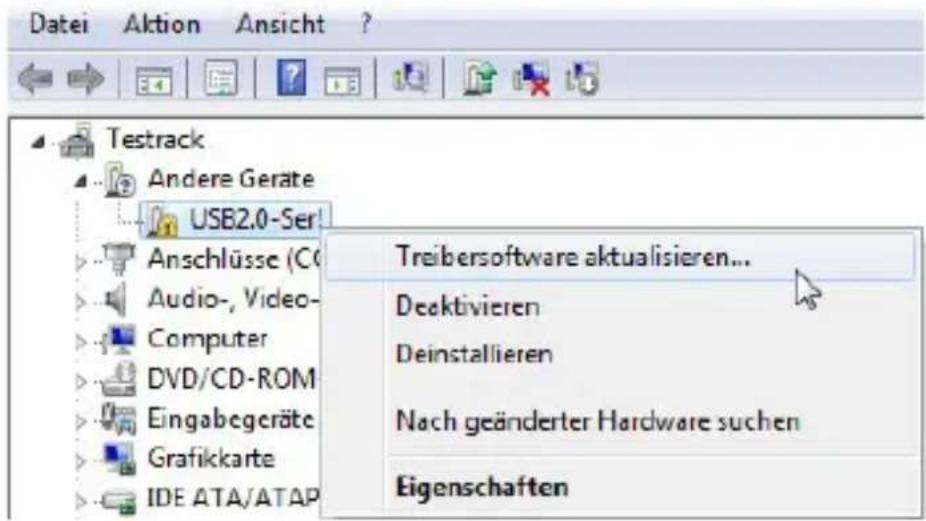
The product is displayed in the Device Manager under the name "USB2.0-Ser!".

Right-click on the device to display the "Update driver software..." option. Select
this option to continue the installation. A new window is displayed. In this window, click on "Browse for driver software on your computer".
Next, using "Browse..." enter the path to the CD on which the driver to be installed is located. Ensure, that the check mark is set for "Include sub-folders" and then click "Next".

Please wait until the system has completed the installation. This may take several minutes. You will next receive a confirmation that the installation was successful. Select "Close" to exit the process. The device is now ready for use.
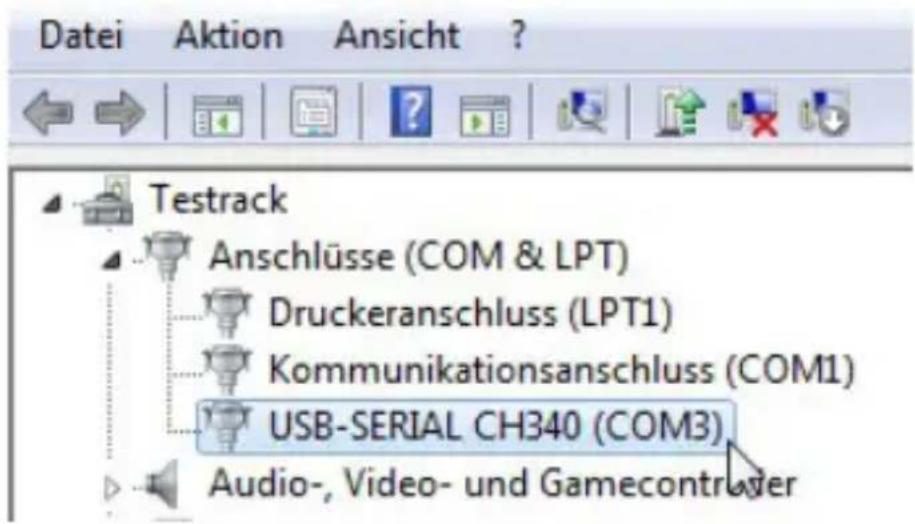
6 Identifying the COM Port
To find out under what name the device can be used, open the Device Manager of your operating system as described in Section 5.1. The device is called "USB Serial CH340". The name is made up of the name of the COM port or its number in brackets, as shown in the following image.
7 Safety instructions and disclaimer
Do not attempt to service this product by yourself as opening or removing covers may result in fire, electric shock or equipment damage. Please avoid any contact to the electric current. This product is only licensed for indoor use and dry areas. Please protect it from water, rain, snow or high humidity and keep it away from high temperatures and direct sunlight.
Do not expose this product to extreme and sudden changes of temperature or heavy vibrations; this may lead to damage of the internal electronic part of this unit. Check this product for signs of damage before putting it in operation. In case the device received any damage, it should not be used. Please contact our customer support. Please observe the relevant national provisions and legal restrictions. Do not use this product for anything other than intended and as described in the manual. Any attempt of repairs or alterations by someone other than the original supplier will invalidate the guarantee and result in refusal of warranty
claims. Persons who are familiar with the operating manual and the applicable regulations concerning working safety and accident prevention may only use the network card. This unit is not intended to be used by persons (including children) with limited physical, sensory or mental aptitude or lack of experience and/or knowledge unless they are supervised by a person responsible for their safety or have received instructions as to how the device is used properly. The technical specifications of this product may change without prior notice.
8 Disposal Instructions
The European Directive (WEEE) requires that old electrical and electronic appliances shall be disposed of separately from normal household garbage for optimal recycling. The component parts must be separated, collected and sent for recycling or disposal in an environment-friendly manner. Otherwise, toxic and dangerous substances could cause enduring damage to the environment if disposed of incorrectly. As a consumer you are legally obligated (Electrical and Electronic Equipment Act-ElektroG) to return electronic equipment at the end of its lifetime to their manufacturer, point of sale, public collection points or importer free of charge. The relevant local laws apply here. The symbol on the product, in the instructions or on its packing indicates these regulations. The reuse or recycling of materials and old units makes an important contribution towards protecting the environment.

WEEE guideline: 2012/19/EU WEEE register number: DE 94495668
WD Plus GmbH, herewith declares that this product 20015/20170406SZ011 conforms to the principle requirements and other relevant stipulations. The complete Declaration of Conformity can be obtained from: WD Plus GmbH, Wohlenbergstraße 16, 30179 Hannover