SAS5001 - Dishwasher Sammic - Free user manual and instructions
Find the device manual for free SAS5001 Sammic in PDF.
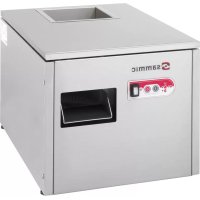
| Product type | Professional flatware polisher |
| Brand | Sammic |
| Model | SAS5001 |
| Category | Dishwasher (flatware polisher) |
| Power supply | 230 V single-phase / 400 V three-phase |
| Frequency | 50/60 Hz |
| Production capacity | 3500 to 5000 pieces per hour |
| Loading speed | 14 pieces every 10 seconds |
| Recommended amount of polishing pellets | 5 kg |
| UV-C germicidal lamp | Yes, for sterilization |
| Heating system | Resistance with thermostat |
| Final drying cycle | Yes, selectable |
| Polishing pellet change indicator | After 200 hours of use |
| UV-C lamp change indicator | After 1000 hours of use |
| Safety function | Automatic stop when lid is opened |
| Lid detection | By magnet |
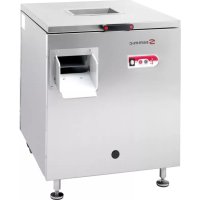
| Adjustable feet | Yes |
| Main switch | Illuminated |
| Indicator lights | Machine ready, heating, change, drying |
| Noise level empty | Less than 70 dB |
| Noise level loaded | Less than 90 dB |
| Power cord length | 2 m |
| Exterior material | Stainless steel |
| Maintenance | Regular cleaning, vacuuming dust |
Frequently Asked Questions - SAS5001 Sammic
User questions about SAS5001 Sammic
0 question about this device. Answer the ones you know or ask your own.
Ask a new question about this device
Download the instructions for your Dishwasher in PDF format for free! Find your manual SAS5001 - Sammic and take your electronic device back in hand. On this page are published all the documents necessary for the use of your device. SAS5001 by Sammic.
USER MANUAL SAS5001 Sammic
Cutlery dryers-polishers
Information on CE marking
Each machine is identified as follows:
- Name and address of the manufacturer: SAMMIC S.L., Basarte 1, Azkoitia, Gipuzkoa (SPAIN).
- "CE" mark.
- The machine model is specified in the next paragraph.
- The serial number is printed on the Guarantee Card and in the Declaration of conformity.
MODELS
This manual describes the SAM-3001, SAS-5001 and SAS-6001 Dryer Polisher installation, operation and maintenance instructions. The model reference and technical data appear on the identification plate affixed to the machine.
European Directives and standards (version 400-230V III and 230V II):
- Machinery Directive 2006/42/EEC.
- Low Voltage Directive 2006/95/EEC.
- Electromagnetic Compatibility Directive 2004/108/EEC.
- The 120V / 60Hz / 1 models comply with the UL-499 and CSA C22.2 standards.
- Study of machine's bacteriological function.
INSTALLATION
For optimum performance and long-lasting preservation of your machine, carefully read and follow the instructions given in this manual.
Location
Place the machine on a firm and perfectly levelled ground.
This condition must be fulfilled for the machine to operate within acceptable limits of vibration. Level the machine using the adjustable feet (F). It is recommended to leave a minimum clearance of 40mm between the machine jacket and the walls or other pieces of equipment which may surround the dryer polisher.
Electric connection
Motor characteristics:
A single-phase motor is supplied for operation on 230V or 120V.
A 2P (10A -16A) wall outlet, always within reach, and a sealed plug are required.
A three-phase motor is supplied for operation on 230V or 400V (factory-set to 400V). To change the voltage setting change the terminal box and motor connection as shown on the wiring diagram.
For three-phase motor powered machines, a 10A 4P wall outlet, always within reach, and a sealed plug are required.
Before connecting the dryer polisher to the mains, check that the motor is prepared to operate on the actual mains voltage.
Power Cable Characteristics
The SAMMIC dryer polishers are delivered complete with a thermoplastics-sheathed power cable 2m in length. THIS APPLIANCE MUST BE EARTHED. The machine earth wire is identified.
ELECTRONIC CONTROL FUNCTIONS
"general switch G"
General light switch, connects and disconnects the machine power supply.
"power switch button I A"
Starts the machine if the cover is in the down position.
With the machine stopped and the door open and by keeping this key pressed down, the final grain drying cycle is selected, and the light indicator switches on (4).
With the machine switched on, by keeping this key pressed down the UV-c lamp switches off for 15 minutes. If you press the on switch button again or stop the machine and switch it on, the lamp comes on immediately.
"power switch button 0 B"
Stops the machine.
To switch off light indicator 3, change of polish granules or change of lamp, with the machine switched off and the door open keep the off switch button pressed down.
"light indicator OK 1"
When the light is on, the granule has reached the working temperature or the pre-selected temperature (see operation).
"resistance light indicator 2"
If the light indicator is lit up the heater is connected, and if it is not lit up the heater is disconnected (see operation).
"change light indicator 3"
If the light indicator is on, the polish granules need to be changed (see change of granules).
If the light indicator is blinking the UV-c lamp needs to be changed (see change of UV-c lamp).
“drying light indicator 4”
If the light indicator is off, the drying cycle has been selected (see drying cycle).
If it is blinking, there is a machine failure (see failures code).
OPERATION
Filling polish granules
Switch the machine on (see operation). Fill the hopper with the amount of polish granules supplied by SAMMIC through the central cutlery inlet (C).
SAMMIC supplies a bag of polish granules with each machine and these are the recommended amounts of polish granules according to the machine model:
SAM-3001 3 Kg. / 6.6 lbs. of polish granules.
SAS-5001 and SAS-6001: 5 Kg. / 11 lbs. of polish granules.
If the motor direction of rotation is correct, the product will be distributed evenly in the hopper with an ascending movement. Once the granules have been distributed evenly, switch the machine off.
If this does not occur in three-phase models, change the motor rotation direction by interchanging two of the phases in the wall socket.
Start up and stopping
Activate the general switch (G). With the cover down and pressing the on switch button (A):
- As the motor starts, an ascending whirl develops inside the tub, causing the items of cutlery to circulate.
- The UV-c lamp lights up.
- The temperature control switches on so that the granules reach the necessary temperature for drying and polishing the cutlery.
- In the SAM-3001 and SAS-6001 models, the fan starts along with the motor, which prevents dirt and polish coming out with the pieces of cutlery
- If you press stop (B) or open the top cover, the machine stops. In the SAS-6001 mode, the motor brake is activated.
- Disconnect the power supply using the general switch (G).
Cutlery temperature control and drying
- If the polish granules are cold, the heaters are connected and the light indicator 2 switches on. Once the set temperature is reached, the heater and the light indicator 2 switch off. The machine ready light indicator 1 switches on and a continuous beeping noise is heard which means that you can start feeding cutlery in the cutlery inlet (C). The dry cutlery will come out through the front outlet (D).
- It is essential that the cutlery is wet or directly coming from the dishwasher, i.e. always damp, when loaded in the dryer polisher.
- The polish granules cool down and at some point the heaters reconnect and light indicator 2 switches on. You will see that the machine ready light indicators 1 and the heaters 2 are switched on. While the machine ready light indicator 1 is switched on, continue to insert cutlery.
- If there are too many polish granules, use cold water. The granule temperature continues to drop, the machine ready light indicator switches off and an intermittent beeping noise is heard. This means that the polish granules need to be reheated. Stop feeding cutlery and wait until the light indicator 1 switches on again and the continuous beeping noise is heard.
Final polish granule drying cycle
With the machine stopped and the cover open, by keeping the on switch (A) button pressed
down the light indicator 4 switches on and the drying cycle is selected.
Lower the cover and start the cycle by pressing the on switch button (A) again. The machine starts and the granules are heated up to the set temperature.
Wait for a few minutes with the machine on and this will stop automatically, ending the cycle.
Run this cycle when you think that the polish granules are damp or the machine has undergone intensive use.
You should not use this cycle with dry granules. To stop the cycle, just press stop (B) or open the door.
Change of granule
Due to use and the presence of water and heat, the effectiveness of the granules is reduced. When the light indicator 3 is switched on, the polish granules need to be changed. The light indicator switches on after 200 hours.
To change the granules, remove used polish granules using a vacuum cleaner. Then pour the amount of polish granules supplied by Sammic into the hopper through the central cutlery feeding hole.
To reset the warning, with the machine off and the door open keep the stop switch button (B) pressed down.
Change of UV-c lamp
Over time and with use the UV-c lamp efficiency is reduced. When the light indicator 3 blinks, it means that the UV-c lamp needs to be changed. The light indicator starts to blink after 1000 hours.
To reset the warning, with the machine off and the door open keep the stop switch button (B) pressed down.
Setting the temperature
You need to access the electronic board and select the temperature by turning the potentiometer. The temperature range is printed on the board.
Performance
Machine throughput depends on the weight of the items of cutlery and the feeding rate.
SAM-3001: 2000 to 2500 pieces / hour
SAS-5001: 3500 to 5000 pieces / hour
SAS-6001: 3500 to 5000 pieces / hour
Items of cutlery shall be fed gradually, taking care that those previously introduced have disappeared into the granules (from 5 to 10 pieces at a time).
Feeding rates
SAM-3001 6 pieces / every 10 seconds.
SAM-5001 14 pieces / every 10 seconds.
SAM-6001 14 pieces / every 10 seconds.
Check that the flow of items of cutlery coming out through the outlet (B) is homogeneous and continuous.
Sanitising
The SAMMIC cutlery polisher uses a UV-C lamp (E) for sanitising both the cutlery and the granules.
This lamp has been successfully tested and is duly certified, so cutlery is sanitised. Exposure to the radiation of this lamp is harmful to the eyes and skin. SAMMIC has implemented all the necessary precautionary measures; any improper use of the lamp is the user's sole responsibility.
Error code
When the light indicator 4, end of drying cycle is blinking, it means that there is a machine failure.
Probe error : "Quick" blinking that means that there is no "on" and "off" cycle. Check the probe connections or change the probe.
Overheating error: Slow blinking. There is a problem with the heater relay or the electronic board.
To reset the alarm, switch off the general switch G.
You can measure the probe heater to check its state.
To do so, disconnect the contact switches. The reference values are :
25^ C - 10 ~K
50^ - 4.1K
MAINTENANCE
WARNING! Before cleaning or carrying out maintenance of your dryer polisher, always unplug it from the mains.
If any components need changing, contact a SAMMIC authorised technical assistance service. Due to the machine's vibration, any incorrect action could damage it.
Change of polish granules each time the change light indicator 3 lights up.
Change of UV-c lamp each time the change light indicator 3 blinks.
Due to use and the presence of heat, the polish granules emit dust. You must remove the polish granules and clean the transparent cover, the hopper and the accessible components once every certain period. If the fan or the UV-c lamp are covered in dust, they may not work properly. Call the authorised technical assistance service to clean and check them.
Before starting up the machine, check that it is stands firmly on the ground.
If any component is replaced in the hopper, it must be left in the same condition as before. If the component, power cable, etc. assembly instructions are not followed, the vibratory action will damage the spare part in a short space of time.
Note
If the power cable should get damaged, it would be necessary to fit a new one; such a replacement may be done only by a SAMMIC authorised technical assistance service.
Should you observe any malfunction, contact a SAMMIC authorised technical assistance service as soon as possible.
Never power clean the outside of the machine. Use a wet cloth and mild detergent for cleaning. Never clean the polycarbonate hopper cover with solvents, alcohol, window-cleaning fluids or any abrasive materials, since they may be harmful to the mechanical properties of the cover.
TROUBLESHOOTING
Cutlery discharge is not even
The cause might be:
- Motor direction of rotation is incorrect. In the case of three-phase motors, change the polarity.
- Cutlery jam. In this event: Stop the machine. Lift the top cover. Check for jams in the upward path. If any, remove the transparent cover after loosening the fixing knobs. Clear the obstruction. Be careful when introducing your hands, as there may be sharp items. Replace the cover and fix it with the rubber washers and knobs. The transparent cover should not be left loose, because this would lead to an increase in noise and a possible fatigue fracture of the cover.
- The amount of polish granules is less than specified.
- The polish granules are very dry and have reduced in volume. This effect is similar to when the amount of polish granules is less than necessary. Use very wet cutlery or add a bit of water to increase the volume.
NOTE With excessive drying, the volume and weight decrease. This must be supervised.
Granules or dust are coming out of the outlet
Too many polish granules.
In the case of models SAM-3001 and SAM6001, there is a problem with the fan.
The machine is dirty. Remove the polish granules and clean the machine.
The polish granules are very wet and there is too much volume. Stop feeding cutlery and run a drying cycle.
Note: With the presence of water, the polish granules increase in volume and weight. This must be supervised.
The dryer-polisher will not start
The machine is plugged in and there is power in the mains.
The top cover is closed.
The magnet on the top cover is not damaged.
Top cover detection check: With the cover closed, if you hold down "run" (A) for one second and the machine does not start up but the drying cycle indicator light 4 lights up, this means that the electronic board does not detect the door magnet or the detector is faulty.
There may be problems with the keypad: If you hear a beep when you press any button, this means that the keypad is OK and that the electronic board has a power supply and is working. If there is no beep, the keypad might be faulty or badly connected.
- There might be problems with the fuse: Check the condition of the fuse in the control box.
There might be problems with the electronic board: Look to see if the power reaches the board. There is also an LED that lights up when the cover is closed and turns off when it is opened. Check the wiring and the board.
The dryer-polisher is vibrating excessively
- Check that the machine stands firmly on the ground.
The wheels and legs are in good condition.
The heater light indicator 2 is lit up but the ready machine light indicator is not switched on. Check the polish granule temperature. If you notice that it is not heating up, there is a problem with the heater or the wiring.
The UV-C Germicide lamp does not light up
The lamp has burnt out. Change the lamp.
- There is a problem in the lamp holder with the heater or the starter unit. Change the lamp holder.
The electronic board does not activate this outlet.
OTHER IMPORTANT INFORMATION
Sound level of the machine standing on a firm ground and correctly braked is:
- When empty: less than 70 dB and the background noise is 25 dB. Measurement is made at a height of 1.6m and 1m away from the source.
- When loaded: less than 90 dB under the above mentioned conditions.
- This machine is not designed for use by children or persons with physical, sensory or mental disabilities, or by inexperienced or unskilled persons, unless they have been supervised or trained in using these machines by a person responsible for their safety.
- Children must be supervised to ensure that they do not play with the machine.
"figure bouton-poussoir IA"
"figure bouton-poussoir 0 B"
Pour la machine.
"figure bouton-poussoir OK 1"
Attivare Anything to do, such as the apple.