
Contessa - Coffee machine GRAEF - Free user manual and instructions
Find the device manual for free Contessa GRAEF in PDF.
| Brand | GRAEF |
| Model | Contessa |
| Category | Espresso coffee machine |
| Machine type | Manual lever with portafilter |
| Water tank capacity | 2.5 litres |
| Espresso pressure | 8 to 12 bar (pressure gauge) |
| Adjustable coffee temperature | 86 °C to 98 °C (in 1 °C steps) |
| Number of simultaneous cups | 1 or 2 cups |
| Main functions | Espresso, steam for milk, hot water |
| Pre-infusion | Adjustable (P0 to P5) |
| Programmable cup volume | Yes (for 1 and 2 cups) |
| Descaling program | 3 circuits: infusion, steam, hot water |
| Descaling reminder | Adjustable: 12 L, 25 L or 50 L |
| Automatic standby | After 30 minutes |
| LCD screen | With function display and flow time |
| Safety | Auto shut-off, burn protection (steam wand) |
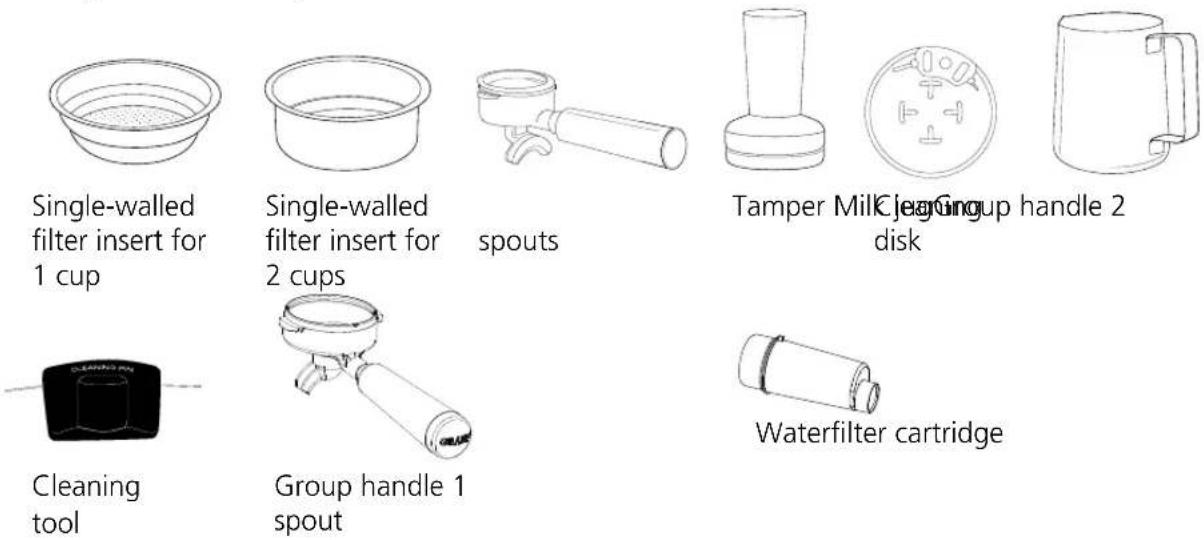
| Included accessories | 2 portafilters (1 cup, 2 cups), tamper, blind filter, cleaning tool, anti-scale water filter cartridge |
| Espresso specialties | Ristretto, Lungo, Doppio, Macchiato, Cappuccino, Caffé Latte, Latte Macchiato, Americano, Corretto |
| Warranty | 2 years manufacturer's warranty |
| Maintenance | Cleaning the brewing unit (backflush), regular descaling |
Frequently Asked Questions - Contessa GRAEF
User questions about Contessa GRAEF
0 question about this device. Answer the ones you know or ask your own.
Ask a new question about this device
Download the instructions for your Coffee machine in PDF format for free! Find your manual Contessa - GRAEF and take your electronic device back in hand. On this page are published all the documents necessary for the use of your device. Contessa by GRAEF.
USER MANUAL Contessa GRAEF
Operating instruction
Mode d'emploi
Gebruiksaanwijzing
Instrukcja obslugi
| Espresso specialities 45 | |
| Product description 46 | |
| Scope of delivery 46 | |
| Safety instructions 47 | |
| Unpacking | 50 |
| Requirements on the installation location 50 | |
| Control panel 51 | |
| LCD-Display | 51 |
| Preheating | 51 |
| Check | 51 |
| Graef | 51 |
| CO Clock | 51 |
| CO Temp | 51 |
| ST Duty | 52 |
| Programming of pre-infusion (pre-brewing) | 52 |
| Clean | 52 |
| Reset | 52 |
| DE Lang | 52 |
| ST Clean | 52 |
| HW Clean | 52 |
| Descaling reminder 53 | |
| Pressure gauge 53 | |
| Under-extraction | 53 |
| Optimal range | 53 |
| Over-extraction | 53 |
| Prior to first use 53 | |
| Initial operation 54 | |
| Venting | 54 |
| Preparation | 55 |
Espresso preparation 56
Cup 56
Volume setting cup. 57
Cups 58
Volume setting cups 59
Operating lever 60
Automatic switching off 61
Making milk froth 61
Tips for making milk froth 62
Hot water withdrawal 62
Dscaling 63
D escaling Steam wand 65
Dscaling hot-water wand 66
Replace water filter cartridge 67
Cleaning 68
Cleaning of the brewing group (backflush) 68
External cleaning 69
Cleaning tool. 70
Programming 70
Coffee temperature 70
Steam flow rate 71
Pre-infusion 72
Dscaling reminder. 72
Factory setting. 73
Technical data 73
After-sales service 73
Troubleshooting 74
Disposal 78
2 year warranty 78
Espresso specialities
Espresso is the basis for a lot of different espresso variants. We would like to introduce you to the best known ones.

Ristretto
- The same amount of coffee as with an espresso, but half the quantity of water.

Lungo
- The same amount of coffee as with an espresso, but double quantity of water.

Corretto
- Espresso lengthened with a dash of alcohol, e.g. Grappa, Amaretto, Brandy etc.

Doppio
- Double espresso with double quantity of coffee and water.

Macchiato
- An espresso with a milk froth dome.
Cappuccino
- An espresso with frothy milk.
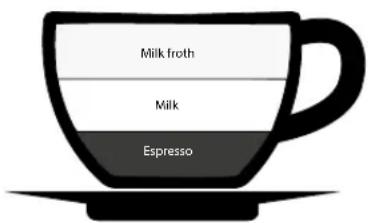
Caffé Latte
- A double espresso with hot milk.
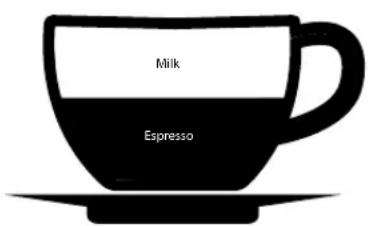
Caffé Americano
- An espresso filled up with the same or double quantity of water.

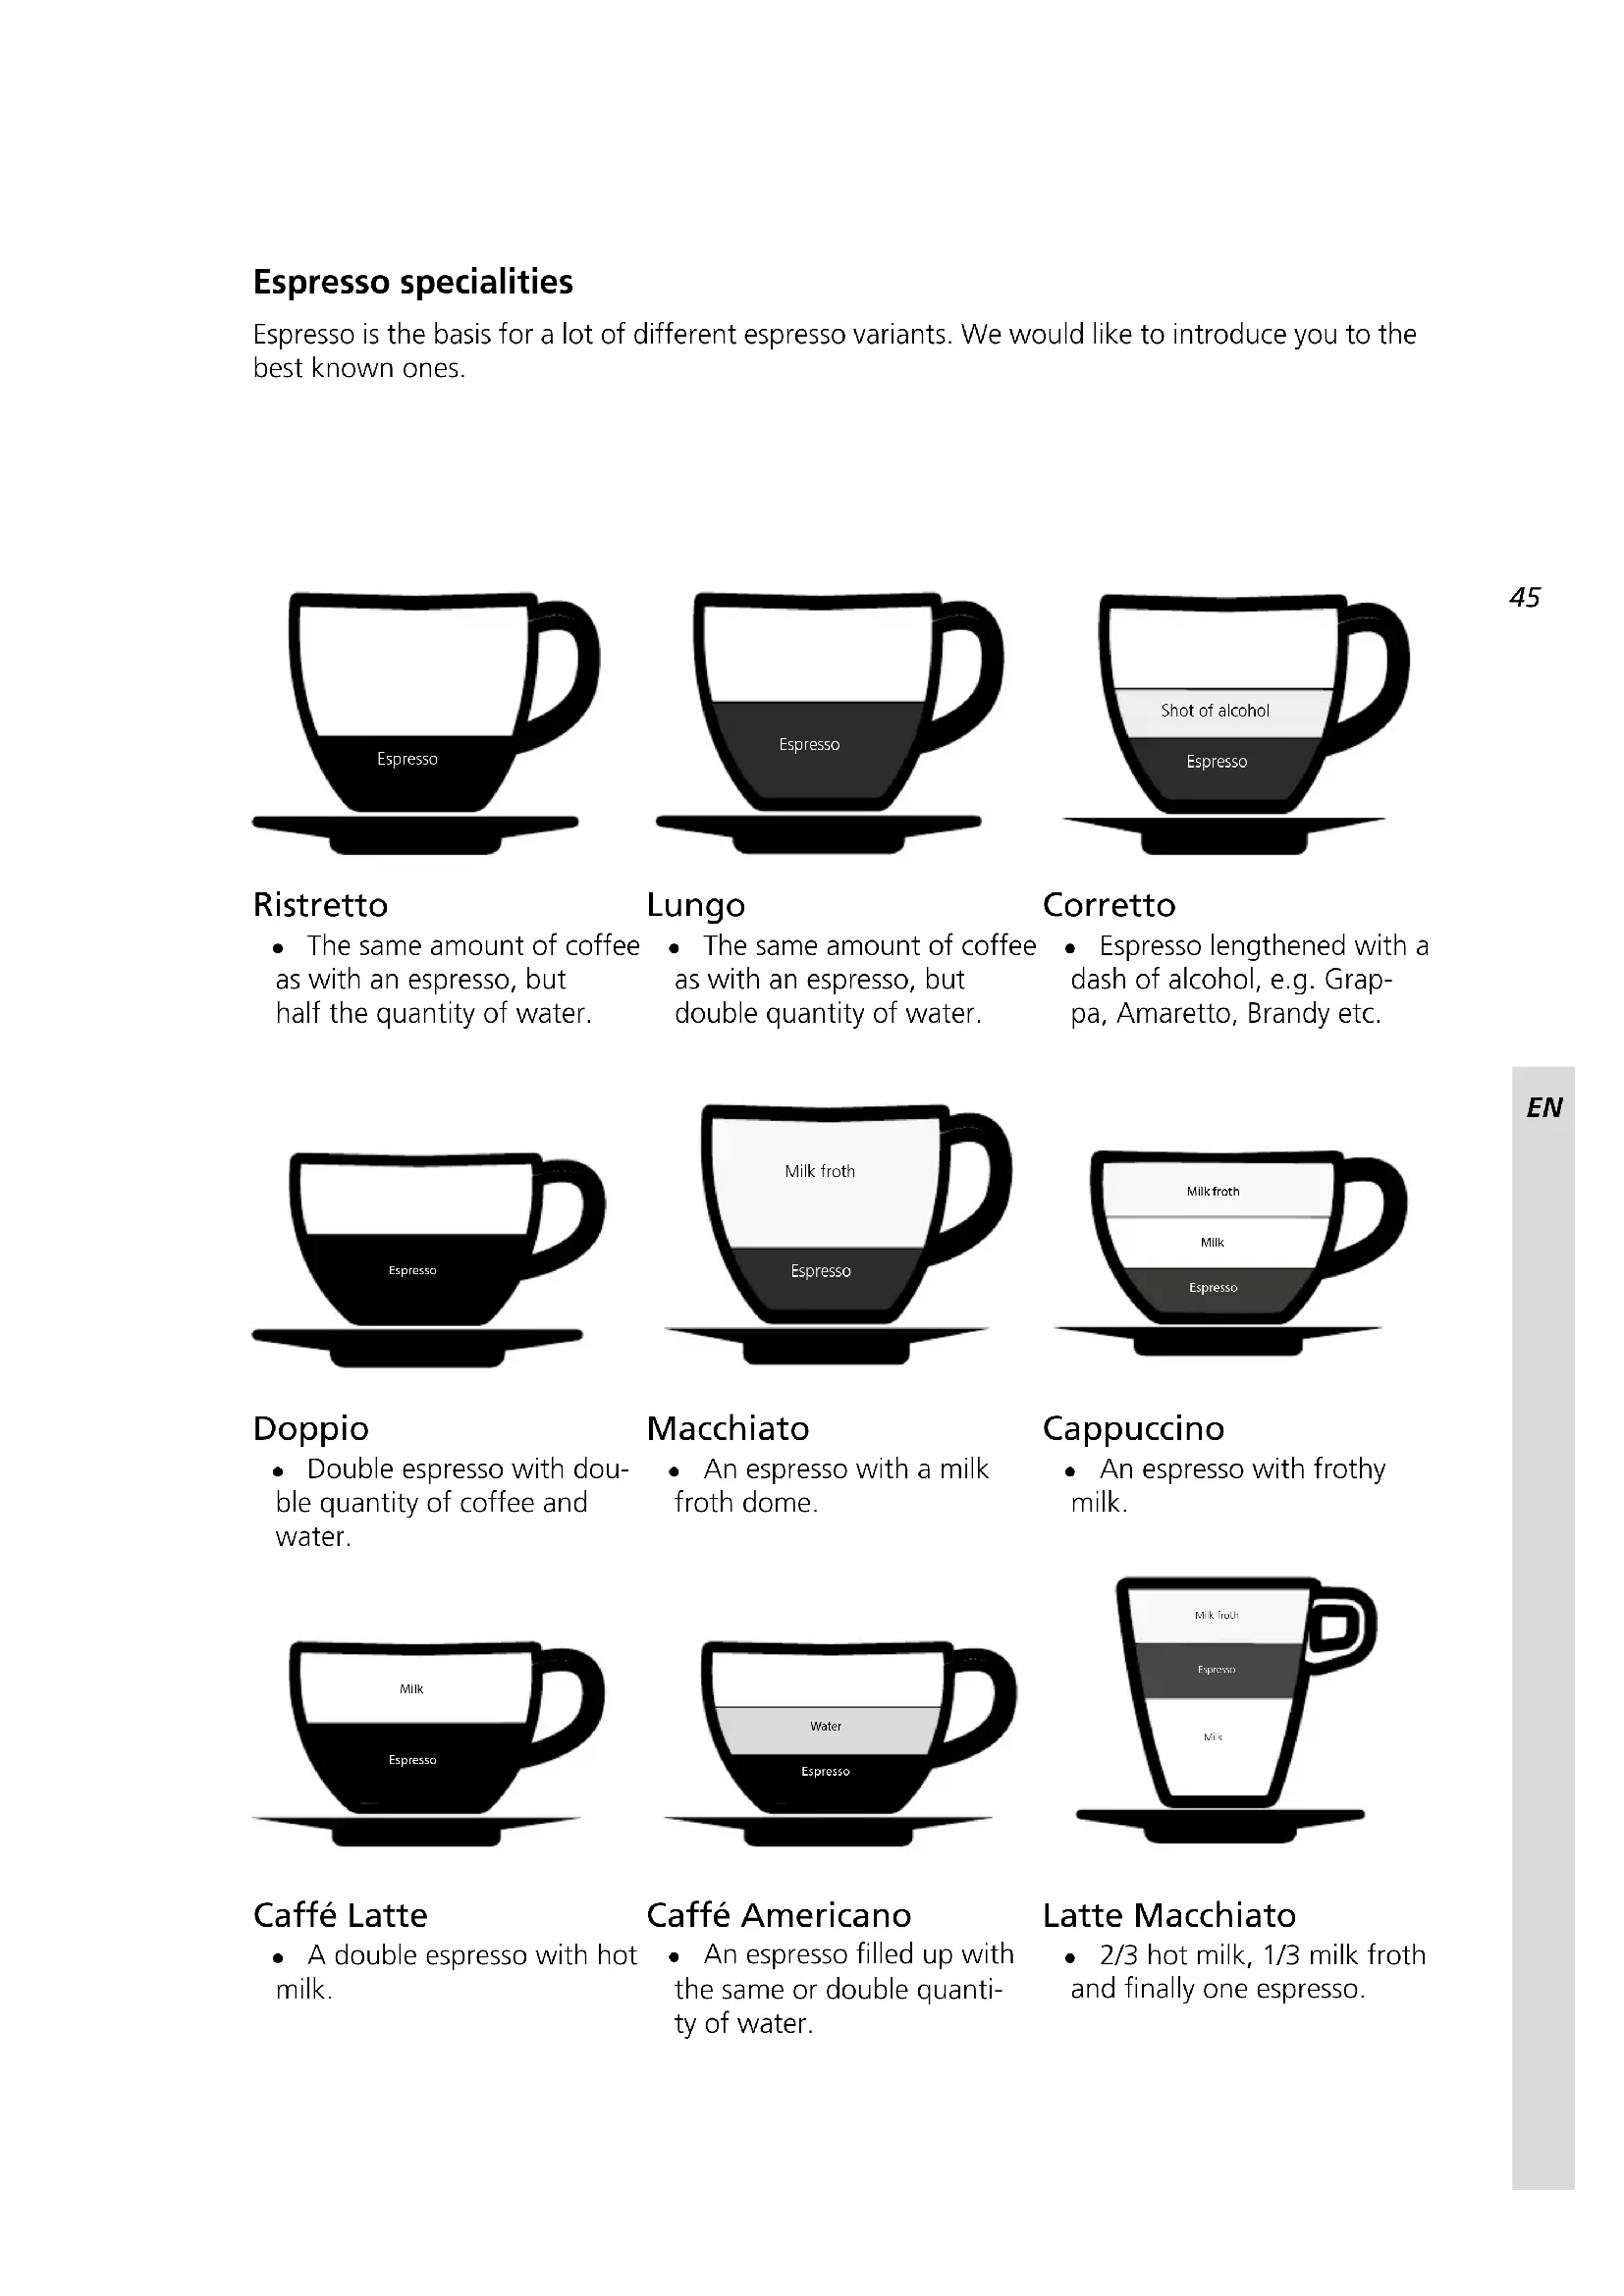
Latte Macchiato
2/3 hot milk, 1/3 milk froth and finally one espresso.
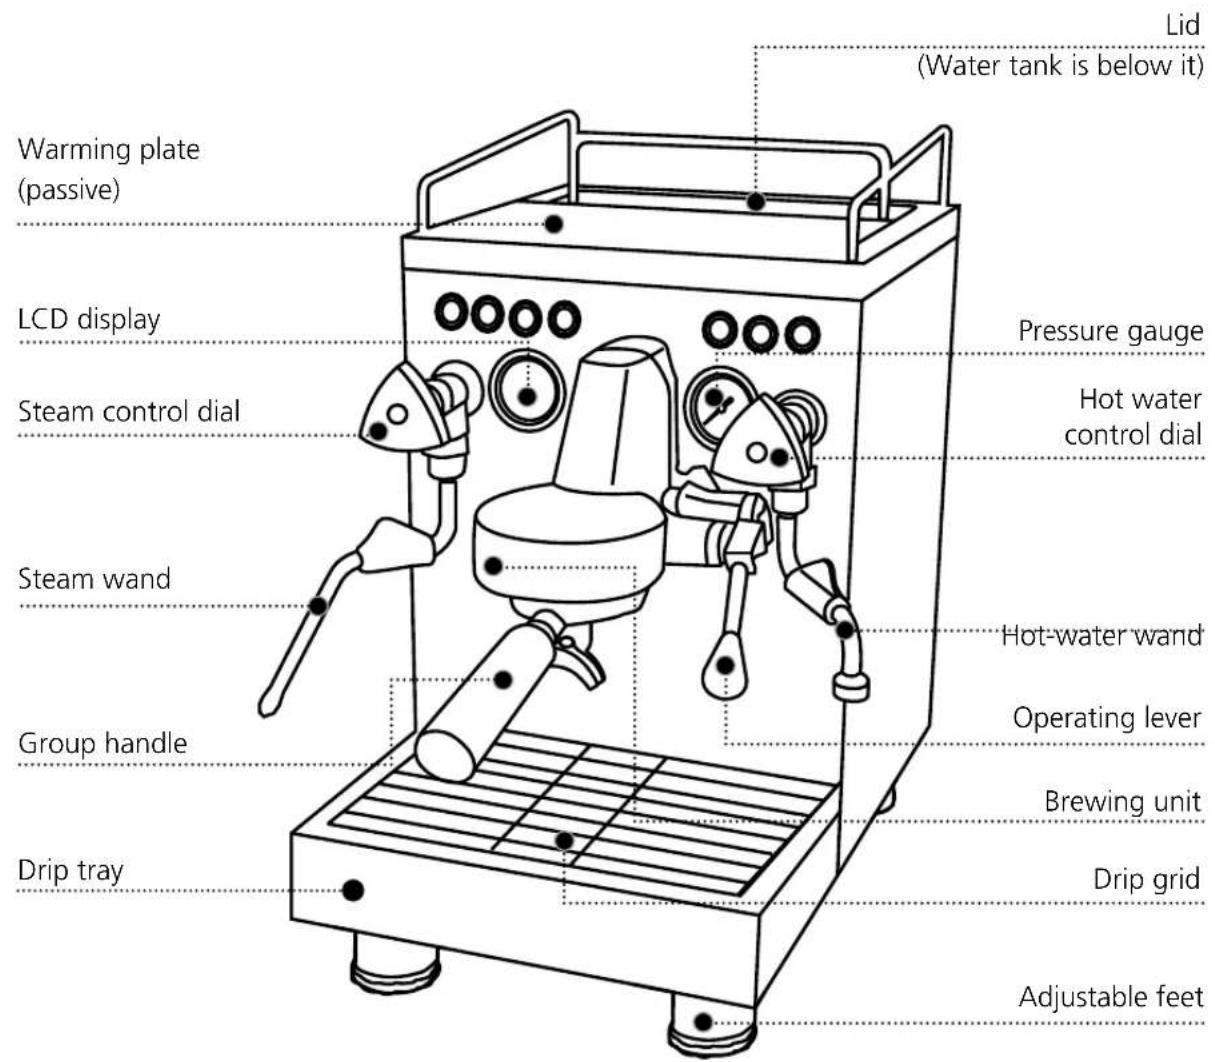
Product description
Scope of delivery
Safety instructions
This device conforms to the relevant safety regulations. However, incorrect handling may lead to personal injury and material damage.
For safe handling of the device, please observe the following safety instructions:
- Before using this device for the first time, check it for visible outer damages on the housing, connection cable and plug. Do not operate any defective device.
- Repairs of the device, e.g. replacing a damaged supply cable, must be carried out exclusively by a skilled person or by the Graef customer service. Incorrect repairs may cause considerable hazards for the user. In addition, in case of non-observation, the warranty claims will become void.
- Defective parts must be replaced by original spare parts only. It is only with these parts that the safety requirements are met.
- This appliance can also be used by children from 8 years age as well as by persons with limited physical, sensory or mental ability or with a lack of experience and/or knowledge if they are supervised or have been trained in using the appliance and have understood the dangers which may result from it. Cleaning and user maintenance must not be carried out by children, unless they are 8 years or older and are supervised.
- This appliance and its supply cable have to be kept away from children under the age of 8 years, and it has to be ensured that they do not play with the appliance.
- The unit is not intended to be used with an external timer or a separate remove control.
- This unit is suitable for use in the household and for similar applications, for example in workers kitchens, in shops and offices, in agricultural farms, in hotels, motels and other bed and breakfast guest houses and institutions.
-
Always pull the supply cord from the electric socket using the connector plug, not on the supply cord itself.
-
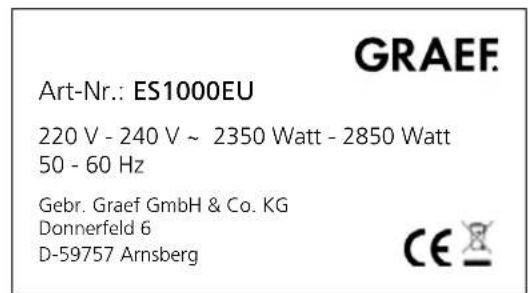
Prior to connecting the unit, compare the details regarding voltage and frequency on the name plate with those of your electrical network. These details must correspond so that no damages occur to the unit.
- Do not use the unit if the mains cable or plug are damaged.
- Prior to using the appliance any further, have a new connection cable installed by the Graef customer service or by an authorised skilled person.
- Do not open the housing under any circumstances. If live connections are touched or the electrical and mechanical construction are modified, there is the danger of electric shock.
-
Never touch live parts. This might cause an electric shock or, in the worst case, lead to death.
-
Never carry the unit by its power cable.
- Never transport the appliance while it is in operation.
-
Never touch the plug with moist hands.
-
Packaging materials must not be used for playing. There is a danger of suffocation.
- Observe the notes on the requirements regarding the installation location and the electrical connection of the unit in order to avoid personal and material damages.
- While water is running through the machine, never remove the group handle filled with coffee grounds, because it is under pressure.
- Use the appliance only if the drip tray and collection tray are properly positioned.
-
Do not misuse the espresso machine other than it's intended use in order to avoid potential injury.
-
Heating element surface is subject to residual heat after use.
-
Before preparing espresso, check to see that the group handle is tightened firmly.
- Pull the mains plug before each cleaning process.
-
Before carrying out external cleaning, allow the appliance to cool.
-
For external cleaning, do not use any aggressive or abrasive detergents and solving agents.
- Do not scratch off stubborn soiling with hard objects.
- Do not put the unit in the dishwasher and do not use it under running water.
- Do not immerse the unit in water.
- To froth milk, only use the attached milk jug or a larger vessel. Do not use a cup. Excessive foaming milk may lead to burns.
- Never direct the steam wand to yourself or other persons. DANGER OF BURNS!
- Always use the handle to move the steam wand or the hot-water wand. After use, do not touch the pipe of the wands. It becomes very hot.
- The surfaces are liable to get hot during use.
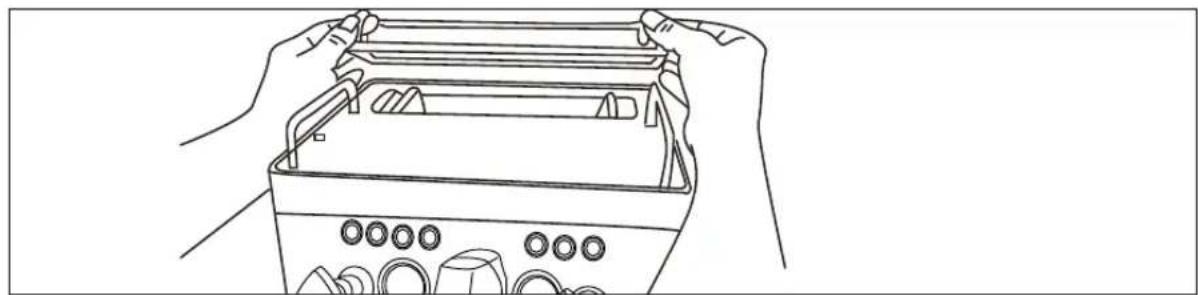
Unpacking
When unpacking the unit, proceed as follows:
Pull the unit out of the cardboard box.
- Remove all packaging and possible stickers on the unit (do not remove the name plate).
Requirements on the installation location
For safe and fault-free operation of the unit, the following has to be observed during installation:
- Use a firm, even, horizontal, non-slip and heat resistant surface with a sufficient load capacity.
- Select an installation location in such a way that children cannot reach any hot surfaces of the unit.
-
The unit is not designed for installation in a wall or a built-in cupboard.
-
Do not set up the unit in a hot, wet or moist environment.
-
The power outlet must be easily accessible so that the power cable can be quickly removed in case of emergency.
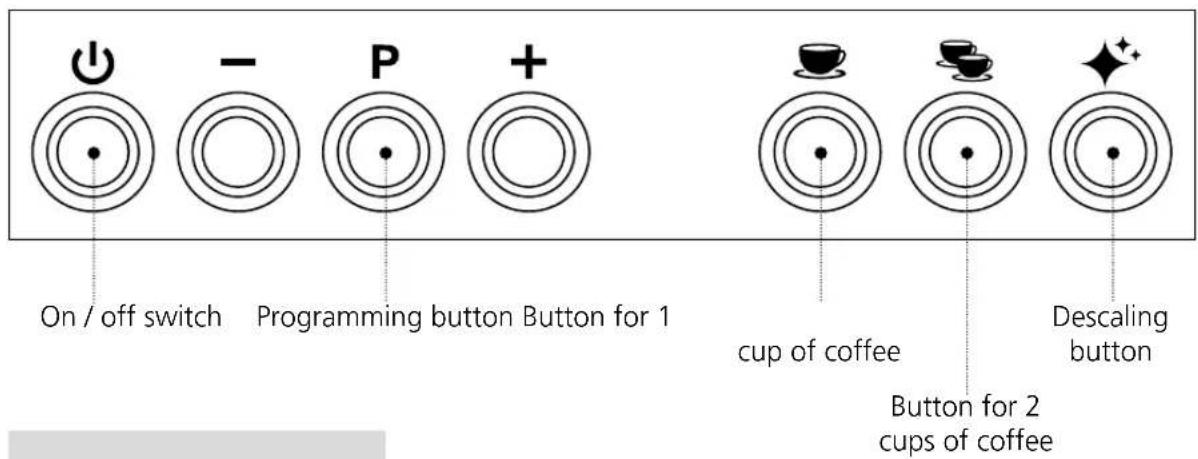
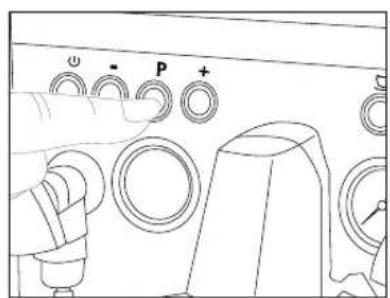
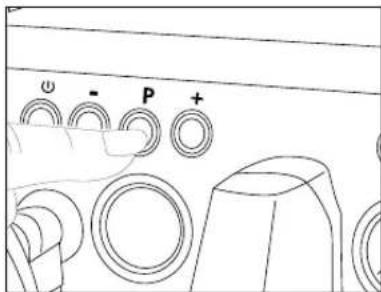
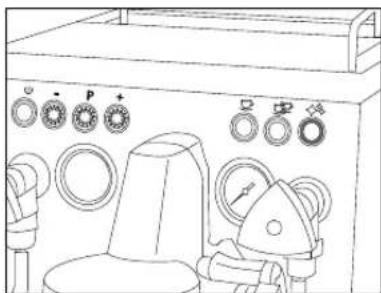
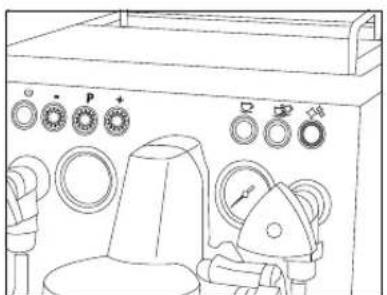
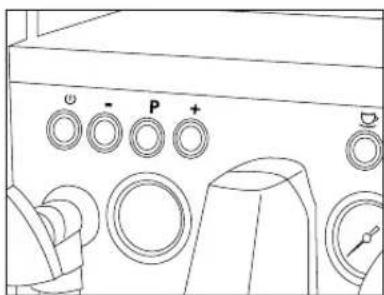
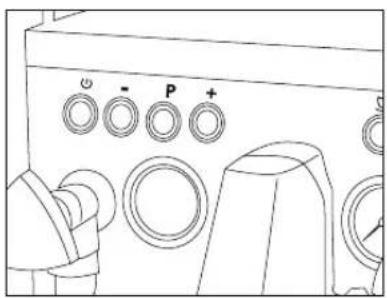
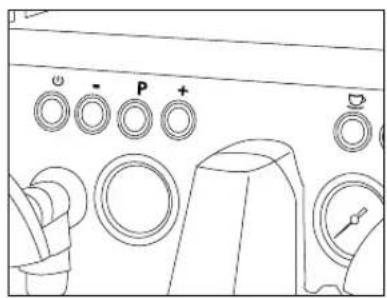
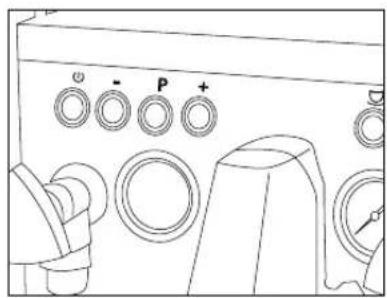
Control panel
LCD-Display
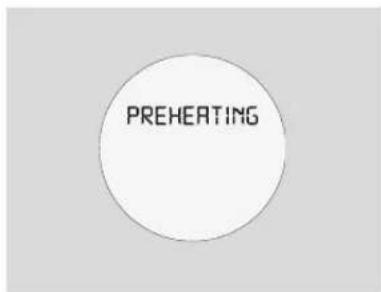
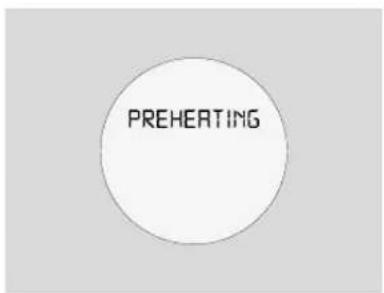
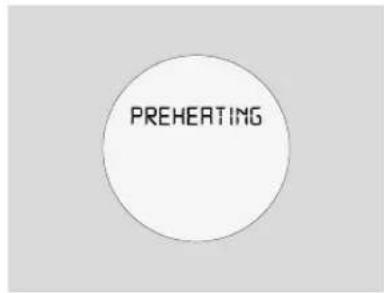
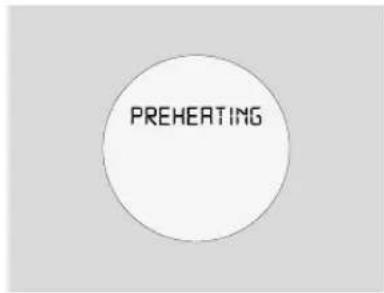
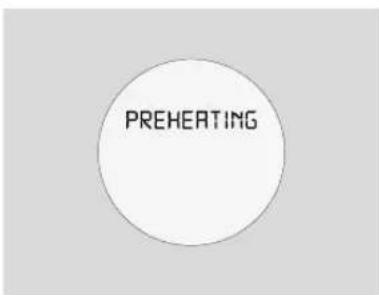
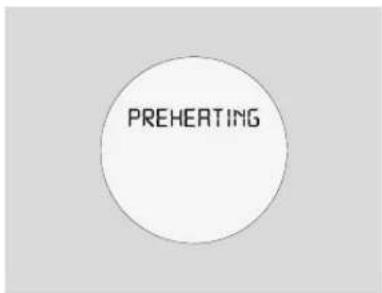
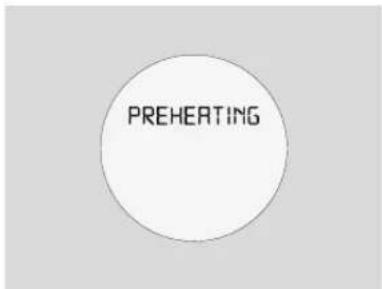
Preheating
The unit is heating up with the On/Off switch flashing.
Check
This means that either the steam regulator or the hot water regulator is not closed or the operating lever is not in position "OFF".
GRAEF
The unit is now ready for operation.
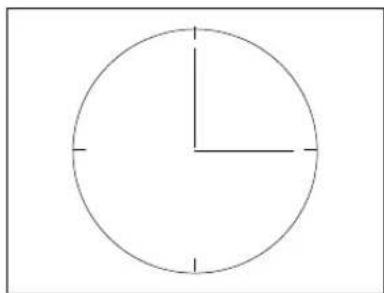
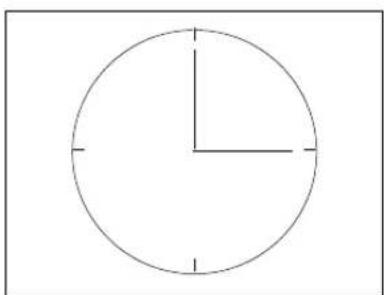
CO Clock
This mode counts the brewing time.
No Water
A signal tone will sound if there is not enough water in the tank any more. Please fill in new water.
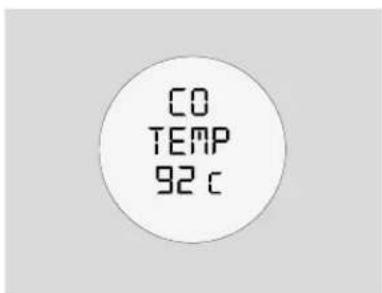
CO Temp
This is the programming function for the coffee temperature. You can choose a temperature between 86^ and 98^
PREHEATING
CHECK
GRAEF
C0 CLOCK 25S
NO WATER
COTEMP92c
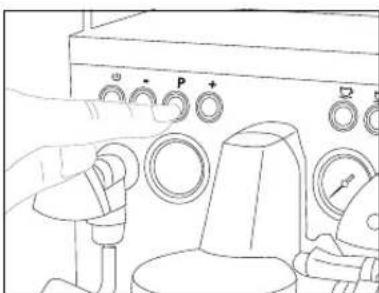
ST Duty
This is the programming function for the steam. You can select whether the steam shall be wetter or drier. You can select between 7 stages.
Programming of pre-infusion (pre-brewing):
The coffee powder is vaporised in the group handle thereby moistening the coffee ground. That way, the water can flow evenly through the coffee ground into the cup. You can select between 5 sequences. Using sequence P 0, you can switch off pre-infusion.
Clean
Here you can set the descending/cleaning reminder. You can select between 12 l, 25 l and 50 l.
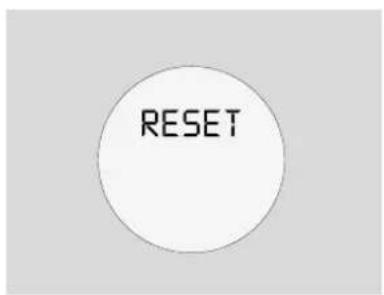
Reset
You can reset everything to the factory settings.
DE Lang
Here you can set the display language. DE for German or EN for English.
CO Clean
This is the descending programme for the brewing unit.
ST Clean
This is the descending programme for the steam wand.
HW Clean
This is the descaling programme for the hot-water wand.
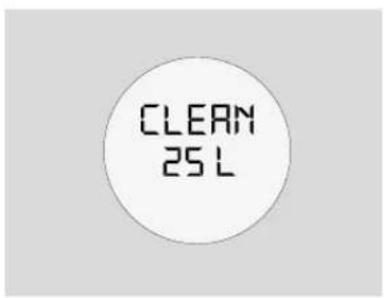
Descending reminder
The factory setting for the descending reminder is set to 25 I. If 25 I have been used, "CLEAN" will be shown at the Display. You can proceed, but "CLEAN" won't disappear until you carry out a complet descaling process. For this, please refer to Chapter "Descaling".
The number of litres can also be changed depending on the use and level of hardness of your water. You can set 12 l, 25 l and 50 l. Further information on this can be read under "Programming".
$$ 1 2 \mathrm {L} = (\text {W a t e r o v e r} 1 5 ^ {\circ} \mathrm {d H}) $$
$$ 2 5 \mathrm {L} = (\text {W a t e r} 7, 3 ^ {\circ} \mathrm {d H} \text {t i l l} 1 4 ^ {\circ} \mathrm {d H}) $$
$$ 5 0 \mathrm {L} = (\text {W a t e r u p t o} 7, 3 ^ {\circ} \mathrm {d H}) $$
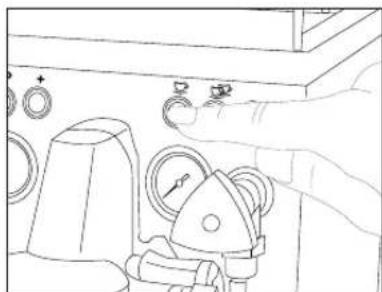
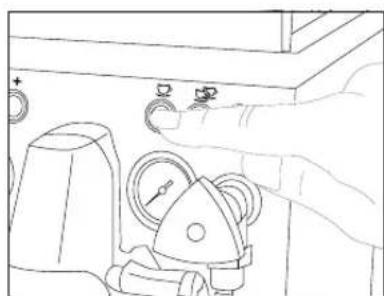
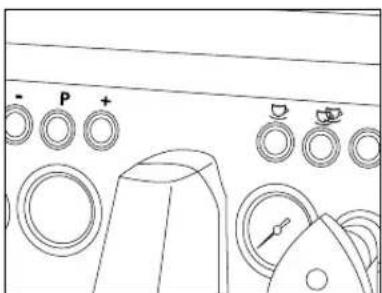
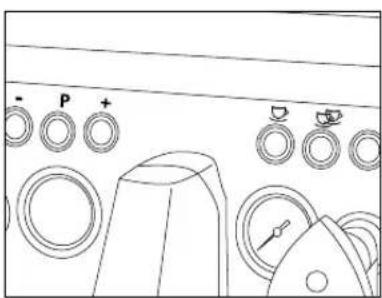
Pressure gauge
Under-extraction
In case of under-extraction you will get a very thin, flat and underdeveloped coffee. In this case, too little components have been dissolved out. The coffee is very light, the cream very thin, not available or the cream is very light with large bubbles.
- Brewing pressure below 8 bar
Grinding degree too coarse (falls rather quickly out of the outlet, with only a few lumps or small balls to be seen. The coffee grounds feel rather coarse-gained when rubbing them between your fingers)
Dosage is too low - Coffee grounds distributed too unevenly in the group handle
- Contact pressure too little
Pressure uneven
Water temperature too low - Coffee beans not fresh
- Coffee grounds not fresh (possibly pre-ground too long)
Optimal range
In case of optimal extraction, the espresso flows evenly, slowly and creamily "like honey" out of the outlet into the cup. The cream is dense and dark brown to golden brown.
- Brewing pressure between 8 and 12 bar
- Contact pressure
- Coffee grounds evenly distributed in the group handle
- Optimal grinding level, not too fine, not too coarse
- Optimal water temperature, not too cold, not too hot
Beans are fresh - Coffee grounds freshly ground
Over-extraction
In case of over-extraction, too many bitter substances are dissolved out of the coffee. The coffee is very dark or the cream is dark brown to reddish and has an unpleasant and bitter or even burnt taste. The outline on the cream is very uneven, with lighter spots being found between darker areas.
- Brewing pressure over 12 bar
- Grinding level too fine (falls rather slowly out of the outlet, partly larger chunks or lumps).
Dosage too high - Contact pressure too strong
Water temperature too high - Prior to preparation, coffee grounds clamped too long in the brewing unit
Prior to first use
Prior to first use, clean the group handle (not the unit) and the water tank under running water so that potential production residues are removed.
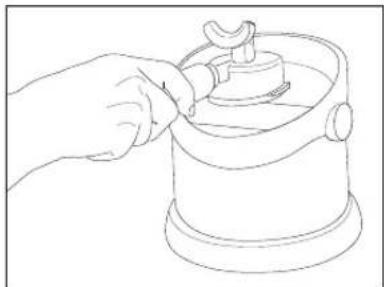
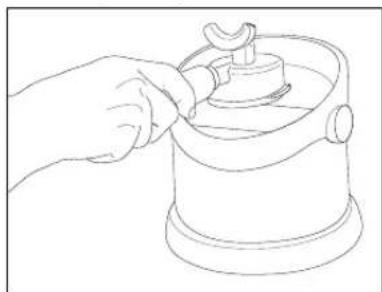
- Remove the water tank and clean it under running water. After that, re-insert the water tank.
Initial operation
Note: Vent the unit prior to initial commissioning or after you have not used the unit for a long period of time. Do not insert the group handle for venting.
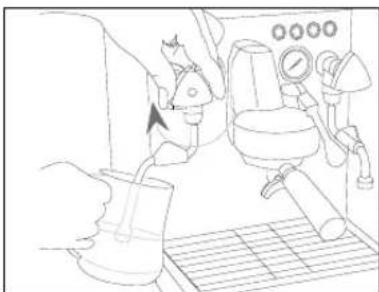
Venting
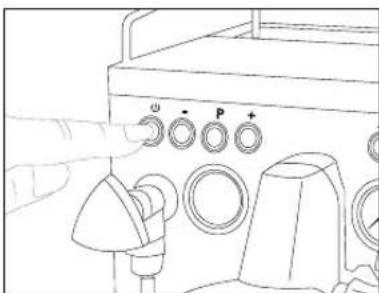
- Insert the plug into the socket.

- Fill water in the tank. 2.5 litres at the maximum.
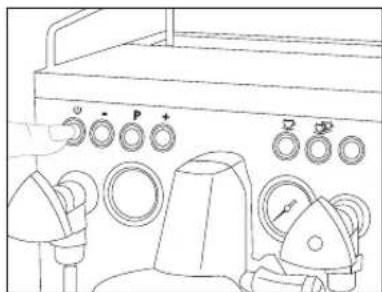
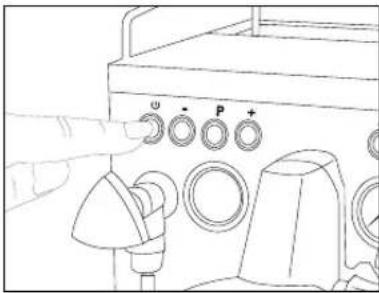
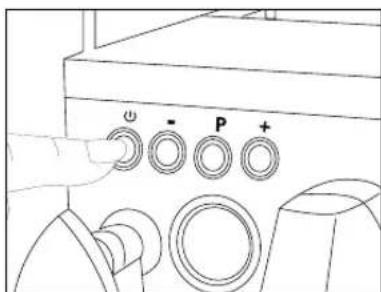
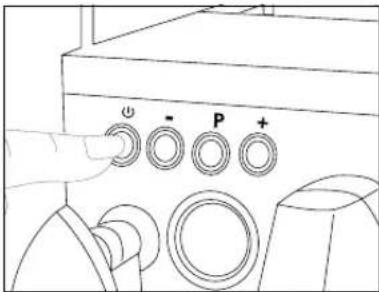
Press the ON/OFF-button
The unit is heating up.

The unit is ready for operation.
- Put one cup under the hot-water wand.
- Open the control dial.
- Let the air escape until a constant water jet runs through.
- Turn off the control dial.
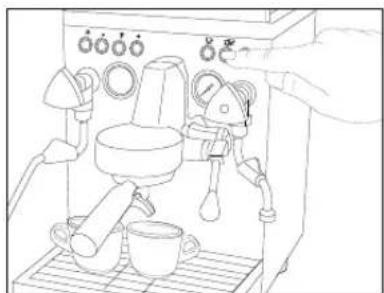
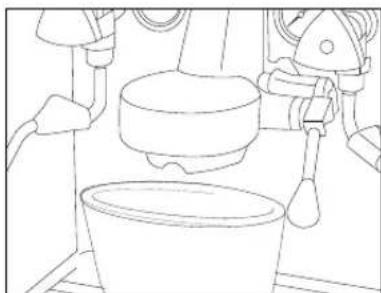
Preparation
Note: After switching the unit back on again, carry out an empty withdrawal (without coffee grounds) as described below in order to bring the system to temperature.
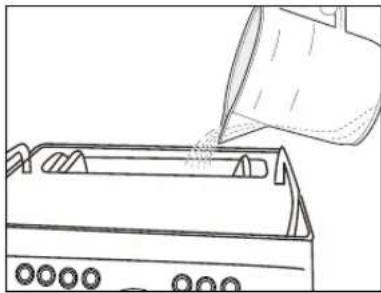
- Fill water in the tank. 2.5 litres at the maximum.
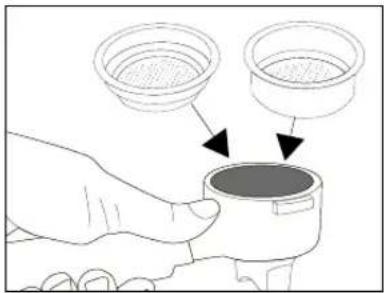
- Insert the desired filter insert.
- Put in the group handle without coffee grounds (from left to right).
- Switch the unit on.
The unit is heating up.

The unit is ready for operation.
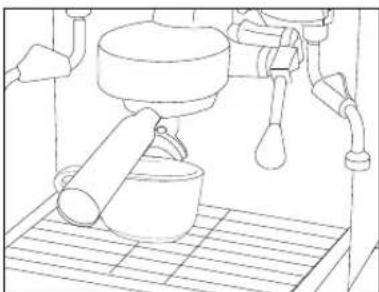
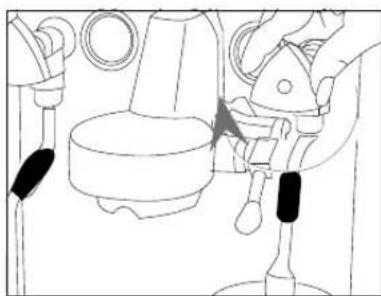
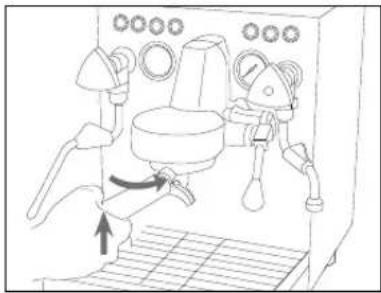
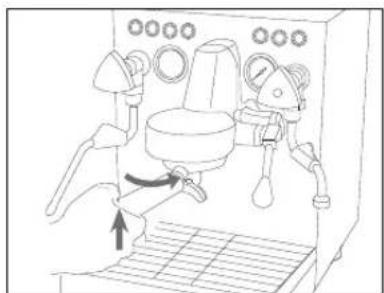
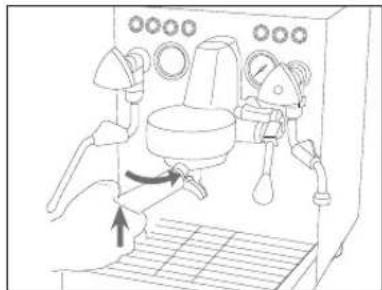
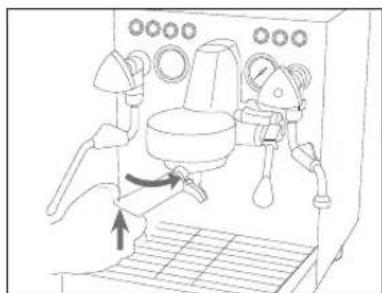
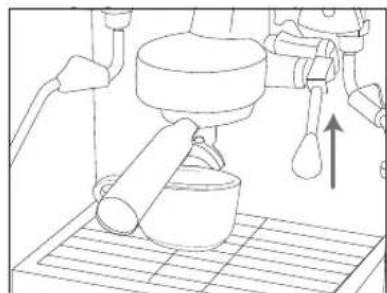
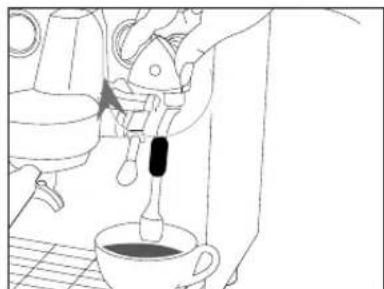
- Put a cup below the outlet.
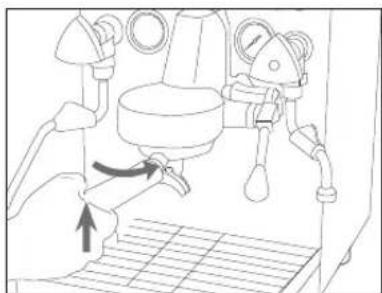
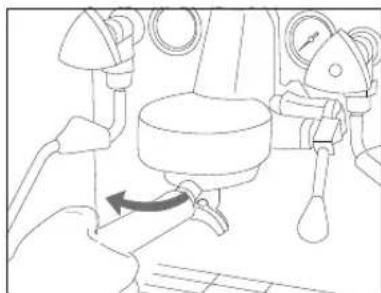
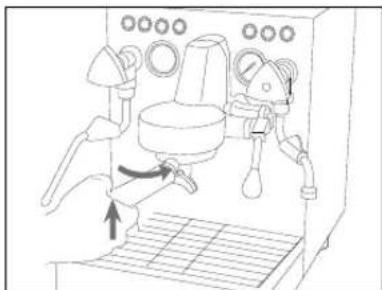
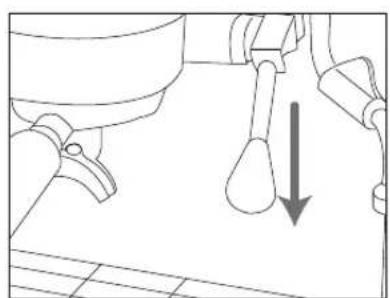
- Press the operating lever upward.
- Allow the cup to be filled half in order to bring the system to temperature.
- Then press the control lever downward.
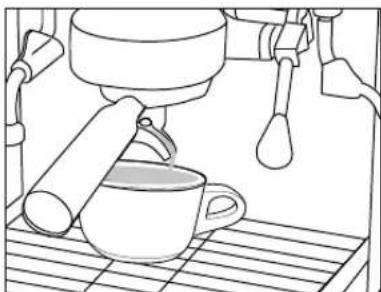
Espresso preparation

Cup
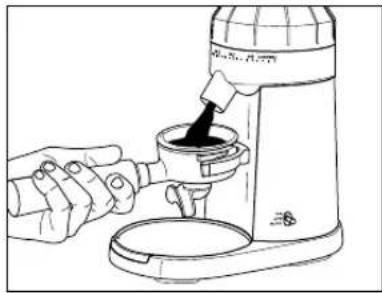
Note: See under preparation in order to warm up the group handle, system and cups. After that, start preparing espresso. Insert the filter insert for 1 cup.
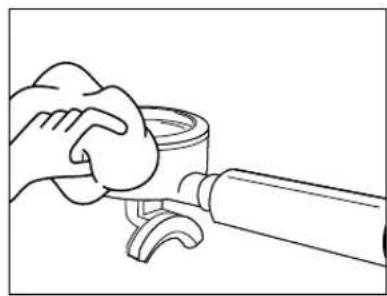
- Dry the group handle after preparation.

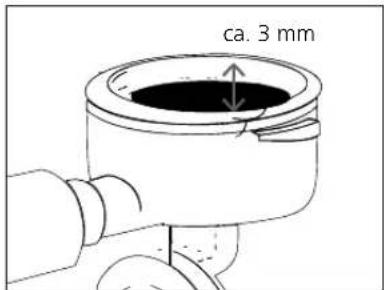
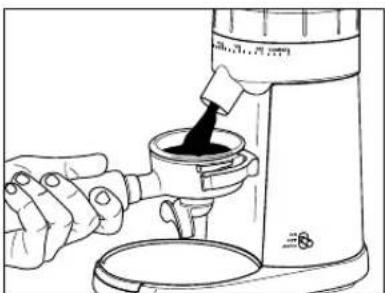
Grind the coffee grounds in the group handle (until the filter is full).

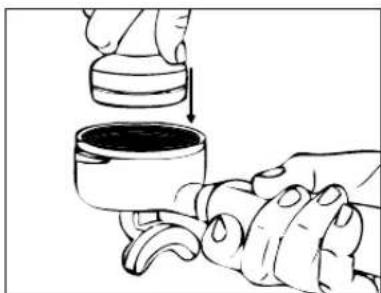
- Firmly press on the coffee grounds using the enclosed tamper.

- The distance between the upper edge and the coffee grounds should be approx. 3mm .
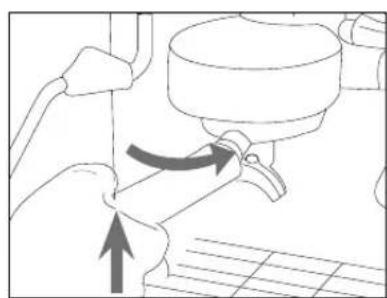
- Clamp in the group handle.
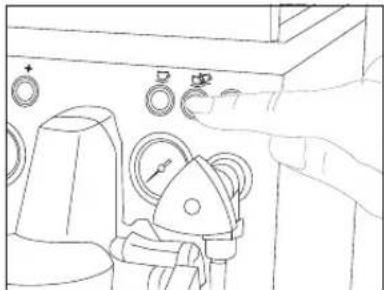
- Put 1 cup below the outlet.
Press the button.
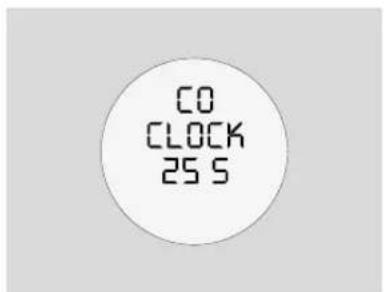
The cycle time is shown. (example 25 seconds)
After finishing the process, remove the group handle.
- Remove the coffee grounds into a used coffee tray (not included in the scope of delivery).
Volume setting

You can change the volume for 1 cup according to your wishes. (The LCD display shows the cycle time, but the volume is determined by a flow meter.)

- Switch the unit or
The unit is heating up.
The unit is ready for operation.

Grind the coffee grounds in the group handle (until the filter is full).
- Firmly press on the coffee grounds using the enclosed tamper.
- Clamp in the group handle.

- Put 1 cup below the outlet.
- Press the button for approx. 3 seconds.
- When the desired volume has been achieved, press the button again to store the setting.

Cups
Note: See under preparation in order to warm up the group handle, system and cups. After that, start preparing espresso. Insert the filter insert for 2 cups.
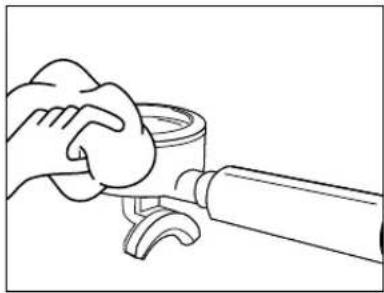
- Dry the group handle after preparation.
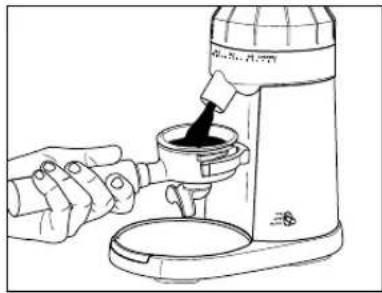
Grind the coffee grounds in the group handle (until the filter is full).
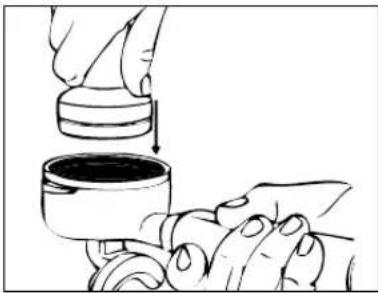
- Firmly press on the coffee grounds using the enclosed tamper.
The distance between the upper edge and the coffee grounds should be approx. 3mm
- Clamp in the group handle.
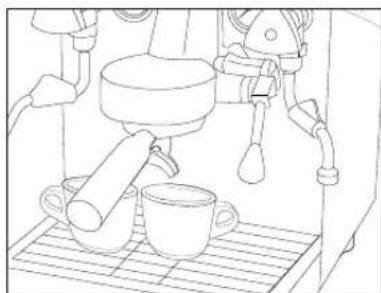
- Put 2 cups below the outlet.
Press the button.

The cycle time is shown. (25 seconds; serves as an example only)
After finishing the process, remove the group handle.
- Remove the coffee grounds into a used coffee tray (not included in the scope of delivery).
Volume setting
You can change the volume for 2 cups according to your wishes. (The LCD display shows the cycle time, but the volume is determined by a flow meter.)
- Switch the unit of.
The unit is heating up.
The unit is ready for operation.
Grind the coffee grounds in the group handle (until the filter is full).

- Firmly press on the coffee grounds using the enclosed tamper.

- Clamp in the group handle.

- Put 2 cups below the outlet.
Press the button for approx. 3 seconds.
- When the desired volume has been achieved, press the button again to store the setting.
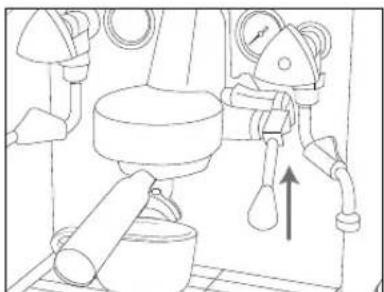
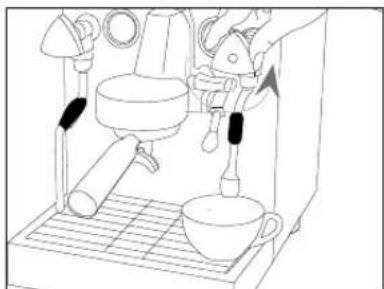
Operating lever
Note: See under preparation in order to warm up the group handle, system and cups. After that, start preparing espresso. You can determine the amount of coffee by the operating lever, regardless of the present amount for 1 and 2 cups.

- Dry the group handle after preparation.
Grind the coffee grounds in the group handle (until the filter is full).
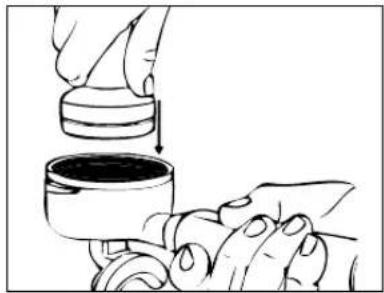
- Firmly press on the coffee grounds using the enclosed tamper.
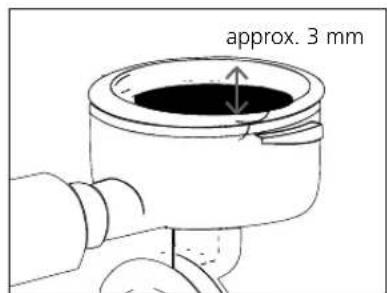
- The distance between the upper edge and the coffee grounds should be approx. 3mm .
- Clamp in the group handle.
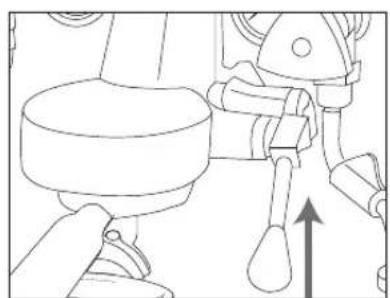
- Put 1 or 2 cups below the outlet.
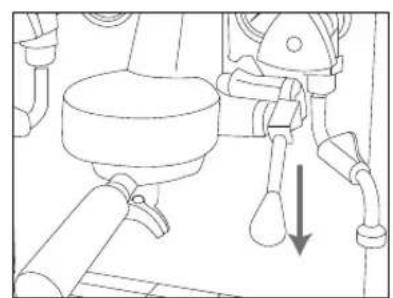
- Press the operating lever upward.

The cycle time is shown. (25 seconds; serves as an example only)
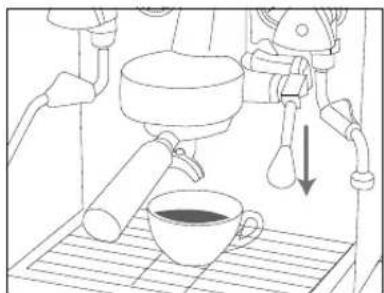
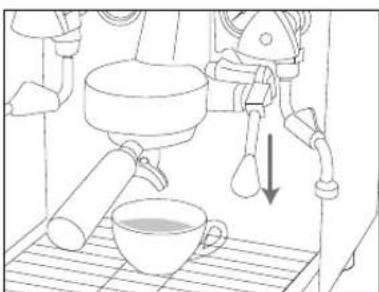
- If the desired quantity is achieve, press the operating lever downward again.
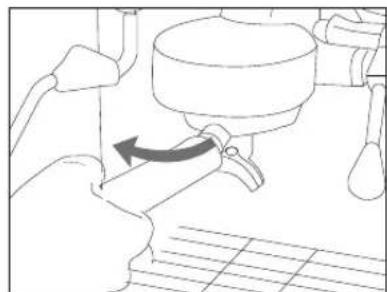
After finishing the process, remove the group handle.
- Remove the coffee grounds into a used coffee tray (not included in the scope of delivery).
Automatic switching off
If the unit is not used for about 30 minutes, it will automatically switch off in order to save energy. (Regulation of the EU commission).
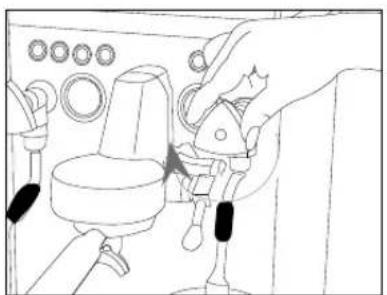
Making milk froth
If the unit is switched off, switch it back on again
The unit is heating up.

The unit is ready for operation.
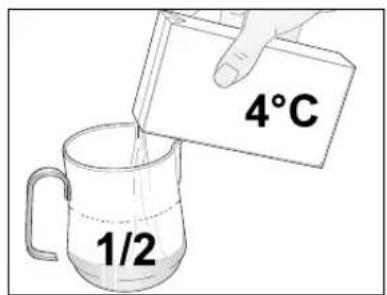
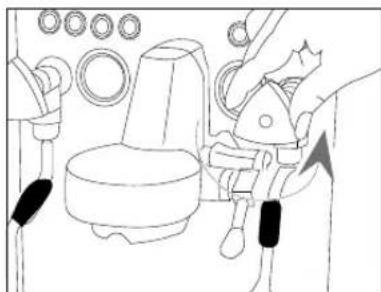
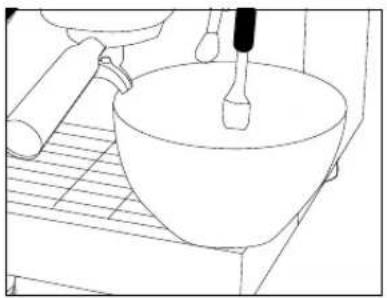
- Pour cold milk into the milk jug.
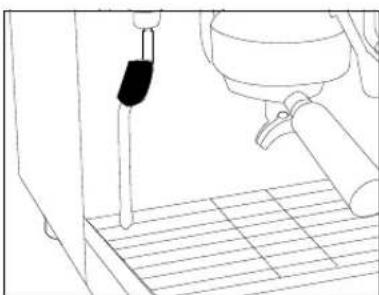
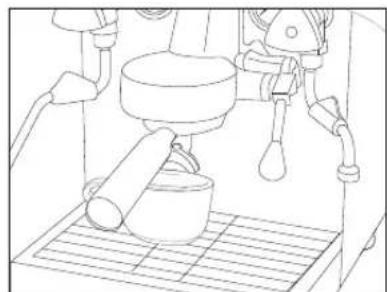
- Direct the steam wand toward the drain cover.
- Open the control dial and let the condensation water escape.
- Turn off the control dial again.

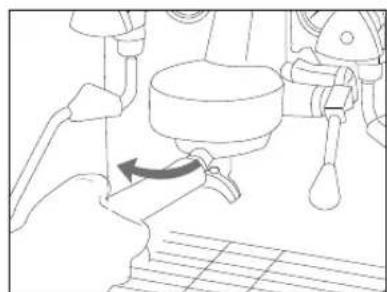
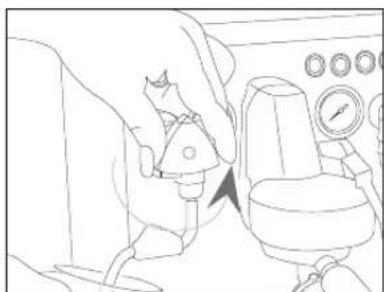
- Turn the steam wand outward.
- Open the control dial and hold the milk jug at a slight angle.
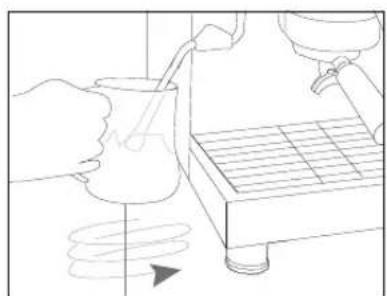
- Once the milk level is increasing, lower the milk jug.
After finishing the process, turn off the control dial.
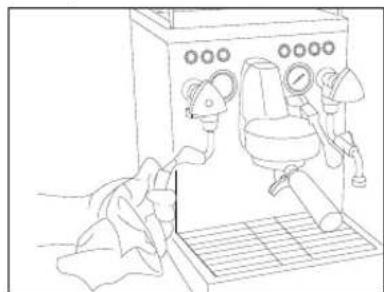
- Immediately after finishing the process, clean the steam wand using a damp cloth. However, allow the pipe to cool down for a moment because it becomes hot.
Please note:
If the milk is heated up to more than 70^ , the foam will simply collapse and the drink will later taste too sweet or even of burned milk.
Tips for making milk froth
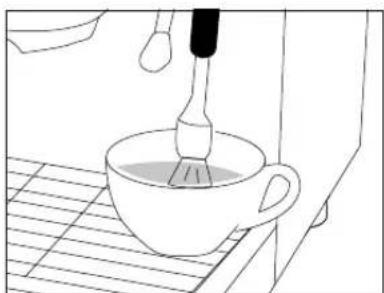
The phases "steep" and "roll"
- First the "steep phase": in order to fold in the air, put the steam wand very closely below the milk surface.
- You will have achieved the right position if you can hear kind of a "sip noise".
- This might suspend for a short time, because the surface of the milk is moving.
Now it is for the "roll phase". -
As soon as the volume of the milk increases, slide the steam wand into the milk.
-
When the pot becomes hot, turn off the control dial.
After making the milk froth, hit the pot briefly onto the table top in order to remove the last coarse air bubbles. -
Swivelling is also helpful to distribute the froth evenly.
-
Immediately after finishing the process, clean the steam wand using a damp cloth. However, allow the pipe to cool down for a moment because it becomes very hot.
- Clean the steam wand also using a short jet of steam so that the milk remnants are blown out of the steam wand.
To practise it, you can use the following method:
Pour cold water into the milk jug.
- Add a drop of detergent.
- Froth it up as described above.
If you froth it correctly, the mixture will look like real milk froth.
Please do not drink this mixture!!
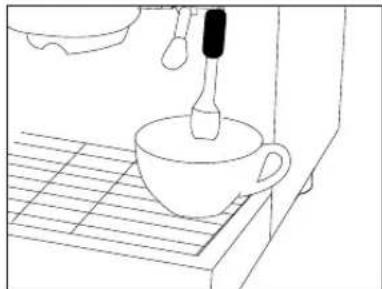
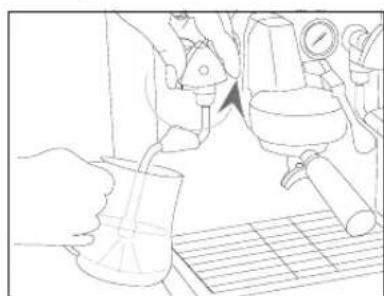
Hot water withdrawal
If the unit is switched off, switch it back on again

The unit is heating up.

The unit is ready for operation.
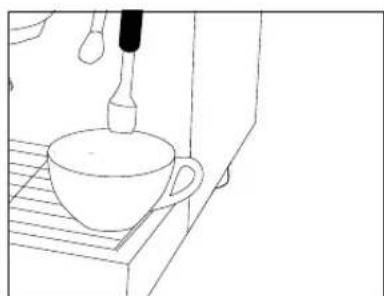
- Put one cup under the hot-water wand.
- Open the control dial.

Water is flowing into the cup.
After finishing the process, turn off the control dial.

Dscaling
Carry out descending regularly, at the latest when "CLEAN" shows up in the display. Now you have to descale all 3 cycles. Use only Graef descending tablets which are especially matched to our appliances. You can obtain them from our online shop on www.graef.de under article number 145618.
We do not assume any liability for lack of or insufficient descaling. In this case, the warranty will become null and void.
-
Remove the waterfilter cadrige.
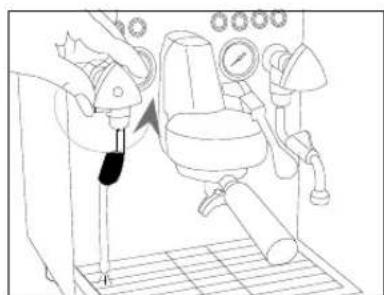
Take out the group handle, water tank and drip tray. -
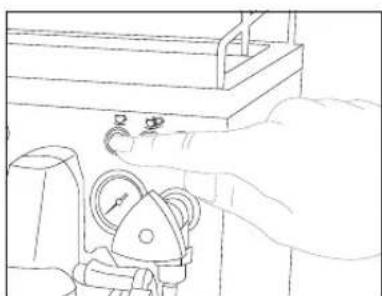
Put the machine on its back side.
- Unscrew the screw below the brewing unit.
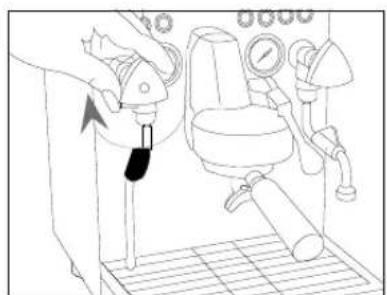
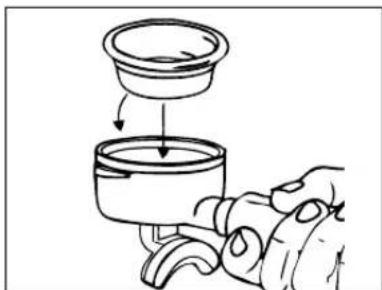
- Remove the 2 filters and the sealing ring.
-
Clean the filters and the sealing ring under running water.
-
Dry them up well and put them in a safe place together with the screw and the washer.
Take a small brush and clear the section in the brewing unit, and remove all old coffee remnants.
- Put the unit into an upright positon again.
- Re-insert the drip tray.
- Switch the unit or.

The unit is heating up.

The unit is ready for operation.
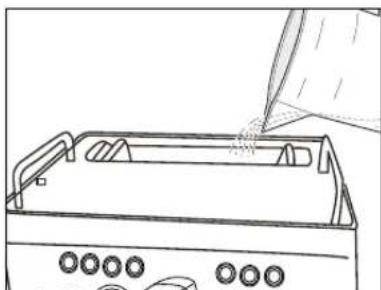
- Fill in 2.5 litres of fresh water.
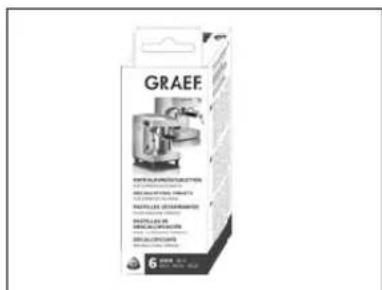
- Put six Graef descending tablets into the tank.

- Allow the tablet approx. 5 minutes to dissolve.
- Place a large container (min. 1 litre capacity) under the shower head.

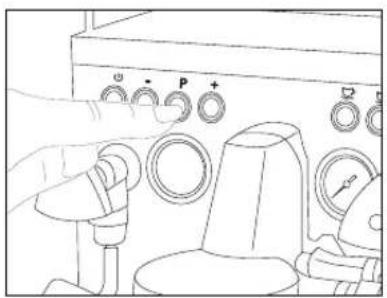
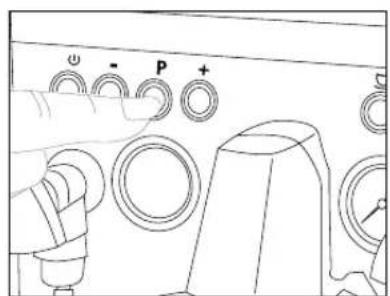
- Press the button once.

CO CLEAN" appears on the LCD display.
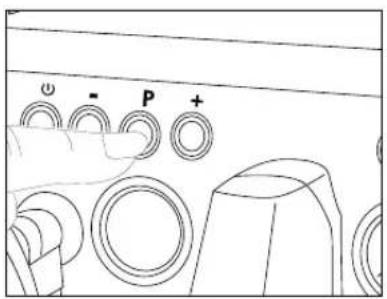
- Confirm using the "P" button.
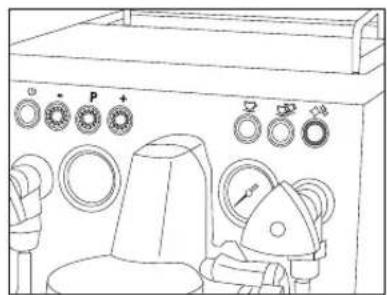
The buttons "P", "+" and "-" illuminate one after the other and the button lights red.
The process may last a few minutes.

The process is complete. Start with the decalcification of the steam wand.
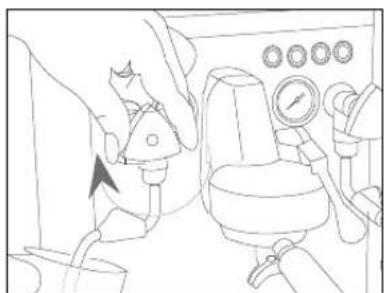
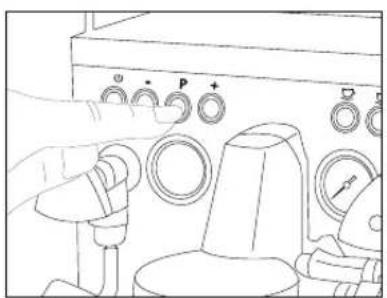
Dscaling Steam wand

- Place a large container (min. 1 litre capacity) under the steam wand.
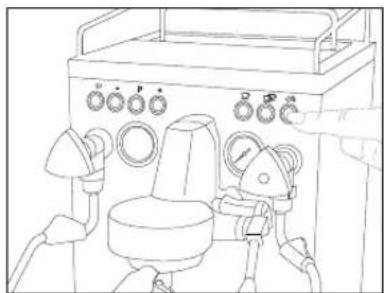
Press the button twice.
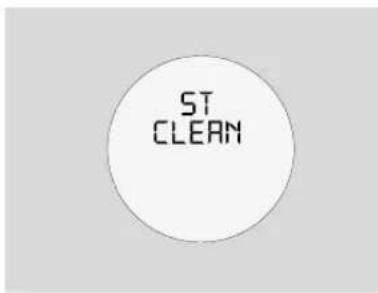
- "ST CLEAN" appears on the LCD display.
- Confirm using the „P“ button.

- "CHECK" appears on the display.
- Open the control dial.
The descending process starts.
The buttons "P", "+" and "-" illuminate one after the other and the button lights red.
The process may last a few minutes.

- "CHECK" appears on the display.
- Turn off the control dial.

The process is complete. Start with the decalcification of the hot-water wand.
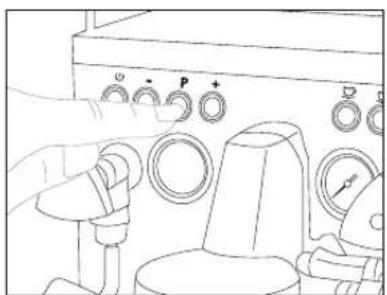
Dscaling hot-water wand
- Place a large container (min. 1 litre capacity) under the hot-water wand.
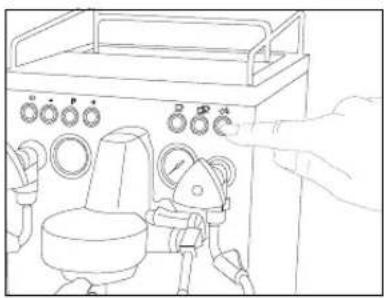
- Press th button three times.
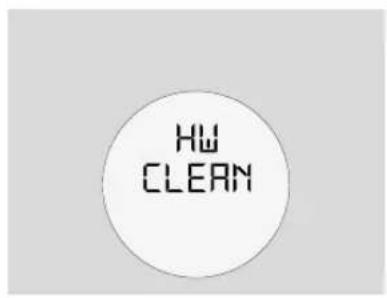
- "HW CLEAN" appears on the LCD display.
- Confirm using the "P" button.

- "CHECK" appears on the display.
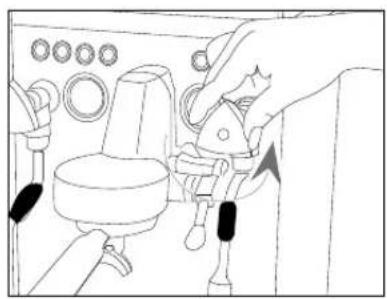
- Open control dial.
The descending process starts.
The buttons "P", "+" and "-" illuminate one after the other and the button lights red.
The process may last a few minutes.

- "CHECK" appears on the display.
- Turn off the control dial.

The process is complete.
Allow the machine to cool down.
Now replace the sealing ring and sieves in reverse order and tighten the sieves again.
Empty the water tank after descending and fill it with fresh water. Let water or steam run through all 3 circuits for approx. 40 seconds each. Afterwards you can use the device as usual.
Replace water filter cartridge
The water tank is equipped with a water filter cartridge. We recommend that you replace it after each descending process. Replacement water filter cartridges are available from our online shop www.graef.de under item no. 146242 or from your specialist dealer.
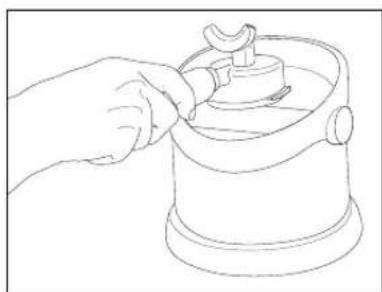
Remove the water tank
If there is still some water in the water tank, empty it.
Pull out the water filter cartridge.
Insert a new water filter cartridge.
Replace the water tank.
Cleaning
Cleaning of the brewing group (backflush)
We recommend to carry out a backflush once a week.
Only use Graef cleaning tablets which are especially matched to our appliances. You can obtain them from our online shop on www.graef.de under article number 145614.

- Switch the unit on.
The unit is heating up.

The unit is ready for operation.
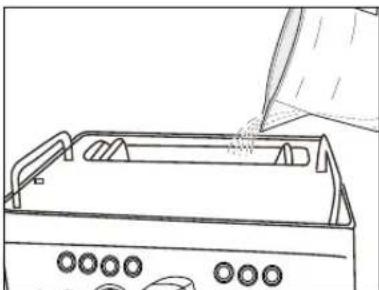
- Fill in 2.5 litres of fresh water.
- Insert the filter insert for 2 cups.
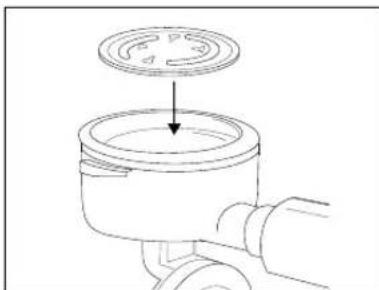
- Insert the cleaning disc.

- Put a Graef cleaning tablet into the group handle.
- Clamp in the group handle.

Make sure that the drip tray is inserted.
- Press the operating lever downward for 10 seconds.

- Press the operating lever upward again.

- Repeat this process 4 times.

- Remove the cleaning disc.
- Clamp in the group handle.
- Press the lever downward for about 10 seconds.
- Press the operating lever upward again.
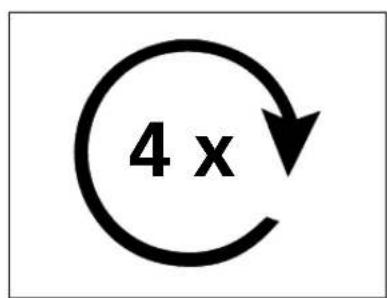
- Repeat this process 4 times.

Now you can proceed as usual with preparing espresso.
Note: Empty the drip tray and insert it back again.
External cleaning
- Use a soft and moist cloth to clean the outer surfaces of the unit. Use a mild detergent in case of heavy soiling.
Pull out the drip tray.
- Remove the drip tray grid.
Empty the drip tray.
Clean both under running water.
- Then re-insert the drip tray and grid.
Cleaning tool
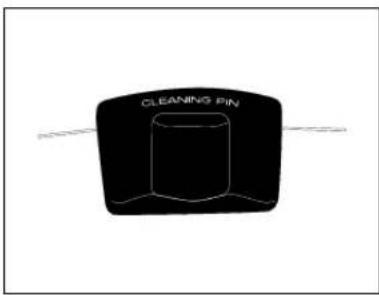
- Remove the cleaning tool.
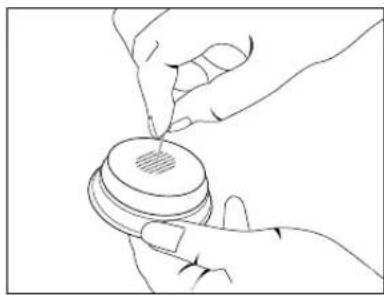
- Using the thinner end of the cleaning tool, clean the holes of the filter inserts.
Programming
It is possible for you to carry out various programming.
- Switch the unit of.
The unit is heating up.

The unit is ready for operation.
Coffee temperature
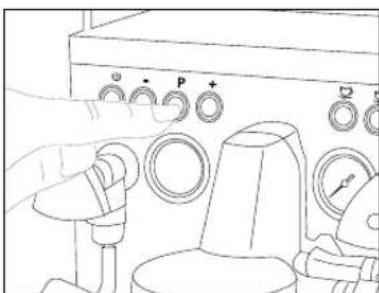
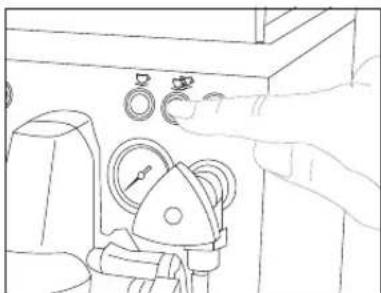
- Press the "P" button.
The factory setting is 92^
To change the temperature, press ^ 十 ^ 一 or"-
- Press the button "P" in order to confirm.
Steam flow rate
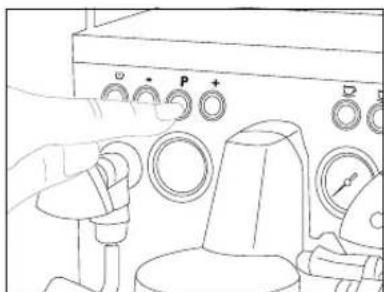
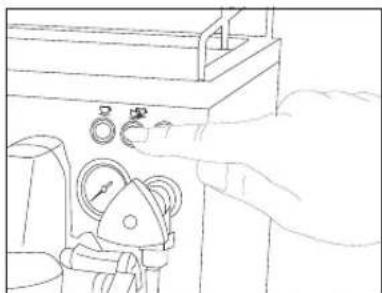
- Press the "P" button twice.
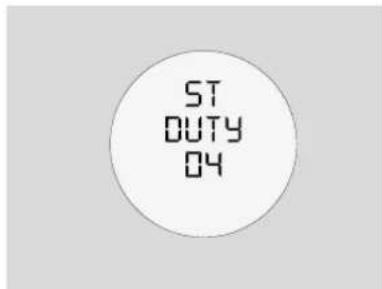
The factory setting is 04.
- 01 is the smallest flow rate (dry) and 07 is the highest flow rate (wet).
To change the flow rate, press ^ + ^ or "· "
- Press the button "P" in order to confirm.
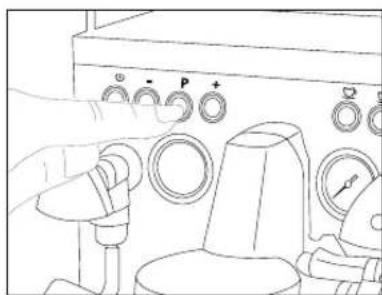
Pre-infusion
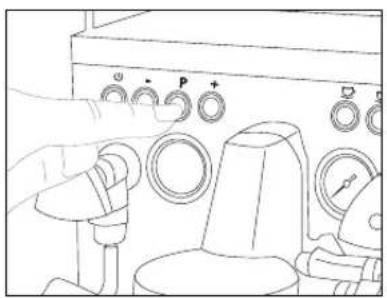
- Press the "P" button three times.
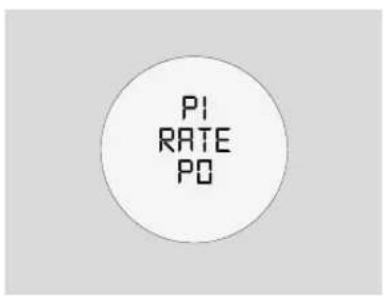
The factory setting is P1.

To change the frequency, press ^ + ^ or -
- Turn off the pre-infusion by setting P0.
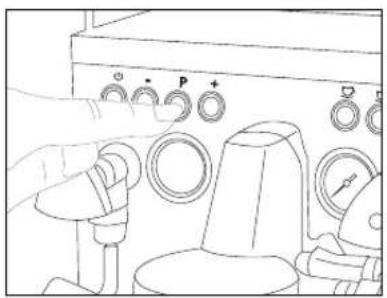
- Press the button "P" in order to confirm.
Dscaling reminder
- Press the "P" button four times.
The factory setting is 25 l.

To change the quantity of litres, press ^ + ^ or -
- Press the button "P" in order to confirm.
Factory setting
- Press the "P" button five times.
- Reset appears on the display.
- Press the "+" and "-" buttons at the same time. Hold them down for approx. 4 seconds.

Factory settings restored.
Technical data
After-sales service
If your unit is defective, please contact your specialist dealer or the Graef customer service on +49 2932-9703677 or write an e-mail to service@graef.de
Troubleshooting
| Error Possible cause Remedy | ||
| The unit is not operational. | The unit is not connected to the power supply. | Insert the plug into the socket. |
| Brewing unit filter clogged. | Clean the brewing unit filter. | |
| The unit is calcified. | Descale the unit. | |
| The control lamps are illumi-nated, but no water flows through. | The unit has run dry / has not been used for a long time and must be vented. | Open the steam wand in order to vent the unit. |
| Very loud pump noise. | The unit is calcified. | Descale the unit. |
| Espresso escapes from above the group handle. | The group handle is not inserted correctly. | Insert the group handle in such a way that it is tight. |
| Coffee grounds are still on the edge of the group handle. | Remove the coffee grounds. | |
| The brewing unit is dirty. | Clean the brewing unit. | |
| The brewing unit seal is dama-ged or worn. | Contact the customer service of Graef. | |
| No water/espresso escapes. | No water in the water tank. | Fill the water tank. |
| The water container has not been inserted correctly. | Insert the water tank correctly. | |
| The unit has run dry / has not been used for a long time and must be vented. | Turn the steam wand into the direction of the drip tray, or put a cup under the steam wand. Turn on the control dial and wait until water flows. Then turn off the control dial. | |
| Water flows through too quickly. | The coffee grounds are too coarse. | Use finer coffee grounds. |
| The coffee grounds have not been sufficiently pressed. (tamped) | Tamp the coffee grounds a bit firmer. | |
| There are too little coffee grounds in the group handle. | Fill in more coffee grounds. | |
| Water flows through too slowly. | The coffee grounds are ground too fine. | Set a coarser grinding level. |
| The coffee grounds have been pressed (tamped) too firmly. | Tamp the coffee grounds applying a bit of pressure. | |
| Water/espresso escapes only drop by drop. | Group handle is clogged. | Empty the group handle and fill it with coffee grounds. Make sure you do not press the coffee grounds too firmly and the coffee grounds are not ground to fine. |
| The unit is calcified. | Descale the unit. | |
| The brewing unit filter is dirty. | Clean the brewing unit filter. | |
| Espresso is too cold or luke-warm. | Cups, filter insert and group handle are cold. | Warm up cups, filter insert and group handle once. |
| Maybe the milk was not sufficiently warmed up when the Cappuccino or Latte were made. | Continue warming up the milk, but without bringing it to the boil. | |
| Espresso does not have cream. | The roast coffee is too old or too dry. | Use fresh beans. |
| The coffee grounds are too coarse. | Set a finer grinding level. | |
| The coffee beans were stored too long or too warm. | Pay attention to the storage location. Do not put the beans into the refrigerator. | |
| Faulty packaging (flavours are volatile) | Leave the coffee beans within the original packaging. | |
| Espresso does not have cream. | Pre-ground coffee from the supermarket used. | Use freshly ground coffee. |
| Unit is soiled. | Clean the unit. | |
| Cups are soiled or greasy. | Clean the cups. | |
| The cream is too light. | If the cream is too light, this means there is little flavour, the ground material is too coarse. | Set a finer grinding level. |
| The cream is too dark. | If the cream is too dark, this means that the espresso is bitter. The ground material is too fine, over-extraction has taken place. | Set a coarser grinding level. |
| Espresso is too sour. | Espresso beans have been roasted too light. | Take a different type of coffee with a darker roast. |
| Grinding level set too coarse. | Set a finer grinding level for your coffee grinder. | |
| Acid-intensive types of Arabica in the coffee mixture. | Take a different type of coffee with less acid-intensive types of Arabica. | |
| Espresso is too bitter. | Grinding level set too fine. | Set a coarser grinding level for your coffee grinder. |
| Very dark roast. | Take a different type of coffee with a lighter roast. | |
| Espresso has a strange flavour. | The unit is soiled. | Clean the unit inside by acti-vating the cleaning function. |
| Poor bean quality. | Ensure a premium bean quality. | |
| Roast coffee is too old, maybe oxidised and therefore rancid. | Take fresh roast coffee. | |
| Espresso has little flavour. | Coffee grounds too old (pre-grinding took possibly place before more than 1 hour). | Always grind directly into the group handle. |
| Espresso has little flavour. | Roast too old. | Make sure you always use a fresh roast. |
| Grinding level set too coarse. | Set a finer grinding level for your coffee grinder. | |
| Wrong storage (e.g. open, in the refrigerator etc.). | Store the beans in such a way that no oxygen and day light can get into the beans. | |
| Unit does not build up pressure, but espresso flows through. | Maybe the unit is calcified / soiled. | Descale or clean the unit. |
| Grinding level too coarse. | Change the grinding level. | |
| The coffee grounds were not tamped firmly enough. | Tamp the coffee grounds a bit firmer. | |
| Espresso gets caught at the brewing unit (very wet) | Too few coffee grounds filled into the group handle. | Fill in more coffee grounds. |
| Espresso gets stuck at the brewing unit (dry). | Grinding level set too fine. | Set a slightly coarser grinding level. |
| No steam. | The steam jet is clogged. | Descale the steam jet and clean it using the attached cleaning tool. |
| Not enough froth when frothing up. | The milk is not fresh. | Use fresh milk. |
| The milk is too warm. | The milk should be well cooled before using it. | |
| The steam jet is clogged. | Clean the steam jet. | |
| The milk was boiled. | Start again using fresh, cool milk. | |
| Steam jet no correctly positioned. | Position the steam jet approx. 1 cm below the milk surface. | |
Disposal
At the end of its service life, this product must not be disposed through normal domestic waste; rather it must be disposed at a collection point for recycling electronic domestic refuse. The symbol on the product and in the operating instructions points this out. The materials can be recycled in accordance with their markings. By recycling, making use of the materials or other forms of recycling old units you are making an important contribution to protecting our environment. Please ask your municipal administration about the responsible disposal sites.
2 year warranty
Starting with the date of purchase, we assume a 24 month manufacturer's warranty for defects that are attributable to manufacturing and material defects. Your legal warranty rights in accordance with § 439 ff. German Civil Code-E remain unaffected by this clause. Not included in the warranty are damages that have arisen due to improper handling and use as well as defects which have only a slight influence on the functioning or value of the unit. Furthermore, shipping damages, unless our responsibility, are excluded from warranty rights. Warranty claims are excluded for damages that arise due to repairs we or our representatives have not performed. In case of a justified complaint, we will repair or replace the defective product with a flawless product as we choose.
Table des matieres
Programmation pre-infusion
12 L = (hard water boven 15^ )
25 L = (middelhard water 7,3°dH tot 14°dH)
Fabrieksinstalling is 92^
- Fabrieksinstelling is P1.
Fabrieksinstelling is 25 L.
Programming af prae-infusion (forbrygning):
CO AFKALKNING lyser pa LCD displayet.

- Espresso preparation 56
- Operating lever 60
- Automatic switching off 61
- Making milk froth 61
- Hot water withdrawal 62
- Dscaling 63
- Cleaning 68
- Programming 70
- Technical data 73
- After-sales service 73
- Troubleshooting 74
- Disposal 78
- year warranty 78
- Espresso specialities
- Ristretto
- Lungo
- Corretto
- Doppio
- Macchiato
- Cappuccino
- Caffé Latte
- Caffé Americano
- Latte Macchiato
- Product description
- Scope of delivery
- Safety instructions
- Unpacking
- Requirements on the installation location
- Control panel
- LCD-Display
- Preheating
- Check
- GRAEF
- CO Clock
- No Water
- CO Temp
- ST Duty
- Programming of pre-infusion (pre-brewing):
- Clean
- Reset
- DE Lang
- CO Clean
- ST Clean
- HW Clean
- Descending reminder
- Pressure gauge
- Under-extraction
- Optimal range
- Over-extraction
- Prior to first use
- Initial operation
- Venting
- Preparation
- Espresso preparation
- Cup
- Volume setting
- Cups
- Operating lever
- Automatic switching off
- Making milk froth
- Please note:
- Tips for making milk froth
- The phases "steep" and "roll"
- To practise it, you can use the following method:
- Hot water withdrawal
- Dscaling
- We do not assume any liability for lack of or insufficient descaling. In this case, the warranty will become null and void.
- Dscaling Steam wand
- Dscaling hot-water wand
- Replace water filter cartridge
- Cleaning
- Cleaning of the brewing group (backflush)
- External cleaning
- Cleaning tool
- Programming
- Coffee temperature
- Steam flow rate
- Pre-infusion
- Dscaling reminder
- Factory setting
- Technical data
- After-sales service
- Troubleshooting
- Disposal
- year warranty
- Table des matieres
- Programmation pre-infusion
- Programming af prae-infusion (forbrygning):
Brand : GRAEF
Model : Contessa
Category : Coffee machine