GD 30 IK - Heating Güde - Free user manual and instructions
Find the device manual for free GD 30 IK Güde in PDF.

| Technical Specifications | Details |
|---|---|
| Heating Type | Electric heating |
| Power | 3000 W |
| Voltage | 230 V |
| Heating Area | Up to 30 m² |
| Dimensions | Compact dimensions for easy storage |
| Weight | Approximately 10 kg |
| Usage | Ideal for workshops, garages, and workspaces |
| Maintenance | Regular cleaning of grills and cable inspection |
| Safety | Overheat protection and stable base |
| General Information | Device designed for indoor use only |
Frequently Asked Questions - GD 30 IK Güde
User questions about GD 30 IK Güde
0 question about this device. Answer the ones you know or ask your own.
Ask a new question about this device
Download the instructions for your Heating in PDF format for free! Find your manual GD 30 IK - Güde and take your electronic device back in hand. On this page are published all the documents necessary for the use of your device. GD 30 IK by Güde.
USER MANUAL GD 30 IK Güde
Translation of the original operating instructions | Oil heater fan
This product is not suitable as a primary heating appliance.
FR
natural_image
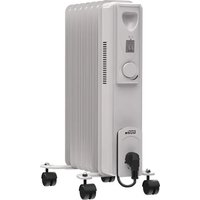
Exterior view of a Heurtechnik industrial heat exchanger with cylindrical fan and wheels (no visible text or symbols)GD 30 IK
85110
natural_image
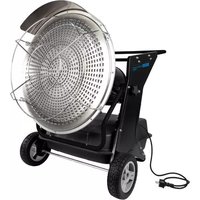
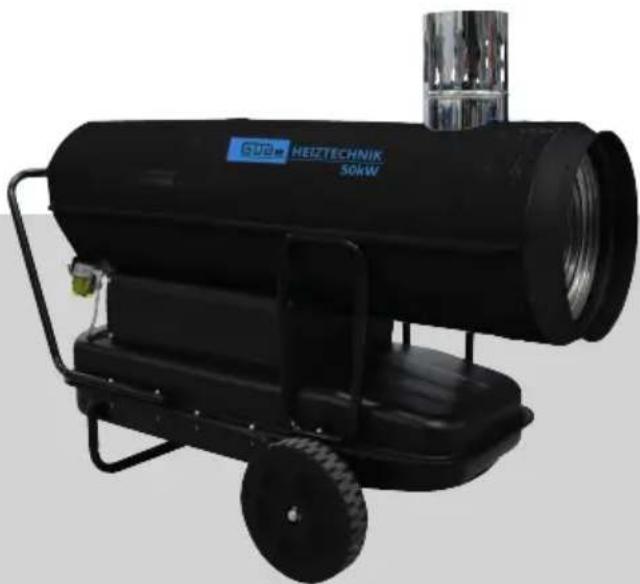
Exterior view of a black industrial heat exchanger with visible branding and wheels (no text or symbols on the device itself)GD 50 IK
85111

EN This device must only be used as described in this manual, in compliance with all specifications and warnings. The manufacturer cannot be held liable for damage resulting from failure to comply with the provisions of generally applicable regulations and the provisions of this manual. The device is intended for private use. For commercial use, it must be inspected by a qualified person before initial use. This inspection must be arranged by the operator (in accordance with BetrSichV §§ 14/15 (German Industrial Safety Regulation)).
ENGLISH Please read the instructions carefully before starting the machine.
text_image
Scanned document page showing two labeled mechanical components with accompanying descriptive text in Chinese.

text_image
Technical diagram of a portable air purifier with numbered parts for identification and assembly reference.text_image
D A B F H O L I K M J E N S R C P Q G a b c 28 20 d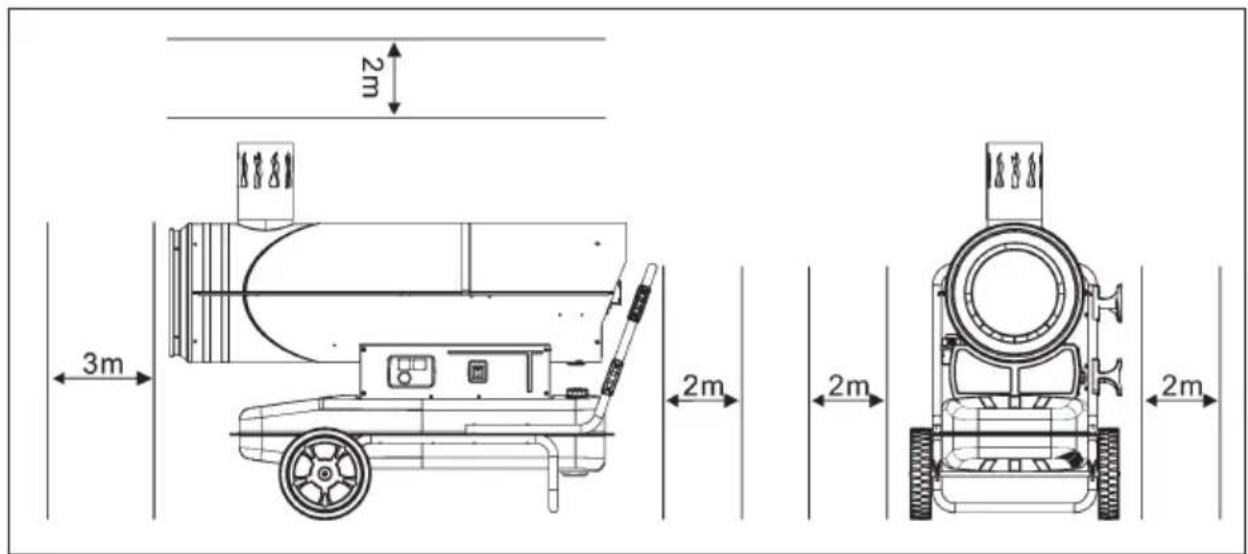
text_image
Diagram showing a crane lifting equipment with red X-marked cross symbol indicating a collision or failure.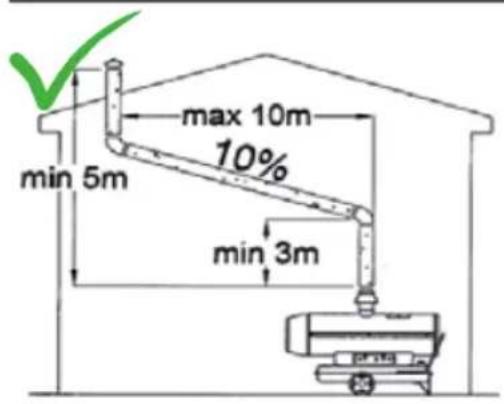
text_image
max 10m 10% min 5m min 3m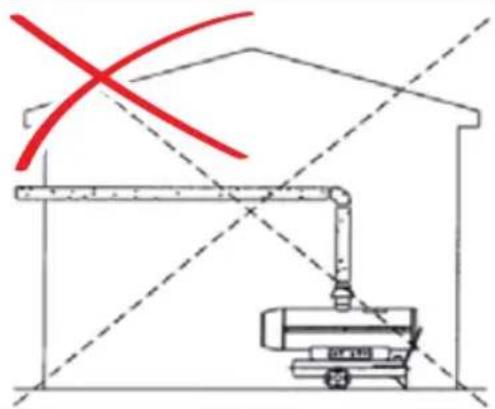
text_image
Technical diagram showing a crane lifting equipment with red X marks and dashed lines indicating alignment or measurement.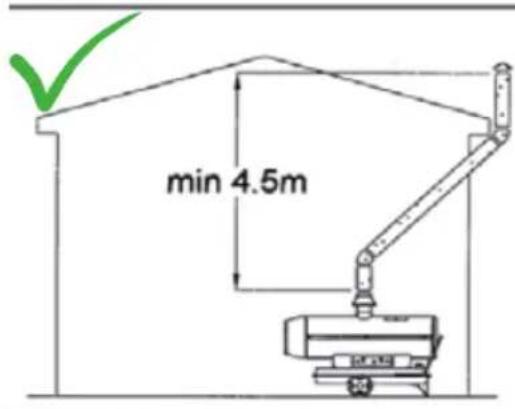
text_image
min 4.5m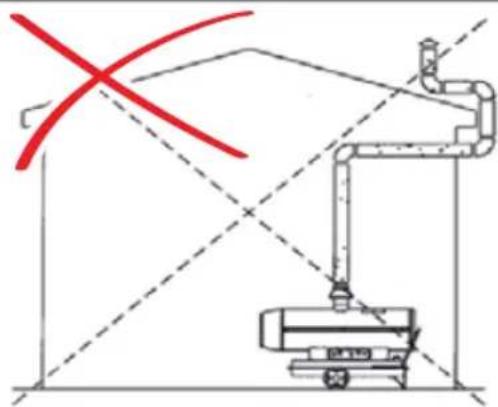
natural_image
Diagram of a mechanical device with a crane and conveyor system, showing alignment lines (no text or symbols)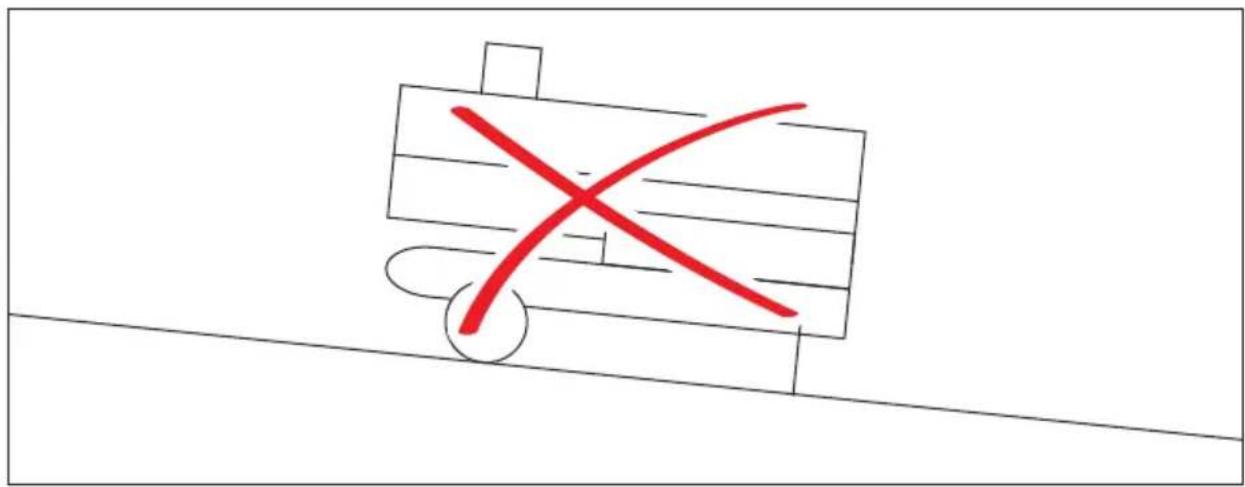
text_image
Hand-drawn sketch of a cart with a red 'X' mark on its side, indicating cancellation or error.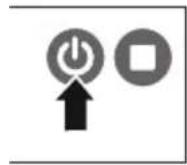
text_image
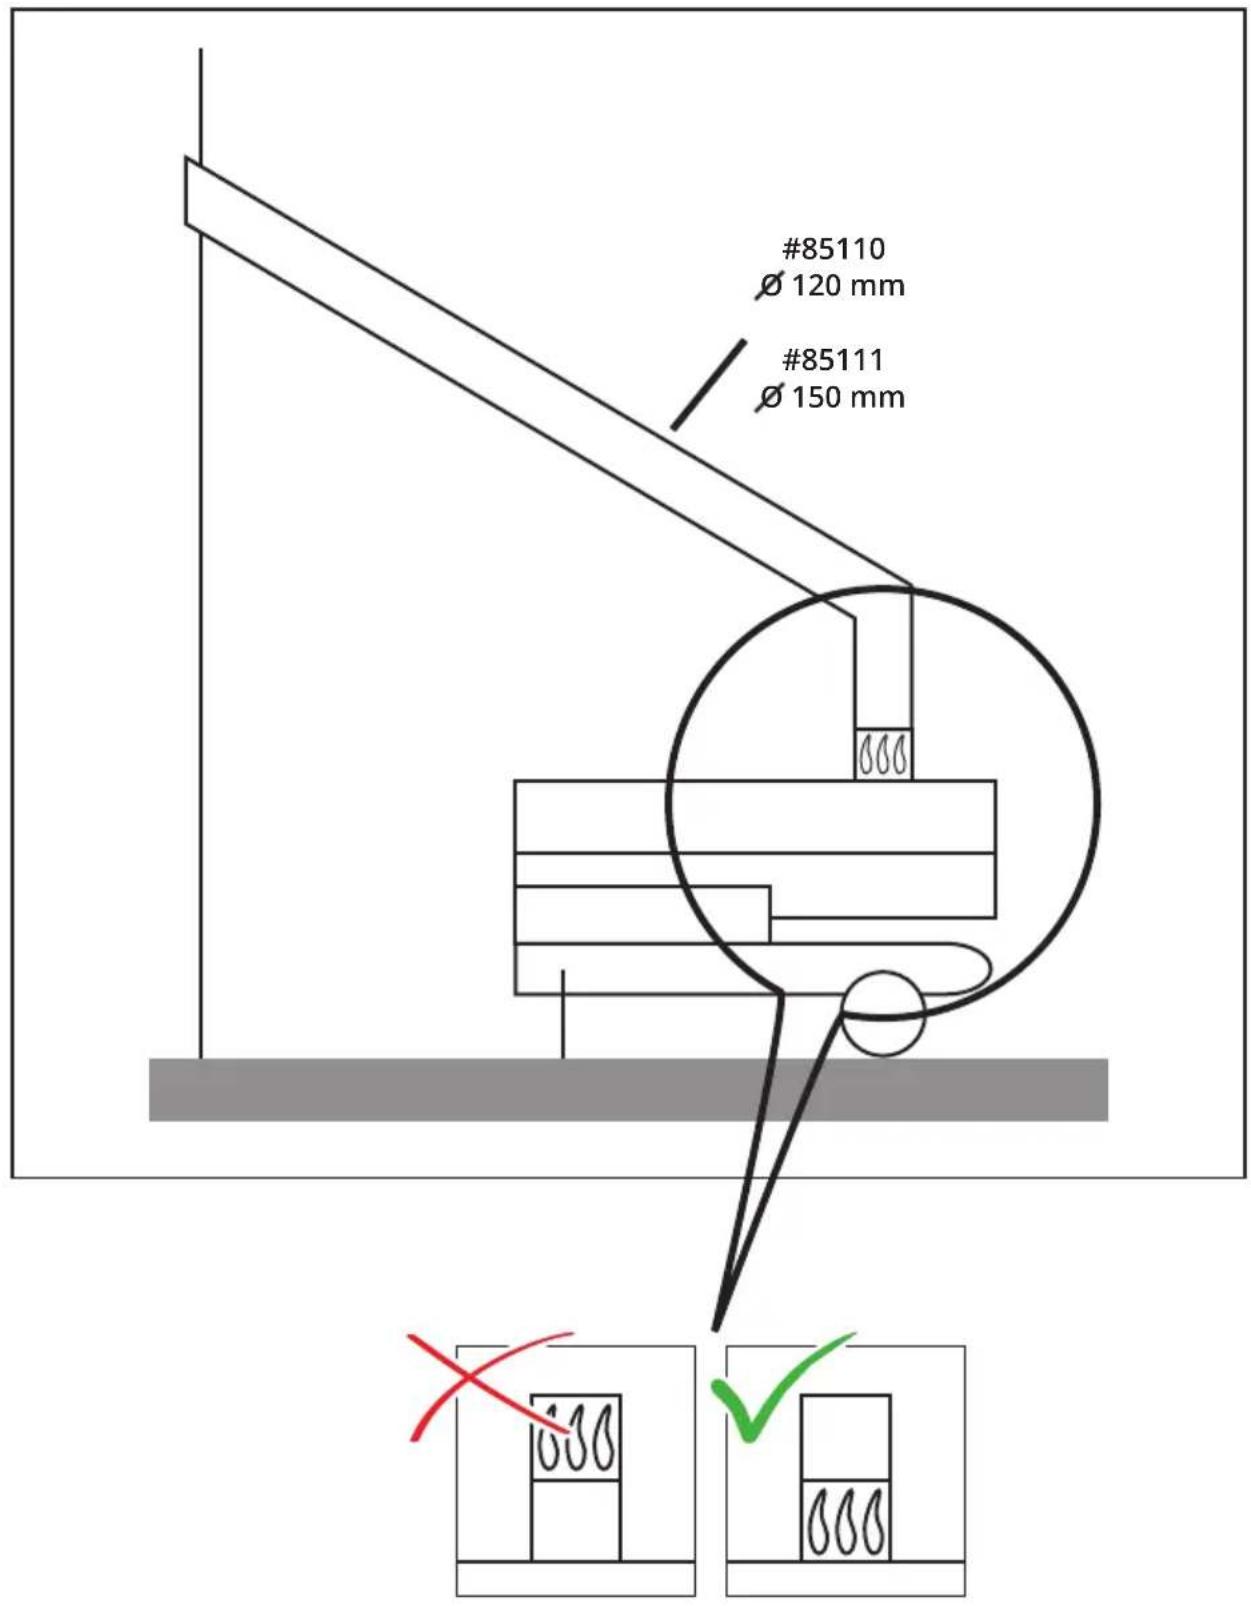
#85110 Ø 120 mm #85111 Ø 150 mm
natural_image
Technical line drawing of a mechanical device with a wrench and labeled component 'S' (no text or symbols beyond basic diagram)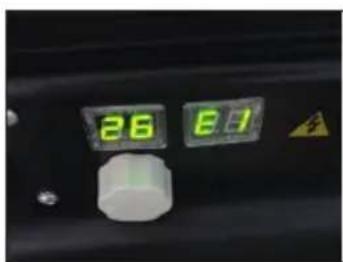
text_image
26 E7
text_image
E1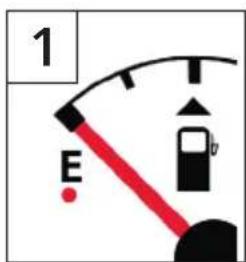
text_image
1 E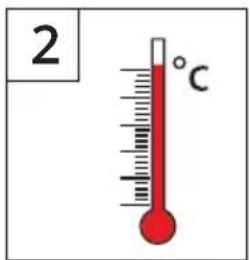
text_image
2 °C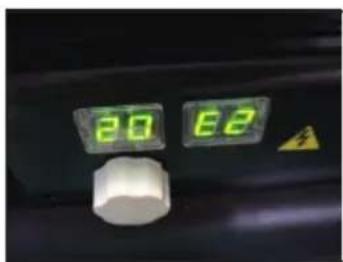
text_image
20 62
text_image
E2
text_image
1 service
text_image
1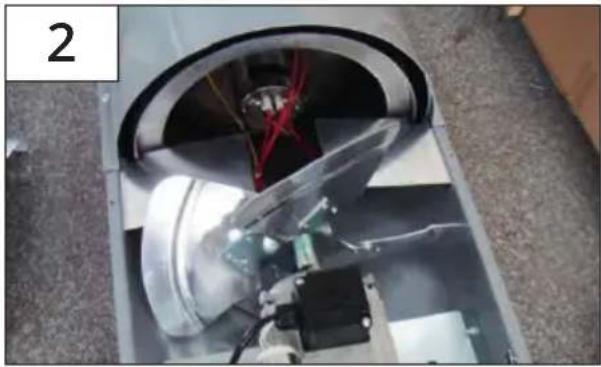
natural_image
Interior view of a mechanical device with visible internal components and no text or symbols
natural_image
Close-up of a hand holding a small black object, possibly a mechanical component or tool, with no visible text or symbols.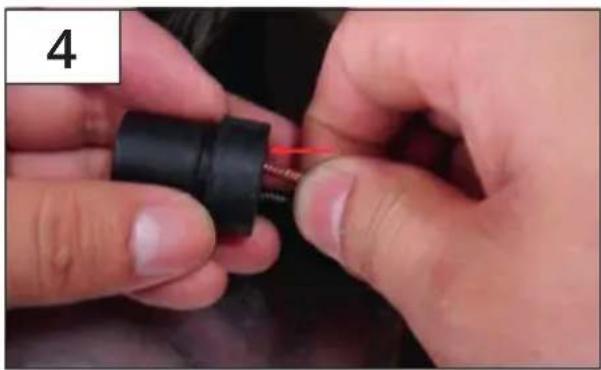
natural_image
Close-up of hands assembling a black plastic connector with red wire (no text or symbols visible)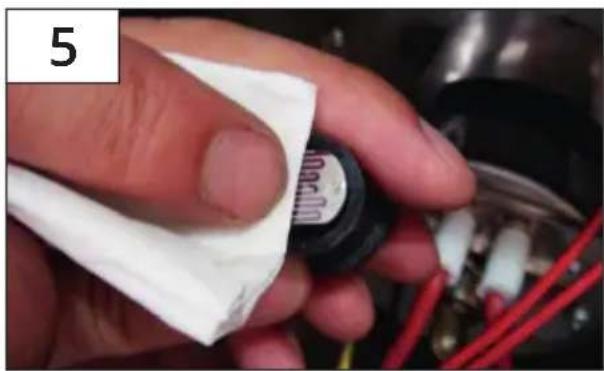
natural_image
Close-up of a hand holding a small electronic component with wires and components, no visible text or symbols
natural_image
Close-up of a hand holding a black cylindrical component with a purple waveform symbol, surrounded by wires and components (no readable text or symbols)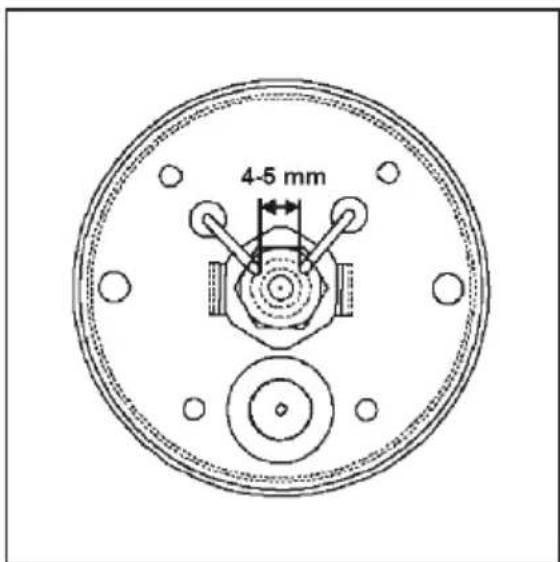
text_image
4-5 mm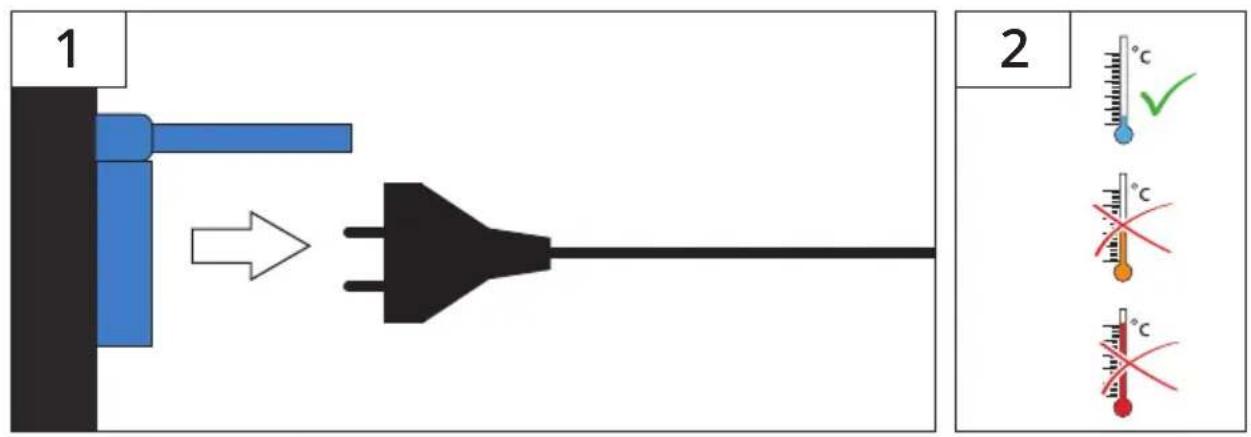
text_image
1 2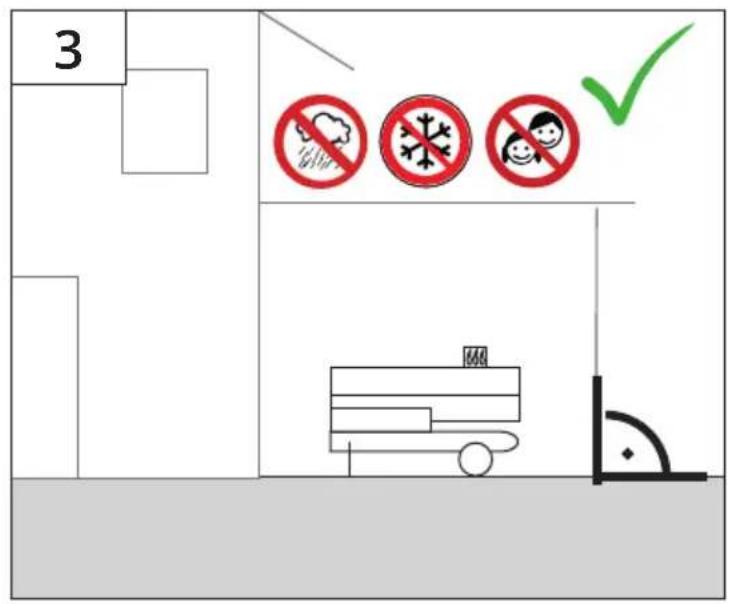
text_image
3 ✓ No smoke No snow No happy childEinleitung
To enjoy your new appliance as long as possible, please read carefully the Operating Instructions and the attached safety instructions before putting it into operation. Further, we recommend keeping the Operating Instructions in order to recall the product features in the future. To follow the continuous product development, we reserve the right to make technical changes for any further improvement.
This document represents the original Operating Instructions.
Appliance description
Professional and high-performance hot-air turbine for heating and drying in the building industry and agriculture.
Heating system using oil. The appliance is fitted with an electronic ignition system. High-quality steel body with robust chassis and light run.
Unpacking
Remove all the packing materials that have been used to pack the heating unit for transport purposes.
Take the heating unit out of the box.
Check the heating unit for any damage caused during transport. If the heating unit is damaged, contact immediately the seller where the appliance has been bought.
Appliance description (pic. A)
A. Hot air outlet
B. Appliance body
C. Handle
D. Fireplace
E. Cable winding-up
F. Bottom cover
G. Tank level indicator
H. Tank opening/lid
I. Wheel
J. Side cover
K. Digital temperature indicator
L. Temperature controller/thermostat
M. ON/OFF switch with indicator
N. Bottom tube frame
O. Fuel tank
P. Fuel filter
Q. Pump with geared wheel
R. Fan with protective grid
a. Thermostat controller
b. Required temperature indicator
c. Actual/room temperature indicator
d. ON/OFF switch
Technical specifications
GD 30 IK
Voltage/frequency: 220-240 V / 50 Hz
Heating output: 30 kW
Turbine output: 780 m³/h
Tank capacity: 561
Fuel consumption: ca. 2,9 l/h
Fuel: Oil
Feeder cable length: 1,2 m
Degree of protection: IPX4
Net/gross weight: 34,5 kg / 38 kg
Order No. 85110
GD 50 IK
Voltage/frequency: 220-240 V / 50 Hz
Heating output: 50 kW
Turbine output: 2000 m³/h
Tank capacity: 69 l
Fuel consumption: ca. 4,5 l/h
Fuel: Oil
Feeder cable length: 1,2 m
Degree of protection: IPX4
Net/gross weight: 62,3 kg / 56,4 kg
Order No. 85111
General safety instructions

Please read carefully these Operating Instructions.
Familiarise with the control elements and appropriate appliance using. Keep the Operating Instructions for future reference.
Safe working
Keep the place of your work clean!
Mess in the place of your work may result in injuries.
Consider the environment influences
Do not expose the appliance to rain.
Do not use the appliance in a wet or moist environment.
Provide appropriate lighting.
Do not use the appliance near flammable liquids or gases.
Keep other persons in safe distance!
Do not let other persons, especially children, touch the appliance and the cable. Keep them in a sufficient distance from the place of your work.
Store the appliance properly!
An appliance that is not used should be stored in a dry, locked place out of reach of children.
Do not overload the appliance!
Work in the specified output limits.
Use the right appliance!
Do not use the appliance for purposes for which it has not been designed.
Look after your appliance!
Follow the maintenance regulations and instructions.
Check regularly the appliance cable and have it replaced by an authorised professional if damaged.
Check regularly the extension cable and replace it if damaged.
Be careful!
Pay attention to what you are doing. Use common sense when working. Do not use the appliance when you are tired.
WARNING!
Use of any other accessories may pose a risk of injury.
Your appliance should be repaired by an electrician only!
This appliance meets the appropriate safety provisions. Repairs may only be executed by an electrician and original spare parts must be used, otherwise the user may face a risk of injury
Appliance-specific safety instructions

WARNINGS
IMPORTANT: Please read carefully the complete Operating Instructions before assembling, handling and maintaining this heating unit. Any unauthorised use of this heating unit may result in serious injuries or death as a result of burn, fire, explosion, electric shock and carbon monoxide poisoning.
! CAUTION: Carbon monoxide poisoning may be fatal!
Carbon monoxide poisoning: Early symptoms of carbon monoxide poisoning are similar to those experienced at flu, i.e. headache, giddiness and/or indisposition. If such symptoms are experienced, it may be possible your heating body is not working properly. Get out immediately! Have your heating unit inspected. Some persons are more sensitive to carbon monoxide than other ones, e.g. pregnant women, persons with cardiac or pulmonary diseases or anaemia, persons under the influence of alcohol and persons at heights. Make sure you have read all the maintenance instructions and have understood them. Keep these Operating Instructions for future reference. They are your gu ide for safe and professional handling of this heating unit.
- Use on oil to prevent fire and risk of explosion. Petrol, crude oil, paint thinners, alcohol and other highly flammable fuels must not be used in any case.
Fuel:
a) Staff providing refuelling must be trained and fully familiarised with the manufacturer's instructions and applicable directives for safe refuelling of heating units.
b) Only oil may be used for refuelling.
c) Any flame including the pilot flame must be blown out to allow the heating unit to cool down before refuelling.
d) Fuel lines and connections must be checked for leaking when refuelling takes place. Any leaking must be repaired before putting the heating unit back into operation.
e) The maximum fuel daily dose should only be stored in buildings near the heating unit. Large fuel reserves to be stored outside the building.
f) All fuel storages must be at least 762 cm from heating units, burners, welders and similar inflammable sources (exception being a fuel tank integrated in the heating unit).
g) If applicable, fuel storage should only be limited to spaces where the flooring design prevents leaked fuel accumulation and the fuel cannot catch fire as a result of deeply stored inflammable sources.
h) Fuel must be stored in accordance with the local official regulations.
General information:
- Never use the heating unit near petrol, paint thinners or other easily combustible fumes.
- Follow all local provisions and regulations when using this heating unit.
- Heating units used near reinforcement grids, canvases or other coverings must be placed in a safe distance from these materials. The recommended minimum distance is 305 cm. Moreover, using fireproof coverings is recommended. Fireproof coverings must be safely attached to be protected against catching fire and prevent heating unit being touched and turned over due to wind gust.
- Before putting the appliance into operation, make sure air vent of at least 2,800 cm ^2 for fresh external
air is provided for heating output of 100,000 BTU per hour.
- To be used at voltage and frequency specified on the type label only.
- A properly earthed extension cable to be used at all times.
- Minimum distance from flammable materials and persons: exhaust: 300 cm at sides, upper and rear side: 200 cm. (see pic. D)
- To prevent a risk of fire, the hot heating unit or heating unit just being operated must be placed on a safe and level surface.
- The heating unit must be transferred or stored in a horizontal position to prevent fuel leaking.
- Keep children and pets in a sufficient distance from the heating unit.
- Unplug the heating unit if not being operated
- Never use the heating unit in residential rooms and sleeping rooms.
- Never block the air inlet (rear side) and air outlet (front side) of the heating unit.
- If the heating unit is hot, being operated or plugged, it must never be transferred, handled, refuelled or maintained.
- Do not fit any piping on the front and rear side of the heating unit.

CAUTION:
Oil to be used only to prevent fire or explosion.

Using the appliance as a heat source for events, parties or operating the appliance in stables is tly prohibited!
Intended use
The GD-series oil hot-air turbine must solely be used for heating and drying purposes in dry outdoor zones, in a safe distance from flammable materials and other animals. It must be placed on a stable and level surface when being operated. Only oil is allowed to be used for refuelling.
(As far as safety, functionality and service life are concerned, the GD series follows the latest criteria: the safety equipment guarantees appropriate working of the appliance; operating noise have been reduced to minimum levels and the careful material selection makes it as much reliable as possible.)
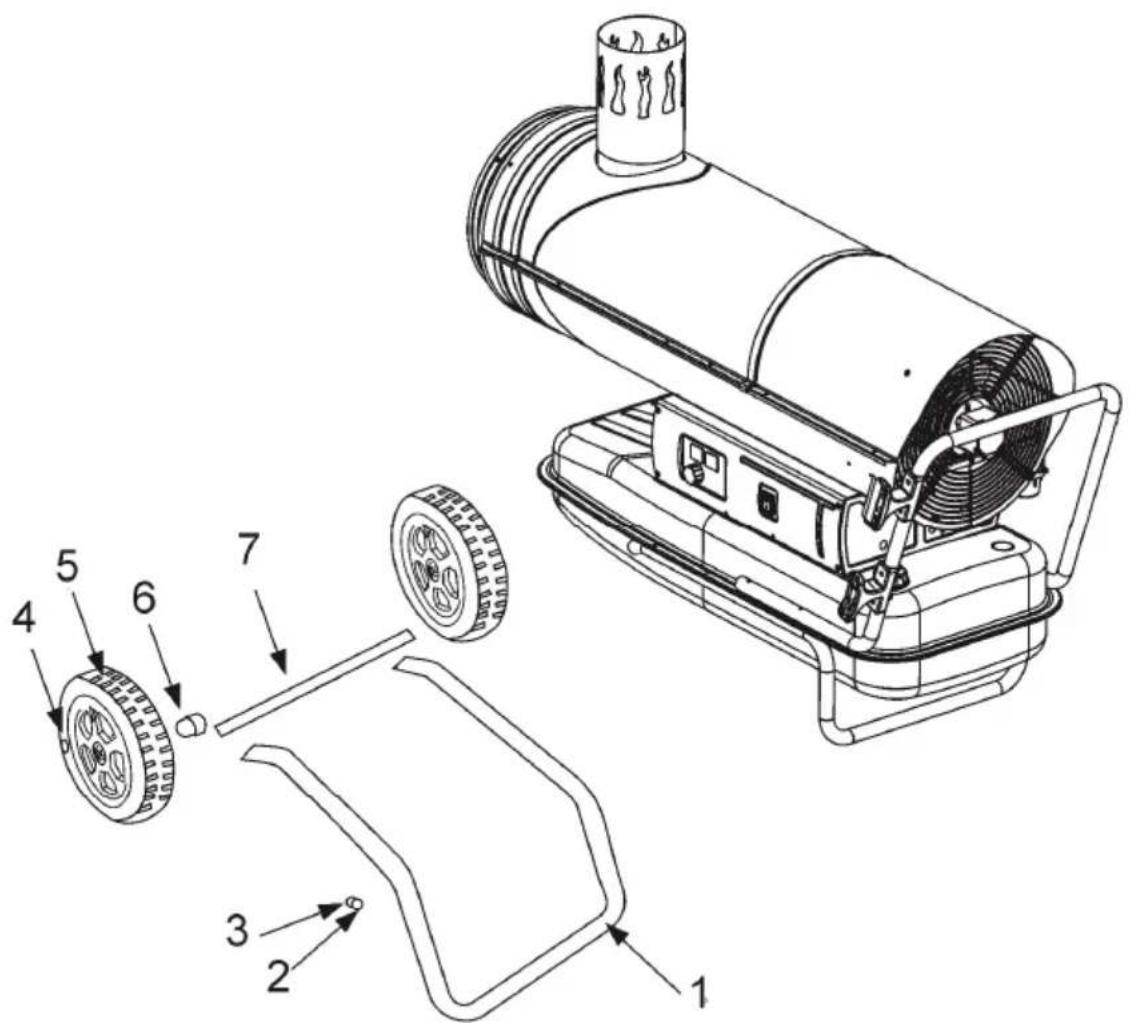
Assembly, pic. B
Description, pic. B
- Frame
- Screw
- Washer
- Wheel cover
- Wheel
- Case
- Axis
These models are supplied with wheels and handles.
Wheels, handles and appropriate parts for attaching are in the box.
Necessary tools:
- medium-sized cross screw driver
- CH 8" fork wrench or adjustment wrench
-
hammer.
-
Put the axis through the wheel support frame. Mount the wheels to the axis. IMPORTANT: When assembling the wheels, the extended wheel hub must point towards the wheel support frame (see picture 3).
- Put a cap nut on each axis end and tighten it by light hammer tapping.
- Fit the heating unit on the wheel support frame. Make sure the heating unit air inlet (rear) is above the wheels. Attach the fuel tank flange holes to the wheel support frame holes.
- Put the front and rear handle on the fuel tank flange. Pull the screws through the handles, fuel tank flange and wheel support frame. After the screw is inserted, tighten the appropriate nut with your hand.
- Tighten the nuts after all screws have been inserted.
Safety equipment
The oil hot-air turbine is fitted with an electronic flame control. The appliance is stopped in case of operating failure. If the oil hot-air turbine is overheated, thermostat preventing overheating is activated, which interrupts the fuel supply; the thermostat is automatically deactivated if the combustion chamber temperature drops below the accepted maximum value. The overheating cause must be identified and removed (e.g. air inlet and outlet blocking or fan stopping) before putting the oil hot-air turbine back into operation. To start the appliance again, please follow the instructions included under "PUTTING THE APPLIANCE INTO OPERATION".
Behaviour in case of emergency
Provide necessary first aid treatment corresponding to the injury nature and seek qualified medical help as soon as possible.
Protect the injured person from other injuries and calm him/her down.
First aid kit must always be available in the place of your work in case of accident in accordance with DIN 13164. Material taken out of the first aid kit needs to be supplemented right away. If help is needed, please provide the following details:
- Place of accident
- Accident nature
- Number of injured persons
- Injur y type
Operating staff requirements
The operator must carefully read the Operating Instructions before using the appliance.
Qualification
No special qualification is necessary for using the appliance apart from detailed instruction by a qualified person.
Minimum age
The appliance may only be operated by persons over 16 years of age. An exception includes youngsters operating the appliance within their professional education to achieve necessary skills under teacher's supervision.
Training
Using the appliance only requires appropriate instructions by a professional or reading the Operating Instructions. No special training necessary.
Putting the appliance into operation
Before putting the oil hot-air turbine into operation and plugging it in, it is necessary to check whether the power supply properties correspond to the values on the type label.
CAUTION:
A safety switch against stray current (RCD) must be integrated in the circuit to which the oil hot-air turbine is connected.
All safety measures regarding ventilation, etc. must be adhered to.
Do not add crude oil to the fuel tank. Close the fuel tank lid again.
Plug the heating unit feeder cable in a standard socket with earth contact.
To put the appliance into operation, the following is needed:
Putting ON/OFF to the ON symbol position ("I"): The fan starts and combustion gets switched on after several seconds.
Therm ostat:
Use the thermostat to set the required room temperature. The required value on the left display (pic. A/b) will change by turning the thermostat controller (pic. (A/a). A/b). The right display (pic. A/c) shows the approximate current room temperature measured on the fan wheel.
After reaching the set temperature, the oil driven fan heater is automatically switched off. If it gets below the set temperature, the oil driven fan heater is automatically switched on again.
Application example:
„ll“(p.2 / d) 15° Actual temperature (p.2 / b) 20° Target temperature (p.2 / c).
The oil heater now heats the "room" up to 20^ and then switches off again automatically. If the device remains ready for operation, the gas fan heater switches on again automatically when the temperature falls below the setpoint.
Application example:
18° Actual temperature (p.2 / c) 15° Target temperature (p.2 / b). The oil heater will now switch off. If the device remains in the ready-to-operate position, the device would switch on automatically if the temperature falls below 15°.
Ignition may take a few seconds when the appliance is started for the first time or after it has not been used for a long time.
To switch the appliance off, the following is needed: Put ON/OFF (pic. A/d) to the OFF symbol position ("0"). Or the set temperature (pic. A/b) must be set lower than the current room temperature (pic. A/c).
Marking
Product safety:
| CE | |
| Product corresponds to appropriate EU standards |
Prohibitions:
 |  | |
| Not to be used in residential area! | No fire, open light and smoking! | |
 | ||
| No covering | ||
Warning:
 |  | |||
| Caution! Hot surface! | Warning against dangerous voltage | |||
 | ||||
| Warning against flammable materials | ||||
 |  | |||
| Caution! Dangerous electric voltage! | Health warning / hazardous substances | |||
Commands:
 |  | |||
| General command symbol | Read the Operating Instructions before using the appliance | |||
Environment protection:
 |  | ||
| Dispose waste professionally so as not to harm the environment. | Packing cardboard material may be delivered to collecting centres for recycling. | ||
 | |||
| Faulty and/or disposed electric or electronic appliances must be taken to appropriate collection centres. | |||
Package:
 |  | ||
| Protect against moisture This side up | |||
| Interseroh-Recycling | |||
Technical specifications:
 |  | ||
| Connection Weight | |||
 |  | ||
| Healing output Turbine output | |||
 |  | ||
Tank capacity Fuel consumption
Disposal
The disposal instructions are based on icons placed on the appliance or its package. The description of the meanings can be found in the "Marking" chapter.
Transport package disposal
The package protects the appliance against damage during transport. Packing materials are usually chosen depending on their environmental friendliness and disposal method and can therefore be recycled.
Returning the package to material circulation saves raw materials and reduces waste disposal costs.
Parts of packages (e.g. foils, styropor) can be dangerous to children. Risk of suffocation!
Keep parts of packages away from children and dispose them as soon as possible.

Old batteries to be delivered to car repairs and appropriate collection centres only.
Servicing
Do you have any technical questions? A claim? Do you need spare parts or the Operating Instructions?
You will be helped quickly and without needless bureaucracy at our webpage www.guede.com in the Service part. Please help us be able to assist you. To be able to identify your appliance when claimed, we need to know its serial No., order No. and year of production. All these details can be found on the type label. Enter the details below for future reference.
Serial No.
Order No.
Year of production:
Tel.: +49 (0) 79 04 / 700-360
Fax: +49 (0) 79 04 / 700-51999
E-Mail: supp ort@ts.guede.com
Important information for the customer
Please be sure to know that returning the product in or after the warranty period must be made in the original packaging.
Guarantee
A warranty period of 12 months applies to commercial use and 24 months apply to private use and commences on the day of purchase of the device.
Warranty applies exclusively to failures due to defective material or workmanship. An original sale slip with indication of date of sale must be presented in case of claiming for the warranty rights.
Warranty does not cover unprofessional use such as device overload, violent use, damage caused by third party or foreign materials, failure to comply with operations and assembly manual, and normal wear and tear.
Transport

CAUTION
Before transporting the appliance:
Switch the appliance off as instructed in the previous paragraph; unplug it and let the hot-air generator cool down.
Make sure the tank lid has been closed safely before lifting or transferring the appliance.
The appliance can easily be transferred by the handle and drawn forward.
Troubleshooting
| Failure Possible cause | Removal |
| Fan not starting and flame not beginning to burn. | 1. No power supply2. Engine winding is burnt out or broken |
| Fan starting and flame not beginning to burn or going out immediately. | 1. Ignition system is not working.2. Flame control is faulty.3. Photocell is not working.4. No or insufficient amount of oil getting to the burner.5. Electric valve is not working. |
| Fan starting and flame beginning to burn but smoking. | 1. Combustion air is not sufficient.2. The fuel used is dirty or contains water.3. Air in the fuel piping.4. Oil volume in the burner is insufficient.5. Too much oil in the burner. |
| Generator not pausing. | 1. Electric valve sealing is defective.2. Fan thermostat is defective. |
| Flame blasting off the appliance in the front. | 1. Insufficient air inlet in the combustion chamber. |
Maintenance and storing
Keep the air slot and body with no dust and dirt.
For cleaning purposes, use a soft cloth and fine soap solution. Prevent direct appliance contact with aggressive cleaning agents. Aggressive, volatile and caustic cleaning agents must not be used.
The appliance needs to be protected against moisture and dust.
If the appliance is not used for a long time, store it in a covered state in a dry, safe place inapproachable to children.

Caution:
Do not service the appliance when plugged, being operated or hot. The failure to do so could lead to serious burns and electric shock.
Regular maintenance:
| Part | Frequency |
| Fuel tank | To be rinsed out every 150 – 200 running hours or as needed |
| Photocell | Clean every season or as needed |
| Fuel filter To be cleaned two times during the heating season or as needed. | |
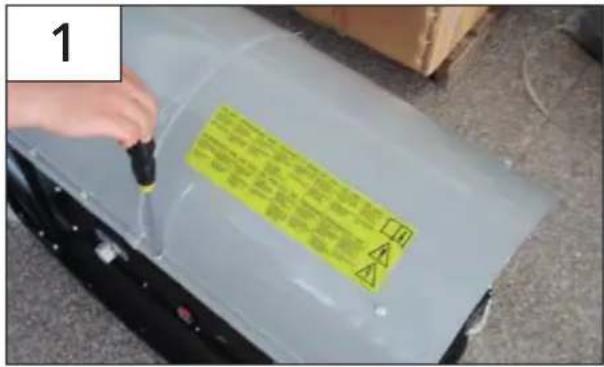
| Ignition electrodes | To be checked every 500 running hours; distance 4-5 mm. |
| Fan blades | To be cleaned every season or as needed; fan wheel screw to be tightened with hand. |
| Engine | Maintenance-free, with permanent lubrication. |
Information required for individual room heaters
| Model identification: 85110 GD 30 IK | ||||||
| Indirect heating function: [no] | ||||||
| Direct heat output: 30 (kW) | ||||||
| Indirect heat output: N/A (kW) | ||||||
| Permissible minimum total length of the flue gas system (vertical + horizontal pipe): NA (m) | ||||||
| Fuel diesel Nitrogen oxide emissions ( | NOX) | |||||
| Value Unit | ||||||
| Select fuel type [liquid] 101 mg/kWh | Input(GCV) | |||||
| Specification Symbol Value Unit Specification Symbol Value Unit | ||||||
| Heat output Efficiency (NCV) | ||||||
| Nominal heat output P | nom | 30,0 kW | Thermal efficiency at nominal heat output | _th,nom | 96 | % |
| Minimum heat output | P_min | N/A | kW | Thermal efficiency at minimum heat output | _th,min | N/A |
| Annual room heating utilisation rate | _s | 81,3 | ||||
| Auxiliary power consumption | Type of heat output/room temperature controller(please select one option) | |||||
| With nominal heat output | eI_max | 0,3 | kW | Single-stage heat output, no room temperature control | [no] | |
| With minimum heat output | eI_min | N/A | kW | Two or more manual levels, no room temperature control | [no] | |
| Power consumption | Mechanical room thermostat | [no] | ||||
| In off mode | P_o | N/A | W | Electronic room thermostat | [yes] | |
| In standby mode | P_sm | N/A | W | Electronic room thermostat with time-of-day control | [no] | |
| In idle mode | P_dkc | N/A | W | Electronic room thermostat with weekday control | [no] | |
| In networked standby mode | P_ram | N/A | W | Other control options (multiple answers possible) | ||
| Standby mode with information or status display | [no] | Room thermostat with presence detection | [no] | |||
| Power requirement of the pilot flame | Room temperature with open window detection | [no] | ||||
| Power requirement of the pilot flame (if available) | P_pilot | 0 kW | Remote control option | [no] | ||
| Adaptive control of the start of heating | [no] | |||||
| Operating time limit | [no] | |||||
| Black ball sensor | [no] | |||||
| Self-learning function | [no] | |||||
| Control accuracy | [no] | |||||
| Energy efficiency class (A++ - G) | A | |||||
Information required for individual room heaters
| Modellkennung: 85111 GD 50 IK | ||||||
| Indirect heating function: [no] | ||||||
| Direct heat output: 50 (kW) | ||||||
| Indirect heat output: N/A (kW) | ||||||
| Permissible minimum total length of the flue gas system (vertical + horizontal pipe): NA (m) | ||||||
| Fuel diesel Nitrogen oxide emissions ( | NOX) | |||||
| Value Unit | ||||||
| Select fuel type [liquid] 101 mg/kWh | Input(GCV) | |||||
| Specification Symbol Value Unit Specification Symbol Value Unit | ||||||
| Heat output Efficiency (NCV) | ||||||
| Nominal heat output P | nom | 50,0 kW | Thermal efficiency at nominal heat output | n_th,nom | 96 | % |
| Minimum heat output | P_min | N/A | kW | Thermal efficiency at minimum heat output | n_th,min | N/A |
| Annual room heating utilisation rate | _s | 81,1 | ||||
| Auxiliary power consumption | Type of heat output/room temperature controller(please select one option) | |||||
| With nominal heat output | eI_max | 0,9 | kW | Single-stage heat output, no room temperature control | [no] | |
| With minimum heat output | eI_min | N/A | kW | Two or more manual levels, no room temperature control | [no] | |
| Power consumption | Mechanical room thermostat | [no] | ||||
| In off mode | P_o | N/A | W | Electronic room thermostat | [yes] | |
| In standby mode | P_int | N/A | W | Electronic room thermostat with time-of-day control | [no] | |
| In idle mode | P_idle | N/A | W | Electronic room thermostat with weekday control | [no] | |
| In networked standby mode | P_ram | N/A | W | Other control options (multiple answers possible) | ||
| Standby mode with information or status display | [no] | Room thermostat with presence detection | [no] | |||
| Power requirement of the pilot flame | Room temperature with open window detection | [no] | ||||
| Power requirement of the pilot flame (if available) | P_pilot | 0 kW | Remote control option | [no] | ||
| Adaptive control of the start of heating | [no] | |||||
| Operating time limit | [no] | |||||
| Black ball sensor | [no] | |||||
| Self-learning function | [no] | |||||
| Control accuracy | [no] | |||||
| Energy efficiency class (A++ - G) | A | |||||