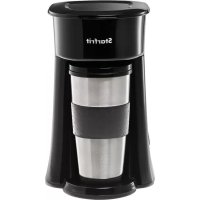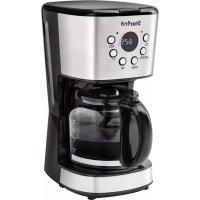
0240010020000 - Coffee machine Starfrit - Free user manual and instructions
Find the device manual for free 0240010020000 Starfrit in PDF.


| Technical Features | Starfrit 0240010020000 coffee machine, 12-cup capacity, 900 W power, integrated filtration system. |
|---|---|
| Usage | Easy to use with an intuitive control panel, keep-warm function, water level indicator. |
| Maintenance and Repair | Easy cleaning thanks to removable parts, regular descaling recommended to maintain performance. |
| Safety | Automatic shut-off system, overheating protection, non-slip base for safe use. |
| General Information | 1-year limited warranty, compact design, ideal for small kitchens or offices. |
Frequently Asked Questions - 0240010020000 Starfrit
User questions about 0240010020000 Starfrit
0 question about this device. Answer the ones you know or ask your own.
Ask a new question about this device
Download the instructions for your Coffee machine in PDF format for free! Find your manual 0240010020000 - Starfrit and take your electronic device back in hand. On this page are published all the documents necessary for the use of your device. 0240010020000 by Starfrit.
USER MANUAL 0240010020000 Starfrit
natural_image
Starfrit brand coffee maker with digital display and glass jar, accompanied by a mug of coffee (no visible text or symbols on main device)PROGRAMMABLE DRIP COFFEE MAKER CAFETIÈRE NUMÉRIQUE CAFETERA
INSTRUCTIONS FOR USE AND CARE P.2 INSTRUCTIONS POUR L'USAGE ET L'ENTRETIEN P.11 INSTRUCCIONES DE USO Y MANTENIMIENTO P.20
OPERATING AND SAFETY INSTRUCTIONS
| Item no. Voltage (V) Wattage (W) Frequency (Hz) | |
| 024001 120 900 60 |
IMPORTANT SAFEGUARDS
READ THE INSTRUCTIONS BEFORE USE
WARNING: To reduce the risk of fire, electrical shock, serious personal injury and/or property damage:
A. Do not touch hot surfaces. Always use the handle while it is in use. Use protective oven mitts or gloves to avoid burns or serious personal injury.
B. To protect against electric shock, do not immerse the power cord, plug or product in water or expose to other liquids.
C. Keep the product out of the reach of children and pets. This product is not intended for use by children. Close adult supervision is necessary when any appliance is used near children.
D. Unplug appliance from electrical outlet before cleaning and when not in use. Allow to cool down completely before assembling, disassembling, relocating, or cleaning the appliance.
E. Do not operate the product if it has a damaged power cord or plug, or after the appliance malfunctions or has been damaged in any manner. Do not attempt to examine or repair this product yourself. Please call the customer service number provided in this user manual.
F. Do not leave the product unattended while it is in use. Always unplug the product from the electrical outlet when not in use.
G. To disconnect, switch appliance to "OFF" then remove plug from the outlet. Pull directly on the plug – do not pull on the power cord.
H. Take proper precautions to prevent burns, fire, or personal or property damage as this appliance generates heat and steam during use.
I. Do not plug or unplug the product into/from the electrical.
J. Use the product in a well-ventilated area.
K. Keep the product away from curtains, clothing, dishtowels, or other flammable materials.
L. Do not use attachments not recommended or sold by the product manufacturer.
M. This product is intended for indoor, non-commercial use in cooking or heating food items for human consumption. Do not use outdoors or for any other purpose.
N. Do not allow the power cord to hang (e.g., over the edge of a table or counter) or touch hot surfaces.
O. Do not place the product on or near a hot gas or electric burner, or in a heated oven or microwave oven.
P. Always place the product on a flat, level, stable surface – it is not recommended to use the appliance on temperature sensitive surfaces.
Q. Connect the power plug to an easily accessible outlet so that the appliance can be unplugged immediately in the event of an emergency.
R. Do not use appliance for anything other than its intended use.
CARAFE SAFETY PRECAUTIONS
A. Do not use a cracked carafe or a carafe having a loose or weakened handle.
B. This carafe is designed to be used only on the keep warm plate of your Starfrit coffee maker. Do not use on a gas or electric range top, or in a microwave or conventional oven.
C. To avoid breakage, handle carafe with care. Avoid impact. Glass will break as a result of impact. Use care when filling with water to avoid hitting your faucet.
D. Do not place the hot carafe on a cool or wet surface. Allow it to cool before washing or adding liquids.
E. Do not set an empty carafe on a hot heating surface.
F. Do not clean with steel wool pads, abrasive cleanser, or any other materials that may scratch.
G. Do not place your hand inside a carafe. When handling, be careful if you are wearing any hand jewelry, especially diamond rings. Jewelry can scratch the glass, increasing the risk of breakage.
H. Do not bump, scratch, or boil dry.
I. Discard the carafe if it is cracked, scratched, or heated while empty for an extended period of time.
J. To avoid accidents, do not pour in the direction of people.
K. If stirring in the carafe, use only wooden, plastic, or rubber utensils. Do not use metal utensils.
L. Follow the above safety precautions carefully to avoid serious burns which may result if breakage occurs while the carafe contains hot liquids.
SAVE THESE INSTRUCTIONS FOR FUTURE REFERENCE
POLARIZED PLUG: This appliance is equipped with a polarized plug (one blade is wider than the other). As a safety feature to reduce the risk of electrical shock, this plug is intended to fit in a polarized outlet only one way. If the plug does not fit fully in the outlet, reverse the plug. If it still does not fit, contact a qualified electrician. Do not attempt to defeat this feature or modify the plug in any way. If the plug fits loosely into the AC outlet or if the AC outlet feels warm, do not use that outlet.
SPECIAL INSTRUCTIONS: A short power supply cord is provided to reduce the risk of becoming entangled in or tripping over a longer cord.
AN EXTENSION CORD MAY BE USED IF CARE IS EXERCISED IN THEIR USE:
- Minimize the risk of overheating by using the shortest UL or ETL listed cord possible.
• The marked electrical rating must be at least as great as that of the product. - Never use a single extension cord to operate more than one appliance.
- Arrange the longer cord so that it will not drape over a countertop or tabletop where it can be tripped over, snagged, or pulled on unintentionally (especially by children).
- DO NOT alter the plug. DO NOT attempt to defeat the safety purpose of the polarized plug.
text_image
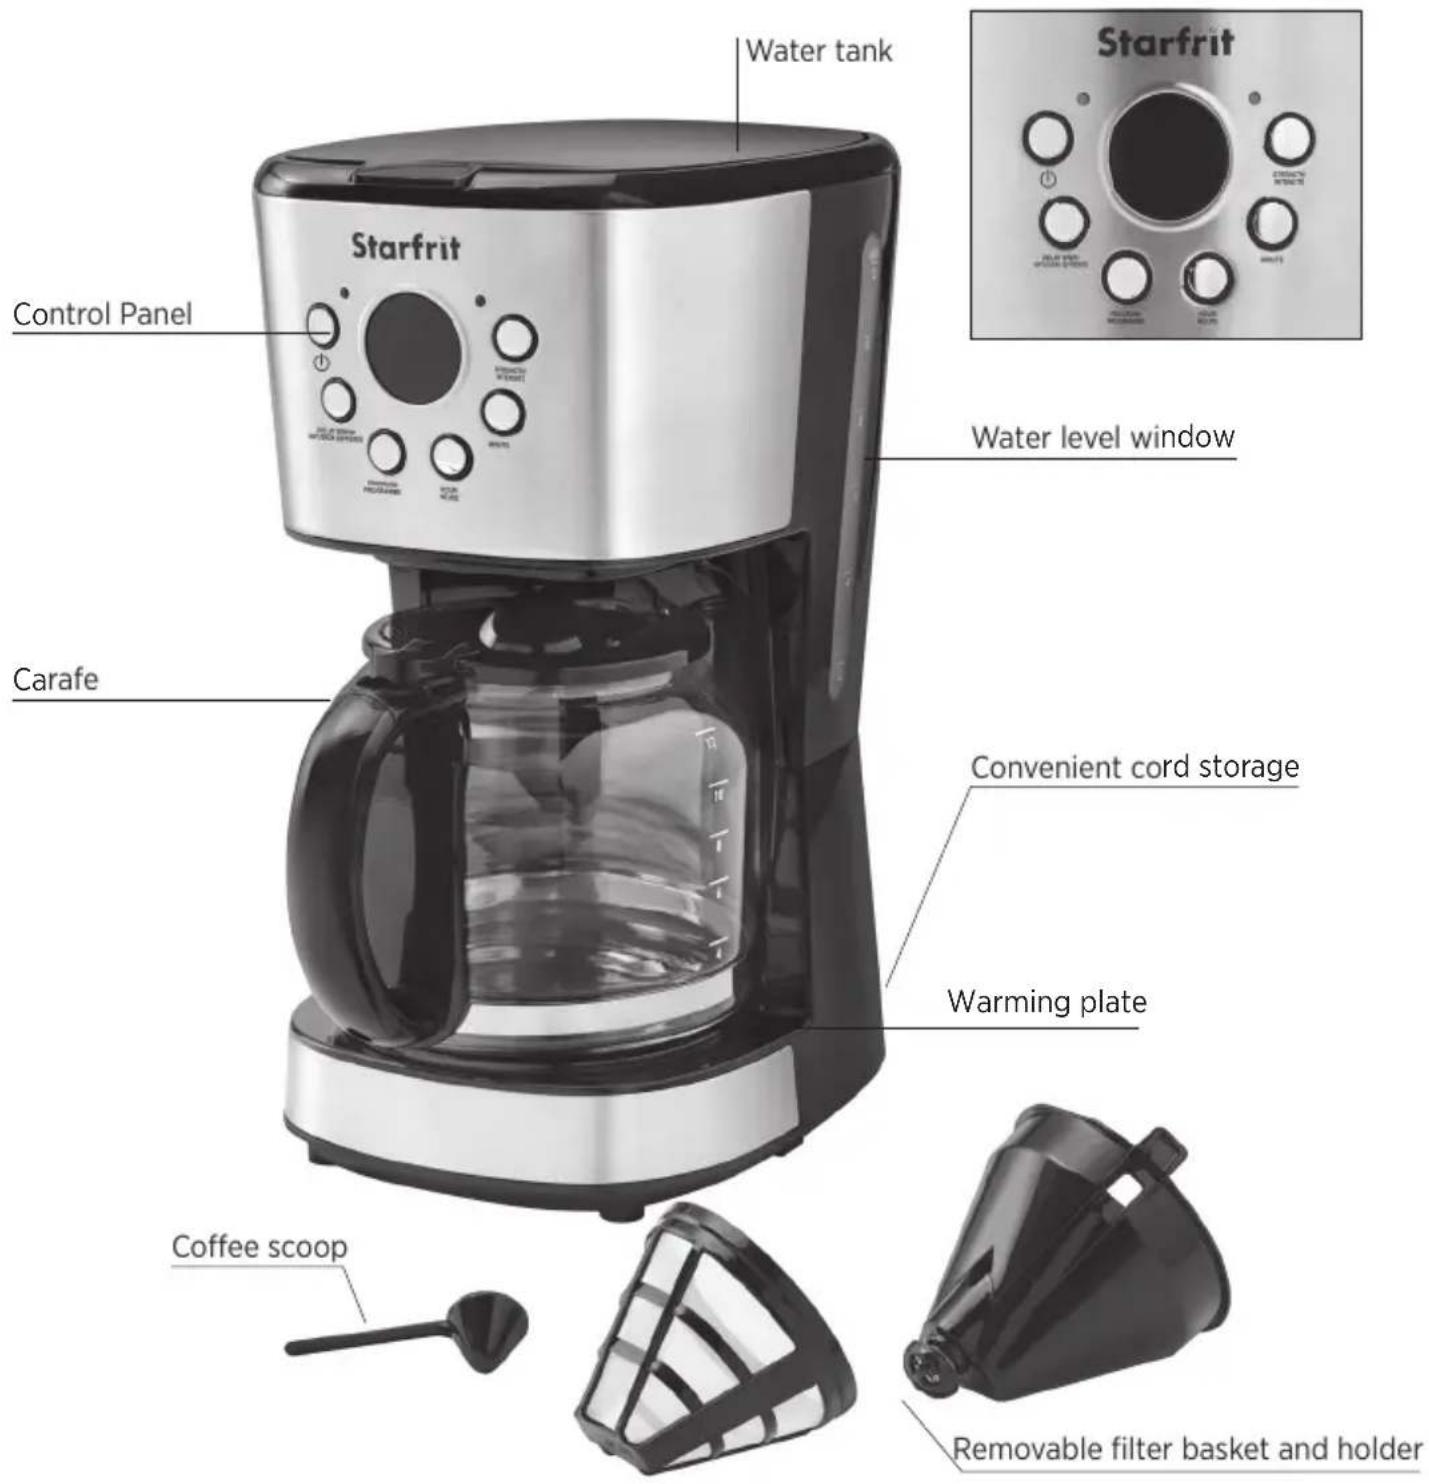
Water tank Control Panel Starfrit Water level window Carafe Convenient cord storage Warming plate Coffee scoop Removable filter basket and holderBEFORE FIRST USE
READ THE INSTRUCTIONS BEFORE USE
NOTE: Remove all parts & accessories and dispose of packaging.
Check that all accessories are complete and the unit is not damaged. Add water into water tank to the max level and brew water for several times without coffee powder, then discard the water.
Clean all detachable parts thoroughly with warm water.
HOW TO MAKE COFFEE
A. Open the top lid and fill the water tank with drinking water. The water level should not exceed the MAX level as indicated on the water gauge.
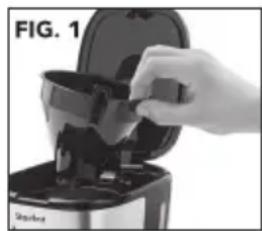
B. Place the funnel into the funnel support, make sure it is assembled correctly, otherwise the top lid cannot be closed.(Fig.1)
C. Place permanent filter in the funnel. (Fig. 2)
D. Add ground coffee into filter paper or permanent filter. Usually 1 level tablespoon of medium ground coffee requires 1 cup of water for each cup of brewed coffee. However, you can adjust according to personal taste.
E. Insert the carafe on the warming plate horizontally.
F. Plug the power cord into the outlet. If you want to adjust the coffee strength, you can press the “STRENGTH” button once, and its corresponding indicator will light up in orange. The unit will then brew thicker coffee. If you do not want to adjust the coffee strength, follow the below operations.
natural_image
Hand pouring liquid into a stainless steel coffee maker (no text or symbols visible)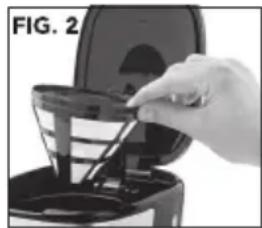
natural_image
Hand pouring liquid into a coffee maker (no text or symbols visible)G. Press the button, its indicator will light up in red and the appliance will start working.
NOTE: During the brewing process, the "PROGRAM", "DELAY BREW", "HOUR" and "MINUTE" functions are invalid.
H. The brewing process can be interrupted by pressing the button at any time, the indicator light will extinguish indicating your coffee maker is turned off.
The appliance will continue brewing once the button is pressed again.
NOTE: You can take out the carafe, pour and serve at any time. The appliance will stop dripping automatically for a maximum of 30 seconds.
I. Remove carafe to serve when brewing is complete (about one minute after the coffee stops dripping out.) NOTE: The volume of coffee you get will be less than the water you have added, as some water is absorbed by the coffee grounds.
J. If you do not want to serve immediately after brewing is complete, keep the coffee maker ON and the coffee will be kept warm in the warming plate. The appliance will shut off automatically 120 minutes after the button has been activated if the unit has not been manually disconnected at the completion of brewing. For a better coffee taste, serve just after brewing.
K. Always turn the coffee maker off and disconnect the power supply when not use. NOTE: Pay close attention when serving coffee. Once the brewing is over, the coffee's temperature will be very high. Avoid hand contact to prevent burning.
DELAY FUNCTION
This coffee machine can delay brewing by up to 24 hours. To delay brewing, follow steps A to F of the “HOW TO MAKE COFFEE” section. Then, follow the below steps to activate the automatic delayed start function:
A. To set the current clock time, press HOUR and MINUTE buttons. NOTE: The time cycle is 24 hours.
B. Press the PROGRAM button, the ⏻ indicator will light up in green and flash. This means the coffee maker has entered the presetting time state. Set the desired brewing time by pressing the HOUR and MINUTE buttons repeatedly.
C. Press the DELAY BREW button, the indicator will light up in green. The LCD screen will display the current clock time. NOTE: You may cancel the automatic start function by pressing ⏻. If you want to change the automatic start time, follow steps B-C once more.
D. When the delayed time is reached, the ⏻ indicator will light up in red and the appliance will start brewing.
E. If you do not want to serve immediately after brewing is complete, keep the coffee maker ON and the coffee will be kept warm in the warming plate. The appliance will shut off automatically 120 minutes after the has been activated if the unit has not been manually disconnected at the completion of brewing. For a better coffee taste, serve it just after brewing. NOTE: During the brewing process, the “PROGRAM”, “DELAY BREW”, “HOUR” and “MINUTE” buttons are invalid.
CLEANING AND MAINTENANCE
CAUTION: Be sure to unplug this appliance before cleaning. To protect against electrical shock, do not immerse cord, plug or unit in water or any other liquid. After each use, always make sure plug is first removed from wall outlet.
- Clean all detachable parts after each use in hot sudsy water.
- Wipe the exterior surface of unit with a soft, damp cloth to remove stains.
- Water droplets may buildup in the above area of the funnel and drip onto the product base during brewing. To control the dripping, wipe off the area with a clean, dry cloth after each use.
- Use a damp cloth to gently wipe the warming plate. Never use an abrasive cleaner.
- Assemble all parts and put aside for next use.
CLEANING WITH VINEGAR
Mineral deposits left by hard water can clog your coffee maker. Cleaning is recommended once a month.
A. Pour white vinegar into the water reservoir up to the 6-cup line on the water window. Add cold water up to the 10-cup line.
B. Put a filter paper in the filter basket and close the cover. Set the empty carafe on the warming plate.
C. Turn on the coffeemaker and let half the cleaning solution brew into the carafe (until water level goes down to around "5"). Turn off the coffeemaker and let it soak for at least 15 minutes to soften the deposits.
D. Turn on the coffeemaker and brew the remaining cleaning solution into the carafe.
E. Turn off the coffeemaker; empty the carafe and discard the soiled filter.
F. Fill the reservoir with cold water to the 12-cup line, replace the empty carafe, then turn on the coffeemaker for a complete brew cycle to flush out the remaining cleaning solution. You may have to repeat this to eliminate the vinegar smell/taste.
G. Wash the filter basket and carafe as instructed in CLEANING AND MAINTENANCE
HINTS FOR GREAT TASTING COFFEE
- Make sure to clean the coffee maker as specified in the “CLEANING AND MAINTENANCE” section. Always use fresh, cold water in the coffee maker.
- Store unused ground coffee in a cool, dry place. After opening a package of ground coffee, reseal it tightly and store it in the refrigerator to maintain its freshness.
- For a better tasting coffee, buy whole coffee beans and finely grind them at home before brewing.
- Do not reuse coffee grounds, this will greatly hinder the coffee's flavor. Reheating coffee is not recommended as coffee is best consumed immediately after brewing.
- Oiliness may occur more frequently if heavily roasted coffees are used.
- Stir coffee in carafe before serving to evenly distribute the flavor.
- Coffee that is poured during brewing cycle may vary in strength from the finished brew.
- For a special occasion, whip some heavy cream with 1 or 2 tablespoons of hazelnut, chocolate or almond liqueur. Use to top off each cup of coffee.
- Keep your coffeemaker scrupulously clean; you will be pleased with the flavor
WARRANTY
1-YEAR LIMITED WARRANTY.
This warranty covers any defects in materials and workmanship for a period of one (1) year from the date of the original purchase. Please retain your original receipt as a proof of the purchase date. Any complaints must be registered within the warranty period. The product will be repaired, replaced (parts including blades or entire appliance) or refunded at our sole discretion. Shipping charges may apply.
This warranty does not cover normal wear of parts or damage resulting from any of the following:
Negligent use or misuse of the product including failure to clean the product regularly, use for commercial purposes, accident, use on improper voltage or current, and use contrary to the operating instructions, disassembly, repair or altercation by anyone other than a STARFRIT authorized service agent.
Decisions as to the cause of damage are the responsibility of Starfrit. All decisions will be final.
MODE D'EMPLOI ET CONSIGNES DE SÉCURITÉ
| Item no. Tension (V) Puissance (W) Fréquence (Hz) | |||
| 024001 120 900 60 | |||
DIRECTIVES IMPORTANTES
natural_image
Hand placing a black plastic cup into a black container (no text or symbols visible)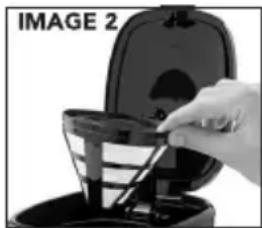
natural_image
Hand pouring liquid into a black coffee cup (no text or symbols visible)CONSEILS POUR OBTENIR DU CAFÉ AU GOÛT EXCEPTIONNEL
natural_image
Close-up of a hand pouring liquid from a black container into a standset (no text or symbols visible)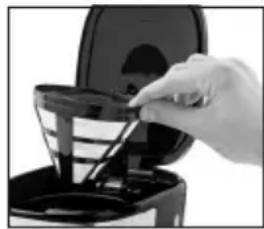
natural_image
Close-up of a hand pouring liquid into a black coffee maker (no text or symbols visible)SUBSCRIBE TO THE NEWSLETTER TO LEARN MORE ABOUT OUR PROMOTIONS!
www. Starfrit.com
INSCRIVEZ-VOUS À L'INFOLETTRE POUR CONNAÎTRE NOS PROMOTIONS !
SUSCRÍBASE AL BOLETÍN DE NOTICIAS PARA INFORMARTE ACERCA DE NUESTRAS PROMOCIONES

www.facebook.com/starfrit
FOR HOUSEHOLD USE ONLY POUR UN USAGE DOMESTIQUE SEULEMENT EXCLUSIVAMENTE PARA USO DOMÉSTICO