BC 400 AA - Battery charger Palmer - Free user manual and instructions
Find the device manual for free BC 400 AA Palmer in PDF.
| Product Type | Battery Charger for NiCd and NiMH rechargeable batteries |
| Model | BC 400 AA |
| Brand | Palmer |
| Compatible Batteries | AA (Mignon), AAA (Micro), 9V block (NiCd/NiMH) |
| Maximum Number of Batteries | 16 AA/AAA or 8 9V block (with optional trays) |
| Charging Current (AA/AAA) | 1000 mA ±5% max |
| Charging Current (9V block) | 35 mA ±5% max |
| Charging Time (AA/AAA) | 2 to 5 hours (depending on battery type and state) |
| Charging Time (9V block) | 4.5 to 10 hours (depending on battery type and state) |
| Operating Voltage | 100-240 V AC, 50-60 Hz |
| Power Consumption | 42 W |
| Fuse | F1AL 250V (5x20 mm) |
| Dimensions (W x H x D) | 480 x 44 x 200 mm |
| Weight (without batteries) | 3.02 kg |
| Enclosure Material | Metal and plastic |
| Mounting | Stand-alone or 19" rack mount (with installation bores) |
| Status Indicators | 16 x 2-color LEDs (red/green) for individual battery status |
| Protection Functions | Overload, short-circuit, deep discharge detection |
| Operating Temperature | 0°C to 40°C |
| Relative Humidity | < 80%, non-condensing |
| Included Accessories | 4 charging trays for AA/AAA, power cable, user manual |
| Spare Parts / Optional | AA/AAA tray: PBC400DRAAA; 9V block tray: PBC400DRA9V (optional) |
| Maintenance | Clean with dry cloth; keep ventilation slots clear |
Frequently Asked Questions - BC 400 AA Palmer
User questions about BC 400 AA Palmer
0 question about this device. Answer the ones you know or ask your own.
Ask a new question about this device
Download the instructions for your Battery charger in PDF format for free! Find your manual BC 400 AA - Palmer and take your electronic device back in hand. On this page are published all the documents necessary for the use of your device. BC 400 AA by Palmer.
USER MANUAL BC 400 AA Palmer
SAFETY INFORMATION 3
INTRODUCTION
CONNECTIONS, CONTROL AND
DISPLAY ELEMENTS 5
OPERATION
TECHNICAL SPECIFICATIONS 8
MANUFACTURER'S DECLARATIONS 9
DEUTSCH
SICHERHEITSHINWEISE
EINFUHRUNG
We have designed this product to operate reliably over many years. Palmer stands for this with its name and many years of experience as a manufacturer of high-quality audio products. Please read this User's Manual carefully, so that you can begin making optimum use of your Palmer product quickly. You can find more information about Palmer at our Internet site www.palmer-germany.com.
SAFETY INFORMATION
- Please read these instructions carefully.
- Keep all information and instructions in a safe place.
- Follow the instructions.
- Observe all safety warnings. Never remove safety warnings or other information from the equipment.
-
Use the equipment only in the intended manner and for the intended purpose.
-
Use only sufficiently stable and compatible stands and/or mounts (for fixed installations). Make certain that wall mounts are properly installed and secured. Make certain that the equipment is installed securely and cannot fall down.
- During installation, observe the applicable safety regulations for your country.
- Never install and operate the equipment near radiators, heat registers, ovens or other sources of heat. Make certain that the equipment is always installed so that is cooled sufficiently and cannot overheat.
- Never place sources of ignition, e.g., burning candles, on the equipment.
- Ventilation slits must not be blocked.
- Keep a minimum distance of 20~cm around and above the device.
- Do not use this equipment in the immediate vicinity of water (does not apply to special outdoor equipment - in this case, observe the special instructions noted below. Do not expose this equipment to flammable materials, fluids or gases. Avoid direct sunlight!
- Make certain that dripping or splashed water cannot enter the equipment. Do not place containers filled with liquids, such as vases or drinking vessels, on the equipment.
- Make certain that objects cannot fall into the device.
- Use this equipment only with the accessories recommended and intended by the manufacturer.
- Do not open or modify this equipment.
- After connecting the equipment, check all cables in order to prevent damage or accidents, e.g., due to tripping hazards.
- During transport, make certain that the equipment cannot fall down and possibly cause property damage and personal injuries.
- If your equipment is no longer functioning properly, if fluids or objects have gotten inside the equipment or if it has been damaged in anoth her way, switch it off immediately and unplug it from the mains outlet (if it is a powered device). This equipment may only be repaired by authorized, qualified personnel.
- Clean the equipment using a dry cloth.
- Comply with all applicable disposal laws in your country. During disposal of packaging, please separate plastic and paper/cardboard.
- Plastic bags must be kept out of reach of children.
- Please note that changes or modifications not expressly approved by the party responsible for compliance could void the user's authority to operate the equipment.
FOR EQUIPMENT THAT Connects TO THE POWER MAINS
- CAUTION: If the power cord of the device is equipped with an earthing contact, then it must be connected to an outlet with a protective ground. Never deactivate the protective ground of a power cord.
- If the equipment has been exposed to strong fluctuations in temperature (for example, after transport), do not switch it on immediately. Moisture and condensation could damage the equipment. Do not switch on the equipment until it has reached room temperature.
- Before connecting the equipment to the power outlet, first verify that the mains voltage and frequency match the values specified on the equipment. If the equipment has a voltage selection switch, connect the equipment to the power outlet only if the equipment values and the mains power values match. If the included power cord or power adapter does not fit in your wall outlet, contact your electrician.
- Do not step on the power cord. Make certain that the power cable does not become kinked, especially at the mains outlet and/or power adapter and the equipment connector.
- When connecting the equipment, make certain that the power cord or power adapter is always freely accessible. Always disconnect the equipment from the power supply if the equipment is not in use or if you want to clean the equipment. Always unplug the power cord and power adapter from the power outlet at the plug or adapter and not by pulling on the cord. Never touch the power cord and power adapter with wet hands.
-
Whenever possible, avoid switching the equipment on and off in quick succession because otherwise this can shorten the useful life of the equipment.
-
IMPORTANT INFORMATION: Replace fuses only with fuses of the same type and rating. If a fuse blows repeatedly, please contact an authorised service centre.
- To disconnect the equipment from the power mains completely, unplug the power cord or power adapter from the power outlet.
- If your device is equipped with a Volex power connector, the mating Volex equipment connector must be unlocked before it can be removed. However, this also means that the equipment can slide and fall down if the power cable is pulled, which can lead to personal injuries and/or other damage. For this reason, always be careful when laying cables.
- Unplug the power cord and power adapter from the power outlet if there is a risk of a lightning strike or before extended periods of disuse.

CAUTION:
To reduce the risk of electric shock, do not remove cover (or back). There are no user serviceable parts inside. Maintenance and repairs should be exclusively carried out by qualified service personnel.
The warning triangle with lightning symbol indicates dangerous uninsulated voltage inside the unit, which may cause an electrical shock.

The warning triangle with exclamation mark indicates important operating and maintenance instructions.

Warning! This symbol indicates a hot surface. Certain parts of the housing can become hot during operation. After use, wait for a cool-down period of at least 10 minutes before handling or transporting the device.

Warning! This device is designed for use below 2000 metres in altitude.

Warning! This product is not intended for use in tropical climates.
SAFETY INFORMATION ABOUT THE CHARGER AND RECHARGEABLE BATTERIES
- The battery charger is exclusively suitable for rechargeable type AA (Mignon), AAA (Micro), and 9V block NiCd and NiMH batteries!
- Exclusively use quick-charging, branded products, preferably nickel metal hydride (NiMH) batteries!
- Do not recharge single-use batteries!
- Prior to charging: check all batteries for damage and do not use any damaged batteries!
- Correctly dispose of damaged and drained batteries at the corresponding collection points!
- Make sure battery contacts and charging trays are clean and have not oxidized!
- Do not use the charger in ambient and battery temperatures below 0^ and over 40^
- Do not leave charging batteries unattended!
- Make sure the polarity of the batteries is correct when you insert them into the charger (see illustrations in the charging trays)!
- Do not use different battery cell types simultaneously in one device!
INTRODUCTION
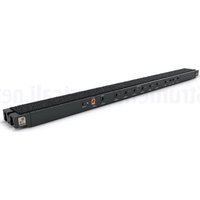
The Palmer BC400AA charger is suitable for simultaneously quick-charging up to 16 type NiMH and NiCd AA or AAA rechargeable batteries. In this process, the charging status of each individual battery is monitored electronically and this is illustrated by separate status LEDs. The charger is suitable as a stand-alone unit or for installation in a 19" rack.
Charging trays for rechargeable 9V block batteries are optionally available as accessories (item no. PBC400DRA9V
Charging trays for rechargeable AA or AAA batteries are available as spare parts (item no. PBC400DRAAA
SCOPE OF DELIVERY
19" charger with four slots
Four charging trays for rechargeable AA or AAA batteries
Power cable
User manual
CONNECTIONS, CONTROL AND DISPLAY ELEMENTS


1 POWER IN
IEC power socket with integrated fuse holder. A suitable IEC power cable is included in delivery.
IMPORTANT NOTE: Exclusively replace the fuse with a fuse of the same type and values. If a fuse trips repeatedly, please contact an authorized service center.
2 POWER
On/off switch with light. The switch lights up as soon as the device has been correctly connected to the mains and it has been switched on. The charger is then ready for operation.
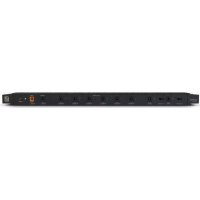
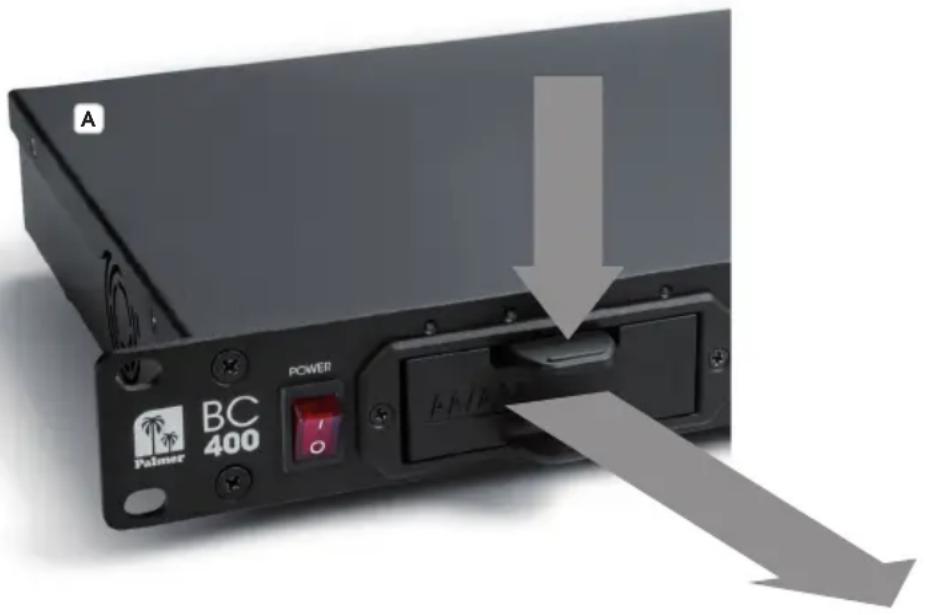
3 SLOTS WITH CHARGING TRAYS
The front of the charger features four slots for one charging tray each.
Each slot is suitable for a charging tray for four rechargeable AAA (Micro) or AA (Mignon) batteries as well as for a charging tray for two rechargeable 9V block batteries (charging trays for rechargeable 9V block batteries are optionally available. Item no. PBC400DRA9V). The intelligent contact alignment makes sure that the correct charging voltage automatically applies at the corresponding rechargeable batteries. Grab the unlocking lever and the handle below with your thumb and index finger to easily remove the charging tray, lightly press the unlocking lever and pull the charging tray from the device towards the front to remove the charging tray (see Fig. A) After having removed rechargeable batteries or having inserted rechargeable batteries into the charging tray for charging, once again slide the charging tray into the slot until the unlocking lever re-engages.
STATUS LEDs
There are four LEDs above the slots to display the charging status of the inserted rechargeable batteries. If a slot is occupied with the charging tray for four rechargeable AAA (Micro) or AA (Mignon) batteries, all four LEDs show the corresponding charging status; with the charging tray for two rechargeable 9V block batteries only the two outside ones will light up. If the charging bay in the charging tray remains unoccupied, the corresponding status LED remains off (LED off). Please refer to the following table for information about the charging status of inserted rechargeable batteries.
| LED permanently lights up red = | Charging rechargeable battery |
| LED permanently lights up green | = Rechargeable battery fully charged |
| LED flashes red = Battery cell error /deep discharge (refer to "OPERATION" for a description) | |
5 INSTALLATION BORES
The 19" charger features installation bores on both sides of the front for installation into a 19" rack.
FAN AND VENTILATION SLOTS
One side of the enclosure features the enclosure fan, the other side features ventilation slots. Do not cover fan and ventilation slots and make sure air can circulate freely.
OPERATION
You can insert any number of rechargeable batteries into AA/AAA charging trays up to a maximum of four; in this process, you can also mix and charge AA and AAA rechargeable batteries (Fig. B Insert the side with the positive terminal into the charging bay first to place AAA rechargeable batteries in the corresponding charging tray. When inserting rechargeable 9V block batteries into the corresponding charging tray, make sure that the rechargeable batteries are inserted with the positive terminals pointing towards the outside (Fig. C). Always note the illustrations and marks in the charging bays of the charging trays and do not stack rechargeable AAA and AA batteries.


Rechargeable batteries and charging tray for rechargeable 9V block batteries not included in scope of delivery!
If the status LED for one or more rechargeable batteries shows that the
charging process has been completed, you can just remove the charging tray from the corresponding slot to remove fully charged rechargeable batteries. You need not switch off the charger for this purpose. After having reinserted the charging tray into the slot, the charging process of the rechargeable batteries remaining in the charging bay continues. Once the charging end voltage of rechargeable batteries has been reached (corresponding status LED lights up green), the quick-charging process is interrupted (overload protection) and the rechargeable batteries' charging status is maintained at this level until the battery is removed.
Deep discharge: If a rechargeable battery has been deep discharged, it may be possible that the charging electronics identify it as faulty and the corresponding status LED flashes red. Leave the rechargeable battery in the charger for approximately 15 minutes, then remove the corresponding charging tray from the charger to interrupt the charging contacts and reinsert the charging tray into the charger. If the corresponding status LED then continues to flash red, the inserted rechargeable battery is damaged. Correctly dispose of the rechargeable battery at an official collection point.
If fully charged rechargeable batteries are reinserted and charged, the charging electronics identify them as fully charged after a few minutes and the charger maintains the charging levels.
You can charge up to sixteen rechargeable AA or AAA batteries and up to eight rechargeable 9V block batteries simultaneously in the Palmer BC400 charger. You can also mix charging trays for rechargeable AA/AAA batteries and charging trays for rechargeable 9V block batteries in the charger.
TECHNICAL SPECIFICATIONS
| Item number: PBC400AA | |
| Product type: Stand-alone and 19" installation unit | |
| Type: Charger for AA/AAA and 9V block NiCD and NiMH rechargeable batteries | |
| Maximum number of re-chargeable AA/AAA batteries: | 4 charging trays with 4 charging bays each (at max. 16 rechargeable batteries can be charged at the same time) |
| Rechargeable AA/AAA batteries charging current (max.): | 1000mA ±5% |
| Charging time for AA/AAA rechargeable batteries: | 2 to 5 hours (depending on the rechargeable battery type used and the charging status) |
| Maximum number of re-chargeable 9V block batteries: | 4 charging trays with 2 charging bays each (at max. 8 rechargeable batteries can be charged simultaneously) Charging trays for rechargeable 9V block batteries optionally available (item no. PBC400DRA9V) |
| Charging current for recharge-able 9V block batteries (max.): | 35mA ±5% |
| Charging time for recharge-able 9V block batteries: | 4.5 to 10 hours (depending on the rechargeable battery type used and the charging status) |
| Control elements: On/off switch | |
| Display elements: 16 x 2-color LEDs (red/green), illuminated on/off switch | |
| Operating voltage: 100-240V AC/50-60Hz | |
| Power consumption: 42W | |
| Protective functions: overload protection, identifies faulty rechargeable batteries, short-circuit protection | |
| Power supply connection: IEC power socket | |
| Fuse: F1AL 250V (5x20mm) | |
| Ambient temperature (run-ning): | 0-40°C |
| Relative humidity: < 80%, non-condensing | |
| Enclosure material: metal, plastic | |
| Enclosure color: black | |
| Dimensions (W x H x D): 480 x 44 x 200mm | |
| Weight (without rechargeable batteries): | 3.02kg |
| Additional features: | 4 rubber feet, preassembled. Charging trays for rechargeable 9V block batteries optionally available (item no. PBC400DRA9V) Charging trays for AA/AAA rechargeable batteries available as spare part (item no. PBC400DRAAA |
Scope of delivery Power cable. 4 charging trays for 4 AA/AAA rechargeable batteries each.
MANUFACTURER'S DECLARATIONS
MANUFACTURER'S WARRANTY & LIMITATIONS OF LIABILITY
You can find our current warranty conditions and limitations of liability at: https://cdn-shop.adamhall.com/ media/pdf/MANUFACTURERS-DECLARATIONS PALMER5bb2340e52a8c.pdf To request warranty service for a product, please contact Adam Hall GmbH, Adam-Hall-Str. 1,
61267 Neu Anspach / Email: Info@adamhall.com / +49 (0)6081 / 9419-0.

CORRECT DISPOSAL OF THIS PRODUCT
(valid in the European Union and other European countries with a differentiated waste collection system)
This symbol on the product, or on its documents indicates that the device may not be treated as household waste. This is to avoid environmental damage or personal injury due to uncontrolled waste disposal. Please dispose of this product separately from other waste and have it recycled to promote sustainable economic activity. Household users should contact either the retailer where they purchased this product, or their local government office, for details on where and how they can recycle this item in an environmentally friendly manner. Business users should contact their supplier and check the terms and conditions of the purchase contract. This product should not be mixed with other commercial waste for disposal.
DEUTSCH
APPAREILS RELIÉS AU SECTEUR
(Valid in the European Union and other European countries with waste separation)