XVMF65 - Car stereo SONY - Free user manual and instructions
Find the device manual for free XVMF65 SONY in PDF.
| Technical Features | 6.5-inch touchscreen, 800 x 480 pixel resolution, compatibility with Android Auto and Apple CarPlay, built-in Bluetooth, FM/AM radio, USB input, RCA audio output. |
|---|---|
| Usage | Ease of use thanks to the touch interface, ability to connect mobile devices for music streaming and access to navigation apps. |
| Maintenance and Repair | Regularly check connections and cables, firmware update recommended to ensure compatibility with new devices. |
| Safety | Professional installation recommended to avoid short circuits, use of an appropriate fuse to protect the device. |
| General Information | Dimensions: 178 x 100 x 50 mm, weight: 1.2 kg, 2-year warranty, technical support available. |
Frequently Asked Questions - XVMF65 SONY
Download the instructions for your Car stereo in PDF format for free! Find your manual XVMF65 - SONY and take your electronic device back in hand. On this page are published all the documents necessary for the use of your device. XVMF65 by SONY.
USER MANUAL XVMF65 SONY
- Full, Wide and Zoom screen modes available, in addition to the normal screen mode.
- The low reflection liquid crystal panel reduces the glare from outside lighting sources.
- Adjustable brightness control, according to lighting conditions
- Backlight dimmer control produces sharp contrast image, free from reversed or blurred colours.
- 2 Audio/Video inputs and 1 Audio/Video output are provided for connecting a video player, video game, and an additional monitor.
- Built-in infrared transmitter for cordless headphones.5 Precautions To avoid the risk of serious injury or accident, read the following precautions before installing and operating the unit. On safety Comply with your local traffic rules and regulations.
- While driving - The driver must not watch or operate the monitor. It may lead to distraction and cause an accident. - The driver must not use the headphones. It may lead to distraction and cause an accident. Park the car in a safe place when the driver watch and operate the monitor, or use headphones. Watching video pictures The video pictures appear only after you park the car and set the parking brake. When the car starts moving, the video pictures automatically disappear after displaying the following caution. Do not operate equipment connected to the monitor or watch the monitor while driving. The caution above appears only when the monitor is connected to the installation cradle.
- After installing - Take care not to bump your head against the unit when getting up from the back seat. - Take extra care not to wind the wire of the headphones around your neck avoiding injury or suffocation in the event of a sudden movement of the vehicle. - Keep small articles out of the reach of children. - Do not leave the monitor under direct sunlight for a long period of time. DRIVE MODE6 On installation
- Installing this unit requires technical expertise. This unit should be installed by a qualified technician or service personnel.
- If you try to install this unit by yourself, do it properly, referring to the installation and wiring diagrams in this operating manual. Improper installation may result in fire or electric shock.
- Before installation, be sure to turn the ignition switch to the OFF position or take the key out. Installing this unit with the ignition on may cause battery drain or a short circuit.
- Do not damage any pipes, tubes, the fuel tank or electric wiring when installing this unit. This can cause a fire. If you drill a hole in car panels, make sure that any hidden car parts will not be damaged.
- Do not use any nuts or bolts for safety devices such as steering linkage, fuel supply or braking systems. This can cause a fire or an accident.
- Take care to prevent cords and wires from getting tangled or crimped in the moving portion of a seat rail.7 Where to install Before installing this unit, please check your local traffic rules and regulations. Do not install this unit where: - It will obstruct the driver’s view. - It will obstruct the operation of the airbag system. - It will obstruct the operation of the vehicle, especially the steering wheel, shift lever, or brake pedal. -A driver or passengers may injure themselves when getting into or out of the car. If you have any questions or problems concerning your unit that are not covered in this manual, please consult your nearest Sony dealer.8
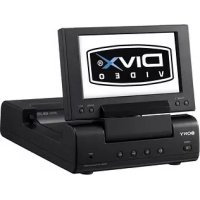
Location of controls Monitor
- If interference occurs while using several cordless headphones If several monitors are installed and used simultaneously, interference may occur. 1 INPUT button Press to select the input source. 2 Receptor for the card remote commander/Transmitter for the cordless headphones* 3 MENU button Press to make various settings. 4 DIMMER button Press to switch the dimmer on/off. 5 POWER (on/off) button Press to turn on/off the monitor. 6 VOLUME +/– buttons Press to turn up or down the volume or to select the item during menu operation. 7 RESET button 8 Monaural speaker9 Tip Refer to “Replacing the lithium battery” for details on how to replace the batteries (page 17). Card remote commander RM-X709 1 ATT button Press to quickly attenuate the volume. 2 INPUT button Press to select the input source. 3 MENU button Press to select the menu settings. 4 |/1 (power) button 5 MODE button Press to change the screen mode. 6 M/m buttons Press to select the desired item. 7 VOL (volume) +/– buttons Press to adjust the volume of the monitor.
MODEMENUINPUT ATT `/1 VOL10 `/1V/vINPUTMODEMENUINPUT ATT `/1 VOL VOLUME ĸ-Ĺ POWERINPUT When NTSC Video is selected VIDEO1 NTSC When PAL Video is selected VIDEO1 PAL Operation Selecting the input source You can select the input source and colour system. 1 Press (POWER). On the card remote commander, press {/1
The power is turned on. 2 Press (INPUT) to select the desired input source. Each time you press (INPUT), the indication changes in the following sequence: To select the connected navigation system Press (INPUT) repeatedly to select “NAVI”. 3 Press M or m ((VOLUME) (+) or (–) on the monitor) to select PAL or NTSC system. Press either button while the source indication (such as “VIDEO 1”) is displayed.
VIDEO 1 VIDEO 2 NAVI11
Setting the screen mode In addition to the full mode, wide, normal and zoom modes are also available. Press (MODE) repeatedly. The current mode is displayed on the screen first. Each time the button is pressed, the screen mode swiches in the following sequence: You can also set the screen mode in the menu setting (page 13). Tip Images may appear coarse-grained when viewed in the zoom mode. Zoom Zoom Zoom Full Full Full Wide Wide Wide Normal Normal NormalNormalAn image with an aspect ratioof 4 to 3. Zoom An image with an aspect ratio of 4to 3 enlarged to the left and rightedges of the screen, with theoverflowing parts (top and bottom)cut off to fill the screen.Full (regular image)An image with an aspect ratioof 4 to 3 enlarged to the leftand right edges of the screen. Wide An image with an aspect ratio of4 to 3, with only the left andright sides of the image beingenlarged to fill the screen. MENU MENU MODE MODEMENUINPUT ATT `/1 VOL12 Switching the DIMMER On/Off Press the (DIMMER) button on the monitor. The current setting of the dimmer is displayed. Each time you press (DIMMER), the dimmer is switched to On/Off. When it is set to On, the display darkens. DIMMER13 Changing the menu settings You can adjust the display settings manually if the display is hard to see from the position where you are seated. 1 Press (MENU). The “Picture” screen appears. Each time you press (MENU), the setting screen changes in the following sequence:
- Appears only when the NTSC colour system is selected. 2 Press M or m ((VOLUME) (+) or (–) on the monitor) to adjust to the desired setting. See the next page for the setting options. Picture 32 Press
or MENU. The setting value of theitem selected appears in thisarea.VOLUME ĸ-Ĺ MENU MENU MODEMENUINPUT ATT `/1 VOL V/v Picture Brightness Color Hue Video AdjustMenu Off WireLess Headphone Speaker Blue Back Mode14 The default settings are underlined. Settings Setting options Picture Settable range: 0 to 63 (default setting is “36”) Adjusting the contrast. Brightness Settable range: 0 to 63 (default setting is “30”) Adjusting the brightness. Color Settable range: 0 to 63 (default setting is “36”) Adjusting the color. Hue Adjust this if the picture is reddish or greenish. The default setting is “CTR (center)”. ”Hue” is displayed for NTSC system only. Video Adjust Resetting the picture, brightness, color, hue, dimmer setting at single operation. Note Input channel, color system for the input video signal (PAL/NTSC), screen mode, and blue background setting will not be reset when you reset the adjustments. Mode Full, Wide, Normal, Zoom Setting the screen mode. Full: An image with an aspect ratio of 4 to 3 enlarged to the left and right edges of the screen (regular image). Wide: An image with an aspect ratio of 16 to 9. Normal: An image with an aspect ratio of 4 to 3. Zoom: An image with an aspect ratio of 4 to 3 enlarged to the left and right edges of the screen, with the overflowing parts (top and bottom) cut off to fill the screen. Blue Back On, Off Setting the blue background screen. Speaker On, Off Turning on and off the speaker on the backside of the monitor. WireLess Headphone 1CH, 2CH, OFF Turning on and off the cordless headphone (MV-02HP) (optional). When using the headphone, select either “1CH” or “2CH” depending on the headphone's channel setting.15 ATT
ATT `/1 VOL Adjusting the volume You can adjust the volume of the unit with the supplied card remote commander. Press (VOL) (+) or (VOL) (–) ((VOLUME) (+) or (–) on the monitor). The default volume level is 25. Quickly attenuating the sound Press (ATT) on the card remote commander. To restore the previous volume level Press (ATT) again or (VOL) (+) or (–) ((VOLUME) (+) or (–) on the monitor). Using cordless headphones You can use infrared cordless headphones, MV-02HP (optional), with the unit. Please refer to the operating instructions for MV-02HP. Notes
- The volume of the cordless headphones cannot be adjusted with the supplied card remote commander. Use the volume control on the cordless headphones.
- For your safety, do not use the headphones while driving a car.
- Do not leave the headphones in a place subject to direct sunlight, or in a high temperature.
- If the cordless headphones are used while exposed to direct sunlight, sensitivity of the infrared receptor may deteriorate, and inferior quality sound may result. ATT On VOLUME ĸ-Ĺ16
Additional Information Maintenance Fuse replacement When replacing the fuse of the power cord or the cigar lighter socket, be sure to useone matching the amperage rating stated on the original fuse. If the fuse blows, checkthe power connection and replace the fuse. If the fuse blows again after replacement,there may be an internal malfunction. In such a case, consult your nearest Sonydealer.WarningNever use a fuse with an amperage rating exceeding the one supplied with the unitas this could damage the unit.
Fuse17 Replacing the lithium battery Under normal conditions, batteries will last approximately 1 year. (The service life may be shorter, depending on the conditions of use.) When the battery becomes weak, the range of the card remote commander becomes shorter. Replace the battery with a new CR2025 lithium battery. Use of any other battery may present a risk of fire or explosion. Notes on lithium battery
- Keep the lithium battery out of the reach of children. Should the battery be swallowed, immediately consult a doctor.
- Wipe the battery with a dry cloth to assure a good contact.
- Be sure to observe the correct polarity when installing the battery.
- Do not hold the battery with metallic tweezers, otherwise a short-circuit may occur. WARNING Battery may explode if mistreated. Do not recharge, disassemble, or dispose of in fire. About the liquid crystal display (LCD) panel Do not press on the LCD panel on the unit as doing so can distort the picture or cause a malfunction. The picture may become unclear, or the LCD panel may be damaged. Notes on cleaning — Clean the LCD panel with a slightly damp soft cloth. — Do not use solvents such as benzine, thinner, commercially available cleaners or antistatic spray.
- Do not use the unit in temperatures under 0 °C or over 45 °C.
- If your car was parked in a cold or hot place, the picture may not be clear. The monitor is not damaged. The picture will become clear after the temperature in your car becomes normal. Some stationary blue or red dots may appear on the monitor. These are called bright spots, and can happen with any LCD. The LCD panel is highly sophisticated, and more than 99.99 % of the segments used in the panel are flawless. However, there is a possibility that less than 0.01 % of the segments are defective and may not light up properly. + side facing up While pushing the lock lever (1), pull out the battery holder (2).
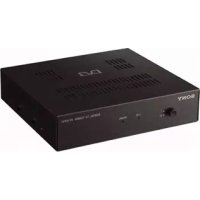
(w/h, d) Picture segment 280,800 (w 1,200 × h 234) dots Power requirements 12 V DC car battery (negative ground) Current drain Approx. 1 A Dimensions 194 × 101 × 27.1 mm (w/h/d) Operating temperature 0 °C – 45 °C Mass Approx. 400 g Connection box XA-122 A/V Output Output Impedance: less than 470 Ω less than 1,000 pF Output Level: 0 dBs ±0.3 dB (0.775 V rms) Video: 75 Ω 1 Vp-p A/V Input ×2 Input Impedance: more than 10 kΩ less than 1,000 pF Input Level (max.): 1.3 dBs +0/–0.3 dB (1 V rms) Video: 75 Ω 1 Vp-p Dimensions 147.5 × 40 × 80 mm (w/h/d) Mass Approx. 250 g Card remote commander RM-X709 Power requirements CR2025 lithium battery Operable range Approx. 2.5 m Dimensions 55 × 125 × 15 mm (w/h/d) Mass Approx. 40 g (including batteries) Supplied accessories Installation kit (1) Monitor stand (1) (with supplied screws (5)) RCA cable (3 m) (2) Connection box XA-122 (1) Card remote commander RM-X709 (with supplied battery) (1) Power supply cord (1) Detach cradle (3 m) (1) Cigar plug (0.3 m) (1) Operating Instructions (1 set) Optional accessories DVD player DVX-11A Cordless headphones MV-02HP Multi Disc Player MEX-R1 Design and specifications are subject to change without notice.19 Troubleshooting The following checklist will help you solve problems you may encounter with your unit. Before going through the checklist below, check the connection and operating procedures. General No picture Good picture, but no sound Dotted lines or stripes No picture when you connect the optional equipment. No response when pressing the buttons on the card remote commander No picture even when playing back the connected device while driving. The operation buttons on the monitor do not function. / The monitor does not turn off. / Nothing but the white background appears on the display.
- The power cord has been disconnected.