
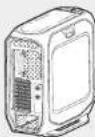
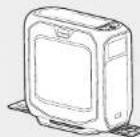
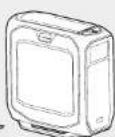
Graphite 780T - Desktop Computer CORSAIR - Free user manual and instructions
Find the device manual for free Graphite 780T CORSAIR in PDF.
| Product type | Full tower PC case |
| Dimensions (L x W x H) | 689 x 332 x 670 mm |
| Weight | 11.3 kg |
| Material | Steel, plastic |
| Supported motherboard form factors | ATX, Micro-ATX, Mini-ITX |
| Expansion slots | 9 (PCI) |
| Included fans | 3 x 140 mm AF140L |
| Fan mounting | Front: 3x120/2x140, Top: 3x120/2x140, Rear: 1x120/140, Bottom: 2x120 |
| Supported radiators | Front and top up to 360mm, rear up to 140mm |
| Storage bays | 2 x 5.25", 6 x 3.5"/2.5" (internal), 3 x 2.5" (SSD) |
| Front connectors | 2 x USB 3.0, 1 x Microphone, 1 x Headphone |
| Dust filters | Front, top, bottom, PSU |
| Supported PSU | ATX (max length 260mm) |
| Fan control | 3-speed button |
| Side panels | Tool-less, lockable |
| Warranty | 2 years |
Frequently Asked Questions - Graphite 780T CORSAIR
User questions about Graphite 780T CORSAIR
0 question about this device. Answer the ones you know or ask your own.
Ask a new question about this device
Download the instructions for your Desktop Computer in PDF format for free! Find your manual Graphite 780T - CORSAIR and take your electronic device back in hand. On this page are published all the documents necessary for the use of your device. Graphite 780T by CORSAIR.
USER MANUAL Graphite 780T CORSAIR
© 2014 Corsair Components, Inc.
All rights reserved. Corsair, the sails logo, and Graphite Series are registered trademarks of Corsair in the United States and/or other countries. All other trademarks are the property of their respective owners. Product may vary slightly from those pictured.
PN:49-001199 rev AA


INSTALLATION GUIDEGUIDED INSTALLATION INSTALLATIONSANLEITUNG
GUIDA ALL'INSTALLAZIONE Guia de instalacion PYKOBOCTBO NO YCTAHOBKE
安装指南■取脱説明書
English 1-10
Francais 11-20
Italiano 21-30
Deutsch 31-40
Espanol 41-50
Pocmo. 51-60
中文 61-70

GRAPHITE SERIES'780T
Table of Contents
Congratulations 1
Case specifications 2
Accessory kit contents 3
Case features. 4
Remove the side panels 5
Install the motherboard 5
Install the PSU 6
Install PCI-E/PCI card(s) 6
Install a 5.25" drive/device (ODD)
Install a 2.5" SSD
Power the Case Fans 8
Install the Front I/O Connectors 8
Frequently asked questions 9
Congratulations!
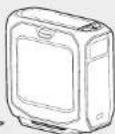
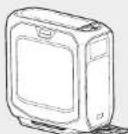
Thank you for purchasing the
Graphite Series 780T Full-Tower Case.
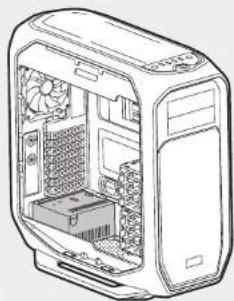
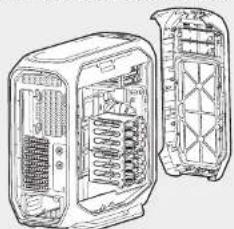
The stunning Graphite Series 780T Full-Tower PC case can satisfy the most hardcore computer gamer or overclocker with ample room for nine drives and nearly a dozen large cooling fans. Water-cooling enthusiasts will appreciate the generous space for dual 360mm radiators. The 780T offers easy maintenance shortcuts like tool-free removal of side panels, hard drives, and graphic cards. A three-speed fan control button and generous options for your array of peripherals make the front-panel a true time saver.
Case Specifications
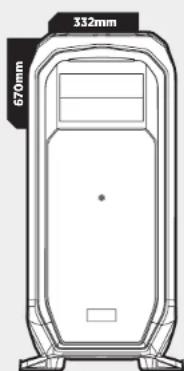
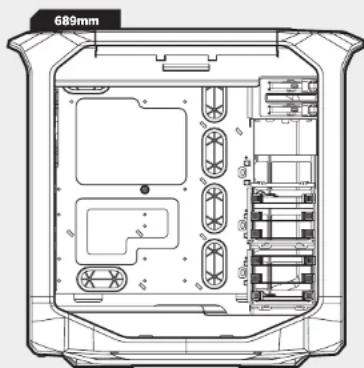
Length 689mm
Width 332mm
Height 670mm
Weight 11.3kg
Maximum GPU Length Top Slots 355mm
Maximum GPU Length All Slots 355mm
Maximum CPU cooler height 200mm
Maximum PSU length 260mm

GRAPHITE SERIES'780T
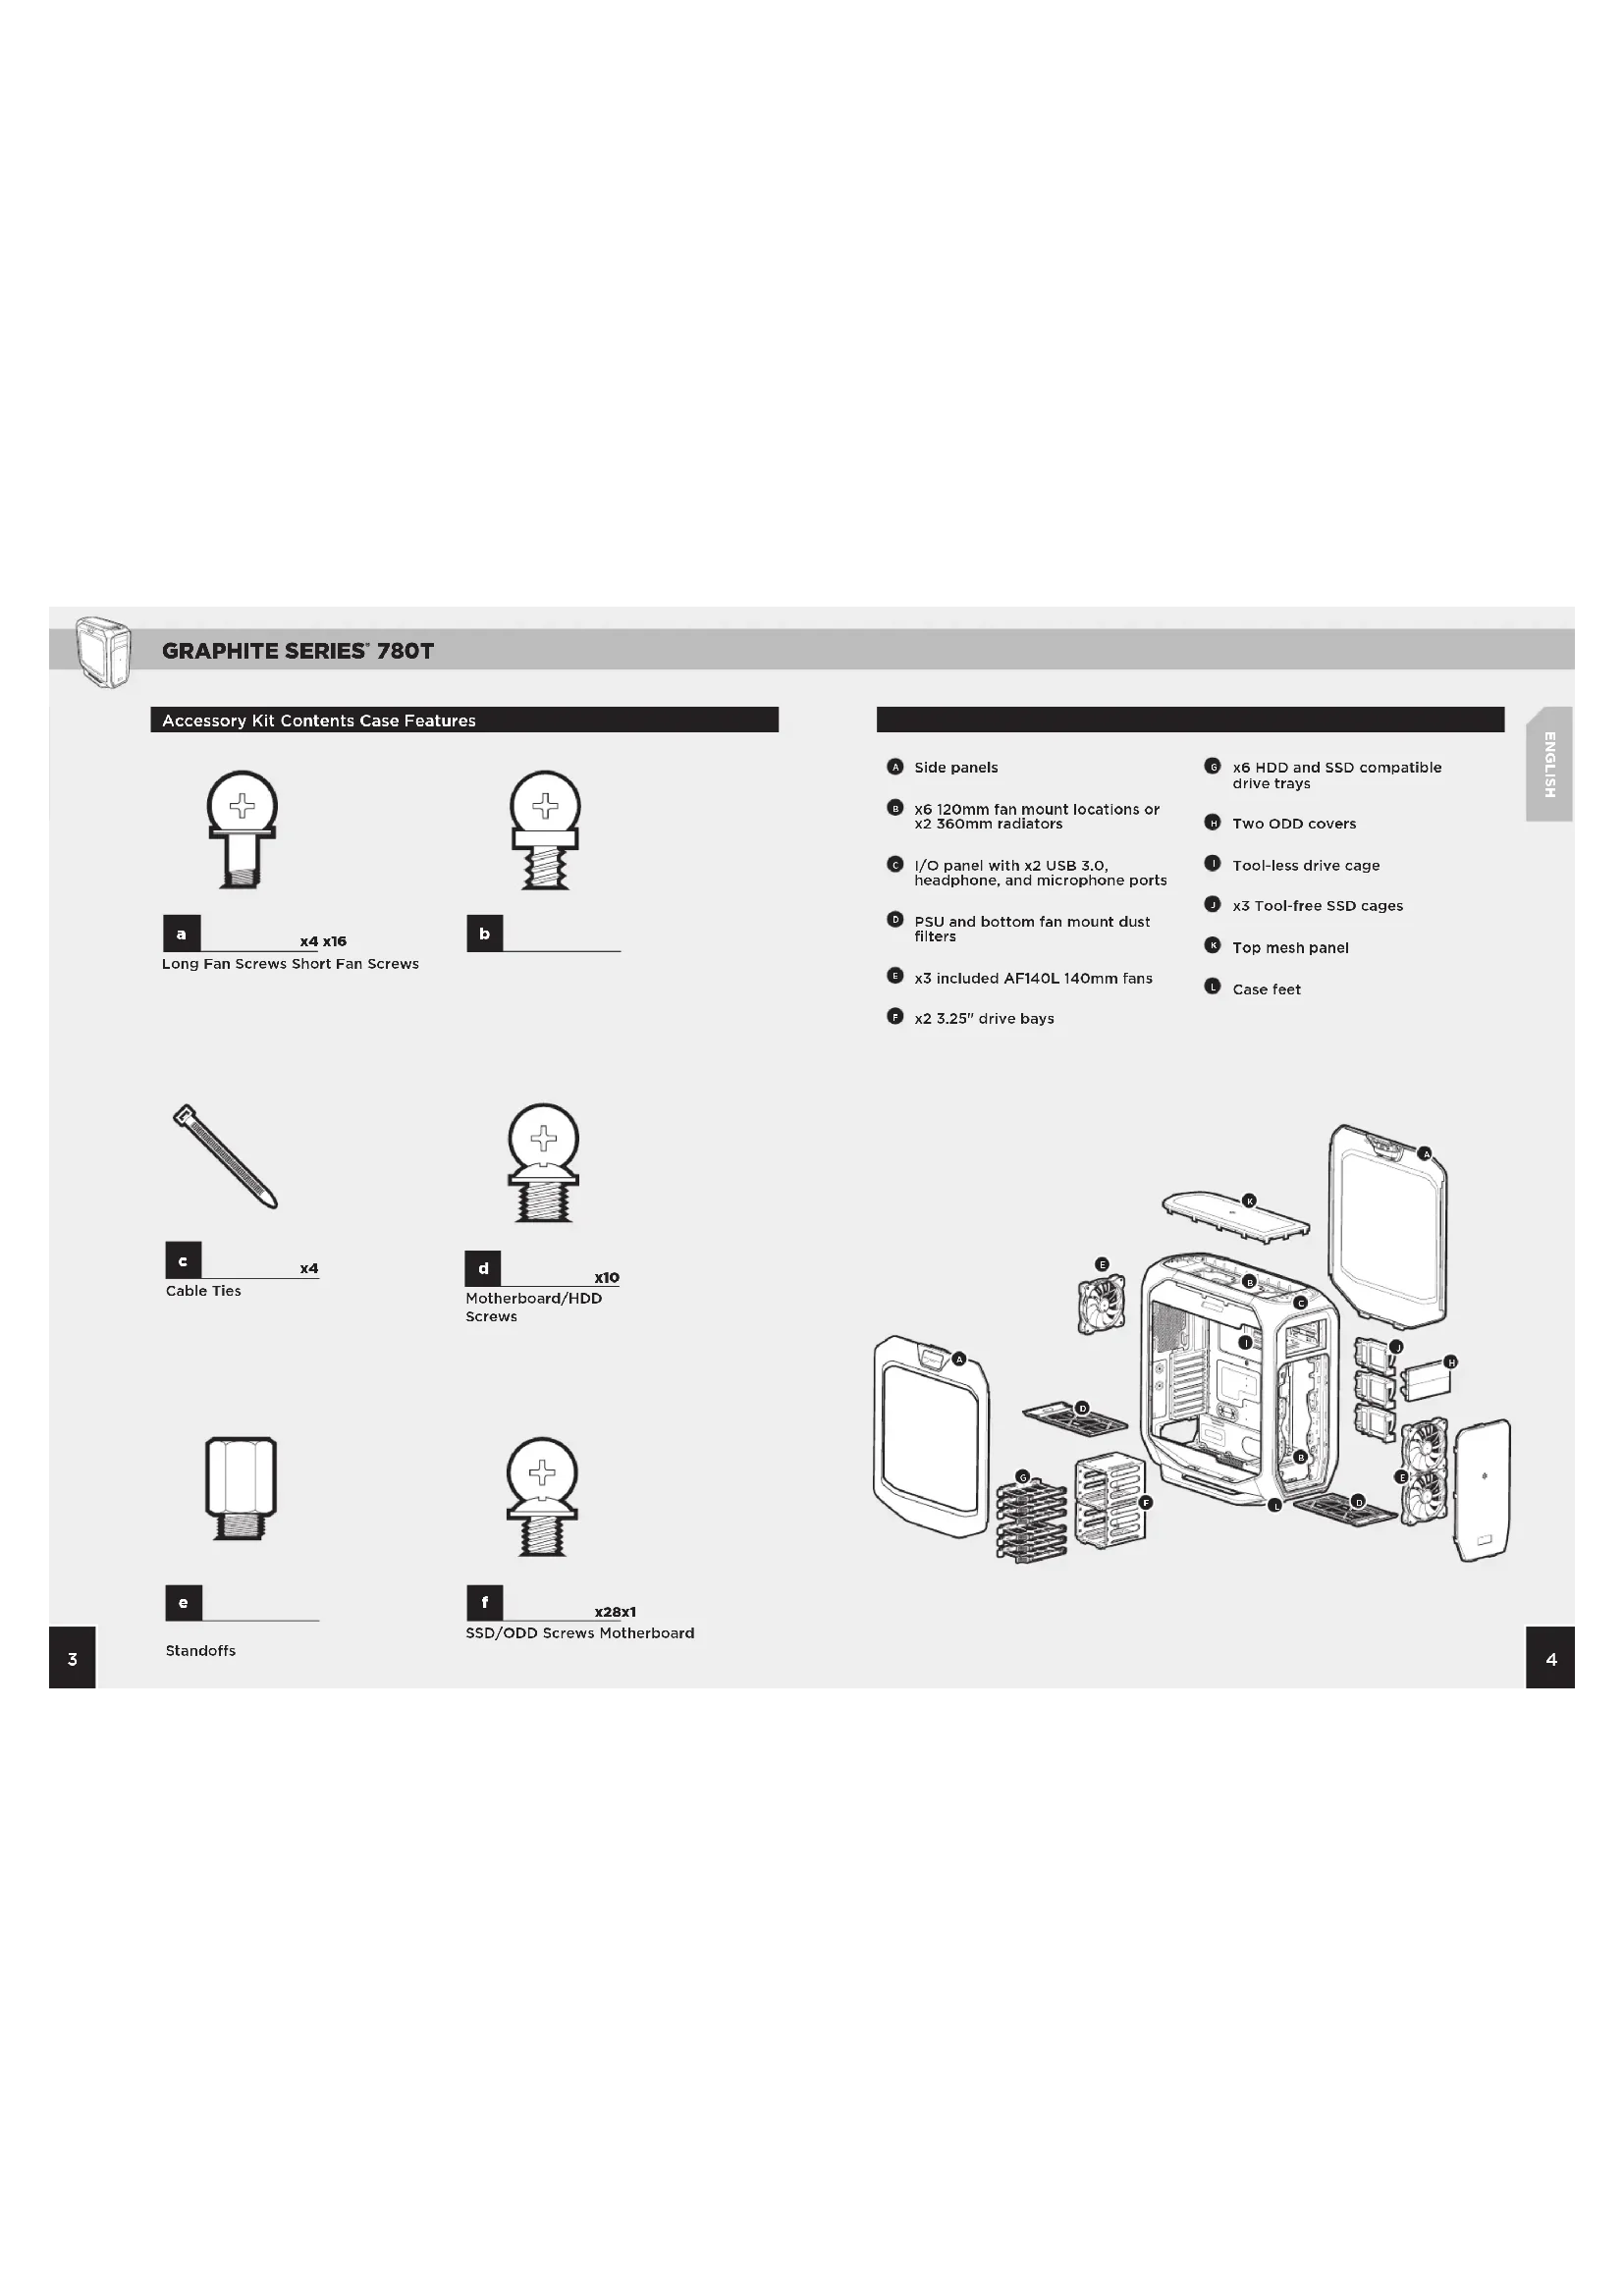
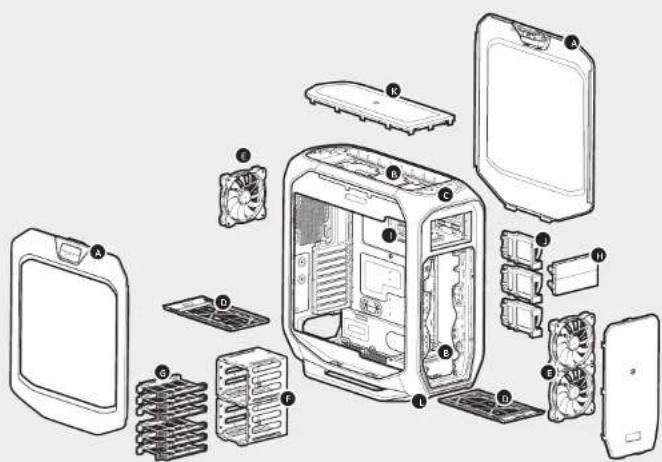
Accessory Kit Contents Case Features

x4 x16
Long Fan Screws Short Fan Screws


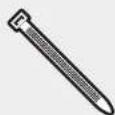

Cable Ties


x10
Motherboard/HDD Screws

Standoffs

x28x1
SSD/ODDScrews Motherboard
Side panels
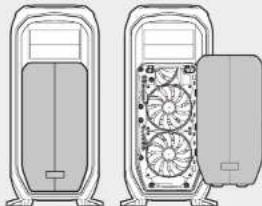
x6 120mm fan mount locations or x2 360mm radiators
I/O panel with x2 USB 3.0, headache, and microphone ports
PSU and bottom fan mount dust filters
x3 included AF140L 140mm fans
x2 3.25" drive bays
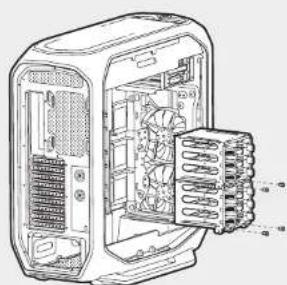
x6 HDD and SSD compatible drive trays
Two ODD covers
Tool-less drive cage
x3 Tool-free SSD cages
Top mesh panel
Case feet

GRAPHITE SERIES'780T
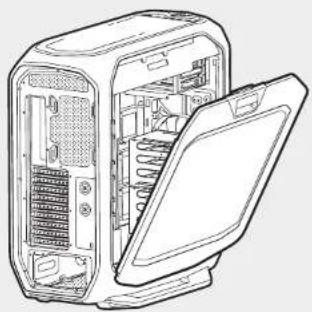
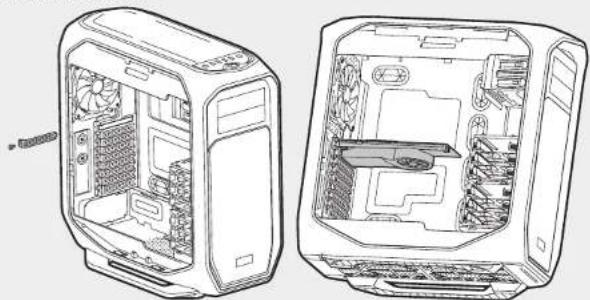
1. Removing the Side Panels
Simply pull upward on the side panel latches to release.
Note: Corsair recommends removing both side panels and setting them aside when building your system to avoid accidental damage. Both side panels are interchangeable and should be removed to reduce clutter.
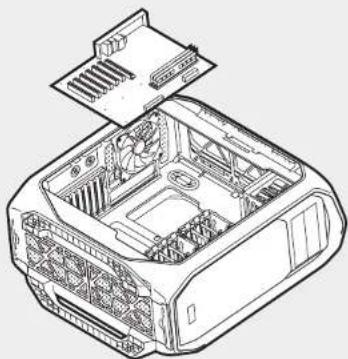
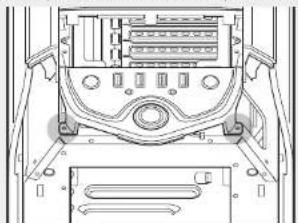
2. Install the Motherboard
First, install your motherboard's I/O shield (see your motherboard's manual for guidance).
Then, align your motherboard with the pre-installed standoffs, and use the provided screws to secure the motherboard to the motherboard tray.
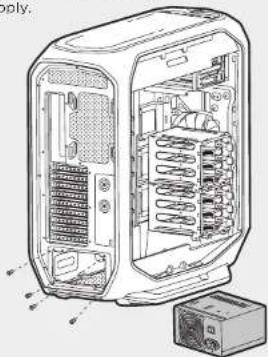
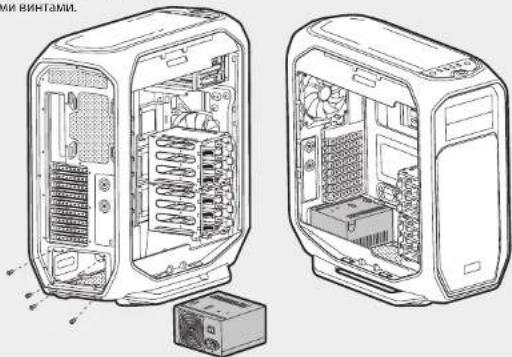
3. Install the PSU
Position the PSU on the bottom of the case then align the case holes and secure the PSU with the screws provided with your power supply.
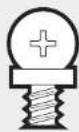
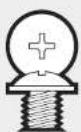
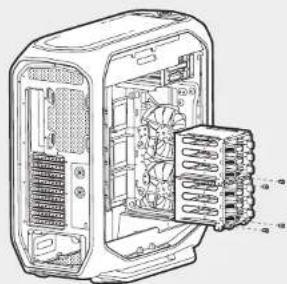
4.Install PCI-E/PCI Card(s)
First, remove thumbscrews and corresponding slot cover(s). Then, install the add-on card and secure with thumbscrews.


GRAPHITE SERIES'780T
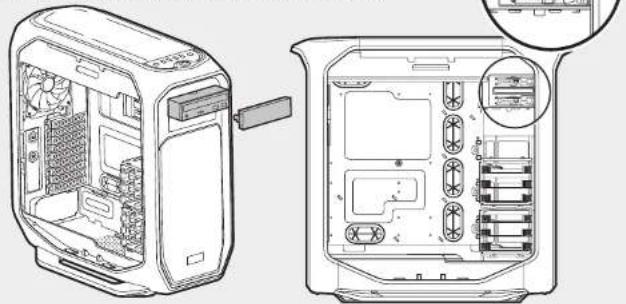
5.Install 5.25" drive/device (ODD)
First, remove the front panel 5.25^ drive bay cover then slide the ODD into the drive bay until the tool-free latch clicks, securing the drive.
Note: To release an optical drive, push in the tool-free tab then pull the drive outward.

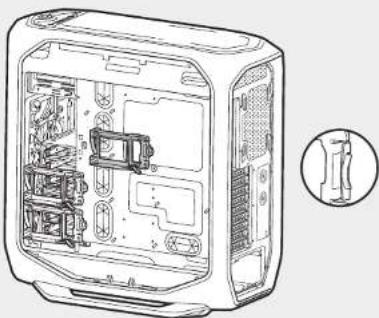
6.Install 2.5^ SSD
Pull down the tab and place the SSD into the tool-free expandable SSD cage until you feel it secure.
Note: To remove the SSD from the cage, simply pull the tab down to release.

7. Power the Case Fans
- Connect the SATA power connector to the PSU SATA power cable.
- Connect the 3 or 4-Pin fan connector to the case fan header.
- Push the fan speed selector button on your case to toggle fan speed.


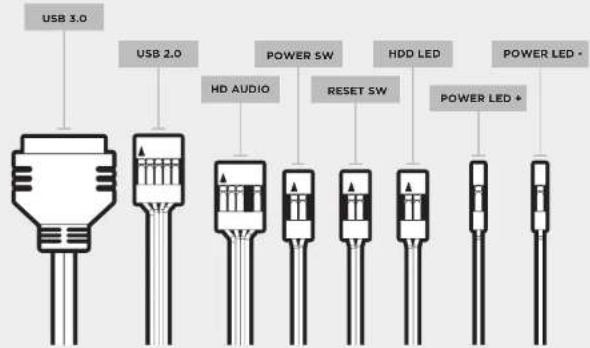
8. Connect the Front I/O Connectors
See your motherboard's manual for front panel header locations and pin-outs.


GRAPHITE SERIES'780T
Frequently Asked Questions
- How do I remove the I/O Panel?
A. First, remove the front fascia by pushing in the three tabs from inside the fascia, then push towards the front of the case.

B. Next, unscrew the 2 screws at each side of the panel.

- Does the polarity matter with the I/O panel's power and reset header? No, only the LED headers.
- Who should I contact if I received my case damaged or one of the fans is no longer working?
Please go to cisair.force.com and request an RMA so that we can replace the damaged part(s).
- Where can I mount a fan?
| Fan Mount Locations | |
| Front 3 x 120 mm or | 2 x 140 mm |
| Top 3 x 120 mm or 2 | x 140 mm |
| Rear 1 x 120 mm or | x 140 mm |
| Bottom 2 x 120 mm | |
| Side X | |
| Mid X | |
- How do I remove the front panel?
To remove the front panel, push the top corners of the plastic cover.
- How do I remove the bottom dust filter(s)?
To remove the bottom dust filter, first locate the pull out tab underneath the PSU, then pull the bottom dust filter out.


- How do I remove the Drive Cage?
Locate and remove the two screws securing the cage to the base on the bottom of the case then pull the drive cage out. Drive cages are stackable and can be installed on top of each other, or completely removed for improved cooling.
Note: Note: The HDD cage can also be removed by removing the four screws located directly under the base on the bottom of the case.
To learn more about this case visit the product page at corsair.com

GRAPHITE SERIES'780T
Table des matieres
full tower Graphite Series 780T.
CAnaYnA TAHOBNIeAaNtPyKuTbIbOxN BTOPOB KTOpyCAJyDA MaTePHCKO rNaTbI (MHOpMaIIO CM.BpyKOoDBTeNoMaTePHCKO nMaTe).
3aTeM bIbOoBHnTe MaTePHNCKyIO
mny CnpBapHTenBHO
yTACHOENHbIMn OONPBOHMn
HONDPYIOOMM BHTAMn
HCIOB3yTE npeOCTARNEHbE
BHTbI DnA 3akpEnHeH
MaTePHNCKO NnATB Ie OEOTcK.

3.YCTAHOBKaNCTOuHHKa NHTAHWA
PONOKITE KTOCHIK NHTAHNA HNHHIOH NOHNEK KOPNYCA,3AETBMPOBHOIe ERO COTBECTHMBA KOPNYCE HAKPENTHE PIPDEOCTABIEHHMHN BHTAMM
4. YctahOBka nnat PCI-E/PCI
Chaana OTBepHnE 6apakouboe BHTbN CHIMMOT COOTBCTBYQOUHE KpBHK PA3BeMOB.3aTeM YcTahONBOI DOnonHtBNHy NAty H 3aKpENMe ee 6apakouboBMn BHAMTN

GRAPHITE SERIES'780T
5.YctahOBnTE 5,25-IOHMoBbI DNCK NNN yCTPOcTBO (ontHueckn DNCK)
Chayana CHHMMTE KpbHKUOTCEPAI 5,25-IMMOBOORDCAHA NEpeHN HANENM,3AET BCTABBEOTNUECKMN DCKBOTCEKN DNNKKA, NOKO HnE HAAPKCPYETC BAJIENKAM; OIBTIPKA nTePeyETe.
Pnmeuhya. JIe aneueeKOnOntHcOoDka DuaCmEpbKa HpeMcyemn -NaHMcUMHe NkAcbUK UcbMbUmEduck Hppy
6.YCTAHOBKa 2,5-IMMOBBIX TBepDoTeNbHbIX INCKOB
TOnHHTe RaHOK BHN3, NOMCTATEBETDPOTBHNB DAPcawPnemb60TeBPToTHNb OTEK TCBETDPOTbBNB HAKONITENe n3a4KnckpyteIero.
PnmeuueHae, Dnra ydanen HmepdomeHnoo duCKa u3 omckcnpocn nomhaumr brykOuH2.
7. NITAHME BENTNAIATOPOB KOPNYCA
- NopknioHne pa3bEm nHTAHNA SATA K pa3bemy SATA ha 6noke nHTAHNA.
- Pooknoite 3-IMN 4-KoHTaIKHbIpaBem BEHTaRTOPA paBaEMy BEHTaRTOPA KpOpyka.
- DpyernpoBnHCKOPOCTBpaueHnBEHTNtropaHaKmntepeKeIIOaTeNbBb6opaCkoPcTBeHTNtropa


8. PodknquHne nepeHnx pa3beMOB BBOda/BbIbOda
PacnonokHe paaBemov nKoTHAKOBnnpepeHnnaenmCBpykoOBCTeNo matepncKoNnne

GRAPHITE SERIES'780T
Tacto3aabaemble Bonpocbi
1. KaK ChrTb naHEnb BBODa-BbIBOda
A. chataa ocbodobite nepehio hanaheb, otkab HaxoDnmeceB hynTpr naHanei Tpr bryka, 3attem BblBnhtte e no HaparBHeNko K nepedjne Jactv Koprjya.
B. 3aTEM OTBepHNTe 2 BHTa C KaKdoI CTopoHbI naHEn.
- Imeet n 3aueHHe noIpaHcTb npn HcNIOB3OBAHnn pa3bema nHTAHHn Bboda-BbIbOda? Her, OHa BaxKa TOnbKO dNnCBeTOHOHDHX pa3bEMOB.
3.KKOMy Cnnyet O6paTbC,ecnKopNc NOnyeh NOpBpeJeHHM HmOHN H3 BENTHAPTOB 60bnue He paobTaer? IepnHre Ha cait consair force. mI aIporcitpe paspeHHe Ha 803par MATEpHaHNO8 (RMA),tIObMb CMOTIM AmeHHTb NOpBpeJeHHte yactH - Td MoXHO yCTAHOBNTB BEHTWATOP?
| Мета ду усанови венталаторов | |
| Плордьсторона | 3х120mmх802Y 140MM |
| Верхаясторона | 3х120mmх802Y 2X140MM |
| Здяйсторона | 1х120mmх802Y 140MM |
| Нимдасторона | 2х120MM |
| Божаясторона | X |
| Срсая лесь | X |
5. KaK ChaTb nepeDIOIO naHEnb?
IINCHTNApeDHeNnHannHaxMMTeHaBepxHHe yrblnactMaccBOKpkiKN.
6. KaK CHaTb HxHnn nbIneBoB qHnBtp?
TcBbCHITNHKHHIINBIEONFIIHPT,CHaHaNAHJIeNTA3HIOKHNKCCATOPAONDOKOKM TNIHANH,3ATEMNHNEKITEHKHHIINBIEONFIIHPTp.

7. KaK CHATb OTCEK PnA DnCKOB?
Hnndtnto nOteBnHTe DBA HNTI, KPNIIIO TECK O CCHOBMO HA NIKHEY AOTK KOPNYCA, 3ATEM BHTAHTE OTCEK INDCKOBIE OTCEK INPDAHAChEHNI BYA YCTAOHBK B TCK. VIX MOHO YCTAOHBITb dpyT hNDpyrOM INNOHOCTBO CHRTI DNNYUHNEHM OXNAKDEHNIA
Npumueyue. Jn Tchmua omckc Kecmco 12kua kmoa oomaeuyme yenopeb uha, paoonokennnn Hnnpocdmehno nod ochoaemuh mneu neu oomccck.
DOnnnnntbnyu Hnnpmauio6 30m Kopnyc m. Ha ctpaHnue npoykta caTa Corsair.com

GRAPHITE SERIES'780T
目录

- GRAPHITE SERIES'780T
- Table of Contents
- Congratulations!
- Thank you for purchasing the
- Graphite Series 780T Full-Tower Case.
- Case Specifications
- Accessory Kit Contents Case Features
- Removing the Side Panels
- Install the Motherboard
- Install the PSU
- 4.Install PCI-E/PCI Card(s)
- 5.Install 5.25" drive/device (ODD)
- 6.Install 2.5^ SSD
- Power the Case Fans
- Connect the Front I/O Connectors
- Frequently Asked Questions
- Table des matieres
- full tower Graphite Series 780T.
- 3.YCTAHOBKaNCTOuHHKa NHTAHWA
- YctahOBka nnat PCI-E/PCI
- 5.YctahOBnTE 5,25-IOHMoBbI DNCK NNN yCTPOcTBO (ontHueckn DNCK)
- 6.YCTAHOBKa 2,5-IMMOBBIX TBepDoTeNbHbIX INCKOB
- NITAHME BENTNAIATOPOB KOPNYCA
- PodknquHne nepeHnx pa3beMOB BBOda/BbIbOda
- Tacto3aabaemble Bonpocbi
- KaK ChrTb naHEnb BBODa-BbIBOda
- KaK ChaTb nepeDIOIO naHEnb?
- KaK CHaTb HxHnn nbIneBoB qHnBtp?
- KaK CHATb OTCEK PnA DnCKOB?
- 目录
Brand : CORSAIR
Model : Graphite 780T
Category : Desktop Computer