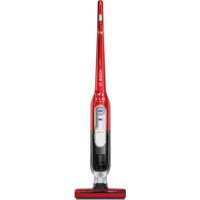
USER MANUAL Athlet Zoo'o BBH6256P1 BOSCH
81.738 Marchos, Encology
www.bocichina.com
- 2017年1月1日
2001011626

ablet
BOSCH
The following table is a simple diagram and cannot be extracted.
◆ Lede Chen
- 2023年1月1日
山
■ 9210.042
- Amet van o
- Osten
as [1986] 2014.
- 12.0000
[Unreadable]
p. 107-49, 236
b. 1952-03-04
-
17:20
-
陈华生
-
10.2.1574
■表决结果:
Your vacuum cleaner....34
Please keep this instruction manual for future reference.
When passing the vacuum cleaner on to a third party, please also pass on this instruction manual.
Intended use
This appliance is intended for domestic use only, not for commercial use. Only use this vacuum cleaner in accordance with the information provided in this instruction manual.
In order to prevent injuries and damage, the vacuum cleaner must not be used for:
■ Vacuuming persons or animals.
■ Vacuuming up:
- Hazardous, sharp-edged, hot or red-hot substances.
- Damp or liquid substances.
- Highly flammable or explosive substances and gases.
- Ash, soot from tiled stoves and central heating systems.
- Toner dust from printers and copiers.
Spare parts, accessories, dust bags
Our original spare parts, original (special) accessories and original dust bags are designed to work with the features and requirements of our vacuum cleaners. We therefore recommend that you only use our original spare parts, original (special) accessories and original dust bags. This will ensure that your vacuum cleaner has a long service life and that the quality of its cleaning performance will remain consistently high throughout.
Please note
- Using unsuitable or inferior-quality spare parts, (special) accessories and dust bags can damage your vacuum cleaner. Damage caused by the use of such products is not covered by our guarantee.
This vacuum cleaner complies with the recognised rules of technology and the relevant safety regulations.
■ The appliance may be used by children over the age of 8 years and by persons with reduced physical, sensory or mental capacity or by persons with a lack of experience or knowledge if they are supervised or have been instructed on the safe use of the appliance and have understood the potential dangers of using the appliance.
■ Children must never play with the appliance.
■ Cleaning and user maintenance must never be carried out by children without supervision.
■ Plastic bags and films must be kept out of the reach of children and disposed of.
= There is a risk of suffocation.
Proper use
■ To charge, only use the charging cable included in the scope of supply.
■ The charging cable must only be connected and operated as specified on the rating plate.
■ The appliance must only be stored and charged indoors.
■ Do not expose the appliance to temperatures below 0 °C or above 40 °C.
■ Never vacuum without the dust bag or dust container, motor protection or exhaust filter.
= This may damage the vacuum cleaner.
- Keep the vacuum cleaner away from your head when using nozzles and tubes. => This could cause injury.
■ Do not use a damaged charging cable. Replace it with an original charging cable.
■ When disconnecting the charging cable from the mains, pull the plug itself to remove it; do not pull on the power cord.
■ Do not pull the charging cable over sharp edges or allow it to become trapped.
■ Before carrying out any work on the vacuum cleaner, switch off the appliance and disconnect it from the charging cable and the mains.
■ Do not operate the vacuum cleaner if it is damaged.
If a fault is detected, switch off the appliance and disconnect it from the charging cable and the mains.
■ For safety reasons, only authorised after-sales service personnel are permitted to carry out repairs and fit replacement parts to the vacuum cleaner.
In the following cases, you must stop the appliance immediately and contact the after-sales service:
- If you have accidentally vacuumed up some liquid or liquid has entered the inside of the appliance;
- If the appliance has been dropped and damaged.
■ Protect the vacuum cleaner from outside weather conditions, moisture and sources of heat.
■ Do not pour flammable substances or substances containing alcohol onto the filters (dust bag, motor protection filter, exhaust filter, etc.).
■ The vacuum cleaner is not suitable for use on construction sites. => Vacuuming up building rubble may damage the appliance.
■ Switch off the appliance when it is not in use.
The packaging is designed to protect the vacuum cleaner from being damaged during transportation. We therefore recommend keeping the packaging for the purpose of future transportation.
Batteries
Your appliance is fitted with lithium-ion batteries which, for safety reasons, are only accessible to professional repair specialists.
For battery replacement, please contact your nearest after-sales centre or an authorised specialist dealer.
Packaging
The packaging is designed to protect the vacuum cleaner from being damaged during transportation. It is made of environmentally friendly materials and can be recycled. Dispose of packaging that is no longer required at an appropriate recycling point.
■ Old appliances
This appliance contains rechargeable lithium-ion batteries. The appliance must therefore only be disposed of by an authorised after-sales service or dealer.
fr
= Fare for kvelning!
Tiltenkt bruk
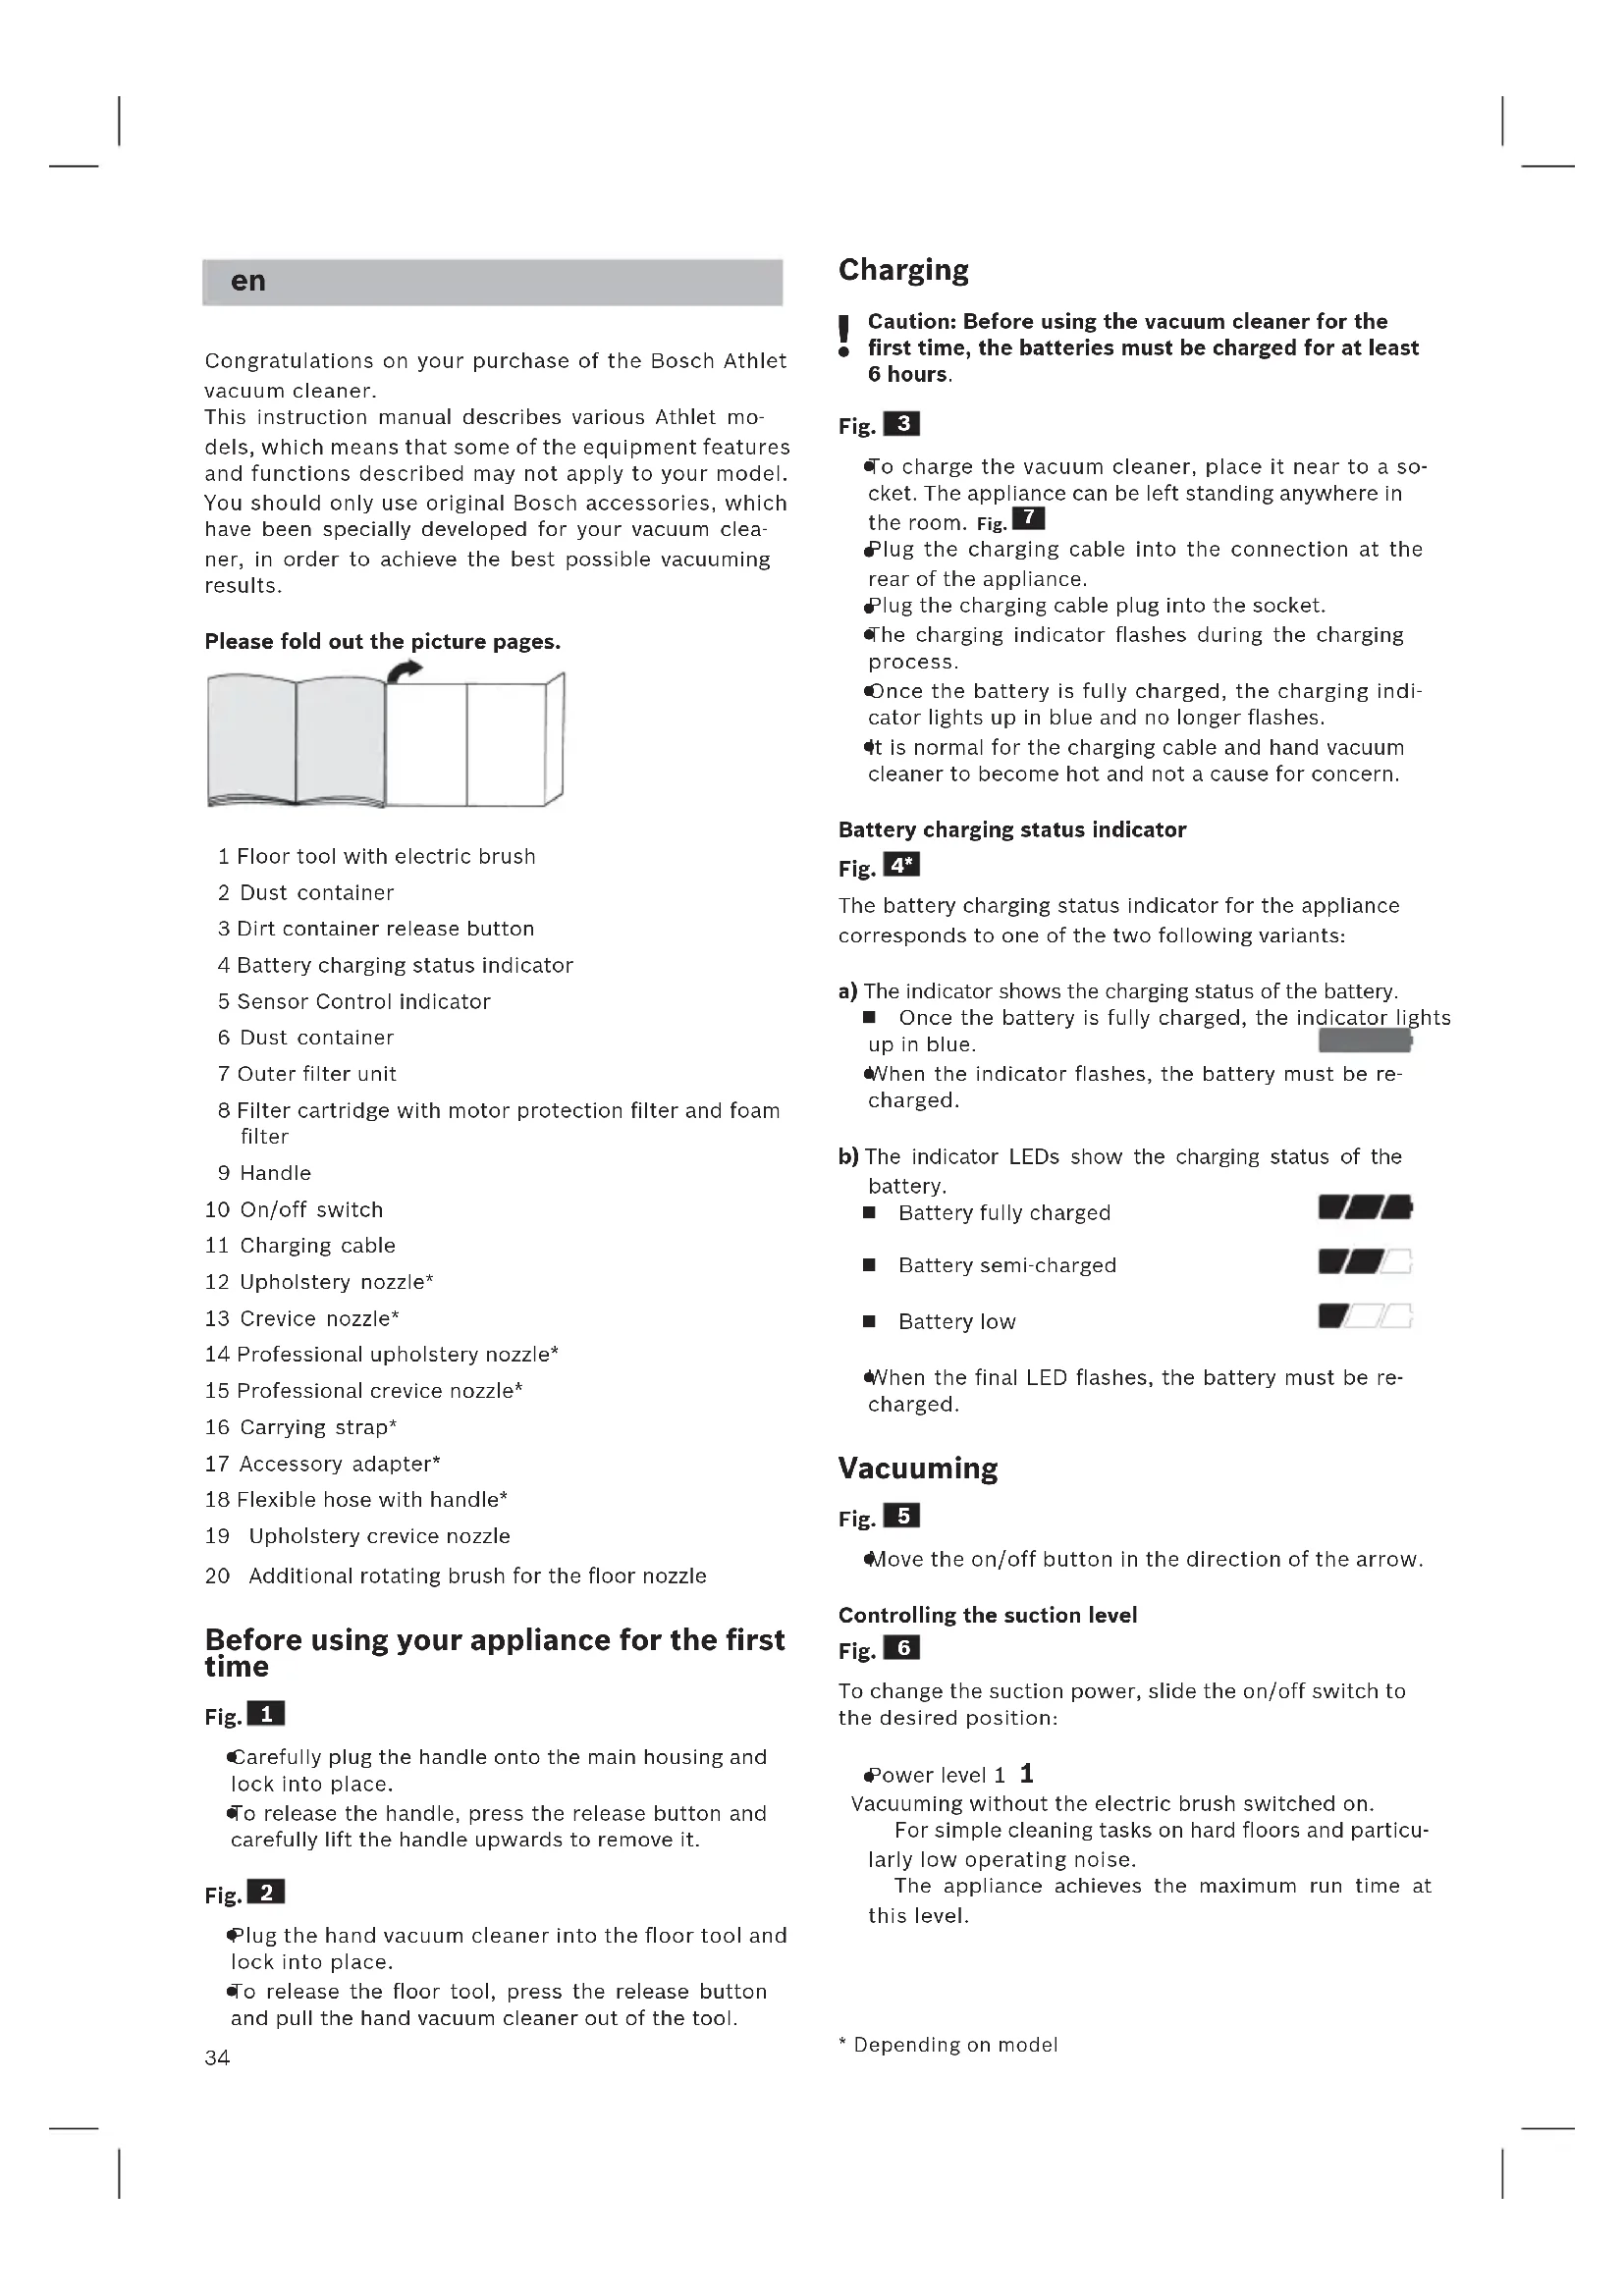
Congratulations on your purchase of the Bosch Athlet vacuum cleaner.
This instruction manual describes various Athlet models, which means that some of the equipment features and functions described may not apply to your model. You should only use original Bosch accessories, which have been specially developed for your vacuum cleaner, in order to achieve the best possible vacuuming results.
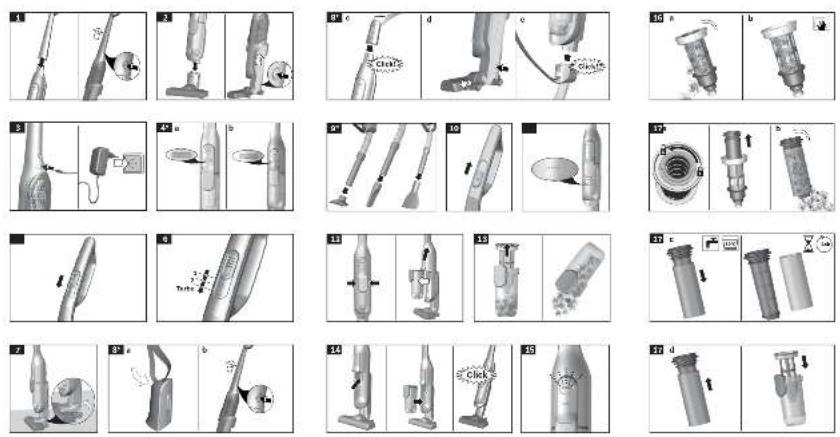
Please fold out the picture pages.

1 Floor tool with electric brush
2 Dust container
3 Dirt container release button
4 Battery charging status indicator
5 Sensor Control indicator
6 Dust container
7 Outer filter unit
8 Filter cartridge with motor protection filter and foam filter
9 Handle
10 On/off switch
11 Charging cable
12 Upholstery nozzle*
13 Crevice nozzle*
14 Professional upholstery nozzle*
15 Professional crevice nozzle*
16 Carrying strap*
17 Accessory adapter*
18 Flexible hose with handle*
19 Upholstery crevice nozzle
20 Additional rotating brush for the floor nozzle
Before using your appliance for the first time
Fig. 1
Carefully plug the handle onto the main housing and lock into place.
To release the handle, press the release button and carefully lift the handle upwards to remove it.
Fig. 2
Plug the hand vacuum cleaner into the floor tool and lock into place.
To release the floor tool, press the release button and pull the hand vacuum cleaner out of the tool.
Charging
! Caution: Before using the vacuum cleaner for the first time, the batteries must be charged for at least 6 hours.
Fig. 3
To charge the vacuum cleaner, place it near to a socket. The appliance can be left standing anywhere in the room. Fig. 7
Plug the charging cable into the connection at the rear of the appliance.
Plug the charging cable plug into the socket.
The charging indicator flashes during the charging process.
Once the battery is fully charged, the charging indicator lights up in blue and no longer flashes.
- it is normal for the charging cable and hand vacuum cleaner to become hot and not a cause for concern.
Battery charging status indicator
Fig. 4*
The battery charging status indicator for the appliance corresponds to one of the two following variants:
a) The indicator shows the charging status of the battery.
■ Once the battery is fully charged, the indicator lights up in blue.
When the indicator flashes, the battery must be re-charged.
b) The indicator LEDs show the charging status of the battery.
■ Battery fully charged

■ Battery semi-charged

Battery low

When the final LED flashes, the battery must be re-charged.
Vacuuming
Fig. 5
- Move the on/off button in the direction of the arrow.
Controlling the suction level
Fig. 6
To change the suction power, slide the on/off switch to the desired position:
Power level 1 1
Vacuuming without the electric brush switched on.
For simple cleaning tasks on hard floors and particularly low operating noise.
The appliance achieves the maximum run time at this level.
Power level 2 2
Vacuuming at normal power and with the electric brush switched on.
For normal cleaning tasks on all floors at an average run time.
Turbo level Turbo
Vacuuming at full power and with the electric brush switched on.
For particularly demanding cleaning tasks on all surfaces (carpets, in particular) and when using an optional accessory. The appliance achieves a shorter run time at this level.
Fig. 7
During short pauses in vacuuming, the appliance can be left standing anywhere in the room. To do this, tilt the vacuum cleaner forwards slightly in the direction of the nozzle.
Caution: When the appliance is left standing, it must be switched off, because if the brush is turning while the appliance is standing still, it could cause damage to the floor covering.
Vacuuming with accessories
Fig. 8*
a) Fasten the carrying strap to the short handle provided.
b) Remove the long handle from the main housing.
c) Insert the short handle and lock it in place.
d) Remove the hand-held vacuum cleaner from the floor nozzle. Fig. 2
e) Plug the accessory adapter into the hand-held vacuum cleaner and lock it in place.
Fig. 9*
Fit nozzles as required to the flexible hose with the accessory adapter handle:
●Upholstery nozzle for vacuuming upholstered furniture, curtains, etc.
- Crevice nozzle for vacuuming crevices and corners, etc.
●Upholstery crevice nozzle for vacuuming upholstery, ideal for cleaning car seats in particular
After using the appliance
Fig. 10
Switch off the appliance after vacuuming.
Emptying the dust container
Fig. 11
In order to achieve the best possible vacuuming results, the dust container should be emptied after every use or, at the latest, when dust at one point in the dust container has reached the marking.
We recommend that you not fill the dust container beyond the marking, as this leads to considerable soiling of the filter.
When emptying the dust container, always check how dirty the outer filter unit is and, if necessary, clean it as detailed in the "Cleaning the outer filter unit" instructions. Fig. 16
! Caution: The filter can only be cleaned if the appliance is switched off.
Never vacuum without the outer filter unit and its fitted filter cartridge.
Fig. 12
Using the release button, unlock the dust container and remove it from the appliance.
Fig. 13
Take the filter unit out of the dust container.
Empty the dust container.
Fig. 14
Remove any dirt which may have been lodged underneath the container ejector opening.
Insert the filter unit into the dust container, making sure it is correctly seated.
Insert the dust container in the appliance, so that it 'clicks' audibly into place.
! Caution: If you notice any resistance when inserting the dust container, check that the filter is complete and that the filter unit and dust container are correctly seated.
Filter care
! Caution: The filter can only be cleaned if the appliance is switched off.
Your appliance is equipped with a "Sensor Control" function.
This function constantly monitors whether your vacuum cleaner is working at its optimum power level. The indicator light lets you know when you need to clean the filter cartridge, so that the appliance can reach its optimum power level once more.
Fig. 15 Sensor Control
The indicator lights up blue or is off when the appliance is working at its optimum level. Once the indicator turns red and flashes, the outer filter unit and filter cartridge must be cleaned.
The appliance is automatically adjusted to power level 1.
Fig. 16 Cleaning the outer filter unit
The outer filter unit should be cleaned at regular intervals in order to ensure optimum operation of the vacuum cleaner.
Please switch off the appliance to clean the outer filter unit.
Remove the dust container from the appliance.
Fig. 12
Take the filter unit out of the dust container. Fig. 13 Clean the outer filter unit.
a) It is usually sufficient to lightly shake or tap out the whole filter unit when the dust container is emptied in order to dislodge any particles of dirt.
b) If this is not sufficient, you can use a dry cloth to remove dirt particles from the surface.
Fig. 17 Cleaning the filter cartridge
Switch off the appliance.
- Remove the dust container from the appliance.
Fig. 12
Take the filter unit out of the dust container. Fig. 13
a) Turn the filter cartridge lid anti-clockwise and remove the filter cartridge from the filter unit.
b) Firstly, clean the filter cartridge by tapping out the dirt.
c) Pull out the foam filter from the motor protection and rinse separately.
Allow the foam filter and motor protection filter to dry completely (approx. 24 hours)
d) After fitting the foam filter, insert the filter cartridge into the dust container.
e) Insert the filter cartridge into the filter unit and lock it by turning the lid clockwise.
If, after hand-washing the filter cartridge, the "Sensor Control" indicator flashes red again, the filter cartridge is so heavily soiled that it must be washed in a washing machine. Use a gentle programme at max. 30 °C and the lowest spin speed.
New filters can be obtained from our after-sales service, if required.
Before carrying out any maintenance, switch off the vacuum cleaner and disconnect it from the charging cable.
Fig. 18
a) Release the brush roller using the release button and pull it sideways out of the floor tool.
b) Using the groove provided, cut through threads and hairs wound round the rollers with scissors and then remove them.
c) Push the brush roller in sideways along the guide rod in the floor tool and lock in place using the release button.
Caution: The floor tool must only be put into operati-
- on with the brush roller fitted.
Care
Before cleaning the hand vacuum cleaner, it must be switched off and disconnected from the charging cable. The vacuum cleaner and plastic accessories can be cleaned with an ordinary plastic cleaner.
Caution: Do not use abrasive materials, glass-cleaning agents or all-purpose cleaning products. Never immerse the vacuum cleaner in water.
Subject to technical modifications.
fr
Jebel Ali Free Zone – Dubai
Tel.: 04 881 4401
mailto:service.uae@bshg.com
www.bosch-home.com/ae
AL Republika e Shqiperise, Albania
AERTECH SH.P.K.
Rruga Qemal Stafa
Pallati i ri perball Prokuroris se
Pergjithshme
Hyrja C Kati 10
Tirana
Tel.: 066 206 47 94
mailto:g.volina@aertech.al
HEATHERTON, Victoria 3202
Tel.: 1300 368 339
mailto:bshau-as@bshg.com
www.bosch-home.com.au
BA Bosna i Hercegovina, Bosnia-Herzegovina
"HIGH" d.o.o.
Gradačačka 29b
71000 Sarajevo
Info-Line: 061 100 905
Fax: 033 213 513
mailto:delicnanda@hotmail.com
European Trade Center Building,
5th floor
1784 Sofia
Tel.: 02 892 90 47
Fax: 02 878 79 72
mailto:informacia.servis-bg@
bshg.com
www.bosch.home.bg
To arrange an engineer visit, to
order spare parts and accessories
or for product advice please visit
www.bosch-home.co.uk
or call
*Calls are charged at the basic rate, please check with your telephone service provider
for exact charges
GR Greece, Ελλάς
BSH Ikiakes Siskeves A.B.E.
Central Branch Service
17 km E.O. Athinon-Lamias &
Potamou 20
14564 Kifisia
Unit 1 & 2, 3rd Floor
North Block, Skyway House
3 Sham Mong Road
Tai Kok Tsui, Kowloon
Hong Kong
Tel.: 2565 6151
Fax: 2565 6681
mailto:bosch.hk.service@bshg.com
www.bosch-home.cn
HR Hrvatska, Croatia
BSH kućni uređaji d.o.o.
Kneza Branimira 22
10000 Zagreb
Tel:. 01 640 36 09
Fax: 01 640 36 03
mailto:informacije.servis-hr@
bshg.com
www.bosch-home.com/hr
www.bosch-home.com/hu
IE Republic of Ireland
BSH Home Appliances Ltd.
Unit F4, Ballymount Drive
Ballymount Industrial Estate
Walkinstown
Dublin 12
Service Requests,
Spares and Accessories
Tél.: 01450 2655*
Fax: 01450 2520
www.bosch-home.co.uk
*0.03 € per minute at peak.
Off peak 0.0088 € per minute
IL Israel, בַרְשָׁ
C/S/B Home Appliance Ltd.
Uliel Building
2, Hamelacha St.
Industrial Park North
71293 Lod
Tel.: 08 9777 222
Fax: 08 9777 245
mailto:csb-serv@zahav.net.il
www.bosch-home.co.il
IN India, Bhātaभारत
BSH Household Appliances
Mfg. Pvt. Ltd.
Arena House, 2nd Floor, Main Bldg,
Plot No. 103, Road No. 12, MIDC,
Andheri East
Mumbai 400 093
www.bosch-home.com/in
IS Iceland
Smith & Norland hf.
Noatuni 4
105 Reykjavik
Tel.: 0520 3000
Fax: 0520 3011
www.sminor.is
IT Italia, Italy
www.bosch-home.com/it
IP Turebekov Yerzhan
Nurmanovich
Jangeldina str. 15
Shimkent 160018
Tel.: 0252 31 00 06
mailto:evrika_kz@mail.ru
LB Lebanon, لبنان
Teheni, Hana & Co.
Boulevard Dora 4043 Beyrouth
P.O. Box 90449
Jdeideh 1202 2040
Tel.: 01 255 211
mailto:Info@Teheni-Hana.com
LT Lietuva, Lithuania
Senuku prekybos centras UAB
Jonavos g. 62
44192 Kaunas
Tel.: 0372 12146
Fax: 0372 12165
www.senukai.lt
LU Luxembourg
General Serviss Limited
Bullu street 70c
1067 Riga
Tel.: 07 42 41 37
mailto:bt@olimpeks.lv
Elkor Serviss
Brivibas gatve 201
1039 Riga
Tel.: 067 0705 20; -36
mailto:domoservice@elkor.lv
www.servisacentrs.lv
MD Moldova
S.R.L. "Rialto-Studio"
ул. Щусева 98
2012 Кишинев
тел./факс: 022 23 81 80
mailto:bosch-md@mail.ru
ME Crna Gora, Montenegro
Elektronika komerc
UI. Slobode 17
84000 Bijelo Polje
Tel./Fax: 050 432 575
Mobil: 069 324 812
mailto:ekobosch.servis@
t-com.me
Unit F 2, 4 Orbit Drive
Mairangi Bay
Auckland 0632
Tel.: 09 477 0492
Fax: 09 477 2647
mailto:bshnz-cs@bshg.com
www.bosch-home.co.nz
PL Polska, Poland
SA Kingdom Saudi Arabia,
and Airconditioning Co. Ltd.
BOSCH Service centre,
Kilo 5 Old Makkah Road
(Next to Toyota), Jamiah Dist.
P.O.Box 7997
Jeddah 21472
Tel.: 800 244 0043
mailto:kunnumalsp@alj.com
www.aljelectronics.com.sa
SE Sverige, Sweden
www.bosch-home.com/tr
4th floor, No. 112 Sec 1
Chung Hsiao E Road
Taipei ROC 100
Tel.: 02 2321 6222
mailto:Bosch@achelis.com.tw
UA Ukraine, Україна
gama-electronics.com
XS Srbija, Serbia
BSH Kućni aparati d.o.o.
Milutina Milankovića 11 4
11070 Novi Beograd
Tel.: 011 205 23 97
Fax: 011 205 23 89
mailto:informacije.servis-sr@
bshg.com
www.bosch-home.rs
ZA South Africa
BSH Home Appliances (Pty) Ltd.
15th Road Randjespark
Private Bag X36, Randjespark
1685 Midrand – Johannesburg
Tel.: 086 002 6724
Fax: 086 617 1780
mailto:applianceserviceza@
bshg.com
www.bosch-home.com/za
de
This appliance is labelled in accordance with European Directive 2012/19/EU concerning used electrical and electronic appliances (waste electrical and electronic equipment - WEEE). The guideline determines the framework for the return and recycling of used appliances as applicable throughout the EU.
fr

pt
GB Conditions of guarantee
For this appliance the guarantee conditions as set out by our representatives in the country of sale apply. Details regarding same may be obtained from the dealer from whom the appliance was purchased. For claims under guarantee the sales receipt must be produced.
FR Conditions de garantie
www.bosch-home.com/tr
www.bosch-yetkiliservisi.com
bosch-infoteam@bshg.com