Octave LP - Turntable ION - Free user manual and instructions
Find the device manual for free Octave LP ION in PDF.
| Features | Details |
|---|---|
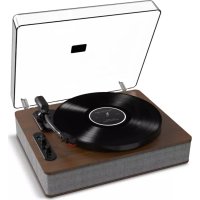
| Product type | Turntable |
| Playback type | Analog |
| Rotation speed | 33 1/3 and 45 RPM |
| Dimensions | Length: 14.5 inches, Width: 17.5 inches, Height: 4.5 inches |
| Weight | Approximately 3.5 kg |
| Connectivity | RCA output, USB |
| Power supply | Power adapter included |
| Included accessories | Cartridge, RCA cable, 45 RPM adapter |
| Usage | Ideal for listening to vinyl records and digitizing vinyl discs via USB |
| Maintenance | Regular cleaning of the turntable and the tonearm recommended |
| Safety | Use on a stable surface, avoid moisture |
| Warranty | 1 year |
Frequently Asked Questions - Octave LP ION
User questions about Octave LP ION
0 question about this device. Answer the ones you know or ask your own.
Ask a new question about this device
Download the instructions for your Turntable in PDF format for free! Find your manual Octave LP - ION and take your electronic device back in hand. On this page are published all the documents necessary for the use of your device. Octave LP by ION.
USER MANUAL Octave LP ION
Snelstartgids Netherlands (48-56)
Appendix English (58)
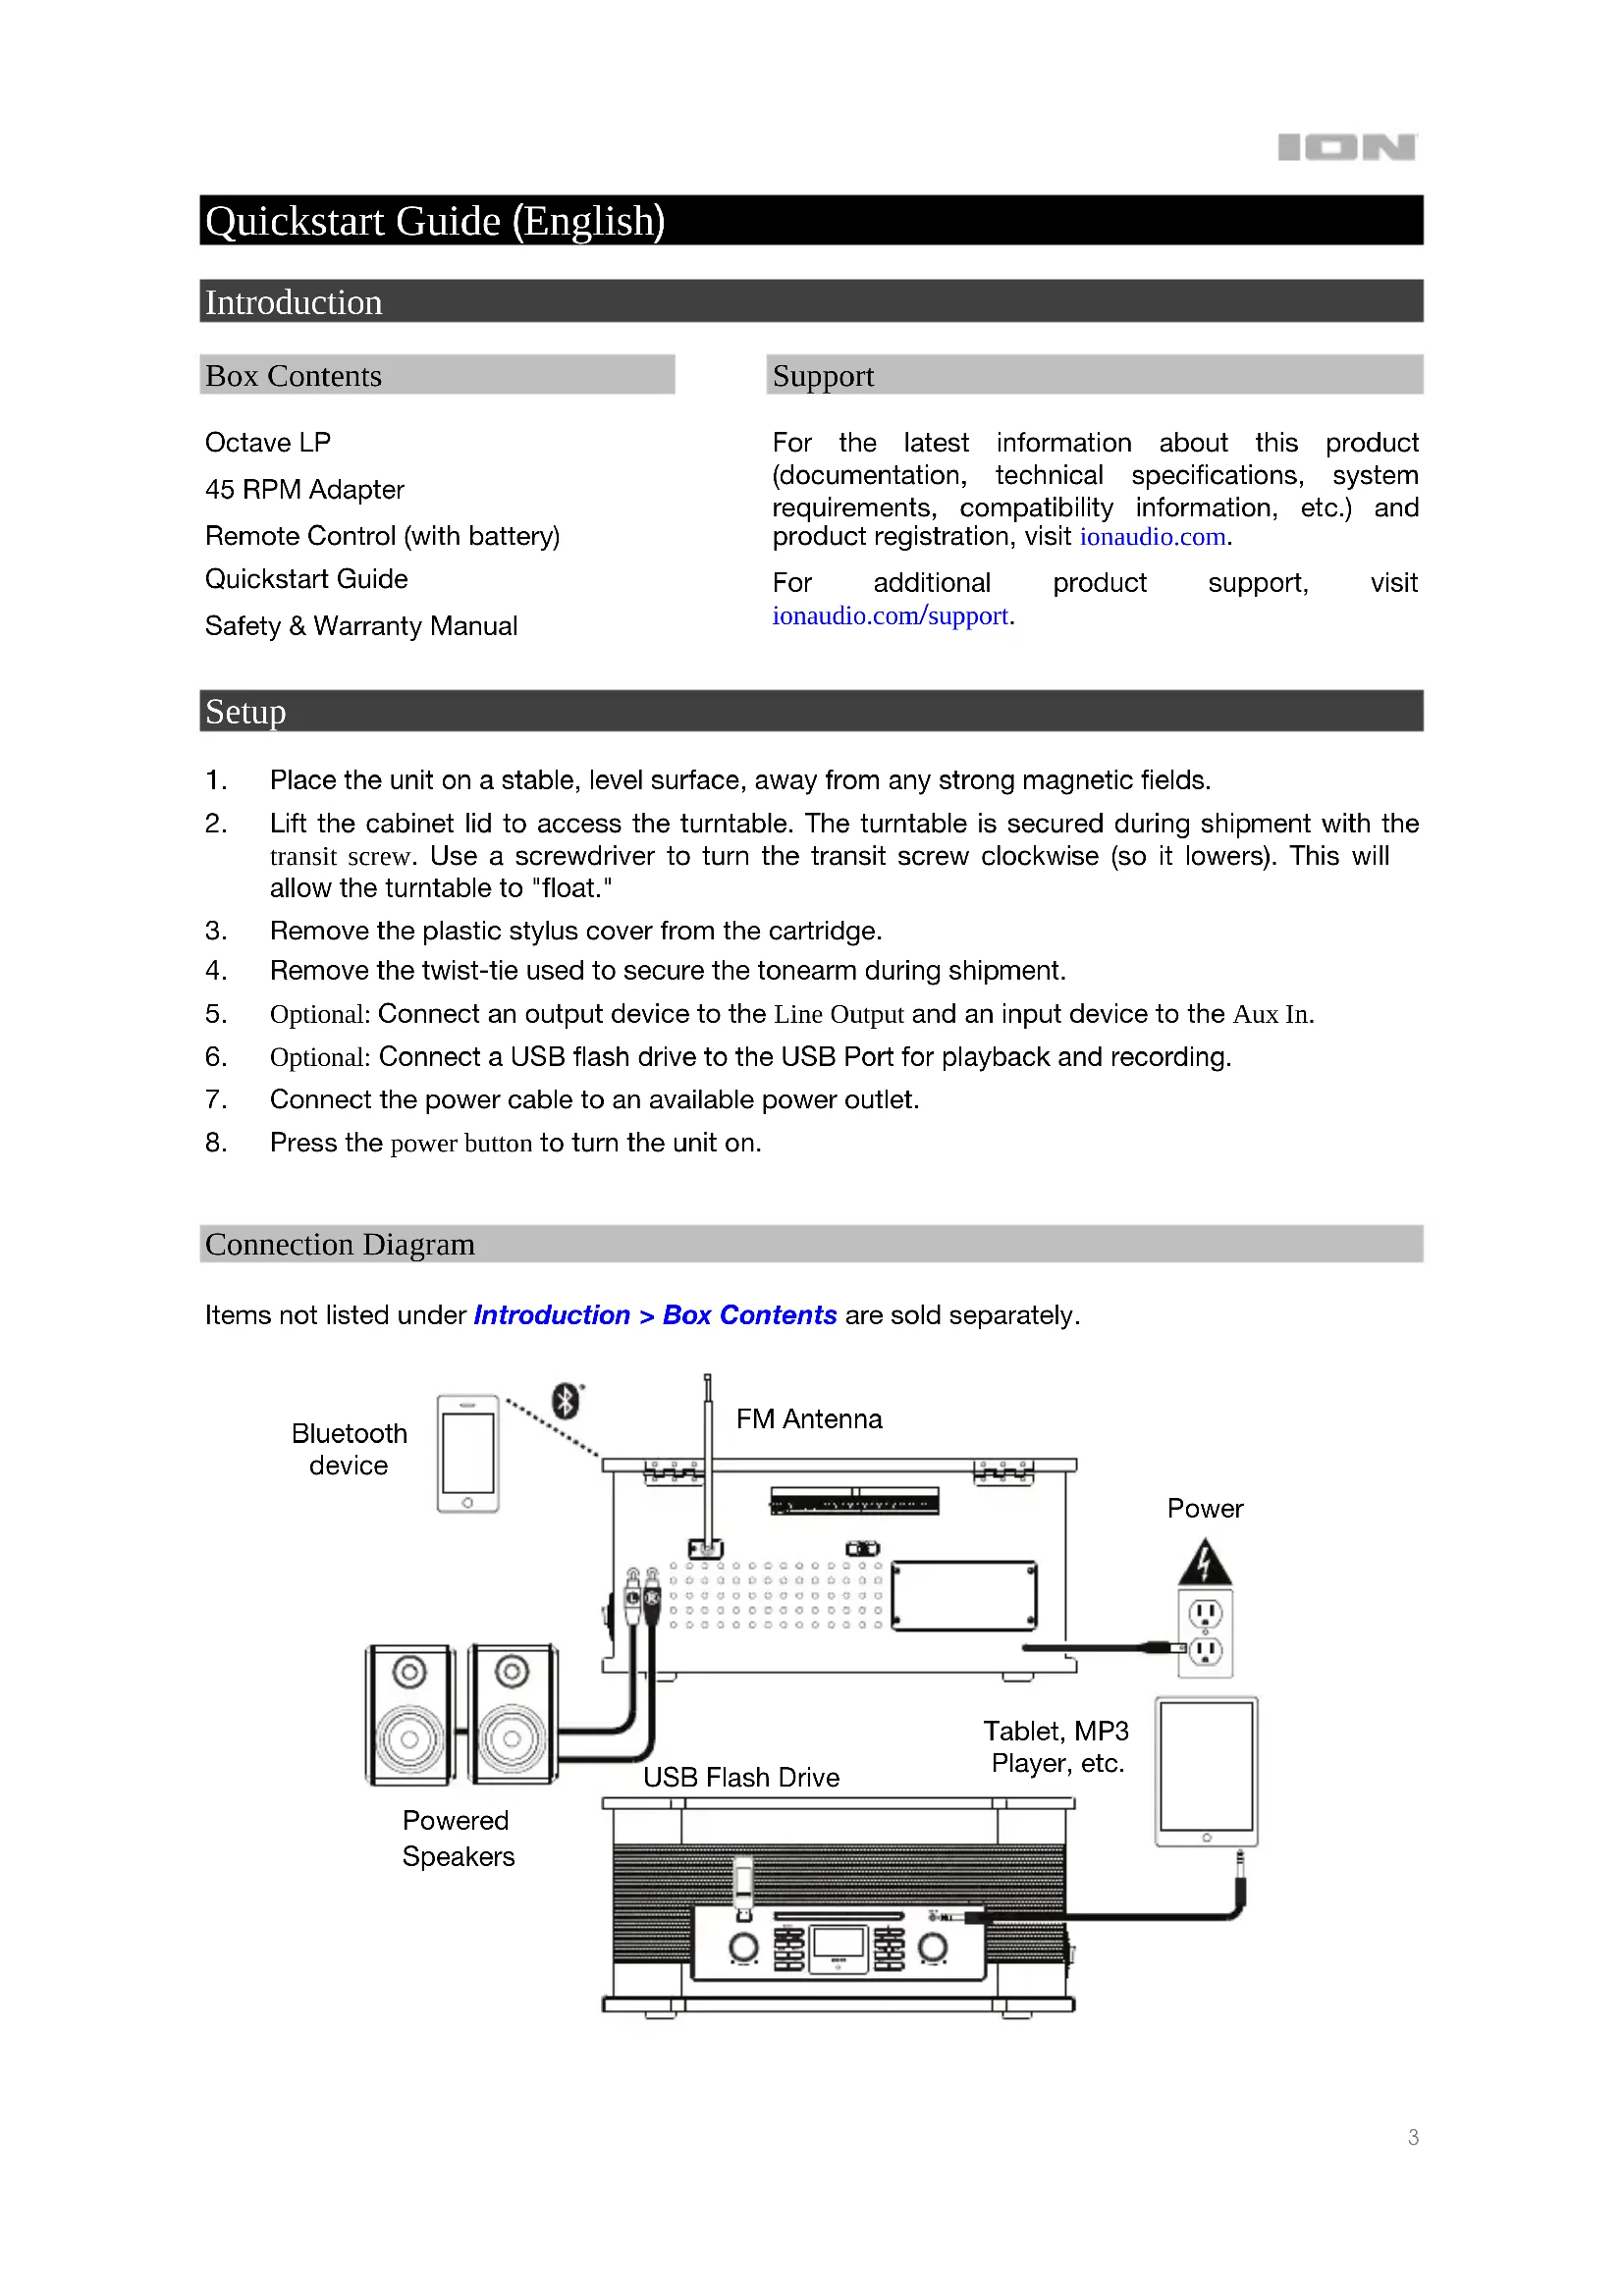
Quickstart Guide (English)
Introduction
Box Contents
Octave LP
45 RPM Adapter
Remote Control (with battery)
Quickstart Guide
Safety & Warranty Manual
Support
For the latest information about this product (documentation, technical specifications, system requirements, compatibility information, etc.) and product registration, visit ionaudio.com.
For additional product support, visit ionaudio.com/support.
Setup
- Place the unit on a stable, level surface, away from any strong magnetic fields.
- Lift the cabinet lid to access the turntable. The turntable is secured during shipment with the transit screw. Use a screwdriver to turn the transit screw clockwise (so it lowers). This will allow the turntable to "float."
- Remove the plastic stylus cover from the cartridge.
- Remove the twist-tie used to secure the tonearm during shipment.
- Optional: Connect an output device to the Line Output and an input device to the Aux In.
- Optional: Connect a USB flash drive to the USB Port for playback and recording.
- Connect the power cable to an available power outlet.
- Press the power button to turn the unit on.
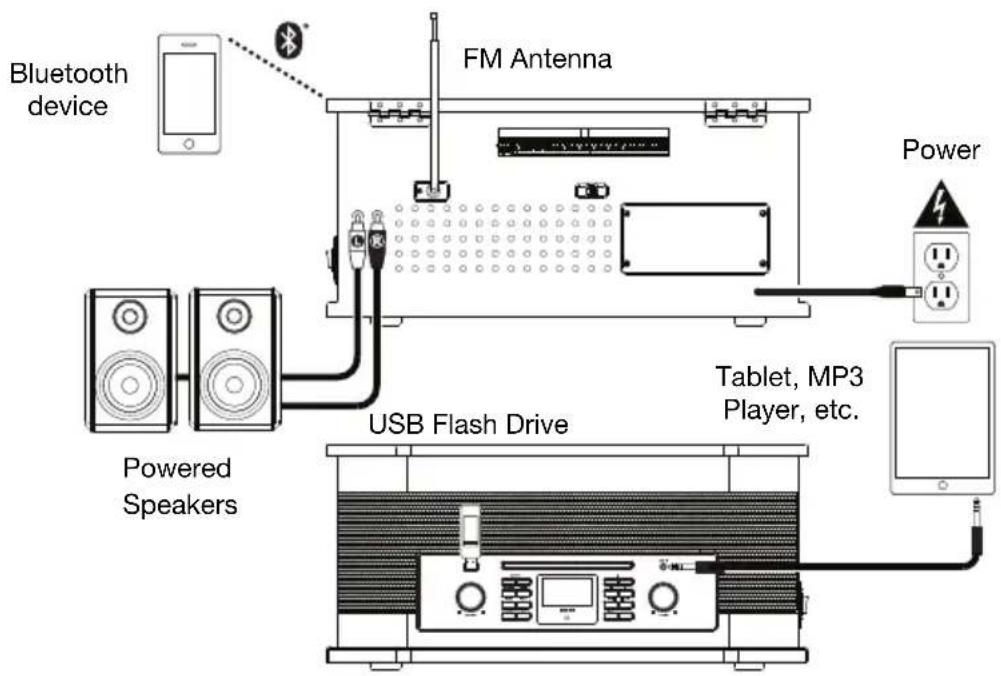
Connection Diagram
Items not listed under Introduction > Box Contents are sold separately.
Features
Front Panel

- Power: Press this button to turn the unit on or put it into standby mode. Do not turn the unit off during media playback—doing so could damage your media.
- Source: Press this button to select the playback source: CD, USB, Phono, Tape, DAB, FM, or Bluetooth.
- Menu: In FM and DAB Modes, press this button to view a Menu with additional settings.
- Scan: In FM Mode, press this button to scan for the next station.
- Info: In FM and DAB modes, press this button to view information about the current station.
- Preset: In FM and DAB modes, press this button to view saved stations. Press and hold this button to save the current station as a preset. There are 10 preset slots for each mode.
- EQ: Press this button to select an EQ setting: Flat, Pop, Classic, Rock, or Jazz.
- Eject: Press this button to eject the CD in the CD Tray.
- Play/Pause: Press this button to start, resume, or pause playback.
- Stop: Press this button to stop playback.
- Previous / Down: Press this button to skip to the previous CD, USB, or Bluetooth track. Press and hold this button to search backward in the track. Release it to resume playback.
- Next / Up: Press this button to skip to the next CD, USB, or Bluetooth track. Press and hold this button to search forward in the track. Release it to resume playback.
- Play Mode: Press this button to cycle through the repeat and random playback modes. In CD and USB Modes, press this button while playback is stopped to enter programming mode.
- Record: Press this button to enter USB recording mode if a USB flash drive is connected to the USB Port.
- Volume: Turn this knob to adjust the sound level for the internal speakers.
- Tuning / Enter: Turn this knob to select the FM or DAB radio station frequency. When navigating menus, use this knob to browse options, and press it to confirm a selection.
- USB Port: Connect your USB flash drive here to play tracks or record files.
- CD Tray: Insert a CD into this tray. This unit is designed to play commercially available CDs, properly burned and finalized CD-Rs and CD-RWs, and MP3 CDs.
- Aux In (1/8" / 3.5 mm): Use a standard stereo 1/8" (3.5 mm) cable to connect an optional line-level audio source to this stereo auxiliary input.
- Display: This screen indicates the unit's current operation.
- Remote Sensor: Point the remote control at this sensor when operating it.
Top Panel
Important: Remove the plastic cartridge cover (needle cover) before operating the turntable.
- Platter: Place your record here.
- 45 RPM Adapter Holder: Holds the included 45 RPM adapter. When not using the adapter, please place it in this holder.
- Tonearm: The fixed tonearm can be raised and lowered by hand, or by using the Raise / Lower Lever.
- 33/45/78 Switch: This switch controls the speed of the turntable platter.

Note: For best results when playing 78 RPM vinyl records, use a 78 stylus (sold separately). Only use a 78 stylus with 78 RPM vinyl records.
- Arm Clip: This specially designed arm clip secures the tonearm while at rest or when not in use. The arm clip has been designed to remain in the up position while unlocked.
- Raise / Lower Lever: Raises and lowers the tonearm.
- Transit Screw: This screw secures the turntable during shipment. Before operating the turntable, turn this screw clockwise (so it lowers). This will allow the turntable to "float."
Rear Panel
- Line Output: Connect this RCA output to a receiver, amplifier, or powered speakers.
Note: Octave LP's volume control will not adjust the volume when the line output is in use.
Warning: The RCA outputs are Line level. Please only connect these to Line level inputs. You may damage your receiver if you plug in a Line level device into a Phono level input.
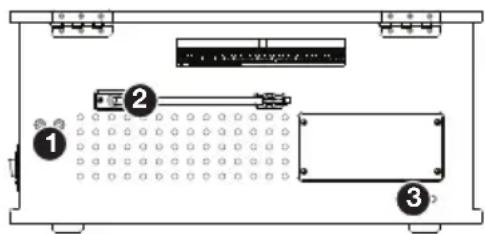
- FM Antenna: Adjust this antenna for better FM radio reception.
- Power Input: The integrated power cable is connected here.
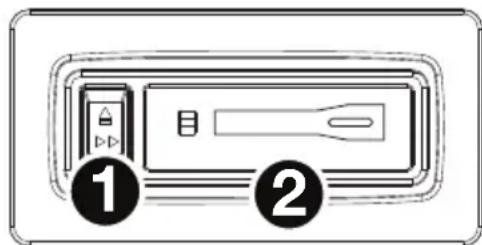
Side Panel
- Cassette Eject / Fast Forward (FF) Button: Push this button completely down to eject the tape. Push the button halfway down to fast forward through the tape.
- Cassette Door: Insert a cassette tape here.
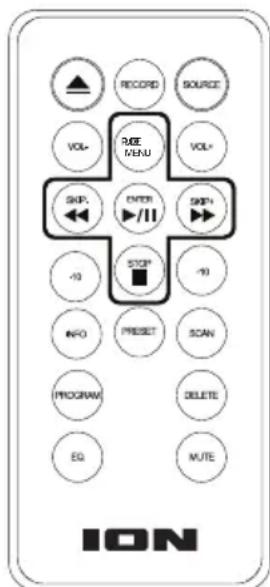
Remote Control
- Eject: Press this button to eject the CD in the CD Tray.
- Record: Press this button to enter USB recording mode if a USB flash drive is connected to the USB Port.
- Source: Press this button to select the playback source: CD, USB, Phono, Tape, DAB, FM, or Bluetooth.
- Vol - / Vol +: Press these buttons to decrease or increase the volume.
- Play Mode / Menu: Press this button to cycle through the repeat and random playback modes. In FM and DAB Modes, press this button to view a Menu with additional settings.
- Skip Previous / Next: Press these buttons to skip to the previous or next CD, USB, or Bluetooth track. Press and hold these buttons to search in the track. Release it to resume playback.
- Play/Pause / Enter: Press this button to start, resume, or pause playback. When navigating menus, press this button to confirm a selection.
- -10/+10: Press these buttons to jump backward or forward by 10 tracks.
- Stop: Press this button to stop playback.
- Info: In FM and DAB modes, press this button to view information about the current station.
- Preset: In FM and DAB modes, press this button to view saved stations. Press and hold this button to save the current station as a preset. There are 10 preset slots for each mode.
- Scan: In FM Mode, press this button to scan for the next station.
- Program: In CD or USB Modes, press this button to program the playback order for tracks.
- Delete: Press this button to delete a USB file.
- EQ: Press this button to select an EQ setting: Flat, Pop, Classic, Rock, or Jazz.
- Mute: Press this button to mute all audio. Press it again to unmute.
Operation
CD Mode
Standard audio and data CDs, CD-Rs, and CD-RWs can be used. If you are using a data CD, make sure it contains MP3 files. The unit cannot play other files.
Note: If a CD contains more than 999 files in a folder, the files above 999 will not appear correctly on the display. Arrange your files into folders with a maximum of 999 files per folder.
Loading and Unloading a CD
- Press the Source button to select CD Mode.
- Open the CD Tray by pressing the Eject button.
- When the CD tray has opened, carefully place the CD in the tray with the label facing up. Position smaller discs in the center of the CD tray.
- Close the CD tray. The total number of tracks on the CD will appear on the display and the CD will play automatically.
Repeat/Random Playback
To change the playback mode, press the Play Mode button. It will cycle through the following modes:
- Repeat (One): The current track is repeated. When active, the Repeat symbol () will appear in the display.
- Repeat Folder: All tracks in the current folder are repeated. When active, Folder will appear next to the Repeat symbol.
Note: This mode is only available when using MP3 discs.
- Repeat All: All tracks are repeated. When active, All will appear next to the Repeat symbol.
- Random (RDM): All tracks are rearranged into a random sequence for playback.
- Off: Normal operation.
Programming CD TrackPlayback Order
Follow these instructions to program the playback order for tracks on a CD.
Note: The CD playback must be stopped before programming track order.
- While stopped, press the Program button on the remote control or the Play Mode button on the front panel.
- Press the Previous or Next buttons to select the location in which the track should be stored, i.e. track 03.
- Press the Program button again. The first programmed selection is now stored in the programmed memory.
- Repeat Steps 2 and 3 to add more tracks to the program.
- To listen to the programmed tracks, press the Play/Pause button. The CD will start playing at the beginning of the first programmed track.
- To clear the programmed memory, press the Stop button twice while the disc is playing.
Track Skip and Search
Briefly press the Previous or Next buttons to skip to backward or forward to another track.
To skip backward and forward by 10 tracks, press the -10 and +10 buttons on the remote control.
Press and hold the Previous or Next buttons to search through a track. Release the button to resume normal playback.
USB Mode
Playback
- Press the Source button to select USB Mode.
- Connect your USB flash drive to the USB Port.
- The total number of tracks will be shown on the display, and playback will begin automatically.
Note: Make sure the drive contains MP3 files. The unit cannot play other files.
- Press the Stop button to stop playing.
Note: Please note that the unit can only read FAT32 format USB flash drives that are 32 GB or less.
Note: If a USB flash drive contains more than 999 files in a folder, the files above 999 will not appear correctly on the display. Arrange your files into folders with a maximum of 999 files per folder.
The playback modes and functions for USB Mode are the same as those for CD Mode, above.
Deleting Files
- Press the Delete button on the remote control.
- Press the Previous/Next buttons to select what you would like to delete: Single File (1), Folder (F), or All (A).
- Press the Delete button again.
Warning: This action cannot be undone.
Phono Mode
Before use, please do the following:
- Ensure the transit screw is properly positioned to unlock the turntable.
- Remove the stylus protector. Reconnect the protective cap on the stylus when not in use.
-
Ensure the tonearm is free to move from the tonearm rest. Lock the tonearm in place again when not in use.
-
Press the Source button to select Phono Mode.
- Lift the cabinet lid and place a record on the platter over the central spindle on the slipmat.
- Set the speed selector to 33, 45, or 78 RPM depending on the record.
- Lift the tonearm from the tonearm rest by using the Raise/Lower Lever and slowly move it over the record. The turntable platter will start turning.
- Place the tonearm on the desired location of the record.
- Gently lower the tonearm onto the record to start playing.
- When the record is finished playing, the tonearm will automatically lift from the record and return to the rest. The turntable platter will stop turning.
- To manually stop the record, lift the tonearm from the record and return it to the rest.
Note: Do not stop or turn the platter manually. Moving or jarring the turntable without securing the tonearm clamp could result in damage to the tonearm.
Tape Mode
- Press the Source button to select Tape Mode.
- Insert the tape with the thicker side of the tape facing to the right of the tape tray. The cassette will play automatically.
- Push the Eject/Fast Forward button halfway down to toggle between fast forward and playback. Release the FF button to start playback.
- Push the Eject/Fast Forward button completely down to eject the tape.
DAB Mode
- Press the Source button to select DAB Mode.
- Octave LP will automatically scan for available stations.
- When you have selected a station, you can press the Info button to view the following information in the display: Program Name, Program Type, Program Number, Audio Setting, Time, and Date.
- While in DAB Mode, press the Menu button to access the following options:
Full Scan: Select this option to perform a full scan for available stations.
- Manual Tune: Select this option to use the Tuning knob to manually search for a DAB station.
- DRC: Select this option to set the Dynamic Range Control to Off, Low, or High.
- Prune: Select this option to remove stations that are no longer transmitting.
- System: See System Settings for more information.
Saving and Recalling Presets
To save a preset:
- While tuned to the desired station, press and hold the Preset button for 2 seconds.
- Turn the Tuning/Enter knob to choose which Preset slot the station will be saved to. Preset slots that have not been used will appear as "Empty") in the display.
- Press the Tuning/Enter knob to save the station to the preset slot. "Stored" will appear in the display.
- Repeat these steps to add up to 10 of your favorite stations as presets.
To recall a preset:
- Briefly press the Preset button.
- Turn the Tuning/Enter knob to select which preset you would like to load.
- Press the Tuning/Enter knob to load the preset.
Note: The process for saving and recalling presets is the same for FM Mode.
FM Mode
- For best results, extend the FM Antenna on the rear panel.
- Press the Source button to select FM Mode.
- Use the Tuning knob to manually select a station, or press the Scan button to jump to the next station depending on the Scan Setting. To change the direction of the Scan, press the Previous or Next buttons. Scan will now search in that direction.
- If you tune to a stereo FM station, the Stereo indicator will appear in the display. If you tune to an FM station with a weaker signal, the reception will automatically switch to Mono.
- When you have selected a station, you can press the Info button to view the following information in the display: Program Name, Program Type, Program Number, Audio Setting, Time, and Date.
-
While in FM Mode, press the Menu button to access the following options:
-
Scan Setting: Select All Stations to scan the entire FM range or Strong Stations Only to scan for stations with a strong signal.
- Audio Setting: Select Stereo Allowed for stereo playback when available or Forced Mono to limit all stations to mono. You can also press the Tuning knob to switch between stereo and mono.
- System: See System Settings for more information.
Bluetooth Mode
- Press the Source button to select BT Mode.
- The display will flash BT Disconnected. When pairing, remain within 10 meters (33 feet) of Octave LP.
- Turn on Bluetooth on your phone or tablet to pair. Select Octave LP as the Bluetooth device.
Note: If your Bluetooth device prompts for a pairing code, enter "0000".
- When successfully paired and connected, the display will show BT Connected.
- To disconnect from the currently paired Bluetooth device and pair to another Bluetooth device, hold the Stop button for 2 seconds.
Aux InPlayback
- Set the Source button to Phono Mode.
- Connect an 1/8'' (3.5 mm) stereo audio cable (not included) from the Aux In on the front panel of Octave LP to the line output or headphone output of your external audio device to be able to listen to the external source through Octave LP's internal speakers.
- Adjust the volume on Octave LP to the desired level.
Note: If the line output of your external device is connected, you only need to adjust the system's volume control. If your external device's headphone output is connected, you may need to adjust the volume control on both your external device and Octave LP to achieve the desired volume.
Recording to USB
To record from an audio source to USB:
- Press the Source button to select CD, Phono, Tape, or Bluetooth Modes.
- Connect your USB flash drive to the USB Port.
- Press the Record button to enter recording mode.
- Press the Previous/Next buttons to select the recording type: Single File (1), Folder (F), or All (A).
- Press the Record button again to begin recording. During recording, the USB indicator will flash in the display.
Note: The recording speed is 1:1.
- Press Stop to stop the recording.
- The unit will create a new folder in the USB drive that contains all recorded tracks.
System Settings
- While in FM or DAB Modes, press the Menu button to open the menu.
- Use the Tuning/Enter knob to select System, then press it to confirm.
-
Use the Tuning/Enter knob to select from the options below, then press it to confirm.
-
Time: Select this option to adjust the time and date settings.
Set Time/Date: Manually set the time and date. Use the Tuning knob to adjust the values on the display, and press it to confirm.
○ Auto Update: Select this option to have the time and date automatically update. Select No Update (Off), Update from Any (FM or DAB), Update from FM, or Update from DAB.
Set 12/24 Hour: Set the time format, either 12 Hour or 24 Hour.
Set Date Format: Set the date format, either MM-DD-YYYY or DD-MM-YYYY.
Language: Select English, German, French, or Italian.
- Software Upgrade: Select this option to update the unit's software.
- SW Version: Displays the current software version.
- Press the Menu button to move back a page.
Technical Specifications
| Speaker Output Power | 2 x 5 W (RMS) |
| Frequency Response | 100 Hz – 10 kHz |
| Output Level | 600 mV |
| Impedance | 8 Ohm |
| Motor | DC Motor |
| Drive System | Auto-return, belt drive |
| Speed | 33 1/3, 45, 78 RPM |
| Cartridge & Stylus | Ceramic Additional cartridges/styluses sold at ionaudio.com |
| Radio Frequency Band | FM: 87.5 MHz – 108 MHz DAB: 174.0 MHz – 239.2 MHz (5A–13F) |
| Remote Control Range 16 feet / 5 meters | |
| Supported Data CD File Types | MP3 (CD, CD-R, CD-RW) |
| Supported USB Flash Drive File Types MP3 | |
| Recorded MP3 File Format | MP3 (192 kB/s, 44.1 kHz) |
| Voltage 100–230 VAC, 50/60 Hz | |
| Power Consumption | 24 W |
| Dimensions (width x depth x height) | 18.8" x 12.9" x 8.8" 478 mm x 328 mm x 224 mm |
| Weight | 16.6 lbs. 7.5 kg |
Specifications are subject to change without notice. Bluetooth and wireless reception and range are affected by walls, obstructions, and movement. For optimal performance, place the product in the center of the room so it is unobstructed by walls, furniture, etc.
Trademarks & Licenses
ION Audio is a trademark of ION Audio, LLC, registered in the U.S. and other countries. The Bluetooth word mark and logos are owned by the Bluetooth SIG, Inc. and any use of such marks by ION Audio is under license. All other product names, company names, trademarks, or trade names are those of their respective owners.
ionaudio.com