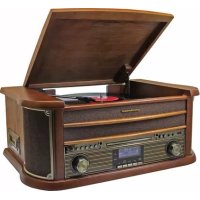
NR545 DAB+ - Turntable Soundmaster - Free user manual and instructions
Find the device manual for free NR545 DAB+ Soundmaster in PDF.


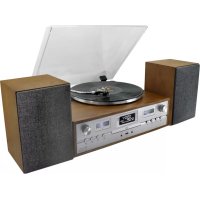
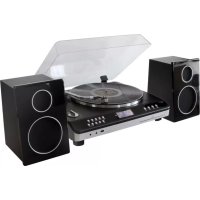
| Product type | Turntable with DAB+, FM radio, CD player, cassette, Bluetooth |
| Brand | Soundmaster |
| Model | NR545 DAB+ |
| Power supply | 230 V AC, 50 Hz |
| Power consumption | 33 W |
| Radio | DAB+ (band III) and FM 87.5-108 MHz |
| Turntable | Auto return, speed selector 33/45 rpm |
| CD player | Compatible with CD, CD-R, CD-RW, MP3 |
| Cassette | Playback and fast forward |
| Bluetooth | Audio streaming from compatible devices |
| USB port | Playback and MP3 recording |
| Auxiliary input | 3.5 mm jack for external sources |
| Display | Backlit LCD |
| Remote control | Included, AAA batteries not supplied |
| Alarm function | Programmable source: CD, FM, DAB, USB |
| Sleep timer | Adjustable up to 120 minutes |
| Equalizer | 4 preset modes |
| Maintenance | Clean with a dry cloth, without abrasive detergents |
| Safety | Do not open the device; risk of electric shock |
| Laser class | Class 1 (CD player) |
Frequently Asked Questions - NR545 DAB+ Soundmaster
User questions about NR545 DAB+ Soundmaster
0 question about this device. Answer the ones you know or ask your own.
Ask a new question about this device
Download the instructions for your Turntable in PDF format for free! Find your manual NR545 DAB+ - Soundmaster and take your electronic device back in hand. On this page are published all the documents necessary for the use of your device. NR545 DAB+ by Soundmaster.
USER MANUAL NR545 DAB+ Soundmaster
Radio data system (RDS)
Copyright by Wörlein GmbH, Germany.
Importeur
Do not dispose of this product with the normal household waste at the end of its life cycle. Return it to a collection point for the recycling of electrical and electronic devices. This is indicated by the symbol on the product, user manual or packaging.
The materials are reusable according to their markings. By reusing, recycling or other forms of utilization of old devices you make an important contribution to the protection of our environment.
Please contact your local authorities for details about collection points.

CAUTION - INVISIBLE LASER RADIATION WHEN OPENING THE COVER OR PRESSING THE SAFETY INTERLOCK. AVOID EXPOSURE TO THE LASER BEAM.


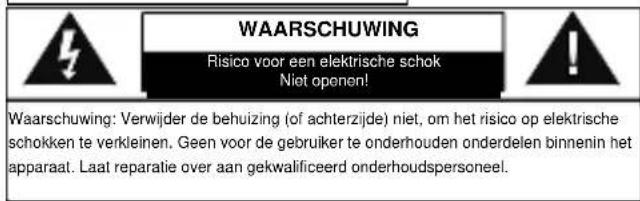
Caution: To reduce the risk of electric shock, do not remove the cover (or back). There are no user serviceable parts inside. Refer servicing to qualified service personnel.
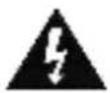

This symbol indicates the presence of dangerous voltage inside the enclosure, sufficient enough to cause electric shock.
This symbol indicates the presence of important operating and maintenance instructions for the device.
Safety, Environmental and Setup Instructions
- Use the device in dry indoor environments only.
- Protect the device from humidity.
Do not open the device. RISK OF ELECTRIC SHOCK! Refer opening and servicing to qualified personnel. - Connect this device to a properly installed and earthed wall outlet only. Make sure the mains voltage corresponds with the specifications on the rating plate.
Make sure the mains cable stays dry during operation. Do not pinch or damage the mains cable in any way. - Disconnect device warning: Main plug is used as the connection, so it should always remain ready operate.
The mains plug is used as the disconnect device, the disconnect device shall remain readily operable. - A damaged mains cable or plug must immediately be replaced by an authorized service center.
- In case of lightning, immediately disconnect the device from the mains supply.
Children should be supervised by parents when using the device.
Clean the device with a dry cloth only. Do NOT use CLEANING AGENTS or ABRASIVE CLOTHS! - Do not expose the device to direct sunlight or other heat sources.
Install the device at a location with sufficient ventilation in order to prevent heat accumulation. - Do not cover the ventilation openings!
The ventilation should not be impeded by covering the ventilation openings with items, such as newspaper, table-cloths, curtains, etc.
It shall be not be exposed to dripping or splashing and that no objects filled with liquids, such as vases, shall be placed on the apparatus.
The unit should not be exposed to direct sunlight, very high or low temperature, moisture, vibrations or placed in dusty environment. - Never attempt to insert wires, pins or other such objects into the vents or opening of the unit.
- Install the device at a safe and vibration-free location.
- No naked flame sources, such as lighted candles, should be placed on the apparatus.
Install the device as far away as possible from computers and microwave units; otherwise radio reception may be disturbed.
Do not open or repair the enclosure. It is not safe to do so and will void your warranty. Repairs only by authorized service/ customer center.
The device is equipped with a "Class 1 Laser". Avoid exposure to the laser beam as this could cause eye injuries. - Only use mercury and cadmium-free batteries.
- Batteries shall not be exposed to excessive heat such as sunshine, fire or the like.
Used batteries are hazardous waste and NOT to be disposed of with the household waste!! Return the batteries to your dealer or to collection points in your community. - Keep batteries away from children. Children might swallow batteries. Contact a physician immediately if a battery was swallowed.
- Check your batteries regularly to avoid battery leakage.
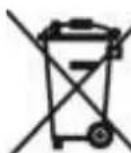
Used batteries are hazardous waste and NOT to be disposed of with the household waste! As a consumer you are legally obligated to return all batteries for environmentally responsible recycling - no matter whether or not the batteries contain harmful substances*.
Return batteries free of charge to public collection points in your community or to shops selling batteries of the respective kind.
Only return fully discharged batteries.
^* marked Cd = cadmium, Hg = mercury, Pb = lead
BATTERY INSTALLATION
The battery compartment is located on the back of the remote control.
- Remove the battery compartment door by pressing in on the tab and lifting it off.
- Insert two (2) AAA size batteries (not included) into the battery compartment following the polarity markings inside the battery compartment.
- Replace the battery compartment door.

LOCATION OF CONTROLS MAIN UNIT
Usage of controls or adjustments or performance of procedures other than those specified herein may result in hazardous radiation exposure.
This unit should not be adjusted or repaired by anyone except qualified service personnel.
Important:
Since movement of the CD mechanism and the sensitive circuitry may cause interference to the radio tuner nearby, switch this unit off while operating other radio devices
Precautions for use
Installation
- Unpack all parts and remove protective material.
- Do not connect the unit to the mains before checking the main voltage and before all other connections have been made.
- Do not cover any vents and make sure that there is a space of several centimeters around the unit for ventilation.
Connection
- Plug in the AC cord (34) to the AC outlet. Switch the unit to standby mode by Main power switch (34). The unit will go to standby mode and the LCD display will dim light up.
- Turn on the unit (4), if the LCD display (6) is on with backlighting, it means the power supply is normal. Now your system is ready to play the music.
Setting the clock
- Set unit in standby mode.
- Press the "Mem/_clk-Adj" button (21) until display flashes "24HR". Press the Skip Up or Skip Down button (14/15) to select the clock format between 12 or 24Hour. Then press the "Mem/_clk-Adj" button (21).
- The first digit of "0:00" is flashing on the LCD display (6). Press Skip Up or Skip Down button (14/15) to set the correct hour. Press "Mem/Clk-Adj" button (21) to store the correct hour.
- The third & fourth digit of "00" is flashing, press the Skip Up or Skip Down button (14/15) to set the correct minutes. Then press "Preset/Clk-Adj" button (21) to store the correct minute.
The clock setting mode will automatically quit if no button is being pressed in a period of about 5 seconds after pressing the "Mem/_clk-Adj" button.
The pre-set time will be re-set completely if dis-connecting the main power supply except backup battery installed. You are recommended to switch the system into standby mode for convenience usage.
Listening to radio
Manual tuning
- Plug in the provided DAB/FM tuner antenna to the antenna socket (32) then switch on the unit by On/Standby button (4), then press Function button (5) to select "FM" mode.
- Tune to the required station by tuning knob (23).
- Turn the Volume knob (17) to the desired volume level.
Auto tuning
- Set the unit to FM mode.
- Press the Scan button (20) once; unit will start to scan at tuning up direct until radio station received. Press and hold the Play/Scan button (7) for a second, the unit will scan to tuning down direction. If the radio data system (RDS) broadcasting signal received, the unit will set the actual time automatically.
- Turn the Volume knob (17) to the desired volume level.
Radio data system (RDS)
This is the features to display the information which released from the radio broadcast and will showed on LCD display step by step as below by pressing the Info button(on the remote control) continuously.
Radio text program type signal strength date/time frequency mono/stereo
Digital audio broadcasting (DAB) radio
- Set the unit to "DAB" mode by Function button (5).
- Press the Scan (20) button once; unit will start to full scan from range 11b-12d one time within around 2 second. Then press Tune up/down button (14/15) to select your desired DAB channel.
- Press the Info button continuously to check the below info released by DAB. Group name frequency transfer rate signal strength date/time program type scrolling text
- Press the Volume knob (17) to the desired volume level.
Preset stations
You can store up to total of 40 radio stations in the memory (20-FM/20-DAB).
1. Set to FM/DAB mode
2. Turn to the desired radio station by "manual" or "auto" tuning method.
3. Press and hold the Mem/Clock-Adjust button (21) around four second to enable memory state, the preset station will flash on LCD display.
4. Preset the Skip/ Pre up/down button (14/15) to select the desired station memory for storage.
- Press Mem/Clock-Adjust button (21) to confirm the preset memory.
- Repeat step 2 to 5 to store other stations.
Recall preset stations
- Press the Mem/Clock-Adjust button (21) once to enable recall state
- Press Skip/ Pre up/down button (14/15) to select the desired memory station.
- Press Memory/Clock-Adjust button (21) to confirm the recall memory station.
The pre-set memories will be cancelled completely if dis-connecting the main power supply and back up battery did not installed. You are recommended to switch the system into standby mode for convenience usage.
There are 3 seconds for program state, after 3 sec. This state would resume to normal tune mode automatically.
You can overwrite a present station by storing another frequency in its place.
FM-Stereo reception
- Press the "Enter" knob (23) repeatedly; the FM programs are receiving in mono and stereo mode repeatedly. In particular when stereo signals are weak, it is preferable to receive the program in Mono.
If stereo signal is being received, the stereo indicator "CD" will appear on LCD display (6) to show FM Stereo program is now receiving.
Hints for best reception:
FM: the receiver work with detachable DAB/FM wire antenna, made sure the antenna had plugged into the antenna socket (32) and totally unraveled for the best reception.
Playing Compact Disc
- Getting start
- Press Function button (5) to select "CD" mode.
- Push the CD tray open (16) to open the CD tray.
- Place a CD with the printed side facing up and then close the CD tray.
- Focus search will performing and the LCD display (6) will show the total number of tracks & total playing time. Then, the unit will start automatically.
- Turn Volume knob (17) to the desired volume level.
- Play / Pause mode
- To interrupt, press the "Play/Pause button (12) once, "PAUES" will show on the LCD display (6). Press again to resume normal playback.
- Stop mode
- If "Stop" button (13) is pressed during play or pause mode, system will go to stop mode.
- Skip mode (skip up /skip down)
- During play or pause mode, if "skip up" button (15) is pressed. It will go to next track and display the track no. and then remain the play or pause mode.
- During play or pause mode, if "skip down" button (14) is pressed. It will go to the previous track, original track no. is displayed and remain the play or pause mode.
For MP3 Disc
- After focus search is performing, the total number of track and album will be shown on the LCD display (6). The unit will start to plat directly.
- Turn "Folder/Tuning up down knob (23) to select the folder number.
- Press "Skip Up" or "Skip Down" button (14/15) to select the track number.
ID3/Display function
Press the "Info" button (19) repeatedly; the LCD display (6) show "file" during playback of MP3 file, the song file/album/song/artist name is being displayed few seconds in sequence. Then will change back to current clock time.
Remark:-
In that case of no name or not supportive languages had been assigned for the track, LCD display will blank (6) when press the Info button (19).
- No Title/Album name can be recognized if the input format on the Disc is not supporting by the system.
- The system support only English and Arabic number for ID3 function.
MP3 track format requirement:
- Bit rate: 32 kbps~320kbps, sampling rate: 32khz, 44.1khz and 48 kHz decodable
The performance of playing MP3 Disc is various from the quality of recording disc and the method of recording. Furthermore,
the searching lead-time for MP3-CD is longer than normal CD due to difference format.
- Repeat/Random mode
Press the "Play Mode" button (11) during playback to select repeat and random function, a single track, all the tracks repeat or folder repeat(MP3 only) and random can be played in difference mode as follow:
For CD
| (1) repeat 1 (2) repeat all track (3) random (4) off mode | |
| Play mode | Indicator on LCD display |
| Repeat track | |
| Repeat all | ALL |
| Random | |
| Off mode | |
For MP3 Disc
| (1) repeat 1 | (2) repeat 1 folder | (3) repeat all tracks |
| (5) off mode | ||
| Play mode | Indicator on LCD display | |
| Repeat track | ○ | |
| Repeat folder | ○□ | |
| Repeat all | ○ALL | |
| Random | × | |
| Off mode | -------- | |
Repeat play
You can listen to the desired track, folder (for MP3 only) or whole disc repeat by this function.
- Random play
You can listen to all the tracks in a random order by this function.
CD programming
Up to 20 tracks can be programmed for disc play in any order. Before use, be sure to press the "stop" button (8).
- Set in CD mode & stop the CD playback.
- Press the "Mem/Clk-Adj" button (21) and "MEM" will appear on LCD display (6).
- Select a desired track by pressing skip up or down button (14/15).
- Press the "Mem/Clk-Adj" button (21) to store the track into memory.
- Repeat steps 3 and 4 to enter additional tracks into the memory if necessary.
- When all the desired tracks have been programmed, press "Play/Pause button (12) to play the disc in assigned order.
- Press "Stop" button (13) to stop playback, press Stop button again to clear all stored memory.
The programming mode will automatically stop if no button is being pressed in a period of about 10 seconds after pressing the "Mem/Cik-Adj" button.
Playback of MP3 song via USB storage media
Connecting
The system is able to decode and playback all MP3 file which stored in the memory media with USB connecting port.
- Set the system at standby mode first or other function except USB mode.
- Open plug-in the USB pen-drive with the face up & make sure it going into completely.
- Connecting the USB upside down or backwards could damage the audio system. Check to be sure the direction is correct before connection.
- Set Function button (5) to "USB mode.
- The system will start reading the storage media automatically after connecting, and LCD display (6) will show the total number of folder and MP3 files being detected and start to playback automatically.
- Repeat the same playback procedure as playing CD/MP3 disc as above.
Remark
The system can detect and read the file under MP3 format only at USB mode but no other music file format.
If connect the system to MP3 player via the USB socket, due to variances in MP3 encoding format, some MP3 player may not be able to play via the USB socket. This is not a malfunction of the system.
USB port does not support connection with USB extension cable and is not designed for communication with computer directly.
Removing of USB
To remove the USB storage media, change the function mode to CD, Aux or Tuner first. Then unplug it by pulling out the USB socket directly.
Encoding of CD file into MP3 file
The system is able to encode normal CD/Tuner/Aux or cassette tape file to MP3 format and recording at memory media with USB connecting port.
The system will create a music folder name - "RIP" for CD-DA encode, "REC" for Tuner, Aux, Cassette encode and "FROMCD" for CD-MP3 disc copy and encode bitrate default at 128kbps.
A) CD encoding
I) Encoding 1 track/1 disc at 1x speed
- Perform normal playback of the CD track you want to encode & record.
- Press "REC" button (10) during the playback of the desire track and the display will show "REC" and "USB" flashing.
- Press "REC" button (10) again the display will show "REC" and "ONE" flashing.
- Press "REC" button (10) again, the system will flashing with "REC USB" icon. Encoding is performing now.
- After completing of recording, unit will stop playback automatically.
- Press "stop" button (11) to interrupt the recording mode anytime
- For encode whole CD track, pls stay CD in stop mode then press "REC" button (10) three times until the display flashes "REC USB", then system will start to playback CD and encoding whole disc.
Remark:
- The recording speed is 1:1 and according to the actual plying time of the cd track
The recording format is preset at - mp3 bit rate: 128 kbps, sampling rate: 44.1khz - Press "stop" button (13) to interrupt the recording mode at any time.
B) Copying of MP3 file
If putting a MP3 disc instead of a CD-disc, the system will copy the files to the USB if press the "REC" button (10). The operation procedures is same as CD encoding as stipulate on above, and the system will switch to copying mode only if MP3 file being read.
C) DAB encoding
- Operate tuner mode refer above listening to radio section to receive the station you would like to encode.
- Press the "REC" button twice (10) until the unit will display flashing with "REC USB" icon. Encoding is now performing.
- After finish of recoding, press "stop" button (13) until the symbol "REC USB" disappear.
1) Plug in the usb pen drive for recording (make sure it has enough empty space).
2) Set the unit to your desired encoding mode by function button (5) such as "tape" mode or Aux etc. and then start to playback the track would like to encode, then press the "button (10) twice.
3) The LCD display (6) will flash with "REC USB" icon. Now the system is starting the encoding mode.
4) Start playback of cassette tape or your external Aux device which the track you prepare to encoding to MP3 format.
5) After finish of recoding, press "stop" button (13) until the symbol "USB" & "REC USB" disappear.
E) track separation(On remote control only)
You can divide the recording music from tape or Aux/DAB etc. in to USB track by track during encoding. Every time when press the "TS" (track separation) button (on remote control) once during encoding from tape or Aux in, the system will generate a new track and continuous the recording. The text "SAVE" at LCD display will flash one time, it means the unit is creating a new track successfully.
F) Copying of MP3 file
If putting a MP3 disc instead of a CD-disc, the system will copy the files to the USB if press the "●REC" button (10). The operation procedures is same as CD encoding as stipulate on above, and the system will switch to copying mode only if MP3 file being read.
File delete at USB / SD card (by remote control)
The system is able to erase the file stored inside the USB pen drive by following:
- Insert the media storage and set at "USB" mode.
- Press the "delete" button and the LCD display (6) will show (del --001)
- Press skip forward or skip backward button to select the file going to delete
- Press the "delete" button to enter "yes/no" mode and then press skip forward or skip backward to select "yes" or "no".
- Press the "delete" button again to confirm the setting.
Remark:
- Press "stop" button once at remote handset to quite delete mode
Phono
1. operation
- Remove the stylus protector.
- Be sure that the tone arm is being detached from the tone arm rest before operating and re-secured again afterwards.
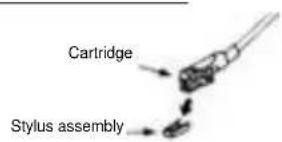
- Select to "Phono" function from function selector (5)
- Set the speed selector (27) to the proper position depending on the record to be played.
- Place the record on the platter (use the spindle adaptor if required).
- Set the Tone arm lever (26) to the up position.
- Lift the tone arm from the rest and slowly move it to the record side. The platter will start to rotate and position the tone arm over the desired position of the record.
- Pull down the Tone arm lever (26). The tone arm will come slowly on the recorder and start playback.
- At the end of record, the tone arm will return to the rest position automatically.
- To stop manually, lift the tone arm from the record and return it to the rest.
- Play suspension
Set the cueing lever (26) to the up position will life up the tone arm and then stop playback temporarily
Remark:
- Due to the auto return system was mechanical design and reset point will be affected after transportation. Thus, the tone arm will return to the rest automatically when first time place it to the platter and it was not the malfunction
Due to the length of the record is various, if you find the tone arm cannot return automatically after playback of record. Please return the tone arm back to the rest position manually or adjust the auto return point as below procedure.
Important:
To make sure the turntable can play the record with different standard completely, a hole with "NO OPEN" PVC plate located at the back of the unit (31) to adjust the screw inside the turntable.
When the turntable stop early and the auto-return, pls use a screw driver to turn the screw inside the hole about 45 degree in clockwise direction, if the record still can not be played completely, stop play and re-turn the screw 45 degree in clockwise direction again, till the turntable can be play the record completely and auto return.
When the turntable can not be stop and auto return but keep running after playing the record completely, pls use a screw driver
to turn the screw inside the hole about 45 degree in counter-clockwise direction, if the record still can not be played completely, stop play and re-turn the screw 45 degree in counter-clockwise direction again, till the turntable can be play the record completely and auto return.
Listing to Tape
General operation
Cassette playback: The system will start the playback automatically after inserting of cassette tape
Stop and ejection: Press the "Tape forward/eject" button completely inwards and the cassette tape will be ejected though the cassette door cover. The "Tape forward/eject" button will keeping at lowest height position.
Fast forward: Press the "Tape forward/eject" button half inwards during Playback mode, the tape winding forward direction. The "Tape forward/eject" button will keep at middle height position.
Slightly press the "Tape forward/eject" button again to resume normal playback. The "Tape forward/eject" button will resume to the highest position.

Remark
- Make sure the direction is correct when inserting the tape into the system.
There is some searching noise can be heard and the system cannot perform normal playback function during fast forward mode.
This is recommended to take out the cassette tape from the system every times after listening and don't leave the cassette tape inside the system when not under playback mode.
Bluetooth connecting and Playback
- Press Function button to select (5) to "Bluetooth" mode.
- The LCD display (6) will flashing with Bluetooth icon, it means the BT is in non-connection/searching mode.
- Switch on the Bluetooth feature of your BT device (such as mobile phone) and select "NR513DAB" BT equipment to connecting.
- Once the connecting was finish and connect successfully, the Bluetooth icon will change to light up on LCD display (6).
- Start to playback your BT device and enjoy the music by the main unit.
Aux-in connection
Connect another audio device, e.g. (portable) CD player, MP3 player, (portable) cassette player, iPod, etc. To this system via a cord with 3.5mm diameter jack plugs (not supplied). Connect one end of this cord to the headphone jack of the external device and the other end to the aux-in jack (2) at the side of the unit. Then press Function button (5) to "AUX" mode. Start to playback your external device to enjoy your music.
More features
A. Sleep function
- Press "Sleep" button (18) "SLP-120" will be shown on the LCD display (6).
- Keep pressing the button to adjust the sleep timer in the order of 120 > 90 > 60 > 45 > 15 minutes respectively and sleep icon indicate on LCD.
- System will stop and go to standby mode automatically after running the selected time.
- To cancel the sleep mode, press "Sleep" button until "SLP-off" displayed and the "zzZ" indicator disappear on LCD display.
B. Timer clock setting
This function allows the system to turn on automatically and wake you up by CD, DAB, FM Radio, USB mode respectively.
First, set the unit at standby mode and then press & hold the "Timer" button (18) to enter the setting mode, the LCD display will show "SET TIMER" then change to "SELECT SOURCE and timer" icon will flash on display:
1) Wake up source: press the "Function" button repeatedly to select the source from "CD" -- "FM" -- "DAB" -- "USB". Press "Timer" button to confirm the selected source.
2) Wake up volume: press the skip/preset up-down button (14/15) to adjust the wake up volume level then press "Timer" button (18) to confirm the wake up level.
3) Wake up time: press "Skip up /down " button (14/15) to set the hour & then press "Timer" button to enter the hours. Press "Skip up /down " button (14/15) to set minutes and press "Timer" button to store the memory.
Remark
If there is no music source being detected (such as USB/CD) when the preset time is reached, system will default to FM mode automatically.
For FM or DAB radio wake up, the system will preset at the latest radio frequency being listened before switching off.
Please switch off the system manually during alarm wake up mode as the system will not turn off automatically after alarm on mode.
Active/de-active timer function
- To active the timer, press once the "Timer" button on remote handset until the timer indicator "⑥" is shown on LCD display (6).
- To cancel timer function by press once again "Timer" button until the timer indicator "..." disappears.
C. Pre-set EQ function
This unit provides 4 differences sound mode to enhance your listening experience. You can select the desired effect by pressing the "Preset EQ" button (22) repeatedly at following sequence:

Remote control transmitter
Control functions
Battery installation (battery not provided)
The infra-red transmitter require 2 pc "AAA" size batteries for operation
Button description
| On/standby | Press to power on / standby the system |
| Play/pause /Scan | In CD/USB mode: press to start playback/pause mode |
| Skip up /down /Tune+/- | Press to select previous/next tracks at CD/USB mode |
| Press to step up/down of radio frequency at tuner mode | |
| Stop Enter | In CD/USB mode: press to stop the playback |
| In Tuner mode: select stereo/mono mode | |
| Folder/Pre Up-Down | In Tuner mode: press to select preset memory up/down |
| In USB mode: press to select folder up/down | |
| Scan | In FM/DAB mode, press to search the station |
| Rec | Press to active encoding/mp3 file copy function |
| Volume +/- | Press to adjust volume level up/ down |
| TS | In encoding mode: press to active track separation function |
| Sleep/Timer | In power on mode: press to active sleep function |
| In standby mode: press and hold to enter timer set up mode and press once to active/de-active timer function | |
| Play mode | In CD mode: press to active random/repeat function |
| Function | Select the function between CD/Tuner/USB/SD/Aux |
| Del/info | In USB mode: press to delete the file in the USB/SD me |
| In MP3 playback mode: press to active ID3 function | |
| In DAB/FM mode, press to see the broadcast information | |
| Preset EQ | Press to select difference EQ mode for enjoyment |
| Mute | Press to cut the sound temporarily |
| Mem / Clk-adj | In standby mode: press & hold to adjust clock |
| In CD/USD/SD/Tuner mode: press to preset memory |

Specification
UKW/FM:87.5-108 MHz
MW/AM:540-1600KHz
Power Supply: AC230V~50Hz
Power consumption: 33W
Remark: Due to ErP stage two requirements and protect the environment. The unit will switch to standby mode automatically once no any music playing over 15 minutes.
PROTECTION DE L'ENVIRONNEMENT

CLASS 1 LASER PRODUCT
KLASSE 1 LASER PRODUKT
LUOKAN 1 LASER LAITE
KCLASS 1 LASER APPARAT
PRODUCTO LASER CLASE 1
ATTENTION - RADIATION LASER INVISIBLE LORSQUE VOUS OUVREZ LE COUVERCLE OU APPUYEZ SUR L'ENCLENCHEMENT DE SECURITE. EVITEZ Toute EXPOSITION AU RAYON LASER

ATTENTION
Radio data system (RDS)
CLASS 1 LASER PRODUCT
KLASSE 1 LASER PRODUKT
LUOKAN 1 LASER LAITE
KCLASS 1 LASER APPARAT
PRODUCTO LASER CLASE 1
WAARSCHUWING - ONZICHTBARE LASERSTRALING WANNEER DE BEHUIZING GEOPEND WORDT OF DE INTERNE BEVEILIGING UITGESCHAKELD. VERMIJD BLOOTSTELLING AAN DE LASERSTRAAL.
Radio Data System (RDS)
Digitale audiobroadcast (DAB) radio
Radio Data System (RDS)
Radio Digital Audio broadcasting (DAB)
Radio data system (RDS)
DAB-radio (digital audio broadcasting)
Radio data system (RDS)
Hurtig freemspoling:
*) markerade Cd = kadmium, Hg = kvicksilver, Pb = bly
BATTERIINSTALLATION
Batterifacet ar placerat pa fjarrkontrollens baksida.
Hereby, Wörlein GmbH declares that this device is in compliance with the essential requirements and other relevant provisions of Directive 1999/5/EC.
A copy of the Declara on of Conformity may be obtained at the following loca on:
Wörlein GmbH, Gewerbestrasse 12, D 90556 Cadolzburg, Germany
Email: info@woerlein.com
Tel.: +49 9103 71 67 0
- Radio data system (RDS)
- Safety, Environmental and Setup Instructions
- BATTERY INSTALLATION
- LOCATION OF CONTROLS MAIN UNIT
- Important:
- Precautions for use
- Installation
- Connection
- Setting the clock
- Listening to radio
- Manual tuning
- Auto tuning
- Digital audio broadcasting (DAB) radio
- Preset stations
- Recall preset stations
- FM-Stereo reception
- Hints for best reception:
- Playing Compact Disc
- - Getting start
- - Play / Pause mode
- - Stop mode
- - Skip mode (skip up /skip down)
- For MP3 Disc
- ID3/Display function
- Remark:-
- MP3 track format requirement:
- - Repeat/Random mode
- Repeat play
- - Random play
- CD programming
- Playback of MP3 song via USB storage media
- Connecting
- Remark
- Removing of USB
- Encoding of CD file into MP3 file
- A) CD encoding
- Remark:
- B) Copying of MP3 file
- C) DAB encoding
- E) track separation(On remote control only)
- F) Copying of MP3 file
- File delete at USB / SD card (by remote control)
- Phono
- operation
- - Play suspension
- Listing to Tape
- General operation
- Bluetooth connecting and Playback
- Aux-in connection
- More features
- Sleep function
- Timer clock setting
- Active/de-active timer function
- Pre-set EQ function
- Remote control transmitter
- Control functions
- Battery installation (battery not provided)
- Button description
- Specification
- PROTECTION DE L'ENVIRONNEMENT
- ATTENTION - RADIATION LASER INVISIBLE LORSQUE VOUS OUVREZ LE COUVERCLE OU APPUYEZ SUR L'ENCLENCHEMENT DE SECURITE. EVITEZ Toute EXPOSITION AU RAYON LASER
- ATTENTION
- Digitale audiobroadcast (DAB) radio
- Radio Digital Audio broadcasting (DAB)
- DAB-radio (digital audio broadcasting)
- BATTERIINSTALLATION
Brand : Soundmaster
Model : NR545 DAB+
Category : Turntable