Barista Perfect 118 - Coffee machine Solis - Free user manual and instructions
Find the device manual for free Barista Perfect 118 Solis in PDF.
| Product type | Automatic espresso machine with professional steam wand |
| Brand | Solis |
| Model | Barista Perfect 118 |
| Dimensions (W × H × D) | 26 × 33.5 × 31.5 cm |
| Weight | 6.3 kg |
| Power supply | 220–240 V ~ / 50 Hz, 1500–1750 W |
| Water tank | Removable, 1.8 L |
| Pump | Italian 15 bar |
| Temperature control | Electronic PID for constant temperature |
| Portafilter | 54 mm stainless steel, with professional distribution |
| Included filters | Single-wall filters (freshly ground coffee) and double-wall filters (pre-ground coffee), for 1 and 2 cups |
| Steam wand | Professional swivel for frothing milk |
| Main functions | Espresso, steam, hot water, low-pressure pre-infusion, automatic rinsing, energy-saving program (standby after 1 min, full shutdown after 20 min) |
| Included accessories | Magnetic tamper, Razor dosing tool, stainless steel milk jug, maintenance tool, rubber filter cover |
| Safety | Automatic shutoff, overheat protection, safety switch (residual-current circuit breaker recommended) |
| Maintenance and cleaning | Cleaning cycle with SOLITABS tablets, descaling with SOLIPOL, regular cleaning of portafilter, steam wand and drip tray |
| Spare parts and repairability | Accessories available from Solis of Switzerland SA (info.ch@solis.com). Repairs by authorized service center only. |
| General information | Manual downloadable free of charge. Private use only. Manufacturer warranty. |
Frequently Asked Questions - Barista Perfect 118 Solis
User questions about Barista Perfect 118 Solis
0 question about this device. Answer the ones you know or ask your own.
Ask a new question about this device
Download the instructions for your Coffee machine in PDF format for free! Find your manual Barista Perfect 118 - Solis and take your electronic device back in hand. On this page are published all the documents necessary for the use of your device. Barista Perfect 118 by Solis.
USER MANUAL Barista Perfect 118 Solis
natural_image
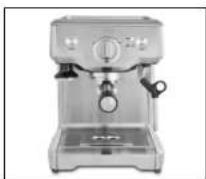
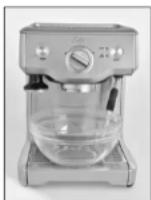
Exterior view of a modern stainless steel coffee machine (no visible text or symbols)text_image
A B C D E F G H I J K L M POWER SELECT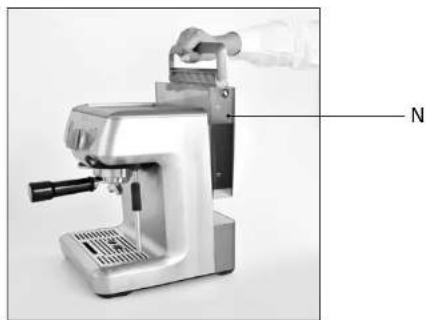
natural_image
Exterior view of a modern espresso machine with labeled component 'N' (no text or symbols on the device itself)natural_image
Hand pouring liquid into a stainless steel coffee machine (no visible text or symbols)natural_image
Exterior view of a modern office building (no signage)natural_image
Person using a BANAN Oeraser on a stainless steel coffee machine (no visible text or labels)
natural_image
Close-up of hands using a mechanical tool to adjust or install a component (no visible text or symbols)natural_image
Hand holding a small mechanical component with a cylindrical body, next to a black tool (no visible text or symbols)natural_image
Illustration of two mechanical tools: a hand holding a clip and a circular device with concentric rings (no text or symbols)text_image
Diagram illustrating five steps of a hand tool application: cleaning, holding a cloth, lifting a key, rotating the handle, and pouring liquid into a beaker.Solis of Switzerland AG
text_image
A B C D E F G H I J K L M POWER SELECT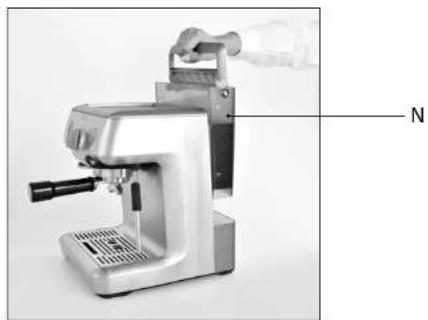
natural_image
Exterior view of a modern espresso machine with labeled component 'N' (no text or symbols on the device itself)natural_image
Hand pouring liquid into a stainless steel coffee machine (no visible text or symbols)▲ AVANT LA PREMIERE MISE EN SERVICE
natural_image
Exterior view of a modern stainless steel coffee maker (no visible text or labels)natural_image
Hand using a espresso machine to brush a cup (no visible text or symbols)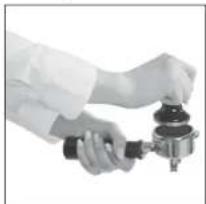
natural_image
Close-up of hands operating a mechanical device with a metallic knob (no visible text or symbols)natural_image
Pure mechanical diagram showing two different states of a valve or pump mechanism (no text or symbols)natural_image
Hand holding a small mechanical device with a lever, no visible text or symbolsnatural_image
Illustration of a hand holding a tool next to a device and a circular gauge with radial lines (no text or symbols)text_image
Diagram illustrating five-step cleaning or cleaning procedure steps with labeled icons and directional arrowsSolis of Switzerland SA
Solis-Haus • CH-8152 Glattbrugg-Zurich • Suisse
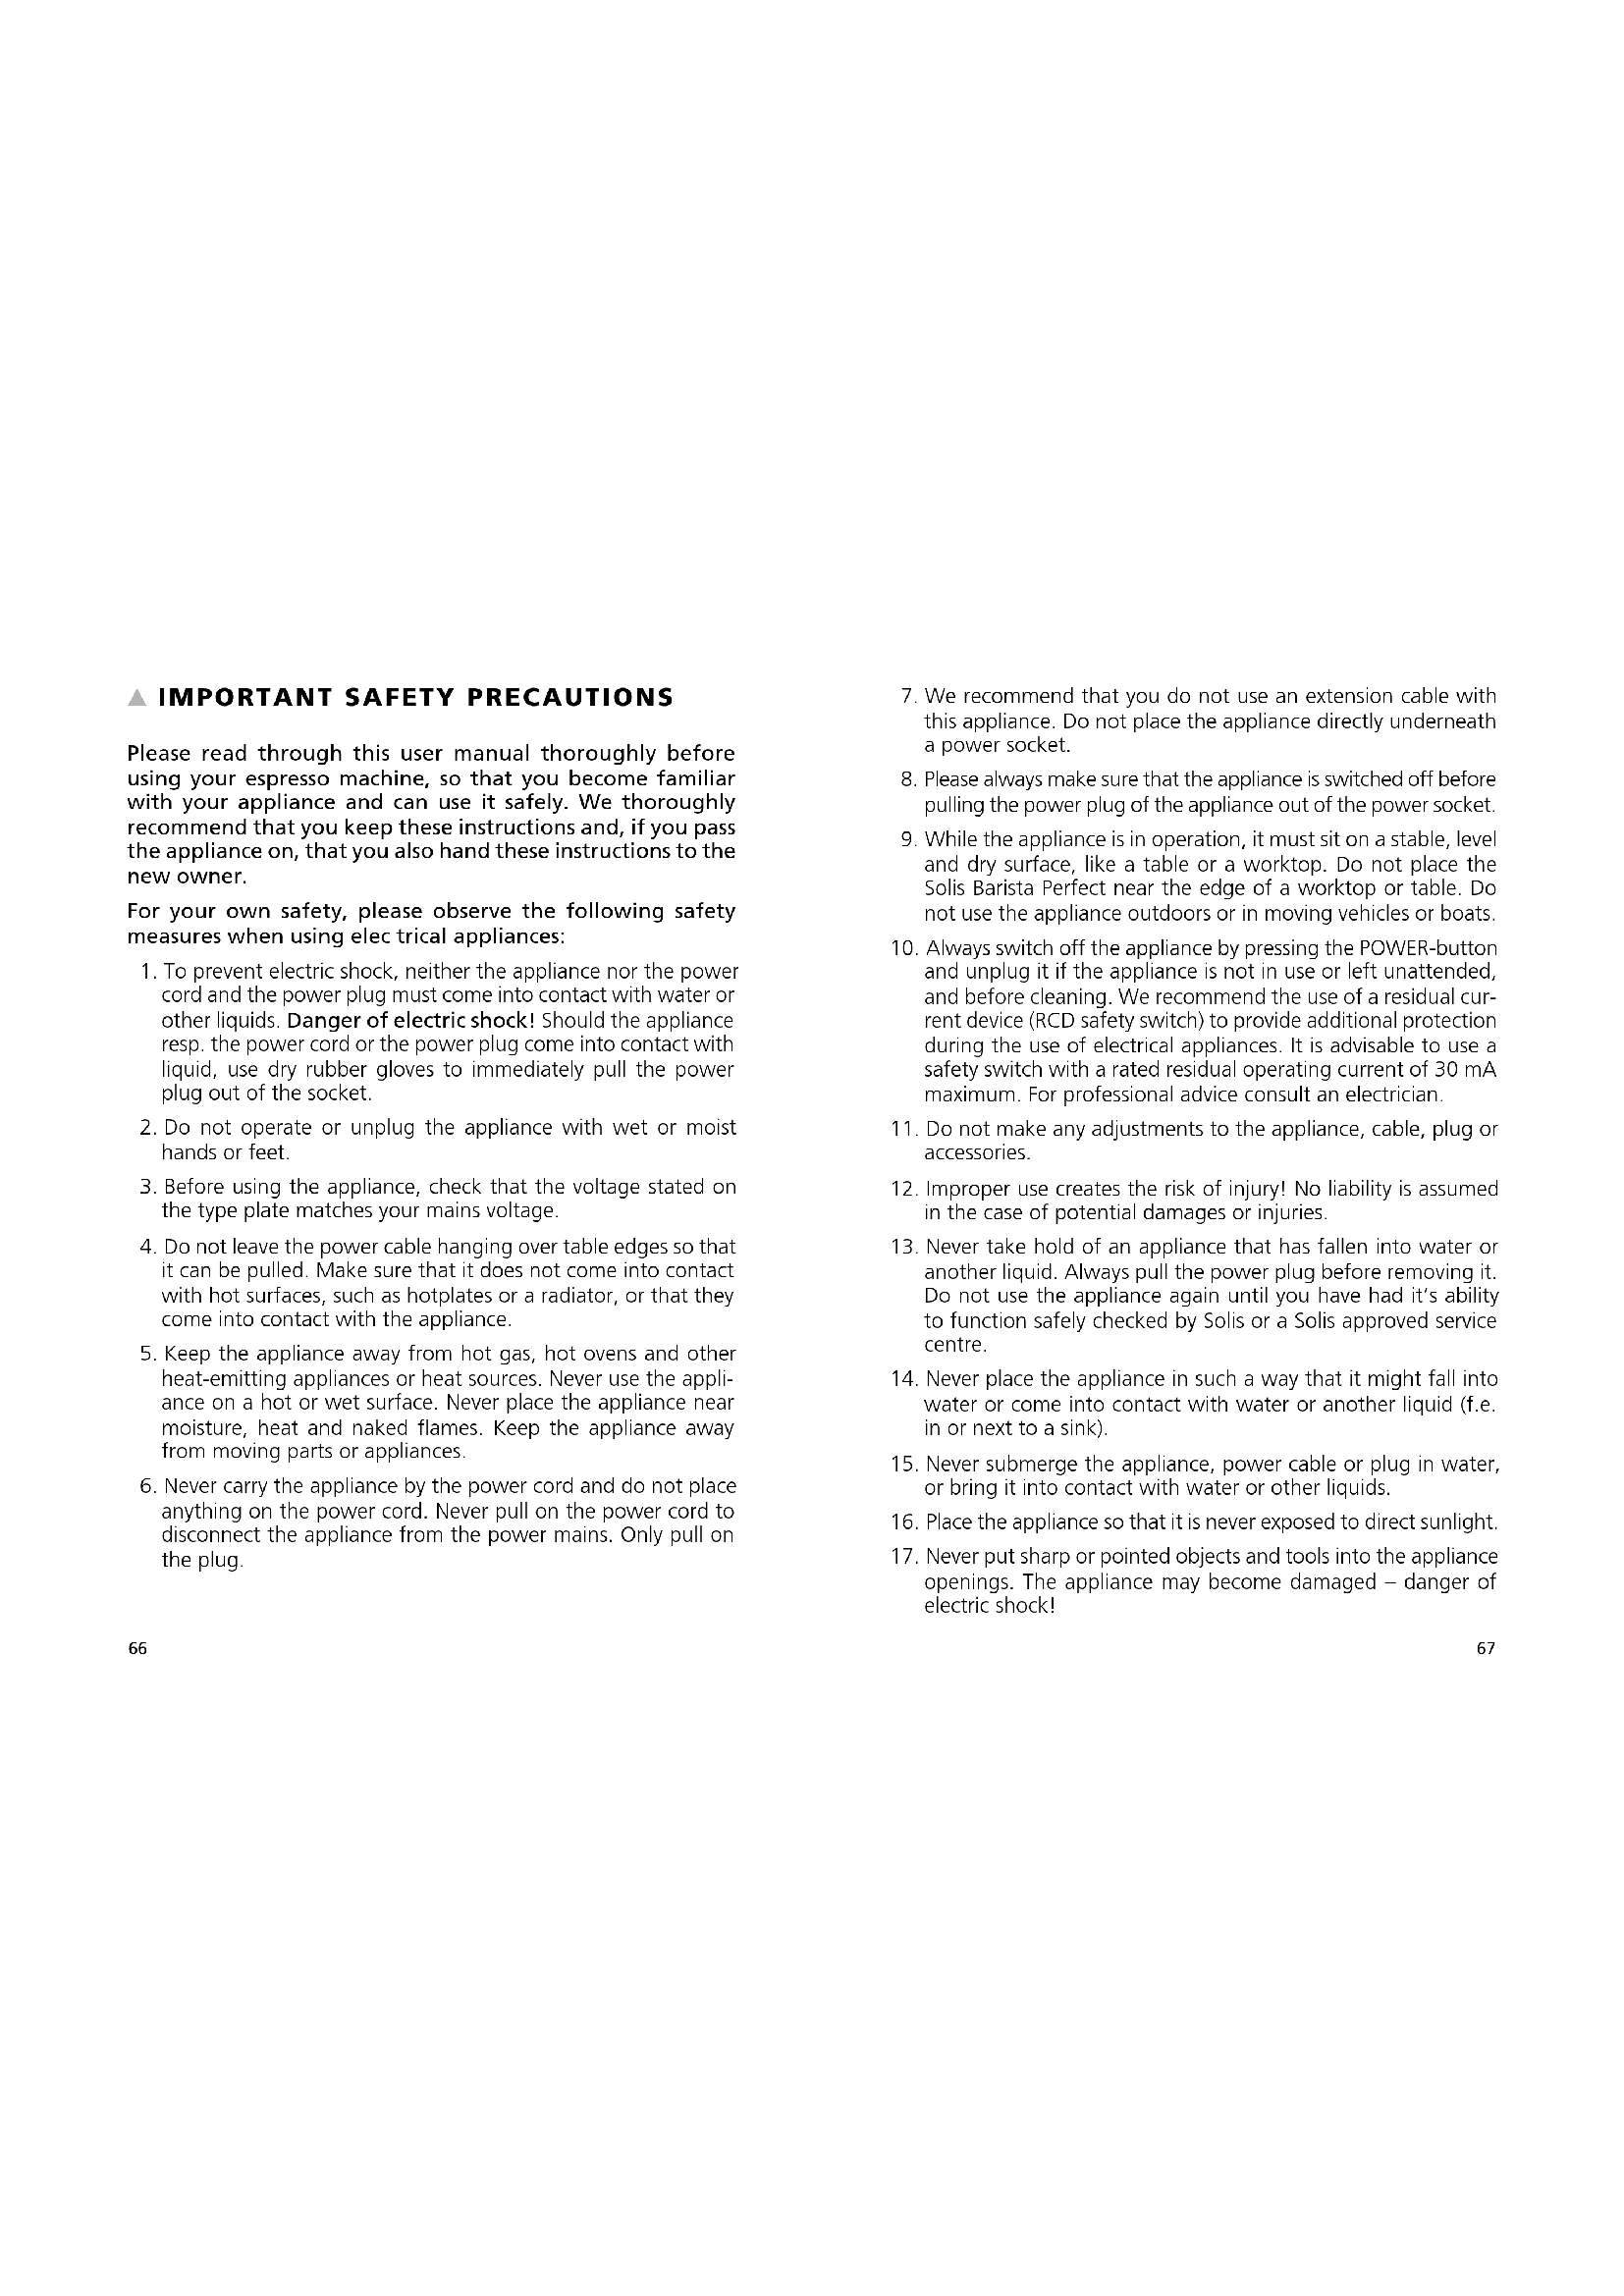
Please read through this user manual thoroughly before using your espresso machine, so that you become familiar with your appliance and can use it safely. We thoroughly recommend that you keep these instructions and, if you pass the appliance on, that you also hand these instructions to the new owner.
For your own safety, please observe the following safety measures when using electrical appliances:
- To prevent electric shock, neither the appliance nor the power cord and the power plug must come into contact with water or other liquids. Danger of electric shock! Should the appliance resp. the power cord or the power plug come into contact with liquid, use dry rubber gloves to immediately pull the power plug out of the socket.
- Do not operate or unplug the appliance with wet or moist hands or feet.
- Before using the appliance, check that the voltage stated on the type plate matches your mains voltage.
- Do not leave the power cable hanging over table edges so that it can be pulled. Make sure that it does not come into contact with hot surfaces, such as hotplates or a radiator, or that they come into contact with the appliance.
- Keep the appliance away from hot gas, hot ovens and other heat-emitting appliances or heat sources. Never use the appliance on a hot or wet surface. Never place the appliance near moisture, heat and naked flames. Keep the appliance away from moving parts or appliances.
-
Never carry the appliance by the power cord and do not place anything on the power cord. Never pull on the power cord to disconnect the appliance from the power mains. Only pull on the plug.
-
We recommend that you do not use an extension cable with this appliance. Do not place the appliance directly underneath a power socket.
- Please always make sure that the appliance is switched off before pulling the power plug of the appliance out of the power socket.
- While the appliance is in operation, it must sit on a stable, level and dry surface, like a table or a worktop. Do not place the Solis Barista Perfect near the edge of a worktop or table. Do not use the appliance outdoors or in moving vehicles or boats.
- Always switch off the appliance by pressing the POWER-button and unplug it if the appliance is not in use or left unattended, and before cleaning. We recommend the use of a residual current device (RCD safety switch) to provide additional protection during the use of electrical appliances. It is advisable to use a safety switch with a rated residual operating current of 30 mA maximum. For professional advice consult an electrician.
- Do not make any adjustments to the appliance, cable, plug or accessories.
- Improper use creates the risk of injury! No liability is assumed in the case of potential damages or injuries.
- Never take hold of an appliance that has fallen into water or another liquid. Always pull the power plug before removing it. Do not use the appliance again until you have had it's ability to function safely checked by Solis or a Solis approved service centre.
- Never place the appliance in such a way that it might fall into water or come into contact with water or another liquid (f.e. in or next to a sink).
- Never submerge the appliance, power cable or plug in water, or bring it into contact with water or other liquids.
- Place the appliance so that it is never exposed to direct sunlight.
-
Never put sharp or pointed objects and tools into the appliance openings. The appliance may become damaged – danger of electric shock!
-
Do not shake or relocate the appliance while it is in operation.
- Only use the appliance as described in this manual. Only use with the provided accessories or accessories recommended by Solis, incorrect accessories can lead to damage of the appliance, resp. to fire, electric shock or personal damage.
- Never start the appliance using a remote or timer.
- This appliance is only for domestic use and is not suitable for commercial use.
- Remove and discard all packaging materials and potential stickers or labels before using the appliance for the first time.
- Check the appliance before each use and ensure that the appliance, power cord and plug are not damaged.
- In order to avoid electric shock, do not use the appliance if the power cord or plug are damaged or the appliance is otherwise faulty, dropped or damaged. Never attempt repairs yourself, except cleaning and descaling the appliance, but take your appliance to Solis or a Solis approved service centre in order to get it inspected or mechanically and electrically repaired.
- People with limited physical, sensorial or mental capabilities as well as unknowing or inexperienced people and children must not use the espresso machine except when supervised or thoroughly instructed on how to use the appliance by a person responsible for their safety. Additionally, they must be aware of the dangers arising from the appliance and know how to operate it safely. Cleaning and maintenance of the appliance must not be done by unsupervised children. Under no circumstances must the appliance be used or cleaned by children under the age of 8.
- Children must be supervised, so that they do not play with the appliance.
- Use only cold tap water in the water tank. Do not use any other liquid.
-
Never use the espresso machine without water in the water tank.
-
Ensure the portafilter is firmly inserted and secured into the brewing group head before using the machine.
- CAUTION: The machine has to cool down for 2 minutes after every espresso extraction before preparing the next espresso.
- Never remove the portafilter during the brewing operation as the appliance is under pressure.
- Do not leave the espresso machine unattended when in use.
- CAUTION: The appliance becomes very hot during use! Allow the appliance to cool down before moving, relocating or cleaning.
- Do not place anything other than cups for warming on top of the cup warming plate. Do not place any other object on the espresso machine!
- Keep the appliance and accessories clean. Follow the cleaning instructions provided in this book.
- Unwind the power cord fully before plugging the plug into the socket.
- Pull the plug after every use. Only then, the appliance is fully switched off.
- Oils or lubricants must not be used with this appliance.
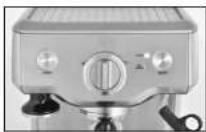
▲ APPLIANCE DESCRIPTION
text_image
A B C D E F G H I J K L M POWER POWER BEET BEET BEET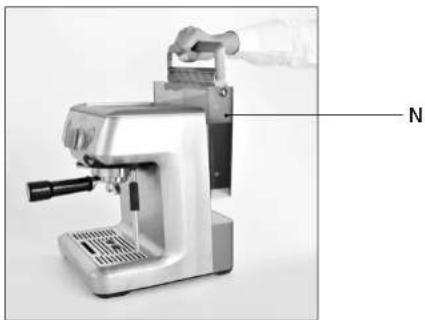
natural_image
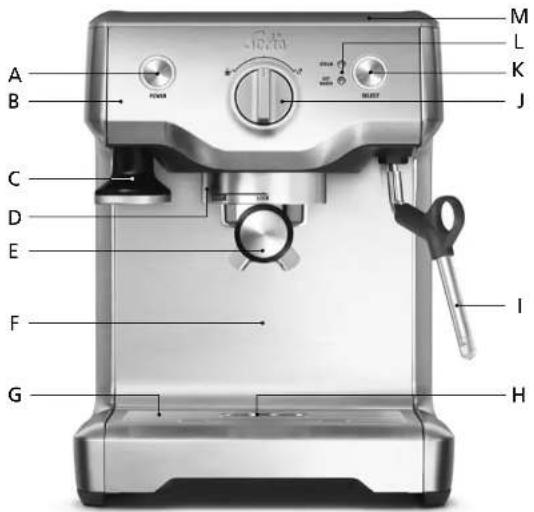
Exterior view of a modern espresso machine with labeled component 'N' (no text or symbols on the device itself)A POWER-button
The button surround flashes when machine is switched on by pressing this button.
B Heating coil
The stainless steel heating coil precisely controls the water temperature.
C Tamper
Thanks to a magnet, the tamper can be attached or removed. The tamper is to press coffee grounds into the portafilter.
D Brewing group with group head
For easy positioning of the portafilter.
E 54 mm stainless steel portafilter with professional style spouts
F Extra-tall housing for large coffee cups
G Removable drip tray with storage tray, located behind the drip tray
H Drip tray full indicator (EMPTY ME) underneath the drip tray grill
I Swivel action steam wand For easily texturing milk.
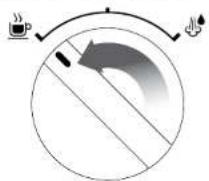
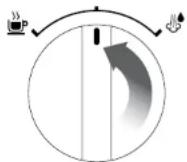
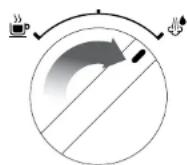
J Selection knob for espresso, standby and steam/hot water
K SELECT button for steam or hot water function
L Control lights "STEAM" and "HOT WATER"
These control lights indicate whether the steam or hot water function has been activated.
M Cup warming plate
N Removable 1.8 litre water tank with lid,
can be filled from the top. (On the back side of the appliance)
ACCESSORIES
– Single Wall Filter baskets for freshly ground coffee
- Dual Wall Filter baskets for pre-ground coffee
– Small stainless steel milk jug for steaming milk
- Measuring instrument „Razor“
CLEANING ACCESSORIES
- Cleaning tool
– Rubber filter basket disk for cleaning cycle
THESE FITTING-EXTRAS MAKE YOUR SOLIS BARISTA PERFECT UNIQUE:
- PID Temperature Control
Electronic PID temperature control guarantees a temperature stability.
- Auto Purge Function
Automatically adjusts water temperature, after the steam function is used to texture milk, to the optimal coffee extraction temperature.
- Heating Coil
The integrated stainless steel heating coil precisely controls the water temperature.
- Low pressure pre-brewing function
At low pressure, the coffee powder is gently moistened before brewing. This makes it swell up, ensuring that the aroma is evenly extracted afterwards.
- Commercial Style Steam Wand
Swivel action for effortless milk texturing.
- Measuring Instrument „Razor“
With this blade-like instrument, excess coffee power can be removed with a flick of the wrist.
POWER SAVING FUNCTION
To save power, the appliance switches to standby mode 1 minute after the last espresso has been made. After further 20 minutes without use, the appliance switches off completely.
natural_image
Hand pouring liquid into a stainless steel coffee machine (no visible text or symbols)BEFORE FIRST USE
- Carefully take the appliance from the packaging and remove all stickers, labels, package inserts and packaging materials.
- Remove all accessories from the appliance.
- Use the handle to lift out the water tank. Clean the water tank and the filter baskets, the portafilter and the small milk jug with warm water and a gentle dish washing liquid. Rinse well and dry thoroughly.
- Also, wipe the outer housing of the espresso machine and the drip tray with the drip tray grill as well as the accessory compartment clean with a soft, slightly wet towel and dry everything.
WARNING: Do not immerse the outer housing, power cord or power plug in water or any other liquid and do not bring them into contact with water.
NOTE: The parts of the espresso machine and the accessories are not dish-washer safe (Exceptions: Drip tray and drip tray grill).
- Fill the water tank with cold tap water to the maximum mark MAX (1800 ml). Close the lid again.
- If you remove the water tank for filling, place it back in and slide it down along the guide rail until it fixes into place.
natural_image
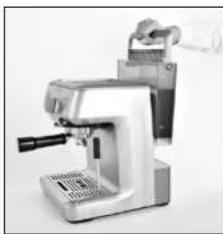
Close-up of a laboratory instrument with a metallic base and control panel (no visible text or symbols)- Plug the power cord into a power outlet.
- Press the POWER-button (A), the button surround will flash.
- A pumping sound will be heard while the machine is heating. Once the right operation temperature has been reached, both button surrounds light up constantly and the appliance switches to standby mode.
FLUSHING THE APPLIANCE
We recommend that you allow a water tank full of water to pass through the appliance, so that the appliance is fully rinsed internally. This should be done without any coffee grounds.
- Once the machine has reached standby mode (The POWER and SELECT button surrounds light up constantly), complete the following two steps:
- Turn the selection knob to the „Espresso“ position 📋 and let hot water run through the brewing group for 30 seconds.
- Either turn the steam wand so that it stands above the drip tray or place a cup under the steam wand. Turn the selection knob to the „Steam“ position and activate the steam function.
- Repeat those two steps until the water in the water tank is used up.
▲ OPERATING YOUR SOLIS BARISTA PERFECT
FILLING THE WATER TANK
- Fill the water tank with cold tap water to the maximum mark MAX. Slide the water tank back into position at the back of the machine.
- Insert plug into power outlet.
- Press the POWER-button (A), the appliance is on. The POWER-button surround will flash while the espresso machine is heating. Once the right operation temperature has been reached, both button surrounds on the control panel light up constantly.
NOTE:
Check the water level before use. Replace the water daily. The water tank should be filled with fresh, cold tap water before each use. Do not use mineral or distilled water or any other liquid.
FILLING COFFEE GROUNDS INTO THE FILTER BASKET
– Selecting the appropriate filter basket:
Use the Single Wall Filter basket for freshly ground coffee or the Dual Wall Filter basket for pre-ground coffee. (See also "Selecting the correct filter basket" under "Tips for a delicious espresso" on page 84).
- Use the smaller filter basket for 1 cup and the larger one for 2 cups. If you want to make a big cup of coffee, you should always decide for the 2 cup filter basket and allow 60 ml of water to run through.


for 1 cup for 2 cups for 1 cup for 2 cups
Single Wall Filter baskets Dual Wall Filter baskets for freshly ground coffee for pre-ground coffee
- Wipe the filter basket with a dry cloth.
- Insert the filter basket into the portafilter and fill the filter basket with coffee grounds.
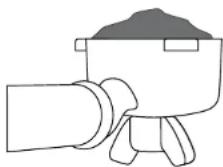
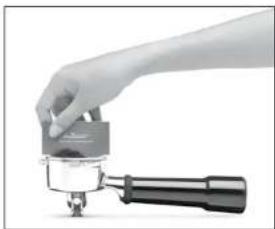
TAMPING THE COFFEE GROUNDS WITH THE TAMPER
- Gently tap the portafilter on a worktop to evenly spread out the coffee grounds in the filter basket. Use the tamper to tightly tamp down the coffee powder. You can either do this by mounting the tamper into the machine and pressing the portafilter against it from below or removing the tamper from the appliance and tamp the coffee powder in the portafilter by hand.
natural_image
Hand using a espresso machine to press or<|rotate_right|> (no visible text or symbols)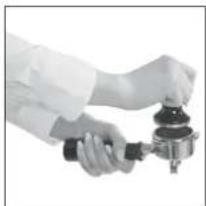
natural_image
Close-up of hands using a mechanical clamp or valve to adjust a component (no visible text or symbols)Press down with approx. 15–20 kg of pressure and repeat the tamping several times. Applying consistent pressure is more vital than applying extremely high pressure. After tamping, you might need to add some more coffee grounds and tamp again to ensure there is enough coffee grounds in the filter basket for the coffee you desire.
TIP: After tamping, the coffee powder should be level with the edge of the filter insert. When pressing the tamper onto the portafilter, the metal part of the tamper should just so disappear in the filter insert.
NOTE: When using finely ground coffee for the single wall filter basket, you might need to use less coffee than usual to achieve the right amount.
- After tamping, remove any coffee residue from the rim of the filter basket so that it can be inserted into the group head properly (see next chapter).
The specially designed measuring instrument „Razor“ helps you remove excess coffee grounds and clean the portafilter edge at the flick of a wrist.
natural_image
Hand holding a small mechanical device with a handle, no visible text or symbolsPlace the „Razor“ in the filter basket, the punched out corners of the instrument lie on the edge of the portafilter.
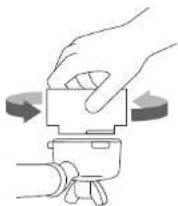
Turning the instrument to the left and right while holding the portafilter over the drip tray will remove excess ground coffee from the portafilter edge. The amount of ground coffee in the filter basket will be just right.
INSERTING THE PORTAFILTER
Before inserting the portafilter, turn the selection knob to „Espresso“ position for 30 seconds to let water run out of the brewing head, rinsing potential coffee residue from the brewing group. This also stabilizes the temperature before the brewing process. After that, return the selection knob to the standby position in the center.
- Place the portafilter under the group head so that the handle is placed directly underneath the inscription INSERT.

- Push up the portafilter against the group head and turn the handle to the right until you feel slight resistance and the handle is at the LOCK position. The handle should now be at a 90° angle to the machine.
Place one or two cups on the drip tray underneath the portafilter spouts.
When both button surrounds light up constantly, the machine has reached its correct operation temperature and you can make a coffee.
MAKING COFFEE
- Turn the selection knob to the „Espresso“ position 🚗A pumping sound can be heard. After 8–10 seconds, espresso flows into the prepared cup.
- When enough espresso is in the cup, return the knob to the standby position in the center. The flow of espresso stops. We recommend letting the espresso flow for approx. 30 seconds.

NOTES:
When using a filter basket for 1 cup, you should prepare approx. 30 ml of espresso. When using a filter basket for 2 cups, you should prepare approx. 60 ml of espresso.
CAUTION: The stainless steel parts of the portafilter get very hot – do not touch!
NOTE: When using the espresso machine for 30 minutes or longer, you should let it cool down for 5 minutes every time after extracting an espresso.
FOR OPTIMAL ESPRESSO: MOISTENING THE COFFEE GROUNDS
At the beginning, the appliance works at low pressure to moisten the coffee grounds, making it increase in volume. The pressure is then continually increased until it reaches the force ideal for pressing the water through the coffee grounds in the portafilter. This takes approx. 8 to 10 seconds.
■ TIPS FOR EXTRACTING ESPRESSO:
– Always use pre-heated cups.
- After turning the selection knob to the „Espresso“ position, it takes about 8 to 10 seconds for the espresso to start flowing out of the portafilter. During these 8 to 10 seconds, the machine will moisten the coffee grounds (see previous chapter).
- The espresso flowing out of the machine should have the consistency of dripping honey.
- Espresso flowing out after 6 seconds or less indicates too few coffee grounds in the filter, under tamping or too coarse grinding, resulting in under-extracted coffee.
- Should the espresso pass out in drops but only start flowing out after 15 seconds or more, you have either used too much coffee grounds, tamped too strongly or the grind size is too fine. In this case, the espresso is over-extracted.
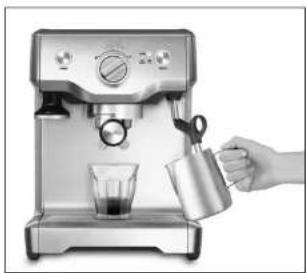
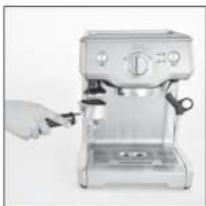
TEXTURING MILK
The professional steam wand of your Solis Barista Perfect can be rotated in all directions and transforms fresh, cold milk into creamy and warm steamed milk. This is done in two steps: First, the milk is loosened with air, then it is thoroughly whisked to make it creamy and well-tempered.
Follow these steps:
- Turn the steam wand so that it is positioned over the trip dray.
- Before holding the steam wand into the milk, you should clean the steam wand with a soft towel and rinse its inside by letting some steam run through (Set selection knob to the „Steam“ position).
- Pour fresh, cold milk into the small milk jug – the level of milk should not exceed the V of the spout.
- Turn the selection knob to the "Steam" position. The LED control light STEAM flashes, indicating that the machine is heating up to generate steam. Potentially escaping condensed water flows into the drip tray. After a few moments, hot steam passes out.
- Then, return the selection knob to the standby position in the center. By doing this, you prevent milk splashing out of the jug.
– The steam discharge pauses for 8 seconds. - Point the steam wand outward, insert the steam wand into the milk and set the selection knob back to "Steam"
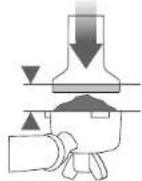
- The tip of the steam wand should be 1–2 cm below the surface of the milk. It should be close to the edge of the jug in the 3 o'clock position.
- Keep the tip submerged until the milk starts spinning clockwise, similar to a whirlpool.
natural_image
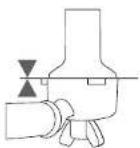
Illustration of a hand using a tool to lift a small object, and a magnified view of a tool with concentric circular patterns (no text or symbols)- Once the milk is spinning, you can lower the jug so that the tip of the steam wand is just on the surface of the milk. This allows air to get into the milk. Keep the wand at the surface and repeatedly dip it into the milk just enough to keep the milk spinning.
- Hold the tip of the steam wand at or slightly below the surface of the milk to keep the milk spinning until it has gained enough volume.
- Dip the tip under the surface of the milk, the vortex should be maintained. When the milk jug becomes too hot to touch, the milk has reached the correct temperature of approx. 60–65 °C.
- Once the milk is heated and foamed, turn the selection knob back to the standby position in the centre and then remove the jug.
- Gently tap the jug on a worktop to allow potential air bubbles to escape, then carefully swirl the jug to even out the consistency.
- Pour the steamed-up milk directly onto the espresso. The trick is working quickly, so that the milk does not separate again.
- Point the steam wand over the drip tray. Briefly set the selection knob to stand let off some steam into the drip tray to clear any residues from inside the steam wand. Wipe the steam wand clean with a damp cloth.
NOTES:
While the espresso machine generates steam, a pumping noise can be heard. This indicates the normal operation of the italian 15-bar pump and is absolutely normal. If you had the steam function continually in use for 5 minutes, the machine automatically switches off the steam function. The control light STEAM (L) goes out, also the surround of the SELECT button (K). The POWER button surround flashes. In this case, turn the selection knob to the standby position in the center.
CAUTION: Only touch the steam wand by the rubber-coated part, as the metal parts can get very hot. You could burn yourself on them.
HOT WATER FUNCTION
- The espresso machine is equipped with a hot water function, which passes out hot water through the steam wand.
- Press the SELECT button (K) and the LED control light by HOT WATER lights up.
- Point the steam wand over the drip tray.
- Turn the selection knob to the „Hot water“ position
- Hot water escapes from the steam wand.
- To stop the hot water function, turn the selection knob back to the standby position in the center.
CAUTION: The hot water from the steam wand might scald you! Therefore, always point the outlet of the steam wand towards the drip tray.
Only touch the steam wand by the rubber-coated part, as the metal parts can get very hot. You could burn yourself on them.
NOTES:
- The standard setting after switching on is always the „Steam“ position (LED control light by STEAM lights up).
- The steam function and the hot water function can not be activated simultaneously.
AUTOMATIC PURGE FUNCTION
With your Solis Barista Perfect machine you can make fresh espresso right after steaming milk. This is made possible by the automatic purge function.
This automatic purge function makes sure that the ground coffee powder is not burned by the water heated up for steam production. The water is automatically transferred to the drip tray, ensuring that the heating coil has the ideal temperature for making delicious espresso. Therefore, you can be sure that your espresso will always be extracted at the optimal temperature, allowing it to unfold its full taste.
■ AFTER PREPARING ESPRESSO
- Remove the portafilter from the group head. To do this, turn the handle of the portafilter to the left until it comes loose.
- Remove the coffee dregs from the portafilter by flipping it 180 degrees and gently tapping it down. Please discard the coffee dregs with your household waste instead of flushing them down the drain, as they might clog up the wastewater pipes.
- Wipe the filter basket clean with a dry towel.
- Turn the selection knob to 📋 and let hot water run through the brewing group for 30 seconds to rinse the machine.
- Place the portafilter back in the brewing head.
▲ TIPS FOR A DELICIOUS ESPRESSO
1. PREHEATING ALL ACCESSORIES
Heating your cup or glass
A warm cup will help maintain the coffee's optimal temperature. Use the hot water function to fill the cup with hot water, pour it away after a while and place the cup on the warming plate on top of the appliance.
Heating the portafilter and filter basket
A cold portafilter and filter basket can reduce the extraction temperature enough to significantly affect the quality of your espresso. Ensure the portafilter and filter basket are preheated with hot water before initial use by rinsing with hot water, using the Hot Water function.
WARNING: Wipe the filter basket and portafilter dry with kitchen paper before dosing with coffee grounds as moisture can encourage "channeling" where water by-passes the coffee grounds during extraction.
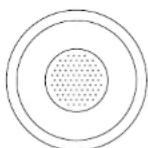
2. SELECTING THE CORRECT FILTER BASKET
Single Wall Filter
The Single Wall Filters are designed to be used with freshly ground coffee. There is an insert for one cup and a larger insert for 2 cups. Try experimenting for yourself with the grind, amount and tamp to create your favourite espresso.
1 cup 2 cups
The Single Wall Filter inserts have no markings on the bottom.
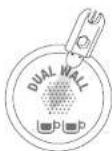
Dual Wall Crema System Filter
The Dual Wall Filters are designed to be used with pre-ground coffee and regulate the pressure to help optimise extraction regardless of the grind, dose or tamp pressure. There is an insert for one cup and a larger insert for 2 cups.


1 cup 2 cups
The Dual Wall Filter inserts are marked by the DUAL WALL label and the symbol for one cup resp. two cups on the bottom.
3. GRIND
The coffee beans should be finely ground, but not too fine. The grind size will affect the rate at which the water flows through the coffee grounds in the filter basket and is crucial to the taste of the espresso.
If the grind is too fine (looks like powder and feels like flour when rubbed between fingers), the water will not flow through the coffee, even when under high pressure. The resulting espresso will be over extracted, very black and bitter in flavour.
If the grind is too coarse the water will flow through the coffee grounds in the filter basket too quickly. The resulting espresso will be under extracted, lacking in colour and flavour.
NOTE: When using the single wall filter insert for 1 cup, the grind size should be finer and the amount of powder should be smaller to ensure full taste.
4. COFFEE DOSE AND TAMPING
Please observe the instructions which have already covered this in the respective chapters (page 75–76).
In general:
A truly great espresso is a balance of sweet, bitter and sour. The flavour of your coffee will depend on many factors, such as the type of coffee beans, roasting temperature, freshness, coarseness or fineness of the grind, dose of coffee grounds and tamping pressure. Experiment by adjusting these factors to achieve the perfect flavour for you.
EXTRACTION GUIDE
GRIND GRIND DOSE TAMP PROCESSING
TIME
| OVER EXTRACTED bitter – astringend | too fine too much too heavy over 40 sec | |||
| BALANCED | optimum | 10–12 g (1 cup)18–20 g (2 cups) | 15–20 kg | 25–35 sec |
| UNDER EXTRACTED underdeveloped – sour | too coarse | too little | too light | under 20 sec |
Always note:
- Wipe the filter basket dry before filling it with coffee grounds.
- When using single wall filter inserts, do not fill in too much coffee!
- Pat the portafilter against a worktop to even out the coffee powder, then press the powder in with the tamper and use the measuring instrument "Razor" to wipe away excess coffee powder. Please refer to the notes given on page 76/77 of this manual.
5. COFFEE
Use freshly roasted coffee beans (f.e. 100% arabica beans), with a "roasted on" date and use within 2 weeks.
We recommend to grind beans immediately before brewing as coffee grounds quickly lose their flavour and aroma.
Store coffee beans in a cool, dark, airtight and dry container. Vacuum seal is recommended.
Buy coffee beans in small batches to reduce the storage time and store no more than one weeks supply at any time.
6. RINSING THE BREWING GROUP
Before inserting the portafilter in the brewing head, you should rinse the brewing group. Turn the selection knob to „Espresso” position ☐ for 30 seconds to let hot water run out of the brewing head, rinsing potential coffee residue from the brewing group. This also stabilizes the temperature before the brewing process.
▲ CLEANING AND CARE
CLEANING AFTER EVERY ESPRESSO EXTRACTION
text_image
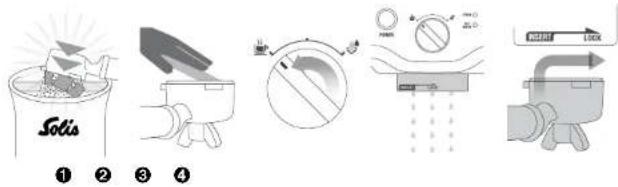
SOLIS ① ② ③ ④ PANOS LOCK- Knock out the coffee powder.
- Wipe the portafilter clean with a dry towel.
- Turn the selection knob to the „Espresso“ position and let hot water run through the brewing group for 30 seconds to rinse the machine.
- After that, place the portafilter back in the brewing head.
DAILY CLEANING
text_image
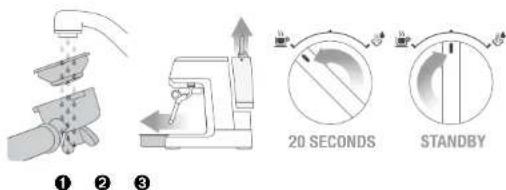
① ② ③ 20 SECONDS STANDBY- Clean and rinse the portafilter and the used filter inserts thoroughly under running water.
- Empty the drip tray and fill the water tank with fresh water.
- Turn the selection knob to the „Espresso“ position ☐Br 20 seconds while the machine is switched on. Then, return it to the standby position in the center. Repeat three times.
PORTAFILTER CLEANING
You should run hot water through the portafilter at regular intervals to rinse out potential coffee residue. To do this, screw the empty portafilter into the brewing head, set the selection knob to „Espresso“ and let hot water run through the empty portafilter.
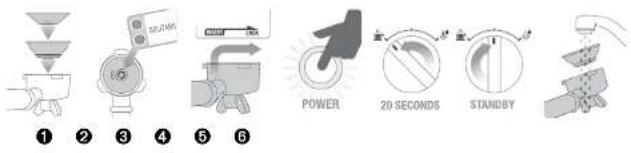
RUNNING THE CLEANING CYCLE
Through regular use, residues of coffee powder and coffee oil form in the appliance, impairing the brewing process. Therefore, you should perform a cleaning cycle once every 2 to 3 months.
text_image
1 2 3 4 5 6 POWER 20 SECONDS STANDBYPlease proceed as follows:
Empty the drip tray and fill the water tank.
1. Place the rubber disk in the filter insert (for one or two cups) and the filter insert in the portafilter.
2. Place a SOLITABS cleaning tablet (without sponge) in the filter insert, on the rubber disk.
3. Twist and install the portafilter in the brewing head.
4. Switch the machine on by pressing the POWER button. Wait for the control light in the button surround lights up constantly.
5. Turn the selection knob to the "Espresso" position 20 seconds. Return the selection knob to the standby position in the center. Repeat both steps until the cleaning tablet has completely dissolved.
6. Switch the appliance off with the POWER button, remove the portafilter and check if the SOLITABS tablet has completely dissolved. Should this not be the case, repeat steps 3 to 5 until the tablet has completely dissolved. Should the SOLITABS tablet have dissolved, rinse the portafilter and the filter basket with warm water.
- Should you encounter problems when making espresso the next time, please refer to the section „Troubleshooting“ for ideas on how to solve the problem.
- The Troubleshooting section can be found on page 93–95.
- SOLITABS cleaning tablets are available from good specialist retailers or from Solis of Switzerland Ltd.
Telephone: 0848 804 884, Telefax: 0848 804 890
email: info.ch@solis.com or www.solis.ch
(Shipping only within Switzerland)
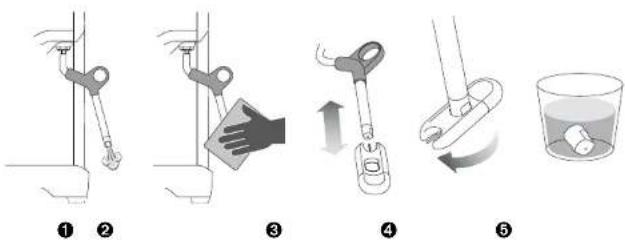
CLEANING THE STEAM WAND
text_image
Diagram illustrating five steps of a hand tool application: manual, cleaning, lifting, adding liquid, and pouring into a container.The steam wand must always be cleaned each time after texturing milk.
Proceed as follows:
- Point the steam wand towards the drip tray and turn the selection knob to the "Steam" position. By doing this, you remove potential milk residue in the steam wand by letting some steam run through. Return the selection knob to the center, to the standby position. Switch the machine off with the POWER button and let the appliance cool down.
- Wipe the outside of the steam wand with a damp cloth.
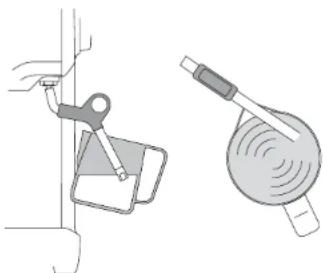
- If the steam wand remains blocked, use the pin on the cleaning tool to clear the opening.
- If the steam wand remains blocked at all, the tip of the steam wand can be removed by using the spanner in the centre of the cleaning tool. Unscrew the tip.
- Soak the tip in hot water before using the pin on the cleaning tool to unblock. Replace the tip back onto the steam wand and secure with the spanner in the cleaning tool.
WEEKLY CLEANING THE FILTER BASKETS, PORTAFILTER AND BREWING GROUP
Periodically run water through the machine with empty portafilter in place, to rinse out any residual coffee particles.
Should the fine holes in the filters become blocked, you have to clean the filter baskets.
Proceed as follows:
- Knock the grinds out of the filter and portafilter.
- Rinse the filter basket under warm, running water.
- Place filter basket into portafilter.
- Screw the portafilter into the brewing head and – without coffee powder – let some hot water run through by setting the selection knob to the „Espresso” position
- To thoroughly clean the filter baskets, dissolve a SOLITABS cleaning tablet in hot water and let the filter baskets sit in this solution over night.
- After that, thoroughly clean and dry the filter baskets.
- The fine needle under the protection cap on the cleaning tool can be used to punch through resp. clean the fine holes in the filter baskets.
■ CLEANING THE OUTER HOUSING AND CUP WARMING PLATE
Before cleaning the outer housing, the appliance must be switched off and unplugged.
Wipe the outer housing and the cup warming plate clean with a soft, slightly wet towel and then dry it with a dry towel.
Do not use abrasive cleaners, pads or cloths which can scratch the surface.
CLEANING THE DRIP TRAY
Before cleaning the drip tray, the appliance must be switched off and unplugged.
The drip tray should be removed, emptied and cleaned at regular intervals, particularly when the drip tray full indicator is showing EMPTY ME!
Remove the drip tray grill from the tray. Clean the drip tray and the grill with warm dish water. Do not use any aggressive detergents or scratching sponges. Rinse the tray and the grill with clear water and dry everything carefully.
Reinstall the drip tray and place the grill back on the drip tray.
NOTE: Drip tray and grill can be cleaned in the dishwasher.
CLEANING THE STORAGE TRAY
The storage tray, located behind the drip tray, can also be removed after the drip tray is removed. Remove the storage tray and wash it with warm soapy water. Do not use abrasive cleaners, pads or cloths. Dry the storage tray thoroughly, then reinstall.
WARNING:
Take care during cleaning that power cord, power plug or appliance is not immersed in water or any other liquid.
■ STORING YOUR SOLIS BARISTA PERFECT
Before storing turn the selection knob to the standby position in the center and switch off the appliance by pressing the POWER button. Unplug the power plug and insert all accessories into position.
Store the cooled, cleaned and dried machine in an upright position, preferably use the original packaging. Do not place anything on top of the machine.
▲DESCALING YOUR MACHINE
Hard water can lead to limestone deposits in and on many of the working parts of the machine if it is used regularly. This reduces brewing flow and power of the machine and impairs the quality of the coffee. We therefore recommend regularly (depending on water hardness, at least once every one to two months) descaling the machine with a mixture of water and SOLIPOL® special. Please follow the descaling instructions.
NOTE: We recommend using exclusively SOLIPOL ^® special as a descaling agent and refuse to take any responsibility for damages caused by the use of other descaling agents.
CAUTION: Should the descaling agent – even in a diluted form – splash or drip onto the appliance, please wipe it off immediately to prevent damage to the surface of the appliance.
Please descale as follows:
- Check if the selection knob is set to the center standby position, the machine is switched off with the POWER button (no light illuminating) and the power plug is pulled.
-
Remove the portafilter. Fill the water tank with the mixture of SOLIPOL® special liquid descaling agent and water (SOLIPOL® special diluted with water at a 1:1 ratio).
-
Plug the power plug into the power outlet.
-
Press the POWER button so that the button surround flashes.
-
Place a large container under the brewing head and the steam wand.
-
As soon as both button surrounds light up constantly, turn the selection knob to the "Espresso" position and let half of the descaling solution run through the brewing group.
-
Empty the container and place it back under the brewing head. Make sure that the steam wand is pointing into the container. Turn the selection knob to the "Steam" position hand let the remaining descaling solution escape through the steam wand. Once no steam is passing out anymore, return the selection knob to the center, to the standby position.
-
When the descaling solution is almost used up, remove the water container and carefully rinse it with fresh water to remove all descaling agent residues. Refill it with fresh tap water.
-
To rinse the machine as well and to remove all descaling agent residues, please repeat steps 3 to 7 until only a little water remains in the water tank. Pour this last bit of water away and refill the tank with fresh tap water. Your appliance is now ready for use again.
NOTE: Please wipe off potential splashes of descaling solution on the outer housing of the machine immediately, as the substance could damage the surface.
ATTENTION: Never submerge the power cord, plug or the machine in water or any other liquid. While descaling the machine, never remove the water tank or allow the tank to run completely empty.
▲ TROUBLESHOOTING
| Problem Possible | Causes What to do | |
| Coffee does not run through | Machine is not turned on or plugged in Water tank is emptyThe selection knob is not in the „Espresso” positionCoffee grind is too fineToo much coffee in the filterCoffee tamped too firmlyThe filter is blocked | Ensure the machine is plugged in and the POWER button is flashing or lightning.Refer to “Filling the Water Tank”(page 74).Turn the selection knob to the left, to the „Espresso” position Ensure you use a suitable espresso grind.Ensure the correct amount (page 85).Refer to “Tamping the Coffee Grounds with the Tamper” (page 76).Clean the filters. Refer to “Cleaning the Filter Baskets, Portafilter and Brewing Group” (page 90). |
| Coffee runs out too quickly | The coffee grind is too coarseNot enough coffee grounds in the filterCoffee grounds not tamped firmly enough | Ensure you use a suitable espresso grind.Ensure the correct amount of coffee grounds (page 85).See page 76, „Tamping the Coffee Grounds with the Tamper”. |
| Coffee is too cold | Cups not preheatedMilk not heated enough (for Cappuccino or Caffe Latte) | Preheat cups. Refer to “Preheating all Accessories” (page 83).When the base of the jug becomes too hot to touch this is when the milk is heated at the correct temperature.Refer to “Texturing Milk” (page 80). |
| No crema Coffee grounds are not tamped firmly enoughCoffee grind is too coarseCoffee grounds are not freshFilter holes are blocked | See page 76, „Tamping the Coffee Grounds with the Tamper”.Ensure you use a suitable espresso grind.Change old beans with fresh roasted or pre-ground. Coffee grounds should not be kept for longer than a week.Use the fine pin on the cleaning tool to clear the holes. Refer to “Cleaning the Filter Baskets, Portafilter and Brewing Group” (page 90). | |
| Machine is making pulsing/pumping sound while extracting coffee or steaming milk | The machine is carrying out the normal operation of the 15 bar pump | No action required as this is the normal operation of the machine. |
| Coffee runs out around the edge of the portafilter | Portafilter is not inserted in the group head properlyThere are coffee grounds around the filter rimToo much coffee grounds in the filterCoffee grounds have been tamped too firmlyIncorrect filter for amount of coffee grounds used | Insert the portafilter to align into “LOCK” position in group head. Refer to “Inserting the Portafilter” (page 78).Clean any excess ground coffee from the rim of the portafilter to ensure a proper fit into the group head.Take care of the correct amount of coffee grounds (page 85).See page 76, „Tamping the Coffee Grounds with the Tamper”.Ensure you use the small filter for 1 cup and the larger filter for 2 cups of coffee. |
| Coffee extracts as drops from the portafilter | The water tank is empty or lowCoffee grind is too fineTo much coffee in filter basketMachine is blocked by mineral deposits | Refer to “Filling the Water Tank” (page 74).Ensure you use a suitable espresso grind.Ensure the correct amount of coffee (page 85).Decalcifying the machine, refer to “Descaling your Machine” (page 92). |
| Machine is making a loud and continuous pumping noise | Water tank is emptyWater tank is not securely in place | Refer to “Filling the Water Tank” (page 74).Refer to “Before First Use” (page 73). |
| Problem Possible | Causes What to do | |
| No steam is generated | Machine is not turned onWater tank is emptySelection knob not set to the „Steam" position, STEAM" function not selected.Steam wand is blocked | Make sure that the power plug is plugged in and that the POWER button is pressed and illuminated.Refer to "Filling the Water Tank" (page 74).Turn the selection knob to the „Steam" position, "HOT WATER" was previously selected, use the SELECT button to switch to the "STEAM" function (LED illuminates).Use the pin on the cleaning tool to clear the opening. If the steam wand remains blocked remove the tip of the steam wand using the spanner in the centre of the cleaning tool.Refer to "Cleaning the Steam Wand" (page 89). |
| No hot water | Tank is emptySteam wand is blocked | Refer to "Filling the Water Tank" (page 74).Use the pin on the cleaning tool to clear the opening. If the steam wand remains blocked remove the tip of the steam wand using the spanner in the centre of the cleaning tool.Refer to "Cleaning the Steam Wand" (page 89). |
| Milk is not creamy after texturing | Not enough steamMilk isn't cold and fresh | Steam wand may be blocked. Refer to "Cleaning the Steam Wand" (page 89).Use cold fresh milk. Refer to "Texturing Milk" (page 80). |
| Machine is not working | Safety thermal-cut has been activated | The safety thermal-cut may have activated due to the pump overheating. Turn the machine off and allow to cool for about 30–60 minutes. |
▲ COFFEE AND SUPPLIES
The following accessories, supplies and coffee variants are available for your Solis Barista Perfect:
Item-no. 978.40 Solis coffee grinder knock-out drawer
Item-no. 993.02 SOLITABS cleaning tablets (10 pcs.)
Item-no. 703.02 SOLIPOL ^® special descaling agent (1,0 litre)
Item-no. 992.00 Solis De Luxe coffee beans (500 g)
Item-no. 992.04 Solis Exclusif coffee beans (500 g)
Item-no. 992.60 Solis Crema coffee beans (500 g)
Item-no. 907.20 Small jug for milk texturing (0,25 l)
Accessories and supplies for your Solis Barista Perfect are available from specialist retailers or from Solis of Switzerland Ltd.
Phone: 0848 804 884, Fax: 0848 804 890, email: info.ch@solis.com or www.solis.ch (shipping only within Switzerland)
▲ TECHNICAL SPECIFICATIONS
Model-No. BES810, type 118
Product description Espresso machine
Voltage/Frequency 220–240V\~/50Hz
Output 1,500–1,750 Watt
Measurements approx. 26 × 33,5 × 31,5 cm (length × height × depth)
Weight approx. 6,3 kg
Technical changes reserved.
▲ DISPOSAL

EU 2002/96/EC
Information for correct disposal of the product in accordance with the European Directive 2002/96/EC
At the end of its working life this equipment must not be disposed of as an household waste. It must be taken to special local community waste collection centres or to a dealer providing this service. Disposing of electrical and electronic equipment separately avoids possible negative effects on the environment and human health deriving from an inappropriate disposal and enables its components to be recovered and recycled to obtain significant savings in energy and resources. In order to underline the duty to dispose of this equipment separately, the product is marked with a crossed-out dustbin.
Solis of Switzerland Ltd reserves the right to carry out technical and visual changes and modifications to improve the product at any time.

HELPLINE:
091 802 90 10
omers in Switzerland)
This item stands out due to its long-life cycle and reliability. Despite this though, if a malfunction ever occurs, simply give us a call. Often a breakdown can be easily and quickly remedied with the right tip or technique without having to straight away send off the device for repair. We will give you all the advice and practical support you require.
Keep the original packaging in a safe place so that you may use it in the event that transportation or shipping of the product becomes necessary.
Solis of Switzerland Ltd
Solis-House • CH-8152 Glattbrugg-Zurich • Switzerland
Phone +41 44 874 64 54 • Fax +41 44 874 64 99
info@solis.ch • www.solis.ch • www.solis.com