7455.0985 - Deep fryer CombiSteel - Free user manual and instructions
Find the device manual for free 7455.0985 CombiSteel in PDF.

| Brand | CombiSteel |
| Model | 7455.0985 |
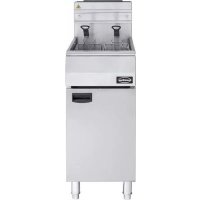
| Product type | Double deep fryer |
| Power supply | 230 V / 50 Hz (estimate) |
| Adjustable thermostat | Yes, up to 180 °C maximum recommended |
| Cold zone | Yes, to preserve oil quality |
| Drain tap | Yes, with control button |
| Frying basket(s) | Two baskets included (double fryer) |
| Housing material | Stainless steel |
| Oil level indicators | MIN and MAX marks |
| Maximum safety (reset) | Yes, with reset button under the control block |
| Overheat protection | Yes, thermal safety |
| Cleaning | Do not immerse; clean with a damp cloth and mild detergent |
| Usage | Indoor only |
| Warranty | 1 year (manufacturing defects) |
| Repairs | Entrust to an approved repairer |
Frequently Asked Questions - 7455.0985 CombiSteel
User questions about 7455.0985 CombiSteel
0 question about this device. Answer the ones you know or ask your own.
Ask a new question about this device
Download the instructions for your Deep fryer in PDF format for free! Find your manual 7455.0985 - CombiSteel and take your electronic device back in hand. On this page are published all the documents necessary for the use of your device. 7455.0985 by CombiSteel.
USER MANUAL 7455.0985 CombiSteel
Please read and keep these instructions
these instructions with appliance.
For indoor use only.
text_image
CE No RoHSNederlands
Geachte klant,
Vermijd overbelasting.
text_image
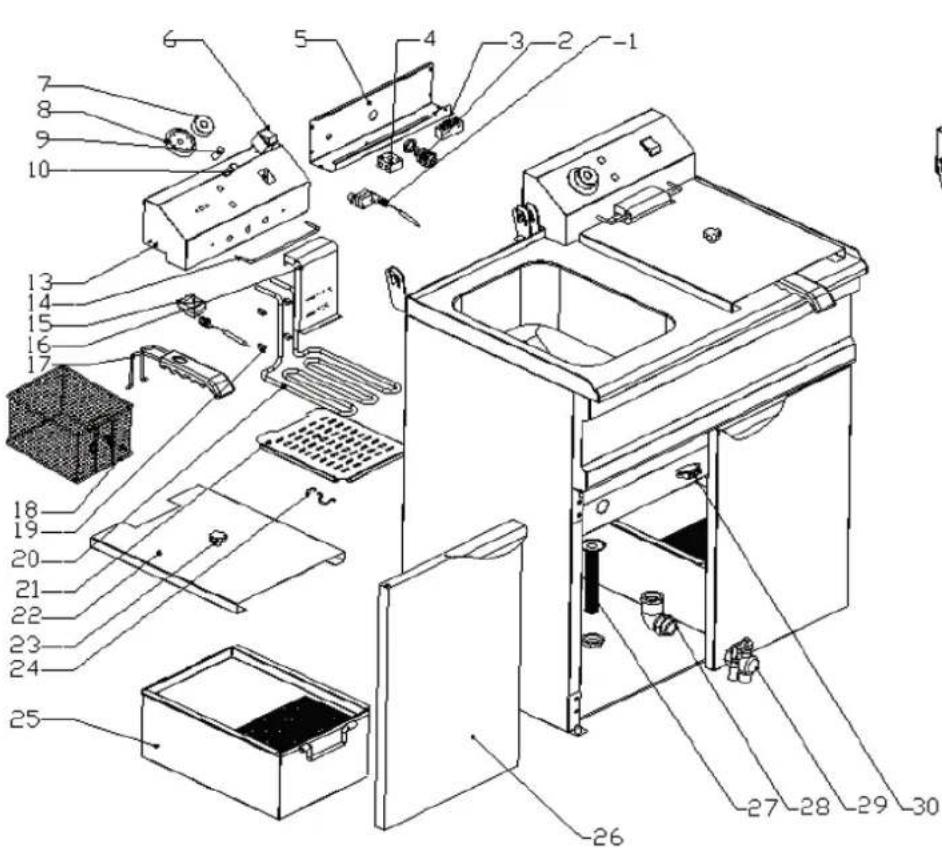
Exploded view diagram of a kitchen appliance with numbered parts for identification
natural_image
Line drawing of a dual-bay air fryer with control panel and side-mounted dish (no text or symbols)| 16 | Oil Indicator | 50 | Magnet |
| 15 | Thermostat | 29 | Tap |
| 14 | Potlock For Flying Basket | 28 | Oil Letout pip2 |
| 13 | Turning Axis | 27 | Oil Letout pip1 |
| 10 | Heating Indicator Light | 26 | Door |
| 9 | Power Indicator Light | 25 | Dil tank |
| 8 | Base of the box | 24 | Champ 2 |
| 7 | Hub | 23 | Handle for Cover |
| 6 | Power Switch | 22 | Gover |
| 5 | Electric Box Cover | 21 | Heating Element Support |
| 4 | Terminal | 20 | Heating Element |
| 3 | Microwave | 19 | Champ 1 |
| 2 | Cable Lock | 18 | Hrying Basket |
| 1 | Security Thermostat | 17 | Handle for Basket |
| No. | Name | No. | Name |
Thank you for purchasing this appliance. Please read these user instructions carefully before connecting the appliance in order to prevent damage due to incorrect use. Read the safety instructions in particular very carefully.
Safety Regulations
☐ Incorrect operation and improper use of the appliance can seriously damage the appliance and injure users.
The appliance may only be used for the purpose it was intended and designed for. The manufacturer is not liable for any damage caused by incorrect operation and improper use.
Keep the appliance and electrical plug away from water and any other liquids. In the unlikely event that the appliance should fall into water, immediately pull the plug out of the socket and have the appliance checked by a certified technician. Not following these instructions could give rise to life-threatening situations.
Never try to open the casing of the appliance yourself.
Do not insert any objects in the casing of the appliance.
Do not touch the plug with wet or damp hands.
☐ Regularly check the plug and cord for any damage. Should the plug or cord be damaged have it/them repaired by a certified repair company.
Do not use the appliance after it has fallen or is damaged in any other way. Have it checked and repaired, if necessary, by a certified repair company.
Do not try to repair the appliance yourself. This could give rise to life-threatening situations.
Make sure the cord does not come in contact with sharp or hot objects and keep it away from open fire. To pull the plug out of the socket, always pull on the plug and not on the cord.
Make sure that no one can accidentally pull the cord (or extension cord) loose or trip over the cord.
Always keep an eye on the appliance when in use.
Children do not understand that incorrect use of electrical appliances can be dangerous. Therefore, never let children use electrical appliances without supervision.
Always pull the plug out of the socket when the appliance is not being used and always before cleaning.
Warning! As long as the plug is in the socket the appliance is connected to the power source.
Turn off the appliance before pulling the plug out of the socket.
☐ Never carry the appliance by the cord.
Do not use any extra devices that are not supplied along with the appliance.
Only connect the appliance to an electrical outlet with the Voltage and frequency mentioned on the appliance label.
□ Avoid overloading.
Turn off the appliance after use by removing the plug from the socket.
Always remove the plug from the socket when filling or cleaning the appliance.
The electrical installation must comply with the applicable national and local regulations.
This appliance is not intended for use by persons (including children) with reduced physical, sensory or mental capabilities, or lack of experience and knowledge, unless they have been given supervision or instruction concerning use of the appliance by a person responsible for their safety.
Special safety precautions
We recommend the use of frying oil or liquid frying fat in this deep fryer. If you however will use solid frying fat, please heat the fat in steps and read "Deep frying tips" carefully.
Always remove the plug from the socket when filling or cleaning the deep fryer.
The electrical installation must satisfy the applicable national and local regulations.
To avoid the risk of fire, do not allow the oil level to drop below the minimum. Always use plenty of oil in the bowl and control this during use.
☐ Never use old oil as this increases the risk of fire.
☐ General rule: use up to 100 grams defrosted chips in 1 liter of oil. For other frozen deep frying products, follow the directions on the package.
Preparations before using for the first time
Check to make sure the appliance is undamaged. In case of any damage, contact your supplier immediately and do NOT use the appliance.
Remove all the packing material and protection film (if applicable).
☐ Clean the appliance with luke-warm water and a soft cloth.
Place the appliance on a level and steady surface, unless mentioned otherwise.
☐ Make sure there is enough clearance around the appliance for ventilation purposes.
Position the appliance in such a way that the plug is accessible at all times.
Installation
Remove the white protective foil from the stainless steel parts.
☐ Install the element holder on the support.
Use
Attention : Plug the appliance on a separate group of 16 ampere
For a double deep fryer, you need 2 separate groups.
☐ Remove the plug from the socket.
Fill the container with oil or hydrogenated oil until the MAX line.
Note! Solid fats must be preheated before filling, this avoids burnt fat and overloading (See "Solid Fat").
Plug the earthed plug into an earthed socket.
Turn on the appliance by using the green on/off button on the operating panel. The green lamp in the switch will light.
Set the thermostat to the desired temperature. The orange lamp will light.
When the set temperature is reached, the orange lamp goes out.
During deep frying the temperature lamp will light off and on to indicate that the heating element will maintain its indicated temperature.
☐ You can now use the deep fryer.
Deep-frying
The deep fryer is designed with a unique cold zone to allow crumbs and residue to sink to the bottom this also enables the usable life of the fat/oil to extend considerably.
Regularly check if there is sufficient oil or fat in the container. The level should never be below the MIN line.
Deep frying tips
☐ Preferably use only liquid frying oil or liquid frying fat.
The recommended temperature for frying chips and snacks is 180°C max.
Remove ice and crumbs from frozen foods.
Do not deep-fry too much at one time. This can cause the oil or fat to cool down too much. Cooled down oil/fat does not properly sear the surface of the food, so that more fat will be absorbed. When used intensively, crumbs and other debris should be filtered out of the oil/fat.
Replace oil or fat in time. Use test strips or test equipment regularly to track when oil/fat should be replaced.
Before oil starts to foam, smoke or gets too viscous you should replace it. Also replace the oil/fat when it has a strong smell or taste.
Do not mix fresh oil with used oil.
Solid Fat
If you use against our advice solid fat anyway: heat the oil slowly in the lowest position until melted. When the fat has melted you can set the proper frying temperature.
When using solid fat, allow the blocks of fat to melt slowly on a moderate heat in a normal frying pan. Carefully pour the melted fat into the deep fat fryer. Plug in the mains plug and switch on the deep fat fryer.
Remove the deep frying basket after use from the fat. This prevents the basket becoming stuck in the solidified fat.
After use
Turn off the appliance by switching off the switch and removing the plug from the socket.
Do not move the deep fryer until it and its contents have cooled down.
Put the lid on the deep fryer, so that the fat does not age.
Draining oil:
CAUTION! Liquefied oil is hot and can cause serious burns. The tap can become very hot during tapping.
If oil comes in contact with the skin, cool with lukewarm water. After which contact a doctor.
Before dr iaing o I:CO LDOWN THE OIL TILL °60
Place a tank under the drain (wait till the oil is cooled down till ± 50°C)
Press the knob of the tap and turn leftwards. The oil will drain from the container.
When the oil has drained from the container, turn the knob back. Check if the knob is locked.
Cleaning and maintenance
Always remove the plug from the socket before cleaning the appliance.
Beware: Never immerse the appliance in water or any other liquid!
☐ Clean the outside of the appliance with a damp cloth (water with mild detergent).
Never use aggressive cleaning agents, abrasives or chlorinated cleaners. Do not use any sharp or pointed objects. Do not use petrol or solvents! Clean with a damp cloth and detergent if necessary.
Do not use abrasive materials.
Faults
| Fault Symptom Possible cause Possible solution | |||
| Appliance does not do anything | Green switch light & orange lamp do not light | No mains voltage | Check the electrical installation. |
| Switch is off | Turn on the switch Switch defective | ||
| Appliance remains cold | Green switch light & orange lamp do not light | Check if the thermostat is on | Turn on the thermostat |
| Thermostat defective Contact your supplier | |||
| Appliance remains cold | Green switch light & orange lamp light | Detachable control panel is not correctly positioned on the support | Install the detachable control panel correct on the support. See Installation. |
| Overload circuit breaker tripped. | Reset the overload circuit breaker. See note 1) | ||
| Micro switch defective Contact your supplier | |||
| Appliance does not reach the set temperature / Long frying time / too high temperature | Overload circuit breaker defective | Contact your supplier | |
| Thermostat defective Contact your supplier | |||
If after these controls, the malfunctioning continues, it is advisable to contact your supplier for assistance. In case of any doubt, always contact your supplier!
1) Reset overload circuit breaker
- Allow the deep fryer to cool down.
- Remove the detachable control panel from the support.
- Unscrew the black protective cap from the bottom of the detachable control panel.
- Press the "reset button" of the overload circuit breaker. You should hear a clear click.
- Screw the black protective cap back on.
- Reinstall the detachable control panel on the support.
Warranty
Any defect affecting the functionality of the appliance that becomes apparent within one year after purchase will be corrected by free repair or replacement provided the appliance has been used and maintained in accordance with the instructions and has not been abused or misused in any way. Your statutory rights are not affected. If the appliance is claimed under warranty, state where and when it was bought and include proof of purchase (f.e. receipt).
In line with our policy of continuous product development we reserve the right to change the product, packaging and documentation specifications without notice.
Discarding & Environment
At the end of the life of the appliance, please dispose of the appliance according to the regulations and guidelines applicable at the time.
Throw packing materials like plastic and boxes in the appropriate containers. Used frying oils and fat dispose according to legal regulations and guidelines.
Spare Parts
text_image
Exploded view diagram of a kitchen appliance with numbered parts for identification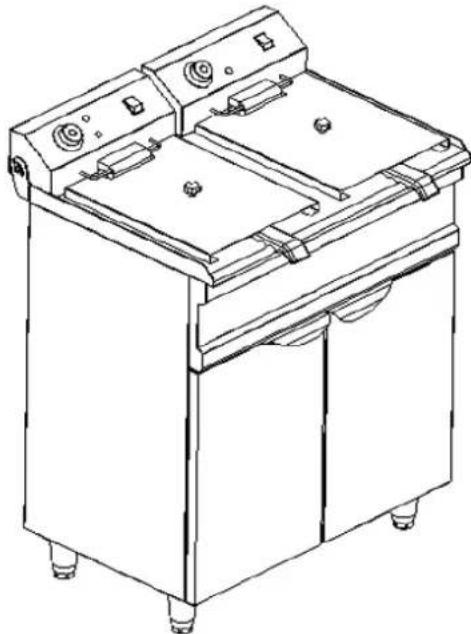
natural_image
Line drawing of a dual-bay air fryer machine with control panel and side legs (no text or symbols)| 16 | Oil Indicator | 30 | Bquet |
| 15 | Thermoutat | 29 | Tap |
| 14 | Kothok For Flying Basket | 28 | Oil Letout pip2 |
| 13 | Turning Axis | 27 | Oil Letout pip1 |
| 10 | Heating Indicator Light | 26 | Door |
| 9 | Power Indicator Light | 25 | Dil tank |
| 8 | Name of the box | 24 | Clamp 2 |
| 7 | Box | 23 | Handle for Cover |
| 6 | Power Switch | 22 | Cover |
| 5 | Electric Box Cover | 21 | Heating Element Support |
| 4 | Terminal | 20 | Heating Element |
| 3 | Microwave | 19 | Clamp 1 |
| 2 | Cable Lock | 18 | Flying Basket |
| 1 | Security Thermostat | 17 | Handle for Basket |
| No. | Name | No. | Name |
Deutsch
text_image
Exploded view diagram of a kitchen appliance with numbered parts for identification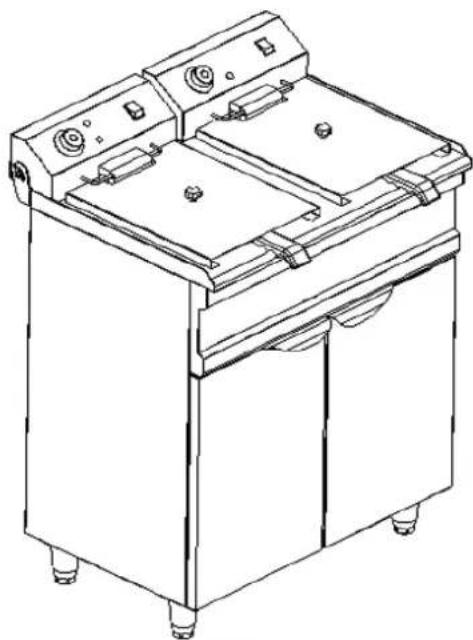
natural_image
Line drawing of a dual-bay air fryer machine with control panel and side legs (no text or symbols)| 16 | Oil Indicator | 30 | Racket |
| 15 | Thermoutat | 29 | Tap |
| 14 | Potlock For Flying Basket | 28 | Oil Letout pip2 |
| 13 | Turning Axis | 27 | Oil Letout pip1 |
| 10 | Heating Indicator Light | 26 | Door |
| 9 | Power Indicator Light | 25 | Dil tank |
| 8 | Pane of the box | 24 | Clamp 2 |
| 7 | Rmb | 23 | Handle for Cover |
| 6 | Power Switch | 22 | Cover |
| 5 | Electric Box Cover | 21 | Heating Element Support |
| 4 | Terminal | 20 | Heating Element |
| 3 | Microwave | 19 | Clamp 1 |
| 2 | Cable Lock | 18 | Frying Basket |
| 1 | Security Thermoutat | 17 | Handle for Basket |
| No. | Name | No. | Name |
text_image
Exploded view diagram of a kitchen appliance with numbered parts for identification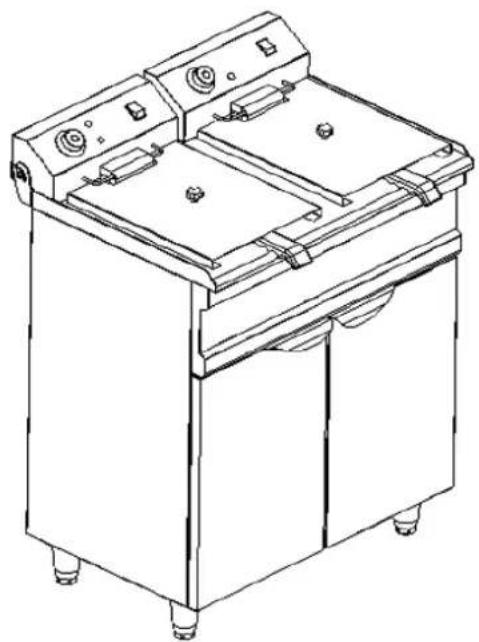
natural_image
Line drawing of a dual-bay air fryer with control panel and side-mounted fans (no text or symbols)| 16 | Oil Indicator | 30 | Rapet |
| 15 | Thermostat | 29 | Tap |
| 14 | Kothok For Flying Bucket | 28 | Oil Letout pip2 |
| 13 | Turning Axis | 27 | Oil Letout pip1 |
| 10 | Heating Indicator Light | 26 | Door |
| 9 | Power Indicator Light | 25 | Dil tank |
| 8 | Name of the box | 24 | Clamp 2 |
| 7 | Bmb | 23 | Handle for Cover |
| 6 | Power Switch | 22 | Cover |
| 5 | Electric Box Cover | 21 | Heating Element Skyport |
| 4 | Terminal | 20 | Heating Element |
| 3 | Microwitch | 19 | Clamp 1 |
| 2 | Cable Lock | 18 | Frying Bucket |
| 1 | Security Thermostat | 17 | Handle for Bucket |
| No. | Name | No. | Name |