
DLite RX 24 - Lamp Elinchrom - Free user manual and instructions
Find the device manual for free DLite RX 24 Elinchrom in PDF.

| Product type | Compact studio flash |
| Brand | Elinchrom |
| Model | DLite RX 24 (D-Lite RX 4) |
| Dimensions | 26 x 19 x 14 cm |
| Weight | 1.3 kg |
| Power supply | Multi-voltage 90-260 V, 50/60 Hz |
| Maximum power | 400 J (Ws) |
| Adjustment range | 25 to 400 J (5 f/stops, 1/10 increments) |
| Modeling lamp | 100 W (max. 150 W), E27 socket, proportional/min/max/off modes |
| Recycle time (230 V) | 0.35 s (min) - 1.2 s (max) |
| Recycle time (115 V) | 0.35 s (min) - 1.6 s (max) |
| Voltage stability | ± 0.5 % |
| Main functions | VFC (Visual-Flash-Control), PMS (Proportional Modelling Lamp), intelligent photocell with pre-flash mode, configurable acoustic signal, built-in EL-Skyport (4 groups, 8 channels), cooling fan |
| Safety | Overheat protection, mains fuse (8AT) and modeling lamp fuse (2.5AF), automatic shutdown on error (codes E1-E8) |
| Maintenance | Flash tube and modeling lamp replacement authorized; external cleaning with a dry cloth; do not open the housing |
| Spare parts | Flash tube (type S, ref. 24009), modeling lamp (100 W E27, ref. 23002/23006), fuses (5x20 mm, 8AT and 2.5AF) |
| Warranty | 24 months (excluding flash tube, modeling lamp and capacitor aging) |
| Item number | 20486.1 |
| Included accessories | Bayonet for Elinchrom accessories, umbrella holder Ø 7 mm, 5/8" stand, power cable |
Frequently Asked Questions - DLite RX 24 Elinchrom
User questions about DLite RX 24 Elinchrom
0 question about this device. Answer the ones you know or ask your own.
Ask a new question about this device
Download the instructions for your Lamp in PDF format for free! Find your manual DLite RX 24 - Elinchrom and take your electronic device back in hand. On this page are published all the documents necessary for the use of your device. DLite RX 24 by Elinchrom.
USER MANUAL DLite RX 24 Elinchrom
elinchrom creative image lighting technology
OPERATION MANUAL
GEBRAUCHSANLEITUNG
MANUEL D'UTILISATION
EI-Skyport Receiver RX built-in with full support for:
EL-Skyport Transmitter Speed functions
EL-Skyport Computer Remote Control
EL-Skyport WiFi Remote Control for Apple ™ Mobile devices

Introduction 3
Declaration of conformity, disposal and recycling, CE marking 4
Safety notice and precaution 5
Basic features & advanced programmable features 6
Before you start / On-Off switch and fuse 7
Control panel 8
Reset the unit 9
Modelling lamp features & setup 9
Digital power display 10
Photocell / Eye-Cell / Automatic Mode 11
Photocell / Eye-Cell / Manual Mode 12
Charge Ready Beep Features & Setup 13
EL-Skyport Transceiver Features & Setup 14
Flash Power & Modelling Lamp Steps Per Touch 14
Flashtube Replacement / Error Management 15
Technical Data 16
EL-Skyport Transmitter Speed Instruction for user 17-22
Guarantee 128-129
P.S: Technical data subject to change.
The listed values are guide values which may vary due to tolerances in components used.
Dear Photographer,
Thank you for buying your D-Lite RX 2/4 compact flash unit.
All Elinchrom products are manufactured using the most advanced technology. Carefully selected components are used to ensure the highest quality and the equipment is submitted to many controls both during and after manufacture. We trust that it will give you many years of reliable service.
All D-Lite RX 2/4 flash units are manufactured for the studio and location use for photographers.
Only by observance of the information given, you can secure your warranty, prevent possible damage and increase the life of this equipment.
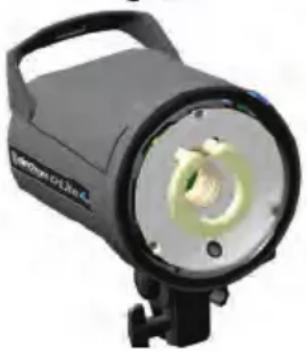
D-Lite RX 2/4 Compact Flash
The quality of light and exceptional performance is the result of long research, application of demanding principles, the long experience of ELINCHROM in lighting products for the studio and the utilisation of the latest technology in this area.
Totally integrated to the range of ELINCHROM flashes, the D-Lite RX 2/4 units maintain the traditional look and function that is ELINCHROM.
FCC Class B Compliance Statement
This equipment has been tested and found to comply with the limits for a class B digital device, pursuant to Part 15 of the FCC Rules and meets all requirements of the Canadian Interference-Causing Equipment Regulations. These limits are designed to provide reasonable protection against harmful interference in a residential installation. This equipment generates, uses, and can radiate radio frequency energy and, if not installed and used in accordance with the instruction manual, may cause harmful interference to radio communications. However, there is no guarantee that interference will not occur in a particular installation. If this equipment does not cause harmful interferences to radio or television reception, which can be determined by turning the equipment off and on, the user is encouraged to correct the interferences by one or more of the following measures:
- Reorient or relocate the receiving antenna.
- Increase the separation between the equipement and receiver.
- Connect the equipment into an outlet on a circuit different from that to which the receiver is connected.
- Consult the dealer or an experienced radio/TV technician for help.
Elinchrom LTD is not responsible for any radio or television interference caused by unauthorised modifications of this equipment or the substitution or attachment of connecting cables and equipment other than those specified by Elinchrom LTD. The correction of interference caused by such unauthorised modification, substitution or attachment will be the responsibility of the user.
Declaration of conformit
English
This device complies with Part 15 of the FCC Rules. Operation is subject to the following two conditions:
- This device may not cause harmful interference.
- This device must accept any interference received, including interference that may cause undesired operation.
| Product name: D-Lite RX 2/4 | |
| Trade name: ELINCHROM | |
| Model number(s): 20486.1 / 20487.1 | |
| Name of responsible party: Eli | Chrom LTD Av. De Longemalle 11 1020 Renens / Switzerland |
| Phone: +41 21 637 26 77 | |
| Fax: +41 21 637 26 81 |
Elinchrom LTD declares that the equipment bearing the trade name and model number specified above was tested conforming to the applicable FCC rules, and that all the necessary steps have been taken and are in force to assure that the production units of the same equipment will continue to comply with the Commissions requirements.
Disposal and recycling
This device has been manufactured to the highest possible degree from materials which can be recycled or disposed of in a manner that is not environmentally damaging. The device may be taken back after use to be recycled, provided that is returned in a condition that is the result of normal use. Any components not reclaimed will be disposed of in an environmentally acceptable manner. If you have any questions on disposal, please contact your local supplier or your local ELINCHROM agent (check our website for a list of all ELINCHROM agents world wide).
CE marking
The shipped version of this device complies with the requirements of ECC directives 29/326/ECC «Electromagnetic compatibility» and 73/23/ECC «Low voltage directive».
CE Statements for EL-Skyport
This device has been tested and found to comply with the requirements set up in the council directive on the approximation of the law of member states relating to EMC Directive 89/336/EEC, low Voltage Directive 73/23/EEC and R&TTE Directive 99/5/EC.
Notational Conventions
The meaning of the symbols and fonts used in this manual are as follows:

Pay particular attention to text marked with this symbol.
Failure to observe this warning endangers your life, destroys the device, or may damage other equipment.
Safety Note
English
According to safety regulations, we draw your attention to the fact that these
electronic flash units are not designed for use outdoors, in damp or dusty conditions and should not be used after being exposed to sudden temperature changes causing condensation. They must always be connected to an earthed (grounded) mains supply.
On no account should any object be inserted into the ventilation holes.
The units may retain an internal charge for a considerable time even though disconnected from the power supply.
- Do not use without permission in restricted areas (like hospitals, etc.).
- Do not use in explosive environments.
Flash tubes and modelling lamps
- Flash tubes and modelling lamps in use are very hot!
- Never touch a flash tube or lamp before the unit has cooled down and is disconnected from the mains (min 30mn).
- Do not fire flashes from short distance (less than 1m) directed at a person and avoid looking directly into the flashlight!
- Keep a min. 1m distance from any flammable materials.
- Keep generally distance to other operating units.
Transport
- Transport the flash unit with care, either in its original packaging or other corresponding packaging fit to protect it against knocks and jolts.
- Transport only in complete discharged conditions. Wait a minimum of 30 minutes after disconnecting from the mains supply before packaging and transportation.
- Never drop the flash unit (danger of flashtube breakage)
Power cable
To guarantee safe operation, use the cable supplied.
- The cable has to be HAR-certified or VDE-certified. The mark HAR or VDE will appear on the outer sheath.
- The cable set must be selected according to the rated current for your flash unit.
- Do not use a multiple adapter to connect one or more flash units per single mains socket.

- Flash systems store electrical energy in capacitors by applying high voltage.
- For your safety, never open or disassemble your flashes.
- Only an authorised service engineer should open or attempt to repair the units.
- Internal defect charge capacitors may explode whilst the unit is in use, never switch on a working flash unit, once it has been found to be faulty.
- Do not connect on the flash unit to mains supply without mounted modelling lamp or flash tube due to high voltage at the contacts! Life Danger!
Included
basic
features
The following basic features are easy to access and they are similar to previous Elinchrom compact flashes.
- Flash power up and down buttons
Modelling lamp (prop / min / max / off) - Photocell on / off button
- Ready charge beep on / off button
- Test-flash button
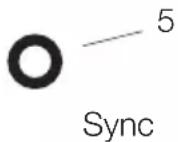
- 3.5mm synchronisation socket
- NEW EL-Skyport Wireless Triggering & Remote. Note: To function the integrated Transceiver requires the optional EL-Skyport Transmitter.
Additional advanced programmable features
All the new features and functions can be customised.
Please read carefully how to configure the new features.
The VFC mode switches off the modelling lamp whilst the flash unit recharges after a flash has been released. This function gives a visual check that all the studio flash units have fired.
The VFC mode can be activated together with the Ready Charge beep for maximum control.
Proportional modelling lamp setup (PMS)
When using compact flashes of different powers, (e.g. 200 & 400 ws) the modelling lamp can be reduced to -1 f-stop for better visual proportionality.
"Eye-Cell" automatic & manual mode
Some cameras may release before the main-flash, several pre-flashes to avoid the red eye effect. In this case a normal photocell would respond and release a flash with the first pre-flash of the camera.
To avoid incorrect synchronisation the intelligent Elinchrom Eye-Cell detects camera pre-flashes.
The Eye-Cell function can be activated in "Automatic Mode" or in "Manual Mode", even configuring LED pre-flashes. (Only for advanced users, read carefully the instructions before changing any parameters).
Charge ready beep setup
The user can customise the Charge Ready Beep from short to long Beep signals.
The acoustical signal length can be set from 70 to 490m /seconds.
EL-Skyport wireless triggering & remote control
To use the wireless triggering and changing flash power settings, or to switch on/off the modelling lamp, requires the optional EL-Skyport Transmitter.
"Group" and "Channel Frequency" settings can be customised on each D-Lite RX 2/4 unit.
Power and modelling lamp steps setup
Normally flash / modelling lamp power adjustments are in 1/10th steps per touch.
These steps can be changed from 1/10th to 7/10th or to 1 f-stop.
Temperature controlled FAN management
The cooling fan switches ON automatically if the unit temperature increases. The microprocessor controls the unit temperature and the fan. If the ventilation is blocked or the fan does not work, the display shows E8.
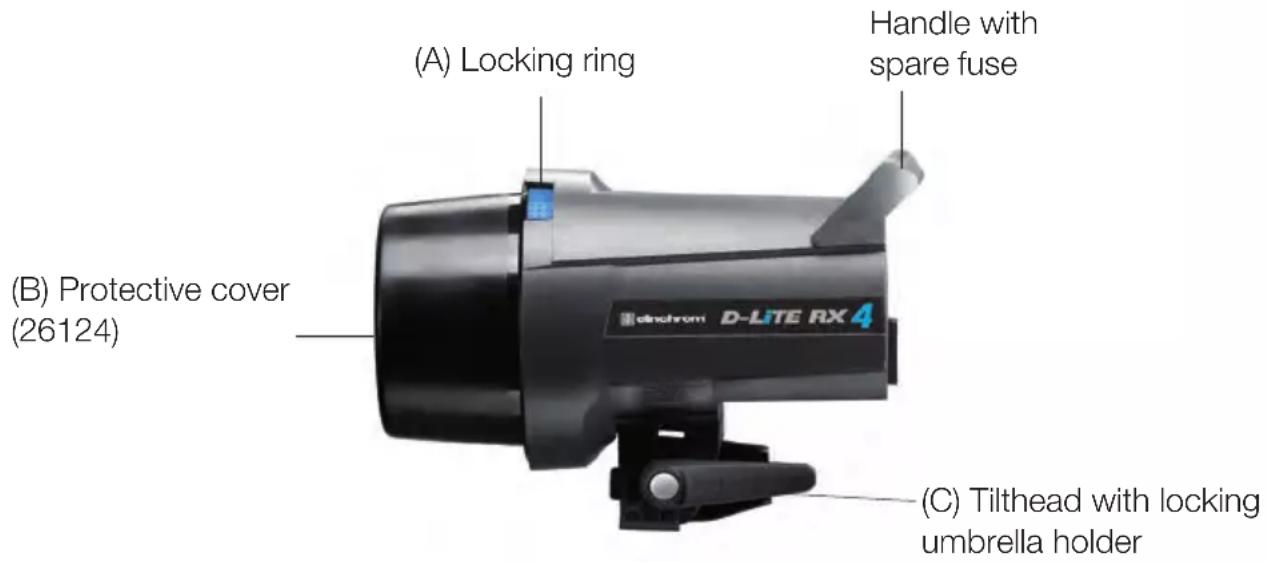
The D-Lite RX 2/4 units are updated for operation on 90 - 260V / 50 - 60Hz . Before connecting for the first time, check to make sure that your Modelling Lamp coincides with the voltage. They must always be connected to an earthed ( grounded) mains supply. D-Lite RX 2/4 units have a bayonet mount and locking ring fitting, for fixing all Elinchrom and Prolinca accessories.
The Reflector Bayonet supports Reflectors and Softboxes up to 1.5kg , e.g. Rotalux 100× 100cm . Mount the unit securely to a suitable stand or support.
Remove the black protective cover. DO NOT operate the unit without first removing the black protective cover.
Operating instructions D-Lite RX 2/4
- Check that the modelling lamp voltage is correct.
- Check that the mains switch (2) is in the position OFF ("O" position).
3.Insert the mains cable into the MAINS INLET (1) and connect this to a FULLY EARTHED OUTLET
4.Using the mains SWITCH (2), switch the unit ON ("I" position). - Select the power with the touch pad (10)
Switch and fuse
Mains supply
Use only the Elinchrom mains cord. Switch off the unit before the mains cord is connected to the mains plug.
Mains fuse
Standard type 5 × 20 ~mm use only tempered fuse 8 AT (code 19022) for D-Lite RX
Note: Before exchanging a blown fuse, switch off the unit and remove the mains cable. Open the little drawer in the mains plug with a screwdriver and replace the fuse with the spare fuse, which is placed in its support in this drawer. (N.B. Please don't forget to check the correct value of the fuse!).
Fuse for modelling light
Fast type 5 × 20mm , 2.5 AF
Switch off the unit and replace the blown fuse with a new one of the correct value.
The fastblow fuse will protect the triac of the modelling lamp circuit, the lamp and therefore the flash tube.

Overview of controls
- Mains inlet socket includes the mains fuse (slow blow)
- Mains on/off switch
- Modelling lamp fuse
- Open flash / Test button
- Synch socket / 3.5 mm jack / low 5V sync voltage
- Digital multi display and charge / discharge indicator*
- Charge Ready Beep on/off
- Eye-Cell on/off - programmable*
- Eye-Cell receptor
-
Power up & down buttons and scroll /program buttons for advanced features setup*
-
Modelling lamp mode button (prop/min/max/off/)
- Tilt head with extra umbrella fitting
- Handle with support for spare fuse
- Standard stand socket 5/8 inch
- Centred umbrella tube for EL Umbrellas - 7 mm diameter
- Knurled clamp screw
*The touches on this display are multifunctional to program / scroll the advanced features and to setup the integrated EL-Skyport Transceiver. For programming please read carefully the following pages!
How to „Reset“ the D-Lite RX 2/4
In case you need to „RESET" the D-Lite RX 2/4 to the manufacturer settings please follow the steps below:
- Switch the unit "off"
- Press both flash power up / down buttons (10) at the same time and switch the unit on
- The Digital LED multi display (6) flashes in fast mode
- Do not continue to press the buttons, the resetting procedure is completed
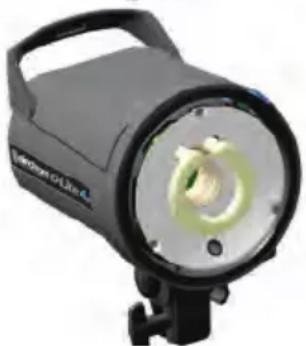
Modelling lamp features & setup
Modelling lamps and fuses for 110 V & 230 V
Unit Modelling lamp 110V Modelling lamp 230V Socket Fuse
D-Lite RX 2/4 100W / 23006 100W / 23002 E27 2.5AF
- Do not use energy saving lamps
Modelling lamp modes
Setting: Press "Modelling" button to set Modelling lamp ON to proportional, min., max. mode, or OFF
LED Indication: • LED is on: only in proportional mode.
- LED is off: in min. / max. / off mode.

- Please use only original ELINCHROM modelling lamps with a maximum power of 100W (effective 150W).
- Press "Prop" push button for more than 2 seconds, until the display shows "F.X" ("X" is 0 or 1) to enter into the Modelling lamp setup menu.
-
Use the "Flash-Power" up and down button to change setting:
-
"F.0": Visual-Flash-Control = OFF. Modelling lamp remains ON after flash.
-
"F.1": Visual-Flash-Control = ON. Modelling lamp switches off during recharging.
- The display switches back to normal mode after approx. 4 seconds if no button is pressed. The settings are automatically stored.
- Standard setting is "F.0", VFC = OFF
Proportional modelling lamp setup (PMS)
(When using heads of different maximum power)
> Enter PMS setup:
- Press "Prop" button for more than 2 seconds to enter into the Modelling lamp setup menu. The display shows "F.X", then press the "Prop" button once more to the PMS menu, the display shows "-X"
-
Use the "Flash-Power" up and down button to change the settings:
-
".0": PMS = OFF, Modelling lamp is set to maximum.
- ".1": PMS = -1 f-Stop, Modelling lamp is reduced by 1 f-stop.
Digital multi-display
The flash / modelling lamp power is displayed in f-stop compatible formats from 2.0 - 6.0 for D-Lite RX 2/4. The flash power difference from (e.g.) 5.0 - 6.0 is 1f-stop.
The power range is 5 f-stops, variable in 1/10th intervals. During charging or discharging, the display «flashes». In case of overheating or malfunction, the display shows “E” for error followed by the error code number.
Display 2.0 3.0 4.0 5.0 6.0
Joules /Ws 25 50 100 200 400
Note: The «D-Lite RX 2/4» units have an integrated discharge system, protected by a thermal switch. To avoid overheating, discharge manually with the «test» button if you want to decrease the power for more than 2f-stops.
Synchronisation socket
Standard socket with 3.5 mm mini-jack (5).
N.B. Do not link ELINCHROM units by cable to other manufacturers sync. outlets.
ELINCHROM uses low voltage (5 V) for security reasons.
Open flash «test»
Having pressed the touch pad to release a flash, the green «READY» light will appear again once the unit is recharged. If the green light does not appear the charge system could be defective.
Please contact an authorized Elinchrom service centre.
Test and Ready (4)

Eye-Cell - advanced photocell sensor
The standard photocell can be remotely triggered by another flash unit!
The D-Lite RX 2/4 photocell is specially designed to work in studio light conditions
Direct light or other strong light sources may reduce the sensitivity of the cell.
Intelligent Photocell-Sensor
The Eye-Cell offers new features and can detect camera pre-flashes (anti red eye effect).
To customise the pre-flash settings, please follow the instructions in paragraph 3.
Eye-Cell Functions
- Standard Photocell mode
- Eye-Cell pre-flash mode
- Automatic Eye-Cell Pre-Flash Setup
- Manual Eye-Cell Pre-Flash Setup
- Setup Pre-Flash Timeframe (only for advanced users)
1. Using the Standard Photocell Mode
Push "Cell" button, for less than 0.5 seconds to switch on/off the standard Photocell sensor.
LED Indication:
Cell LED is ON: Active photocell.
Cell LED is OFF: Inactive photocell.
If active, the Photocell sensor will trigger the flash unit with any recognized flash impulse.
2. Eye-Cell Pre-Flash Mode
(This is only activation, not the setup. To Setup, follow step 3)
Press the Cell button for approx. 1 second; the status LED starts flashing.
LED Indication:
Cell LED flashes in slow intervals; the Eye-Cell pre-flash mode is activated.
Cell LED is OFF; the Eye-Cell pre-flash mode is inactive.
Function:
In active mode the unit ignores up to 6 anti-red-eye flashes and synchronizes / triggers only with the last main flash. This is useful where if the camera anti-red eye pre-flashes can't be switched off.
3. Automatic Eye-Cell Pre-Flash Setup "c.0"
Press the Cell button for 4 seconds until display shows "c.X" for automatic setup.
("X" is the number of pre-flashes including main flash from 1 up to 7)
Scroll with the "Flash-Power" up and down button to "c.0".
Now use the camera-on flash and release a test exposure. The camera will release several anti-red eye flashes (if activated). The D-Lite RX 2/4 Eye-Cell detects the number of flashes the camera released and stores the value automatically, and switches back to Eye-Cell Pre-flash mode. Ready to use.
If the cell button was pressed down for 6 seconds the "Setup Pre-Flash Timeframe" is activated and the display shows t.4 or b.1 (standard settings). Do not change these values; this would deactivate the "Automatic Eye-Cell Mode!"! Wait a few seconds, the unit switches back to the standard mode and the display shows the flash power settings. Should the t.4 or b.1 values have been changed, please set the "Setup Pre-Flash Timeframe" back to standard settings as descrit at paragraph 4.
4. Manual Eye-Cell Pre-Flash Setup
A. Press Cell button approx. 4 seconds until display shows "c.X".
("X" is the number of settable pre-flashes plus the main flash from 1 up to 7)
B. With "Flash-Power" up and down button, set the number of pre-flashes incl. mainflash.
C. The display switches back to normal mode after approx. 4 seconds if no button is pressed.
The settings are automatically stored.
D. Cell LED flashes in fast intervals if the Eye-Cell pre-flash mode is active.
> Recall The Eye-Cell Settings:
If you want to recall the actual Eye-Cell pre-flash setting, repeat the steps A.
If you want to control the actual Eye-Cell pre-flash setting, repeat the steps A to D.
5. Setup Pre-Flash Timeframe (only for advanced users)

Change manufacturer settings only in case of problems with the auto-detection of your camera pre-flashes.
> Setting:
- Press Cell button for more than 6 seconds until display shows "t.X" ("X" is the value from 1 to 8)
- Use the Cell button to toggle between "t.X" and "b.X" settings.
- Use the "Flash-Power" up and down buttons to change the values.
- The display switches back to normal mode after approx. 4 seconds if no button is pressed.
The settings are automatically stored.
- Standard settings are:
----> t.4 (t. is the time window of all released anti red-eye flashes incl. the main flash).
----> b.1 (b. is the minimum time delay between two anti red-eye flashes incl. the main flash).
Pre-Flash Timeframe Setting "t.X
t. is the time window of all released anti red-eye flashes incl. the mainflash. Change setting only when the pre-flash procedure is longer than the manufacturer settings.
Set the value t. between 1 and 8 to ensure that all pre-flashes including the main flash are inside the time frame.
Value12345678
Time: [seconds] 1 2 3 4 5 6 7 8
Pre-Flash Block Time Setting "b.X": (Only For LED Anti Red-Eye Cameras)
Pre-Flash Block -Time: set the minimum delay between each pre-flash.
Chose values between 0 and 7.
Value b 0 1 2 3 4 5 6 7
Time: [milliseconds] 0 2 4 6 8 10 12 14
This feature creates a melody if settings are different between each unit to improve the acoustical recognition that all the flashes have fired and recycled.
Charge Ready Beep Setup
- Setting
- Press "Audio" button, less than 0.5 seconds to switch the Charge Ready Beep (ON / OFF)
- LED Indication
- Charge Ready Beep LED is on: Audio is active
- Charge Ready Beep LED is off: Audio is inactive (Mute)
- Changing Charge Ready Beep -On-Time Setting
- Press Audio button for more than 2 seconds until the display shows "A.X" ("X" is the value from 1 up to 7)
- Use the Flash-Power” up and down button to change the value settings
- The display switches back to normal mode after approx. 4 seconds if no button was pressed. The settings are automatically stored.
- Standard setting is: "A.3"
Value A 1 2 3 4 5 6 7
Beep-On-Time in m/seconds 70 140 210 280 350 420 490
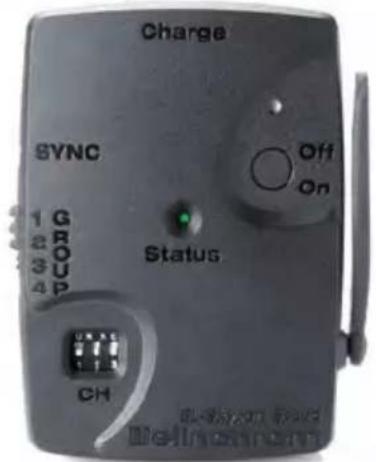
EL-Skyport on / off
Press the flash power up-down buttons together to enter into the "Advanced Feature Setup"
Display shows Change settings with the flash power up-down buttons

r.0 EL-Skyport off
r.1 EL- Skyport on
r.2 EL-Skyport speed mode (only available with EL-Skyport Speed modules)
After 3 to 4 seconds the settings are saved automatically and the display shows the flash power setting.
Group Settings
Press the flash power up-down buttons together to enter into the "Advanced Feature Setup".
Then, scroll to G.1 using the Prop/Free button.
Display shows Select Group with the flash power up-down buttons
G.1 Group 1 (standard setting)
G.2 Group 2
G.3 Group 3
G.4 Group 4
After 3 to 4 seconds the settings are saved automatically and the display shows the flash power setting.
Frequency Channel Settings
Press the flash power up-down buttons together to enter into the "Advanced Feature Setup".
Then, scroll to F.1 using the Prop/Free button (only use in cases of interference with other systems).
Display shows Change the Channel with the flash power up-down buttons

F.1 to F.8 Select Frequency Channel from 1 - 8.
Note: The transmitter must have the same Frequency Channel
setting. Standard setting is Frequency Channel 1.
After 3 to 4 seconds the settings are saved automatically and the display shows the flash power setting.
Power Steps Per Push
Press the flash power up-down buttons together to enter into the “Advanced Feature Setup”
Then, scroll to i.1 using the Prop/Free button.
Display shows Select values with the flash power up-down buttons

i.0 +/- 1f-stop
i.1 +/- 1/10 (standard setting)
i.2 +/- 2/10
i.3 +/- 3/10
i.4 +/- 4/10
i.5 +/- 5/10
After 3 to 4 seconds the settings are saved automatically and the display shows the flash power setting.
If the unit does not flash but the ON/OFF switch indicates that there is power, it could be that the flash tube needs replacing. Flash tubes have a long life with average use, but multiflashing in long sequences can cause overheating of the electrodes leading to premature ageing, or perhaps the flastube is broken or cracked.
To replace the flash tube:
- Switch off the mains switch
- Remove the mains cable
- Take the unit from its stand or lay it horizontally on a rigid surface. It will need to be held firmly whilst removing and replacing the tube.
- Allow the flash tube and modelling lamp to cool for several minutes. They may be very hot.
- Carefully remove and store the modelling lamp.
- Use a protective glove to remove the flashtube:
A - Pull the flash tube firmly out of the terminals
B - If the tube is broken, use security gloves. Avoid cutting yourself!
C - If the tube is broken, never touch the metal electrodes and ensure that the unit is disconnected from the mains and discharged, wait min.
30 minutes! Use an insulated tool to pull out the electrodes.
- Take the new flash tube. A glove or "plastic protection" MUST BE USED. Contact with your fingers on the glas, will cause dark markings on the tube when it is used.
- Check that the tube is correctly aligned (central) and that the trigger contact is gripping the tube.
- Re-connect and test the unit as usual.

Error Management
Error Fault Description
| E1 | Overvoltage detected | Switch unit OFF, wait 2 minutes and switch unit ON again. If the error shows up again the unit requires a check up at the Elinchrom service centre |
| E2 | Overheating | Wait until the unit has cooled down. The unit will switch back to normal operation as soon as temperature decreases to normal working level. |
| E3 | Auto dump function fault | The Unit has detected a time out in the ADF mode. Switch the unit OFF, wait 2 minutes and switch the unit ON again; use the Test release button for power reduction. If the error shows up again the unit requires a check up at the Elinchrom service centre. |
| E4 | Charge fault | Unit has detected a time out during recharging. Switch unit OFF, wait 2 minutes and switch unit ON again. If the error shows up again the unit requires a check up at the Elinchrom service centre. |
| E5 | Mains supply fault | Unit has detected a mains supply fault. Check your mains cord and mains installation sockets. Switch unit OFF, wait 2 minutes and switch unit ON again. If the error shows up again the unit requires a check up at the Elinchrom service centre. |
| E8 | Fan manage-ment fault | Unit has detected a FAN management problem due to overheating. Wait until the unit has cooled down. Check if the FAN is blocked. If the error shows up again the unit requires a check up at the Elinchrom service centre. |
| Technical data | D-Lite RX 2 | D-Lite RX 4 |
| Ws / Joule J(Ws) 200 400 | ||
| F-Stop | 45.3 64.3 | |
| Power range f-stop | 5 | 5 |
| Power range Ws J(Ws) 12-200 25-400 | ||
| Power adjustment f-stops 1/10 f-stops | ||
| Recycling time, min. / max. (230 V) s 0.2 / 0.6 0.35 / 1.2 | ||
| Recycling time, min. / max. (115 V) s 0.2 / 0.8 0.35 / 1.6 | ||
| Flash duration s 1/1200 1/800 | ||
| Power stability 0.5% | ||
| Auto Power Dumping | Applies power settings automatically | |
| Voltage | V Multi voltage, 90-260 V | |
| Modelling lamp | 100W/E27 - effective 150W | |
| Modelling lamp setting | Proportional, low, full, off | |
| Flashtube - Plug-in type S | Code 24009 | |
| Umbrella fitting | Centred tub, for EL-umbrellas ø 7mm | |
| Sync voltage | 5V compatibility with digital cameras | |
| Power consumption 115 V / 60 hz no flash / recycling | 160 W / 850 VA | |
| Power consumption 230 V / 50 hz no flash / recycling | 140 W / 1200 VA | |
| EL-Skyport | Integrated transceiver, 4 Groups, 8 Frequencies | |
| Dimensions | cm | 26 x 19 x 14 |
| Weight | kg | 1.3 |
| D-Lite RX 2/4 | Code | 20486.1 |
| 20487.1 | ||
Radio interference suppressiv CE-IEC 491 EN 60 555 - EN 61 000 - 4 - 2/3/4/5
Tolerances and specifications conforming to IEC and CE standards. Technical data subject to change without notice.
EL-Skyport
Transmitter Speed
19350
User Manual
Contents :
Features 18
Battery Installation 18
Hot-shoe connector 17
Operating Instructions 18
Frequency Channel 19
Trigger Modes 19
IntegratedSYNCSocket 20
Elinchrom RX Features 20
EL-Skyport Modules 21
Troubleshooting 21
CE Statements 22
FCC Compliance and
Advisory Statement 22
Disposal and recycling 22
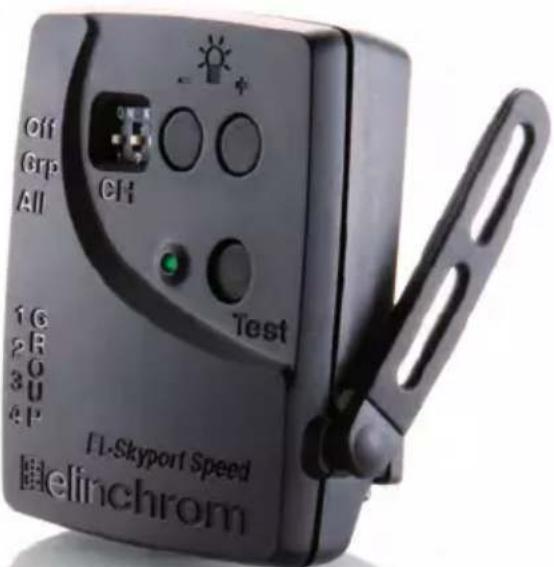
EL-Skyport Transmitter SPEED //19350
Operating instructions :
2.4 GHz digital wireless Flash Trigger Transmitter
Features
EL-Skyport Transmitter Speed is designed with the latest 2.4 GHz Digital Wireless Technology.
SLR Camera Sync speeds: SPEED mode up to 1/250 s, STANDARD mode 1/160 - 1/200 s.
- 5 selectable trigger modes, (4 Groups + All)
- 8 frequency channels.
- 40 Bi t security encryption.
- Up to 60m range indoors for standard mode and up to 40m in speed mode.
- Up to 120m range outdoors f or standard mode and up to 60m in speed mode.
- Batery life up to 6 Months - over 30'000 flashes.
- RX-feature buttons (Remote Control).
- Test trigger but ton and feature button.
- Integrated Hot-shoe (middle contact) improved.
SYNC-sock et for direct connection improved.
- Two flash modes, standard and speed.
- The "Standard" mode is fully compatible with previous EL-Skyport versions.
- The SPEED function is available for Ranger Quadra A S, BXRi 250 / 500 und D-Lite RX 2/4 and all other units, when used with the Universal
Speed.
- Status LED for EL -Skyport mode and battery status.
- Improved housing, battery drawer and switches.
- New Hot-shoe with screw-lock.
- New extra f features; configure EL-Skyport with the new EL-Skyport PC / MAC software 3.0.
You will appreciate the convenience of this professional and powerful wireless device.
Note: Shutter speed and distance range are influenced by interference from other 2.4 GHz electronic equipment and reflections of ceilings, walls, floors, furniture, metall, trees and humidity in woods etc.
For better performance the Transmitter and Receiver antenna should have direct sight, without any walls or objects in - between.
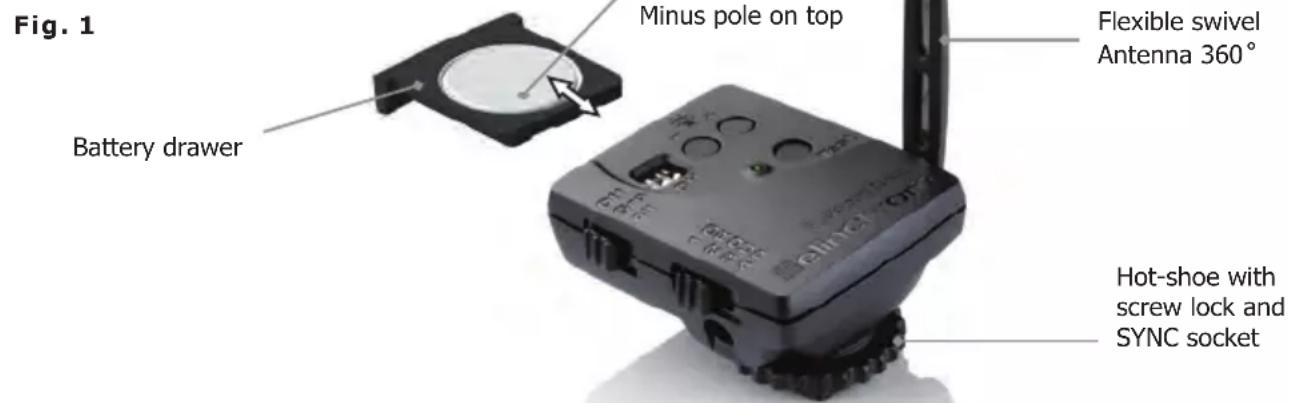
Battery Installation
- Pull the battery drawer out carefully.
- Place the Lithium battery, see Fig. 1 for correct polarity.
- Close the battery drawer.
! CAUTION:
- Ensure correct polarity / minus pole on top.
- Use only the Lithium Battery CR2430 3.0 V 19372.
- Remo ve battery if the EL-Skyport Transmitter is not used for some time.
- Never short -circuit battery poles.
- Avoid direct sunlight or temperatures above 45^ C . The battery may explode!
Hot-Shoe Connector with Screw-Lock
The new Hot-shoe connector with screw-lock and middle contact synchronisation is designed to fit digital and analogue cameras with maximum sync output of 3V (the middle contact is the positive pole).
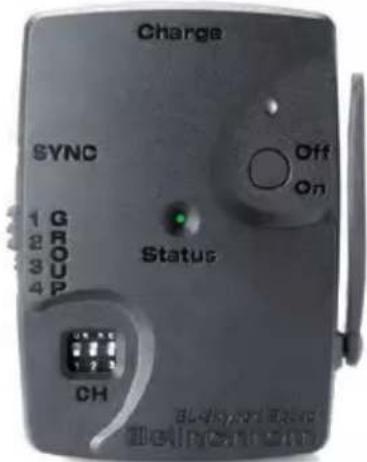
Operating Instructions

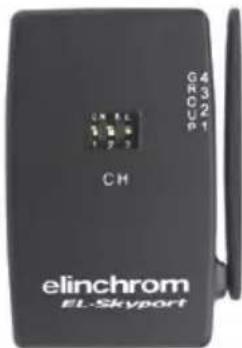
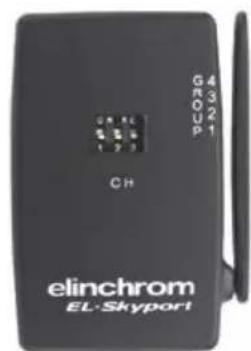
Frequency Channel
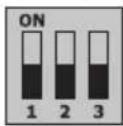
Note:
Transmitter and the corresponding Transceiver RX, the Universal Receiver or the EL units with integrated EL-Skyport Receiver must have the same frequency channel settings!
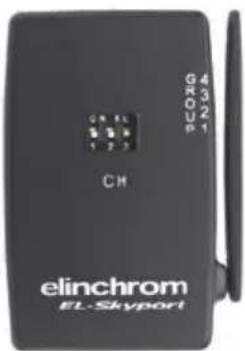
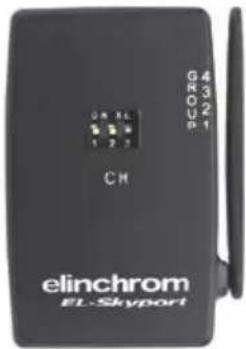
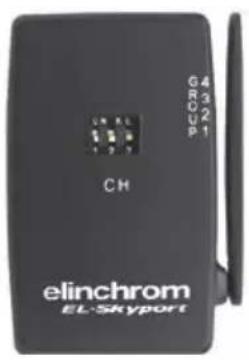
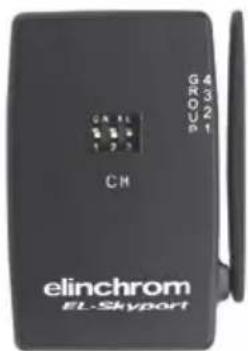
| Frequency Channel | Slide Button configuration Frequency | / Mhz | ||
| 123 | ||||
| 1 (default) Off | Off Off 2456 | |||
| 2On Off Off | 2458 | |||
| 3Off On Off | 2460 | |||
| 4On On Off | 2462 | |||
| 5Off Off On | 2469 | |||
| 6On Off On | 2471 | |||
| 7Off On On | 2473 | |||
| 8On On On | 2475 | |||
EL-Skyport Sync Speed & Standard Mode
The SPEED function is available for Ranger Quadra AS, BXRi 250 / 500 und D-Lite RX 2/4 and all other units, when used with the EL-Skyport Universal Speed.
Select "Speed" sync mode
Synchronises SLR cameras up to 1/250 s, or compact digital cameras up to 1/2850 s
- Select "Group" or "All" mode.
- Press test push button for minimum 5 seconds until the STATUS LED flashes two times.
- Release test push button.
- Now the EL-Skyport Transmitter Speed works in "SPEED" mode (r.2 mode).
Select "Standard" triggering mode
Synchronises SLR cameras up to 1/200 s, or compact digital cameras up to 1/1600 s
- Select "Group" or "All" mode.
- Press test push button for minimum 5 seconds until the STATUS LED flashes one time.
- Release test push button.
- Now the EL-Skyport Transmitter Speed works in "STANDARD" mode.
EL-Skyport Module Configuration:
Only possible with EL-Skyport PC / MAC software v 3.0 and higher.
- Power-Save Timer, individual programmable or disabled.
- Trigger delay is programmable from 250 ms up to 15 s.
- Download the FREE EL-Skyport Software from www.elinchrom.com
SET Config Mode: (to configure included features)
- Switch module OFF.
- Hold test push button and switch TX ON.
- Keep test push button pressed until STATUS LED is ON.
Check also EL-Skyport PC / MAC software 3.0 for changing Transmitter Speed setting.
The EL-Skyport Transmitter triggers the EL-Skyport Receiver modules in the following modes:
- Off Unit is OFF, no function.
- Select Group - Group (1 to 4).
Set switch to Group. and select Group 1 to 4.
All corresponding EL-Skyport Receivers with the same selected Group (1 to 4) are triggered. - ALL Mode switch is set to ALL.
All corresponding EL-Skyport Receivers are triggered regardless of which Group is selected.
Integrated Hot-Shoe SYNC 2.5 mm Socket
Use the included Sync cable to connect the integrated 2.5 mm Mono Jack socket with the camera or lens PC socket directly.
EL-Skyport Transmitter SPEED RX Features
Compatible with Ranger RX, Style RX, Digital RX, BXRi 250 / 500, Ranger Quadra AS!
If the EL-Skyport Transmitter SPEED is used with the EL-Skyport Transceiver RX, BXRi 250 / 500 or the Ranger Quadra AS, the following EXTRA
features are available:
Depending upon which Group is selected, the following RX-unit settings can be modified:
- Flash power increase in 1/10 f-stops.
press push button + to increase the power of selected Group of (or ALL) RX-units in 1/10 f-stops. - Flash power decrease in 1/10 f-stops.
press push button - to reduce the power of selected Group of (or ALL) RX-units in 1/10 f-stops. - Modelling lamp toggle.
press and hold the push button + , 2 seconds or longer before releasing, to toggle modelling lamp of the selected Group of (or ALL) RX-units.

Power save mode timer:
- After not using the Transmitter for 30 minutes the Power Save mode is active. To reactivate the Transmitter, press the TEST push button.
- The Power Save mode timer can be configured with the EL-Skyport PC / MAC software v 3.0 and higher.
Status LED:
- LED flashes every 4 seconds one time in "Standard" mode and two times in "Speed" mode.
- LED intensity correspond to the battery status - if off or very low => exchange the battery.
- LED is OFF if the Transmitter is switched OFF or in Power Save mode.
Reset to manufacturer default setting:
- Switch ON.
- Press test button for min 10 seconds.
EL-Skyport Modules
EL-Skyport Universal SPEED (NEW) / Universal (previous version)
- Universal Receiver for all makes of Flash with a SYNC socket, conforming to Sync norms!
EL-Skyport Transceiver RX
- This Transceiver is only for Elinchrom RX units. The module operates all RX features with the EL-Skyport software and triggers the flash.
EL-Skyport USB RX SPEED (NEW) / USB RX (previous version)
- To operate RX flash units via computer the USB module should be used in conjunction with the EL-Skyport Transceiver RX and the EL-Skyport software.
Universal Speed & Universal
Transceiver RX 19353

USB RX Speed & USB RX
Troubleshooting
Should an error occur, first check the following points:
| Having this problem? Check the following points: | |
| No flash unit can be triggered with the Transmitter Mode "All" is selected | Check if the Transmitter is switched ON. Check battery polarity. Check if the Receiver module is connected correctly to the unit. Check if the frequency selector switch is set to the same channel. Check if Transmitter is in the same trigger mode Speed or Standard. |
| Some units do not fire when triggered with the Transmitter Mode "Grp" is selected | Check if the Channel selector switch is set to the same Group. Reduce distance to any "not working" unit. Check if Transmitter is in the same trigger mode Speed / Standard. |
| TEST flash works, but the camera will not trigger flash unit | Check hot-shoe ftting. Connect the 2.5 mm to PC SYNC cable instead of hot-shoe connection. |
| Limited Distance range | Reposition the units. Increase the distance to walls and ceilings. Position the antenna of Transmitter and Receiver. Use an RX extension cable to reduce the distance between the modules. |
CE Statements

This device has been tested and found to comply with the requirements set up in the council directive on the approximation of the law of member states relating to EMC Directive 89/336/EEC, Low Voltage Directive 73/23/EEC and R&TTE Directive 99/5/EC
FCC Compliance and Advisory Statement
This device complies with Part 15 of the FCC rules. Operation is subject of the following two conditions: 1. this device may not cause harmful interference, and 2. this device must accept any interference received, including interferences that may cause undesired operation.
The equipment has been certified to comply with the limits for a Class B computing device pursuant to Part 15 of the FCC Rules. These limits are designed to provide reasonable protection against harmful interference in a residential installation. This equipment generates, uses, and can radiate radio frequency energy and, if not installed or used in accordance with the instructions, may cause harmful interference to radio communications. However, there is no guarantee that interference will not occur in a particular installation. If this equipment does cause harmful interference to radio or television reception, which can be determined by switching the equipment off and on. The user can try to correct the interference by the following measures:
- Reorient or relocate the receiving antenna
- Increase the separation between the equipment and receiver
- Connect the equipment to an outlet on a circuit different from that to which the receiver is connected.
- Consult the dealer or an experienced radio/TV technician for help, changes or modification not expressly approved by the party responsible for compliance could avoid the user's authority to operate the equipment.
Disposal and recycling

This device has been manufactured to the highest possible degree from materials which can be recycled or disposed of in a manner that is not environmentally damaging. The device may be taken back after use to be recycled, provided that it is returned in a condition that is the result of normal use. Any components not reclaimed will be disposed of in an environmentally acceptable manner.
If you have any question on disposal, please contact your local office or your local ELINCHROM agent (check our website for a list of all ELINCRHOM agents worldwide).
Einleitung 24
This equipment has been tested and found to comply with the limits for a class B digital device, pursuant to Part 15 of the FCC Rules and meets all requirements of the Canadian Interference-Causing Equipement Regulations. These limits are designed to provide reasonable protection against harmful interference in a residential installation. This equipment generates, uses, and can radiate radio frequency energy and, if not installed and used in accordance with the instruction manual, may cause harmful interference to radio communications. However, there is no guarantee that interference will not occur in a particular installation. If this equipment does not cause harmful interferences to radio or television reception, which can be determined by turning the equipment off and on, the user is encouraged to correct the interferences by one or more of the following measures:
- Reorient or relocate the receiving antenna.
- Increase the separation between the equipement and receiver.
- Connect the equipment into an outlet on a circuit different from that to which the receiver is connected.
- Consult the dealer or an experienced radio/TV technician for help.
Elinchrom LTD is not responsible for any radio or television interference caused by unauthorised modifications of this equipment or the substitution or attachment of connecting cables and equipment other than those specified by Elinchrom LTD. The correction of interference caused by such unauthorised modification, substitution or attachment will be the responsibility of the user.
EL-Skyport Transceiver RX
Transceiver RX 19353

USB RX Speed & USB RX
Fehlerbehandlung
Transceiver RX 19353

USB RX Speed & USB RX
Dépannage
Transceiver RX 19353

USB RX Speed & USB RX
EL-Skyport Transmitter Speed //19350
EL- Skyport Transceiver RX 19353
Transceiver RX 19353

USB RX Speed & USB RX
Soluzione guasti
EL-Skyport Transmitter Speed Instruction for user 122-127
TapaHTn 128-129
Ybaxaembl foTorpaΦ!
Cnacn6o 3a nokyriky komnaKTHO rHa6opa cTyuHoro CBeTa D-Lite RX 2/4.
IpoDyKzIg Elinchrom npOn3BODITcC npImeHHeM Hn6OJIe nepeoDBx TexHOJor. TuaTeIbHO OTo6paHHbIe KOMNoHEtbl caMOro BbICOKOro KaueCTBa IpoUIM MHOrOuNCleHHbIe NcblTaHnI prN pOn3BOdCTBe n NocIe erO 3aBepSeHnI. Mbl rapaTnpUe, YTO daHHe o6OpyOBaHne HaJeXHO pOcLynKIT Bam MHOrO JeT. BCE kAmepbl c lamPamN-BCbIshkAm D-Lite RX 2/4 pa3pa60TaHbl dJa NcNoB3OBaHnB CStyInnHa yLIuCe npOpeCCNOHaNbHbIMn fOToRaPamN. CLeDyI npEcdTaBHeHnHKe INHΦopMaun, Bbl ObecNeHTe CObIIOHeHne rapaHTm, npEOTBpATnTE nTeHUnAIBhble IOBpeKdEHnO6OpyOBaHnN yBelenuHTe cPoK IcNoB3OBaHnRA BaWeJ fOToKaMepbI.
KomnaKTHaB BCnblska D-Lite RX 2/4
KaueCTBO CBeta N ee NCKIIOHTeBHa 3ΦΦeKTHBHOCTb AIBJIAOTcpe3yIbTaTOM DOJIINX ICCJEoBAHNI, CNEOBAHNI JecTKIM Tpe6oBaHnM, 60rAToR OOnbTA KOMNaHNI ELINCHROM B pON3BOIDCTBe OCBETeBHBIX TOBAPOB DnI CTUdNHO IcNOB3OBAHnN IN PIPMeHeHn HOBeIuXx TexHOJOrN B DaHHoCfpepe.
BceuIeNoYbIaB HeoTbeMJIeMbIM KOMnoHeHToM accOpTImMeHTa BCnbIeK ELINCHROM, D-Lite RX 2/4 IMeIoT TpaDnIOHHb BHeuHm BvN i FyHKuN IpOdyKuN ELINCHROM.
IoTBeHdHe nce COOTBeTCTBnI npaBnIam AmePKaHcKo IocyapCTBeHHo KOMnCCn N O KOMMynKaunm KJIacc B
Данhoe оборуданhoe Истыно I пизнио COOTBETCTBYUOUM CTahdapTam UФрOBOrO obopuydoHnna Klacca B,В cootBETCTBnC cactbIO 15 Hopm AmeprkaHcko rocydapCTBeHHo KOMCCN IO KOMMyHkaUmaM, IN COOTBETCTByET BCem Tpe6obAHnmaK KaHaDcKnx HOpM NO obopydoBaHIO, Bbl3bBAIOUeMy NOMEx.Даньie HOpMbI pa3pa60TaHb IЯ for oecneueHnna 3aunTbI npOTNB BpeHORO BO3deICTBnI prycaHOBke TaKOrO obopydoBaHnB RAknbIX paiohax.Данhoe obopydoBaHne npOn3BOIDIT,Notpe6JAEr N MOKeT n3nyaTb 3HeprnIO paDNON3JUeHnI, IN eCIn OHO He yCTaHABINBaETCn I pImeHReTCB COOTBETCTBn C nHCTpyKUnei, DAHNoe obopydoBaHne moKET OKa3bIBaTb BpeHoe BO3deICTBnE Ha cpeCTBa paDNOCBzR.N.ODnako, HeJIb3a DaTb rapaHTIO TORO, YTO pIn yCTaHOBKe B KaKDom KOHKPeTHOM Clyuae nomex He npOn3oJTe. EcnI daHHO obopydoBaHneЯBIAETcNtOCHNKOMnomex pIn npNeMe paDN- N TeJIeBN3IOHNO CnHana, YTO MoXHo ONpeJeNTb PocpeCTBOM erO BKlIOUeHnA-BbIKIOUeHnA, NOnb3OBaTeJIb MOKeT yCTpaHNTb NOMEX nCleNyUOIM 6ba3om:
- nepeHa npabntb nIIN I3MeHnTb paCNoIOXKeHne npHHMaIOUeJ aHTHeHbl.
- yBénluHTb paCtOHaHne MEXdy o6OpyDobAHem I npHeMHNKOM CnHaJa.
- NOДКЛIOЧИТь оборудоване И примнк. К розтkaM, BKПОчЕНьIMВ pa3HBie KOHTypa.
- 06paTnTbcra 3a nOmoIbIO K dInIepy IIN cneuaIaNCTy B oBnaCTn paIIO- N TeNeTeXHnK.
Elinchrom LTD He Hecet OTBETCTBEHHOCTn 3a NOMex paIIO- I TeJIeBN3IOHORO CnIHana, BbI3BaHHbIe HecAHKUOHINPOBAHbIM N3MeHENIA MOpUPDobAHNIG NII 3AmEHON IIIO6abHeHem CoEDINHAUIX Ka6ene I O6OpDobAHNtAKIM, KOToPoe He npEdyCMOTpeHO KOMNaHne Elinchrom LTD. IcnpabLeHne NOMEX, Bbl3BaHHbIX TAKIM HecAHKUOHINPOBAHbIM N3MeHENEM, 3AmEHON IIIN DO6abJIeHNEM, YBJIaTcR OTBETCTBEHHOCTbIO NOIb3OBATeJI.
Декларачnia O COOTBETCTBHN
Pycckn
DaHHoe yctpoictBO pa3pa6oTaHO B COOTBeTCTBnC cactbIO 15 HopM AmepnKaHcKo rOcyapCTBeHHoI KOMnCCN NO KOMMyHnKaUm. Ero nCNoJIb3OBaHne NOnuHReTcA DBym CNeDyUOUM YCJOBnM:
1.ДанhoeуctpoIcTBOMOKeTHeBbI3bIBaTbBpeHOroBO3dEChTBnJ.
2.Данhoe yctpoiCTBOdoJxHO BOCpHIMMaTb IIO6oe BO3dEICTBNE,B TOM YIcNe BO3dEICTBNE,KOTOpoe MoKet Bbl3BaTb HnpaBnIbHyIO pa6Ory yCTpoiCTBa.
Mmnybchblc Bcblskn N JAmnbI NHJLOTHO CBeTa
Bo Bpempa60TbIMnYbChbE BCbIuKIN naMbI NIOTHORO CBeta HArpeBaIOTc!
He npikacaiTecb K IMnyIbCHOB BCnblke Do TOrO, KaK annapaT OCTbHET N 6yDet OTKnIOueH OT cTeN (MHN 30 MIn).
He npimehnTe Iamny-BCnbIky Ha KopoTknx pacctoHnx (Mehee 1 M) ot YelOBeka n He cmoTpnte npraMo Ha Hee!
-Держпглмну-Вспьшky Ha paCCTOHHMIMHmym 1 M OT IeRKOBCIamaMeHryIOxxCr MaTePnaIOB.
Co6IIOdaIte dIcTaHcIIO C dpYrIM pa6OtaIOUIMn npN6OpAMn.
TpaHcnpTnpOBka
- TpaHcnpTpyNe Ha6Op CTyDmHOrO CBeta OCTopoXHo, NcNoIb3yIe DnA 3TNx CJIeN opuHaJIbHyU OyakOBky IIN COOTBeTCTByIOUyIO yNAKOBYdAaUNTBtO YdapOB IN TpCKN.
- TpaHCnOpTnpyIe NOJIHOCTbIO B pa3pJxKeHHOM COCTOAHIN. IIOJOxKdTe MHNmym 30 MNHyT NocJe OTKJIIOUeHNNOT cETn nepeD yNAKOBkO IN TpaHCnOpTnpOBkoN.
- He donnyckaite naednna habopa ctydHoro cbeta (BO n36exaHne nobpeckdeHn mnybchoB CbnbkiN).
Ka6eIb nHTaHn
Дянаджно 6e3oNaChNo pa6Otbl nCnoIb3yIte Ka6eIb, npJnaIaIoUmIcK DaHOMy npOdykT.
- Ka6eJIb DoJxKeH ImeTb cepTnΦnKaTbI HAR nII N VDE. 3HaK HAR nII N VDE nOABNTcra Ha BHeUHeNIOBepXHOCTn KOpnyca.
- Ka6eNbHa apMaTpya DOJxHa Bbl6npaTbCBA COOTBeTCTBm C HOMHaJIbHbIM HaPRAKeHEm BaUeRo H6opa CTyDnHOro CBeta.
- HNKOrda He nCNoIb3yIte yHnBepcAIBhBI aDAnTep Ira noKluOeHn6oJee Ondoro Na6opa cTuynHoro CBeta K OndHO p03eTke.

- CnCTeMbI BCnblwek XpaHrT 3JIeKTpNueckyIO 3HeprnIO B KOHdeHcTopaX NOB BbICOKM HnprjKeHem.
He OTKpbBaIte n He pa36paIte IaMnbI paIb BaIe 6eONaChocTn.
ToIbKO yIIOJIHOMOeHHBm INHXeHep nO peMOHTy IN TexHHeCKOMy 06CnyKnBaHnO DoJIKeH OTKpbIBaTb NII NbITaTcR OTPeMOHTnpOBaTb BCnblIKy. - HaKoJIteIbHbIe KOHDeHcATOpbl C BHyTpEHHIMN DepeKtAmM OryT B3OpBaTbcr npn IcNoIb3OBAHm BCbIuKn, NO 3ToI npUHe HIKOrda He BKIOuayTe JAMny, ecIn o6HApyKnB H HeHcnpaBHOCTb.
He noikouaTe IMnybChyIO BCblkky K cETn nITAHN 6e3 yCTaHOBJIeHNO JAMNBI IINTHO CBeTa NIN IMnybCHOBcblIKN NO npuHHe BbcOKOHO HapJxKHe Ha KOHTAKTx! OnaCHO dIg Xn3Hn!
CleyuOuIe 6a3OBbIe fYHKUIN IerKoOCTyHbI N COBnaAIO T C TaKIMN B npEiueCTByIOxM OdeJX BCblwek Elinchrom.
- KHOPIKINBKLIOUeHnN BbIKLIOUeHnBCblIiKIn
- Khonkni 3akpenneHnra, prop / min / max / off
- Khonka BkIIOueHn IN BbIKIOueHn FOTo3JIeMeHTa
- Khonka BkIIOueHn I BbIKIOueHn CInHa n3aprKn
- Khonka TectypobAHNA BCbIiKIN
3.5-MM pa3bem cHxpoHn3aUIN
HOBbl EL-Skyport Wireless Triggering & Remote. PrimeeHne: dans pa60bI BCTpoEHbI PepaTnK Tpe6yeT onuHaBbI EL-Skyport Transmitter.
DOnOpHnTeIbHbIe paCUnpeHHbIe npOprpaMMnpyEmble Bo3MOxKHOCTY
Bce HObIe BO3MOxHOCn I cyHKcIIN YBIAOTc HAcTpaNBAeMbIM. IoxaIyIcTa, npOHTaIte BHNMaTeJIbHO 06nx HAcTpoIke.
Modelling lamp features & setup
Modelling lamps and fuses for 110V & 230V
CBeToNDnHaNnHnKaIaIy:
3JemeHT CBeToDIOda BKJIIOUeH: AKTINBbI JFOTo3JeMeH. 3JemeHT CBeToDIOda BbIKJIIOUeH: HeAKTINBbI JFOTo3JeMeH.
EcnnΦOTOnaIeMeHT aKTINBHyI, DaTcHk 3aTpyCKaET IMNpyLbCHyIO BCnblIKy.
2. Pexim peadBapntelbHOB BCbIshKn «Eye-Cell
(ЗTOЯВЯETСАИШьakTиBaциЕ,нО He NaCTpoIKOДЯ BыПОЛHeHЯ NaCTpoIKN CMOTpNTe Ⅲar 3)
HaKMTe u yedeXnBaTe KNONkY 3IeMeHtA npMepHO 1 cekyHny; Ha dncnnee BbcBceuNbaetc CBeToIOndna HNDkaCua COCTOHN KaMepbl.
CBeToIIOHnA INDnKaUra: CBeToIIOHnA BCbIuKa B MaIbIX INTEpBaJax; pexIM npedBapnteHOB BCbIuKn DaTUnKa aKTtBEH. CBeToIIOHbI 3JeMeHT BblKJIIOUeH; pexIM npedBapnteHOB BCbIuKn DaTUnKa HeaKTtBEH.
Функця:ВаKTиBHom pexime habop nponyckaet 6 BCnblwek npOTnBOeCTByIOxN XΦΦeKTy KpaChbix rla3 INCHXPOnH3npyeTc/ 3anyckaetc TOnbKO C NOMOuIIOcJIeHNe OCHOBHO BCnblIKN. 3To 3ΦΦeKTHBHO,ecIN PpeDbapHTeJbHbIe BCblIaIKKaMepbl He MOrT 6bITb OTKIIIOueHbl.
3. ABTomatnuecka NaCTpOJa npeBapntbHOb BCnbIshKn «Eye-Cell»"c.0"
HaKMTe u ydepXnBaTe KONky 3IeMeHTa np6n3ntbH0 4 cekyHdbI, noka Ha dncnlee He noBNTcra "c.X" - HndNKATop aBtOMaTneCKo HAcTPOkN. ("X" YBJIeTCa KOINueCTBOM ppeBapNTeJbHbIX BCNbIiEk, BKIOUaOCHOBHyO BCnbIiSKy, ot 1 do 7)
BcTpoeHHbI TpaHcNbep EL- Skyport dIy 6ecnpoBODHO 3aynska I yCTaHOBKn
EL-Skyport BkI / BbIKI, rpynnn a KaHaJ yactoTbI MOryT 6bITb aanTnpObaHbI NOI daHHoro nolb3OBaTeJI.
EL-Skyport BкЛ / ВыIKЛ
HaxMNTe KNONy BCnblkN OJHOBpeMeHHO BBePx N Bn3 dIa BXoJa B MeHIO "YCTaHOBka IOnONHITbHbIX yHKu"
HacrpoKn n3MeHeHn nocLe HaKaTn KHOIOK BCbIuKn BBepx N BHN3
r.0 EL- Skyport BbIKJ / off
r.1 EL- Skyport BKJ / on
r.2 Pexkim ckopoctn EL-Skyport (doctyneH toIbko BmecTe c EL-Skyport Speed / ECO) Iocne
3-4 cekyHn HAcTpoKn ABToMaTHueCKn COxpaHraIOTc, a Ha dncJIee NOABJrEe Tc HAcTpoKb BCNbIIuKn.

Групnobbie国有资产
HaxMnTe OndHOBpeMeHHO KhoIKN BCbIbIK N BBePx I BHN3 IJ BxOJa B MeHIO "YCTaHOBka DOnONHtJIbHbIX YHKcui" ("Advanced Feature Setup"). 3aTeM doynte do G.1 c nOMoUbIO KhoIKN Prop/Free.
DcPnE Bb6op rpynnbI C NOMOuBIO KHOIOK BCNBIUKN BBepx-BHN3
G.1 Group 1 (CTaHd HacTpoKn)
G.2 Group 2
G.3 Group 3
G.4 Group 4
Yepe3 3-4 cekyndbl hactpoiKn 6dyT aBtOMaTnueckn coxpaHebl, a Ha dncnlee 6dyT oTo6paXeHbI hAcTroKKn BCnblIKN.
Hactpoyn qactotbkaHaJa
Haxmnte OndHOBpeMeHHo KONK BcIbIeKn BBepx N BHN3 dIyBXOda B MeHIO "YCTaHOBka DONoJIHITeJIbHbIX yHKu" ("Advanced Feature Setup"). 3aTeM doJnte do F.1 c nOMouIb KO HONK Prop (NcnoJIb3OBaTb TOnkO B Cnyae BO3HKnHOBeHn Iomex B dpyrnx cnCTeMax).
Dncnne CmeHa KaHana C NOMOUBIO HxKaTNA KHOPOK BCbIuKN BBePxA-BH3
F.1 to F.8 BbI6epNTe KaHaJ YacToTbI OT 1-8.

BHHMaHHe: TpaHcMnTtep DoJXKeH NMeTb Te Xe HAcTpOKn, UTO I KaHaJI YacCTOtbl. CTaHdApTHbIe HAcTpOKn YCTaHOBLeHbI Ha 3HaueHm KHaHaJa YacCTOtbl 1.
Yepe3 3-4 cekynbl HaCTpoKn 6ydyT aBToMaTnueckn coxpaHeHbI, a Ha dncnlee 6ydyT OTObpaKeHbI HAcTPOKn BCbluKN.
I3meHeHne MoUcHOCTn 3a HaxKaTne
HaxmTe BMeCTe KhoNkI 已 Bcblska-MoUHOCTb BBepx-BHN3 dJa BxoDa B "PacuHpeHHyIO HaCTpoiKy BO3MOXHOCTe". 3aTeM, nepeiDnTe k i.1, nCNoB3yKhoNkY "Ocbo6OuNTb/IpOdepKaTb".
Ha dncnnee Bb6epnte 3haeHne c nmoUbIO KhoNKn «Bcblka-MoUHocTb» BBepx-BHN3
i.0 +/-1f-stop
i.1 +/- 1/10 (ctaHapTha yCTaHObKa)
i.2 +/- 2/10
i.3 +/- 3/10
i.4 +/- 4/10
i.5 +/- 5/10

Pocne 3 - 4 cekyHn HacTpoN Kn COxpaHrOTc aBtOMaTHueCKn Ha dncnEe BbIBOaTc HAcTOKn MoUHOCTN BCblIKN.
3aMeHa NMnyIbCHOB BCnblkN
Pycckn
EcnHabop He 3aropaetcXOTpeKluOaTeIb ON/OFF noka3bIbAeT, YTO nITaNHe BKNIOueHO, BO3MOxHO, Heo6xoJIMo 3aMeHHTb IMnyIbCHyIO BCblIshky. IMnyIbChIbe BCblIshKc CnyKaT DOJIr Opi yCNOBn HOpMaIbHOro IcNoJIb3OBAHN, ODAKO MHOKeCTBO BCblIseK 3a npOJOIXeTbHOe BpeM MOYr BbI3BaTb NepePpeB 3JeKtpoDOb, UTo BeET K IpexKeBpeMeHHOMy N3HOCU IN, BO3MOxHO, NOIOMKe ININ TpeuINHAM B JAmne IMpyIbCHOBcblIKN
ДяЗamHeIЯMnIbIMNpyMbCHOBcNbUHKN:
- OTKJIIOUHTe OCHOBHO BKIIIOuHaTeJIb
2.ИЗВЛЕКИТЕΚАБЛПИТАНЯ - CHIMITE Ha6op co ⅢTaTbA nIIN NOIOXKITe rOpN3OHTaJIbHO Ha POBHyIO NOBepxHocTB.
Ee heo6xOIMO KpeIKO depKaTb BO BpeMraMeHbl IaMbl IMNylbCHOB CnblIiKN.
4.ДаTe IaMne IMNyIbCHO BcNbIiKu IN LaMne NINOTHO CBeTa OCTbITb Ha HECKoJIbKO MInHyT. OHn MOrY T 6bITb ropAUMN.
5.AkkypaTHO DOCTAHbTe IN COXpAHnte JAmNy NINNOTHO CBeta. - Pn n3BLeuehen IaMnbl NmNylbChO BcNbIuKn Nolb3yITeCb 3aunTHo nepaTko:
A-CnIbHO HaxMHTe Ha IaMny N BbITOJKHNTe ee n3 3aXHMOB
B-Ecnn lamna cIomHa, nCnoJIb3yIe 3aIuTHbIe nepuaTkn. B npOTNBHom clyuae Bbl MoKTe nope3aTbcr!
C-EcnnIaMna cIOMaHa,He npKacaiTecb K MetaJIHnueckm 3JeKtpoam n y6eINTeCb B TOM,yTO IaMna OTKJIIOUeHa OT CeTI NITAHn I He 3apJxKeHa,POJOxDInTE MHNIMyM
30 MnHyT! IJRA TORO, YTO6bI N3BHeUb 3JIeKTPoDbI, INCIOJB3yIte INHCTpyMeHT (PpeMTe) C n3OJaUnei.
- DoctaHbTe HOByU NaMny NMnYbCHoB BCbIuKu. Ppi 3OM Bbl DOJXHbI BocNoJIb3OBaTbCnepaTKo NIn Dpyra 3aunTa n3 pnaCTnKa. KoHTaKT BaUNx naJIbueB CO CTekJIHHO NOBepXHOCTbIO Bbl3OBET NOBLeHne TeMHbIX nIteH Ha NaMne.
- Y6eIITecb B TOM, UTo IaMna pacNoIOXeHa npabInbHo (no ueHTpy), a KOHTaKT
MexaHn3Ma 3aIycka yIepeKNaBaet lamny.
9. OToeHNHte n 3aTe npOBepeIaamny.

YcTpaHHe HEnCnPaBHOCTe
Error Fault Description
PykoBODCTBO noIb30BaTeJIa
Copepkane:
Bo3MOxHocTn 123
UcTaHOBka 6aTapei 123
KOHHeKTop Hot-Shoe 123
EL-Skyport Transmitter SPEED //19350
HCTpykuni No 3KcnlyaTaun :
2.4 TgucnfoboB 6ecnpoBOHbI nycKOBo nepeaTunK Ira BCnbwek
BO3MOXKHOCTN
EL-Skyport Transmitter Speed pa3pa60TaH c nCnoIb3OBAHNem 2.4 Tt CnΦpOBo BeCnpOBoHO
Texholornn.
- CkopocTN cnHxpoHn3aun c kaMepor SLR: peKIM SPEED do 1/250 c, peKIM STANDARD 1/160 - 1/200 c.
- 5 BBi6npaembix pexkma 3anycka, (4 rpynnbl + Bce)
- 8 chaTOTHbIX KaHaJIIOB.
40-pa3pndHoe uHΦpoBaHne.
Дальноctыdo60MВnomeueHINДЯCTaHdapTHOROpexKIMaNdo40M-ДяCKOpocTHoro.
Дальноctыdo120M BHe NOMEueHnIЯдя cTahdapTHOROpexKIMaNdo60M-ДЯCKOPoCTHOrO.
Cpok cnjxkb6b 6aTapen do 6 MecaeB - 6oJee 30000 BCnblweK. - KhoIKN BO3MOXHOCTN RX (YdaJIeHHbIKoHTpoJIb).
- TECTOBARnyCKOBAR KHONKa IN KHONKa BO3MOXKHOCTN.
- BCTpoeHHbIyIyUyWeHHbI KOHHeKTop (cpeHn KoHTaKT).
SYNC-pa3bEm nI pyMoN yIyUweHNo CBzN.
-Два рекима BCnbIbIKN,CTaHdApTHbI N CkOpoCTHOI. - PexkIM "CTaHapT" NOLHOCTbIO COBMeCTm C npEdbIyUcIMN BepCnAIM EL-Skyport.
-ФункцИ SPEED ДocTyнha ДЯ Ranger Quadra AS, BXRi 250 / 500 n D-Lite RX 2/4 n BCexpyrx yctpoIcTB, пи Испльзовани c Universal Speed. - INДикатOP CTatyca ДЯ ПOKa3a peKmua n ypoBHe
3apya 6aTapei EL-Skyport.
- UnyuweHHbK Kopnyc, 6aTapeHbI OTCek n nepeKluOaTeJI.
HObBKOHHeKTopc3aunToOnOT pa3BnHnBaHn.
HOBbIe 3KCTpa-BO3MOxHOCHTn; HAcTpoIte EL-Skyport c nOmoBIO HOBOro IIO EL-Skyport PC/MAC 3.0.
Bac ydNBt ydo6TBO 3Toro npoceccnoHaIbHoro n 3ΦΦeKTHBHO 6ecnpoBOdHO rYCTPOINCTBa.
PpmeHne:3aepkKa cpa6aTbHaHnI npaoee pacCToHHe NOBepKHeBblnHIO n3nyehnO Tpynx 2.4 Tc 3JeKTPoHnro 06opyoBaHnI OtpaxKeHn of noToJka,CTeH, nola, Me6eIi, MetaIIa, DepeBbeB N BnaXHOCTN B Jecy.
Iyue npOn3BODntelbHocTn nepedaouza I npHIMaIOUa aHTeHHbl DOJXHb CB83bBaTbcr HaPryMlyo,6e3 CTen n PpeDMTOB MeKdy HmN.
YctaHOBka 6aTapeN
- OctopoxHo OTKpoIe 6aTapeHbI OTcEK.
- YctaHOBNTe IHTneByIO 6aTapeH, CM. Fig. 1 dIra co6JIIODeHHN NOJARPHOCTN.
- 3akpoIte 6atapeHbI OTeK.
! OCTOPOXHO:
- YDOCTOBepbTeEcB B npaBnIbHOn NpIpaHOCTH / «MnHyc» BBepxy.
- Исторы толков латenteю батею CR2430 3.0 V 19372.
BbTaunTe 6aTapeo,ecn EL-Skyport Transmitter He 6ydt nCnoIb3ObaTbcd oJnroe BpeMa.
HnKOrda He 3aMbkaTe nIoHa 6aTapeN. - Избeraи Te nonаданяnpЯMbix coJIHeuHbIX lyuei nIII TempeaTyp Bblwe 45^ . BaTapeЯ moKeT B3OpBaTbcr!
CoednHeHne c 3aunToJ OT pa3BnHnuBaHHa
HOBBI KOHNKTOP C 3aIHTOJ OT pa3BUNHUNBAHIN N KOHTAKTOM CNHXPOHN3aUIN pa3pa60TaH DnNCIOJIb3OBAHIN C UINΦpOBbIMN aHaIIOROBbIMN KAMEPAIM C MaKCMaJIbHBIM BByOXIDbIM CNHXPOHN3IPYIOUIN HAnPjaKeHEm 3 B (KOHTAKT IMeET NOIOC «ПИOC»).
IHctpyKuNn no 3KcPnyaTaunn
Fig. 1
BbIDBnKHOJIoTOK 6aTapeN
Batape (19372) «MnHyc» CBepxv
EL-Skyport Transceiver RX
- ΘTOT npneonepeaTnK nOxDnT toBko dIy BCnbIeK Elinchrom RX. Moynb noDepxnaeT BCE BO3MOXHocTn RX c IIO EL-Skyport n 3anyckaet BCnbIwky.
EL-Skyport USB RX SPEED (HOBbl) / USB RX (npebdyuzaa Bepcnna)
- Дя pa60ыс BCпьшкам RX chepe3 komьютep 6bl pa3pa60han USB-moуль - on
- РеднаЗнейдя COBmecTHOrO ИсользOBаня c EL-Skyport Transceiver RX и ПО EL-Skyport.
Universal Speed & Universal
Transceiver RX 19353

USB RX Speed & USB RX
BbIaBHeHHeNCpPaBHOCTe
EcnB03HnkaeT Own6Ka, B nepByIO oupepeb o6paNTte BHMaHHe Ha cIeDyUOJIne MOMeHTbl:
This ELINCHROM product will be repaired free of charge by the vending agent if during a period of 24 months from date of purchase its working order is impaired through a manufacturing or material defect. The faulty product should be immediately sent to the authorized dealer or ELINCHROM agent. This guarantee is not valid for equipment which has been misused, dismantled, modified or repaired by persons not belonging to the ELINCHROM distribution network. It does not cover flash tubes, lamps and the normal ageing of capacitors. No responsibilities can be accepted for damage resulting from unsatisfactory operation of the equipment, such as wasted film or other expenses.
GARANTIE
Deutsch
Please ,register" your Elinchrom product online, under www.elinchrom.com >Support > Login > Product Registration
In case you cannot register your Elinchrom unit via internet, please fill in the Guarantee card and post it to Elinchrom LTD
Please return this registratioin card directly to
Your full name and address
Name und Addresse