Merkur 20020112 - Heating Sonnenkönig - Free user manual and instructions
Find the device manual for free Merkur 20020112 Sonnenkönig in PDF.
Frequently Asked Questions - Merkur 20020112 Sonnenkönig
User questions about Merkur 20020112 Sonnenkönig
0 question about this device. Answer the ones you know or ask your own.
Ask a new question about this device
Download the instructions for your Heating in PDF format for free! Find your manual Merkur 20020112 - Sonnenkönig and take your electronic device back in hand. On this page are published all the documents necessary for the use of your device. Merkur 20020112 by Sonnenkönig.
USER MANUAL Merkur 20020112 Sonnenkönig
natural_image
Top-down schematic of a rectangular device with internal grid structure and two curved handles (no text or symbols)natural_image
Top-down schematic of a rectangular device with internal grid pattern and two curved handles (no text or symbols)Heizstrahler
natural_image
Line drawing of four identical 3D corner brackets with floral patterns on top (no text or symbols)natural_image
Two identical mechanical components with flanged ends, shown in simple line drawing style (no text or symbols)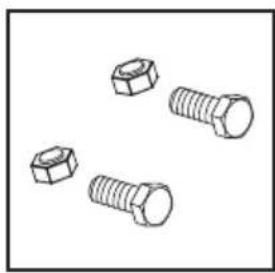
natural_image
Illustration of three different types of bolts (no text or symbols present)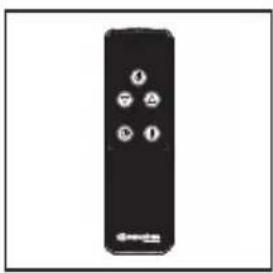
natural_image
Black remote control with four buttons (no text or symbols visible)natural_image
Technical line drawing of a mechanical bracket assembly with mounting holes and a gear mechanism (no text or symbols)natural_image
Simple line drawing of a wire coil with a cross symbol, no text or labels present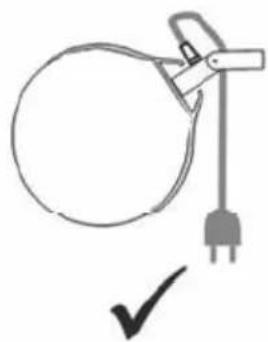
natural_image
Simple line drawing of a circular object with a vertical rod and a plug, no text or symbols present.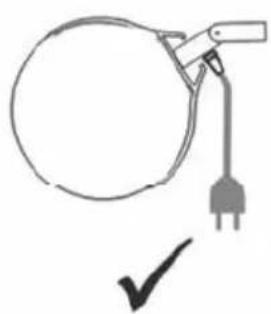
natural_image
Simple line drawing of a circular object with a plug and a checkmark below (no text or symbols)
text_image
Min.0.5M Min.1.8M 30° 45° Min.0.5M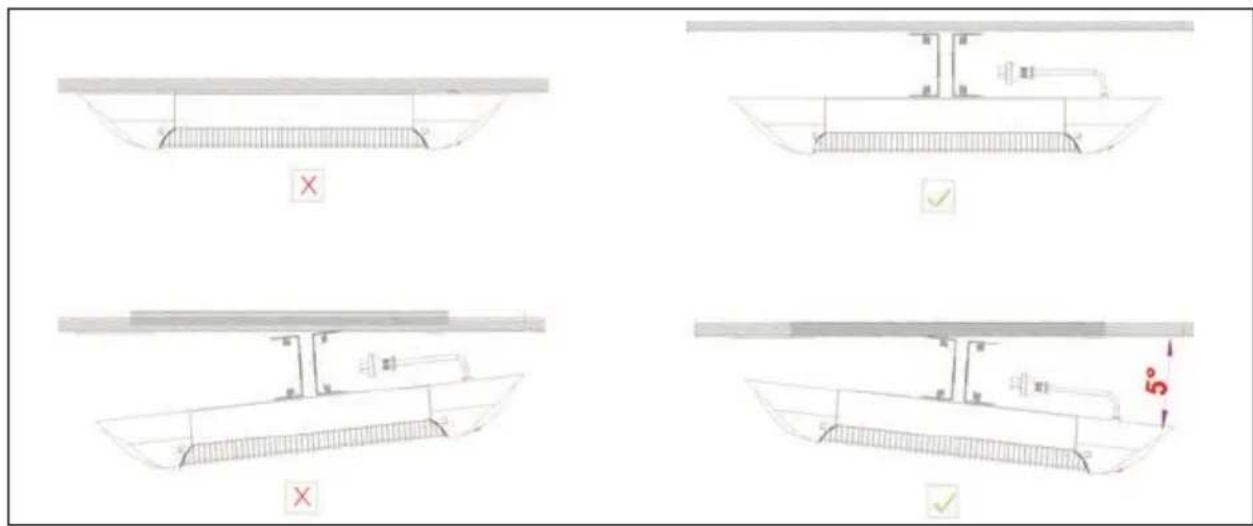
text_image
Technical diagram showing four views of a boat with crosshair indicators and dimension annotations including 5° angle and checkmark.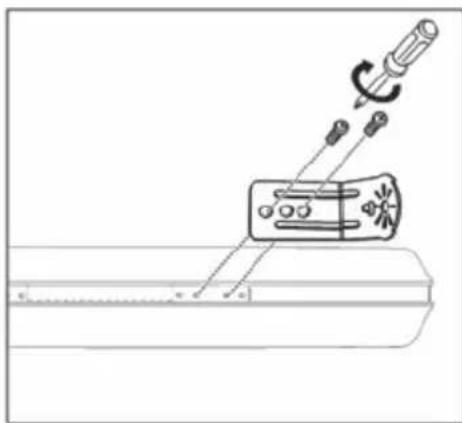
natural_image
Technical line drawing of a mechanical assembly with tool and component (no text or symbols)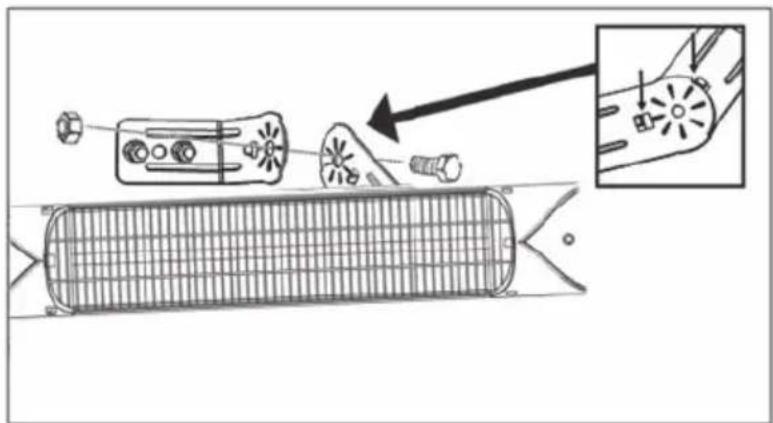
text_image
Technical diagram showing a mechanical assembly with labeled components and an inset detail view of a component.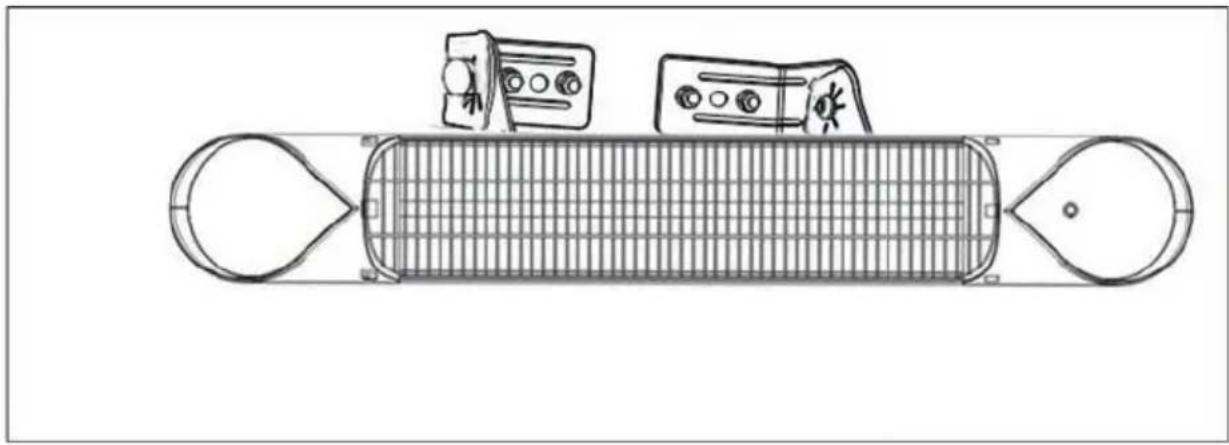
natural_image
Top-down line drawing of a rectangular device with internal grid and two labeled components (no text or symbols)text_image
Warning symbol showing a hand holding a cylindrical object with steam rising, indicating hazard or caution.Sonnenkönig of Switzerland
Olensbachstrasse 9-15
CH-9631 Ulisbach
Tel. Int. +41 58 611 60 00
Tel. Nat. 0848870850
www.sonnenkoenig.ch
Firma
Sonnenkönig of Switzerland
Festnetz 14 Cent/Minute
natural_image
Top-down schematic of a rectangular structure with internal grid pattern and two curved ends (no text or symbols)natural_image
Top-down schematic of a rectangular device with internal grid pattern and two curved handles (no text or symbols)Chauffage

natural_image
Line drawing of four identical corner brackets with floral patterns on top (no text or symbols)natural_image
Two identical 3D-rendered mechanical parts with no text or symbols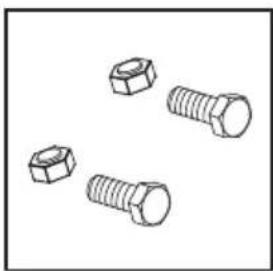
natural_image
Illustration of three hexagonal nuts (no text or symbols)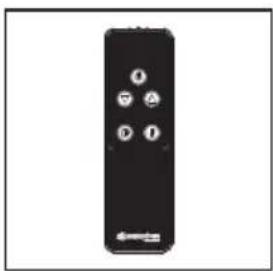
natural_image
Black remote control with four buttons (no text or symbols visible)natural_image
Technical line drawing of a mechanical bracket assembly with mounting holes and a gear mechanism (no text or symbols)natural_image
Simple line drawing of a wire coil with a cross mark, no text or symbols present
natural_image
Simple line drawing of a circular object with a vertical rod and a plug, no text or symbols present
natural_image
Simple line drawing of a circular object with a plug and a checkmark below (no text or symbols)FR

text_image
Min.0.5M Min.1.8M 30° 45° Min.0.5M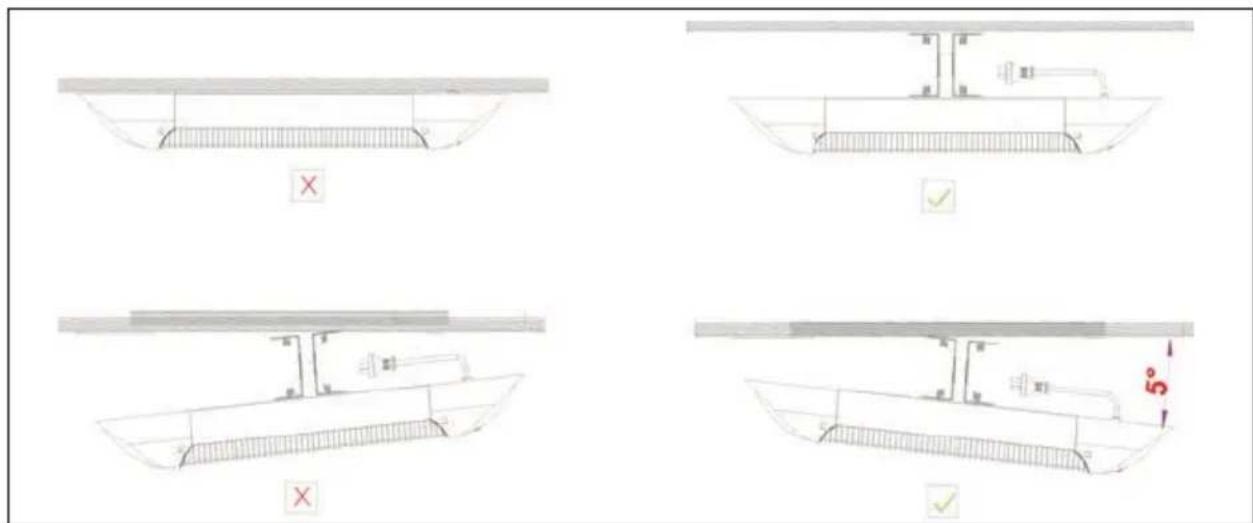
text_image
Technical diagram showing four different boat loading configurations with checkmark indicators and dimension annotations.
text_image
Technical diagram showing assembly steps of a motor or fan device with labeled components and directional arrows indicating motion.
natural_image
Top-down line drawing of a rectangular device with internal grid and two labeled components (no text or symbols)text_image
Warning symbol showing a hand holding a test tube with steam rising, indicating hazard or caution.Modifications techniques
Sonnenkönig of Switzerland
Olensbachstrasse 9-15
CH-9631 Ulisbach
Tel. Int. +41 58 611 60 00
Tel. Nat. 0848870850
www.sonnenkoenig.ch
Maison
Sonnenkönig of Switzerland
natural_image
Top-down schematic of a rectangular structure with internal grid pattern and two curved ends (no text or symbols)natural_image
Top-down schematic of a rectangular device with internal grid pattern and two curved handles (no text or symbols)Stufa
natural_image
Illustration of four identical L-shaped metal brackets with floral patterns on top (no text or symbols)natural_image
Two identical mechanical components with flanged ends, shown in isometric view (no text or symbols)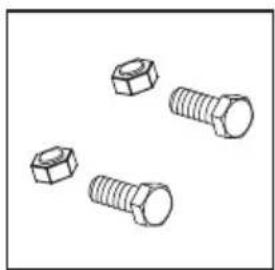
natural_image
Illustration of three different types of bolts (no text or symbols present)
natural_image
Black remote control device with four buttons (no text or symbols visible)Vite zigrinata (2x) TelecomandoViti (2x)
3. Montaggio
natural_image
Technical line drawing of a mechanical bracket assembly with mounting holes and a gear-like component (no text or symbols)text_image
Diagram showing three different cable or wire connection configurations with cross and checkmark indicatorsIT

text_image
Min.0.5M Min.1.8M 30° 45° Min.0.5M
text_image
Technical diagram showing four different boat loading configurations with checkmark indicators and dimension annotations.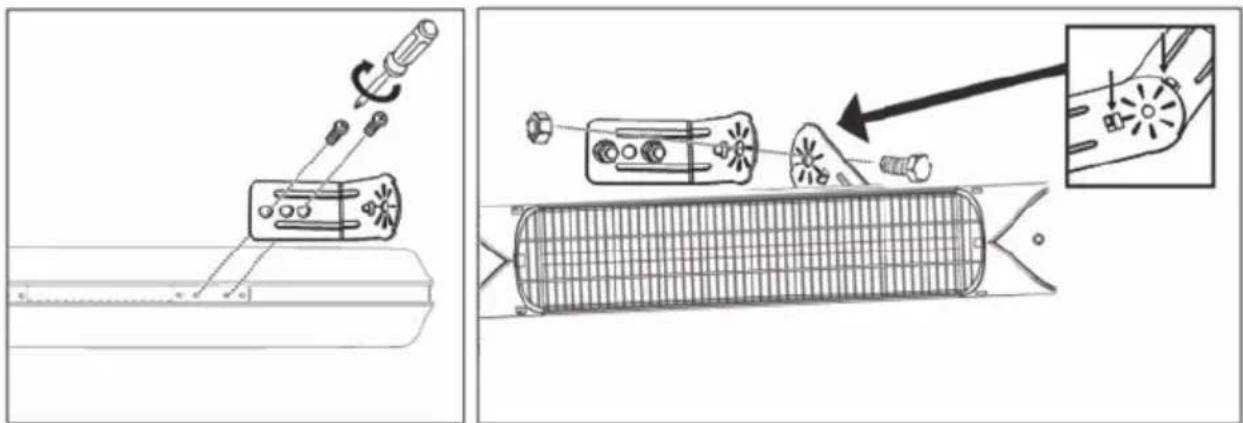
natural_image
Technical illustration showing mechanical assembly and component disassembly (no text or symbols)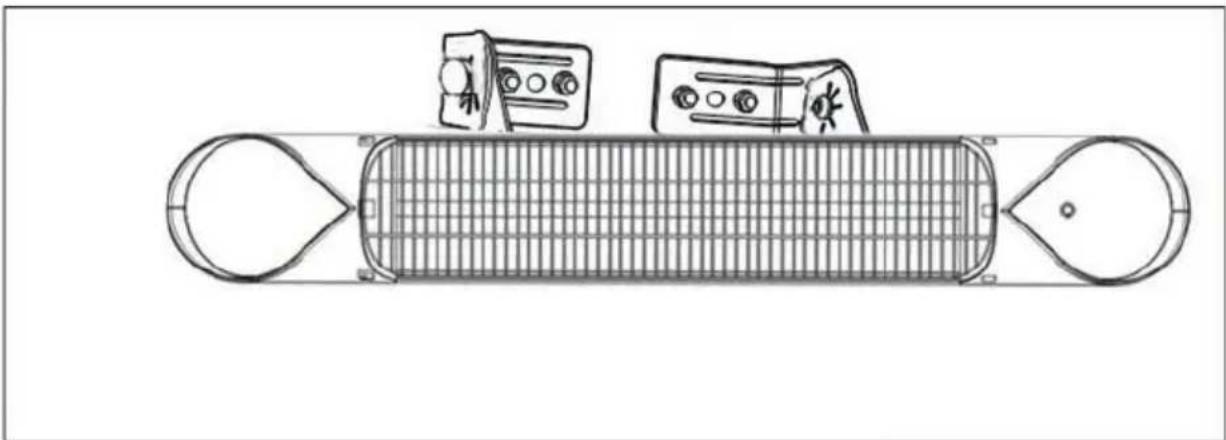
natural_image
Top-down line drawing of a rectangular device with internal grid and two labeled components (no text or symbols)text_image
Warning symbol showing a hand holding a cylindrical object with a crossed-out X mark, indicating thermal hazard or stress.Sonnenkönig of Switzerland
Olensbachstrasse 9-15
CH-9631 Ulisbach
Tel. Int. +41 58 611 60 00
Tel. Nat. 0848870850
www.sonnenkoenig.ch
Ditta
Sonnenkönig of Switzerland
natural_image
Top-down schematic of a rectangular structure with internal grid pattern and two curved ends (no text or symbols)This product is only suitable for well insulated spaces or occasional use.
EN
INDEX
- Safety instructions.... 45
- Content of packing.... 46
- Installation 47
- Operation ....51
- Troubleshooting....51
- Cleaning and maintenance 52
- Warranty / Disposal / Technical change.... 53
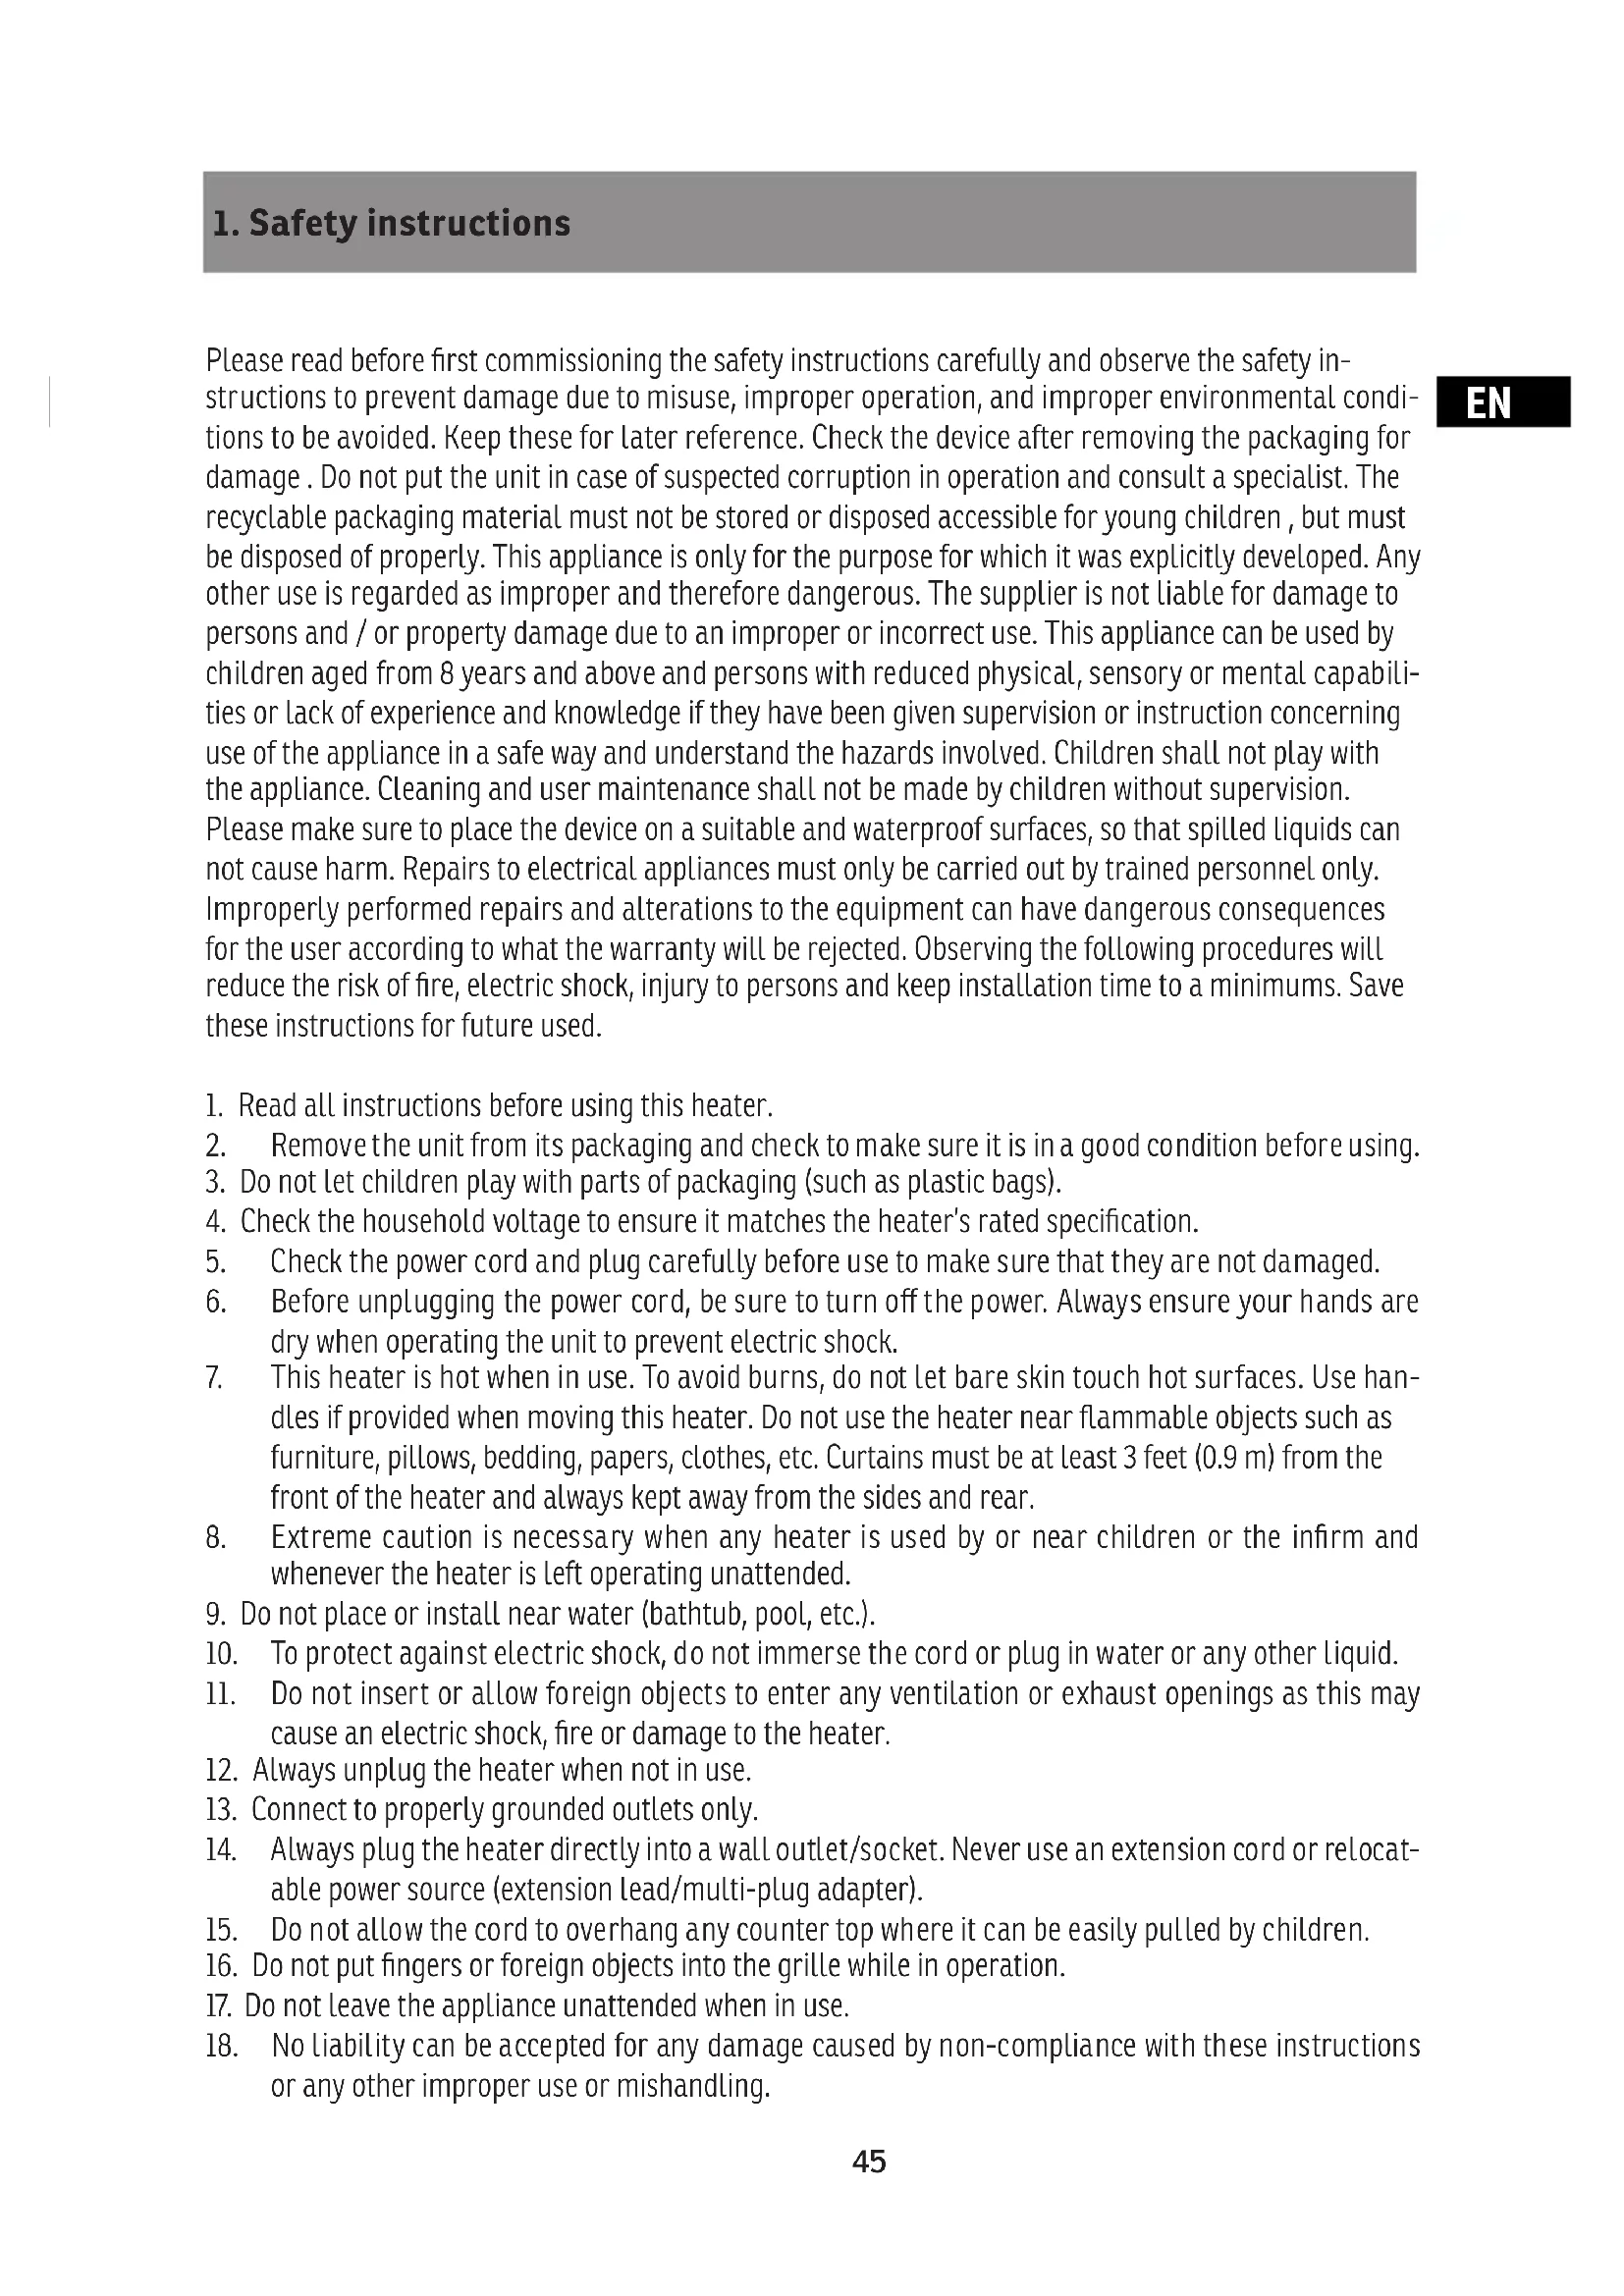
1. Safety instructions
Please read before first commissioning the safety instructions carefully and observe the safety instructions to prevent damage due to misuse, improper operation, and improper environmental conditions to be avoided. Keep these for later reference. Check the device after removing the packaging for damage. Do not put the unit in case of suspected corruption in operation and consult a specialist. The recyclable packaging material must not be stored or disposed accessible for young children, but must be disposed of properly. This appliance is only for the purpose for which it was explicitly developed. Any other use is regarded as improper and therefore dangerous. The supplier is not liable for damage to persons and / or property damage due to an improper or incorrect use. This appliance can be used by children aged from 8 years and above and persons with reduced physical, sensory or mental capabilities or lack of experience and knowledge if they have been given supervision or instruction concerning use of the appliance in a safe way and understand the hazards involved. Children shall not play with the appliance. Cleaning and user maintenance shall not be made by children without supervision. Please make sure to place the device on a suitable and waterproof surfaces, so that spilled liquids can not cause harm. Repairs to electrical appliances must only be carried out by trained personnel only. Improperly performed repairs and alterations to the equipment can have dangerous consequences for the user according to what the warranty will be rejected. Observing the following procedures will reduce the risk of fire, electric shock, injury to persons and keep installation time to a minimums. Save these instructions for future used.
- Read all instructions before using this heater.
- Remove the unit from its packaging and check to make sure it is in a good condition before using.
- Do not let children play with parts of packaging (such as plastic bags).
- Check the household voltage to ensure it matches the heater's rated specification.
- Check the power cord and plug carefully before use to make sure that they are not damaged.
- Before unplugging the power cord, be sure to turn off the power. Always ensure your hands are dry when operating the unit to prevent electric shock.
- This heater is hot when in use. To avoid burns, do not let bare skin touch hot surfaces. Use handles if provided when moving this heater. Do not use the heater near flammable objects such as furniture, pillows, bedding, papers, clothes, etc. Curtains must be at least 3 feet (0.9 m) from the front of the heater and always kept away from the sides and rear.
- Extreme caution is necessary when any heater is used by or near children or the infirm and whenever the heater is left operating unattended.
- Do not place or install near water (bathtub, pool, etc.).
- To protect against electric shock, do not immerse the cord or plug in water or any other liquid.
- Do not insert or allow foreign objects to enter any ventilation or exhaust openings as this may cause an electric shock, fire or damage to the heater.
- Always unplug the heater when not in use.
- Connect to properly grounded outlets only.
- Always plug the heater directly into a wall outlet/socket. Never use an extension cord or relocatable power source (extension lead/multi-plug adapter).
- Do not allow the cord to overhang any counter top where it can be easily pulled by children.
- Do not put fingers or foreign objects into the grille while in operation.
- Do not leave the appliance unattended when in use.
- No liability can be accepted for any damage caused by non-compliance with these instructions or any other improper use or mishandling.
EN
-
This appliance is not intended for use by persons (including children) with reduced physical, sensory or mental capabilities or lack of experience and knowledge unless they have been given supervision or instruction concerning use of the appliance by a person responsible for their safety. Children and vulnerable people should be supervised to ensure they do not play with the appliance.
-
Use this heater only as described in this manual. Any other use not recommended by the manufacturer may cause fire, electric shock or injury to persons.
-
Do not operate any heater with a damaged cord or plug or after the heater malfunctions or has been dropped or damaged in any manner. Disconnect the power at the outlet and have the heater inspected by a reputable electrician before using again. If the supply cord is damaged in any way, it must be replaced by the manufacturer, its service agent or a similarly qualified person in order to avoid a hazard.
-
Do not run the cord under carpeting. Do not cover the cord with throws, rugs, runners or similar coverings. Do not run the cord under furniture or appliances. Arrange the cord away from traffic area, where it will not be tripped over.
-
To disconnect heater, turn the control to off, and then remove plug from the outlet.
-
To prevent this appliance from overheating, keep the air inlets and outlets clean and free of anything that may cause a blockage. Check all inlets and outlets from time to time to ensure they are clear of any dirt or dust accumulation. DO NOT COVER.
-
The heater has hot and arcing or sparking parts inside. Do not use it in areas where gasoline, paint or flammable liquids are used or stored.
-
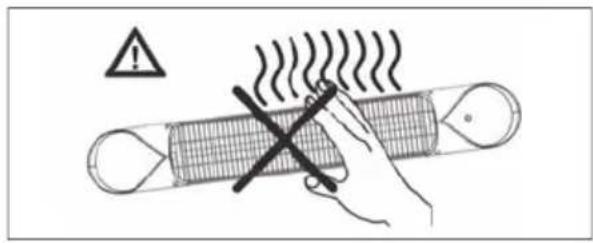
Parts of the heater may exceed 200^ C. Contact with the heating tube, reflector or metal parts near the heating tube may cause severe BURNS. To avoid burns, do not let bare skin come into contact with the hot surfaces of the heater.
-
NEVER place hands under the heating elements. ALWAYS allow the heating element to cool for at least 10 minutes before touching the heating tube or any adjacent parts.
-
This product contains recyclable materials. Do not dispose of this product with regular household waste. Please contact your local authority for the nearest collection point.
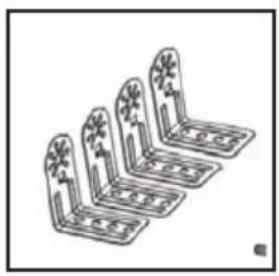
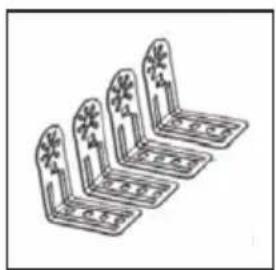
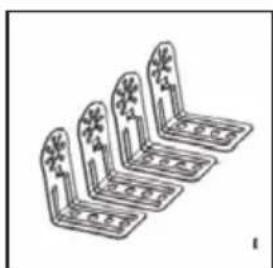
2. Content of packing

natural_image
Top-down schematic of a rectangular device with internal grid pattern and two curved handles (no text or symbols)Heater
natural_image
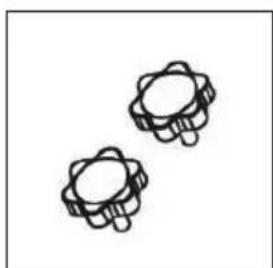
Line drawing of four identical metal corner brackets with floral patterns on top (no text or symbols)Wall fixing accessory (4X)
natural_image
Two identical 3D-rendered mechanical parts with no text or symbols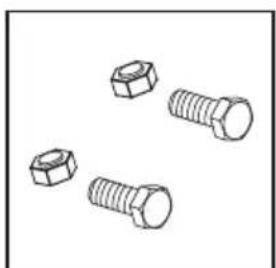
natural_image
Illustration of four different types of bolts (no text or symbols)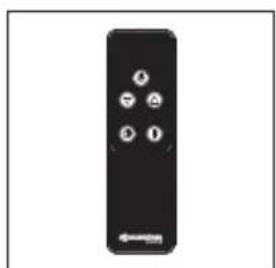
natural_image
Black remote control with four buttons (no text or symbols visible)Knurled screw (2x) Remote controlScrew (2x)
3. Installation
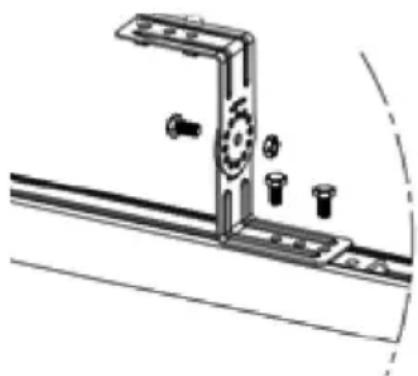
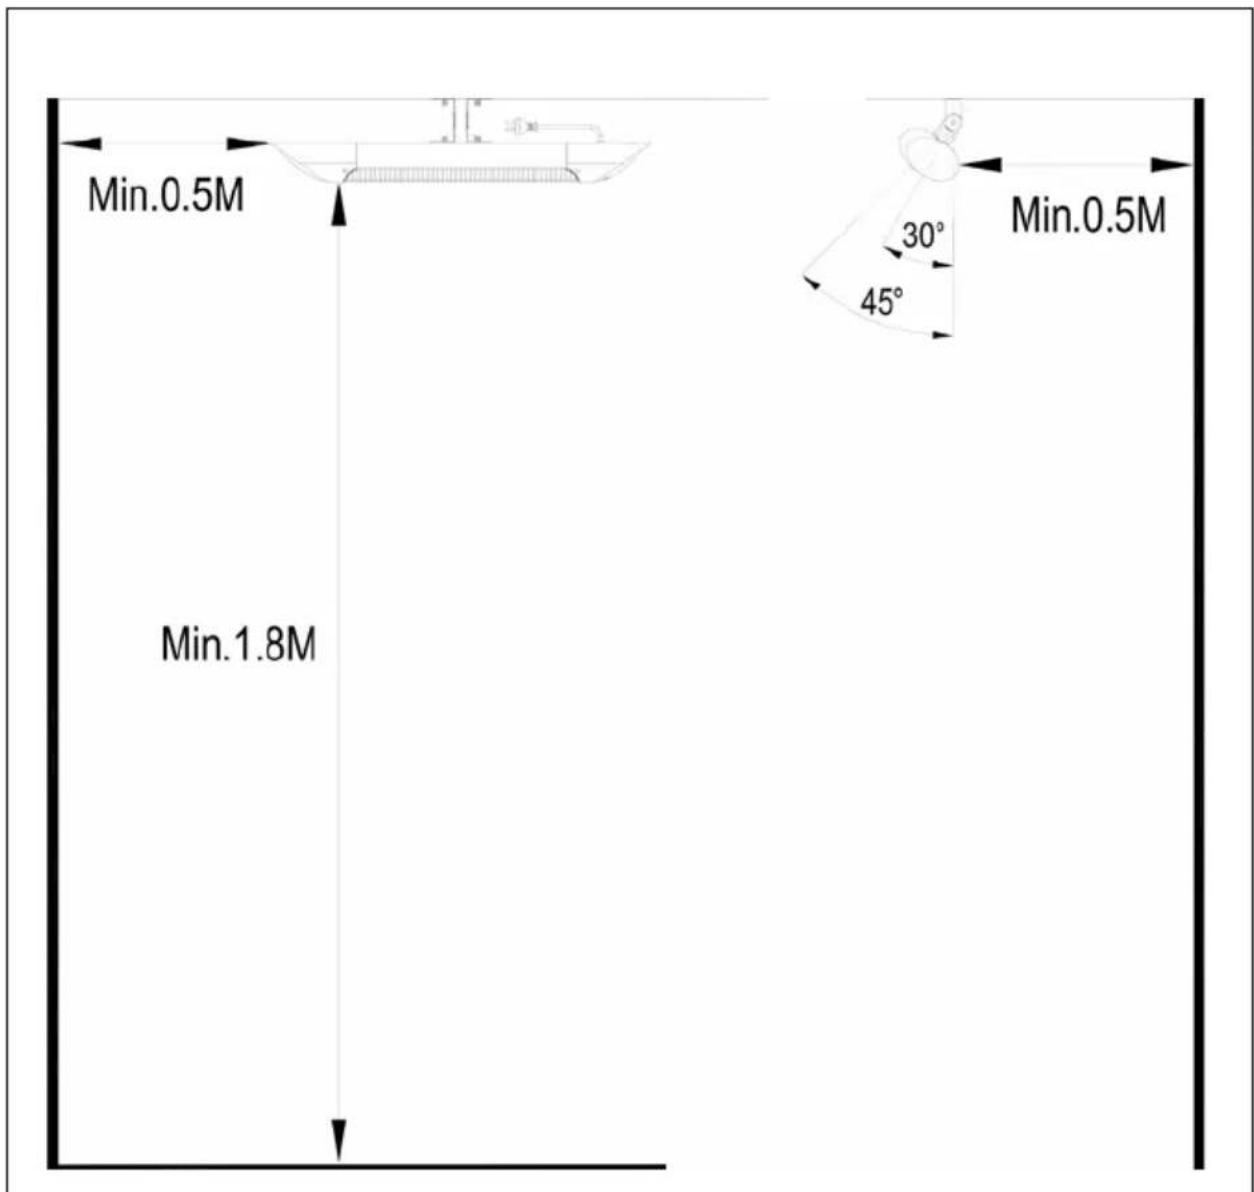
A mounting bracket is provided with the heater. The bracket has been specifically designed to allow the product to be fitted to a ceiling. Before drilling the holes for the ceiling mount, please ensure that the surface is solid and that there are no hidden water pipes or electrical wires. The heater must be installed no less than 50 cm from any side walls and no less than 2.4 m from the floor.
Warning: The appliance must be installed on solid surfaces such as concrete, wood or metal, etc.
natural_image
Technical line drawing of a mechanical bracket assembly with mounting holes and a gear mechanism (no text or symbols)EN
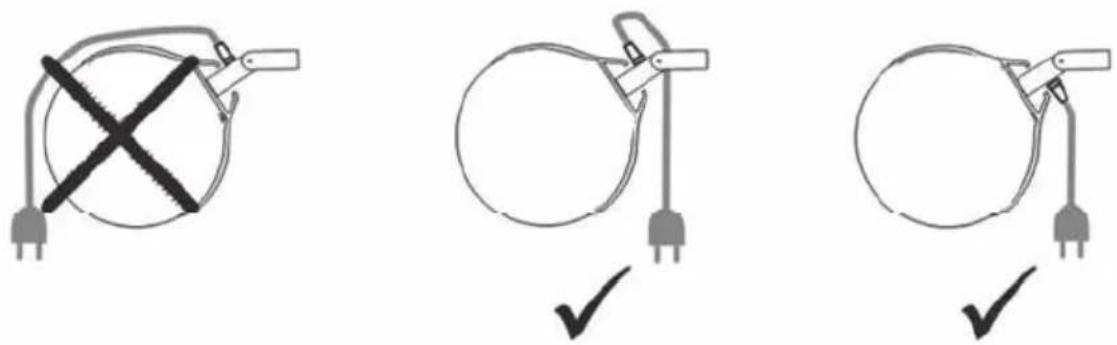
Important: Please ensure that the supply cable is well secured so that it does not come into contact with the reflector or trail into the heated area. The supply cable can be fixed to the metal mounting bracket behind the heater with plastic zip ties.
- This heater should be installed by a competent person, i.e. a qualified electrician.
- Always disconnect the heater from the electrical supply and allow it to cool before installation.
- When mounting on a ceiling, the lowest part of the heater must be located at or above a minimum height of 2.4 m from ground level so that the heater cannot be touched when in operation.
- When mounting on a ceiling, there must be a distance of 2.4 m between your appliance and the floor.
- When mounting on a ceiling, there must be a distance of 0.5 m between any side walls and the appliance.
- There must be a minimum distance of 1 m between your appliance and any living beings.
- There must be a distance of at least 1 m between the front side of the heater and materials such as wood, cardboard or cloth, etc.
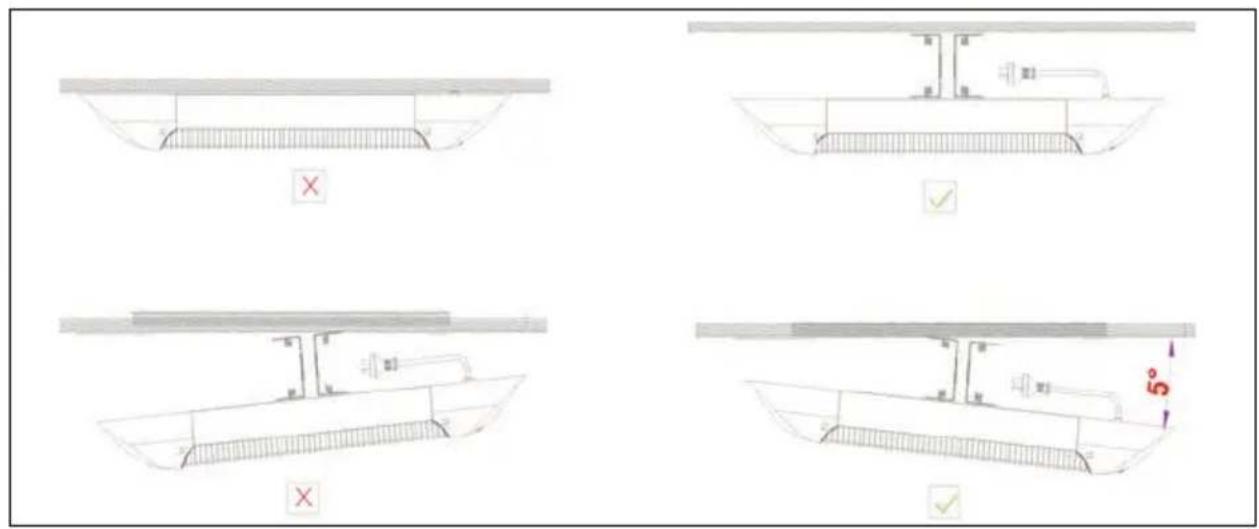
- When mounting on a ceiling, do not position the heater at an angle more than 90^ or less than 45^ .
- The supply cable must be at the lower end of the heater if the heater is installed at an angle or vertically.
-
Keep the supply cord away from the body of the heater, which will get hot during use.
-
Do not install the heater on an inflammable surface.
-
Observe the minimum safe distance between the heater body and the inflammable surfaces when mounted.
-
The heater should always have a minimum clearance of 0.5 m from the ceiling and adjacent walls.
-
If the heater is to be used outside, a weatherproof outlet is recommended.
-
Before drilling, ensure that there are no wires or water pipes in the area where the heater is to be installed.
-
The heater must be installed on the mounting brackets provided.
-
Fasten the brackets securely to the mounting surface and to the back of the heater using the fittings supplied.
-
Fasten the heater securely onto the brackets using the fittings supplied.
-
The brackets can be used to adjust the direction of the heater. Adjust the heater angle by loosening the two bolts on the ceiling-mounting bracket and tighten the bolts again when the desired angle is reached.
EN
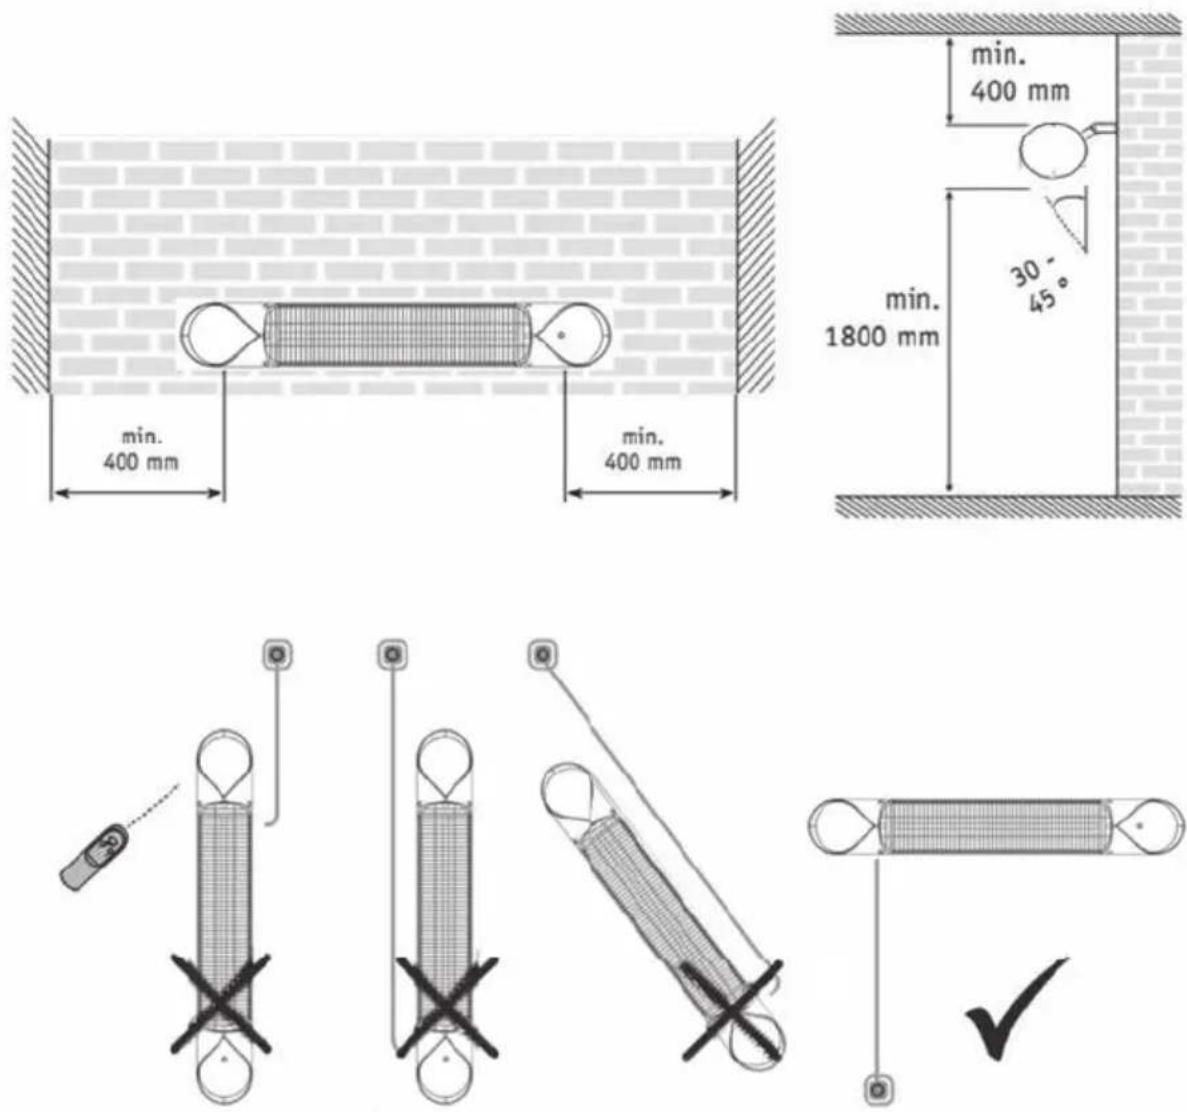
Position the heater so that the cable and connector are under and behind the unit. Both vertical and horizontal installations are possible.
Ceiling installation
text_image
Min.0.5M Min.1.8M 30° 45° Min.0.5MEN
text_image
Technical diagram showing four views of a boat with labeled components and red X marks, including a 5° angle indicator.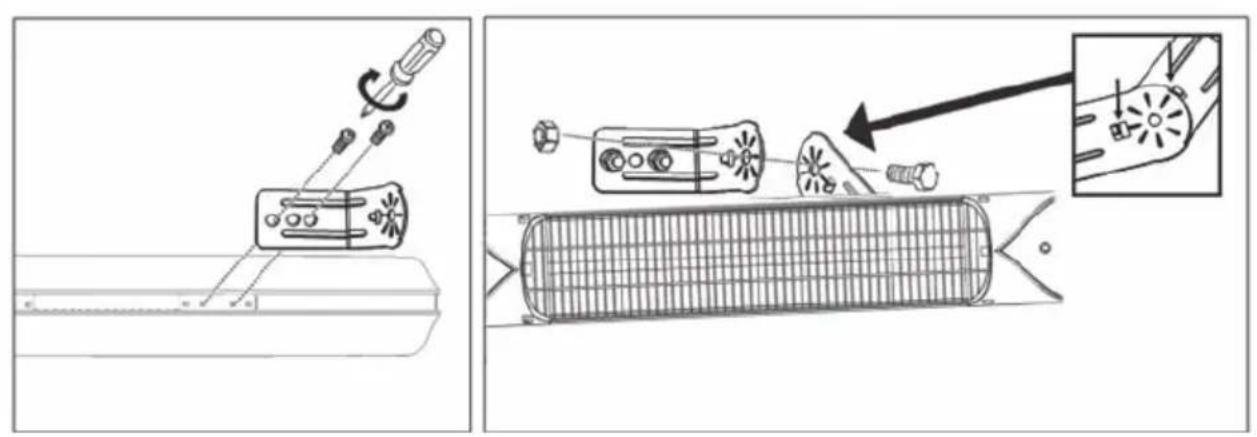
natural_image
Technical diagram showing mechanical assembly and component alignment (no text or symbols)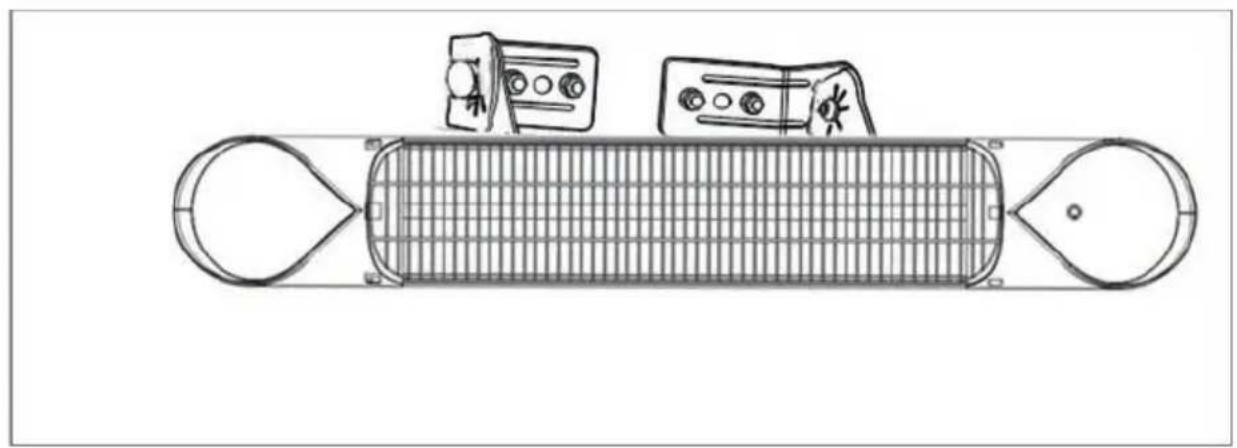
natural_image
Top-down line drawing of a rectangular device with internal grid and two labeled components (no text or symbols)During operation and 5 minutes after switching off – VERY HOT SURFACE!!!
text_image
Warning symbol showing a hand holding a cylindrical object with steam rising, indicating hazard or caution.E1 Error on display: Control unit overheat. Check installation clearances.
E2 Error on display: Tip over function, adjust less than 60° working angel and restart heater.
L1,2,3,4 on display and no heat: Bulb is damaged. Arrange replacement of bulb with Sonnenkönig or your local dealer.
4. Operation
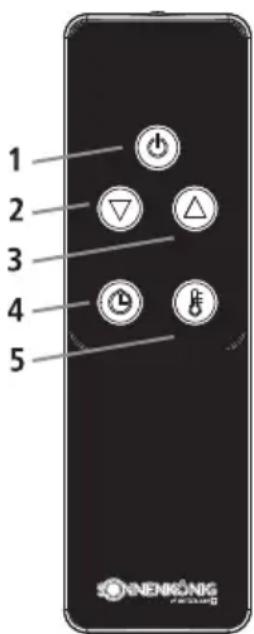
Remote Control
1 Power button: Turn the heater off.
2 Down button: Decrease temperature, timer and level.
3 Up button: Increase temperature, timer and level.
4 Timer button: Use to set the duration of hours that the heater will be in operation. Press the Timer button and TO will display. Use the Up and Down buttons (buttons 2 and 3) to adjust the number of hours you would like to set.
5 Level button: Use to select one of four heat levels (L1-L4). Press the Level button then use the Up and Down buttons (buttons 2 and 3) to increase or decrease the heating level.
Note: All sonnenkönig heaters and their remote controls have the same frequency, so it is possible to control several heaters with just one remote.
text_image
1 2 3 4 5 ONENKONGInserting Batteries
Insert 2 AAA alkaline batteries into your remote control.
-
Turn the remote control over so that the rear is facing you and remove the battery cover. Insert the batteries in accordance with the instructions and ensure the polarity is correct.
-
Change the batteries in the same way as described above.
NOTICE:
-
Replace old batteries with batteries of the same type. Otherwise your heater may not function properly.
-
If the heater will not be used for long periods, remove the batteries to prevent leakage as this may damage the remote control.
-
Do not allow water or liquid to enter the remote control.
Caution:
The heater should be switched OFF and unplugged from the electrical connection if the appliance will not be operated for a long period of time, if cleaning or maintenance is being conducted, or if you want to change the location of the heater. Periodic inspection and removal of any accumulated dirt will ensure that the heater can be operated safely.
5. Troubleshooting
-
Check if the power cord is plugged into an electrical outlet, if not, plug in.
-
Check if electricity to the main fuse is working.
-
Check to see it the thermostat knob to the ON position.
-
Check the thermostat setting, the heater may be off because it has reached the desired temperature setting.
6. Cleaning and maintenance
EN
Regular and careful cleaning helps your infrared heater operate efficiently for many trouble free years. To clean your heater follow steps below:
- Unplug the power cord for your safety before cleaning your appliance.
- Make sure the heater is cool before continuing.
- To keep the heater clean, the outer shell maybe cleaned with a soft, damp cloth. You may use a mild detergent if necessary. After cleaning, dry the unit with a soft cloth. (CAUTION: DO NOT let liquids enter the heater).
- DÔ NOT use alcohol, gasoline, abrasive powders, furniture polish or rough brushes to clean the heater. This may cause damage or deterioration to the surface of the heater.
- DO NOT immerse the heater in water.
- Wait until the heater is completely dry before use.
Storage: Store the heater in a cool, dry location when not in use to prevent dust and dirt build up. Use packaging carton to store.
ATTENTION:
- Always disconnect the heater from the electricity supply and allow it to cool before attempting to work on it.
- If the heater has collected dust or dirt inside the unit or around the heating element, have to unit cleaned by a qualified service agent. Do not operate the heater in this condition.
- The only maintenance required is cleaning of the external surfaces of the heater.
- Do not touch the heating element with bare fingers, as residue from your hand could affect the life of the lamp. If it is accidentally touched, remove the finger marks with a soft cloth moistened with mentholated spirit or alcohol.
- Do not attempt to repair or adjust any electrical or mechanical functions on this heater.
- The heater contains no user serviceable parts. Should the product suffer damage or breakdown, it must be returned to the manufacturer or its service agent.
- Damaged supply cords to be replaced by the manufacturer, service agent or similarly qualified person in order to avoid hazard.
The heat-related vapors generated during operation may pose a risk to animals with a particularly sensitive respiratory system, such as birds. Bird owners are advised to keep the animals away from the unit.
7. Warranty / Disposal / Technical change
WARRANTY
The Products are controlled just before delivery. If despite a lack of your product, try trustfully your seller. Please bring your receipt, as this is to be submitted for each warranty. The guarantee period is 24 months from date of purchase.
DISPOSAL
The device must be disposed of properly. The device can be distributed free of charge for disposal at each dealer.
TECHNICAL CHANGES
Subject to changes in technology and design. We shall not be liable for technical or editorial changes or omissions in this document.
Please save the packaging materials of the unit.
CE DECLARATION OF CONFORMITY
This device complies with the following standards
EMC EN 55014-1:2017
EN 55014-2:2015
EN IEC 61000-3-2:2019
EN IEC 61000-3-11:2019
LVD EN 60335-1:2012 + AC:2014 + A11:2014 + A13:2017 + A1:2019 + A2:2019 + A14:2019
EN 60335-2-30:2009 + Cor.:2010 + A11:2012
EN 62233:2008
LVD 2014/35/EU
EMC 2014/30/EU
RoHS 2015/863/EU
Do not use the radiant heater near water sources. Do not place the device near a bathtub or other water containers.
DISPOSAL INSTRUCTIONS FOR THE ELECTRICAL PART OF THE PRODUCT
In accordance with Article 26 of the Decree-Law of 14 March 2014 implementing Directive 2012/19/EC, and the Law of 31 March 2015 implementing Directive 2015/863/EU on the reduction of the use of hazardous substances in electrical and electronic equipment and on waste management.
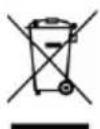
The crossed-out dustbin symbol on the machine or packaging indicates that the waste generated at the end of its useful life must be collected separately from other waste. The user must therefore take the device to the appropriate collection points at the end of its service life. Sort electronic and electrical waste or send back to the retailer when purchasing new, equivalent devices in a one-to-one process. Appropriate separate collection for subsequent commissioning of the equipment to be recycled, treatment and environmentally sound disposal helps to avoid possible adverse effects on the environment and health, and promote the reuse and/or recycling of the materials to which they belong. Misuse of this product by the user will result in the application of the administrative penalties provided for in the applicable legislation. Batteries contained in the device must be disposed of separately in the appropriate containers for the collection of used batteries.
DISPOSAL OF BATTERIES AND ACCUMULATORS
In accordance with Legislative Decree 188 of 20 November 2008 implementing Directive 2006/66/EC on batteries, accumulators and related waste, the symbol of the crossed-out waste bin on the battery indicates that the disposal of used batteries is prohibited in household waste.
Single-use and rechargeable batteries contain substances that are highly polluting for the environment. The user is obliged to dispose of used batteries at collection points in the municipality or in appropriate containers. This service is free. In this way, legal requirements are adhered to and the environment protected. The symbols identifying hazardous materials that may be present in single-use and rechargeable batteries are as follows: Hg = Mercury, Cd = Cadmium, Pb = Lead.
Notizen | Notes | Nota
EN
Company
Sonnenkönig of Switzerland
Olensbachstrasse 9-15
CH-9631 Ulisbach
Tel. Int. +41 58 611 60 00
Tel. Nat. 0848870850
www.sonnenkoenig.ch
Company
Sonnenkönig of Switzerland