USER MANUAL Cristalprofi e1902 JBL
https://www.jbl.de/productregistration
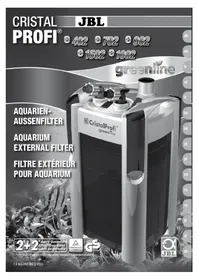
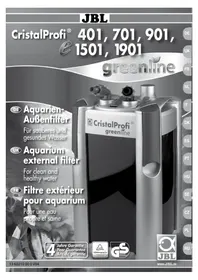
The purchase of this high-quality JBL CRISTALPROFI® greenline external filter was a wise decision. Highly efficient filtering of your tank and the simplest possible operation are key factors in the design of this filter.
Safety Precautions
If a multi-socket extension cable is used, it must be positioned above the filter power connection.
These appliances can produce magnetic fields that may cause damage or disturbances to electrical equipment. This also applies to cardiac pacemakers. Please consult the manual of the medical appliance in question for recommended safe operating distances.
There is a danger of fingers being squashed by magnetic force when maintenance work is carried out.
Unforeseen chemical reactions may cause the feet of the appliance to leave permanent marks on varnished and waxed furniture or wooden floors. Appropriate protection should therefore be used if the appliance is placed on a wooden surface.
Please note: Basic safety precautions including the following should be observed to protect from injury and electric shock:
1. Read and follow all safety advice.
- Warning: As these external filters are in contact with water, particular care must be taken to avoid electric shock. Should one of the following situations arise, do not repair the appliance yourself. The appliance must be repaired by an authorised specialist or disposed of:
a) If the appliance falls into the water, do not try to retrieve it! Pull all power plugs first and then retrieve the appliance.
b) The aquarium and the appliance should be positioned next to a wall socket in such a way that no water can splash onto the socket or the plug. The power cable of the appliance should form a "drip loop" to prevent water running along the cable into the power socket.
c) Never touch the plug if the socket or plug is wet! First switch off the circuit to which the appliance is connected (safety switch) and then disconnect the plug. Check the power socket and plug for water.
- The appliance may be used by children over the age of 8 and by persons with a physical, sensory or mental impairment, as well as by inexperienced persons, if they are under supervision. They should have received an introduction to how to use the appliance for
this purpose and be aware of the risks of use. The appliance is not a toy. Children should not clean the appliance or do maintenance or repair work on it unless they are over the age of 8 and are being supervised.
- Always disconnect the appliance from the power supply when the appliance is not in use, before dismantling or installing parts and before cleaning the appliance. Never disconnect the plug by pulling on the cable. Always hold the plug when disconnecting.
- The appliance may not be used for any other purpose than is intended by the manufacturer. The use of accessories not recommended by the manufacturer may result in hazardous situations.
- Do not operate or store the appliance where there is a risk of frost.
- The power cord of this appliance cannot be replaced. If the cable is damaged, the appliance must be disposed of.
- Before using the appliance for the first time, make sure it has been installed correctly.
- Do not operate without water.
- The appliance is for indoor use only. The appliance may only be used for aquatic purposes.
- Disconnect all electrical appliances in the aquarium from the power supply before carrying out any work on the appliance or in the aquarium.
- Do not use this appliance to pump liquids with a temperature above 35^
- Avoid electric shock by never immersing the appliance, mains plug or power cord in water or any other liquid.
- Save these instructions!
CE, TUV/GS

DISPOSAL: Do not dispose of the pump head of this appliance with your general household waste. Comply with local disposal regulations for electric appliances.
Contents:
Description of functions Page 19
Special features Page 19
Parts and names Page 20
Technical data Page 21
Installation Page 21
Note on pumping capacity
Maintenance and care Page 25
What to do if.... Page 28
Filter media for solving problems
Page 24
Page 30
Description of functions
The JBL CRISTALPROFI® greenline Filter cleans the tank water in a closed circuit.
A maintenance-free pump built into the filter head ensures permanent water circulation. The water is fed from the aquarium into the filter media basket, where it flows through the filter media from the bottom to the top and is cleaned appropriately, before being pumped back into the aquarium. The filter is NOT self-priming. The air initially contained in the system must be removed before starting the appliance. This can be done by selecting the built-in quick-start option by pushing the priming button.
Special features
Energy efficient
The filters of the JBL CRISTALPROFI® range consume up to 43% (depending on model) less power than previous comparable models.
High capacity, quiet
New motor technology delivers the same effective water circulation in your aquarium as previous models. Optimised pump impeller with ceramic bearings ensures quiet running and long service life.
Rarely needs cleaning
Immediately below the pump head, there is an innovative combi filter basket II in which the extensive pre-filter media is very easily accessible. Due to regular cleaning or replacement of the pre-filter media, the remaining filter materials rarely need cleaning.
- Complete with JBL MicroMec high-capacity biological filter balls
The round shape and varying diameter of the balls produces a self-cleaning effect. As a result, these filter media only need cleaning at very long intervals.
The main filter media can be used for up to a year when used in conjunction with the easily cleaned pre-filter.
Simple to start, safe to use
The built-in quick-start priming button makes starting the filter child's play, without the annoyance of manual priming.
All the parts of the filter are easy to fit and designed in such a way that incorrect assembly is impossible.
An innovative patented [EP 1869973] hose connection block prevents water leakage when the block is disconnected from the filter.
Tested to TUV/G.
- Complete and ready to plug in
The filter is fully ready to plug in and equipped with filter media. The filter media have been selected to ensure efficient mechanical and biological water purification that leaves your aquarium water clear and healthy.
The enclosed accessories guarantee easy connection to almost any freshwater or marine aquarium
Parts and names
1 Hose connection block with water-stop
1 a Middle lever
2 Pump head 2 a left stopcock lever 2 b right stopcock lever
3 Profile seal
4 Combi filter basket II 4 a Upper part 4 b Lower part
5 Filter basket
6 Filter canister 6 a Locking clips
7 Water outlet pipe (to the aquarium) with a threaded hose coupling
8 Angle piece (2 x)
9 Extension piece (2 x)
10 Wide jet pipe
11 Spray bar (2 parts)
12 End cap for spray bar (pre-fitted!)
13 Suction cup (5 x)
14 Short hose clip for suction cup (5 x)
15 Long hose clip for suction cup (5 x)
16 Suction pipe (from the aquarium), telescopic, with a threaded hose coupling
17 Intake strainer
18 Hose ( 12/16 for CP e402, e702 and e902, 16/22 for CP e1502, 19/25 for CP e1902)
F1 Pre-filter media: T-profile foam, 15 ppi
F2 Biological main filter media: JBL MicroMec high-performance biological filter balls
F3 Biological main filter media: Foam pad 25 ppi
F4 Mechanical/biological fine filter media: Foam pad 35 ppi
F5 Available as accessory: mechanical fine filter media: Cotton fleece (2 - 3 layers)
ppi: pores per inch; 1 inch = 2.54 cm
| Technical data | CP e402
greenline | CP e702
greenline | CP e902
greenline | CP e1502
greenline | CP e1902
greenline |
| Max. flow rate [l/h] | 450 700 900 1400 1900 |
| Aquarium size [l] | 40-120 60-200 90-300 | 160-600 200-800 |
| L x W x H [mm]* | 180 x 210 x
284 | 180 x 210 x
350 | 180 x 210 x
405 | 200 x 235 x
460 | 200 x 235 x
564 |
| Filter canister [l] | 4,6 6,1 7,6 12 15 |
| Filter baskets [l] /
number | 1,2 / 1 1,2 / 2 1,2 / 3 1,9 / 3 1,9 / 4 |
| Combi filter basket [l] | 1,1 1,1 1,1 2,3 2,3 |
| Filter media [l] | 2,3 3,5 4,7 | 8 | 10 |
| Hose size [mm] | 12/16 | 12/16 | 12/16 | 16/22 | 19/25 |
| Voltage [V] /
Frequency [Hz] | 230 / 50
(110 / 60) | 230 / 50
(110 / 60) | 230 / 50
(110 / 60) | 230 / 50
(110 / 60) | 230 / 50
(110 / 60) |
| Power input [W] | 4 (4,5) | 9 (11) | 11 (15) | 20 (27) | 36 |
| Energy savings compared to the previous model |
| W | | 4 | 4 | 15 | |
| KWh per year | | 35 35 | 131,4 | | |
| € per year** | | 7 | 7 | 26,28 | |
| € during the guarantee
period** | | 28 28 | 105,12 | | |
| *including the hose connection block
** at € 0.20 / KWh |
Installation

Unpacking and preparation
Carefully remove the filter and the separate accessories from the packaging and check that nothing is missing. In the event that anything is missing or damaged, please contact your specialist retailer.
Open all 4 locking clips on the filter container and remove the pump head. All models of the CRISTALPROFI® greenline external filters in the series XO2 have a new combi filter basket II with an extensive pre-filter. This thus eliminates the water distribution plate, which was part of the previous models. Take out all the filter baskets one at a time and thoroughly rinse all the filter media under lukewarm mains water. Place the filter baskets back in the filter canister in the original order.
Please note: After the removal of the pre-filter material the lower part of the combi filter basket II can be separated from the upper part by slightly moving the retaining lugs towards
the middle of the basket. Simple plug-in assembly. The retaining lugs snap into place by themselves.
Before you fit the pump head, biologically activate the filter media with JBL FilterStart cleansing bacteria (available at your specialist retailer) as follows:
Empty the complete contents of the required number of bottles of JBL FilterStart over the pre-filter media in the combi filter basket.
Number of bottles of JBL FilterStart:
CristalProfe402: 1 bottle
CristalProfe702: 1 bottle
CristalProfe902: 2 bottles
CristalProfe1502: 3 bottles
CristalProfe1902: 4 bottles
Put the pump head back on the filter canister and close the locking clips. Make sure that the intake opening is properly seated at the pump head of the combi filter basket II.
Please note: The empty filter baskets are interchangeable (excepting e402). However, the combi filter basket is the only one that can be inserted last on top. The pump head can be turned 180^ in any direction.
The combi filter basket II likewise needs to be turned 180^ so that the intake openings fit together again. When the pump head is unintentionally incorrectly positioned the clips at the canister don't lock. In this case do not use force, but turn either the pump head or the combi filter basket 180^ .
Tip: Always open and close clips positioned opposite each other. This prevents unnecessary wear on the pump head seal and ensures an accurate fit when the filter canister is closed.

Attaching the hose connection block and hoses
Turn the two small stopcock levers on the pump head to the () position opposite the "OPEN" mark, so that the groove in the base of the levers points vertically upwards.
Place the hose connection block with the middle lever pointing upwards into the pump head and press it down firmly.
To fasten, press the middle lever down to secure and turn the two small stopcock levers to the "OPEN" position. Now the ball valves integrated in the hose connection block are open and the hose connection block cannot be removed, even if the middle lever is raised (safety lock).
Push each hose onto a hose connection and turn the nut anti-clockwise until the hose fits firmly.

Positioning the filter
The filter can now be positioned in the intended place for use in the aquarium cabinet or similar. Attention must be paid to the following: If the filter is to be housed in the cabinet, the distance in height between the surface of the water and the bottom of the filter may not exceed 180~cm max. (max.120 cm for the e402). If the filter is located next to the aquarium,
the distance between the surface of the water and the top of the filter must be at least 20~cm
CAUTION: the filter should always be operated in an upright position!

Attaching pipes and hoses
Place the intake strainer on the end of the suction pipe and attach it to the inside of the aquarium using the suction cups and pipe clips. Use long or short clips depending on the design of the aquarium edge. Pull out the telescopic pipe so that the intake strainer is about 5cm above the base of the aquarium. The two parts of the telescopic pipe are sealed against one another by an O-ring so that no air is drawn into the telescopic pipe, even if the water level is low (e.g. in a turtle tank).
Connect the water outlet pipe, angle piece and spray bar (if required) and secure them in the aquarium with suction cups. First, remove the end cap of the spray bar and only replace it when the filter is operating.
Important note: The plug connections between the parts 8 - 12 and the water outlet pipe (7) are NOT waterproof. For this reason they are to be positioned INSIDE the aquarium ONLY. Please ensure that any water leaking from the connections, during operation cannot leave the aquarium and cause damage to furniture etc.
Tip: We advise against using the spray bar in aquariums containing plants, as too much of the vital plant nutrient, CO_2 , is expelled from the water. The best results are achieved by using the water outlet pipe with an angle piece or a wide jet pipe with the outlet just below the surface of the water to produce moderate surface agitation. The distance between the outlet and the surface of the water can be individually set by using the two extension pieces.
Connect the hose with the suction pipe from the "IN" position on the hose connection block (black elbow connection) and the hose with the water outlet pipe from the "OUT" position (grey elbow connection). Firmly attach the hoses by turning the nuts anticlockwise until they are tight.
Tip: The installation of a JBL ProFlora Direct inline diffuser into the hose which leads from "OUT" to the aquarium enables a smart and effective CO_2 supply. Furthermore there will be no disturbing diffuser inside the aquarium. JBL ProFlora Direct is available as an accessory at your specialist retailer.
Cut the hoses as short as possible to avoid kinking. This also makes priming easier.

Starting up
Make sure that the two small stopcock levers on the pump head are in the "OPEN" position. During the following start up procedure, the water outlet pipe with the spray bar, etc.
must be positioned ABOVE the surface of the water for optimum ventilation of the appliance.
Press the "START" button on the pump head repeatedly with the palm of your hand until water begins to flow into the suction hose (hose on "IN"). Wait until the filter has completely filled with water and the water in the hose leading to the water outlet pipe (hose on "OUT") is at the same level as the surface of the water in the aquarium.
Connect the filter to the mains power supply. The water will now flow out of the water outlet pipe into the aquarium. At first, it may be mixed with air that is still trapped between the layers of the filter media. Gently shake the filter to dislodge the air which will escape with the stream of water.
Please note: If you replace an existing aquarium filter with a JBL CRISTALPROFI® external filter, we recommend running both the new filter and the old filter parallel in the same aquarium for the first 2 weeks, before dismantling the "old" filter. This ensures that the new filter has a sufficiently large colony of cleansing bacteria and avoids harmful nitrites occurring in the transitional phase.
Check that all parts are watertight.

Regulating the water flow
The water flow can be regulated by the stopcock labelled OUT if required (grey elbow connection). The further the lever is turned away from the "OPEN" mark, the less water is pumped by the filter. Never use the lever opposite to regulate flow!
Important: Reducing capacity by more than half should be avoided for the following reasons: running noise may increase, the service life of the rotor may be shortened and the cooling required when the pump head is in operation is no longer reliably guaranteed.
Note on the pumping capacity
For optimum reliable performance, we strongly recommend the use of JBL original filter media only.
As usual technically, the data given on the type plates and the packaging refer to maximum IDLE RUNNING DATA of the pump, without hoses and filter media:
CP e402: 450 l/h
CP e702: 700 l/h
CP e902: 900 l/h
CP e1502: 1400 l/h
CP e1902: 1900 l/h
When operated in an aquarium, this data is reduced by varying degrees, depending on the length of hose and the filter media used. An accumulation of dirt in the hoses and filter media will further reduce performance.
The following approximate capacities refer to a hose length of 1.5m and operation with the supplied filter media in a clean or new condition:
CP e402: 200 - 250 l/h
CP e702: 350 - 400 l/h
CP e902: 380 - 450 l/h
The filter media and hoses should be cleaned when these levels are reduced by about 50% .
Maintenance and care
Caution: Regular maintenance and cleaning of the filter is vital to prevent a loss in the pumping capacity.
All JBL CRISTALPROFI® greenline external filters are supplied with a standard filling of filter media to provide clean and healthy aquarium water for "normal" operation. The filters provide extremely good conditions for the development of colonies of cleansing bacteria which play an essential role in the breakdown of pollutants. Mechanical pre-filtering ensures that these bacteria can efficiently carry out their task undisturbed for as long as possible.
You can of course adapt to your special needs by selecting from the wide range of available JBL filter media. Depending on your choice of filter media, this may influence the pumping capacity of your filter and the length of time the filter media can be used.

Make sure to always disconnect the mains plug before carrying out any work on the filter!
Turn the two small stopcock levers on the pump head to the stop position (●) opposite the "OPEN" mark. Lift the middle lever on the hose connection block as far up as possible and push to the stop position. This slightly lifts the hose connection block out of its seat. Pull upwards to lift the hose connection block out. The ball valves in the hose connection block are now closed and retain the water in the hoses. This prevents accidental opening e.g. by children and any associated unwanted leakage of water.
Open the 4 locking clips on the filter canister and remove the pump head.
Remove the filter baskets with the filter media and rinse the filter media in lukewarm water (25^) . Never wash ALL the filter media at the same time, as too many beneficial cleansing bacteria would be washed away. The JBL CRISTALPROFI® filters of the e range are designed so that, as a rule, only the pre-filter material (F1) has to be cleaned whilst the remaining filter material must be cleaned at longer intervals.
Tip: Do not forget to clean all the hoses and pipes regularly with an appropriate brush (e.g. JBL Cleany), as bacterial deposits on the inside of the pump drastically reduce the pumping capacity of the filter.

Mechanical pre-filter media made of coarse foam cut into a T-profile to absorb as much coarse dirt as possible. These media should be changed every 2 months. They can be rinsed once or twice.
(F2) High capacity biological filter balls (JBL MicroMec):
JBL MicroMec is a highly porous biological filter medium made from sintered glass and with a special surface and pore structure, which provides excellent conditions for colonisation by beneficial cleansing bacteria. This allows an effective biological breakdown of pollutants. It is therefore particularly well suited for intensive long-term filtration in freshwater and marine aquariums. The round shape and varying diameter of the balls produce a self-cleaning effect. As a result, this filter material only needs rinsing briefly every 6 - 12 months, depending on the amount of dirt. Change when the balls begin to disintegrate.
Filter media to solve particular problems can be found in Chapters 12 and 13.
(F3) Filter foam (JBL UniBloc):
Foam pads with medium-sized pores for effective biological filtering thanks to optimal colonisation conditions for cleansing bacteria. The pads have a section which can be removed to insert filter media for special problem solutions. Careful cleaning is required every 6 months.
Replace pad after three to four cleans. Only clean or change one of the two pads at a time and in alternation.
(F4) Filter foam
A fine-pored foam pad for the lower part of the new combi filter basket II.
The fine-pored pad catches particles of dirt which could otherwise damage the pump, and is a biological filter. The fine pad needs to be cleaned about every 4 months or as required (if pumping capacity deteriorates). Replace after three to four cleans.
$$
(F 1 + F 4 = J B L C o m b i B l o c I I)
$$
(F5) Cotton fleece (JBL SymecPad)
These fleece pads are not a standard feature of the filter and are only available as an accessory from your specialist retailer. High-quality fleece pads for mechanical fine filtering. The pads can be inserted into any CRISTALPROFI® filter basket. We strongly recommend their use during the last filter step, e.g. as a replacement for the fine-pored filter foam pad in the lower part of the combi filter basket II. The fineness of the SymecPads can result in a rapid reduction of the filter performance. Therefore a change or a cleaning every 2 weeks is recommended.

Cleaning the hoses
Bacteria settle in the hoses producing slime, which can significantly obstruct the flow of water. Algae growth only occurs in strong light. The hoses should therefore be cleaned regularly with a cleaning brush (e.g. JBL Cleany). Simply rinsing with tap water is not enough!

Cleaning the impeller and casing
Turn the cover of the impeller casing anti-clockwise towards "Open" and remove the cover by pulling gently.
Pull the impeller out of the casing. CAUTION: the impeller is held in the casing by magnetic force. Take appropriate care when removing the impeller, making sure to avoid injuring your fingers.
The ceramic shaft is held by two rubber bearings, which remain either on the shaft or on the bottom of the impeller casing, or in the middle of the casing cover, when the impeller is removed.
Clean the impeller casing, impeller and shaft with a suitable cleaning brush, then rinse in clean water. Limescale can be easily removed by soaking in JBL Clean A (available at your specialist retailer). Never dip the pump head in water or other liquid to clean it. Use a damp cloth (e.g. JBL WishWash) to clean the surface of the casing.
Place the ceramic shaft and impeller back in the casing. Check that both rubber bearings are present and correctly positioned for the ceramic shaft. Put the impeller cover back in and, pressing gently, turn the cover towards "CLOSE" until the stop point.
Please note: If the impeller has to be replaced due to wear and tear, the complete set comprising the impeller with the shaft and 2 rubber bearings must be replaced. Only this way can flawless operation and quiet running be guaranteed. When the impeller and shaft are removed, a rubber bearing often adheres to the base of the impeller casing where it is very difficult to remove. JBL has produced a special tool for this purpose which is available at specialist pet shops under the name "Extraction tool for impeller bearing". A useful cleaning brush for the impeller casing comes with the tool.

Re-starting the filter
Place the pump head back on the filter canister and close the locking clips as described in (1). Place the hose connection block with the attached hoses back in position as described in (2). Then turn the right-hand stopcock lever towards "OPEN" until the stop point. Repeat with the left-hand lever a few seconds later.
If the water does not begin to run into the filter automatically, start the filter as described in (5).
Connect the filter to the mains power supply.
What to do if...?
The pump head cannot be correctly fitted
| Cause Solution | |
| One or more filter baskets are overfilled or not positioned correctly on top of one another | Do not overfill filter baskets, check that the baskets are properly stacked on top of each other. |
| Intake openings at pump head and combi filter basket II are not properly seated over each other | Turn pump head or combi filter basket II 180°. |
Filter on pump head leaks
| Cause Solution | |
| Locking clips not closed or incorrectly closed Close | all locking clips correctly |
| Profile seal is dirty | Clean sealing surfaces and grease with petroleum jelly (e.g. Vaseline) |
| Canister seal is fitted incorrectly, twisted, damaged or missing. | Position the seal correctly or replace |
| Leakage does not occur until after startup procedure, usually at the clips. | Seal inside the hose connection block is damaged. Change hose connection block. |
Filter does not run or no water flows out
| Cause Solution | |
| No power supplied Plug into power supply | |
| No water in the filter | The filter is not self-priming! Press start button and fill filter with water (5) |
| Impeller and/or shaft fitted crooked, shaft broken, rubber bearings of shaft missing, bayonet lock on impeller casing not positioned correctly | Dismantle, check, replace faulty parts and re-assemble. Check that shaft and bayonet lock are correctly positioned. |
| Faulty or missing impeller. Impeller blocked by gravel or snail shells | Clean the impeller casing, fit an intact impeller |
Flow rate greatly reduced
| Cause Solution | |
| One or both stopcock levers on the pump head not in “OPEN” position” | Check and correct lever position |
| Hose connection block dirty | Remove hoses and use a suitable brush to clean the hose connection block, when installed correctly, with the stopcock levers in “OPEN” position |
| Hoses kinked, etc. Check hoses for kinks, constrictions, etc. | |
| Intake strainer clogged Clean the intake strainer | |
| Hoses blocked with deposits Clean hoses with cleaning brush | |
| Filter media heavily soiled | Clean the filter media (particularly the pre-filter media). |
| Filter media placed in net bags | Do not place long-term biological filter media e.g. JBL MicroMec, JBL Sintomec, etc. in finely meshed net bags. Only use the original JBL CristalProfi filter media with the appropriate foam edge for special problem solutions (Section D) |
| Filter media not cleaned properly | Remove the filter media from the filter basket and clean. |
| Incorrect filter media used | Only place fine filter media e.g. filter wool loosely in the filter baskets so that water flow will not be obstructed. |
| Pump is dirty | Clean pump chamber, impeller and cover with a cleaning brush (specialist retailer) (10) |
| Water does not circulate properly Repeat start procedure (5) |
| Impeller and/or shaft fitted crooked, shaft broken, rubber bearings of shaft missing, bayonet lock on impeller casing not positioned correctly | Dismantle, check, replace faulty parts and re-assemble. Check that the shaft and bayonet lock are correctly positioned. |
| Too many accessories attached to the hose system | Accessories (e.g. UV-C clarifier, etc.) reduce the water flow. Remove accessories or operate with own separate water circulation. |
Air in filter
| Cause Solution | |
| The point of connection of the telescopic suction pipe is above the water surface | When doing a partial change of water, siphon off water to approx. 5 cm above the point of connection only. Otherwise disconnect the plug. |
| Filter is positioned too high | The top of the pump head should be at least 20 cm below the water surface, the lower the better. |
| The hose installation leaks and draws in air | Check that all connections are airtight and fit correctly |
| Airstone too close to suction pipe | If air is additionally provided by an air pump, check that there is sufficient distance between the air stone and the suction pipe. |
| “IN” and “OUT” hoses mixed up Reconnect hoses correctly |
| High flow resistance due to dirty filter media or filter media in a net bag | Clean the filter media and do not use finely meshed net bags for long-term biological filter media (JBL MicroMec, JBL SintoMec). Only use the original JBL CRISTALPROFI® filter media with the appropriate foam edge for special problem solutions (Section D) |
Stopcock lever on the pump head stiff
| Cause Solution | |
| The O-rings no longer glide | Dismantle the hose connection block (7) and spray the stopcock ball valves with commercially available silicone oil. Reassemble the hose connection block and move the stopcock lever back and forth a few times. |
Fish dead and/or water cloudy
| Cause Solution | |
| Nitrite poisoning due to too rapid change from “old” to “new”. Cleansing bacteria disposed of with old filter. | Run the old filter and new filter parallel in the same aquarium for 2 weeks or incorporate 1/3 of the old filter media in the new filter. Never carry out an “over-all clean up” of the aquarium all at once! |
12 Filter material to use with foam edge
The following filter materials are most effective in a relatively slow water flow. In the e-series JBL CRISTALPROFi® filters, a slow water flow is achieved by a two-stage principle. The filter foam F3 (JBL UniBloc) is pre-cut so that an oval core area can be taken out and replaced by special filter media in finely meshed net bags. Optimal efficiency is thus achieved by the water flowing slowly through the special filter media, whilst at the same time the medium-sized pore struc-ture of the foam edge means that the overall water flow through the filter is obstructed as little as possible. The following filter materials are suitable for this purpose:
JBL CarboMec - High-capacity active carbon
Removes residue medication, water discolouration and high molecular pollution from fresh water and salt water. Virtually no increase in conductivity and phosphate levels in the water.
JBL PhosEx ultra - Solves algae problems by reliably removing phosphate
Prevents and eliminates undesirable algae growth by removing the main nutrient, phosphate, from fresh water and salt water.
JBL NitratEx - Nitrate remover
Eliminates nitrate from fresh water. Prevents and eliminates the growth of undesirable algae by reliably removing the nutrient, nitrate, from fresh water. Exchange resin can be regenerated with cooking salt.
JBL ClearMec - Pollutant remover for crystal-clear water without algae trouble
A mixture of clay pellets and special resins removes the pollutants, phosphate, nitrate and nitrite, from fresh water, thereby preventing undesirable algae growth. The clay pellets pro
mote colonisation by cleansing bacteria and additionally support the biological breakdown of pollutants. The result is crystal-clear, healthy water.
13 Filter material to use without foam edge
The following filter media hardly slow down the flow of water in the filter and therefore do not require foam edge. The amount contained in the pack is specifically measured for filter baskets of the JBL CRISTALPROFI® e range of filters.
JBL MicroMec - High capacity biological filter pellets
JBL MicroMec is a highly porous biological filter medium made from sintered glass and with a special surface and pore structure, which provides excellent conditions for colonisation thanks to beneficial cleansing bacteria. This allows an effective biological breakdown of pollutants. It is therefore particularly well suited for intensive long-term filtration in freshwater and marine aquariums.
JBL CerMec - Ceramic rings
A mechanical filter medium which, though, also acts biologically as a result of colonising by cleansing bacteria. The ring shape makes it especially well-suited for directing water flow in all directions, thereby ensuring optimal flow through the filter.
JBL TorMec - Active peat pellets for natural tropical water
JBL TorMec Pellets are pressed from two peat components with differing amounts of humic substances. This produces a rapid initial effect and an evenly dosed long-term effect. JBL TorMec reduces the carbonate hardness and the pH level due to the high level of humic substances. It also helps prevent algae by slightly discolouring the water and therefore filtering out certain sections of the light spectrum, as in natural tropical waters.
Manufacturer Guarantee
in addition to the legal claims of the customer against the seller the guarantee comprises delivery of goods which are free of defects and doesn't restrict the statutory claims for defects in accordance with § 437 BGB.
We, JBL GmbH & Co. KG Dieselstr. 3, 67141 Neuhofen, Germany offer the end customer a guarantee of 2 years from the date of purchase for functionality and absence of defects for the products listed below.
Furthermore we offer the end user, after a successful product registration for the device within the statutory warrantee period, under
https://www.jbl.de/productregistration
an extended 4 years guarantee from the date of purchase.
JBL CristalProfi e402 greenline, JBL CristalProfi e702 greenline, JBL CristalProfi e902 greenline, JBL CristalProfi e1502 greenline, JBL CristalProfi e1902 greenline
The guarantee does not cover parts subject to wear and tear, such as the installed seal rings, impellers or shafts.
The guarantee includes the repair at our discretion by replacement (free delivery of a comparable product) or its overhaul in accordance with the technical requirements.
The remaining period of the original warranty period applies for the part to be overhauled or replaced under this guarantee.
The guarantee does not include the compensation of direct or indirect consequential damages.
The guarantee only applies for sales to customers within the European Union.
The guarantee is void, if the product was not correctly installed, maintained or cleaned, intentionally damaged or modified in any way not according to the intended purpose by the customer or third parties.
Please contact your specialist retailer during the warranty period by presenting a valid purchase receipt or contact us under
http://www.jbl.de/en/help-desk
Tuyau couple [mm] 12/16 12/16 12/16 16/22 19/25
Tension [V] 230/50 230/50 230/50 230/50
Frequence [Hz] (110/60) (110/60) (110/60) (110/60) (110/60)
Puisance [W] 4 (4,5) 9 (11) 11 (15) 20 (27) 36
JBL NitratEx - Agent anti-nitrate
https://www.jbl.de/productregistration.
JBL CristalProfi e402 greenline, JBL CristalProfi e702 greenline, JBL CristalProfi e902 greenline, JBL CristalProfi e1502 greenline, JBL CristalProfi e1902 greenline
https://www.jbl.de/productregistration
JBL CerMec - Anelli in ceramicica
https://www.jbl.de/productregistration
https://www.jbl.de/productregistration
https://www.jbl.de/productregistration
Massas filtrantes [I] 12/16 12/16 12/16 16/22 19/25
https://www.jbl.de/productregistration
JBL CristalProfi e402 greenline, JBL CristalProfi e702 greenline, JBL CristalProfi e902 greenline, JBL CristalProfi e1502 greenline, JBL CristalProfi e1902 greenline
https://www.jbl.de/productregistration
https://www.jbl.de/productregistration
PacnaKOBka n noJroTOBka
OCTOPOXHO BbHyTb n3 ynaKOBKn fNbTp n OTdJIbHO yloXeHHbIe KOMJIeKTyUoIue n npOBepuTb Ha noHOTy KOMJIeKTa. Pn HEDOKOMJIeKTe nIi HaIIuNIOBpeJKeHn O6paTntEcB CBOI CNEuaIIN3UPOBaHHbMaRa3IH.
OTKpoIe BCE 4 3axnma Ha Kopnyce fInbTp a n cHmnte roNoBy hacoca. Bce moJeN BHeu Hero fInbTp a «JBL CRISTALPROF greenline»cepnn X02 ocHauehbl HOBOI KOM6HnpoBaanHO fInbTpauOnHHoKop3HHKOII c fInbTpom dIra rpyboon oUcTKn, o6naDauuM 6OJIbwoI pIoUaIbI. Tem cambIM B VODOpacPpeJIteNbHom IOdOHe, IMeBWeMcB npex
HIX MoJeIx, 6OJIbIe HeT Heo6XoIIMocTn. IocTaHbTe No NopRy Bce FInbTpauNoHHbIe KOp3INKn I TuaTeNbHO npOMOIte BCE FInbTpuyUcne MaTePnaJIb I CnErKa T'EnIOB VODOnpOBOdHO BoE. PocNe 3TOrO yCTaHOBITe FInbTpauNoHHbIe Kop3INKn B FInbTp B INCXoIHOIPOJEOBaTeNbHOCTN.
Примechанe: посе удали сильтуюшero MaTeриа Ддя Губочпки Нжнюч actb KOM6HnHpOBaHHoN cHlbTpauOnHOK Oр3инКИ II MoxHOb OTdelenTb OT BepxHei, cIeRka BdaBnBaY ydePKNBaIOUcne BbICTynB HAnpaBNeHn UeHTpa KOp3инКИ. C6opKa npON3BOJNTcnyTem npoctOy uCTaHOBKn YaCteN dpyr Ha dpyra. YdePknBaIoUne BblCTuNby 3aCKaIBaHOT BФHKcnpOBaHHoe NonoXeHne CamOCTOTeNbHO.
Ipepe yctaHOBKO roIObI nombl Bam cneJeT 6nOLOrueckn aKTHBnPoBaTb paCNOJoxHHbE B fNlbTppe fNlbtpyUoUe MaTePnaIbI C nOMoUbIO fNlbTppyUoUx 6aKTePn JBL FilterStart> (npodaOTcB cneuaHn3npOBaHHom mara3nHe) cneDuOuIM o6pa3OM:
BbIeTe Bc coepKIMoe Heo6xOaMOro KOINueCTBa 6ytbIOueK «JBL FilterStart» Ha nbTpuyuux MaTePnAnaДЯ rpy60I OUNCKn B KOM6HInpOBaHHoI nbTpaUHOHOn KOp3HNke.
KoIuYeCTBO 6yTbIIOueK «JBL FilterStart»:
JBL CristalProfi e402: 16ytbIouka
JBL CristalProfe702:16yTbIIOUka
JBL CristalProf e902: 2 6yTbIIOuKn
JBL CristalProfe1502:36yTbIIOuKN
JBL CristalProfi e1902: 46yTbIIOUKN
YCTaHOBnTe rONOBy NOMbI Ha KOpNyc fHbTpA n 3aKpOte cKO6bl. Iprn 3OM o6paTne BHNMaHHe Ha npaBnIbHoe paCnOLOXeHne BCacbIBaIOUeRO OTBepCTnRA rONOBbl NOMbI Ha OTBePCTnKOM6HnHropoBaHHoF hNbTpauOnOHoKop3nHKn II.
Примechанe: nuctbie Фильстрацноньie KOP3ннк (зa ncklquehne mодeи e402) можно
проньлho Meнят b Mectamn, a Kom6инрованнay Фильстрацноннay KOP3ннka может
6bIb yCTaHOBnHa TOLbKO NocleДн e CBepxy. ГОБуnomпы B yCTaHOBnEHOM NOLOXeHn
MOЖНО NOBOPaUNBaT b ILIO6OM HAnpaBNeHn Ha 180°. Пpr nТOM KOM6инрOBaHNHyO Фиь-
TPaцноHnyO KOP3ннky Il TaKke cIeDyET NOBOPaUNBaT b Ha 180°, uTO6bl BCacbIbAOuIne OT-
BepcTnA COBnaДaII. B cIyuae cIyuaHoi He npaBnIbHOJ yCTaHOBKn rOLObI nOMпы CkO6bl
Ha KOPnyce Фильстра 3akpbIb HeBO3MoJxH. B ΘOM cIyuae He npinaraTe yCnII, a NOBep-
HNTe IIn6O rOLOBy NOMпы, IIn6O KOM6инрOBaHNHyO ФильстрацноHnyO KOP3ннky Il Ha 180°.
PekomeHdaa: BceTgA OTKpbIbAte N 3akpbIbAte cKO6bl, paONIOXeHHbIe npOTNBONIOJHO Kpct-HaKpeCT. B 3tOM Cnyae pOΦnIbHoe yNIOtHeHne B rOIObe HAcoca n3HaUNBaETcMeHbSe, a ΦNlbTp 3akpbIbAEtca OCO6eHNo PIIOTHO.
2Писоeннeнe6лoka nodklqueHnЯ shaHrob n camnx shaHrob
YCTaHOBnTe 06a 3anOpHbIX pbUaXKa Ha rOIOBe NOMNbI B NOJOKeHne (●), nPOTuBOIOnIOJXHOe MapKnIpOBKe «OPEN», TaK UTo6bl KaHaBka Ha KOpnyce pbUaXKa HaxOДиJaCb B BepTtKaJIbHOM NOJOKeHnI n CMOTppeNa BBepx.
Iocne 3Toro yctaHOBnTe 6nok nOdknUoyenra WnaHROB C BbITaHyTbIM BBepx cpeHm pbuAROM B rOLOBY NOMbl N CInbHo HaXMITE Ha HrO BHn3.
CpeHn pbIar onyCTnte dIra fHKcauIN BHN3 n NOBepHIne o6a 3anOpHbIX pbIayKka B noLo-KeHne ,OPEN". Tem camblm OTKpbIbaOTcI aapOBBe KJIaNaHbI, paCNOLOXeHHbIe B 6Noke noKIIoueHn IJHaHROB, n 6NoKIOKJIIOUeHn IJHaHROB HeBO3MOxHcHrTb, daJe npINoDnRb CpeHn pbIar (npedoxpaHntbHna fHKcaun).
HaedeHbTe KaKdbI ShaHr Ha npBnHcNBAeMOe NOKIOUeHne N 3aTaNTE raIKN npOTNB acOBOI CTpeKN Do npOCHoro 3aKpePHeHry ShaHra.

YctaHOBkaΦnIbTpHa Na npeHa3HaueHHoe MeCTO
Посл eТORO можно устанавиваьфиьтп на прedlyсмOTpeHhoe Дя Hero MeCTO B aKBapИуMHOM wkaфу ИИВ dpyrom NOxODЯш месTe. Пpr nToM npocm Bac co6IouaTb cneyIO- ue: prn paCnoLoXeHnФиьТра B aKBapNUMHom wkaфу pa3Hnua BbICOT MeJdy NOBepxHOcTBIO BObl I DHom fNilbTpA DOJIgHa COCTaBLaTb He 6Obee 180 cm (y moJIeN e402 - He 6OJIe 120 cm). Prn paCnoLoXeHnФиьТра радom c aKBapNUMom pacCTOJHne OT NOBepxHOcTN BObldoBepxHe KpOMKnФиьТра DOJIgHNo COCTaBLaTb He MeHee 20 cm.
BHIMAHHE:KcnnyatnpoBaTb NlbTp TOnbKO B BepTKaJIbHOM NOLOKeHN!

UctahOBka Tpy6ok u shaHrob
Hacadnte BOO3a6bOpHyo KOp3nHKy Ha BOO3a6bOpHyo Tpy6ky i npNKpeNtTe Ix C nOMOsbIO npncocok n Tpy6hbx 3axmOB Ha BHyTpeHHIO CTENKy aKBapnyMa. B 3abucmocTn OT ctpykTypbl (kauecTba) kpar aKBapnyMa NCNoIb3yIte KOpOTKne IIN dInHHbIe Tpy6hble 3axmbl. BbITAHNTe TeLECKOnuYeCKy IO Tpy6ky HAcToIbKO, UTObl BOO3a6OpHaKop3nHka paCnOlaRaLacb npimepHO Ha 5 cm Bblse dHa c rpyHTom. Obe yactn TeleckOnuYeCKo Tpy6kn N30npoBaHbl dpyr OT dpyra ynpHTeNbHbIM KOIbUcOM KpyIoro ceehna, UTObl TeleckOnuYeCKa Tpy6ka He noDcBIBaIa BO3dyxa daJke npn Hn3kOM ypOBHe BoIb (HaNP., B 6accenHe dJa cepenax).
CoeHHnTe MeKdy co60y Tpy6ky dIy BbITEkHna BOdbI, KOJIeHO n npH Heo6xOJIMocTn Tpy6- Ky-ΦneI TY u TaKxe npIKpeNITe Ix npCockaMn B aKbapnyme. 3aInyuKy c Tpy6Kn-ΦneI TBi CHaHaJa HxKHO ChrTb, IN ToIbKO NocIe 3aNycka INbTpa B EKcIIyaTaunIO yCTaHOBntb Ha MecTo.
Baxhnoe npimueaHne: pa3bemhbie coeHHnna 3JeMeHTOB 8 - 12 MeKdy CO6oN n C Tpy6koI dIy BbInycka Bobl (7) HE RBLJIOTCRe pmeTnHbIMN. IOnToMy INX MOxHO yCTaHaBnBaTb TOIbKO BHTPN aKBapnMa. Bo BpeM NcKnpyatauIN cIeINTe 3a Tem, YTO6bl BOJa, BO3MOKHO, BbICTynpaUOaJn3 MeCT coeHNHeHn, He nonaja 3a npeDeJIb aKBapnMa n He HaHeCnAbpeD Me6en n dp. ImyueCTBy.
PekomeHdaa: B aKBapnyme c paCTnteNbHOCTbIO He peKomeHdyETc npImeHrTb Tpy6-ky-ΦneIy, nocKoJIbKy iHaue n3 aKBapnyma 6ydeT HeHyXHO ydaJIaTbCmHO BoaHOro INTaTeNbHOro BeIeCTBa dIra pacteHn CO. ONtMaJIbHbIM YBIAeTc HcNoJIb3OBAHne BbyNcKHO Tpy6Kn C KOJeHOM IIN C sInpOKoCTpyHn Ho cAdKO, HO npI eTOM BbyNcKHOe OTBepCTne DOJxHO haoDITbcra NOD IOBepXHOCTbIO BObl, UTObl NOyUHTb UMepeHHoe DBNKeHne IOBepxHOCTn BObl. IVcNoIb3yra oBe ydInHHTeNbHbIe qACTn, MOxHO INHNIBNuAalbHO yCTaHO-BNTb paCCTOAHHe OT BbyNcKHOrO OTBepCTn K NOBepXHOCTn BObl.
CoeHNHTe IaHr OI O3nCn IN>Ha 6loKe nOdkIoueHn IaHroB (uehpoe yrgnoBoe noD
KlouHne) c BODo3a6OpHoi Tpy6ko, a 7nAhr OT no3uun «OUT» (cepoe yrnoBoe noDKluOyeHne)-c Tpy6koI dIy BbITEKaHnB BObl. 3aΦnKcnpYnte 7naHn, 3aBepHyB raIKn npOTNB acobOI CTpeKN IIO npOHOrO 3akpePNeHn 7naHroB.
Pekomehdaqia: 30000000000000000000000000000000000000000000000000000000000000000000000000000000000000000000000000000
YkopOTnTe ⅢaHn, HACKoJIbKO 3TO BO3MOxHo, UTo6bl N36eKaTb ux nepereN6OB. 3To TaKxe o6IerUaET 3anyck.

NyskB3Kcnnyatauio
Y6eIITecb, yTo 06a 3anOpHbIX pbUaXka Ha roLoBe HacOca HaxoJrTcB B noLoXeHNN «OPEN» Bo Bpemn oocneDyUoIero 3aNycca Tpy6ka dnn BbITEKaHNA BObl C Tpy6ko-ΦneiToN nT.Д. DoJIxHa HaxoINTBcH HAД nobepxHocTbIO BObl, yTO6bl npu6Op MOxHO 6blIO ONTImaJIbHO OCBO6OHTb OT BO3dUxa.
Heckobko pa3 haKmnte IaOHBIO Ha KhoNky "START"Ha roIObe Hacoca, noka Boda He noteuet B BOO3a6OpHbI ⅢNaHR (Ibnr NOdknUoyen K IN")Tepeb noOxDnte, noka fInlbTp PONHOCTbIO He 3aONHNTCra BOo, a BOa B IlaHRe K Tpy6Ke BblTeKaHna (Ibnr NOdknUoyen K "OUT") He DOCTURHET OINHaKOBOB BBICOTbl C yPOBHeM BOdBi BAKBapNyMe.
BkIouHte fNbTp B 3neKtpocetb. NocIe NOdkUoyehn BA Oda BbITEkaET n3 Tpy6Kn BbITeKaHnBAkBapnym.Bhauane OHa MoKeT 6bTb CMeaHa C BO3dyXOM, KOTOpblOCTaJIcM MeJyCIOAMN fNbTpuyoJero Maepnana.Ecn ClerKa BCTpaxHyTb fNlbTp, To BO3dyx OCBO6OJTcR N BbIETeTc Co CTpyEi BObl.
BknIOuHTe nIbTp B 3NeKTKpOcTeB.
YTo delaTb,ecn…
Toloba Hacoca He yctaHaBnBaetcnaHdIeKaunm 6pa30M
ΦnIbTp He pa6OtaeT nnn He Kaaet Body
CnIbHO cH3nlaocb MoUHOCTb 0nIbTp
TapaHTnIu3roTOBNTeJIa
TapaHTna cyuaceCTbyeT hapaNy c yctaHOBHeHHbIMN 3aKOHOM npITraHnMaM NOKyNaTeIa NO OTHOseHIO K npOdaBcy Ha noLyueHne TObapa 6e3 KaKnx-Jn6o HeoCTaTKOB Hne OrpaHnUBAe T npeducMOrpeHHbIX 3aKOHOM npTeH3nNo KaueCTBy corl. ct. 437 TpaXdAnckoro Kodekca OPΓ (BGB).
Mbl, Kompania JBL GmbH & Co. KG, ynl.Диьшт., 3, 67141 HoixofoH, RepmaHn, npedocTabIeM KOHeuHOMy nokyaTeJIIO rapaHTIO Ha OTCyTCTBne HeDOCTaTKOB mCnpaBHOCtb HnKeYka3aHHbIX n3denn cpoKOM 2 roDa, cHTa co dHa NOKynKn.
Kpome Toro, KOHeuHOMy NOKyNaTeIIO NOcNe ycneuHoi pernCTpaunu n3dennB npedycmoTpeHHbI 3aKOHOM DByXLeTHNI rapaHTnHbICpOK no aDpecy
https://www.jbl.de/productregistration
PpeoctabIaem pacuHpeHHyO rapaHTIO cpoKOM 4 roDa, CUHTaC O HN NOKyPKN.
JBL CristalProfi e402 greenline, JBL CristalProfi e702 greenline, JBL CristalProfi e902 greenline, JBL CristalProfi e1502 greenline, JBL CristalProfi e1902 greenline
TapaHTnHe paCnpocTppaHreTcHa n3HaUNBaIOUneCn 3JeMeHTbI, TaKne KaK yNtHnTeNbHbIe KOnbua, pa6Ooee Koneco mnn ocm.
TapaHTnBkIIOuAeT NO HaSeMy BbIbOpy pEmOHT nyTeM 3aMeHbI n3dEInra (6ecnlaTHna NoCTaBka paBHOueHHOro n3dEInra) mI erO peMOHT corJaCHO TexHnueckm Tpe6oBaHNaM.
Ha oTppeMOHTnOBoAHbIe nO rapaHTn nn 3aMeHeHbIe qactn deiCtByeT ocTabuNcra pOK rapaHTn.
TapaHTnHe BkJIouaet Bo3MeueHnI npMOrO nIIN ONocpeIOBaHHoro KOCBeHHoro yuepe6a.
TapaHTnpaCnpocTppaHareTcNCKIIOUHTeJIbHO Ha npOaJn nOKyNaTeJm BHyTpN Ebponeckoro Co103a.
TapeNTna npekpaaaet deiCTBne, cIIN I3dennie 6bIIO NOdBeprHyTO NOKyNaTeJIeM nn TpeTbIM IIncOm HeKOMnTeHTHomy pemOnTy, TexHnueckomy o6CnyXnBaHNIO nn OuchTke, yMbIShJeHHOMy NOBpeXKeHnIO, a TaKxE KaKOMy-Im60 N3MeHeHnIO, npOTNbOppeaSeMy erO Ha3HaueHnIO.
B TeueHne rapaHTnHoro cpoKa o6paauTecb B CBOI cpeuaHn3npoBaHHbIMara- 3mN C npeOCTaBHeHem DeiCTBNTelbHoro KaccOBoro YeKa IIN CBxHTecb C HAMn NO aDpecy
https://www.jbl.de/productregistration
https://www.jbl.de/productregistration
https://www.jbl.de/productregistration
, iA EKTETaEvn Eyyunon 4 Etov ano Tnv nepounvia ayopac yia tn ouokeu.
JBL CristalProfi e402 greenline, JBL CristalProfi e702 greenline, JBL CristalProfi e902 greenline, JBL CristalProfi e1502 greenline, JBL CristalProfi e1902 greenline
Ano tvv yyunon eiaipouvtai ta avaalwoiama eapntmuata, oIwC n.x. oteyavonoinIKoi daKTuλioi, acn aic n aEvc.
H eyyunon kaunnei tnv eniokeun ouwova me tnv enioyn mac, eoawavikataoataoc (dwopeav npadoon evoc ioaiou npoiovtoc) n eidiopthetaonc baoi twv loxovtwv texvikwv anatnoeov.
Tia ta aptnmuata nou eioopwthkav n avtikataoatahknav baoei tnc, yyyunonc ioxuei o unoileiouevoocxpoovc yyyunonc.
H eyyunon 8ev nepiaaβavei tnv anoZnuiowon yia aεoec, n εμεoec, επakóλouθec, Znuiéc.
H eyyunon ioxuei anokkleeotikya iia nwaioeic o e nalec evtoc tnc Eupwnaiknc Evwongc.
H eyyunon nauéi va ioxuei, éav to npoiov dev ouvapuoloynθnke, ouvtnpnθnke n kathetaipotn-ke μe tov evδeδεiyμévo tpóno anó tov πelatn n kanoiov tpito, unéotn ζnla εκ ppoθeσewc kaωc kai tpoiooinθnke μe onoiovδnnote μη εyekpiévo tpóno.
EvtoC Tnc diapkeiaac ioxuoc Tnc eyyunonc, aeneuovvtheiEe EpiideiEtnc eykupnc anodeiEnc ayopac oTov ExiDikevu evo emopo Tnc pioxnc oac n ENIkoivwnote maic mac otn dieuvon
http://www.jbl.de/en/help-desk
尊敬的用户:
https://www.jbl.de/productregistration