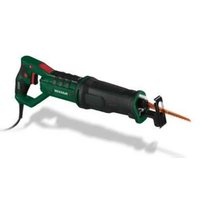
PSTDA 18Li A1 - Electric saw PARKSIDE - Free user manual and instructions
Find the device manual for free PSTDA 18Li A1 PARKSIDE in PDF.
| Product type | Cordless pendulum jigsaw |
| Brand | Parkside |
| Model | PSTDA 18Li A1 |
| Nominal voltage | 18 V |
| No-load stroke speed | 0 - 2700 min⁻¹ |
| Stroke | 20 mm |
| Pendulum motion | 3 levels + precision cut |
| Wood cutting depth | 80 mm |
| Aluminium cutting depth | 12 mm |
| Metal cutting depth | 5 mm |
| Bevel cuts | 0°, 15°, 30°, 45° left/right |
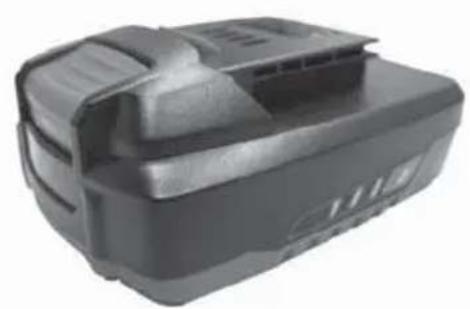
| Battery type | Lithium-Ion, 18 V, 1.5 Ah |
| Charger | PLG 18 A1: input 230-240 V~, output 18 V 1.8 A, charging time ~60 min |
| Sound pressure level | 80 dB(A) |
| Sound power level | 91 dB(A) |
| Hand/arm vibration | 9.2 m/s² (K=1.5 m/s²) |
| Anti-restart protection | Yes |
| Work light | Yes |
| Dust extraction port | Yes |
| Chip blower | Yes (switch) |
| Delivery contents | Saw, charger, battery, parallel stop, 3 blades, hex key, splinter guard, instruction manual |
| Maintenance and cleaning | Clean with a dry cloth, store in a dry place, check battery charge regularly |
| Spare parts and repairability | Use original parts, repair by authorized service center |
| Warranty | 3 years |
Frequently Asked Questions - PSTDA 18Li A1 PARKSIDE
User questions about PSTDA 18Li A1 PARKSIDE
0 question about this device. Answer the ones you know or ask your own.
Ask a new question about this device
Download the instructions for your Electric saw in PDF format for free! Find your manual PSTDA 18Li A1 - PARKSIDE and take your electronic device back in hand. On this page are published all the documents necessary for the use of your device. PSTDA 18Li A1 by PARKSIDE.
USER MANUAL PSTDA 18Li A1 PARKSIDE
text_image
PDF online www.lidl-service.com PARKSIDE POTRA 18.02.01CORDLESS JIGSAW PSTDA 18-Li A1
GB IE
CORDLESS JIGSAW
Translation of original operation manual
SE
BATTERIDRIVEN PENDELSTICKSÅG
Before reading, unfold the page containing the illustrations and familiarise yourself with all functions of the device.
FI
GB / IE Translation of original operation manual Page 1
| FI Alkuperäisen käyttöohjeen käännös Sivu 13 | |||
| SE Översättning av bruksanvisning i original Sidan 25 | |||
| DK Oversættelse af den originale driftsvejledning Side 37 | |||
| FR / BE Traduction du mode d'emploi d'origine Page 49 | |||
| NL/BE | Vertaling van de originele gebruiksaanwijzing | Pagina | 61 |
| DE/AT/CH | Originalbetriebsanleitung | Seite | 73 |
text_image
1 2 3 4 5 PARKSIDE PASTA (MILK) 6 7 8 9 10 11 12 13 14 15 16 17 18 19 A 20 21 22 23 24 25 26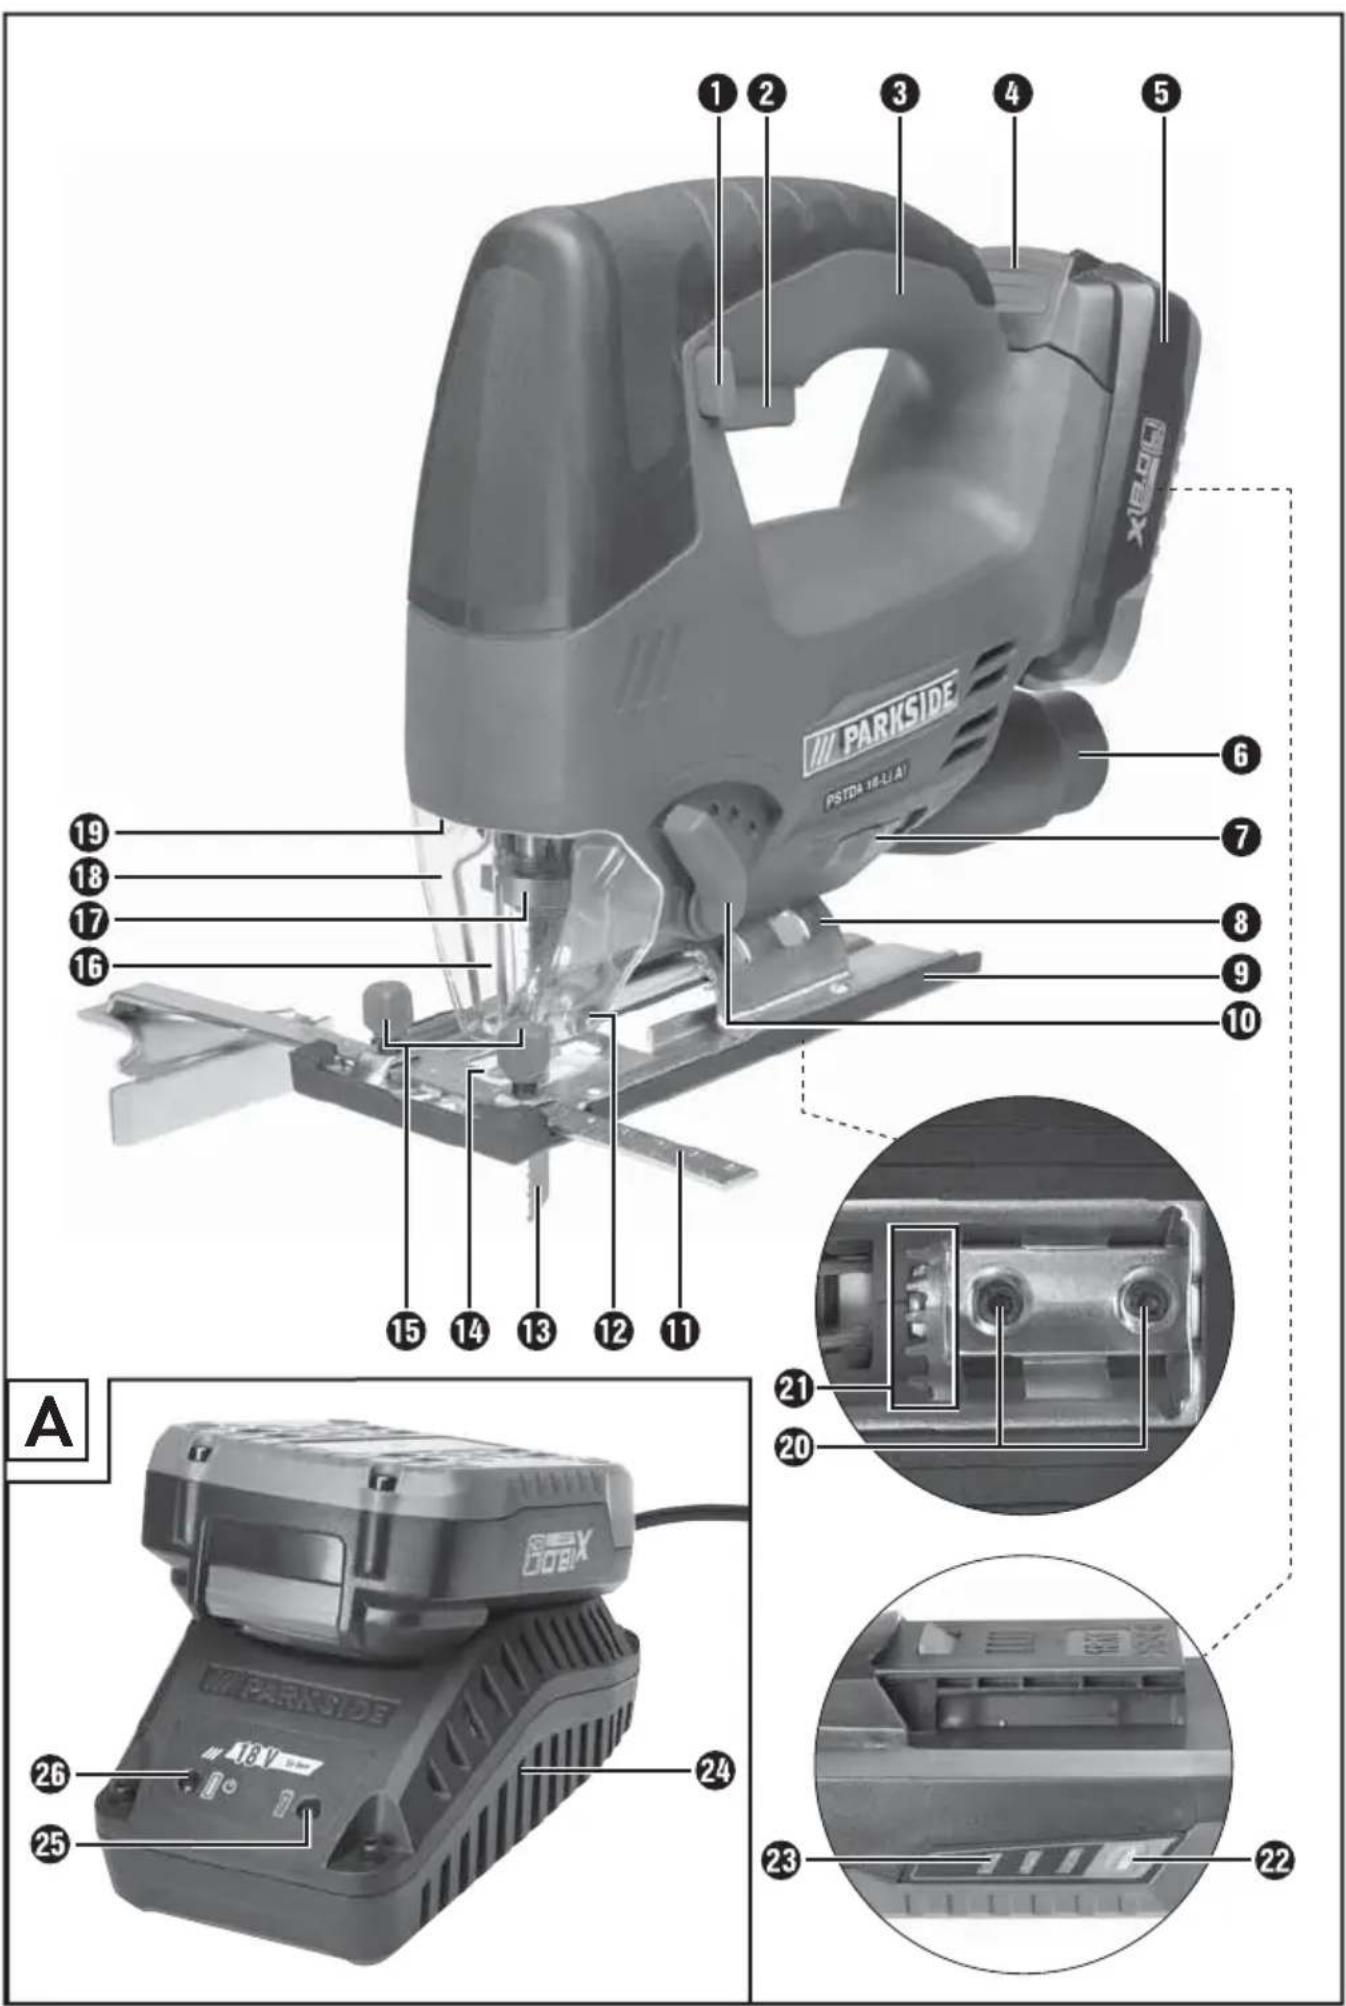
text_image
1 2 3 4 5 PARKSIDE PIKTRA (PAJAL) 6 7 8 9 10 11 12 13 14 15 16 17 18 19 A 20 21 22 23 24 25 26 27 28 29 30 31 32 33 34 35 36 37 38 39 40 41 42 43 44 45 46 47 48 49 50
Contents
Introduction....2
Intended use....2
Features 2
Package contents 2
Technical data 2
General Power Tool Safety Warnings 3
-
Work area safety.... 3
-
Electrical safety 3
-
Personal safety....4
-
Power tool use and care 4
-
Use and handling of the cordless power tool 4
-
Service 5
Appliance-specific safety instructions for jigsaws 5
Safety guidelines for battery chargers 5
Supplementary notes 5
Genuine accessories/auxiliary equipment. 6
Information on saw blades....6
Before initial use....6
Charging the battery (see Fig. A)....6
Attaching/disconnecting the battery pack to/from the appliance....6
Checking the battery charge level 6
Initial use....7
Fitting/changing the saw blade....7
Fitting the protective cover 7
Fitting the guide fence 7
Connecting the sawdust extraction device....7
Sawdust blowing function 7
Fitting the splinter guard....7
Fitting the sliding shoe 7
Operation 7
Setting the cutting angle....7
Setting the stroke rate....8
Adjusting the pendulum stroke 8
Switching the appliance on/off 8
Maintenance and cleaning 8
Warranty....8
Service....9
Importer 9
Disposal....9
Translation of the original Conformity Declaration .... 10
Ordering a replacement battery 11
Online ordering 11
Telephone ordering 11

CORDLESS JIGSAW PSTDA 18-Li A1
Introduction

tulations on the purchase of your new appliance. You have selected a high quality product. The operating instructions are part of this product. They contain important information on safety, usage and disposal. Before using the product, familiarise yourself with all handling and safety instructions. Use the product only as described and for the range of applications specified. Upon cession of the product to a third party, also hand over all documents.

Intended use
This appliance is suitable for straight and curved cutting as well as mitre cuts of up to 45° on angular workpieces made of plastic, wood and light metal. This appliance is exclusively intended for private use in dry indoor spaces. Observe the guidelines on saw blade types. Any other usage of or modification to the appliance is deemed to be improper and carries signifi cant risk of accidents. The manufacturer shall assume no liability for damage attributable to misuse.
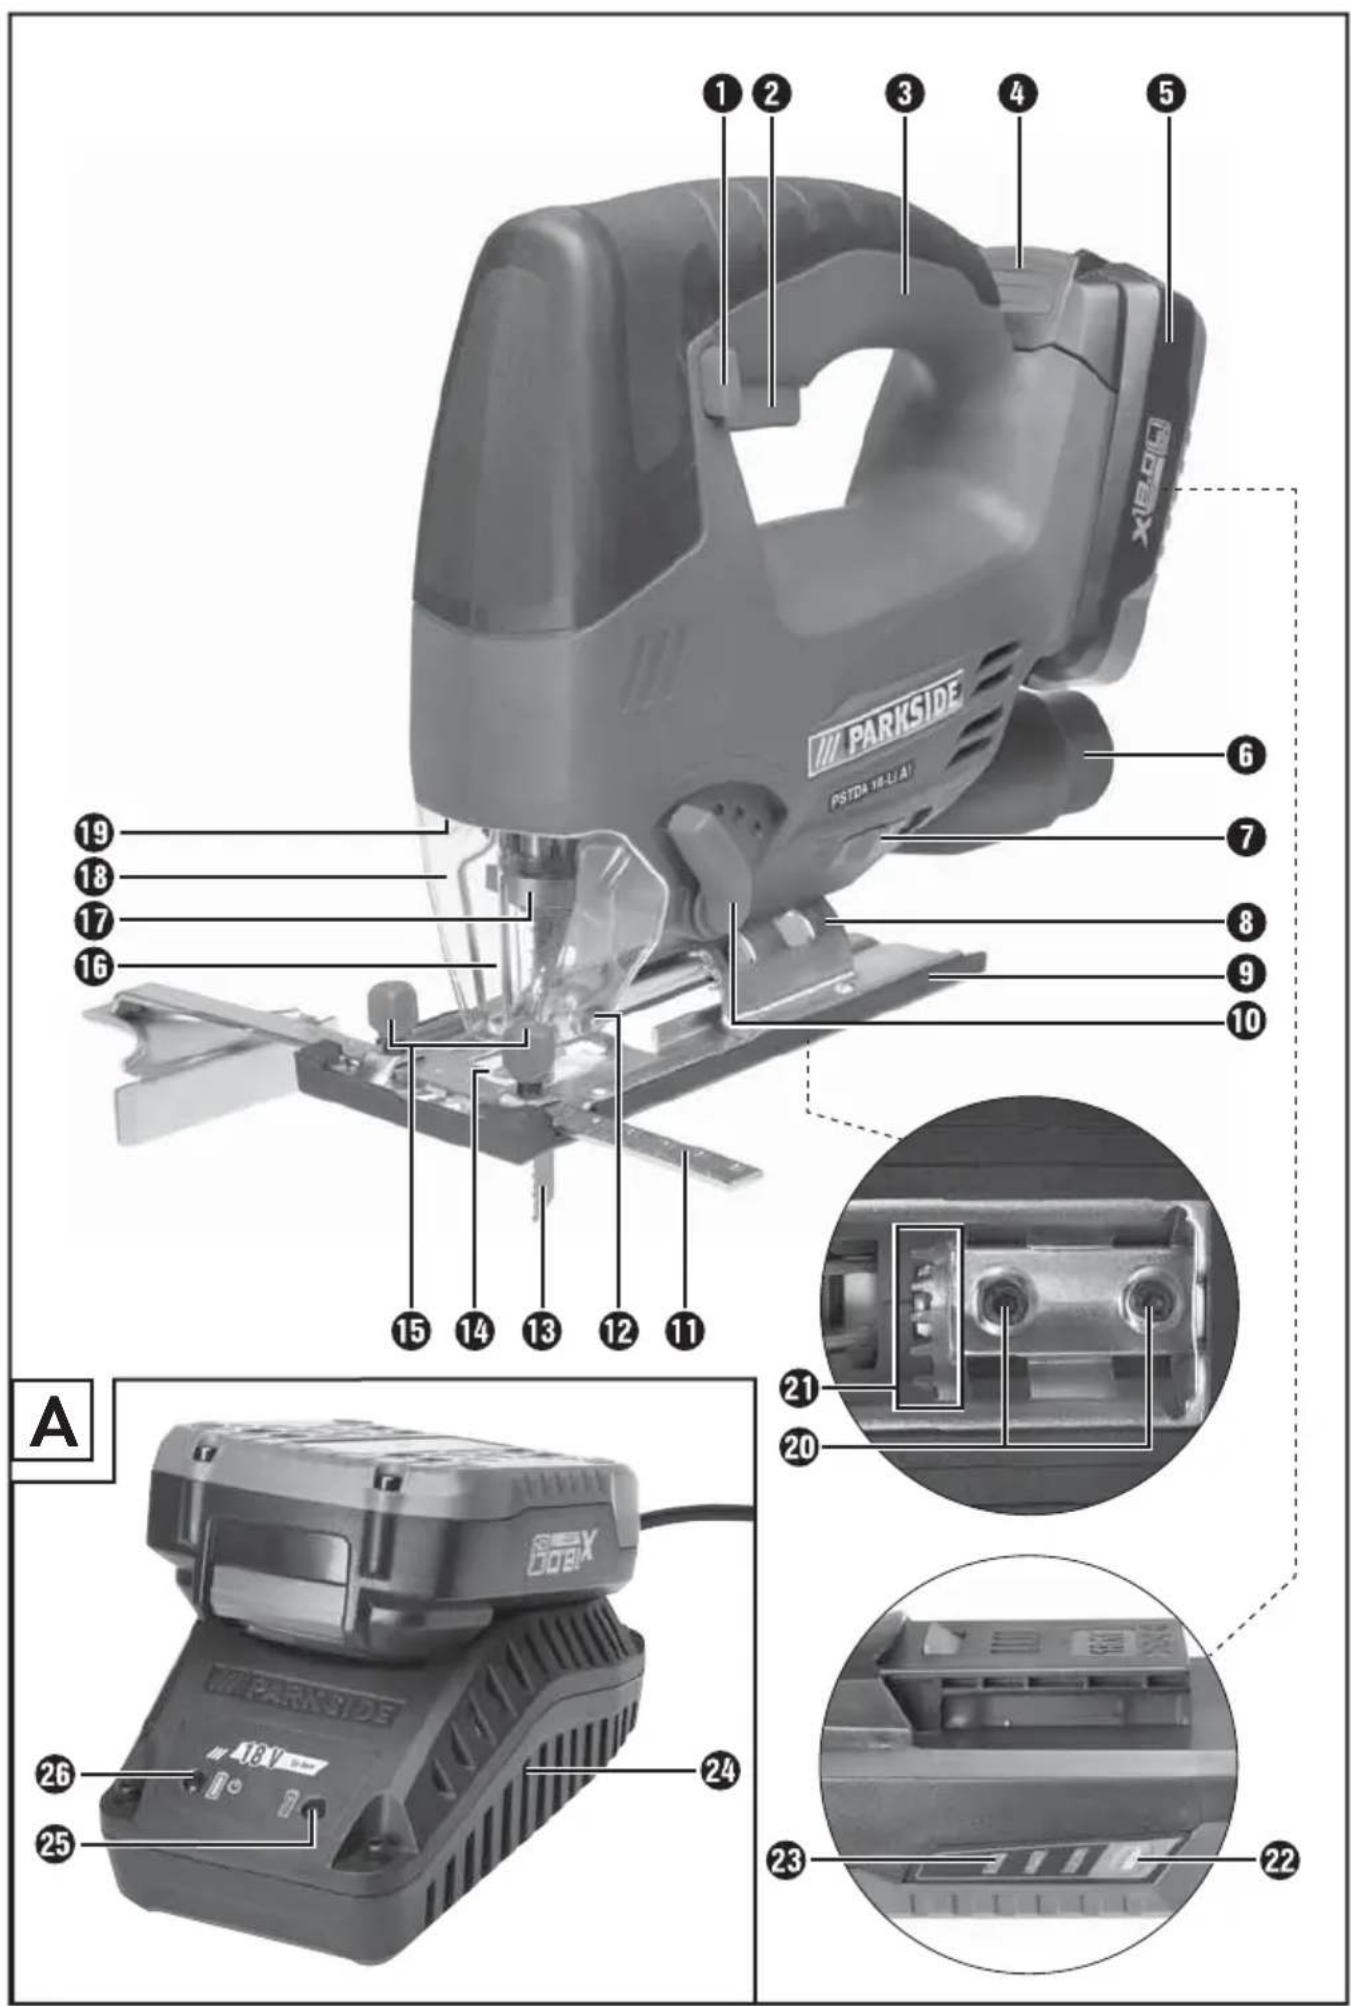
Features
① Safety lock-out for On/Off switch
② On/Off switch
③ Housing
4 Release button for battery pack
5 Battery pack
6 Extraction nozzle
⑦ Switch for sawdust blower
8 Baseplate
9 Sliding shoe (removable)
10 Pendulum stroke switch
11 Guide fence
12 Guide roller
13 Saw blade
14 Splinter guard
15 Insertion openings (each incl. locking screw)
16 Protective bracket
17 Quick-release chuck
18 Protective cover
19 Working light
20 Clamping screws
21 Toothing
22 Battery charge level button
23 Battery display LED
24 Rapid charger
25 Red charge control LED
26 Green charge control LED
Package contents
1 cordless jigsaw incl. extraction nozzle
1 rapid battery charger
1 guide fence
2 saw blades for woodworking
1 saw blade for metalworking
1 Allen key
1 splinter guard
Operating instructions
Technical data
Cordless jigsaw:
PSTDA 18-Li A1
Rated voltage: 18 V
Idle speed: n 0-2700 min ^-1
Stroke: 20
Pendulum stroke: 3 stages and fi ne-cut setting
Cutting depth: wood/aluminium/metal: 80/12/5 mm
Cuts: 0^ - 15^ - 30^ - 45^ left/right
Battery: PAP 18 A1
Type: LITHIUM
Rated voltage: 18 V ---
Capacity: 1.5 Ah
Rapid battery charger: PLG 18 A1
INPUT:
Rated voltage: 230-240 V \~, 50 Hz
Power consumption: 40 W
OUTPUT:
Rated voltage: 18 V ---
Charging current: 1.8 A
Charging time: approx. 60 min
Fuse (internal): 2 A T2A
Protection class: II/回
Noise and vibration data:
Noise measurement value determined in accordance with EN ISO 4871 The A-rated noise level of the power tool is typically as follows:
Sound pressure level: 80 dB(a)
Sound power level: 91 dB(a)
Uncertainty K: 3 dB

ear protection!
Weighted acceleration, typically:
Hand/arm vibration a_h=9.2 m/s^2
Uncertainty K = 1.5 m/s ^2
NOTE
The vibration level specified in these instructions has been measured in accordance with a standardised measuring procedure specified in EN 60745 and can be used to make equipment comparisons. The specified vibration emission value can also be used to make an initial exposure estimate.

WARNING!
The vibration level varies in accordance with the use of the power tool and may be higher than the value specified in these instructions in some cases. There is a risk of underestimation of the vibration load if the power tool is used regularly in this manner. Try to keep the vibration loads as low as possible. Measures to reduce the vibration load are, e.g. wearing gloves and limiting the working time. Wherein all states of operation must be included (e.g. times when the power tool is switched off and times where the power tool is switched on but running without load).

General Power Tool Safety Warnings

WARNING!
▶ Read all safety warnings and all instructions. Failure to follow the warnings and instructions may result in electric shock, fi re and/or serious injury.
Save all warnings and instructions for future reference.
The term "power tool" in the warnings refers to your mains-operated (corded) power tool or battery-operated (cordless) power tool.
1. Work area safety
a) Keep work area clean and well lit. Cluttered or dark areas invite accidents.
b) Do not operate power tools in explosive atmospheres, such as in the presence of fl ammable liquids, gases or dust. Power tools create sparks which may ignite the dust or fumes.
c) Keep children and bystanders away while operating a power tool. Distractions can cause you to lose control.
2. Electrical safety
a) Power tool plugs must match the outlet. Never modify the plug in any way. Do not use any adapter plugs with earthed (grounded) power tools. Unmodified plugs and matching outlets will reduce risk of electric shock.
b) Avoid body contact with earthed or grounded surfaces, such as pipes, radiators, ranges and refrigerators. There is an increased risk of electric shock if your body is earthed or grounded.
c) Do not expose power tools to rain or wet conditions. Water entering a power tool will increase the risk of electric shock.
d) Do not abuse the cord. Never use the cord for carrying, pulling or unplugging the power tool. Keep cord away from heat, oil, sharp edges or moving parts. Damaged or entangled cords increase the risk of electric shock.
GB IE
e) When operating a power tool outdoors, use an extension cord suitable for outdoor use. Use of a cord suitable for outdoor use reduces the risk of electric shock.
f) If operating a power tool in a damp location is unavoidable, use a residual current device (RCD) protected supply. Use of an RCD reduces the risk of electric shock.
3. Personal safety
a) Stay alert, watch what you are doing and use common sense when operating a power tool. Do not use a power tool while you are tired or under the influence of drugs, alcohol or medication. A moment of inattention while operating power tools may result in serious personal injury.
b) Use personal protective equipment. Always wear eye protection. Protective equipment such as dust mask, non-skid safety shoes, hard hat, or hearing protection used for appropriate conditions will reduce personal injuries.
c) Prevent unintentional starting. Ensure the switch is in the off-position before connecting to power source and/or battery pack, picking up or carrying the tool. Carrying power tools with your fi nger on the switch or energising power tools that have the switch on invites accidents.
d) Remove any adjusting key or wrench before turning the power tool on. A wrench or a key left attached to a rotating part of the power tool may result in personal injury.
e) Do not overreach. Keep proper footing and balance at all times. This enables better control of the power tool in unexpected situations.
f) Dress properly. Do not wear loose clothing or jewellery. Keep your hair, clothing and gloves away from moving parts. Loose clothes, jewellery or long hair can be caught in moving parts.
g) If devices are provided for the connection of dust extraction and collection facilities, ensure these are connected and properly used.
Use of dust collection can reduce dust-related hazards.
4. Power tool use and care
a) Do not force the power tool. Use the correct power tool for your application. The correct power tool will do the job better and safer at the rate for which it was designed.
b) Do not use the power tool if the switch does not turn it on and off. Any power tool that cannot be controlled with the switch is dangerous and must be repaired.
c) Disconnect the plug from the power source and/or the battery pack from the power tool before making any adjustments, changing accessories, or storing power tools. Such preventive safety measures reduce the risk of starting the power tool accidentally.
d) Store idle power tools out of the reach of children and do not allow persons unfamiliar with the power tool or these instructions to operate the power tool. Power tools are dangerous in the hands of untrained users.
e) Maintain power tools. Check for misalignment or binding of moving parts, breakage of parts and any other condition that may affect the power tool's operation. If damaged, have the power tool repaired before use. Many accidents are caused by poorly maintained power tools.
f) Keep cutting tools sharp and clean. Properly maintained cutting tools with sharp cutting edges are less likely to bind and are easier to control.
g) Use the power tool, accessories and tool bits etc. in accordance with these instructions, taking into account the working conditions and the work to be performed. Use of the power tool for operations different from those intended could result in a hazardous situation.
5. Use and handling of the cordless power tool
a) Charge the rechargeable battery unit using only the charger recommended by the manufacturer. Chargers are often designed for a particular type of rechargeable battery unit. There is the danger of fire if other types of rechargeable battery units are used.
b) Only the rechargeable battery units supplied are to be used with the power tools. The use of other rechargeable battery units may result in injury or a fire hazard.
c) When they are not being used, store rechargeable battery units away from paper clips, coins, keys, nails, screws or other small metal objects that could cause the contacts to be bridged. Short-circuiting the contacts of a rechargeable battery unit may result in burns or fire.
d) Fluid may leak out of rechargeable battery units if they are misused. If this happens, avoid contact with the fluid. If accidental contact occurs, rinse the affected area with water. Seek additional medical help if any of the fluid gets into your eyes. Escaping battery fluid may cause skin irritation or burns.

ON! RISK OF EXPLOSION!
Never charge non-rechargeable batteries!

at the battery against heat, e. g., against continuous intense sunlight, fi re, water and moisture. Danger of explosion.
6. Service
a) Have your power tool serviced by a qualified repair person using only identical replacement parts. This will ensure that the safety of the power tool is maintained.
Appliance-specific safety instructions for jigsaws
- Hold the power tool by the insulated handles if carrying out work during which the power tool may come into contact with concealed power cables. Contact with a live cable may also cause metal parts of the appliance to become live and may result in electric shock.
Safety guidelines for battery chargers
This appliance may be used by children aged 8 years and above and by persons with limited physical, sensory or mental capabilities or lack of experience and knowledge, provided that they are under supervision or have been told how to use the appliance safely and are aware of the potential risks. Children must not use the appliance as a plaything. Cleaning and user maintenance tasks may not be carried out by children unless they are supervised.

charger is suitable for indoor use only.

WARNING!
Do not operate the appliance with a damaged cable, supply cord or mains plug. A damaged power cord causes danger to life by electric shock.
Supplementary notes
- Keep your hands away from the sawing area. Do not reach underneath the workpiece. Contact with the saw blade may result in injury.
- Keep your hands away from the stroke rod and the quick-release chuck. There is a risk of crushing if contact is made with these components.
■ Always switch on the power tool before applying it to the workpiece. Otherwise, there is a risk of a kickback.
■ When sawing, ensure that the baseplate 8 and the sliding shoe 9 is placed against the workpiece.
■ When you use the splinter guard ^14 , take off the sliding shoe 9 rst.
■ After completing your work, switch the power tool off and do not pull the saw blade out of the insert until the tool has stopped entirely. This prevents kickbacks, and allows you to put the tool down safely.
■ Only use undamaged saw blades that are in perfect working order. Bent and blunt saw blades can break or may cause a kickback.
GB IE
- Secure the workpiece. Use clamps/a vice to hold the workpiece firmly. This is safer than simply holding it in your hand.
■ Never work on moistened materials or damp surfaces.
Dust may be hazardous! When working for extended periods on wood and, in particular, materials that produce dusts that are hazardous to health, connect the appliance to an appropriate dust extraction device.
■ Wear a dust mask.
■ Ensure there is sufficient ventilation.
Genuine accessories/auxiliary equipment
■ Only use the accessories and auxiliary equipment that are specified in the operating instructions or that are compatible with the appliance.
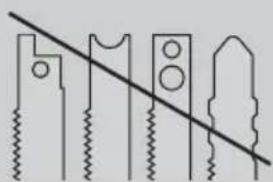
Information on saw blades
Parkside basic equipment includes saw blades principally for use with wood and metal.
- 2 saw blades for general wood cutting
● 1 saw blade for light metals up to 3 mm
NOTE
▶ You can use any saw blade provided it is fitted with a suitable mounting (single-lug shank).
Saw blade type
suitable unsuitable
natural_image
Pure mechanical diagram showing a diagonal line intersecting four saw and two blocks (no text or symbols)Before initial use
Charging the battery (see Fig. A)

CAUTION!
▶ Always unplug the appliance before you remove the battery pack from or connect the battery pack to the charger.
HINWEIS
Three appliances - three compatible batteries. Interchangeable! (see chapter ordering a replacement battery)
■ Never charge the battery pack when the ambient temperature is below 10^ C or above 40^ C.
Connect the battery pack 5 to the rapid battery charger 24 see Fig. A).
◆ Push the mains plug into the mains power socket. The control LED 25 vill light up red.
The green control LED indicates that the charging process is complete and the battery pack is ready.
◆ Push the battery pack 5 back into the appliance.
■ Never recharge a battery pack again immediately after rapid charging. This could overcharge the battery pack, thus reducing the lifespan of the battery and charger.
■ Switch off the charger for at least 15 minutes between successive charging sessions. Also disconnect the power plug from the mains power socket.
Attaching/disconnecting the battery pack to/from the appliance
Inserting the battery pack:
Allow the battery pack to click into place in the appliance.
Removing the battery pack:
◆ Press the release button and remove the battery pack.
Checking the battery charge level
◆ Press the battery charge level button to check the status of the battery (see also main diagram).
The status/remaining charge will be shown on the battery display LED 2 is follows:
◆ RED/ORANGE/GREEN = maximum charge/power
RED/ORANGE = medium charge/power RED = low charge - charge the battery
Initial use
Fitting/changing the saw blade
Remove the battery before carrying out any work on the power tool (e.g. maintenance, tool-changing, etc.) as well as during carriage and storage of the power tool.
Unintentional depressing of the On/Off button can result in injury.
◆ Push the protective cove ^18 together at the two outer holders and pull it off toward the front.
- Turn the quick-release chuck and hold it in this position.
◆ Press the required saw blade into the quick-release chuck is far as the limit stop.
Release the quick-release chuck it must return to its initial position. The saw blade is now locked.
Fitting the protective cover
Mount the protective cover 1 before connecting the machine to the dust extraction.
Mount the protective cover onto the machine in such a manner that the two outer holders engage in the openings on the casing.
Remove the protective cover ^18 for applications without dust extraction as well as when performing mitre cuts. For this, push the protective cover ^18 together at the two outer holders and pull it off toward the front.
Fitting the guide fence
The guide fence 1 can be fixed on the left-or right-hand side of the appliance.
- Undo both the locking screws on the insertion openings 15
♦ Push the guide fence ^11 into the insertion openings ^15
◆ Re-tighten the two locking screws.
Connecting the sawdust extraction device
◆ Push the extraction nozzle into the vacuum extraction duct until it is secured.
Optional depending on the diameter of the dust and sawdust extractor.
◆ Attach an approved dust and sawdust extractor to the extraction nozzle 6
Supporting the extraction function:
◆ Slide the sawdust blower switch⑦ to the rear.
Sawdust blowing function
Switching the sawdust blowing function on:
◆ Press the sawdust blower switch7 forwards.
Fitting the splinter guard
The splinter guard 14 can prevent fraying of the surface while sawing wood. The splinter guard 14 can only be used for certain saw blade types, without the sliding shoe 9 and only for cutting angles of 0^ .
- Press the splinter guard from below into the baseplate 8 notch facing upwards).
Fitting the sliding shoe
When working on sensitive surfaces, you can fit the sliding shoe ⑨ on the baseplate ⑩ avoid scratching the surface.
Mount the sliding shot onto the baseplate and press it up at the back until it clicks into place on the baseplate
To remove the sliding sho⑨, unfasten it at the rear of the baseplate ⑧ and slide it off forwards.
Operation
Setting the cutting angle
- Undo the locking screw ^30 with the supplied Allen key and pull the baseplate ^8 to the rear.
Adjust the cutting angle to 0^/15^/30^/45^ with the aid of the markings on the baseplate 8 Push the baseplate 8 to the front so that the locking pin engages in the toothing 21
◆ Re-tighten the locking screws with the Allen key.
GB IE
Setting the stroke rate
The ON/OFF-switch ? has a variable speed control. Pressing the ON/OFF switch ? slightly yields a low speed. Increasing pressure increases the speed.
NOTE
The integrated motor brake ensures rapid stoppage.
Adjusting the pendulum stroke
You can use the pendulum stroke switch to adjust the pendulum movement of the saw blade 13 You can achieve fine, clean-cut edges without pendulum movement (setting "0"). Deactivate pendulum movement when working on thin workpieces. You can achieve an increasingly fast work rate if the pendulum stroke is activated (settings 1-3).
Switching the appliance on/off
Switching the appliance on:
♦ Push the safety lock-out to the left or right and keep it pressed.
Press the ON/OFF switch ^2 .
Once the saw is running, you can release the safety lock-out ^1 . The working light ^19 illuminates when the ON/OFF switch ^2 is depressed lightly or completely. This allows illumination of the work area in low lighting.
Switching the appliance off :
Release the ON/OFF switch ②
Maintenance and cleaning

NING! RISK OF INJURY! Switch the power tool off and remove the battery before starting any work on the power tool.
■ The appliance must always be kept clean, dry and free from oil or grease.
■ Use a soft, dry cloth to clean the housing.
If a lithium-ion battery is to be stored for an extended period, the charge level should be checked regularly. The optimum charge level is between 50% and 80%. Optimum storage conditions are cool and dry.
■ Clean the appliance after completing your sawing work.
■ Remove any dirt (e.g. sawdust). Clean the saw blade mounting, if necessary with a brush or by blowing it out with compressed air.
Warranty
You are provided a 3-year warranty on this appliance, valid from the date of purchase. This appliance has been manufactured with care and inspected meticulously prior to delivery. Please retain your receipt as proof of purchase. In the event of a warranty claim, please contact your Customer Service unit by telephone. This is the only way to guarantee free return of your merchandise.
The warranty only covers claims for material and manufacturing defects, not for damage sustained during carriage, components subject to wear and tear or damage to fragile components such as switches or batteries. This appliance is intended solely for private use and not for commercial deployment.
The warranty shall be deemed void in the case of misuse or improper handling, use of force or interventions which were not carried out by one of our authorised Service centres. Your statutory rights are not restricted by this warranty.
The warranty period is not extended in consequence of repairs carried out under the warranty. This also applies to replaced and repaired components. Any damage or defects present at the time of purchase must be reported immediately after unpacking, but no later than two days after the date of purchase. Repairs carried out after expiry of the warranty period shall be subject to charge.
Service

WARNING!
▶ Have the power tool repaired by the Service centre or a qualified electrician and only using genuine replacement parts. This will ensure ongoing safety of the appliance.
▶ Always ensure that the power plug or the mains cable is replaced only by the manufacturer of the appliance or by that party's approved Customer Service unit. This will ensure ongoing safety of the appliance.
GB
Service Great Britain
Tel.: 0871 5000 720 (£ 0.10/Min.)
E-Mail: kompernass@lidl.co.uk
IAN 102866
IE
Service Ireland
Tel.: 1890 930 034
(0,08 EUR/Min., (peak))
(0,06 EUR/Min., (off peak))
E-Mail: kompernass@lidl.ie
IAN 102866
Hotline availability:
Monday to Friday 08:00 - 20:00 (CET)
Importer
KOMPERNASS HANDELS GMBH
BURGSTRASSE 21
44867 BOCHUM
GERMANY
www.kompernass.com
Disposal

ckaging is made from environmen- tally friendly materials and can be disposed of at your local recycling plant.

dispose of power tools in normal domestic waste!
European Directive 2012/19/EU requires that worn-out power tools be collected separately and recycled in an environmentally compatible manner.

dispose of batteries in your normal domestic waste!
Defective or worn-out rechargeable batteries must be recycled according to Directive 2006/66/EC. Take the battery pack and/or appliance to available collection facilities.
Please consult your local authorities regarding suitable disposal of worn out power tools/battery packs.
Translation of the original Conformity Declaration
We, KOMPERNASS HANDELS GMBH, Custodian of Documents: Mr. Semi Uguzlu, BURGSTR. 21, 44867 BOCHUM, GERMANY, hereby declare that this product complies with the following standards, normative documents and EC directives:
Machinery Directive (2006/42/EC)
EC Low Voltage Regulations (2006/95/EC)
EMC (Electromagnetic Compatibility) (2004/108/EC)
RoHS Directive (2011/65/EU)
Applied harmonised standards:
EN 60745-1 / A11: 2010
EN 60745-2-11: 2010
EN 62233: 2008
EN 55014-1 / A2: 2011
EN 55014-2 / A2: 2008
EN 60335-1:2012
EN 60335-2-29 / A2:2010
EN 61000-3-2 / A2: 2009
EN 61000-3-3: 2013
Type designation of machine:
Cordless jigsaw PSTDA 18-Li A1
Year of manufacture: 07 - 2014
Serial number: IAN 102866
Bochum, 20/06/2014

text_image
Safery FryndCE
Semi Uguzlu
- Quality Manager -
The right to effect technical changes in the context of further development is reserved.
Ordering a replacement battery
If you want to order a replacement battery for your appliance, you can do so easily via the Internet on www.kompernass.com or by telephone.
The price of the replacement battery is €20, including VAT and shipping. Due to limited stocks, this item may sell out quickly.
natural_image
Black plastic battery pack with lid and side slots (no visible text or symbols)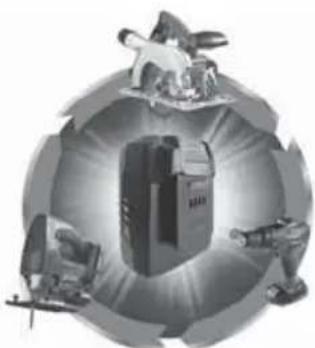
natural_image
Abstract illustration of a globe with embedded devices and figures (no text or symbols)Three appliances - three compatible batteries. Interchangeable!
Online ordering
To order a replacement battery from the Accessory Shop:
■ Use your Internet browser to visit www.kompernass.com.
- Click on the corresponding flag on the right hand side at the bottom of the page to select the desired country and language.
- Click on the tab "Accessory Shop" and then select the appropriate replacement battery under the heading "Topseller".
■ After you have placed the rechargeable battery in the shopping basket, click the "Checkout" button and follow the on-screen instructions to complete the ordering process.
NOTE
▶ Online ordering of replacement parts is not possible in all countries. In this case, please contact the Service hotline.
The promotion is limited to one battery per customer/appliance and also to a timeline of one month after the promotion period. Thereafter, the replacement battery can be ordered as a replacement part, with other conditions prevailing.
Telephone ordering
GB
Service Great Britain
Tel.: 0871 5000 720 (£ 0.10/Min.)
IE
Service Ireland
Tel.: 1890 930 034
(0,08 EUR/Min., (peak))
(0,06 EUR/Min., (off peak))
To ensure that your order is processed swiftly, have the article number of your appliance to hand (e.g. IAN 102866) in case of questions. The article number can be found on the label or the title page of these instructions.
Sisällysluettelo
Johdanto....14
KOMPERNASS HANDELS GMBH
BURGSTRASSE 21
44867 BOCHUM
GERMANY
www.kompernass.com
Hävittäminen

natural_image
Black plastic electronic device casing with visible internal components (no text or symbols)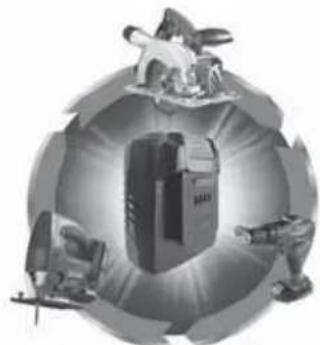
natural_image
Illustration of a globe with mechanical devices and a central device, symbolizing global navigation or automation (no text or symbols present)Hand/Armvibration a_h=9,2 m/s^2
Osäkerhet K = 1,5 m/s²
OBSERVERA
natural_image
Pure electrical circuit lines without any symbolsInnan produkten tas i bruk Ladda batteripaket (se bild A)
VAR FÖRSIKTIG!
natural_image
Pure technical line drawings of mechanical components without any text or symbolsKOMPERNASS HANDELS GMBH
BURGSTRASSE 21
44867 BOCHUM
GERMANY
www.kompernass.com
Kassering

natural_image
Pure mechanical diagram showing a diagonal line intersecting multiple saw and block components (no text or symbols)Før første brug
KOMPERNASS HANDELS GMBH
BURGSTRASSE 21
44867 BOCHUM
GERMANY
www.kompernass.com
Bortskaff else

text_image
fetiyank CESemi Uguzlu
- Kvalitetschef -
natural_image
Black plastic battery pack with visible internal compartments and mounting holes (no text or symbols)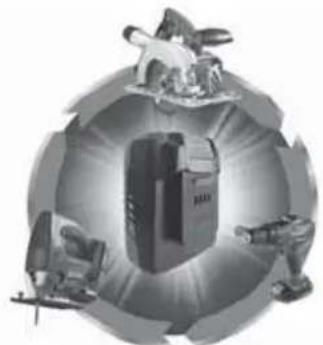
natural_image
Diagram of a robotic arm surrounded by a globe with mechanical components (no text or symbols)Tre apparater - tre kompatible batterier. Kan skiftes mellem de forskellige apparater!
Online-bestilling
Informations relatives aux lames 54
Informations relatives aux lames
natural_image
Pure electrical circuit lines without any symbolsKOMPERNASS HANDELS GMBH
BURGSTRASSE 21
44867 BOCHUM
GERMANY
www.kompernass.com
Mise au rebut
Directive Machines (2006/42/EC)
Directive RoHS (2011/65/EU)
natural_image
Black plastic battery pack with visible internal compartments and mounting holes (no text or symbols)
natural_image
Abstract illustration of a globe with internal mechanical components (no text or symbols)ACCU-DECOUPEERZAAG PSTDA 18-Li A1
Inleiding

Nominale spanning: 18 V ---
Oplaadstroom: 1,8 A
natural_image
Pure mechanical diagram showing gear and shaft components without any text or symbolsKOMPERNASS HANDELS GMBH
BURGSTRASSE 21
44867 BOCHUM
GERMANY
www.kompernass.com
Afvoeren
text_image
Safery FryndCE
Semi Uguzlu
natural_image
Black plastic electronic device casing with lid and ventilation slots (no visible text or symbols)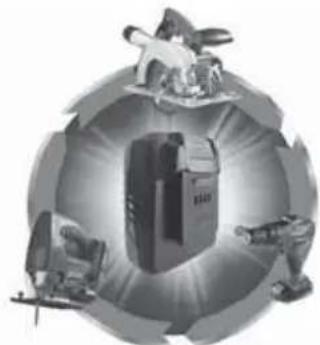
natural_image
Illustration of a globe with internal mechanical devices and human figures (no text or symbols)natural_image
Pure technical line drawings of mechanical components without any text or symbolsKOMPERNASS HANDELS GMBH
BURGSTRASSE 21
44867 BOCHUM
GERMANY
www.kompernass.com
Entsorgung

text_image
Sofia Fand CESemi Uguzlu
natural_image
Black plastic battery pack with visible internal compartments and mounting base (no text or symbols)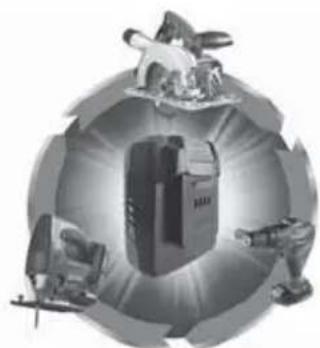
natural_image
Abstract illustration of a globe with mechanical devices and a central device, no text or symbols present.KOMPERNASS HANDELS GMBH
BURGSTRASSE 21
44867 BOCHUM
DEUTSCHLAND / GERMANY
www.kompernass.com
Last Information Update · Tietojen tila · Informationsstatus
Tilstand af information · Version des informations
Stand van de informatie · Stand der Informationen:
07/2014 Ident.-No.: PSTDA18-LiA1-072014-5