84000 - Garden seeder Chapin - Free user manual and instructions
Find the device manual for free 84000 Chapin in PDF.
| Title | Description |
|---|---|
| Product type | Backpack sprayer |
| Tank capacity | 15 liters |
| Tank material | Polyethylene |
| Maximum pressure | 3 bars |
| Weight | 3.5 kg |
| Dimensions | 45 x 20 x 50 cm |
| Nozzle type | Adjustable nozzle |
| Recommended use | Gardening, plant treatment, disinfection |
| Maintenance | Cleaning after each use, checking seals |
| Safety | Wearing gloves and protective glasses recommended during use |
| Warranty | 2 years |
Frequently Asked Questions - 84000 Chapin
User questions about 84000 Chapin
0 question about this device. Answer the ones you know or ask your own.
Ask a new question about this device
Download the instructions for your Garden seeder in PDF format for free! Find your manual 84000 - Chapin and take your electronic device back in hand. On this page are published all the documents necessary for the use of your device. 84000 by Chapin.
USER MANUAL 84000 Chapin
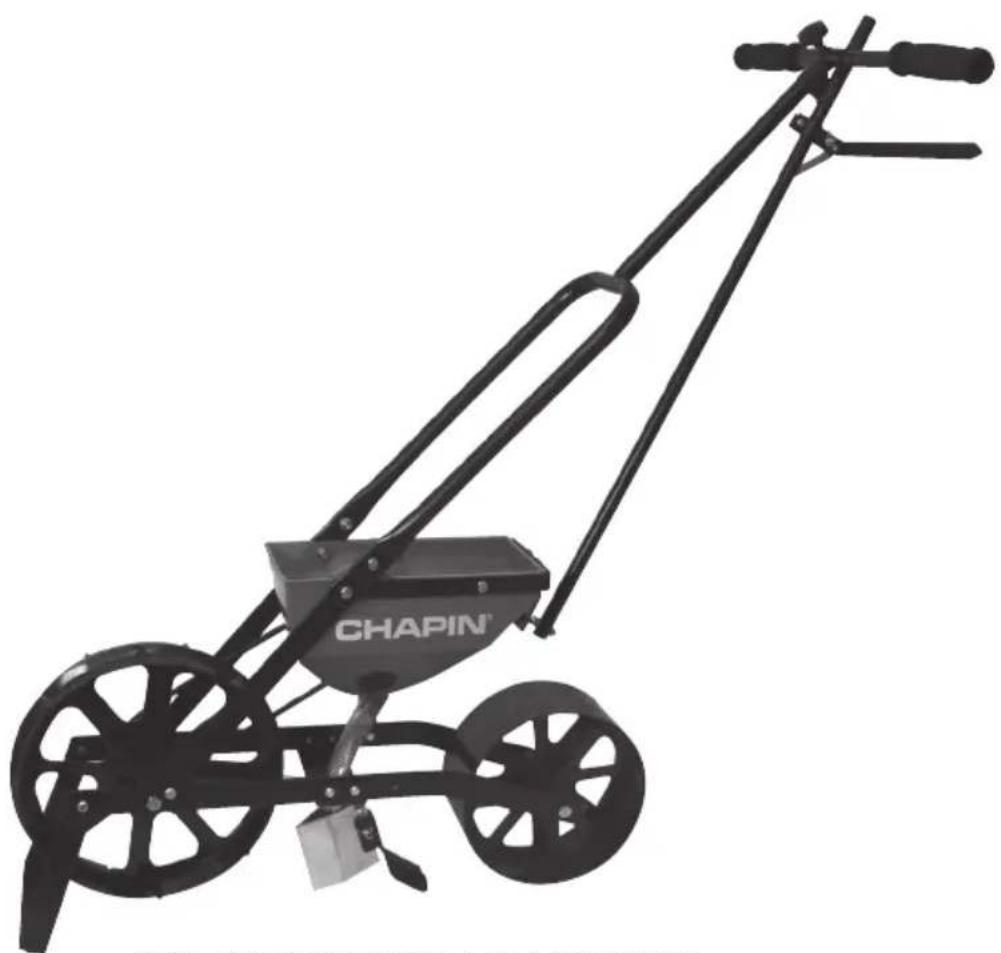
GARDEN SEEDER Assembly / Operation Instructions / Parts

natural_image
Black CHAPIN bicycle with articulated arm and wheels (no visible text or symbols)DO NOT RETURN TO THE STORE.
Please call 800-950-4458
if you are missing any parts, having trouble assembling, or have any questions regarding the safe operation of this product.
WARNING
Carefully Read These Instructions Before Use
MODEL 84000

IMPROPER USE OR FAILURE TO FOLLOW INSTRUCTIONS CAN RESULT IN PRODUCT FAILURE OR INJURIES. FOR SAFE USE OF THIS PRODUCT YOU MUST READ AND FOLLOW ALL INSTRUCTIONS BEFORE USING.
WARNING: Handling the brass parts of this product will expose you to lead, a chemical known to the State of California to cause birth defects and other reproductive harm. Wash hands after handling.
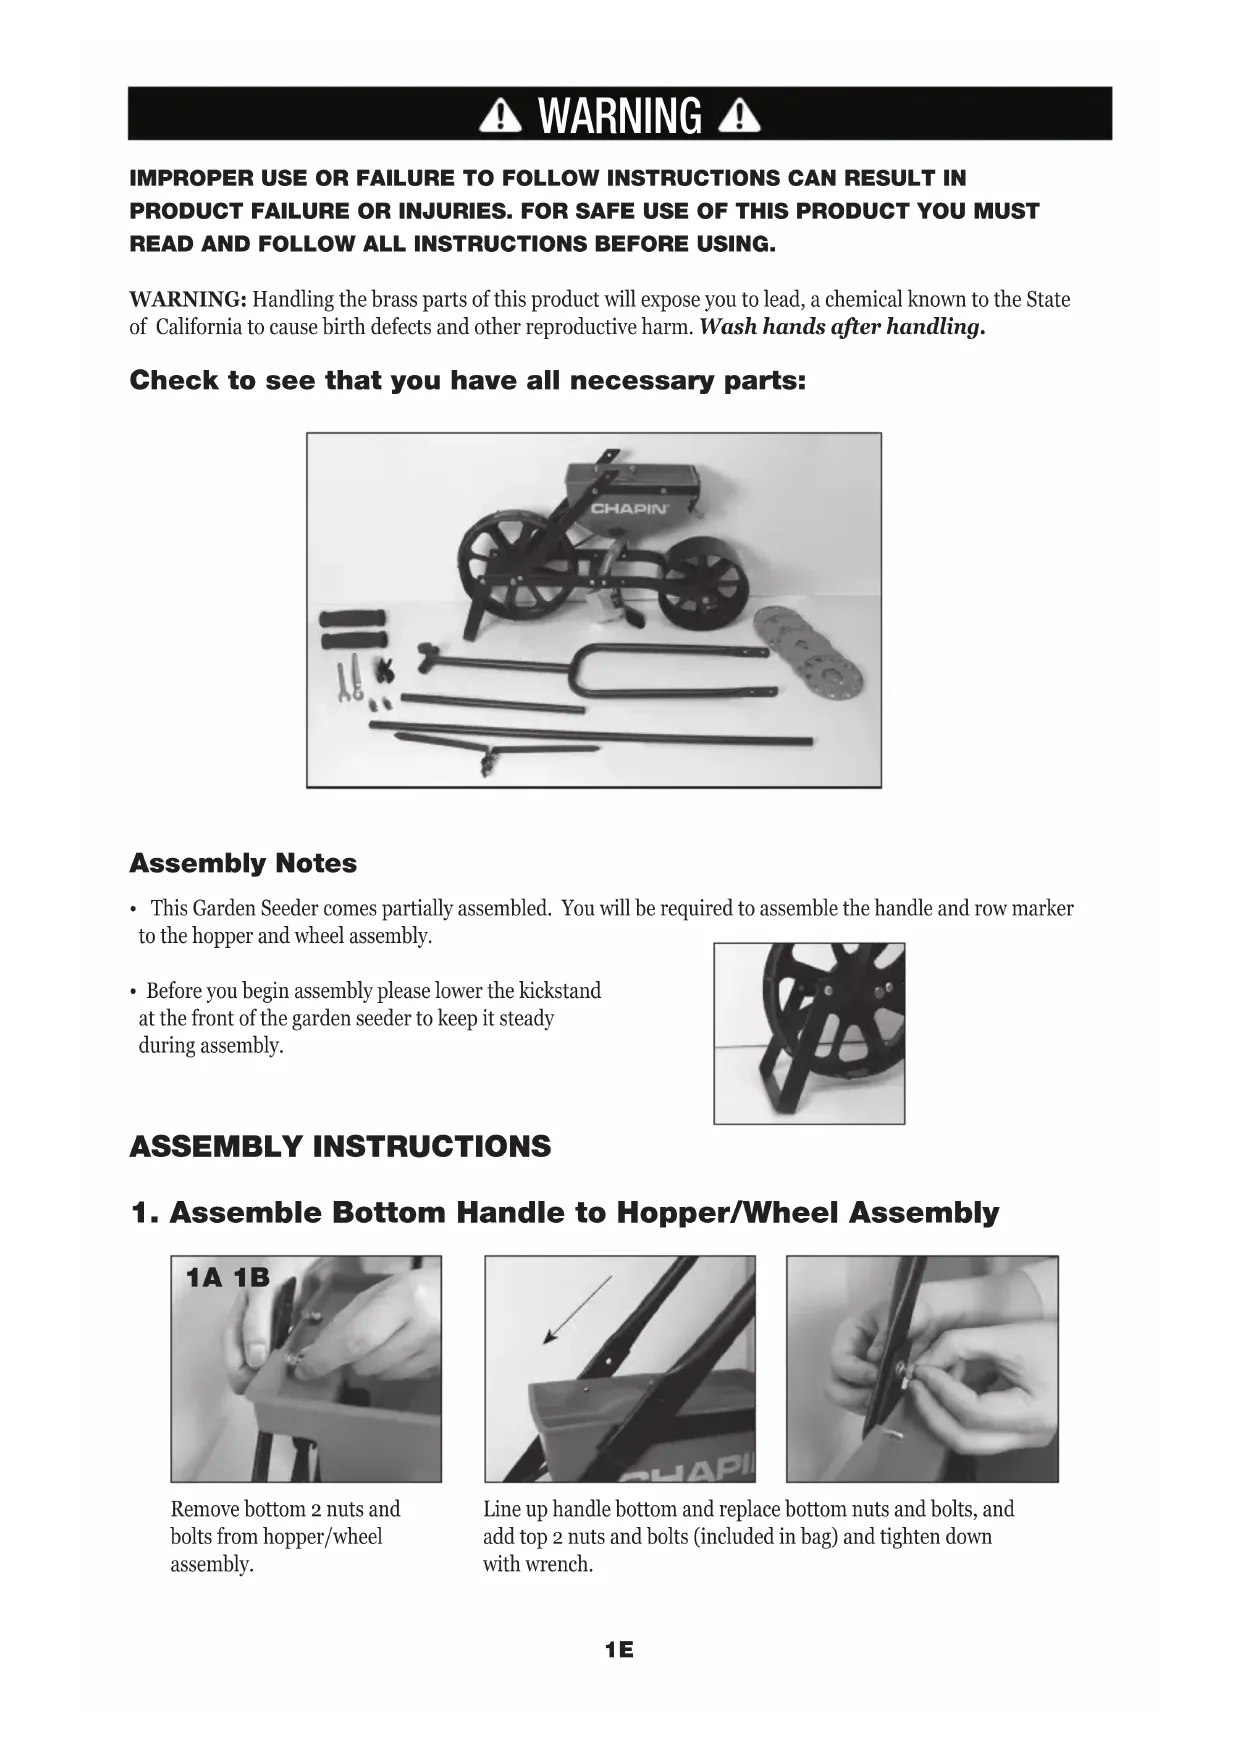
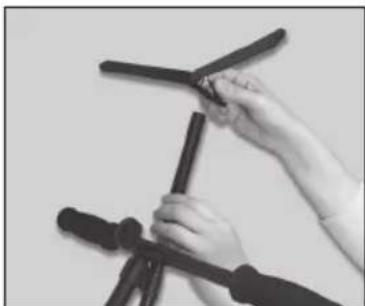
Check to see that you have all necessary parts:
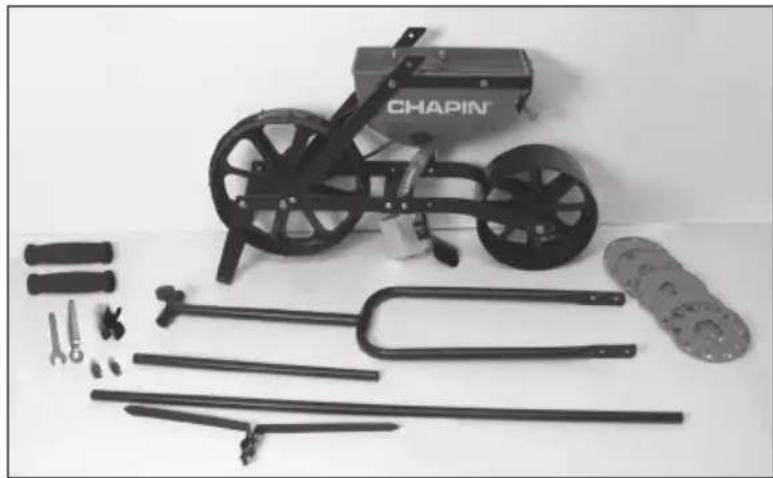
natural_image
Black-and-white photo of a CHAPIN motorcycle with various mechanical components laid out on a white surface (no text or symbols visible)Assembly Notes
- This Garden Seeder comes partially assembled. You will be required to assemble the handle and row marker to the hopper and wheel assembly.
- Before you begin assembly please lower the kickstand at the front of the garden seeder to keep it steady during assembly.
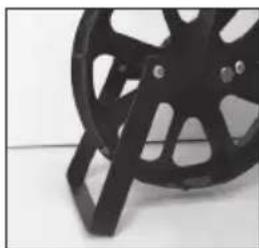
natural_image
Close-up of a black plastic wheel with a flat blade, resting on a light surface (no text or symbols visible)ASSEMBLY INSTRUCTIONS
1. Assemble Bottom Handle to Hopper/Wheel Assembly
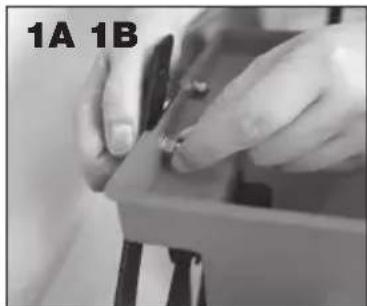
natural_image
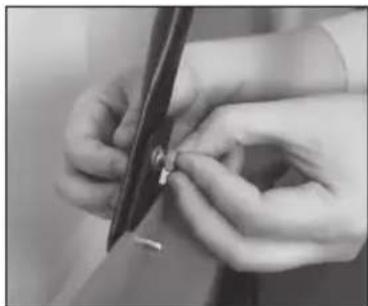
Close-up of hands adjusting a small object with a small object on top (no visible text or symbols)Remove bottom 2 nuts and bolts from hopper/wheel assembly.
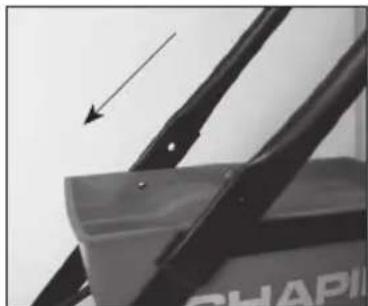
natural_image
Close-up of a mechanical component with an arrow pointing to a feature, no visible text or symbolsLine up handle bottom and replace bottom nuts and bolts, and add top 2 nuts and bolts (included in bag) and tighten down with wrench.
natural_image
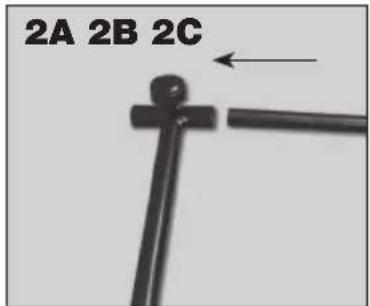
Close-up of hands holding a small object with a ruler, no visible text or symbols2. Assemble Handle Cross Bar
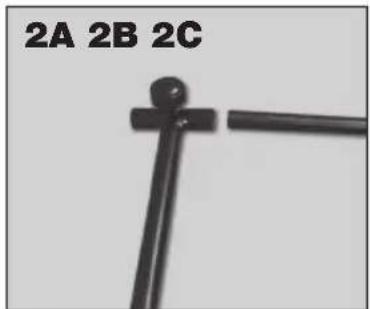
text_image
2A 2B 2CSlide handle cross bar through hole at top of handle bottom.
natural_image
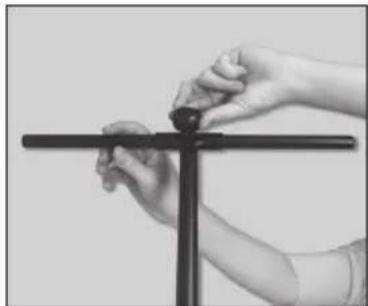
Close-up of hands adjusting a metal frame with a knob (no text or symbols visible)Center and tighten thumb screw.
natural_image
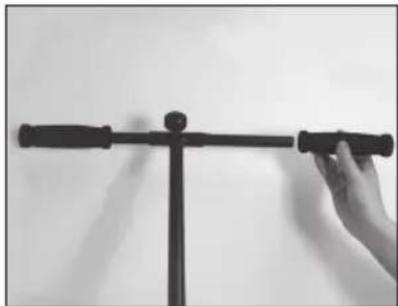
Hand holding a metal scale with two handles, against a plain background (no text or symbols visible)Attach foam grips (included in bag).
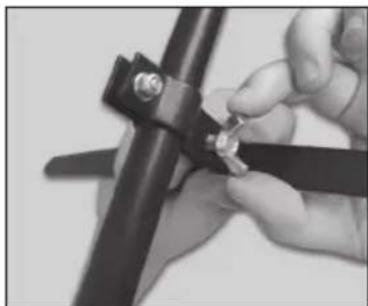
3. Row Marker Assembly
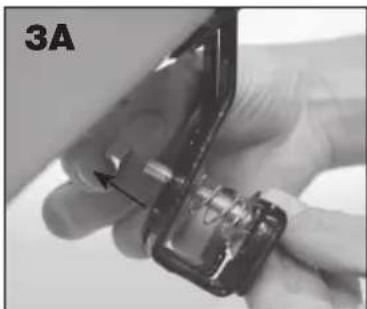
natural_image
Close-up of a hand holding a small electronic device with a metallic clip, labeled '3A' in the corner (no other text or symbols visible)Remove nut from row marker pole (leave spring and washers attached to bolt).
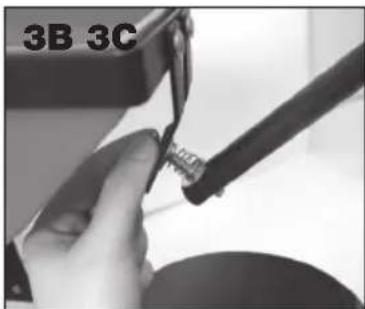
natural_image
Close-up of a hand using a tool to adjust or install a small component, labeled '3B 3C' in the corner (no other text or symbols visible)Slide pole through hole in bracket at the back of the hopper and secure with the nut.
text_image
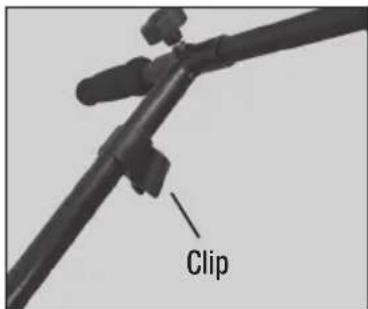
ClipAttach row marker clip to top of handle (below cross bar).
text_image
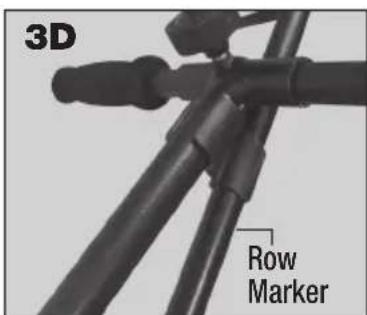
3D Row MarkerLock row marker into clip.
4. Row Marker Blade Assembly
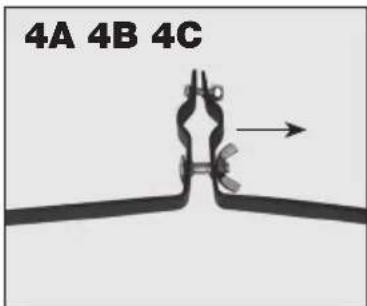
text_image
4A 4B 4CRemove wing nut from carriage bolt.
natural_image
Close-up of hands holding a black tool with two blades, no visible text or symbolsSlide blade onto row marker pole. Set length to proper row spacing.
natural_image
Close-up of hands holding a black metal bracket with a screw and nut (no text or symbols visible)Secure bolt with wing nut.
GARDEN SEEDER MAINTENANCE
- Hopper should be wiped out with a clean cloth after each use. Accumulation of dust, dirt, or residue from seeds may cause the seed plates to stick and alter the accuracy of the planting of seeds.
- Static electricity may build up in the seed hopper and interfere with the planting of fine seeds. Under these circumstances please wash the hopper and seed plates with a mild dishwashing detergent and allow them to dry thoroughly.
- We recommend removing the seed plate and cleaning the hopper and seed plates thoroughly before storing the garden seeder.
OPERATING INSTRUCTIONS
- One seed plate is in the hopper and the remaining 5 are in the storage bag. To replace the plate with the desired plate:
a. Remove the plate by holding the pulley and belt stationary with one hand while rotating the seed plate in the "OFF" direction, indicated by the arrow on the plate.
b. Push the seed plate off the hub through the hole.
- Select the desired seed plate. Use the Seed Plate Guide to determine the best seed plate based on the type and size of seed you're planting.
a. We suggest testing the seed plate with your seed before planting.
b. If more distance between seeds is required, place a piece of masking tape over every other hole or as required on the seed plate to achieve your desired distance.
- Install the selected seed plate (make sure the hopper is completely empty before installing new plate)
a. Hold seed plate at an angle with the bottom against the straight wall inside the hopper
b. Line up the slots against the inside of the hopper and rotate approximately 12 " in the "ON" direction until the cam action locks the seed plate into place on the hub. Do not force the seed plate on.
- Set the planting depth with the wedge shaped ground opener located directly under the hopper.
a. Move the ground opener until the top edge is in line with the appropriate planting depth (refer to the planting instructions on the packaging of the seed you're plating for proper planting depth)
b. Tighten wing nut after adjustment is made and check the depth by moving the garden seeder forward a few inches.
- Pour seeds into the hopper. DO NOT fill the hopper above the FILL LINE indicated inside the hopper.
- Using the Row Marker
a. Mark the first row with strings and stakes.
b. Lower the row marker pole and adjust the row marker blades to the desired width for the next row.
c. Lift the kickstand over the front wheel and begin walking at a steady pace.
- Emptying the Hopper
a. Remove the drain plug from side of hopper.
b. If there are any remaining seeds in the hopper, lower the kickstand and tip the garden seeder forward until all seeds are removed.
Seed Plates Included:
| Plate # | Used For |
1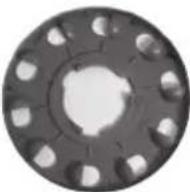 | Baby Lima Beans, Peas |
2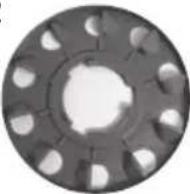 | Medium Beans, Medium Peas |
3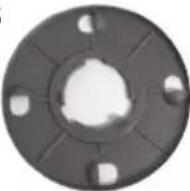 | Sunflower, Cucumber, Corn |
4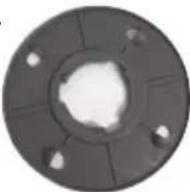 | Sweet Corn |
5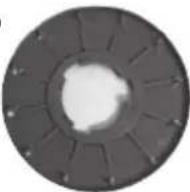 | Small Beets, Radishes |
6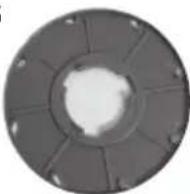 | Brussels Sprouts, Rutabaga, Parsnips, Spinach, Cabbage, Broccoli, Rhubarb, Endive, Carrots, Cauliflower, Celery, Kale, Lettuce, Onions, Peppers, Turnips |
Additional Seed Plates Available
| Qty Part No. Description | |
| Disk #7 - Lima Beans | |
| Disk #8 - Beets, Okra, Set of 4-6-9002 | Swiss Chard |
| Shells Sprouts, Cabbage, Carrots, Mustard, Onions,Parsley, Parsnips, Peppers, Cauliflower, Celery, Endive, Kale, Lettuce,Rhubarb, Rutabaga, Spinach, Turnips | |
| Disk #10 - Medium Radish, Spinach, Asparagus, Leek | |
CHAPIN®
SEMBRADORA PARA JARDINES Assembly / Operation Instructions / Parts
natural_image
Black CHAPIN bicycle with articulated arm and wheels, no visible text or symbols on the device itselfNO LO REGRESE A LA TIENDA
natural_image
Product photo of a CHAPIN motorcycle with various mechanical parts and tools (no visible text or symbols)natural_image
Close-up of a black film reel with visible spokes and mounting holes (no text or symbols)INSTRUCCIONES DE MONTAJE:
natural_image
Close-up of hands adjusting a small component with a tool, labeled '1A 1B' in the corner (no other text or symbols visible)natural_image
Close-up of a mechanical component with an arrow pointing to a feature, no visible text or symbolsnatural_image
Close-up of hands holding a small object with a ruler, no visible text or symbols2. Ensamble la barra transversal de la manija
text_image
2A 2B 2Cnatural_image
Close-up of hands adjusting a metal frame with a small knob (no text or symbols visible)natural_image
Hand holding a metal scale with two handles, against a plain background (no text or symbols visible)natural_image
Close-up of hands holding a small electronic device with a metallic component, no visible text or symbolsnatural_image
Close-up of a hand holding a small cable or connector with a black cable inserted, no visible text or symbolsnatural_image
Close-up of hands holding a small propeller or model airplane (no text or symbols visible)natural_image
Close-up of hands holding a black metal bracket with screws, no visible text or symbolsnatural_image
Black CHAPIN bicycle with articulated arm and wheels, no visible text or symbols on the device itself.NE PAS RAPPORTER AU MAGASIN
natural_image
Product photo of a CHAPIN motorcycle with various mechanical parts and tools (no visible text or symbols)natural_image
Close-up of a black film reel with a metallic bracket, resting on a white surface (no text or symbols visible)natural_image
Close-up of hands adjusting a small object with a tool, labeled '1A 1B' in the corner (no other text or symbols visible)natural_image
Close-up of a mechanical component with an arrow pointing to a detail (no visible text or symbols)natural_image
Close-up of hands holding a small object with a ruler, no visible text or symbolsnatural_image
Close-up of hands installing or adjusting a metal frame with a small component (no text or symbols visible)natural_image
Hand holding a metal scale with a pointer, against a plain background (no text or symbols visible)natural_image
Close-up of hands holding a mechanical component with a metallic bracket (no visible text or symbols)natural_image
Close-up of a hand holding a small mechanical component with a tool, no visible text or symbolsnatural_image
Close-up of hands holding a small wooden object with three blades, no visible text or symbolsnatural_image
Close-up of hands using a tool to adjust or install a black metal bracket (no text or symbols visible)1 Year Limited Warranty
Chapin warrants this product against defects in workmanship and materials for a period of 1 year. If a defect is found during this period, Chapin will repair or replace the product at no charge provided the failure is not the result of incorrect installation, mishandling or normal wear and tear as determined by Chapin. Chapin may request return of the product along with the original purchase receipt for examination and compliance with the terms of this warranty. All returned product must first receive authorization from Chapin by phone at 800-950-4458 or mail at 700 Ellicott Street, Batavia, New York, 14021.
LIMITATIONS: This warranty covers only the product. Any additional expense associated with repair or replacement of defected product is specifically excluded. Chapin makes no warranty against product failure due to the effects of corrosion. As a preventative measure, clean and dry your spreader thoroughly after each use.
text_image
CHAPIN® The Way to Spray Since 1884www.chapinmfg.com
800-950-4458
P.O. Box 549 700 Ellicott St.
Batavia, NY 14021-0549 U.S.A.