ML705 - Lighting MAKITA - Free user manual and instructions
Find the device manual for free ML705 MAKITA in PDF.

| Product Type | Rechargeable LED Lamp |
| Brand | Makita |
| Model | ML705 |
| Power Source | DC 7.2 V |
| LED Power | 1 W |
| Operating Time | Approximately 5 hours (BL7010 battery) |
| Charge Time | Approximately 30 minutes (DC07SA charger) |
| Dimensions (L x W x H) | 115 x 46 x 40 mm (excluding flexible stand) |
| Net Weight (with battery) | 0.24 kg |
| Battery | Rechargeable Makita (compatible with BL7010) |
| Charger | DC07SA |
| Flexible Stand | Included for hands-free lighting |
| Belt Clip | Yes, integrated |
| Use | Indoor only |
| Protection | Double insulation |
| Laser Class | Class 2 according to IEC 60825-1 |
| Maintenance | Clean with a dry cloth; do not immerse |
| Safety | Do not look directly at the light source; do not expose to rain |
| Repairability | Refer to an authorized Makita service center |
| Warranty | According to manufacturer's conditions |
Frequently Asked Questions - ML705 MAKITA
User questions about ML705 MAKITA
0 question about this device. Answer the ones you know or ask your own.
Ask a new question about this device
Download the instructions for your Lighting in PDF format for free! Find your manual ML705 - MAKITA and take your electronic device back in hand. On this page are published all the documents necessary for the use of your device. ML705 by MAKITA.
USER MANUAL ML705 MAKITA
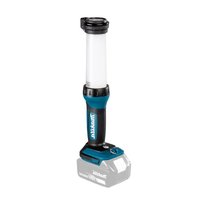
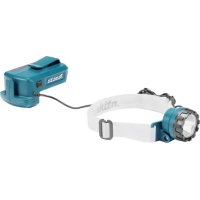
GB Rechargeable Grab Light Instruction manual
F Lampe torchre rechargeable Manuel d'instructions
Explanation of general view
-
Charging light
-
Light
-
Raised portion
-
Button
-
Clip
-
Hole of the clip
-
Battery cartridge
-
C-shaped portion
-
Switch
-
Flexible leg
SPECIFICATIONS
| Model ML705 | |
| Power source D.C 7.2 V | |
| LED 1 W | |
| Operating time Approx. 5 hours (BL7010) | |
| Charging time Approx. 30 min (DC07SA) | |
| Dimensions (With battery cartridge Without flexible leg) 11 | 5 mm (L) x 46 mm (W) x 40 mm (H) |
| Net weight (With battery cartridge) 0.24 Kg |
- Due to our continuing programme of research and development, the specifications herein are subject to change without notice.
- Note: Specifications may differ from country to country.
Symbols
The following show the symbols used for the equipment. Be sure that you understand their meaning before use.

Read instruction manual.

Do not direct the light beam at persons or animals and do not stare into the light beam yourself (not even from a distance).

This cordless worklight produces laser class 2 light radiation according to IEC 60825-1 ed. 1.2.-2001. This can lead to other persons being unintentionally blinded.

DOUBLE INSULATION.

Indoor use only

Ready to charge Charging.

Charging complete

Delay charge (too hot battery)

Defective battery.

Do not destroy battery by fire.

Do not expose battery to water or rain.

Do not short batteries.

Always recycle batteries.

Only for EU countries Do not dispose of electric equipment together with household waste material! In observance of European Directive 2002/96/ EC on waste electrical and electronic equipment and its implementation in accordance with national law, electric equipment that have reached the end of their life must be collected separately and returned to an environmentally compatible recycling facility.
IMPORTANT SAFETY INSTRUCTIONS
WARNING:
When using electric tools, basic safety precautions should always be followed to reduce the risk of fire, electric shock, and personal injury, including the following:
READ ALL INSTRUCTIONS.
-
Read this instruction manual and the charger instruction manual carefully before use.
-
This light is not waterproof. Do not use it in damp or wet locations. Do not expose it to rain or snow. Do not wash it in water.
-
A short-circuit can cause a large current flow, overheating, possible burns and even a breakdown.
(1) Do not touch the inside of the light with tweezers, metal tools, etc.
(2) Do not touch the battery terminals with any conductive material.
(3) Avoid storing the battery cartridge in a container with any metal objects such as nails, coins, etc. - Never expose the battery cartridge to flames, fire or great heat. Breakage may cause release of injurious material.
- If electrolyte gets into your eyes, rinse them out with clear water and seek medical attention right away. It may result in loss of your eyesight.
- If operating time has become excessively shorter, stop operating immediately. It may result in a risk of overheating, possible burns and even an explosion.
- Be careful not to drop, shake or strike battery.
- When the tool is not in use, always switch off and remove the battery cartridge from the tool.
- Do not store the tool and battery cartridge in locations where the temperature may reach or exceed 50^ (122^) .
- Do not give the tool a shock by dropping, striking, etc.
- Do not expose the light to eyes continuously. It may hurt them.
- Do not cover or clog the lit tool with cloth or carton, etc. It may create a risk of fire.
- Do not disassemble the charger or battery cartridge; take it to a qualified serviceman when service or repair is required. Incorrect reassembly may result in a risk of electric shock or fire.
- If any problem develops, consult your nearest Makita Service Center or dealer. To maintain product safety and reliability, repairs, maintenance or adjustment should be carried out by Makita Authorized Service Center.
SAVE THESE INSTRUCTIONS.
FUNCTIONAL DESCRIPTION
CAUTION:
- SAVE THESE INSTRUCTIONS - This manual contains important safety and operating instructions for battery charger.
- Before using battery charger, read all instructions and cautionary markings on (1) battery charger, (2) battery, and (3) product using battery.
- CAUTION - To reduce risk of injury, charge only MAKITA rechargeable batteries. Other types of batteries may burst causing personal injury and damage.
- Non-rechargeable batteries cannot be charged with this battery charger.
- Use a power source with the voltage specified on the nameplate of the charger.
- Do not charge the battery cartridge in presence of flammable liquids or gases.
- Do not expose charger to rain or snow.
- Never carry charger by cord or yank it to disconnect from receptacle.
- After charging or before attempting any maintenance or cleaning, unplug the charger from the power
source.Pull by plug rather than cord whenever disconnecting charger.
- Make sure cord is located so that it will not be stepped on, tripped over, or otherwise subjected to damage or stress.
- Do not operate charger with damaged cord or plug - replace them immediately.
- Do not operate or disassemble charger if it has received a sharp blow, been dropped, or otherwise damaged in any way; take it to a qualified serviceman. Incorrect use or reassembly may result in a risk of electric shock or fire.
- The battery charger is not intended for use by young children or infirm persons without supervision.
- Young children should be supervised to ensure that they do not play with the battery charger.
- Do not charge battery cartridge when temperature is BELOW 10^ (50^) or ABOVE 40^ (104^) .
- Do not attempt to use a step-up transformer, an engine generator or DC power receptacle.
Charging (Fig.1)
Charge the battery cartridge with the Makita charger before use.
- Plug the battery charger into the proper AC voltage source. The charging light will flash in green color.
- Insert the battery cartridge so that the plus and minus terminals on the battery cartridge are on the same sides as their respective markings on the charger.
- When the battery cartridge is inserted fully, the charging light will change from green to red and charging will begin. The charging light will remain lit steadily during charging.
- When the charging light changes from red to green, the charging cycle is complete.
- After charging, unplug the charger from the power source.
NOTE:
- The battery charger is for charging Makita battery cartridge. Never use it for other purposes or for other manufacturer's batteries.
- If you charge a battery cartridge from a just operated tool or a battery cartridge which has been exposed to direct sunlight or heat for a long time, the charging light may flash in red color. If this occurs, wait for a while. Charging will begin after the battery cartridge cools.
- If the charging light flashes alternately in green and red, charging is not possible. The terminals on the charger or battery cartridge are clogged with dust or the battery cartridge is worn out or damaged.
CAUTION:
- Always be sure that the tool is switched off and the battery cartridge is removed before adjusting or checking function on the tool.
Installing or removing battery cartridge (Fig. 2)
- Always switch off the tool before insertion or removal of the battery cartridge.
-
To remove the battery cartridge, withdraw it from the tool while pressing the buttons on both sides of the cartridge.
-
To insert the battery cartridge, align the tongue on the battery cartridge with the groove in the housing and slip it into place. Always insert it all the way until it locks in place with a little click. If not, it may accidentally fall out of the tool, causing injury to you or someone around you.
- Do not use force when inserting the battery cartridge. If the cartridge does not slide in easily, it is not being inserted correctly.
Lighting up the lamp (Fig. 3)
CAUTION:
- Do not look in the light or see the source of light directly.
- Push the switch to light up the light. To turn off, push the switch again.
NOTE:
- When remaining battery capacity becomes lower, light turns off automatically. So you should charge the battery cartridge soon.
- Operating time may be shortened according to environments and battery conditions.
OPERATION
Clip (Fig. 4)
User can carry the light with hands free by hooking the clip on a belt.
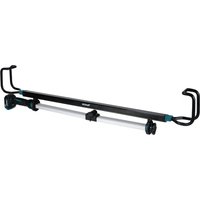
Attaching flexible leg (Fig. 5, 6 & 7)
Slide the C-shaped portion of the flexible leg over the light in the direction of the arrow.
Hold the flexible leg securely in place by fitting the raised portion of the flexible leg in the hole of the clip.
Removing flexible leg (Fig. 8, 9)
Slightly raise the grab light's clip and remove raised part of flexible leg from clip slot, and then slide of the leg as shown in the diagram.
CAUTION:
- Do not remove the flexible leg while the raised part of the leg is inserted in the clip slot of the grab light.
Doing so may damage the grab light.
Using flexible leg (Fig. 10, 11)
CAUTION:
- Do not wind the flexible leg over a part of body such as hand or arm to use the flash light.
This may cause the tool to drop, resulting in the flash light damage, personal injuries etc.
- Do no carry the flash light by flexible leg.
This may cause the flash light to drop, resulting in the flash light damage, personal injuries etc.
- Do not wind the flexible leg over moving objects such as bicycle to use the flash light.
Vibration may cause the flash light to drop, resulting in the flash light damage, personal injuries etc.
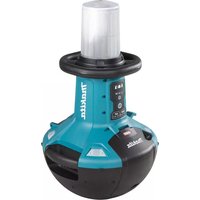
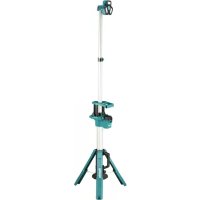
By attaching the flexible leg to the light, the light can be set on or fixed at various locations for hands-free lighting.
e.g. 1) The light can be set on the surface of a workbench or the like by standing the light on the flexible leg.
e.g. 2) The light can be fixed by wrapping the flexible leg around a pipe, bar or the like.
NOTE:
- Do not bend the flexible leg excessively. Doing that may cause flash light breakage.
- When winding the flexible leg over a rod, make sure that it grabs securely to avoid its accidental turn and drop before releasing your hand from the flash light.
- The flexible leg is for use with the flash light only.
- Do not use it for other application. Using for other application may cause the flash light damage, personal injuries etc.
MAINTENANCE
CAUTION:
Always be sure that the cleaner is switched off before carrying out any work on the cleaner.
To maintain product safety and reliability, repairs, maintenance or adjustment should be carried out by a Makita Authorized Service Center.
ACCESSORIES
CAUTION:
These accessories or attachments are recommended for use with your Makita tool specified in this manual. The use of any other accessories or attachments might present a risk of injury to persons. Only use accessory or attachment for its stated purpose. If you need any assistance for more details regarding these accessories, ask your local Makita service center.
- Flexible leg
- Battery Charger
- Battery Cartridge