
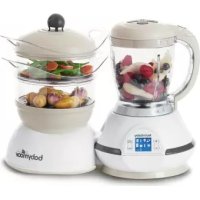
NutriBaby A001114 - Bottle sterilizer BABYMOOV - Free user manual and instructions
Find the device manual for free NutriBaby A001114 BABYMOOV in PDF.
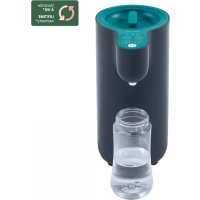
| Product Type | Baby bottle sterilizer with steam cooking, warming, defrosting, blending functions |
| Brand | Babymoov |
| Model | NutriBaby A001114 |
| Sterilization capacity | Up to 3 bottles |
| Warming capacity | Up to 3 bottles or 1 jar |
| Steam cooking capacity | 400 g per basket (2 baskets max) |
| Blender bowl capacity | 400 g cooked fruits/vegetables; 300 g meat/vegetable mix; max 200 ml cooking juice |
| Water volume for sterilization | 150 ml |
| Water volume for steam cooking | 350 ml |
| Water volume for bottle warming | 60 ml |
| Functions | Sterilization, bottle warming, jar warming, steam cooking, defrosting, blending |
| Screen | LCD with function selection and control buttons |
| Materials | Heat-resistant plastic, stainless steel blades |
| Cleaning | Baskets, trays, blender bowl, lids, spatula: dishwasher safe; bases: wipe with damp cloth |
| Descaling | Every 5 cycles approximately: 100 ml hot water + 100 ml white vinegar, let sit for 1-2 hours |
| Safety | Automatic shut-off if water low, blender bowl lock, audible alarms |
| Power supply | Electric, 220-240 V (not specified, estimated) |
| Dimensions | Approx. 30 x 25 x 35 cm (estimated) |
| Weight | Approx. 2.5 kg (estimated) |
Frequently Asked Questions - NutriBaby A001114 BABYMOOV
User questions about NutriBaby A001114 BABYMOOV
0 question about this device. Answer the ones you know or ask your own.
Ask a new question about this device
Download the instructions for your Bottle sterilizer in PDF format for free! Find your manual NutriBaby A001114 - BABYMOOV and take your electronic device back in hand. On this page are published all the documents necessary for the use of your device. NutriBaby A001114 by BABYMOOV.
USER MANUAL NutriBaby A001114 BABYMOOV
natural_image
Line drawing of two household appliances: a coffee maker with a Nutribaby label and a babymoov device (no text or symbols on the devices themselves)NutriBaby
Réfs.: A001100 - A001114 - Á001115
- Notice d'utilisation
- Instructions for use
- Benutzungsanleitung
- Gebruikshandleiding
- Instrucciones de uso
- Instruções de uso
- Istruzioni per l'uso
• Návod k použití
- Инструкция по использованию
- Hasznàlati utasitàs
- Instructiuni de utilizare
- Instrukcja użytkowania
- Brugsanvisning
- Οδηγίες χρήσης

natural_image
3D rendered image of a mechanical lever or tool with a labeled point 'n' (no other text or symbols)
natural_image
Illustration of a glass mug with a straw inside, labeled 'J' pointing to its side (no text or symbols on the cup itself)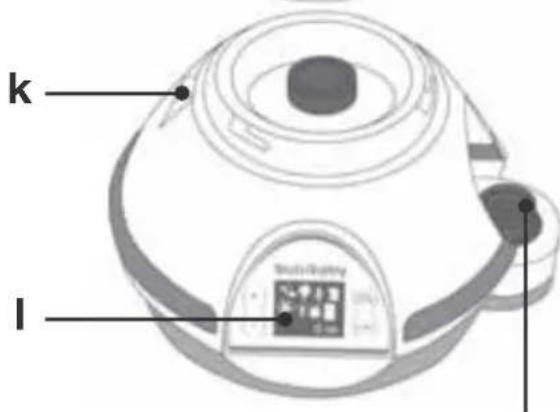

natural_image
Circular mechanical component with concentric rings and mounting holes, labeled 'c' pointing to a feature (no text or symbols beyond label)
natural_image
3D rendered mechanical component with a central hexagonal feature and a labeled dimension 'd' (no text or symbols beyond the label)
natural_image
Simple line drawing of a circular object with internal cutouts and a labeled point 'e' (no text or symbols beyond the label)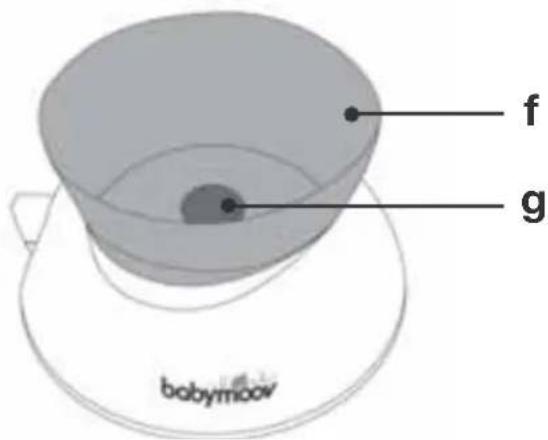
A. CHAUFFE-BIBERON - BOTTLE WARMER - FLÄSCHCHENWÄRMER - FLESSENWARMER CALIENTABIBERONES - AQUECEDOR DE BIBERÕES - SCALDA-BIBERON - OH ÍVA KOJENECKÝCH PAЗОГРЕВ БУТЫЛОЧКИ - Θ'ЕРМАНŞН МПІМПЕР'О - PODGRZANIE BUTELKI - CUMISÜVEG FELMELEGÍTÉS - ÎNCALZITOR BIBEROANE - PODGRZEWACZ DO BUTELEK - FLASKEVARMER

natural_image
Illustration of a kitchen appliance being processed with a hand, showing a blender and lid (no text or symbols)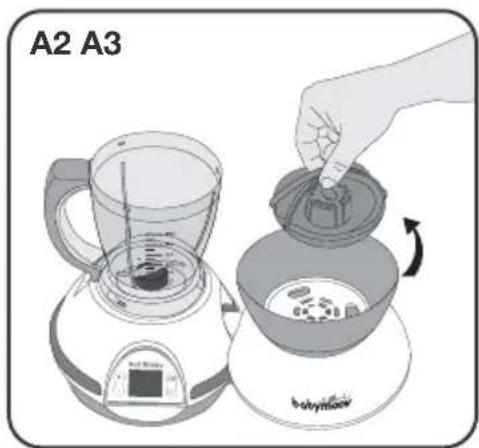

natural_image
Illustration of a babymoor appliance with a glass lid and base, no text or symbols present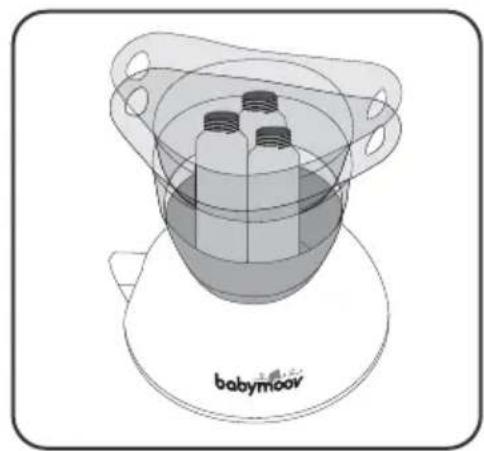
natural_image
3D rendering of a babymoov device with internal components and mounting brackets (no text or symbols on the device itself)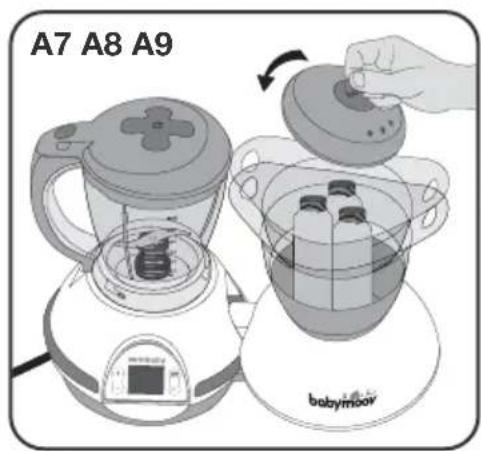

natural_image
Illustration of a hand pointing at a small circular button on a device (no text or symbols visible)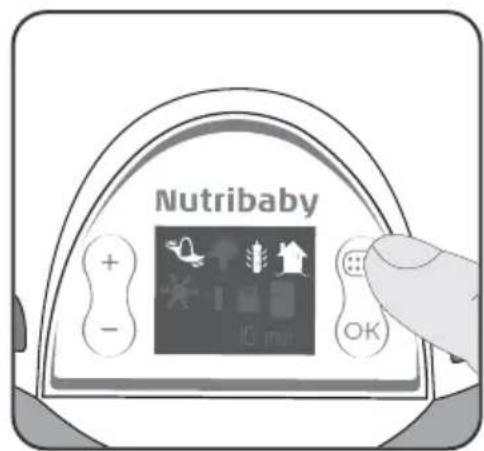

B. RÉCHAUFFER LES PETITS POTS - HEATING A BABY FOOD JAR - GLÄSCHEN ERHITZEN - EEN POTJE OPWARMEN - CALENTAR UN POTITO - AQUECER UM BOIÃO - RISCALDARE UN VASETTO - OHŘEV DĚTSKÉ STRAVY VE SKLENIČCE - PAZÓRPEB BAHOЧКИ - Θ'EPMANΣΗ BAZAKIOY - PODGRZANIE SŁOICZKA - KISÜVEGEK FELMELEGÍTÉSE - ÎNCALZIRE BORCANELE CU MÂNCARE - PODGRZEWANIE SŁOICZKÓW - VARMER BABYMAD PÅ GLAS
natural_image
Illustration of a hand holding a kettle next to an electric kettle, with no visible text or symbols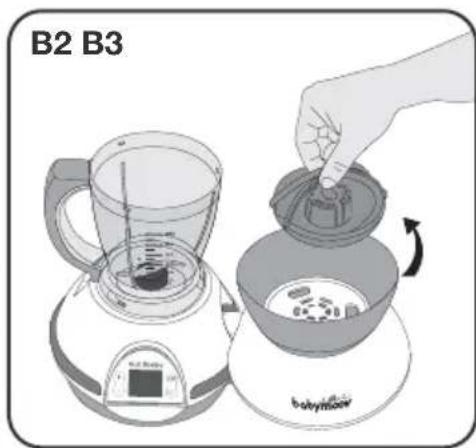

natural_image
Illustration of a babymoov-shaped container with internal components and a base, no text or symbols present.
natural_image
Diagram of a babymoov device with three internal components and mounting brackets (no text or symbols)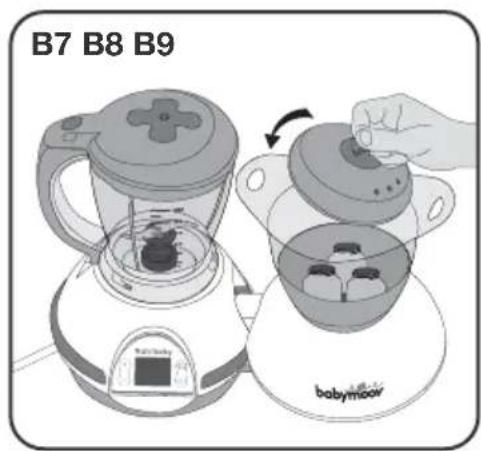
natural_image
Illustration of a hand pointing at a button on a white and gray device (no text or symbols)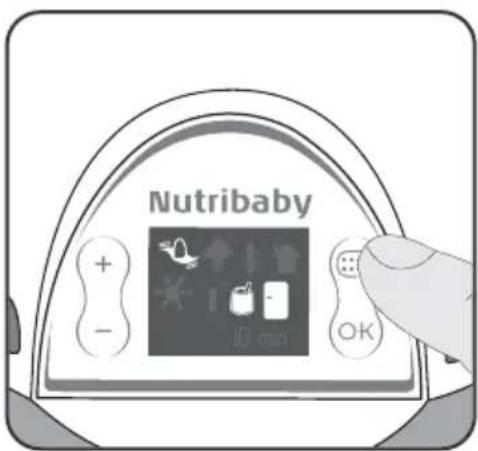
C. STERILISER - STERILISING - STERILISIEREN - STERILISEREN - ESTERILIZAR - STERILIZZARE STERILIZACE - CTEРИЛИЗАЦИЯ - АПОЗТЕІРΩΣΗ - STERYLIZACJA - STERILIZÁLÁS - STERILIZARE - STERYLIZOWANIE - STERILISERER
natural_image
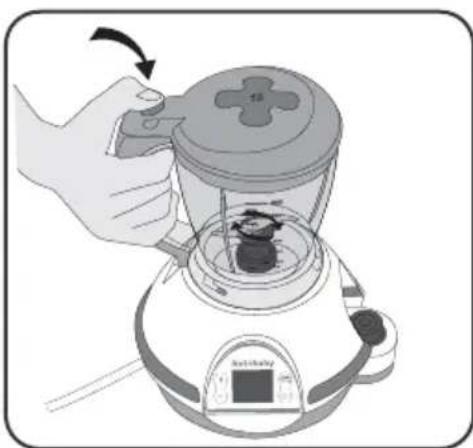
Illustration of a blender being placed on top of a stand, showing internal components and a hand interacting with it (no text or symbols)

natural_image
Illustration of a babymoov-shaped container with a lid and base, no text or symbols present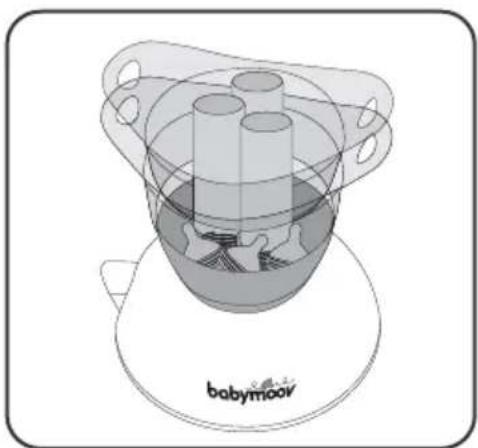
natural_image
3D diagram of a babymoor device with internal components and mounting base (no text or symbols)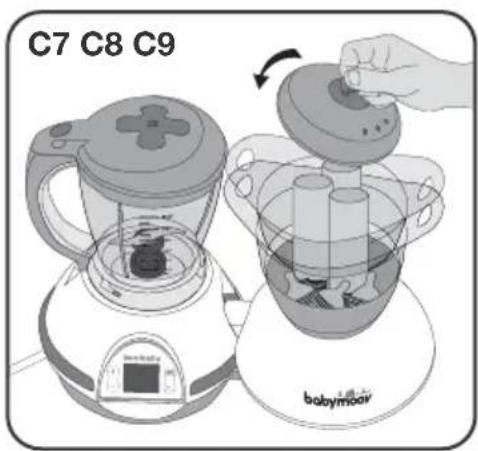
natural_image
Illustration of a hand pointing at a button on a device (no text or symbols visible)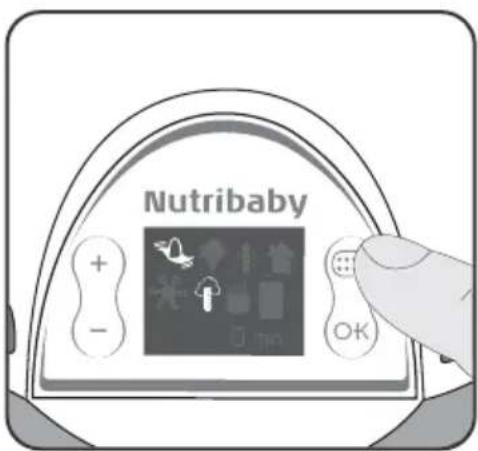
D. CUISSON VAPEUR - STEAM COOKING - DAMPFGAREN - STOMEN - COCCIÓN AL VAPOR COZEDURA A VAPOR - COTTURA AL VAPORE - VAŘENÍ V PÁŘE - BAPKA HA ΠΑΡΥ - ΨΗΣΙΜΟ ME ATMO GOTOWANIE NA PARZE - PÁROLÁS - GATIRE CU ABURI - GOTOWANIE NA PARZE - DAMPER

natural_image
Illustration of a hand holding a kettle next to an electric kettle, with no visible text or symbols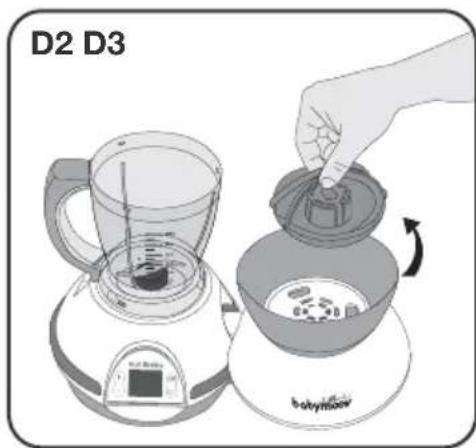

natural_image
Illustration of hands performing a circular mechanical operation with a rotating arrow (no text or symbols)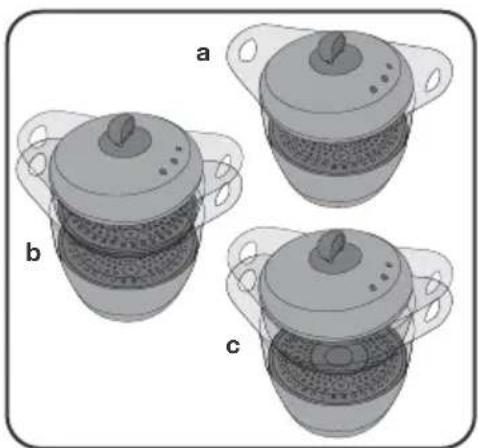
natural_image
Three identical 3D illustrations of a multi-tiered container or vessel with handles, labeled a, b, and c (no text or symbols on the objects themselves)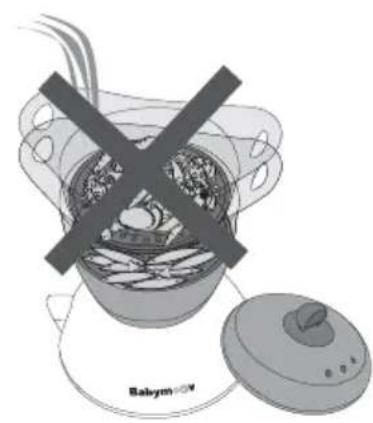
natural_image
Illustration of a steaming pot with a crossed-out X symbol, next to a lid labeled 'Babymov' (no text on pot or pot itself)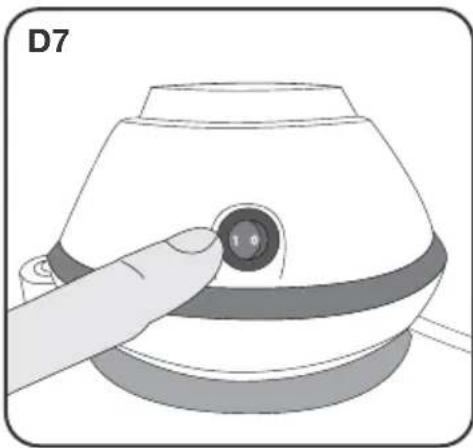
natural_image
Illustration of a hand pointing at a button on a device component (no text or symbols)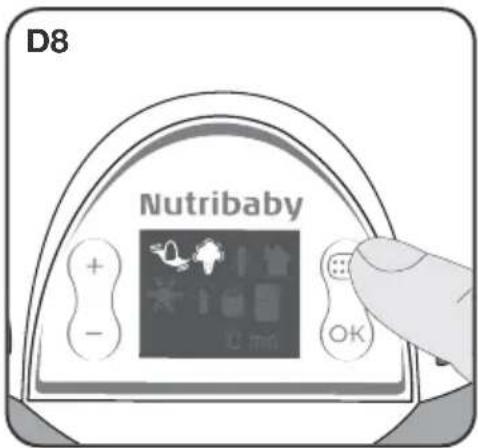
natural_image
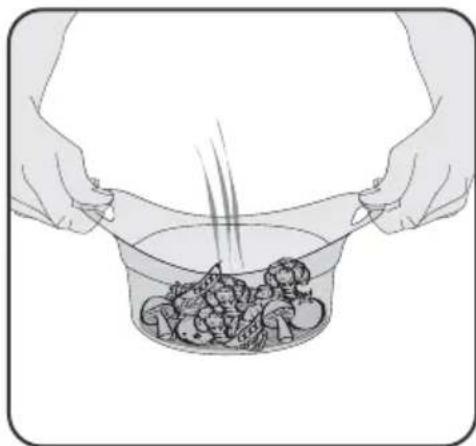
Illustration of hands holding a bowl containing chopped vegetables, with a spoon above (no text or symbols)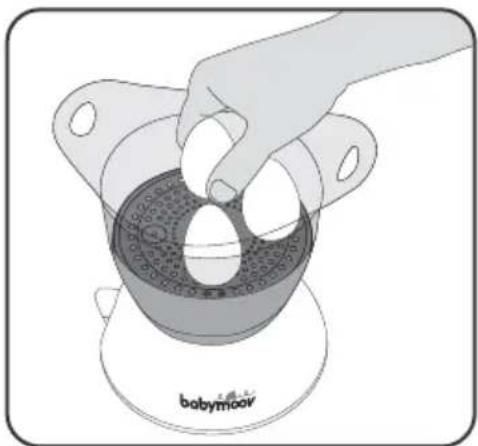
natural_image
Illustration of a hand placing eggs into a babymoov container (no text or symbols on the diagram itself)F. MIXAGE - BLENDING - MIXEN - BATIR - MISTURA - FRULLATI - MIXOVÁNÍ - MIKCAX - ANAMEIÉH
MIKSOWANIE - MIXERELÉS - MIXARE - MIKSOWANIE - MIKSER
natural_image
Illustration of a hand pouring liquid into a small kitchen blender (no text or symbols visible)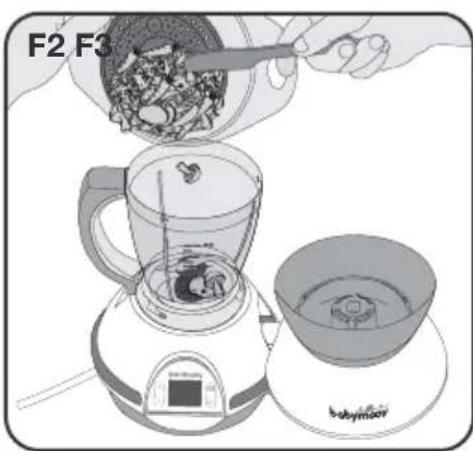
natural_image
Illustration of a blender being heated by a bowl of food, with a hand pouring liquid from a container (no text or symbols)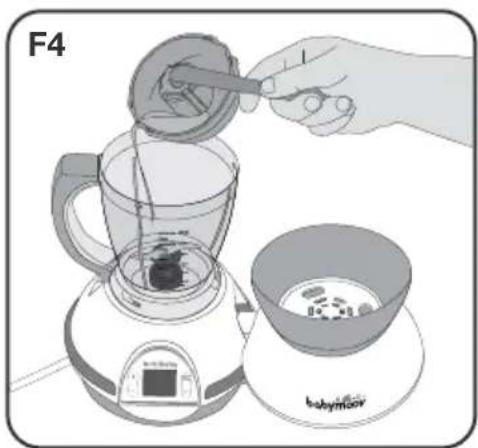
natural_image
Illustration of a blender being filled with liquid, showing the lid and side bowl (no text or symbols)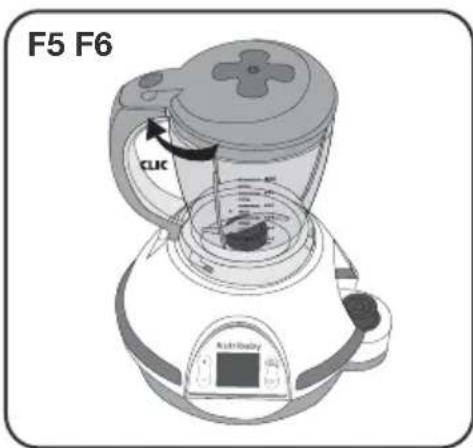
natural_image
Illustration of a coffee maker with a side panel and control panel (no text or symbols)
natural_image
Illustration of a hand using a blender to press or adjust a small object inside a digital kitchen appliance (no text or symbols visible)H. NETTOYAGE DE VOTRE NUTRIBABY - CLEANING NUTRIBABY - REINIGUNG IHRES NUTRIBABY REINIGING VAN UW NUTRIBABY - LIMPIEZA DEL NUTRIBABY - LIMPEZA DO SEU NUTRIBABY PULIZIA DEL VOSTRO NUTRIBABY - MYTÍ PRÍSTROJE NUTRIBABY - УХОД ЗА ВАШИМ NUTRIBABY KAQAPIΣΜΟ TOY NUTRIBABY - MYCIE URZĄDZENIA NUTRIBABY - NUTRIBABY TISZTÍTÁSA - CURATARE A APARATULUI DUMNEAVOASTRA NUTRIBABY - MYCIE URZĄDZENIA NUTRIBABY - RENSNING AF DIN NUTRIBABY
H1
natural_image
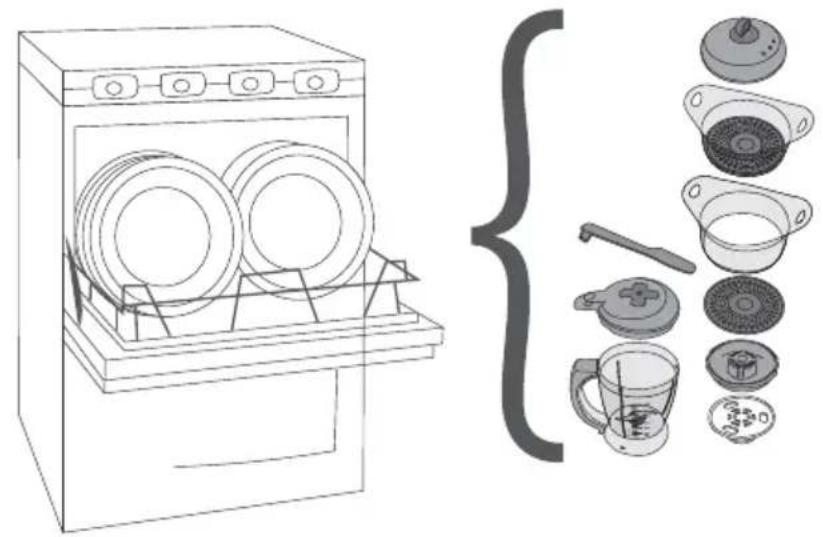
Line drawing of a washing machine with multiple plates and a separate arrangement of kitchen utensils (no text or symbols)
natural_image
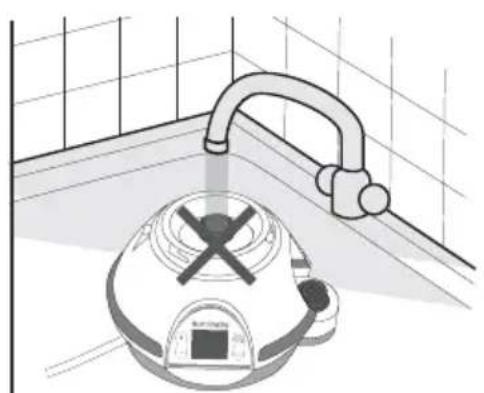
Illustration of a kitchen sink with a curved pipe and a cross-shaped component (no text or symbols)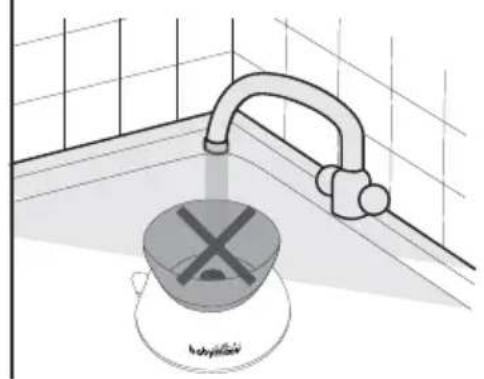
natural_image
Illustration of a kitchen sink with a showerhead and a cross symbol, no text or labels presentH2
natural_image
Technical diagram of a mechanical assembly with a lever, base plate, and workpiece (no text or symbols)TABLEAU DES TEMPS DE CUISSON - COOKING TIMES - GARTABELLE - KOOKSCHEMA - TABLA DE LOS TIEMPOS DE COCCIÓN - TABELA DOS TEMPOS DE COZEDURA - TABELLA DEI TEMPI DI COTTURA - TABULKA DOBY VARU POTRAVIN - ТАБЛИЦА ДЛИТЕЛЬНОСТИ -ПИНАКАЗ ТОН ХРОНОН ПУНЗИМАТОЗ - TABELA CZASU GOTOWANIA - FÖZÉSI IDŐ TÁBLÁZAT - TABLOU CU TIMPUL DE GATIRE - TABELA CZASÓW GOTOWANIA - TABEL FOR TILBEREDNINGSTID
 /Nb /Nb |  | |
| 300 g 15 | - 17 min | |
| 200 g 16 | - 20 min | |
| 200 g 18 | - 20 min | |
| 250 g 20 | - 25 min | |
| 300 g 10 | - 12 min | |
| 200 g 8 | - 10 min | |
| 400 g 20 | - 25 min | |
| 200 g 18 | - 20 min | |
| 1 - 2 20 | - 25 min | |
| 300 g 17 | - 20 min | |
| 200 g 12 | - 15 min | |
| 200 g 14 | - 16 min | |
| 250 g 12 | - 15 min | |
| 300 g 10 | - 14 min | |
| 100 g 8 | - 10 min | |
| 200 g 15 | - 17 min | |
| 200 g 12 | - 14 min | |
| 200 g 8 | - 10 min | |
| 200 g 8 | - 12 min | |
| 200 g 8 | - 10 min | |
| 200 g 8 | - 10 min |
 /Nb /Nb |  | |
 | 200 g 6 - | 8 min |
 | 200 g 3 - | 7 min |
| [cxz5] | 100 g 6 - | 10 min |
 | 200 g 12 - | 14 min |
 | 200 g 12 - | 14 min |
 | 500 g 14 - | 18 min |
 /Nb /Nb |  | |
 | 180 g 15 | - 18 min |
 | 120 g 10 | - 12 min |
 | 150 g 8 | - 12 min |
 | 120 g 8 | - 10 min |
| [DK60] | 4 5 min | |
| [CK62] | 4 12 - | 15 min |
FONCTIONS
natural_image
Simple black-and-white illustration of a broccoli stalk (no text or symbols)
natural_image
Simple black-and-white diagram of a duck-like shape inside a divided rectangle (no text or symbols)
natural_image
Simple line drawing of a cloud with a vertical bar inside, adjacent to empty rectangular cells (no text or symbols)
• Heats up to three baby bottles at the same time
• Heats all baby food jar sizes
- Sterilises up to three baby bottles
- Steam cooks all foods
- Thaws
- Blends
- Possibility of steaming and of mixing at the same time (the icon of mixing is constantly selected no matter the chosen mode)
SAFETY INSTRUCTIONS
Read all the instructions below carefully before using Nutribaby.
- To prevent the risk of electric shock, do not immerse the apparatus or its electrical cord in water or any other liquid.
- Use the apparatus only to cook/heat/blend/sterilise or thaw. Any other use may be dangerous.
- Take care when handling the blender blades, especially when removing the blades from the bowl, and emptying or washing the bowl.
- The apparatus contains no parts useful to the user for repairs. Do not disassemble the apparatus.
-
Monitor the apparatus when in use with children nearby. Keep the apparatus out of reach of children.
-
This apparatus is for indoor use only. Do not use outdoors.
- Do not allow electrical cord to hang over the edge of the table or counter. Do not place near hot surfaces.
- Use the apparatus on a flat, stable and dry surface.
- Do not place the apparatus on a hot surface or near an oven or gas burner, or any other heat source.
- Do not touch the hot surfaces on the apparatus (heating chamber).
- Do not move the apparatus during use, once it has been plugged in, or if it contains hot water.
WARNINGS
- WARNING: To avoid danger, if the electrical cable is damaged, it must be replaced by the manufacturer, its after-sales service department or a qualified electrician.
- Always disconnect the appliance from the supply if it is left unattended and before assembling, disassembling or cleaning.
- This appliance shall not be used by children. Keep the appliance and its cord out of reach of children. Appliances can be used by persons with reduced physical, sensory or mental capabilities or lack of experience and knowledge if they have been given supervision or instruction concerning use of the appliance in a safe way and if they understand the hazards involved.
• Children shall not play with the appliance.
• The appliance potential injury from misuse. - Be careful if hot liquid is poured into the blender as it can be ejected out of the appliance due to a sudden steaming.
-
Respect heating times, and ensure the baby bottle and its contents are at a suitable temperature before feeding your baby.
-
Use plastic or glass baby bottles suitable for boiling, or other heat-resistant recipients with this apparatus.
- Always check your utensils prior to using them with Nutribaby.
- This appliance is designed to be used for domestic and suchlike applications such as:
- kitchen areas reserved for personnel in stores, offices and other professional environments,
- farms,
- use by hotel, motel customers and other accommodation environments,
- bed and breakfast environments.
- Electrical and electronic equipment can be recycled. Do not throw electrical or electronic apparatuses away with your household waste. Ensure they are recycled.
- Throughout the European Union, this symbol indicates that the product must not be disposed of with household waste, but must be recycled.
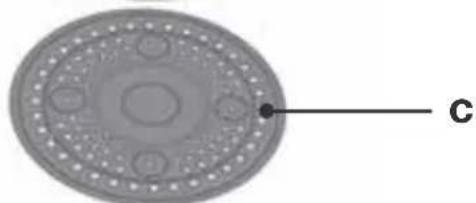
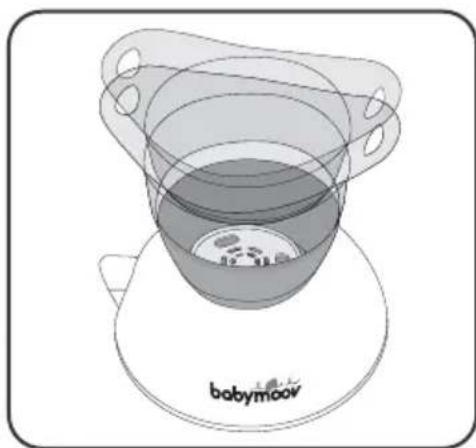
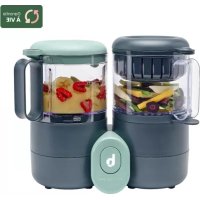
COMPONENTS
a. Cooker lid
b. Cooking basket
c. Removable cooking tray
d. Cooking juices receptacle
e. Insulating grill
f. Water tank
g. Cooking base
h. Mixing bowl lid
i. Blender switch
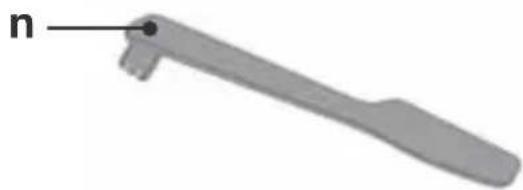
j. Mixing bowl
k. Blender connector
I. LCD screen
m. Cooker and blender connector
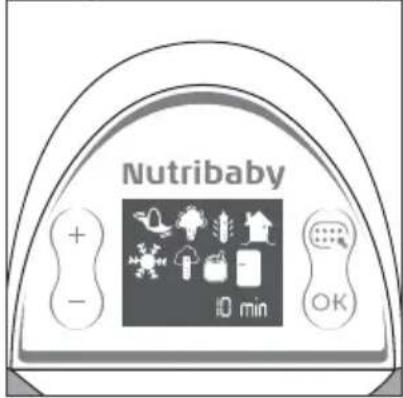
n. Spatula
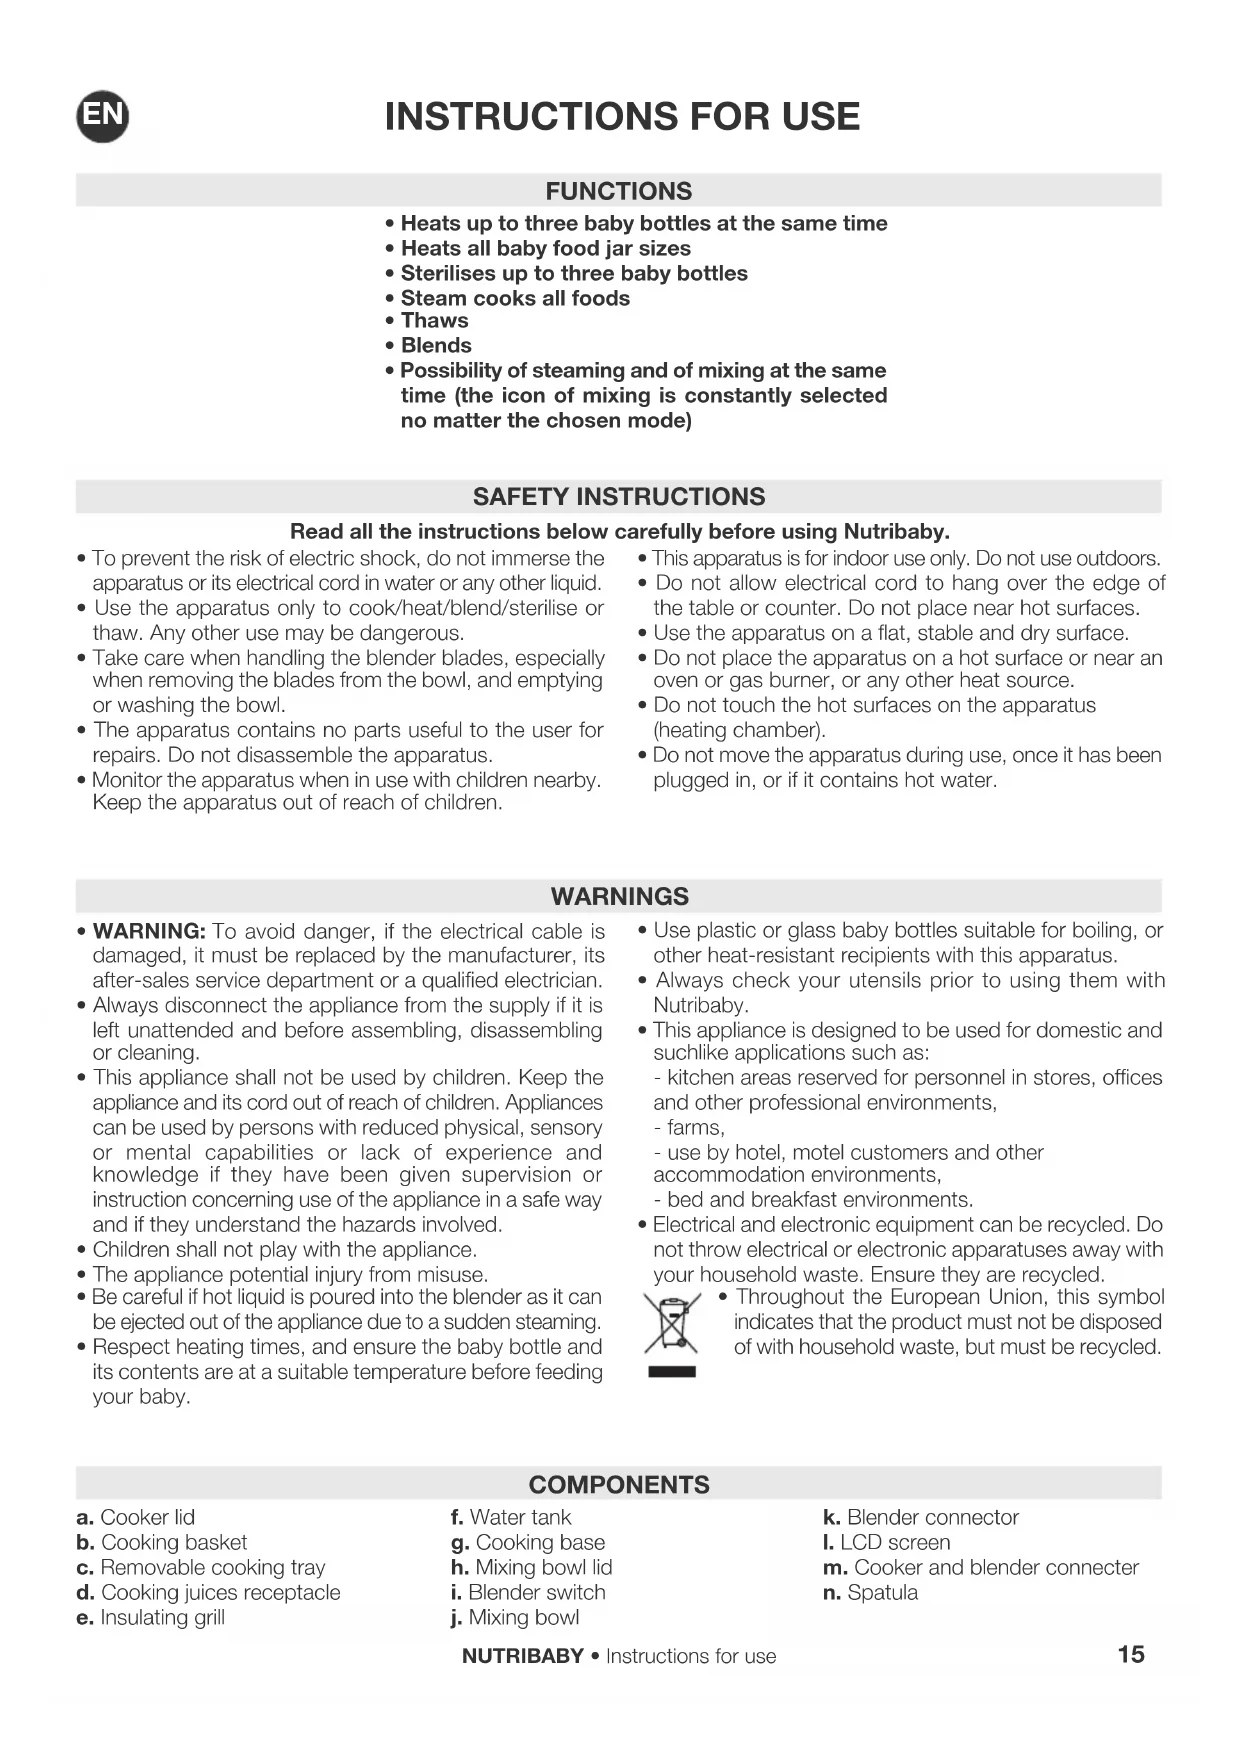
LCD SCREEN
Heating time or baby bottle capacity selector
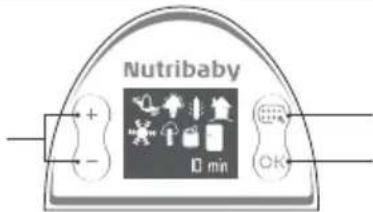
Function selector Cycle start and stop
Meaning of the function icons


The icon of mixing is constantly selected no matter the chosen mode. Indeed, it is possible to use the steaming function at the same time as the chopping function
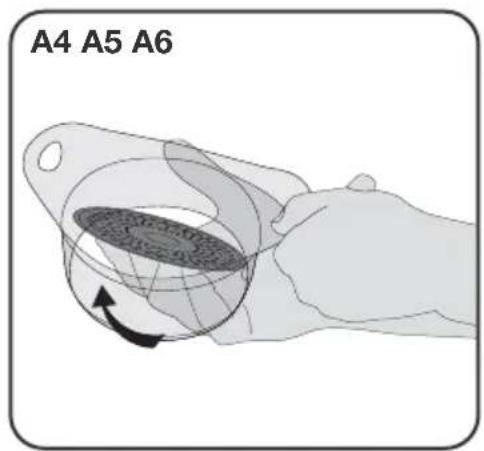
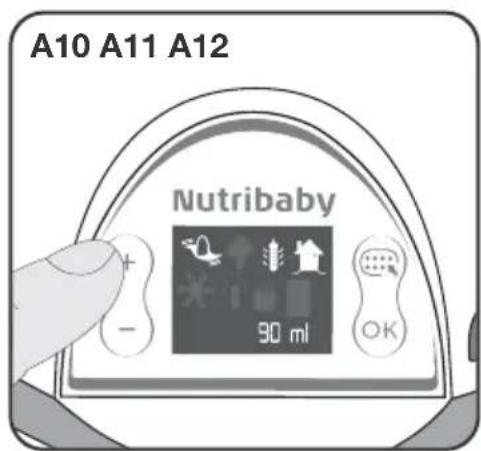
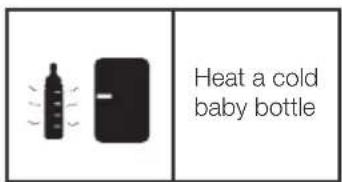
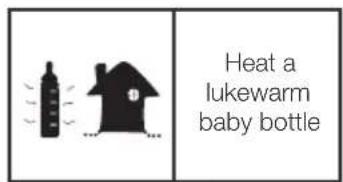
A. HEATING A BABY BOTTLE
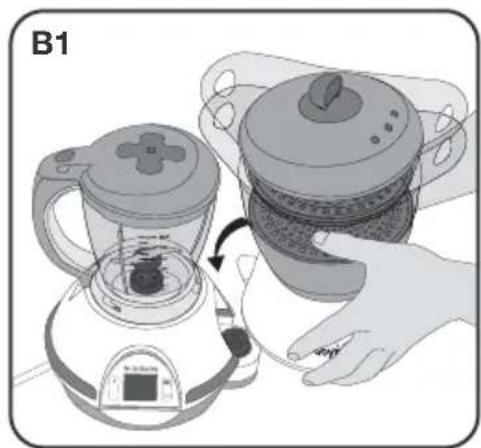
A1. Connect the cooker to the blender.
A2. Remove the cooking juices receptacle.
A3. Pour 60 ml of water into the tank using the measuring marks on the mixing bowl (level C).
A4. Remove the trays from each steam basket.
A5. Stack the trays, and place them on the base of the apparatus.
A6. Place the baby bottles on the insulating grill above the water tank.
A7. Place the lid on the cooker.
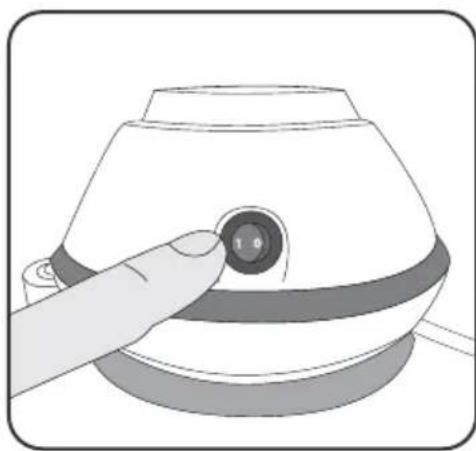
A8. Turn on using the On/Off switch on the back of the blender. The LCD screen on the front of the apparatus lights up.
A9. Press the "Mode" button one or more times to choose the desired function.
- If cold water is to be heated, select the baby bottle + refrigerator icon

- If lukewarm water is to be heated, select the baby bottle + house icon

A10. Press the + or - buttons to select the quantity of water to be heated.
A11. Press OK to start.
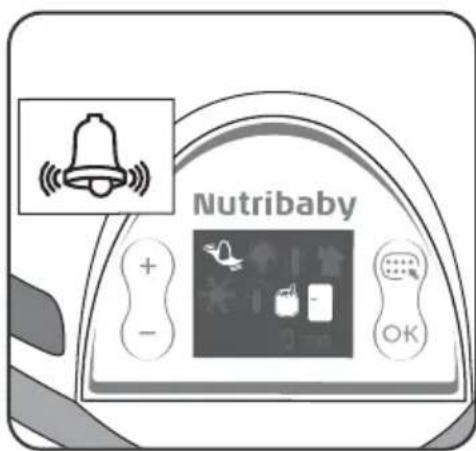
A12. At the end of the cycle, an alarm will sound to inform you that the baby bottle is ready. Press OK to turn off the alarm.
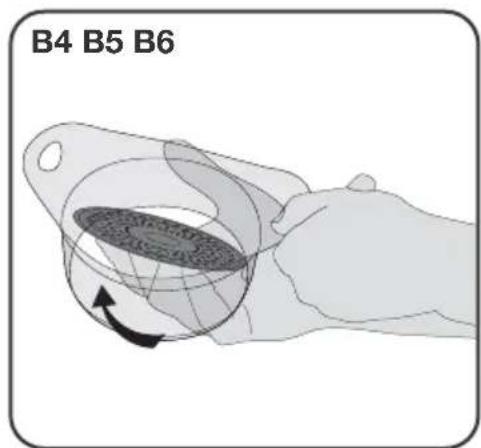
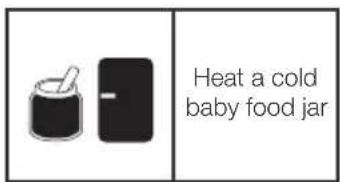
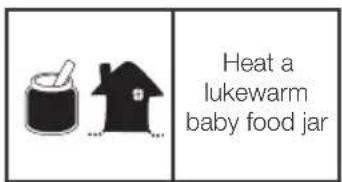
B. HEATING A BABY FOOD JAR
Follow steps 1 to 5 of the baby bottle heating function.
B6. Place the baby food jar to be heated on the insulating grill.
B7. Place the lid on the cooker.
B8. Turn on using the On/Off switch on the back of the blender. The LCD screen on the front of the apparatus lights up.
B9. Press the "Mode" button one or more times to choose the desired function.
- If cold baby food is to be heated, select the baby food jar + refrigerator icon
- If lukewarm baby food is to be heated, select the baby food jar + house icon
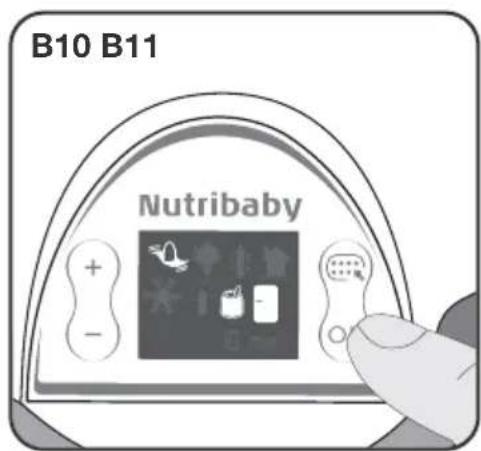
B10. Press OK to start.
CAUTION: To prevent the risk of burns, always check the temperature of the food before feeding your baby. Shake baby bottles well to mix, then pour a drop of milk on the inside of your wrist to check the temperature.
CAUTION: The pre-programmed cycles are based on the average heating time of a baby bottle or baby food jar. The material and thickness of the baby bottle, a removable bottom and the size of the baby food jar may affect the temperature of the food. Heating more than one bottle at once may also affect heating times. If the food is too hot or too cold, reduce or increase the heating time, using the “steam cooking” function.
Pre-programmed times for baby bottles
| Quantity of water/milk in the baby bottle | 90 ml 120 ml 150 ml 180 ml 210 ml 240 ml 270 ml 300 ml 330 ml | ||||||||
| Time for a baby bottle prepared with lukewarm water | 2 min 35 | 2 min 45 | 3 min 3 min | 3 min 10 | 3 min 10 | 3 min 10 | 3 min 15 | 3 min 25 | |
| Time for a baby bottle prepared with cold water | 3 min 40 | 3 min 50 | 4 min 30 | 4 min 40 | 5 min 5 | 5 min 05 | 5 min 10 | 5 min 15 | 5 min 30 |
C. STERILISING
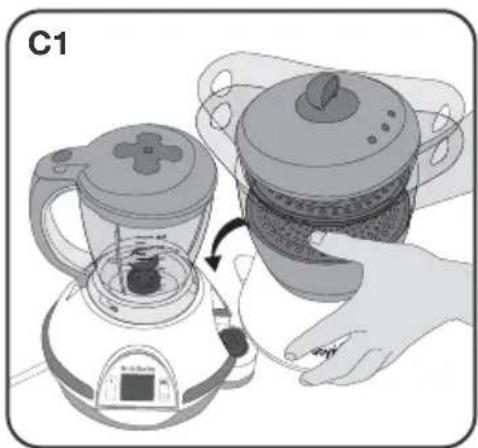
C1. Connect the cooker to the blender.
C2. Remove the cooking juices receptacle.
C3. Pour 150 ml of water into the tank using the marks on the mixing bowl (level B).
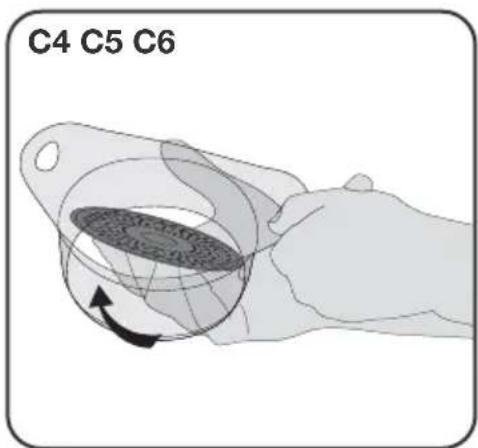
C4. Remove the trays from each steam basket.
C5. Stack the trays, and place them on the base of the apparatus.
C6. Place the baby bottles upside down on the tray above the water tank. Add any accessories you also wish to sterilise.
C7. Place the lid on the cooker.
C8. Turn on using the On/Off switch on the back of the blender. The LCD screen on the front of the apparatus lights up.
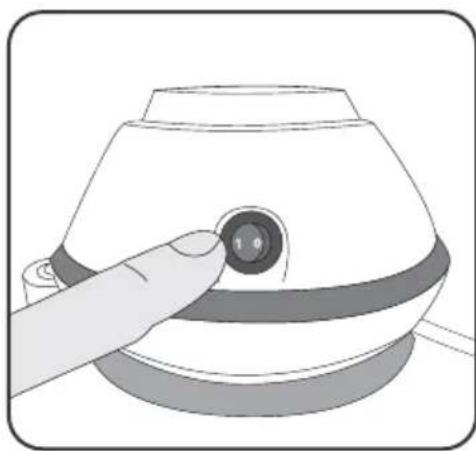
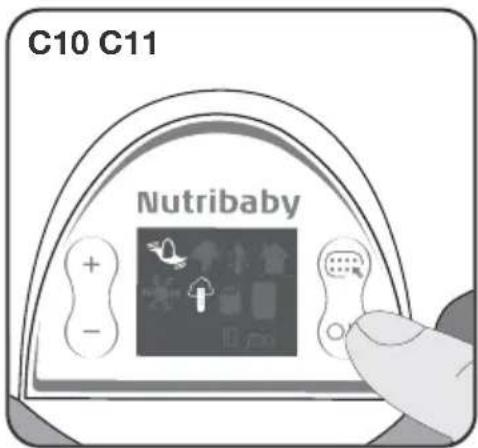
C9. Press the "Mode" button one or more times to choose the desired function. Select the "sterilisation" icon 1.
C10. Press OK to start.
C11. At the end of the cycle, an alarm will sound to inform you that the baby bottles are ready. Press OK to turn off the alarm.
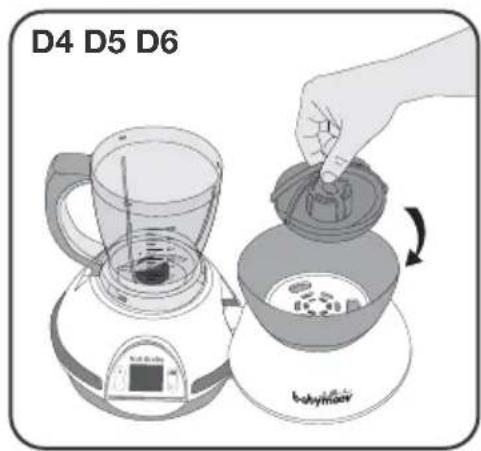
D. STEAM COOKING
D1. Connect the cooker to the blender.
D2. Remove the cooking juices receptacle.
D3. Pour 350 ml of water into the tank using the marks on the mixing bowl (level A).
D4. Replace the cooking juices receptacle: it will collect the juices from the food, allowing you to preserve its nutritional value.
D5. Place the trays in the basket as desired.
D6. Cut the ingredients into small cubes measuring approx. 15 mm X 15 mm and place them in the cooking baskets.
- Ingredients can be separated by type (vegetables/meat), or cooking time. For example, place potatoes, which require a relatively long cooking time in the bottom basket, and courgettes, which cook more quickly, in the upper basket, which you will add during the cooking cycle: no more overcooked vegetables!
- Place no more than 400 g of food in each basket.
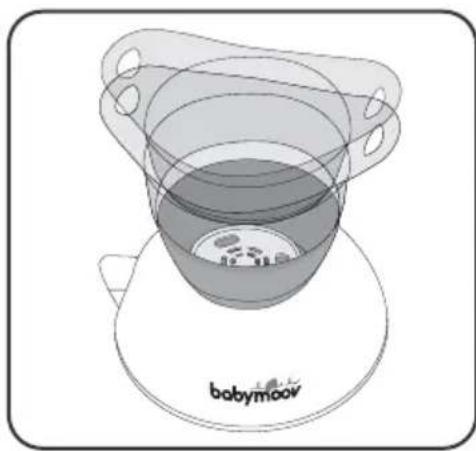
- Thanks to the removable trays, you can adjust the capacity according to need: one small basket (a), two baskets (b), or one large basket (c) by removing the tray for the upper basket
Once the baskets are in place, place the lid on top.
D7. Turn on using the On/Off switch on the back of the blender. The LCD screen on the front of the apparatus lights up.
D8. Press the "Mode" button one or more times to choose the desired function. Select the "steam cooking" icon 🔊.
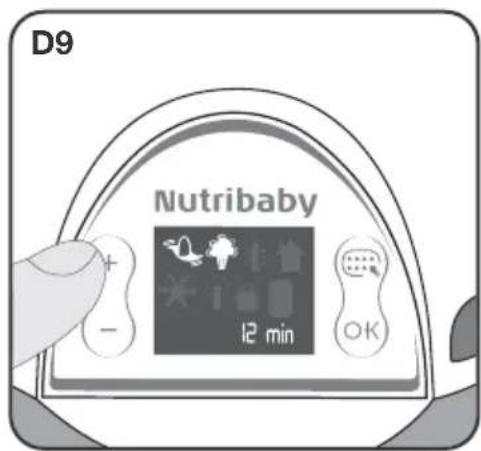
D9. Select the desired cooking time using the + and - buttons. The time will depend on the type and amount of food you wish to cook. Refer to the cooking-time table.
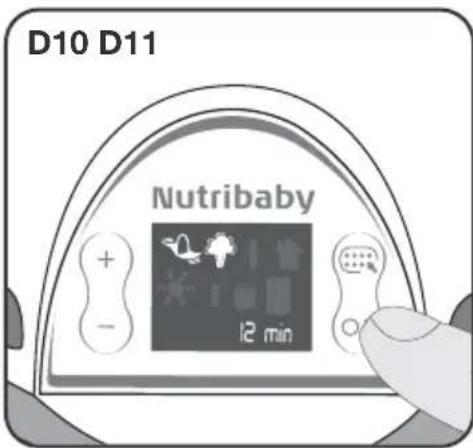
D10. Press OK to start cooking.
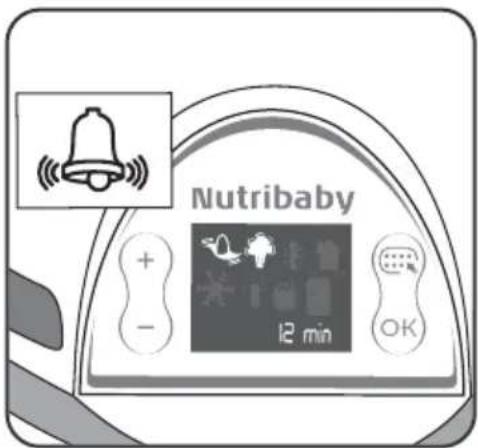
D11. At the end of the cycle, an alarm will sound to inform you that cooking is complete. Press OK to turn off the alarm. If you wish to continue cooking, press + or – to add minutes, then press OK to start.
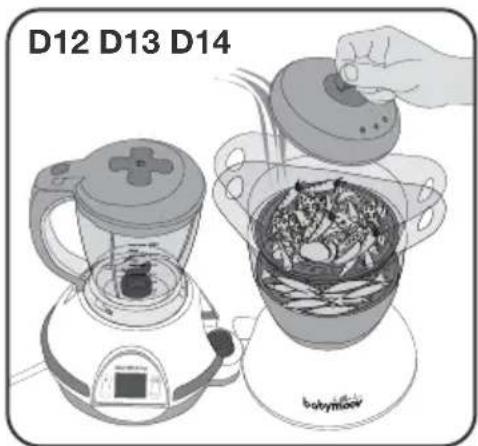
D12. Use the handle to remove the lid. Take care not to burn yourself.
D13. Use the handles to remove the steam baskets.
D14. You can also cook eggs. Place the eggs in the egg supports built into the trays.
COOKING TIMES see page 9
Cooking times are based on cooking in the bottom basket. These times may vary according to the size of the pieces of food, their quantity, the amount of empty space left in the basket, and the initial temperature of the food. You must increase the cooking time if you use the second cooking basket.
To cook ingredients requiring different cooking times, place the foods that need to cook the longest in the bottom basket. During cooking, add the second basket with the foods requiring a shorter cooking time.
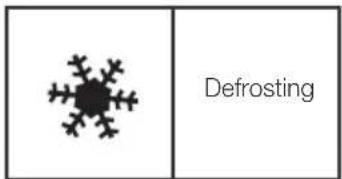
E. DEFROSTING
Proceed in the same way, choosing the "defrosting" icon ✿
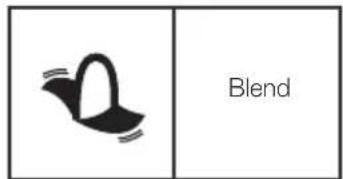
F. BLENDING
The icon of mixing is constantly selected no matter the chosen mode. Indeed, it is possible to use the steaming function at the same time as the chopping function.
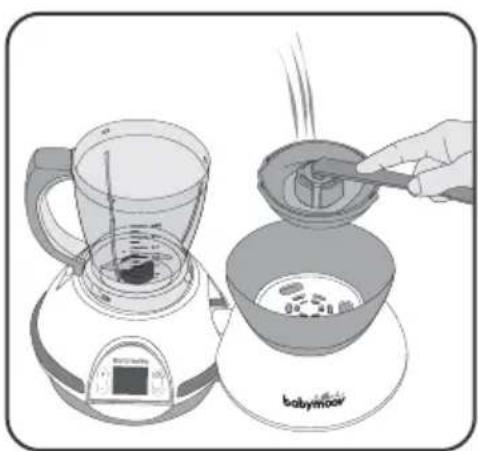
F1. Once your ingredients are cooked, open the lid of the cooking bowl and let the food cool for a few minutes.
F2. Transfer the cooked food to the mixing bowl, using the spatula provided. For best results, do not blend more than 400 g of cooked fruit or vegetables, or a total of 300 g of meat/vegetables, mix at a time.
F3. Hold the receptacle using the side opposite the spatula, which you will use as a pincer.
F4. Pour the cooking juices into the mixing bowl, dosing them according to the desired texture. Do not add more than 200 ml of cooking juices.
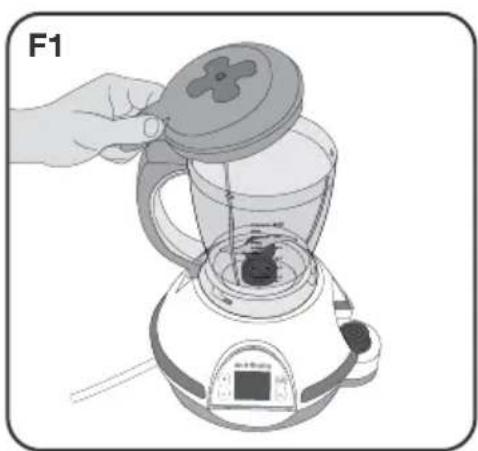
F5. Place the lid on the mixing bowl and lock.
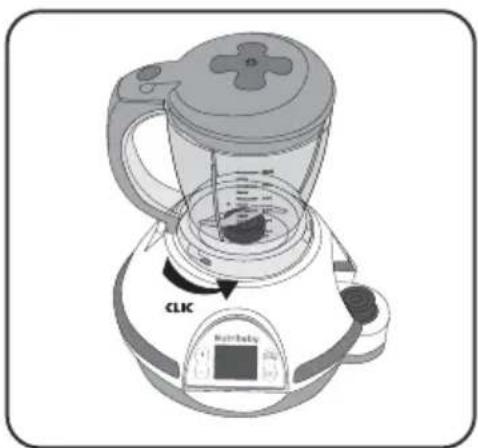
F6. Lock the mixing bowl onto the base. For your safety, the apparatus will not operate if the bowl is not locked on the base.
F7. Blend the preparation, pressing on the button for 5 seconds, then waiting 5 seconds, then blending again for 5 seconds. Do not blend for more than 30 seconds to prevent overheating. Repeat this operation up to three times. We recommend you then allow the apparatus to cool for 30 minutes prior to blending again.
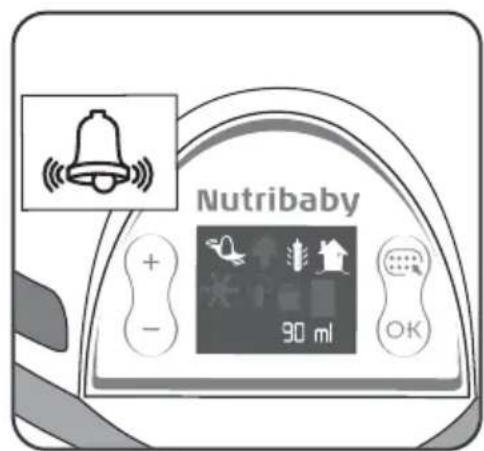
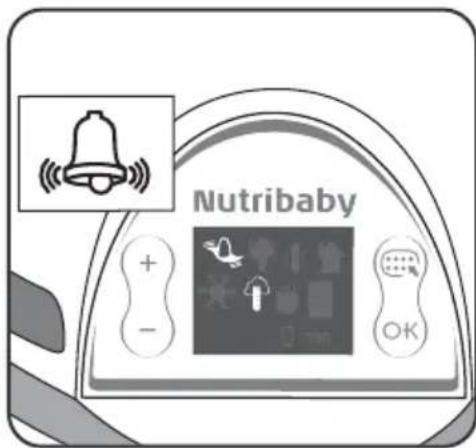
G. ALARMS
- An alarm will sound if, during the cooking cycle, the apparatus tank runs out of water: remove the steamer baskets and add water. Press OK to shut off the alarm, ensuring you reconnect the cooker to the blender, and restart the heating cycle to finish cooking.
- An alarm will sound if, during the cooking cycle, the blender and the cooker are not correctly connected: Press OK to shut off the alarm, reconnect the blender and cooker and restart the cooking cycle.
- An alarm will sound at the end of the cycle to notify you that cooking is complete.
H. CLEANING NUTRIBABY
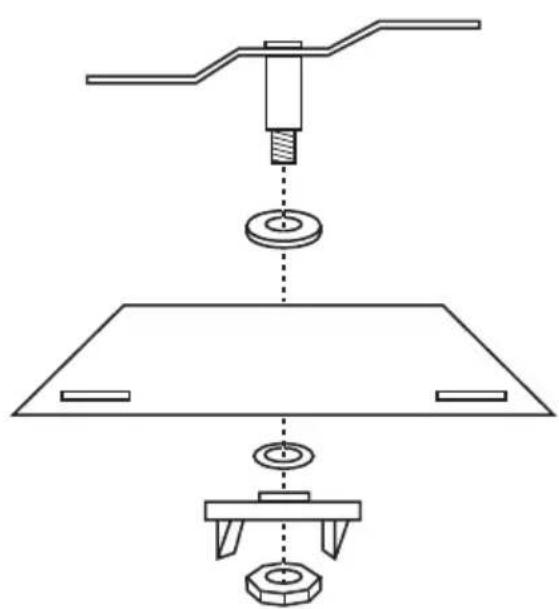
H1. Unplug Nutribaby and ensure it is cool before cleaning.
CAUTION: The bases of the cooker and blender must not be washed in a dishwasher.
- Wipe off the cooking dome inside the tank, and the base of the mixing bowl with a damp cloth or sponge. Do not use detergents or cleaners. Allow to dry. Do not immerse Nutribaby in water or any other liquid. Do not wash Nutribaby under running water. Do not allow water to enter parts containing electrical components.
- Do not use abrasive or scouring cleansers for cleaning as they may damage the apparatus and its surfaces.
- The cooking baskets, removable trays, cooking juices receptacles, lids, spatula and mixing bowl may be washed using a sponge, hot water and dish detergent. Rinse well and allow to dry. These elements are also dishwasher safe.
Descaling the cooking tank
After Nutribaby has been used for a certain time, mineral deposits may form on the cooking dome and damage it. You should descale the cooking tank regularly (after five cycles), pouring 100 ml of hot water and 100 ml of white vinegar on the resistance. Let it sit for one to two hours (or more if necessary), without plugging in the apparatus. Pour off the mixture and wipe off the cooking dome with a wet cloth.
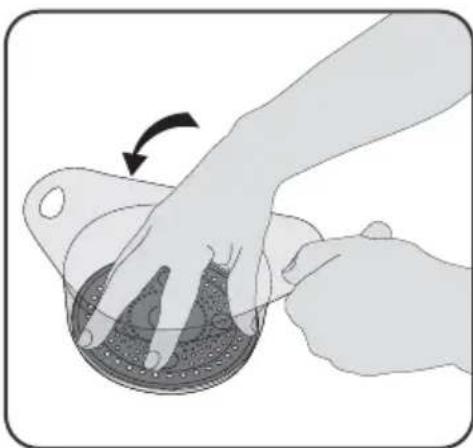
H2. Removing the blades
FUNKTIONEN
natural_image
Simple black-and-white illustration of a broccoli head (no text or symbols)
natural_image
Simple black-and-white diagram of a duck with wings, no text or symbols present
natural_image
Simple line drawing of a cloud with a vertical bar inside, no text or symbols present
natural_image
Simple black-and-white illustration of a broccoli head (no text or symbols)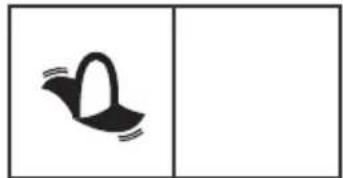
natural_image
Simple black-and-white diagram of a duck-like shape with motion lines, no text or symbols present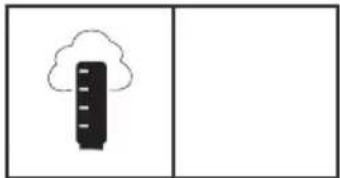
natural_image
Simple line drawing of a cloud with a vertical bar inside, no text or symbols present
MANUAL DE INSTRUÇÕES
FUNÇÕES
natural_image
Simple black-and-white illustration of a broccoli head (no text or symbols)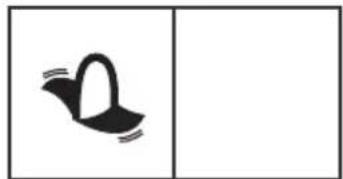
natural_image
Simple black-and-white diagram of a duck-like shape inside a divided rectangle (no text or symbols)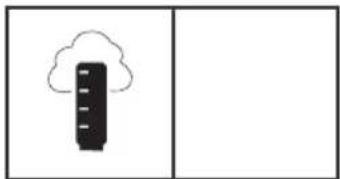
natural_image
Simple line drawing of a cloud with a vertical bar inside, no text or symbols present
natural_image
Simple black-and-white illustration of a broccoli head (no text or symbols)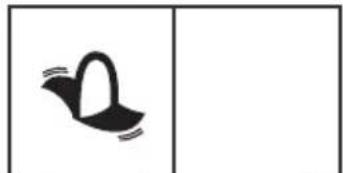
natural_image
Simple black-and-white line drawing of a stylized swan or wave inside a divided rectangle (no text or symbols)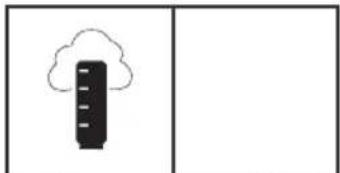
natural_image
Simple line drawing of a cloud with a vertical bar inside, no text or symbols present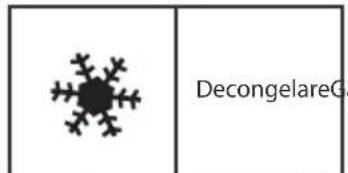
Valg af funktion
Start eller stop for cyklus
natural_image
Simple black-and-white illustration of a broccoli head (no text or symbols)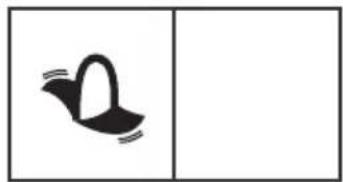
natural_image
Simple black-and-white diagram of a duck-like shape inside a divided rectangle (no text or symbols)
natural_image
Simple line drawing of a cloud with a vertical bar inside, no text or symbols present

- NutriBaby
- FONCTIONS
- SAFETY INSTRUCTIONS
- Read all the instructions below carefully before using Nutribaby.
- WARNINGS
- COMPONENTS
- LCD SCREEN
- Meaning of the function icons
- HEATING A BABY BOTTLE
- HEATING A BABY FOOD JAR
- STERILISING
- STEAM COOKING
- COOKING TIMES see page 9
- DEFROSTING
- BLENDING
- ALARMS
- CLEANING NUTRIBABY
- Descaling the cooking tank
- H2. Removing the blades
- FUNKTIONEN
- MANUAL DE INSTRUÇÕES
- FUNÇÕES
Brand : BABYMOOV
Model : NutriBaby A001114
Category : Bottle sterilizer