
CHVIDEOCR - Video device CONCEPTRONIC - Free user manual and instructions
Find the device manual for free CHVIDEOCR CONCEPTRONIC in PDF.

| Product Type | Analog-to-Digital Video Capture Device |
| Brand | Conceptronic |
| Model | CHVIDEOCR |
| Main Functions | Analog video capture (Composite/S-Video) to digital, image capture, audio recording |
| Connectivity | USB 2.0, multi-AV input (Composite/S-Video, stereo audio) |
| Supported Video Sources | Composite, S-Video |
| Maximum Resolution | 720 × 480 (NTSC) / 720 × 576 (PAL) |
| Output Video Format | MPEG-2, MPEG-4 (via supplied software) |
| Audio Format | Stereo PCM |
| Supplied Software | CyberLink PowerDirector (full version) |
| System Compatibility | Windows XP, Vista, 7, 8, 10 |
| Power Supply | Via USB port (5V, 500 mA) |
| Dimensions (approx.) | 80 × 40 × 20 mm |
| Weight (approx.) | 50 g |
| Box Contents | Device, multi-AV cable, CD-ROM, user manual, warranty card |
| Care and Cleaning | Clean with a dry, soft cloth. Avoid moisture and abrasive products. |
| Safety | Do not expose to water. Use only with compliant power sources. Keep out of reach of children. |
| Spare Parts and Repairability | No spare parts available. Contact technical support for any repairs. |
| General Information | Allows digitizing analog videos (VHS, camcorder) to your computer. Support at www.conceptronic.net/support. |
Frequently Asked Questions - CHVIDEOCR CONCEPTRONIC
User questions about CHVIDEOCR CONCEPTRONIC
0 question about this device. Answer the ones you know or ask your own.
Ask a new question about this device
Download the instructions for your Video device in PDF format for free! Find your manual CHVIDEOCR - CONCEPTRONIC and take your electronic device back in hand. On this page are published all the documents necessary for the use of your device. CHVIDEOCR by CONCEPTRONIC.
USER MANUAL CHVIDEOCR CONCEPTRONIC
Conceptronic CHVIDECOR
Gebruiksaanwijzing
Congratulations on the purchase of your Conceptronic Home Video Creator.
This User Manual gives you a step-by-step explanation of how to install and use the Conceptronic Home Video Creator on your computer.
When you need more information or support for your product, we advise you to visit our Service & Support website at www.conceptronic.net/support and select one of the following options:
- FAQ : Frequently Asked Questions database
- Downloads : Manuals, Drivers, Firmware and more downloads
- Contact : Contact Conceptronic Support
For general information about Conceptronic products visit the Conceptronic website at www.conceptronic.net
1. Package contents
The following items are present in the package of the Conceptronic Home Video Creator:
- Conceptronic Home Video Creator
Product CD-ROM - Multi AV cable
- This Multilanguage user manual
- Warranty card & CE declaration booklet
2. Driver and software Installation
Before connecting the home video creator to your computer, you need to install the drivers & software on your computer.
A. Turn on your computer.
B. Insert the CD-ROM in the optical drive of your computer. The AutoPlay option will be shown automatically. Click on "Run Autorun.exe" to start the autorun menu.
C. Select "Install Drivers" and follow the onscreen instructions to install the required drivers for the home video creator.
D. Select "Install Power Producer 7 Software" and follow the onscreen instructions to install the software.
E. Restart your computer.
F. Connect the multi AV cable to the multi AV input of the home video creator.
G. Connect the home video creator to a free USB port on your computer.
Your computer will recognize new hardware and install the required drivers. When the computer finishes the installation, the home video creator is ready to use.
3. Using the Conceptronic Home Video Creator
When the installation of the drivers and software is finished, you can start using the Conceptronic Video Home Creator with the CyberLink software.
3.1 Capturing video
You can start the CyberLink PowerDirector software in various ways:
- Click on the "Start" button and select "All Programs", "CyberLink PowerDirector" and click on "PowerDirector".
- Double-click on the "CyberLink PowerDirector" shortcut on your desktop.
Note: The first time the Power Producer is started, you need to enter an activation key before you can proceed. You can find the activation key on the CD-ROM sleeve.
When the CyberLink PowerDirector application is started, you will see the menu of the software.
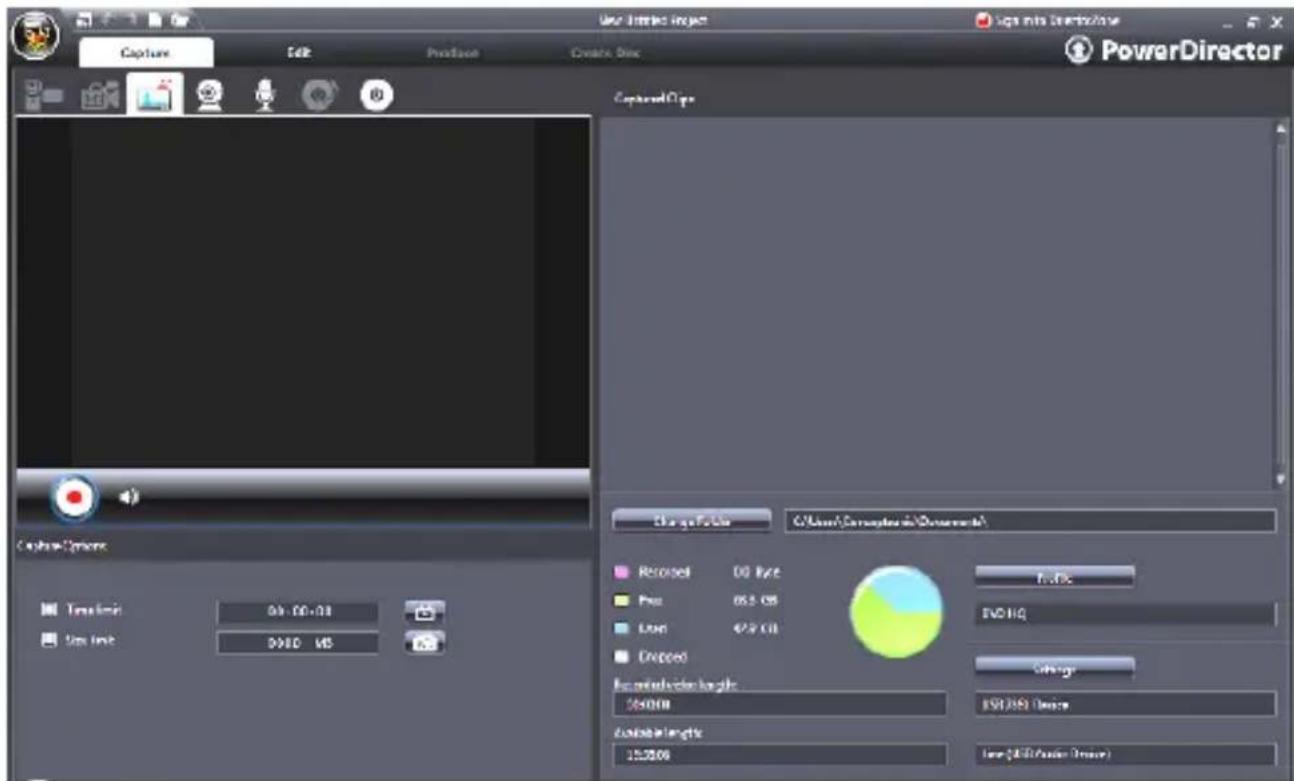
- Choose the tab "Capture" in the top left corner to go to the capturing screen.
- Click on "Settings" in the lower right corner and make sure "Capture device" is set to "USB 2863 Device" and select the correct "Capture source" (Composite or S-Video). Make sure the "Audio device" is set to "USB 2863 Device" and click on "OK" to save the settings.
- Press the red "Record" button and press "Play" on your capture device.
- When the capture is finished, press the "Stop" button.
- You will now be asked to give the captured file a name. Chang the filename or press "OK" to continue with the default name.
The movie is now captured on your hard drive.
3.2 Making snapshots
With CyberLink PowerDirector it is also possible to capture a single frame and save it as a picture (BMP) file.
- Choose the "Capture" tab in the top left corner and press "Play" on your capture device.
- When the screen appears which you would like to capture press the "Snapshot" Button on the Conceptronic Video Home Creator.
- You will now be asked to give the captured file a name. Chang the filename or press "OK" to continue with the default name.
The snapshot is now captured on your hard drive.
3.3 Capturing audio only
Although the CHVIDEOCR is designed to capture analog audio and video and save it as digital content on your computer, it can also record audio only from most analog audio sources (for instance: CD player, MP3 player, etc.). However, third party software is needed for this.
An example of software which allows you to record audio only using the CHVIDEOCR is Audacity. A tutorial (step-by-step explanation) of this software package is available in the FAQ section of our website, www.conceptronic.net.