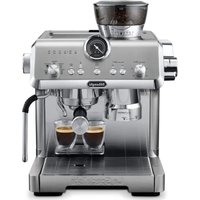
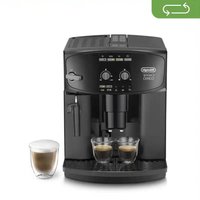
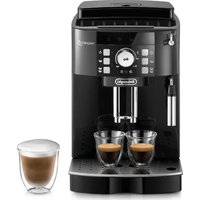
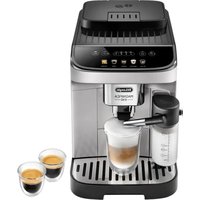
TrueBrew CAM51015B - Coffee machine DELONGHI - Free user manual and instructions
Find the device manual for free TrueBrew CAM51015B DELONGHI in PDF.
Frequently Asked Questions - TrueBrew CAM51015B DELONGHI
User questions about TrueBrew CAM51015B DELONGHI
0 question about this device. Answer the ones you know or ask your own.
Ask a new question about this device
Download the instructions for your Coffee machine in PDF format for free! Find your manual TrueBrew CAM51015B - DELONGHI and take your electronic device back in hand. On this page are published all the documents necessary for the use of your device. TrueBrew CAM51015B by DELONGHI.
USER MANUAL TrueBrew CAM51015B DELONGHI
When using any electrical appliance, some basic safety precautions should be observed. Specifically:
- Read all instructions carefully.
- Make sure the voltage of your electrical system corresponds to the voltage shown on the bottom of the machine.
- Do not touch hot surfaces. Use handles or knobs.
- To protect against fire, electrical shock and personal injury, do not immerse cord, plug, or appliance in water or other liquid.
- Keep the appliance out of the reach of children and do not leave appliance unattended while in operation.
- Disconnect the plug from the power outlet when the machine is not in use and before cleaning.
- Do not operate the machine with a damaged cord or plug, after faulty operation, or when it has been damaged in any way. Contact De'Longhi Customer Service.
- The use of accessories not recommended by the manufacturer may result in fire, electrical shock, or personal injury.
- Do not use the machine outdoors.
- Make sure the power cord does not hang over the edge of the table or counter-top to avoid getting accidentally caught or entangled.
- Do not place the machine or its electrical parts on or near electric stoves, cooking surfaces, or gas burners.
- Plug cord into the wall outlet. To disconnect, first turn machine "off", then remove plug from wall outlet.
- Do not use this machine for any purpose other than its intended use. This appliance is for household use only. The manufacturer declines all responsibility for any damage caused by improper, incorrect, or irresponsible use.
WARNING: To reduce the risk of fire or electric shock, do not remove the cover or the exterior of the unit. Don't attempt to repair or modify the machine, doing so will void the warranty. Repair should be done by authorized service personnel only!
SAVE THESE INSTRUCTIONS
THIS APPLIANCE IS FOR HOUSEHOLD USE ONLY
SHORT CORD INSTRUCTIONS
- A short power cord is provided to reduce risks resulting from becoming entangled in or tripping over a longer cord.
- Longer, detachable power supply cords or extension cords are available and may be used if care is exercised in their use.
If an extension cord is used, the marked electrical rating should be at least as great as the electrical rating of the appliance. If the appliance is provided with 3- wire, ground
ing type cord, the extension should be a GROUNDING TYPE 3 - WIRE CORD. The longer cord should be arranged so that it will not drape over the counter-top or table top where it can be pulled on by children or tripped over.
- Your product is equipped with a polarized alternating current line plug (a plug having one blade wider than the other). This plug will fit into the power outlet only one way. This is a safety feature. If you are unable to insert the plug fully into the outlet, try reversing the plug. If the plug should still fail to fit, contact your electrician to replace your obsolete outlet. Do not defeat the safety purpose of the polarized plug.
INTRODUCTION
Thank you for choosing this coffee machine. We hope you enjoy using your new appliance. Take a few minutes to read this Instruction for Use. This will avoid all risks and damage to the appliance.
Troubleshooting and repairs
In the event of problems, first try and resolve them by reading the information given in sections "Troubleshooting". If this does not resolve the problem or you require further information, contact De'Longhi customer services only. The addresses are given in the guarantee certificate provided with the machine.
DESCRIPTION OF APPLIANCE
A. Beans container and pre-ground coffee lid
B. Pre-ground coffee funnel
C. Beans container
D. Pre-ground coffee funnel seat
E. Water tank lid
F. Water tank
G. Control panel
H. Coffee spout
I. Infuser
L. Tray assemble
M. Cup holder
N. Cup tray
0. Drip tray water level indicator
P. Disposal water container
Q. Coffee grounds container
R. Drip tray
S. Carafe (* some models only)
T. Ground coffee measure
U. "Total Hardness Test" indicator paper
V. Descalere
Z. Draining tray
BEFORE USE
Checking the appliance
After removing the packaging, make sure the product is complete and undamaged and that all accessories are present. Do not use the appliance if it is visibly damaged. Contact De'Longhi Customer Services.
Installing the appliance
When you install the appliance, you should respect the following safety warnings:
- The machine gives off heat. After positioning the machine on the worktop, leave a space of at least 1.18 in / 3 cm between the surfaces of the machine and the side and rear walls and at least 5.6 in / 15 cm above the coffee maker.
Water penetrating the machine could cause damage. Do not place the appliance near taps or sinks. - The appliance could be damaged if the water it contains freezes.
Do not install the appliance in a room where the temperature could drop below freezing point.
- Arrange the cord in such a way that it cannot be damaged by sharp edges or come with contact with hot surfaces (e.g. electric hot plates).
- Adjust the cord length and store the excess in the cord guide under the machine.
Connecting the appliance
Check that the mains power supply voltage corresponds to that indicated on the rating plate on the bottom of the appliance. Connect the appliance to an efficiently earthed and correctly installed socket with a minimum current rating of 10A only. If the power socket does not match the plug on the appliance, have the socket replaced with a suitable type by a qualified professional.
The first time you use the appliance, rinse with hot water all removable accessories which may come into contact with water. The first time you use the machine, the water circuit is empty and the appliance could be very noisy. The noise becomes less as the circuit fills.
Coffee has been used to factory test the appliance and it is therefore completely normal for there to be traces of coffee in the grinder. The machine is, however, guaranteed to be new.
FIRSTUSE
- Connect the appliance to a mains socket.
The button blink and the icon lights on.
- Remove the water tank (F), fill to the MAX level (marked on the tank) with fresh water, then put the tank back in the appliance correctly.

- Place a container holding a minimum of approx 7 floz/200 ml underneath coffee spout (H).
- Press button. The appliance delivers water from the coffee spout.
The coffee machine is now ready for normal use.
The first time you use the appliance, you need to make some coffees before it starts to give satisfactory results.
Please note: If no water is delivered from the coffee spouts and the button keeps flashing, press the button again.
SETTINGS
Pressing button it is possible to set: AM-PM or 24h, hours and minutes, acoustic signal, temperature, water hardness and auto-on.
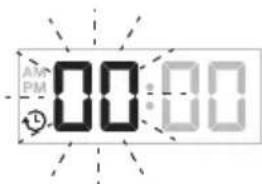
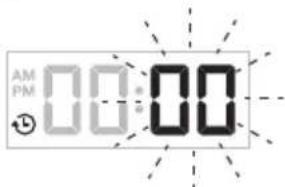
Set the time:
- Press button; AM is displayed. Press button to set AM, PM or 24h.
To set the time press button; the hour blink; press button to set the desired hour. Press button again; the minutes blink; press button until the desired minutes is displayed.
Auto-on:
The appliance will deliver the selected drink at the set time; place a cup or a mug under the coffee spout. Auto-on has to be activated new every time, after the preparation in auto-on mode the auto-on function is reset.
Press button; the auto-on icon blink;
- press button; the auto-on icon is lights up;
- press button the size of beverages and type of cofee icons lights up;
press size button to select the desired coffee quantity;
- three levels of strength (light, gold and bold) lights up;
- press type button to set the desired levels of strength;
- press button to confirm;
the hour blink;
press button to set the desired hour and press button to confirm;
- the minutes blink;
- press button to set the desired minutes and press button to confirm;
- the auto-on icon stays on.
Please note: The settings are saved. To check your settings press

icon.
Short cut auto on: Press the button for 3 seconds to enable or disable your settings.
Acoustic signal:
Press button; the icon is lights up. Press button to enable (the icon blink) or disable (the icon is lights up) the acoustic signal.
Set coffee temperature:
Press button; the icon is lights up. Press button to set the desired temperature (1-low, 2-medium or 3-high).
When you scroll to exit menu the icon blinks to confirm the actual setting, when the clock appears again on the display the setting is completed.
Water hardness:
Press button; the 品 icon is lights up. Press button to set the water hardness (1, 2, 3 or 4).
Measuring water hardness:
- Remove the total hardness test indicator paper from its pack.
- Immerse the paper completely in a glass of water for one second.
- Remove the paper from the water and shake lightly. After about a minute, 1, 2, 3, or 4 red squares form, depending on the hardness of the water. Each square corresponds to one level.
level 1 soft water
level 2 slightly hard water
level 3 hard water
level 4 very hard water
Auto-off:
After 30 minutes the appliance switches off automatically; this setting cannot be changed.
MAKING COFFEE
- Fill the water tank (F) with fresh water.
Press button.
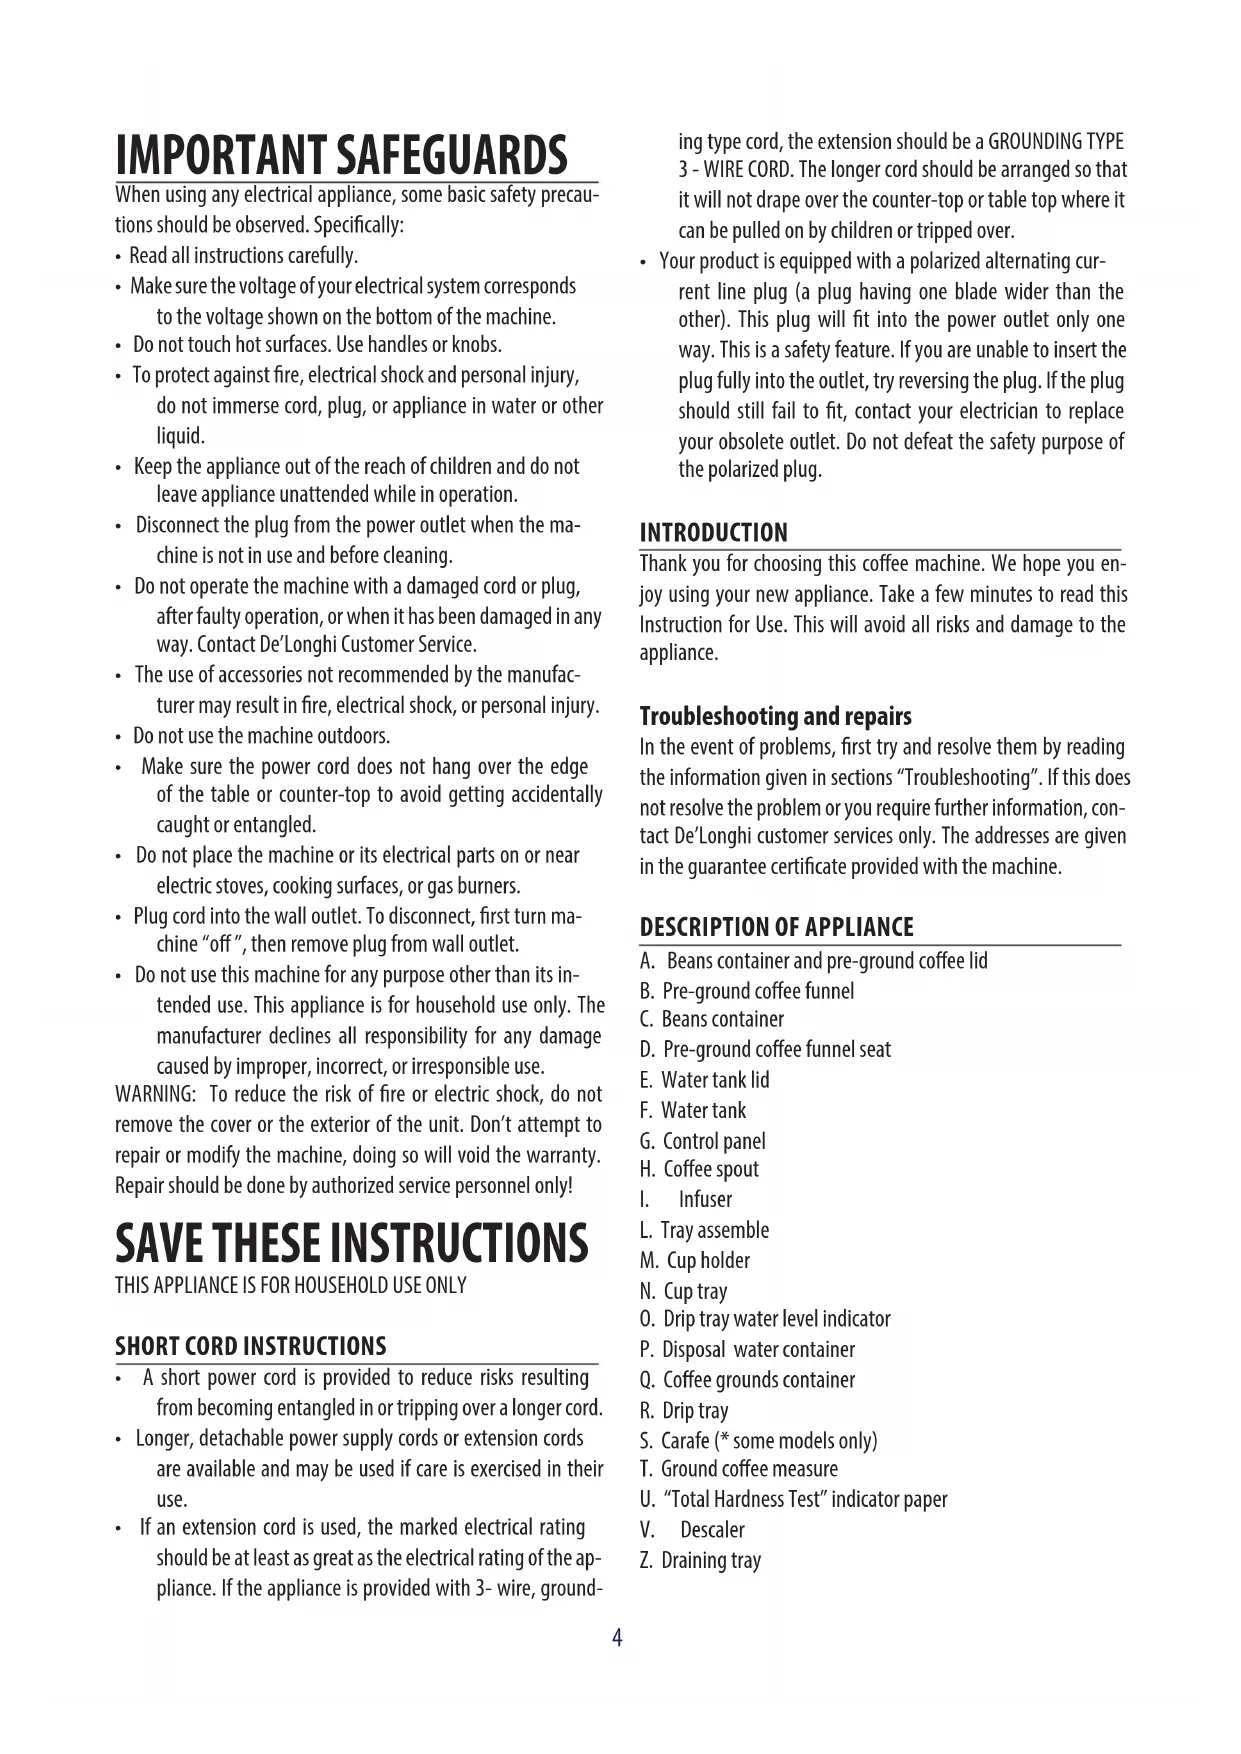
The appliance is ready for use when the main screen appears. - Open the cup holder (M) and place a cup or a mug under the coffee spout (H).
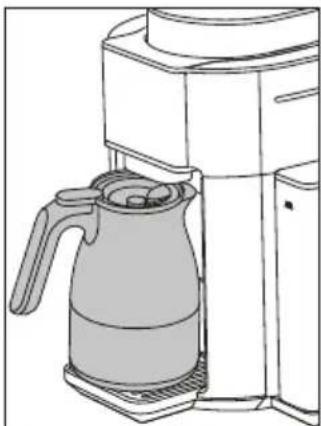
If using the carafe (S) (some models only), place it directly
on the cup tray (N).

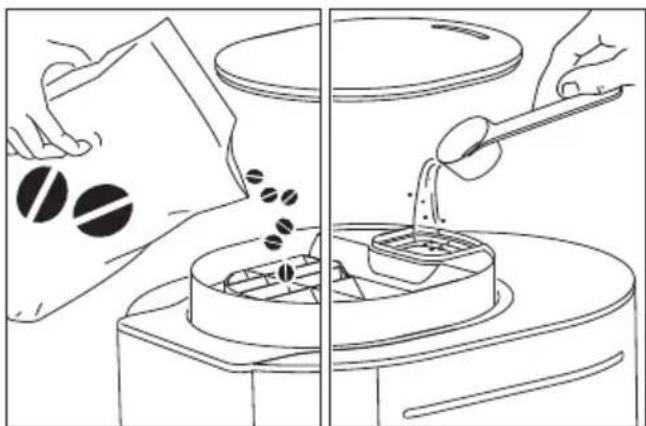
- Fill the beans container (C) with coffee beans.
The icon lights on when the beans container is at the minimum level.
To prepare pre-ground coffee, add pre-ground coffee in the pre-ground coffee funnel seat (D) using the measure (T) (see table of suggested quantities).
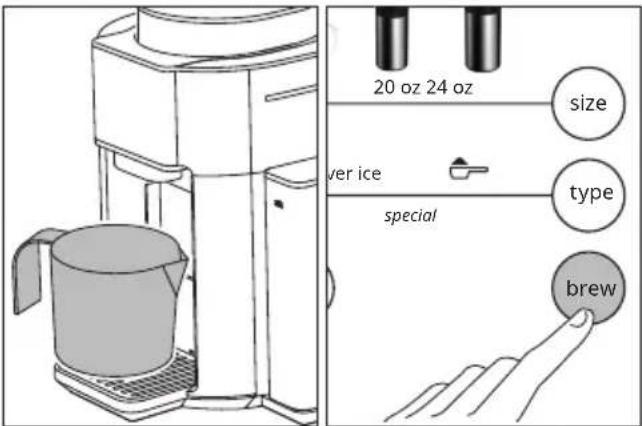
Press button to select the desired coffee quantity;
espresso style 3 oz and 6 different quantities of coffee.
The selected beverage lights on:
| 3 oz | espresso style |
| 8 oz | coffee |
| 12 oz | |
| 16 oz | |
| 20 oz (some models only) | |
| 24 oz | |
| 40 oz (some models only) |
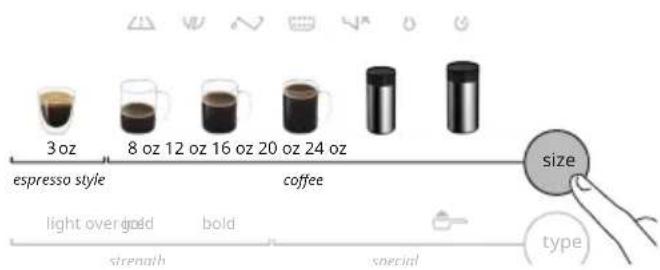
- Press button to select the type of coffee; three levels of strength (light, gold and bold) and two special and over ice). The selected beverage lights on:
| light | strengthgold |
| bold | |
| (precground) | special |
| over ice |
Preground coffee:
To prepare pre-ground coffee, select
- Add pre-ground coffee in the pre-ground coffee funnel seat (D) using the measure (T).
- Press button. The appliance delivers the selected beverage.
The pre-ground coffee can be selected only with 3oz, 8oz, 12oz and 16oz size.
| Coffee cup quantity | Ground coffee measure (0.25oz / 7g) |
| 3 oz 2 | |
| 8 oz 2 | |
| 12 oz 3 | |
| 16 oz 4 |
Do not exceed these suggested quantities.
Over ice:
To prepare over ice beverage select 'over ice'.
Press button.
- Press button to choose three levels of 'strength' (light, gold and bold) and if not selected, after 5 seconds the control panel returns to the main screen.
- Fill a large cup or a mug with ice cubes.
| Coffee cup quantity Ice cube quantity (*) |
| 3 oz 2 |
| 8 oz 6 |
| 12 oz 9 |
| 16 oz 12 |
| 20 oz (some models only) 15 |
| 24 oz 18 |
| 40 oz (some models only) 30 |
(*) An ice cube about 16g of water
- Press button. The appliance delivers the selected beverage.
To turn the appliance off, press the button. - The appliance automatically performs internal rinse cycle.
CARAFE (S) (some models only)
Ensure your carafe (S) is clean and empty before brewing. Residual coffee will affect the taste and can cause overflow. Lock the carafe lid and place the carafe under the coffee spout.
Pre-heating
To obtain best results it is recommended to pre-heat the carafe or cup.
A pre-heated carafe will help maintain the coffee's optimal temperature and keep coffee hotter for longer time. To pre-heat the carafe fill it with hot water, wait about 30 seconds and empty the carafe.
Cleaning the carafe
After each use and before brewing a new preparation, empty
the carafe. Rinse the carafe and the carafe lid under warm running water. We also recommend regularly washing the carafe in warm, soapy water using a soft bristled brush. Rinse and dry. Do not use abrasive pads, cloths or cleaners which can scratch the surface.
CLEANING
Important: Before maintenance or cleaning of the appliance, turn off and unplug. Do not use solvents, abrasive detergents or alcohol to clean the coffee machine. Do not use metal objects to remove coffee deposits as they could scratch metal or plastic surfaces. Disposal water container (P), coffee grounds container (Q) and carafe (S) can be washed in a dishwasher, the other components of the machine are hand-wash only.
The following parts of the machine must be cleaned regularly:
- Coffee grounds container (Q): When the coffee grounds container (Q) is full the icon lights on.
To access to the components remove the tray assemble (L). Extract and empty the grounds container and clean thoroughly to remove all residues left on the bottom. It is normal to find small amount of ground coffee residues inside the unit or around the infuser. The appliance cannot be used to make coffee until you have cleaned the grounds container. Even if not full, empty the coffee grounds container after two, three days.
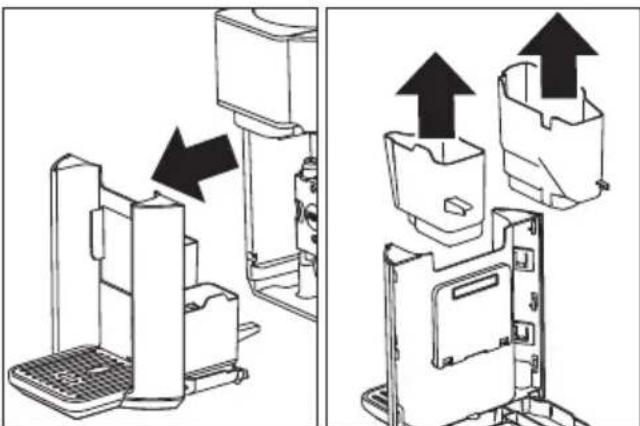
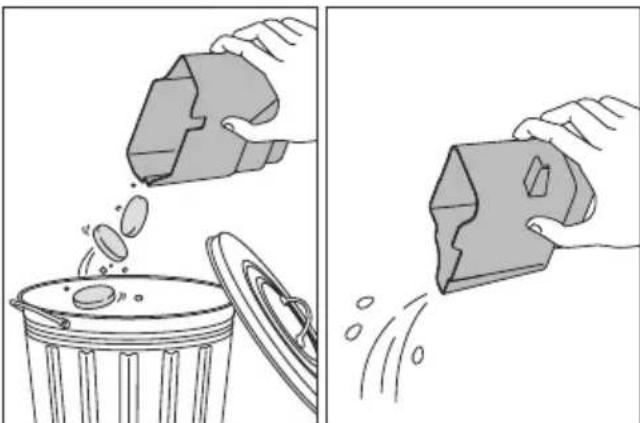
- Disposal water container (P): empty and clean with a
damp cloth and a little mild washing up liquid.
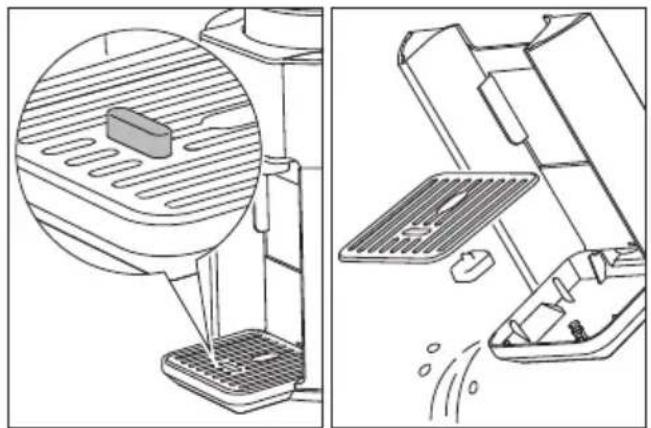
- Drip tray (R): the drip tray is fitted with a water level indicator (O) showing the amount of water it contains. Before the indicator protrudes from the cup tray (N), the drip tray must be emptied and cleaned, otherwise the water may overflow the edge and damage the appliance, the surface it rests on or the surrounding area.
Please note: When cleaning the drip tray, the grounds (Q) and water (P) containers must always be emptied completely, even if they are not actually full.
- Infuser (I) and Draining tray (Z): The infuser must be cleaned at least once a month.
Press the two red release buttons inwards and at the same time pull the infuser outwards. Soak the infuser in water for about 5 minutes, then rinse under the tap.
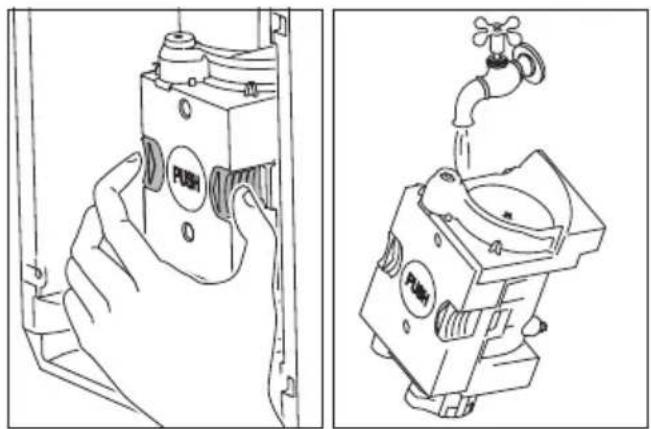
Do not use detergents to clean the infuser as this could cause damage.
Remove any coffee residues left in the infuser housing.
Extract, empty and rinse the Draining tray (Z), then put the tank back in the appliance correctly.
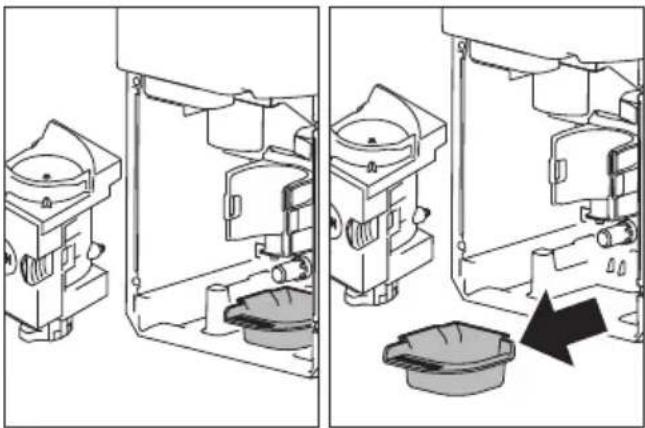
After cleaning, replace the infuser by sliding it onto the internal support, then push the PUSH symbol fully in until it clicks into place.
Please note: The infuser cannot be extracted when the machine is on. Make sure the machine has run the shutdown procedure correctly.
- Pre-ground coffee funnel (B): Check regularly (about once a month) that the pre-ground coffee funnel is not blocked. If necessary, remove coffee deposits with a brush. It is possible to take out the funnel for a better cleaning.
- Water tank (F): clean the water tank regularly (about once a month) with a damp cloth and a little mild washing up liquid.
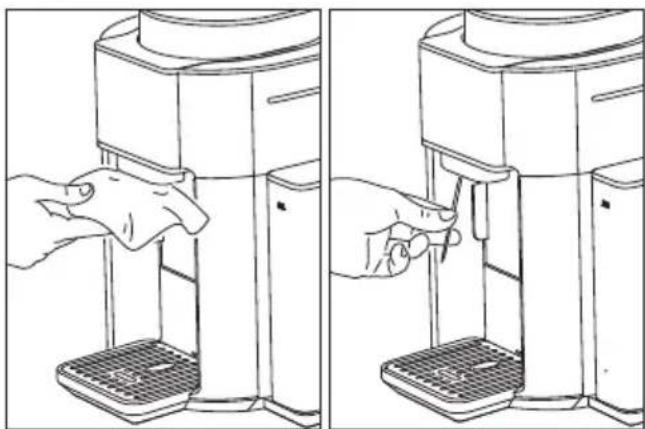
- Coffee spout (H): clean the coffee spoutregularly with a sponge or cloth. Check the holes in the coffee spout are not blocked. If necessary, remove coffee deposits with a toothpick.
DESCALING
Descale the machine when the button lights on.
Please note: Before use, read the instructions and the labelling on the descaler pack. It is important to use De'Longhi descaler only. Using unsuitable descaler and/or performing descaling incorrectly may result in faults not covered by the manufacturer's guarantee. Descaler could damage delicate surfaces. If the product is accidentally spilt, dry immediately. The whole process will
take about 30 minutes.
- Press button for 3 seconds.
The icon lights on.
- Empty drip tray (R) and coffee grounds container (Q).
The icon lights on.
-
Pour the descaler into the water tank (corresponding to a 3.5 floz/100ml pack) then add water (about 35 floz/1 litre) and put the water tank back.
-
Place a container holding a minimum of 70 floz/2 litres underneath coffee spout (H).
-
Press button.
-
The button blink. The and icons lights on.
The descale programme starts and the descaler liquid comes out of the coffee spout. A series of rinses and pauses is performed automatically to remove all the scale residues inside the coffee machine.
-
The appliance is now ready for rinsing through with clean water. The icon lights on. Empty the container used to collect the descaler solution. Extract the water tank, empty, rinse under running water.
-
Empty drip tray (R) and coffee grounds container (Q). The icon lights on. Fill with fresh water up to the MAX level and put back in the appliance.
-
Place the container used to collect the descaler solution empty under the coffee spout.
-
Press button. Hot water is delivered from the coffee spout. The icons lights on.
-
At the end of the cycle the icons lights on.
-
At the end of the rinse, extract the tray assemble (L,) remove, empty and replace the disposal water container (P). Empty the container used to collect the rinse water, remove the water tank and fill with fresh water up to the MAX level, then put back in the appliance.
The descending cycle is now complete and the appliance turn off.
- When you turn on the appliance again, water alarm is activate and the [ brew ] button blink. Press [ brew ] button to refill the circuit and the coffee m chine is now ready for use.
Please note: It is possible to make an extra descaling cycle by pressing the button for 3 seconds.
ICONS MESSAGES
| The icons lights | Probable cause | Solution |
| The infuser is not present | Pull the drip tray out, insert the infuser then put back the drip tray | |
| Brewing unit alarm | Clean the inside of the appliance, if the message is still displayed contact De'Longhi customer service | |
| The beans container (C) is almost empty | Fill the beans container (C). | |
| The water tank (F) is empty. | Fill the water tank (F) with fresh water and pressbrew button to complete the delivery of the beverage, except 'espresso style' that will not be completed. | |
| No water in the water circuit | Press the brew button to fill the water circuit | |
| The coffee grounds container (Q) or the disposal water container (P) is full. | Empty the coffee grounds container (Q) and the disposal water container (P) | |
| Tray assemble (L) is not inserted correctly. | Insert correctly tray assemble (L), disposal water container (P) and coffee grounds container (Q). | |
| Not enough pre-ground coffee has been filled. | Place pre-ground coffee in the funnel and repeat delivery. |
TROUBLESHOOTING
| The appliance does not come on. | Plug into the mains socket. |
| The appliance does not start. | Insert correctly tray assemble (L), disposal water container (P) and coffee grounds container (Q). |
| The appliance does not respond to commands. | Insert correctly tray assemble (L), disposal water container (P) and coffee grounds container (Q). |
| Water tank (F) is full but the ⓷ icon lights on. | Insert correctly the water tank and press button for start the circuit filling procedure. |
| Once remove the tray as-semble coffee grounds there are coffee grounds outside the ground container | You might have added the pre-ground coffee while the unit was turned off. Please make sure to follow the procedure explained on section "pre-ground" |
| The infuser cannot be extracted | The unit must be turned off completely to be able to extract the infuser |
TECHNICAL DATA
Voltage: 120V 60Hz
Absorbed power: see rating label
Max. water tank capacity: 60oz / 1.8l
Max. beans container capacity: 0.55lb / 250g
Size LxDxH: 12 x 15 x 15.8 in /
303 × 390 × 403 ~mm
Weight: 20.2lb / 9.2kg