
Flow T2200 - Exercise bike Tacx - Free user manual and instructions
Find the device manual for free Flow T2200 Tacx in PDF.
| Product type | Exercise bike |
| Brand | Tacx |
| Model | Flow T2200 |
| Resistance type | Magnetic |
| Weight | Approximately 25 kg |
| Power supply | Mains 110-220 V, 50/60 Hz |
| Display | LCD screen |
| Measurements | Speed, Cadence, Power (watts), Heart rate (with optional chest strap) |
| Resistance adjustment | 14 levels (from -4 to +9) |
| Power range | 18 to 1998 watts (in 15-watt increments) |
| Calibration | Manual via deceleration procedure |
| Recommended tire pressure | 7-8 bar |
| Maximum user weight | 120 kg |
| Heart rate sensor compatibility | ANT+ or Tacx chest strap |
| Displayable units | km/h or mph, kg or lb, kJ or kcal |
| Training functions | Speed, cadence, power, heart rate mode |
| Load indicator | Resistance level bar graph |
| Maintenance | Clean with a damp cloth, avoid water on the brake |
| Safety | Use on stable surface, do not exceed max weight |
| Spare parts | Available on the Tacx website |
Frequently Asked Questions - Flow T2200 Tacx
User questions about Flow T2200 Tacx
0 question about this device. Answer the ones you know or ask your own.
Ask a new question about this device
Download the instructions for your Exercise bike in PDF format for free! Find your manual Flow T2200 - Tacx and take your electronic device back in hand. On this page are published all the documents necessary for the use of your device. Flow T2200 by Tacx.
USER MANUAL Flow T2200 Tacx
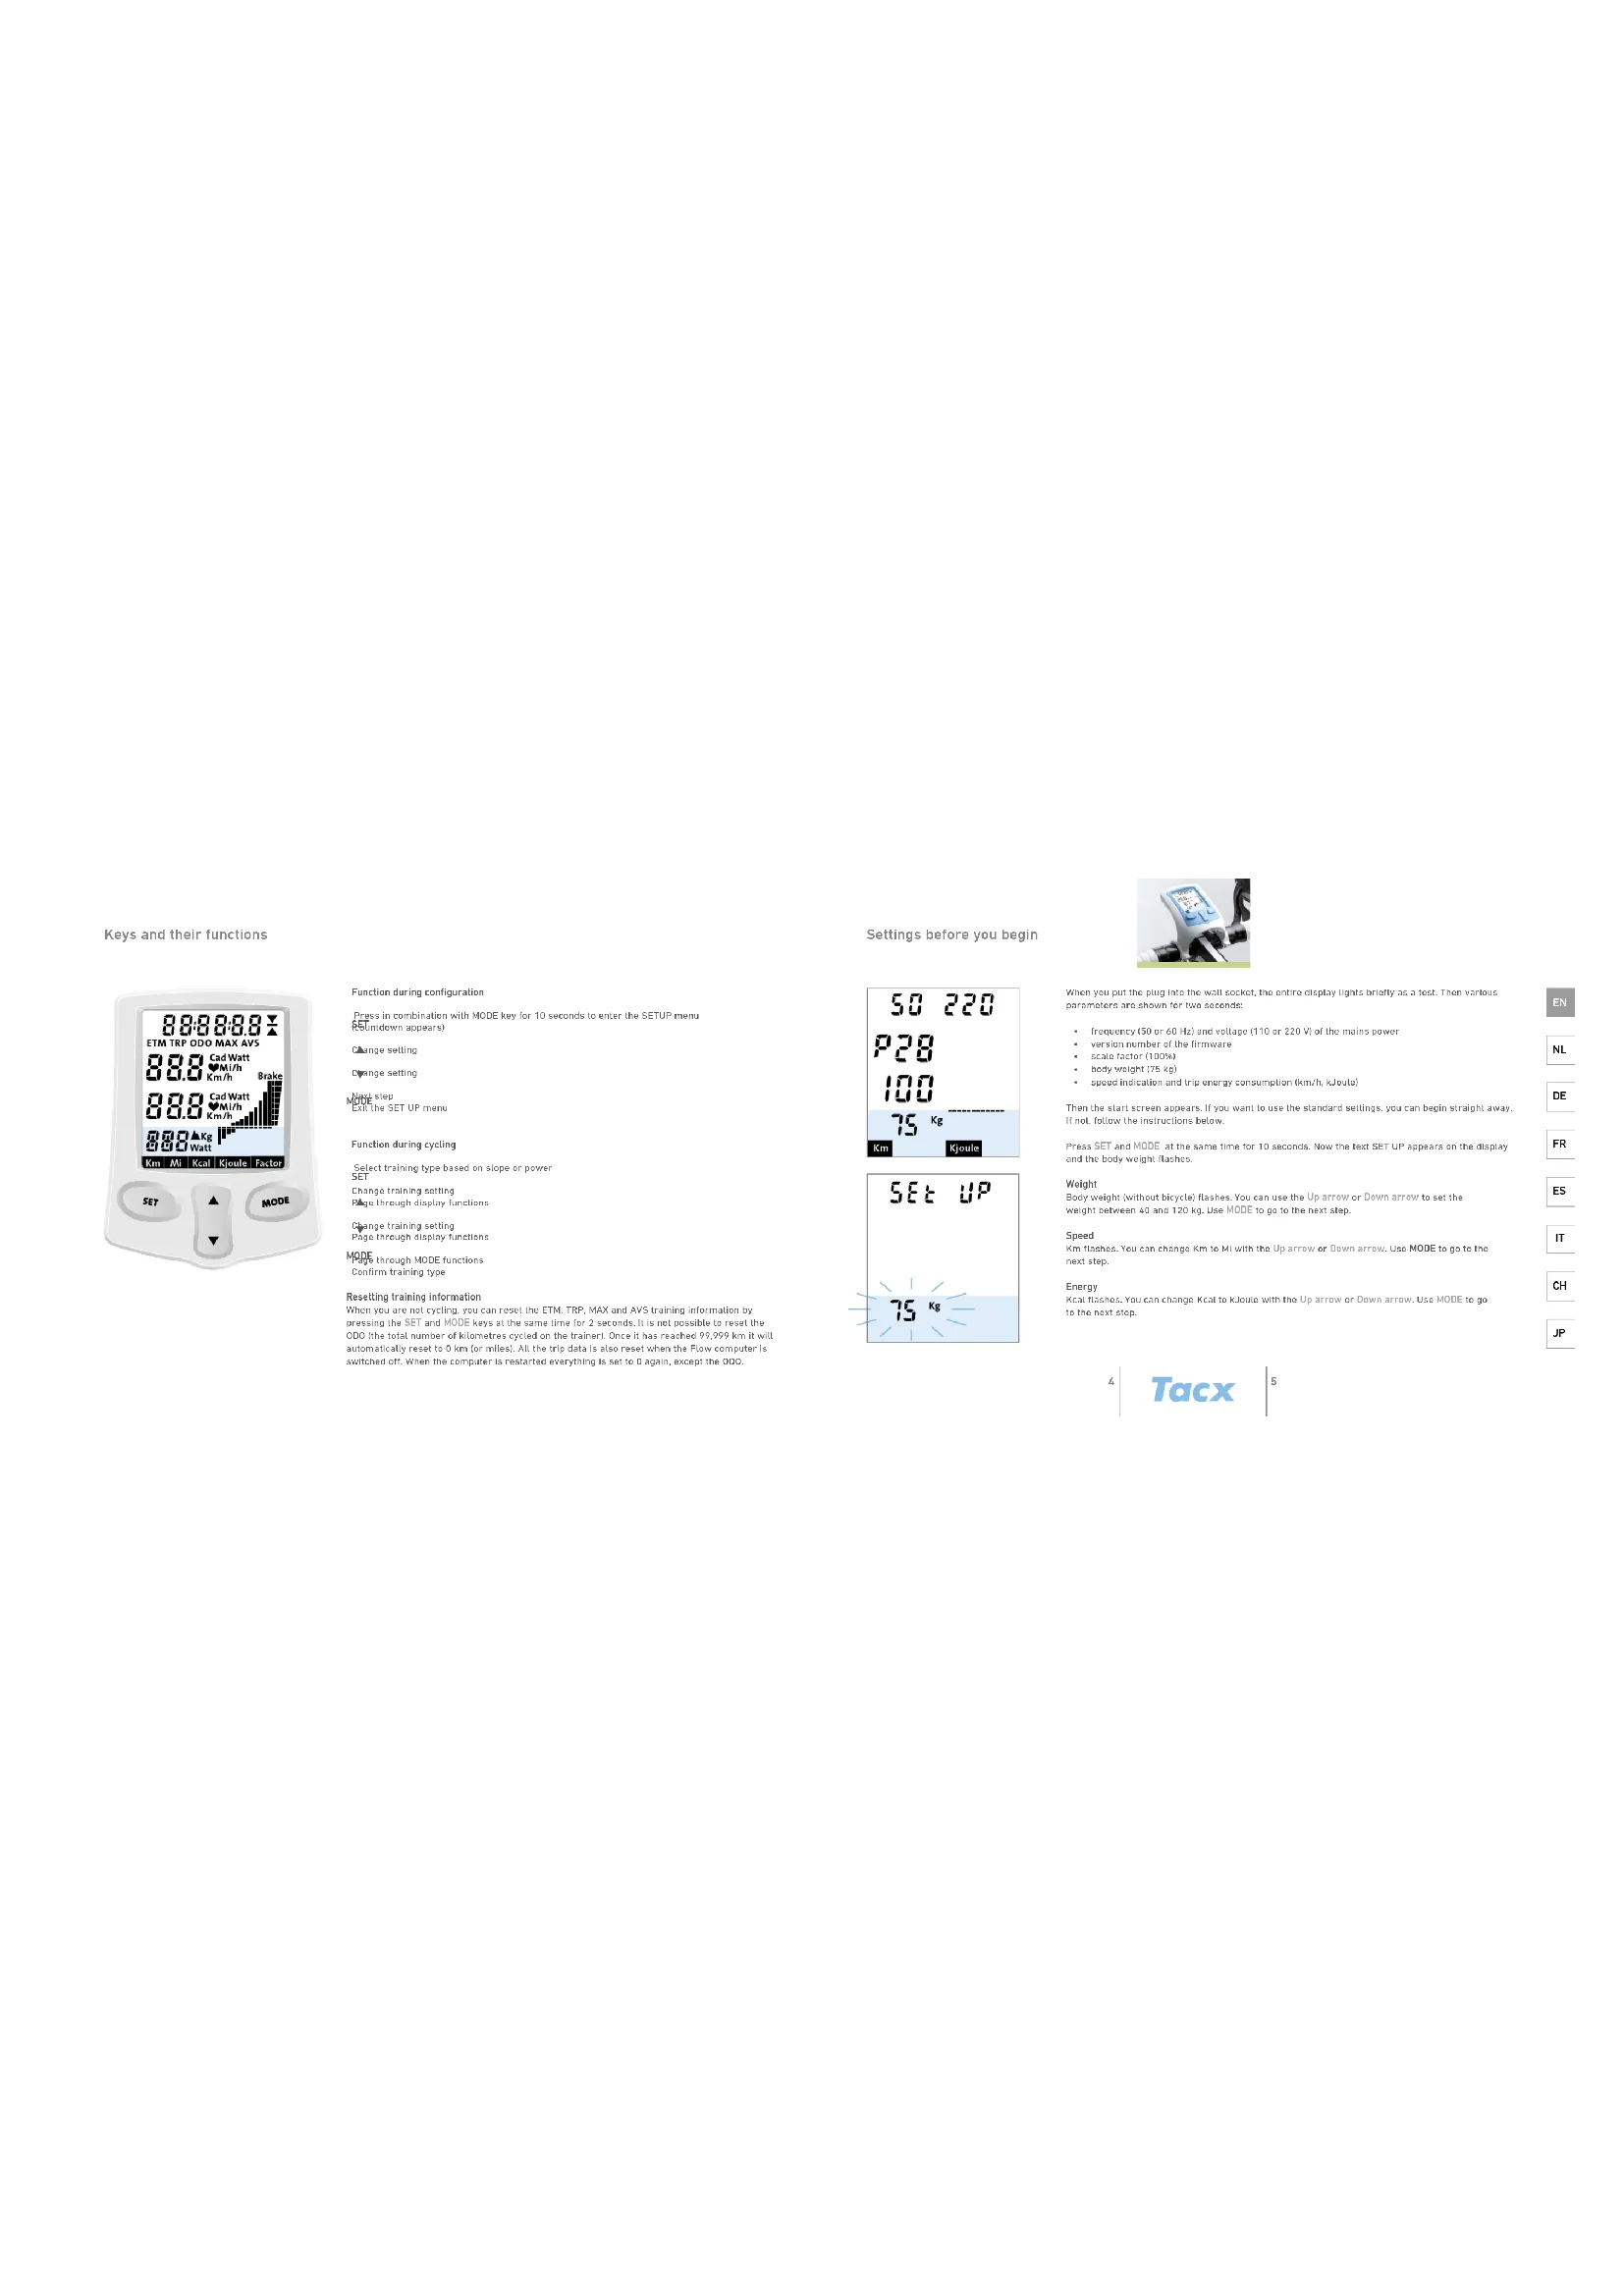
Keys and their functions
Function during configuration
Press in combination with MODE key for 10 seconds to render the SETUP menu.
Change setting
Change setting
Next step:
Exte h c SET UP menu
Function during cycling
Select training type based on slope or power
Change training settings
Page through display functions
Change training setting
PSY
MODE through MODE functions
Confirm training type
Resulting training information
When you are not cycling, you can read the ETM_TRP_MAX and AVS training information by pressing the SET and HODE keys at the same time for 2 seconds. It is not possible to read the DDD the total number of kilotons cycled on the trainer. Once it has reached 99.999W it will be possible to read the DDD in the computer. The computer will be able to read the DDD as a switched off when the computer is restarted everything is set to 0 again, except the DDD.
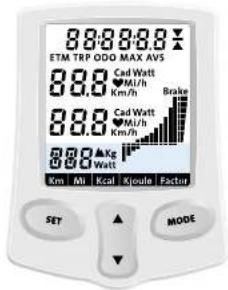
Settings before you begin


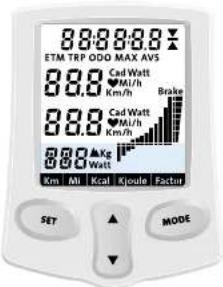
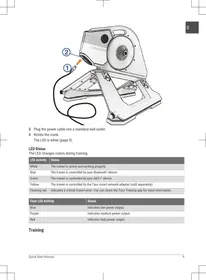
When you put the plug into the wall socket, the entire display lights brightly as a test. Then various parameters are shown for two seconds:
frequency (50 or 60 Hz) and voltage (110 or 220 V) of the mains power
version number of the firmware
1. 2017年度
spad Indication and trip onany consumption (mth, hJou)
Then the start screen appears. If you want to use the standard settings, you can begin straight away. If not, follow the instructions below.
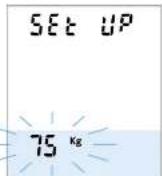
Press SET and MODE at the same time for 10 seconds. Now the text SET up appears on the display and the body weight flashes.
Weight
Body weight (without bicycle) flashes. You can use the Up arrow or Down arrow to set the
AIGN BENWae 40 and 120 kg. OSE MODE 3 go to IFC AOK: SPC
5p
Km Fasnes. You can change Km to Mi with the Up arrow or Down arrow. Use MODE to go to the
Energy
KoR JFthos. You can change Kral to kins with the Up arrow or Down arrow. Use MODE in top to next step.
Settings before you begin


The accuracy of the flow's power display contents on tractors such as the pressure of the cylinder against the tire, the tire pressure, furthering magnetic forces and the differences in mass voltage. To guarantee a good power measurement, the brake must be calibrated. For optimal calibration, the brake must be calibrated with microtaxis before warm-up the brake. Make sure the tire pressure is between 7 and 8 bar.
Brake calibration
The calibration value 6 appears at the bottom. You start the brake calibration with the Up arrow, which causes three dashes to appear at the bottom of the display. Cycle it a speed above 30 km/h (19 mi/h) until the ward STDF appears. The moments you stop, the Flow computer measures the deescalation of the rear wheels and the new calibration value appears on the display.
If the calibration fails (e.g., because you began peddling during the measurement), ERROR appears on the display. You can start the calibration again with the Up arrow. You can set the calibration value to 0 with the Down arrow. Use MOUL to confirm the settings and switch to the training display.
Training with the Flow
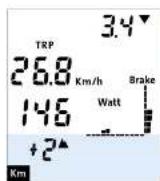
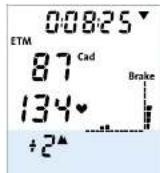
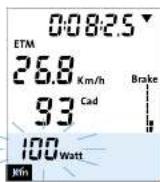
The Flow registers four training parameters: speed, power, cadence and heart rate.
2. Two training parameters are shown at any time, on the 3rd and 3rd lines of the display. With the D line in the middle of the display, the three parameters are the heart rate and heart rate. With the D line down arrow you can switch the training parameters on the three lines.
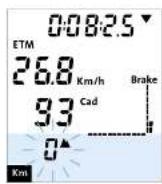
MODE functions for SPEED (km/h or mi/h)
The MODE functions on the 1st line of the display correspond to the training parameter on the 2nd line (the first line is used as a reference for the training parameter). The mode functions are defined as follows: (slapped time), TRP (trap time), DDO (indicator), MAX (maximum speed) and AVS (average speed).

The values vary reflect the actual time spent cycling since the computer was reset or switched off. If you have a break, the data will be retained. Over time your machine cycling, the interruptor能耗 calculating again using all the data
MODE functions for CADENCE (Cad)
c. When the 2nd line is set to censure (C4), TRF means the total number of pedal revolutions during the trip, MAX means the maximum pedalling frequency and AVS the average paralling frequency.

Tacx
Training with the Flow

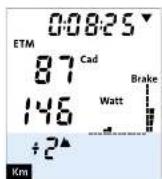
MODE functions for POWER INWTO
When the 2nd line is set to power [Ved], TRIP means the trip consumption, MAX the maximum power required for the previous period. The maximum power required is calculated based on the limits of the spacecraft and the power source and is denoted by location or location.

MODE functions for HEART RATE
When the 2nd line is set to heart rate, MAX means the maximum heart rate and AVS the average heart rate.

If the flow computer does not receive a start rate signal before the initiating begin, the heart rate function is not updated. The heart rate function will be updated until the starting time of the program. When the heart rate signal is interpolated during cycling, three studies will appear to place in the heart rate values.
Average indicator
This function indicates whether the training information shown on the 1st line is average, above average or below average.
Flow training settings

The flow allows you to train by slope f(x) and power W_AT . Slope makes use of the trainer's cylinder and is adjustable in 1/4 steps/min. -20 < f(x) ≤ -6 is equivalent in an actual downhill slope of 4% and the same applies for the 9V uphill step. During power training the computer adjusts the resistance of the motor to always pedal at the desired power setting. You can set this from 10 to 900 Watts in 16 Volt steps.
Setting training value
When you press Set, the slope at the lower left begins to flash. Use the arrow keys to change the setting of the line to confirm. The slope is shown on the display in the form of vertical bars. At a horizontal bar it's shown
Once you press SET and the arrow begins in flash. If you press SET again the power setting begins to flash. You can adjust this setting with the Arrow keys. Press OK mode to confirm this setting.
Operating range
The brake indicator is a visual representation of the brake position. Here you can see at a glance whether the brake is still within the operating range. As the braking unit applies the brakes, the height of the bar increases. The set power is not broken if the bar is at its minimum or maximum height. In this situation the indicator fiends as a warning.
Actual speed, radius and power p in the arc are initial fluxes, assuming that the arc is outside the operating range. Select the combination appropriate for you that is applicable at that moment:
Error messages during cycling
You can find the FADs for the Flew at www.fleec.com under SERVICE. Here you will find up to date information about what to do if an error message appears on the screen.
Functies toetsen
Bedlening liddens instellen
(Shuntwater vasschijt)
Aanpassen inelting
Aangassen Instelng
VER.PAT SETUPmnu
MODE funclies biHARTSLA
Last day displayed the harta-sing zhen, dan beleihen MAX co maxima harta sng an AVS de gemindelde for-habig.

As you've had instructions on set SET, you can then import some of the buildingstacks. The SET files may even be used to import the buildingstacks from the command line. Mat on PjR project uses this data for installing a drag-on node mode on the installation site to log off
Werkungsgabod
STUDY SUREN AND ANZELERINKFOLD
Tainngseinstellung andern
MDREtnco duch die MODEevoktion
Tralnncstvassss
Qulrrer to menu SET UP
If you apply our application to SET, it will be considered to be a legal document on both sides of the sea. Utilizing these two documents will not be sufficient for your purposes. This is an electronic version of the manuscript and will be published in the journal as follows: http://www.sciencedirect.com/term/ barrios verticalos. B. It is not a separate horographic guide which applies.
- laus is ciali 2003 p 295
- laus is ciali 2003 p 306
Ulllic Moe para confirmar his ajustas y cabhla a la pantalla enredaniamin.
Flow Operating computer

Tacx
www.tacx.com
T2200.26 | 2013-10


Brand : Tacx
Model : Flow T2200
Category : Exercise bike