NEO 3M - Home trainer Tacx - Free user manual and instructions
Find the device manual for free NEO 3M Tacx in PDF.
| Brand | Tacx |
| Model | NEO 3M |
| Product type | Direct-drive trainer |
| Axle compatibility | Quick-release axles 130/135 mm and thru-axles 142/148 mm |
| Cassette compatibility | Shimano 11-speed cassette (compatible with others with adapters) |
| Power supply | Mains (adapter included) or internal dynamo (self-powered) |
| Connectivity | Bluetooth, ANT+, Wi-Fi |
| Power measurement | Integrated, accuracy ±1% |
| Simulated incline | Up to 25% (climb) and -5% (descent) |
| Inertia | Flywheel weight of 15 kg |
| Noise level | Quiet (magnetic drive) |
| Dimensions (folded) | Approximately 68 x 74 x 53 cm |
| Weight | Approximately 22 kg |
| Maximum user weight | 130 kg |
| Recommended use surface | Firm or low-pile mat (avoid thick carpets) |
| Compatible app | Tacx Training (iOS/Android) |
| Optional accessories | Training mat 181x92 cm, adapters for special axles |
| Maintenance and care | Clean with a damp cloth, do not use solvents |
| Safety | Read the safety guide before use, do not use with a rocker plate |
| Spare parts and repairability | Available via Garmin or Tacx dealers |
Frequently Asked Questions - NEO 3M Tacx
User questions about NEO 3M Tacx
0 question about this device. Answer the ones you know or ask your own.
Ask a new question about this device
Download the instructions for your Home trainer in PDF format for free! Find your manual NEO 3M - Tacx and take your electronic device back in hand. On this page are published all the documents necessary for the use of your device. NEO 3M by Tacx.
USER MANUAL NEO 3M Tacx
text_image
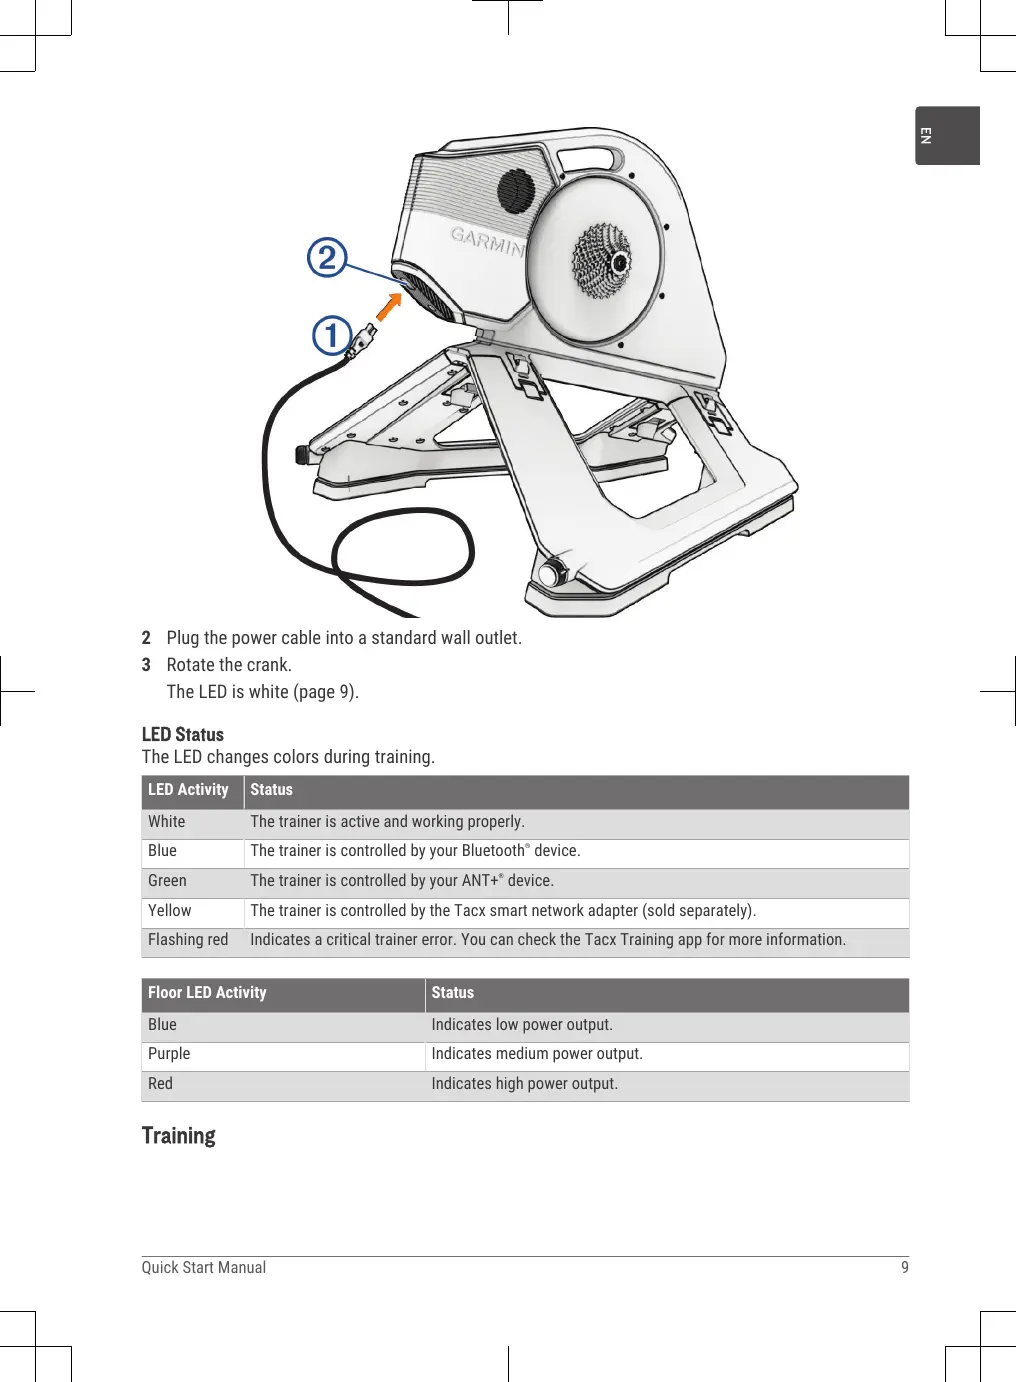
GARMINI ② ①2 Plug the power cable into a standard wall outlet.
3 Rotate the crank.
The LED is white (page 9).
LED Status
The LED changes colors during training.
| LED Activity | Status |
| White | The trainer is active and working properly. |
| Blue | The trainer is controlled by your Bluetooth® device. |
| Green | The trainer is controlled by your ANT+® device. |
| Yellow | The trainer is controlled by the Tacx smart network adapter (sold separately). |
| Flashing red | Indicates a critical trainer error. You can check the Tacx Training app for more information. |
| Floor LED Activity | Status |
| Blue | Indicates low power output. |
| Purple | Indicates medium power output. |
| Red | Indicates high power output. |
Training
Going for a Ride
Your first ride on the Tacx NEO 3M trainer should be a short, manual training ride. You should get comfortable with the motion plates.
1 Unlock the motion plates.
TIP: You must rotate each knob toward 🔒, until it clicks.

natural_image
Technical diagram of a mechanical component with an inset close-up showing a cylindrical component (no text or symbols present)2 Start pedaling slowly.
The trainer LED is white (page 9).
3 Practice shifting and increasing your speed.
Tips for Natural Riding
-
Avoid sprinting when the motion plates are enabled. You can sprint if the motion plates are locked.
• If you feel motion sickness while riding, try these options: -
Focus your vision on a point in front of your bike.
- Watch a training video while riding.
- Drink plenty of water before and during your ride.
- Stop riding until you feel better, and try again.
Tacx Training App
You can download the Tacx Training app to your compatible phone, tablet, or computer.
- Ride exciting courses without leaving your home.
• Create your own rides, workouts, and more. - Manage your training, customize the default settings, and diagnose issues.
- Sync your indoor training data with your Garmin Connect™ account.
- Update your trainer software.
Pairing the Trainer with the Tacx Training App
The first time you pair the trainer with the Tacx Training app, you must connect the trainer to an external power source.
TIP: For ethernet or Wi-Fi ^® network connections, you can purchase a network adapter accessory at buy .garmin.com.
1 Select an option:
- Scan the QR code with the camera on your phone, and follow the on-screen instructions.

- To add the Tacx NEO 3M trainer to your existing account, open the Tacx Training app, and select Settings > Device Manager.
2 On the trainer, press the pairing button ①.
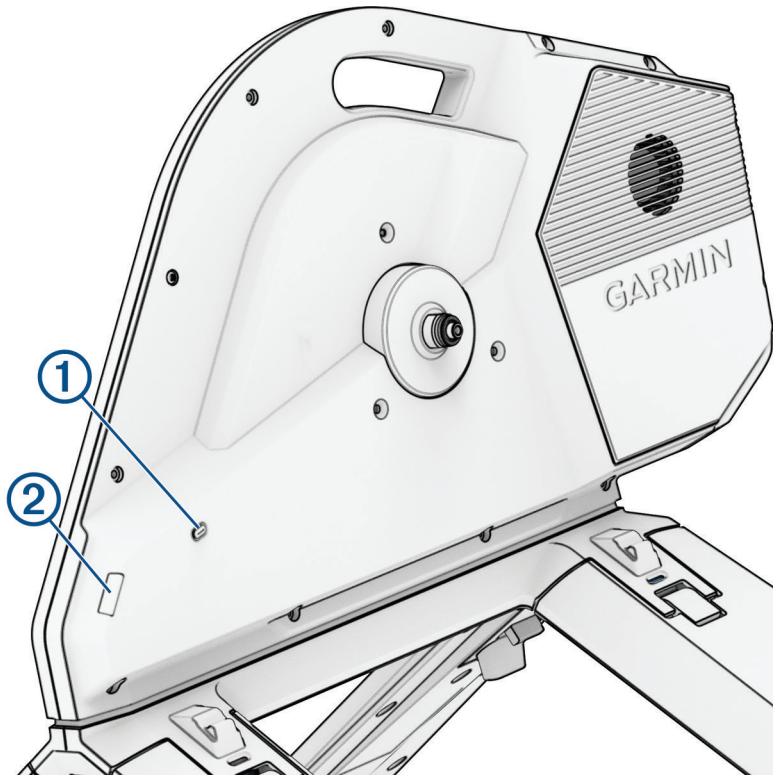
text_image
① ② GARMIN3 On the Tacx Training app, follow the on-screen instructions.
The connected trainer is green.
4 Select a workout or course.
5 Start pedaling.
The trainer LED ② changes from white to blue when paired with the app using Bluetooth technology (page 9).
EN
Device Information
Device Care and Storage
• Unplug the trainer when it is not in use.
- Check the alignment, and lock the motion plates when the trainer is not in use.
• Wipe off the trainer after every use.
• Clean the trainer before storing it.
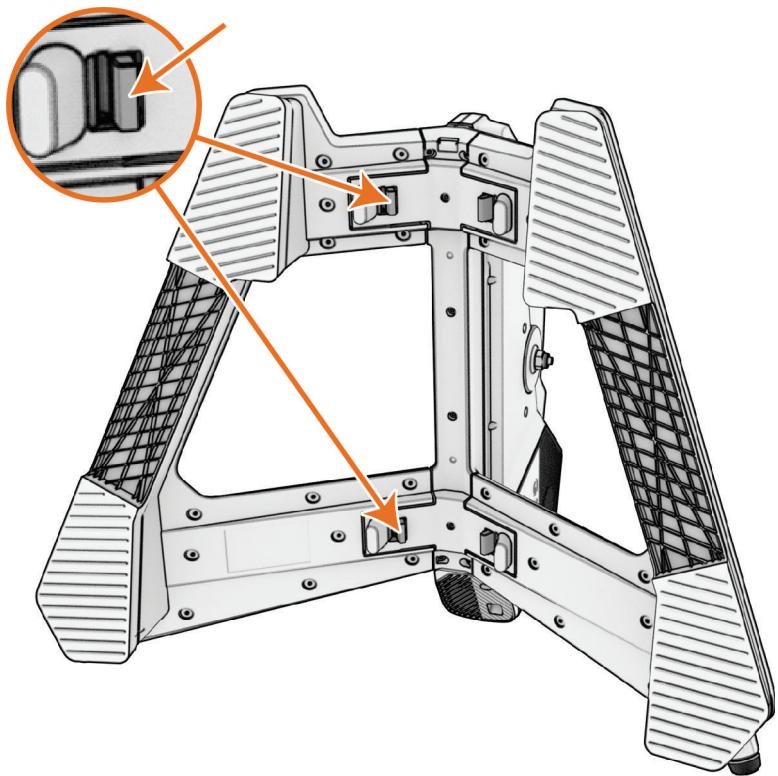
Folding the Trainer for Storage
1 Check the alignment, and lock the motion plates.

natural_image
Technical diagram of a mechanical component with an inset close-up showing a cylindrical component (no text or symbols present)2 Lean the trainer back.
3 Unlock both sides of the trainer.
natural_image
Technical illustration of a mechanical assembly with orange arrows indicating component alignment (no text or symbols present)4 Fold up both sides until they click into place.

natural_image
Mechanical assembly diagram showing a fan or lift mechanism with orange arrows indicating rotational motion (no text or symbols present)Getting the Owner's Manual
Go to www.garmin.com/manuals/NE03M.
Specifications
| Power supply | Use the included power cable.From 100 to 240 V, 50/60 Hz |
| Operating temperature range | From -10° to 40°C (from 14° to 104°F) |
| Storage temperature range | From -20° to 60°C (from -4° to 140°F) |
| NOTICEIf the trainer is stored or shipped below this temperature range, allow the trainer to normalize to the operating temperature range, and wait 12 hr.before use. Extreme temperature changes can cause condensation inside the trainer that may result in property damage. | |
| Wireless frequency and transmit power | 2.4 GHz @ 6 dBm maximum |
| Maximum rider weight | 125 kg (275 lb.) |